Other Actions for Items
Edit Item
You can change details of an existing item in Zoho Books. Here’s how:
- Go to Items module and select Items.
- Select the item that you want to edit.
- Click the Edit icon on top of the page.
- Make the changes in the item details.
- Click Save.
Note:
Any changes you make in the item details will not affect any previous transactions.

Clone Item
If you want to create an item which has similar details to an existing item, you can clone the particular item. Here’s how you can do it:
- Go to the module Items and select Items.
- Select the item you want to clone.
- Click More > Clone Item.
- Make necessary changes in the New Item page.
- Click Save to create the new item.

Mark as Inactive
If you no longer want to use an item in Zoho Books, you can choose to mark it as inactive. This is a better alternative to deleting the item permanently.
To mark an item as inactive:
- Go to Items module and select Items.
- Select the item you want to mark as inactive.
- Click More > Mark as Inactive. To make the item active again, click More > Mark as Active from the same page.

Delete Item
If you are no longer using an item in your organization, you might want to delete it. However, if you have recorded any sales or purchase transactions for that item, you would need to delete them first.
A better alternative would be to mark the item as inactive. When you do so, they will no longer appear in your transactions. If you want to start using that item again, you can mark it as active.
To view the sales transactions:
- Go to Reports > Sales by Item.
To view the purchase transactions:
- Go to Reports > Purchases by Item.
You have to delete all these transactions of the item in order to delete the item.
After you’ve deleted all the transactions, you can delete the item. Here’s how:
- Go to the Items module and select Items.
- Select the item you wish to delete.
- Click More > Delete.
- Click Delete to confirm.

Export Items
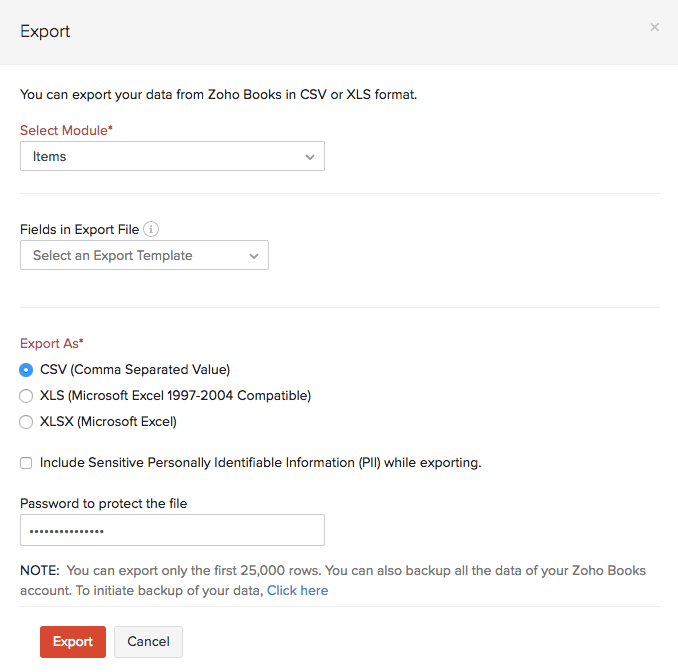
You can export items from Zoho Books on to your system in the CSV, XLS or XLSX format. Here’s how:
- Go to Items and select Items.
- Click the More icon in the top right corner of the page.
- Click Export Items.
- If you want to export only certain fields, you can select a template under Fields in Export File. If you don’t have an export template, you can create a new one by clicking + Add New.
- Select the export file format under the Export As field.
- To export any Personally Identifiable Information (PII), mark the box Include Sensitive Personally Identifiable Information (PII) while exporting.
- Enter a Password if you would like to secure your file.
- Click Export.


 Yes
Yes