Functions in Bills
Let us have a look at some of the functions that can be performed on Bills in Zoho Books.
Apply Credits to Bill
If you have recorded vendor credits for a particular vendor, you can apply these credits to their bills. Here’s how:
- Go to Purchases on the left sidebar and select Bills.
- Select a bill on which you wish to apply credits.
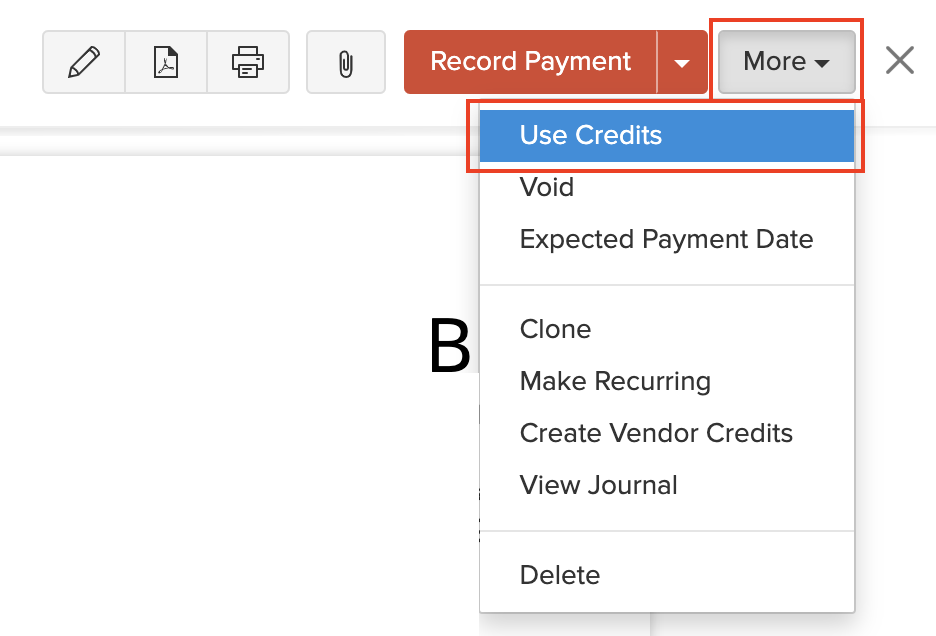
- Click More > Use Credits.
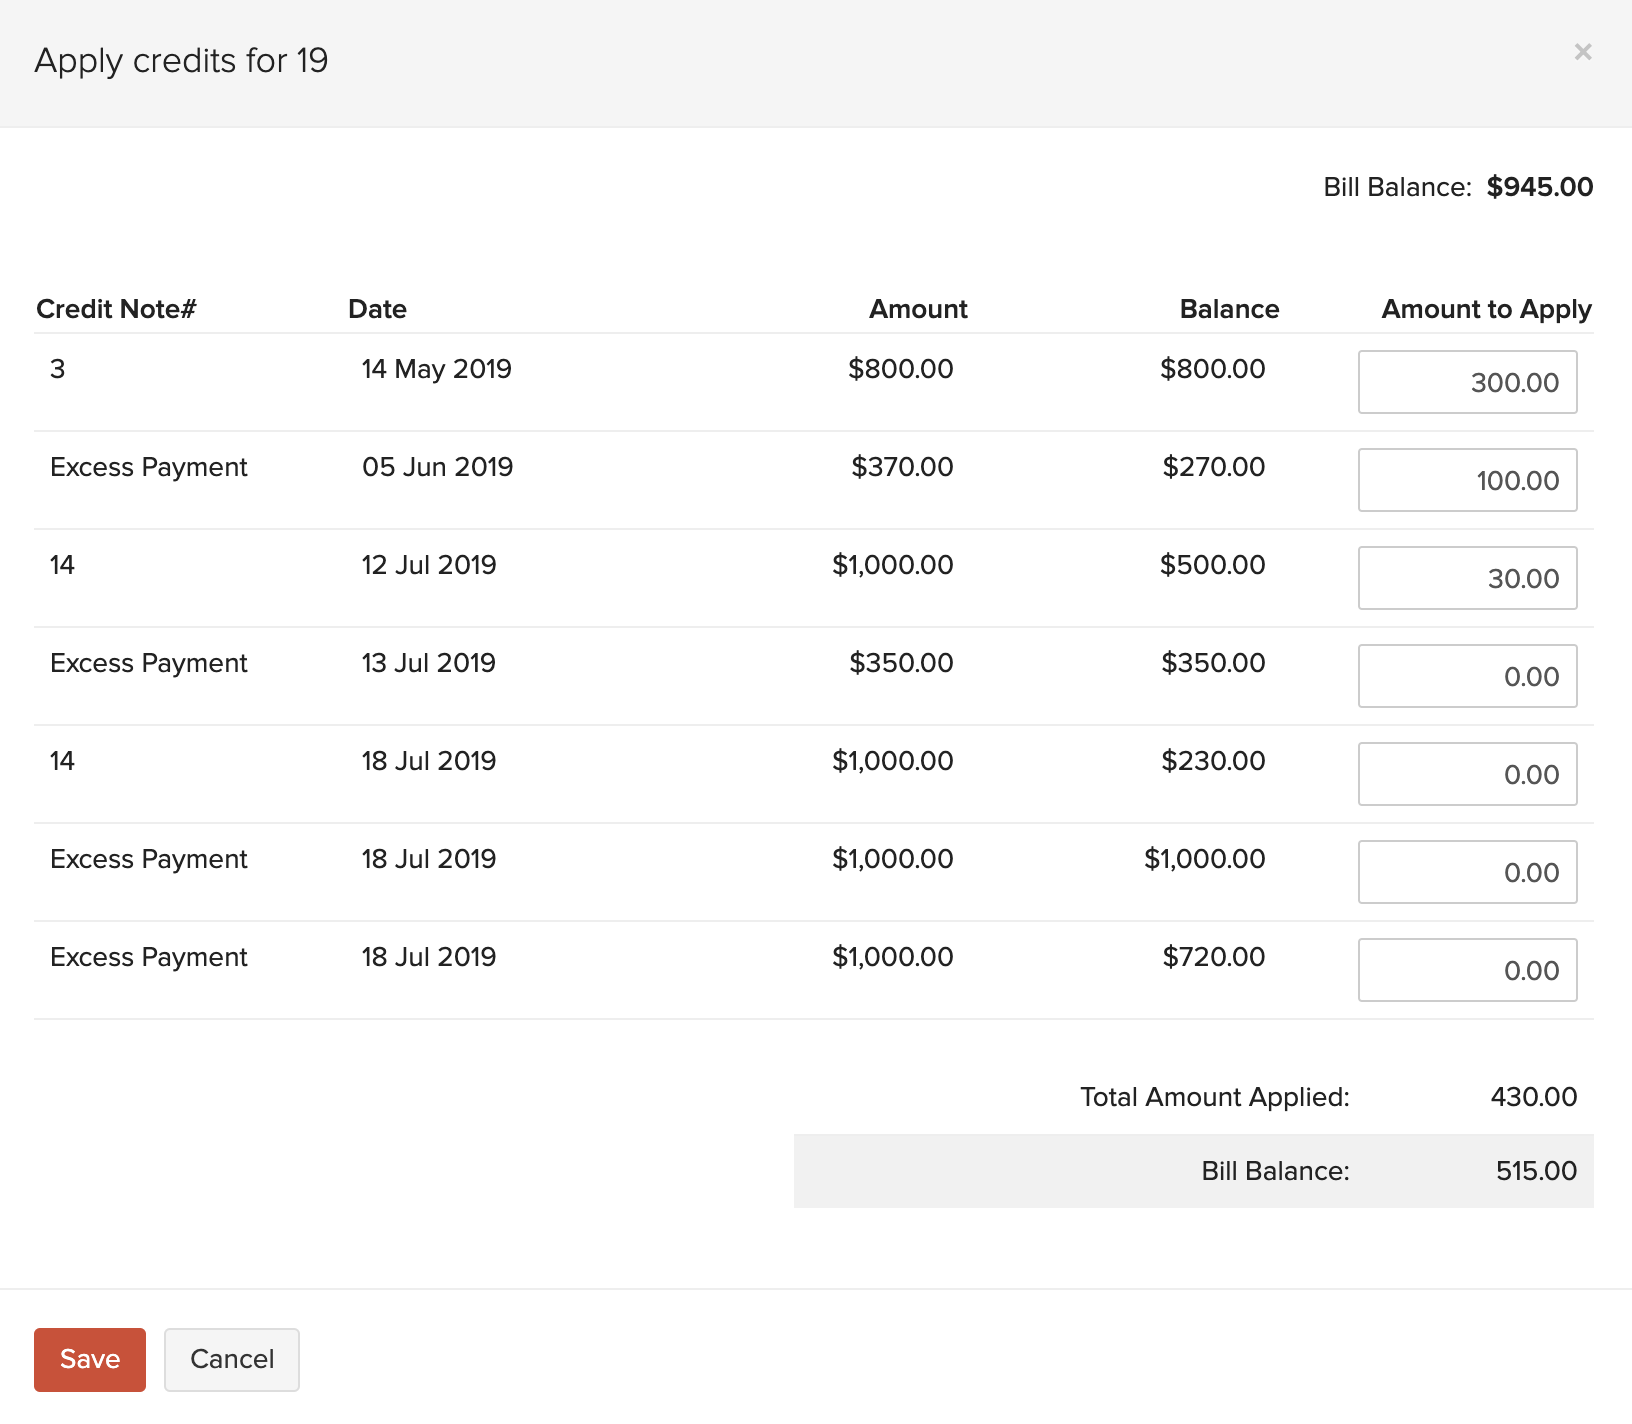
- Enter the amount to apply across the vendor’s various bills.
- Click Save.
Create an Invoice for a Bill
If you have a line item in a bill that you’ve marked as billable to the customer, you can create an invoice for the bill with those billable items. Here’s how:
- Go to Purchases on the left sidebar and select Bills.
- Select the bill that has billable line items for which you want to create an invoice.
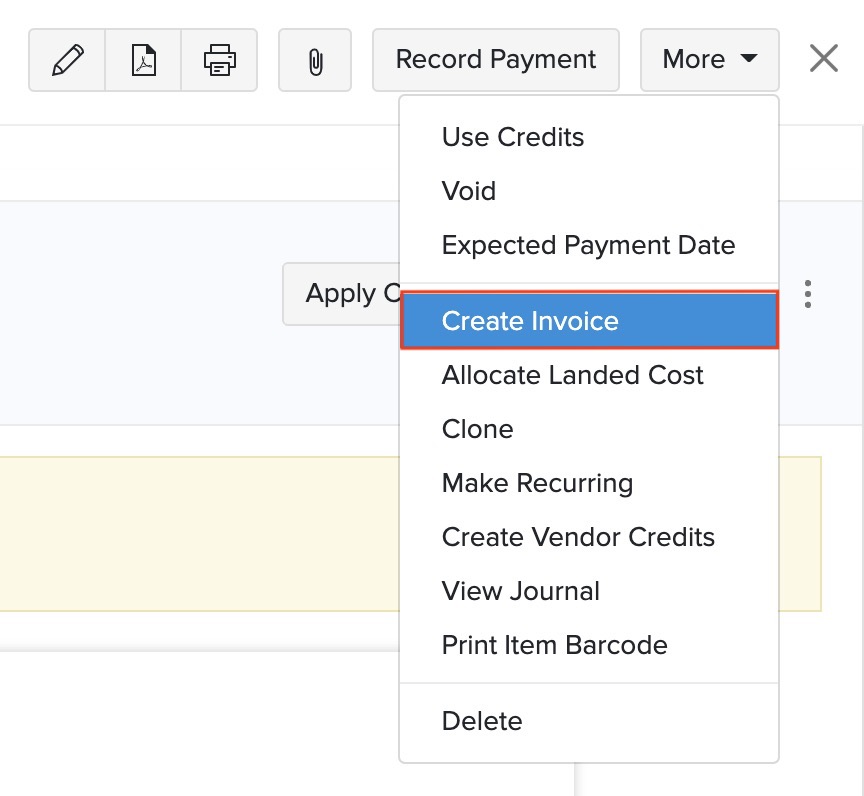
- Click the More dropdown and select Create Invoice. You will be redirected to the invoice creation page.
If you had given a markup percentage for the billable item in the bill, the marked up amount will be displayed along with the rate of the line item in the invoice.
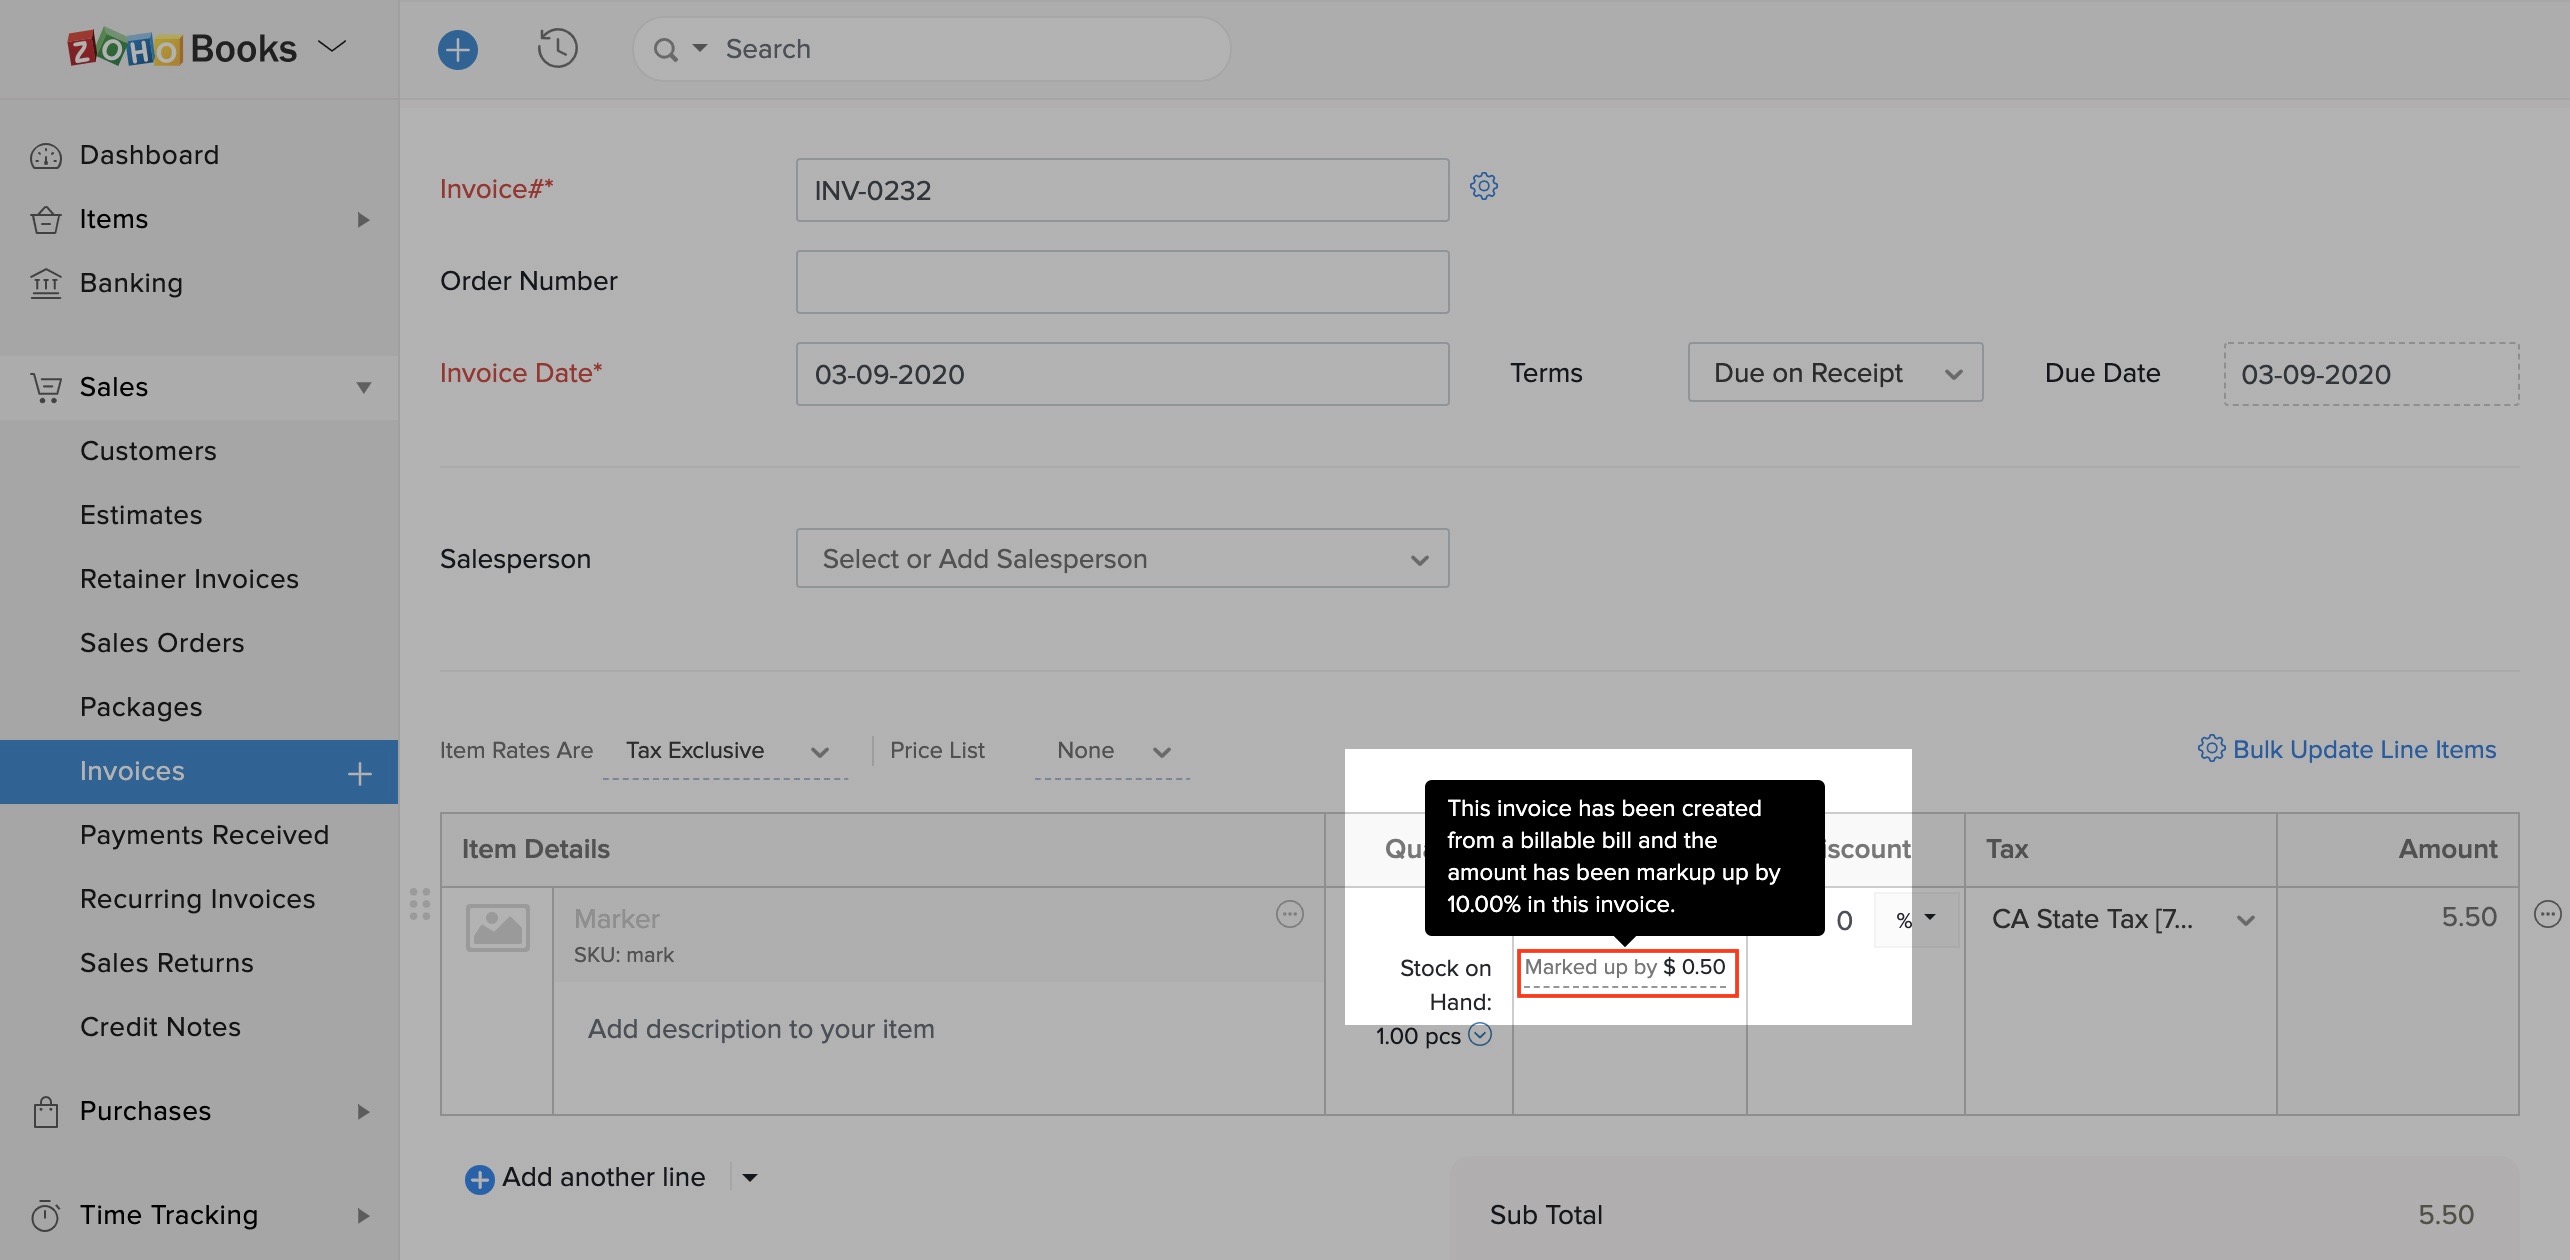
- Click Save as Draft or Save and Send.
Delete Applied Credits
You can delete the credits that you have applied across the vendor’s various bills.
- Go to Purchases on the left sidebar and select Bills.
- Select the bill on which you have applied credits.
- Click the Credits Applied tab on top of the page.
- Hover over the credit you wish to delete.
- Click the Delete icon.
- Click OK to confirm

Set Expected Payment Date
You can enter an expected payment date by which you wish to make payment for your bill. Here’s how:
- Go to Purchases on the left sidebar and select Bills.
- Select the bill for which you wish to set the expected payment date.
- Click More > Expected Payment Date.
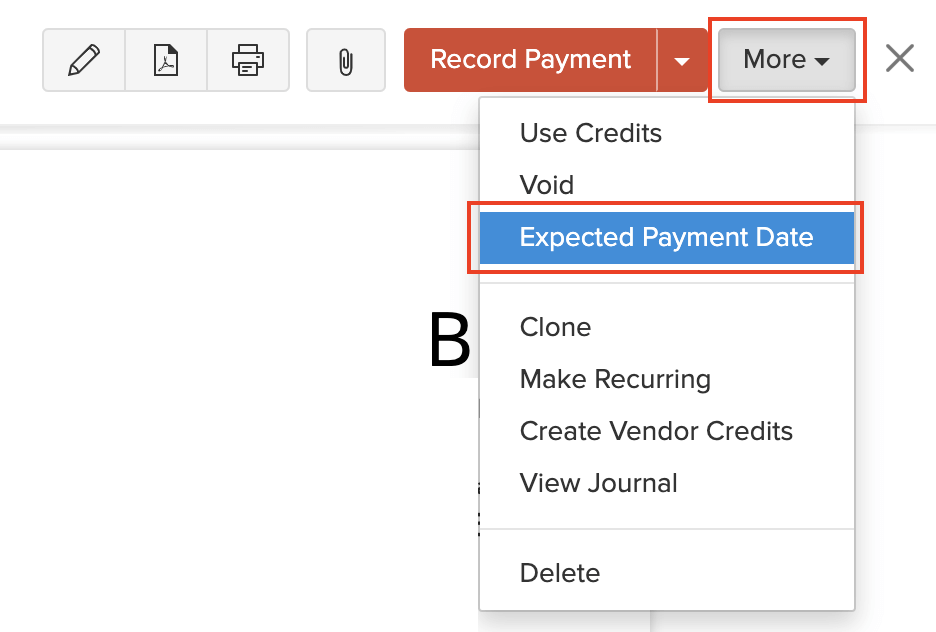
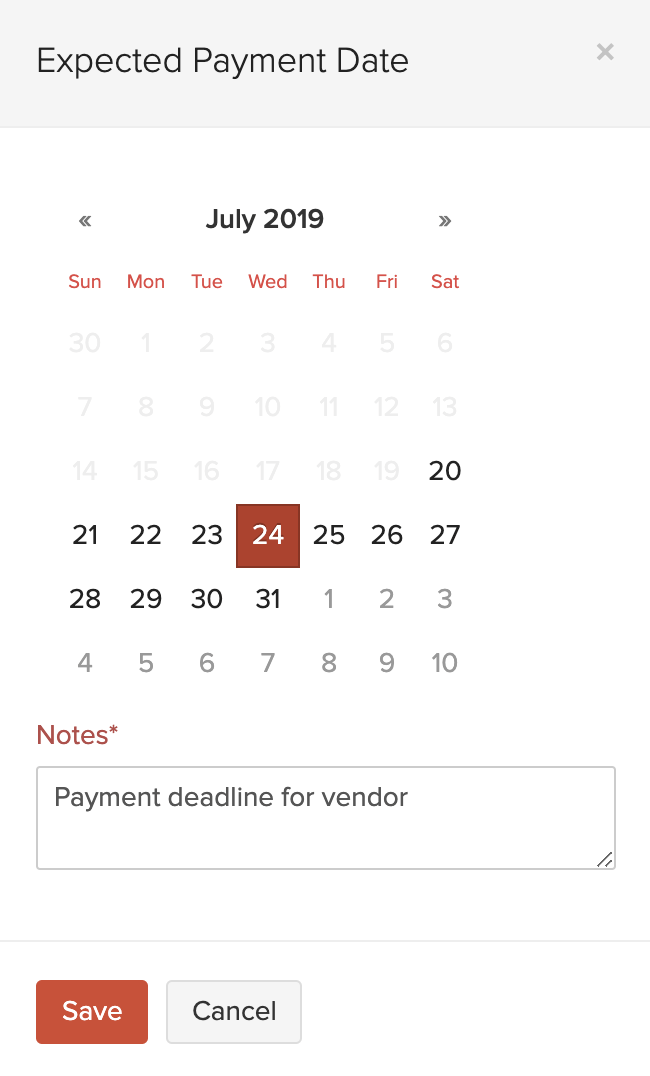
- Select a payment date and enter notes for it.
- Click Save.
You can find the expected payment date in the Comments & History section of the bill. To delete this date:
- Click the Delete icon next to the activity.
- Select Delete to confirm.

Create Vendor Credits
You can create vendor credits for any bill. When you do so, all the items in the bill will be included in the vendor credit.
To create a vendor credit:
- Go to Purchases on the left sidebar and select Bills.
- Select the bill for which you wish to create vendor credits.
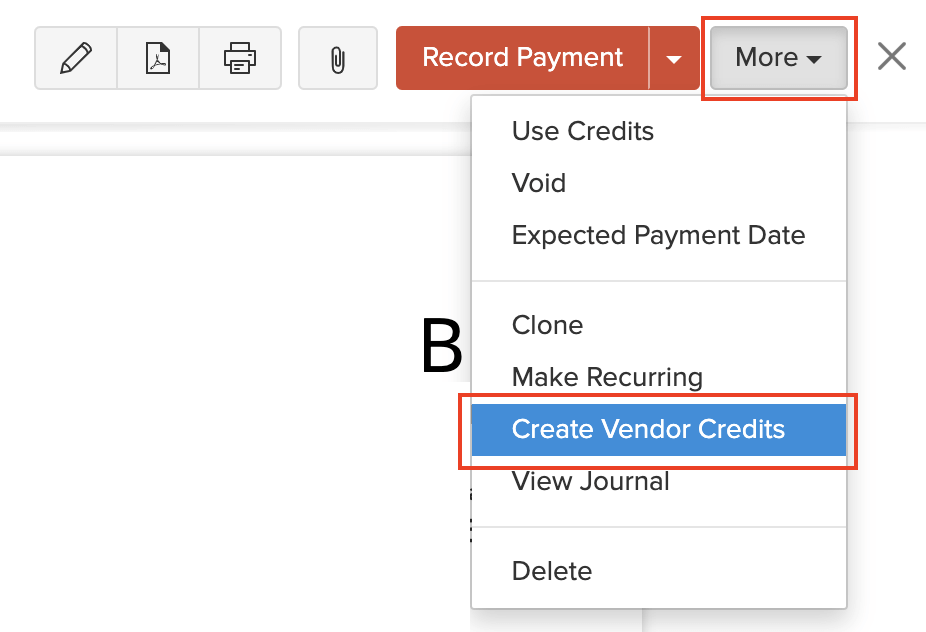
- Click More > Create Vendor Credits.
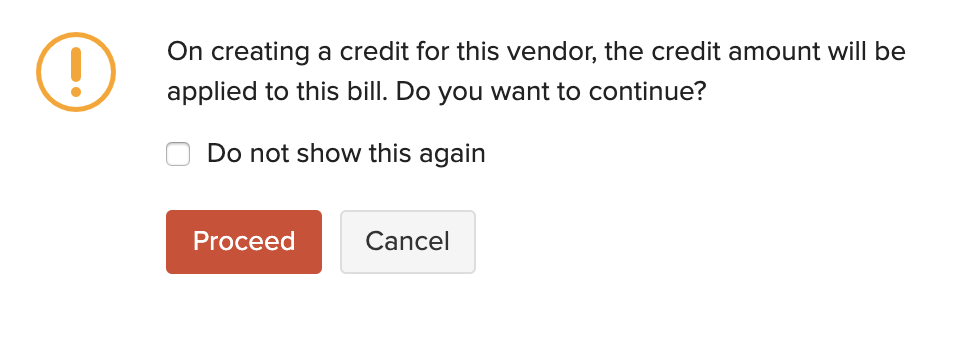
- Click Proceed.
- Fill in the required details of the vendor credit and save it.
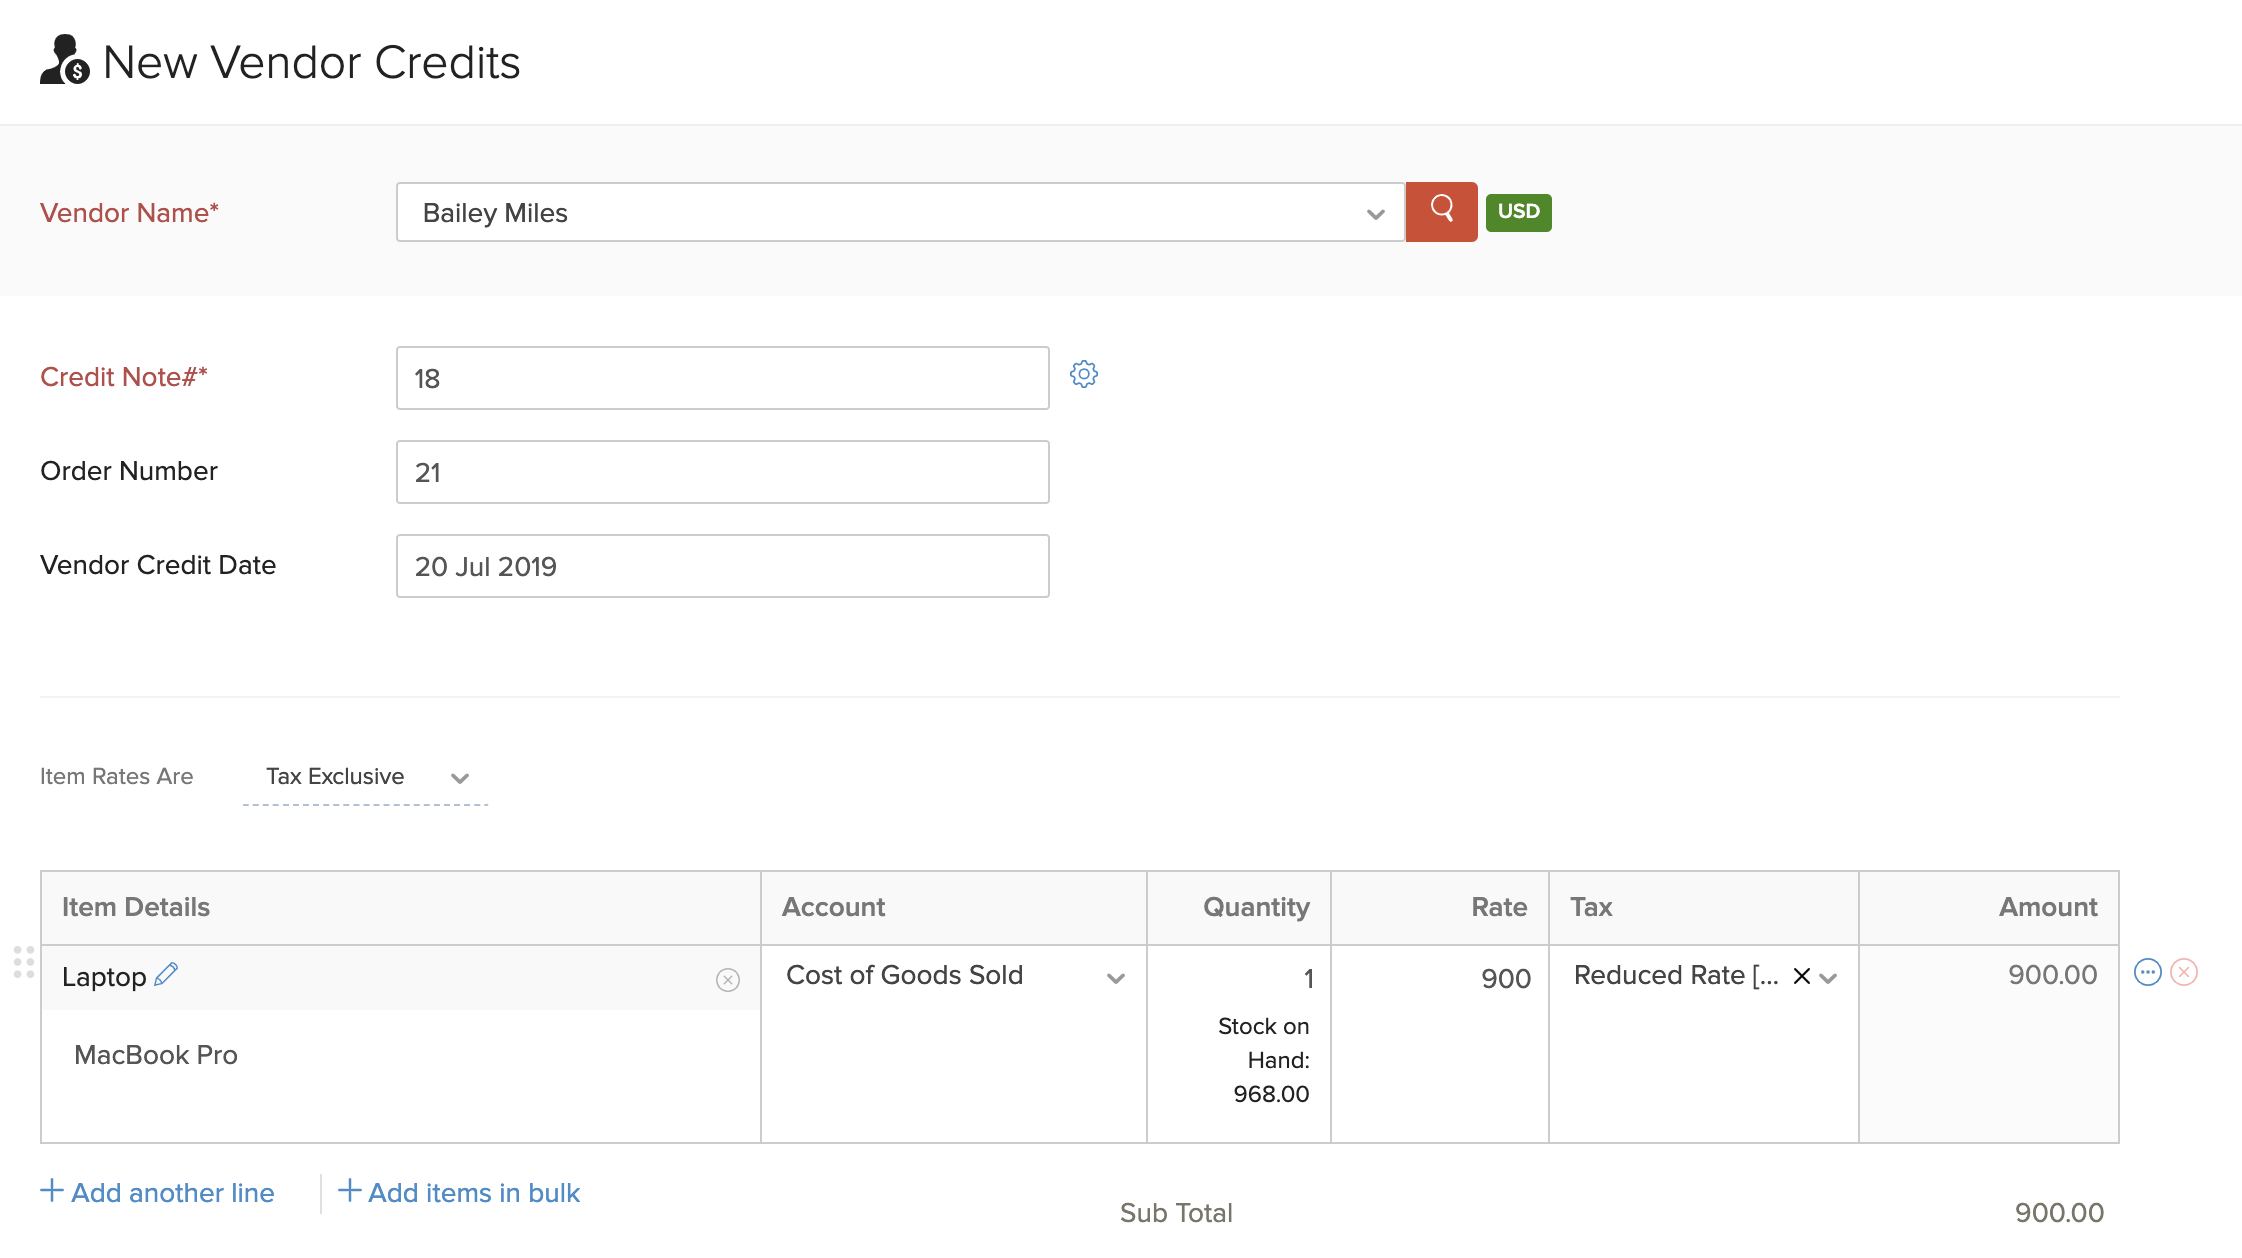
Insight: Once you create a vendor credit for the bill, it will automatically be applied to the bill, and the bill’s status will change to Paid. If the vendor credit amount exceeds the bill amount, then the entire payment for the bill will be recorded and the excess amount will be stored as the balance amount for the vendor credit.
Customize Template
You can customize the format of your bill’s PDF. Here’s how:
- Go to Purchases on the left sidebar and select Bills.
- Select the bill for which you wish to customize the template.
- Hover over the bill and click the Customize button in the top right corner.
- From here, you can perform various actions for the bill’s template.

Learn more about Templates and Bill Templates.
Landed Costs
The Landed Cost of a product is the cost incurred while bringing a product that you have purchased from your vendor into your warehouse. This cost is exclusive of the cost of goods. Few examples of landed costs include freight, shipping charges, customs and other charges that the seller may incur till they procures the goods.
Tracking the landed costs help you calculate the actual cost in receiving the product(s). This, in turn, will help you to decide the selling price for your stock without compromising your profits.
Enable Landed Costs
To enable landed costs in Zoho Books:
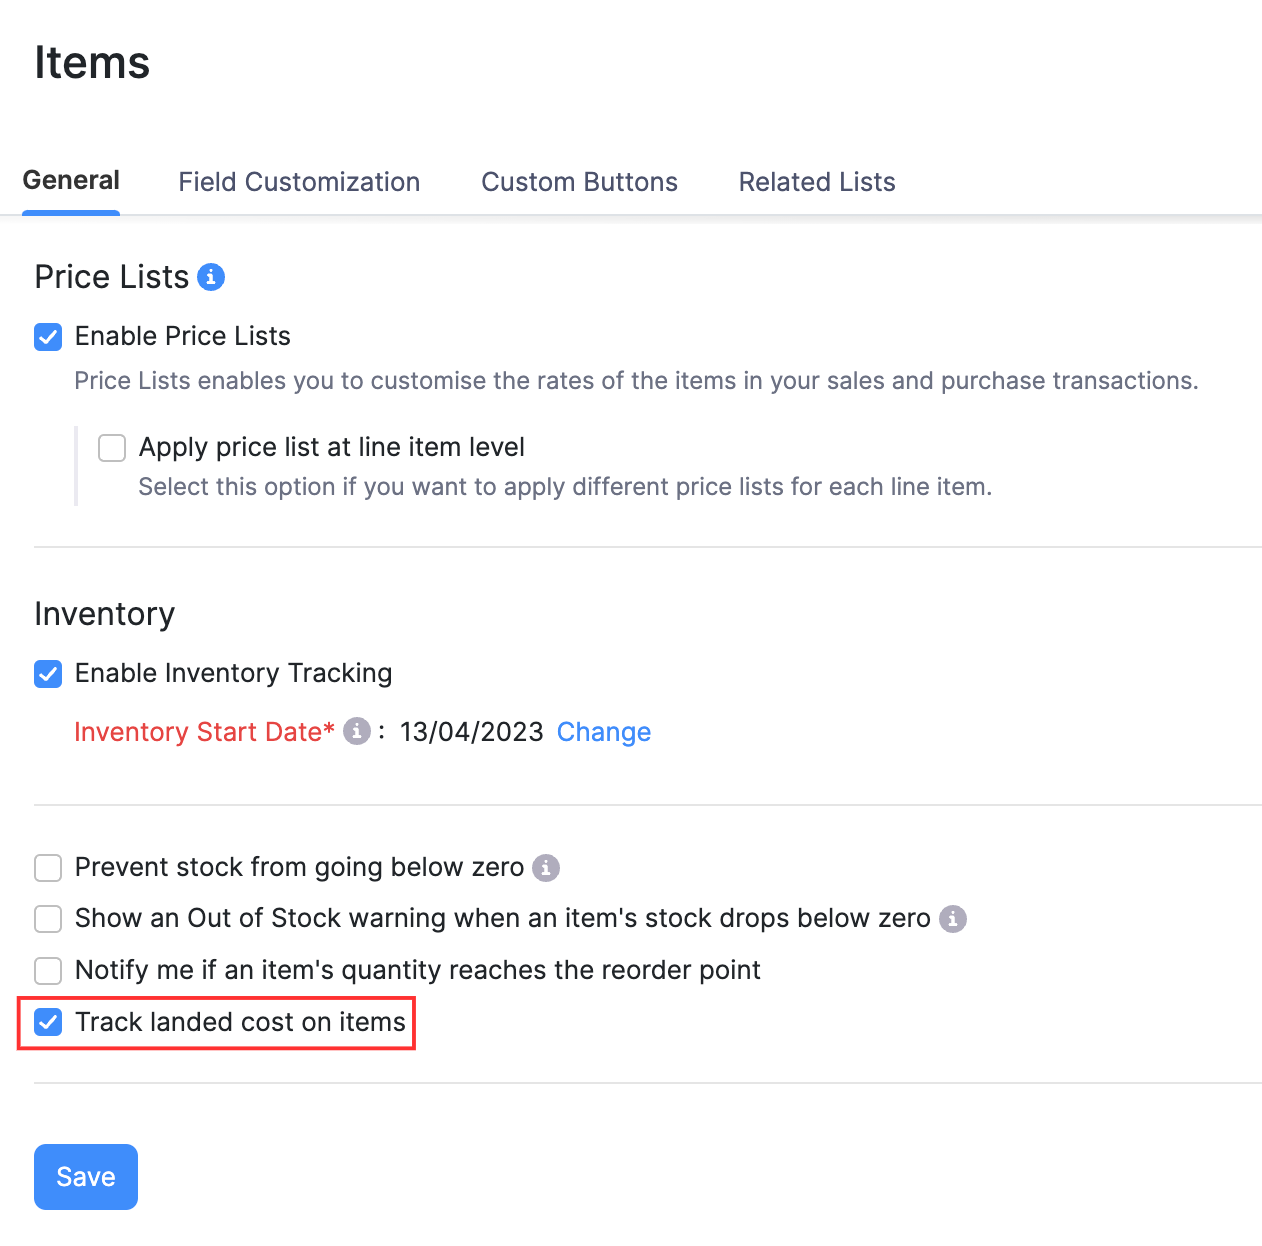
- Click Settings on the top right corner of the page.
- Select Items under Items.
- Check the Track landed cost on items option.
- Click Save.
Note:
You will be able to enable landed costs only if you have enabled inventory tracking for your organization. If you haven’t enabled it yet, mark the box I would like to enable Inventory in the same page (Settings > Items > Items).
Allocate Landed Costs
Once you have enabled landed costs for your organization, you will be able to add and allocate them to the items in your bills.
Step 1: Adding Landed Costs to Bills
You can allocate landed costs directly to the whole bill itself.
- Go to Purchases > Bills.
- Create a new bill and enter the items.
- Click + Landed Cost below the Item Details and enter the additional cost incurred as an item (for e.g. Freight). You can create a new item as a Service or choose one that you might have created already.
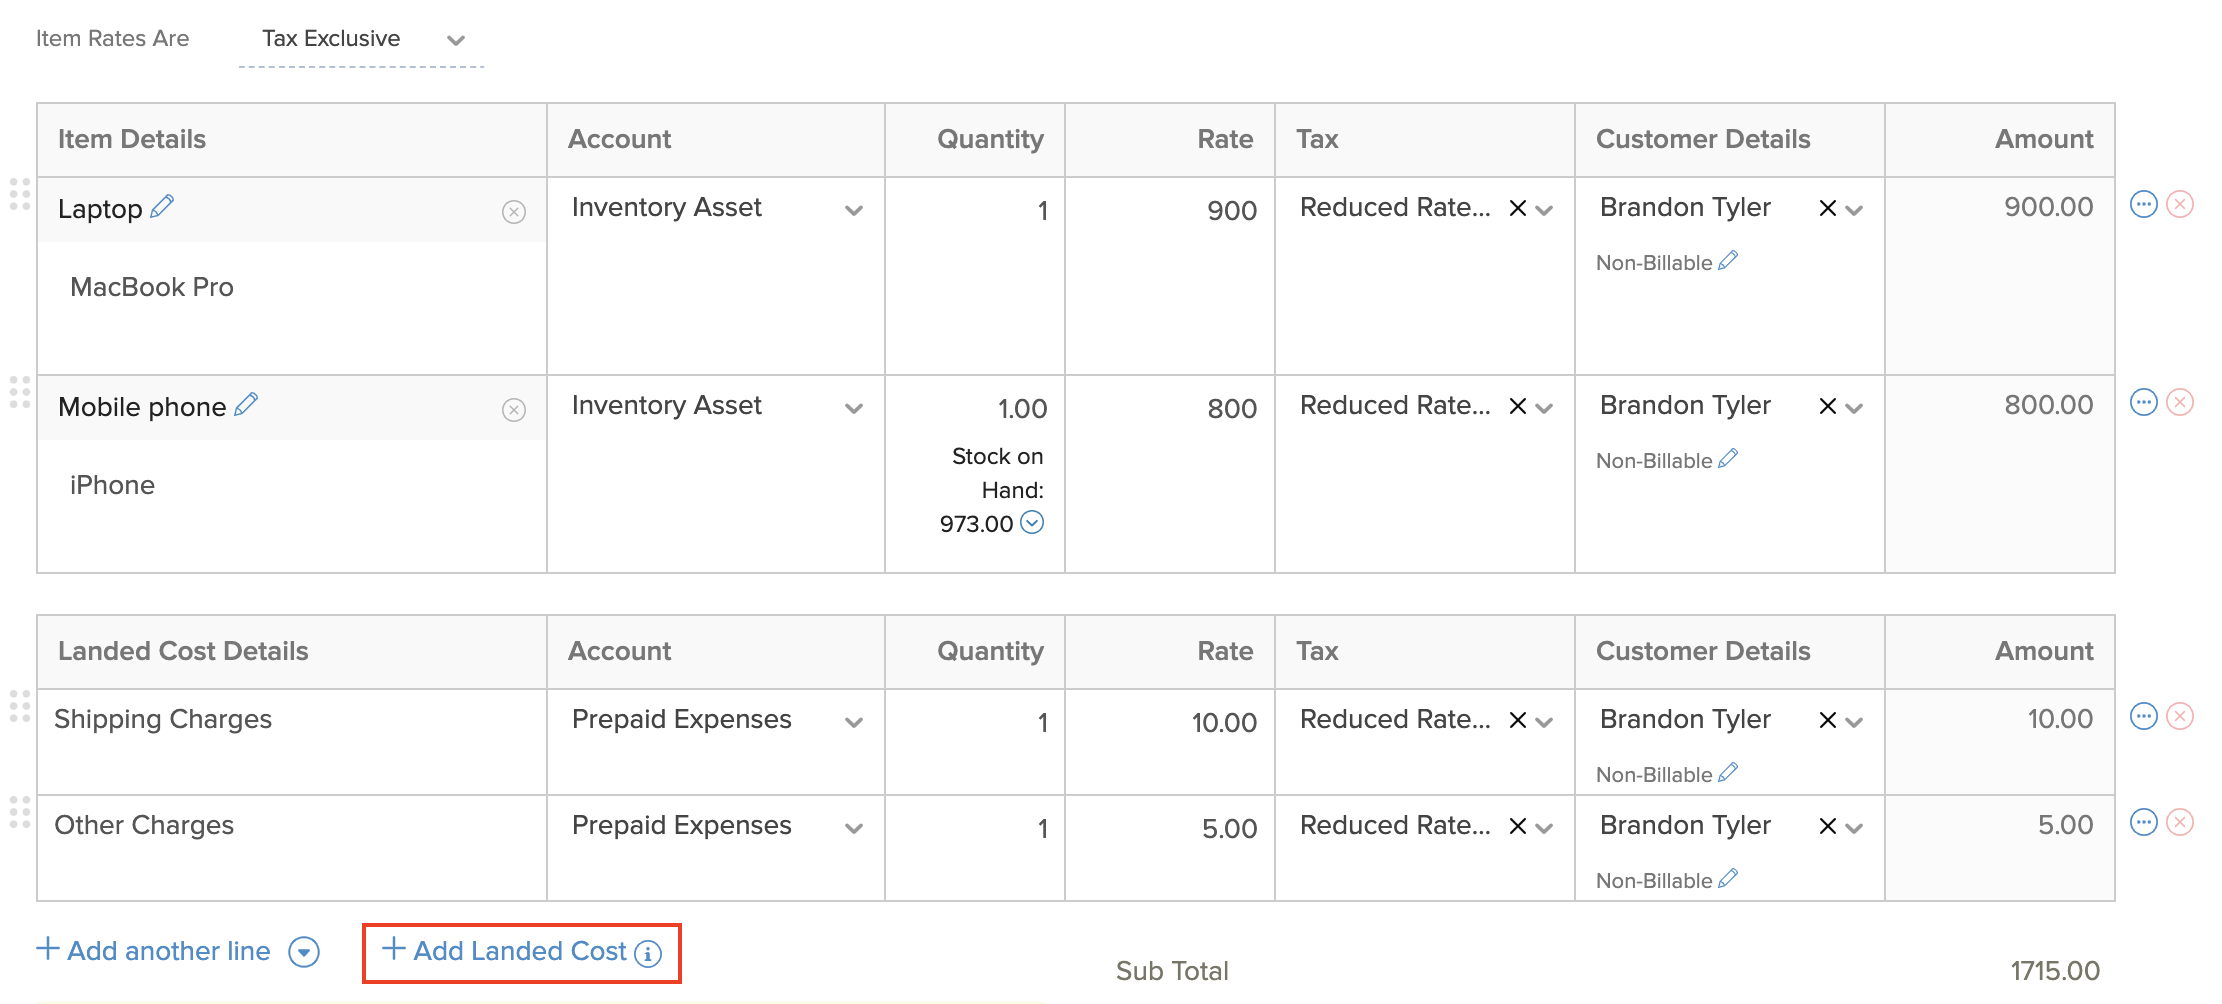
- Click Save as Draft or click Save as Open and Apply Landed Costs to start allocating the costs to items.
Note:
Landed Costs can be allocated only to items for which inventory is tracked.
Step 2: Allocate Landed Costs to Items in the Bill
You can allocate landed costs to different items in a bill. There are three ways of doing this:
- Allocate landed costs while creating a bill
- Create a new bill, add Landed Costs to the bill, and click Save as Open and Apply Landed Costs.
- When you are saving the bill, a popup will appear, from where you’ll be able to allocate the landed costs to the bill proportionately based on the Value or Quantity of the items.
- Edit the Charge fields if you would like to make changes to the costs calculated.
- Click Save & Next if there are two or more landed costs to be allocated.
- Click Skip if you wish to allocate the landed cost later.
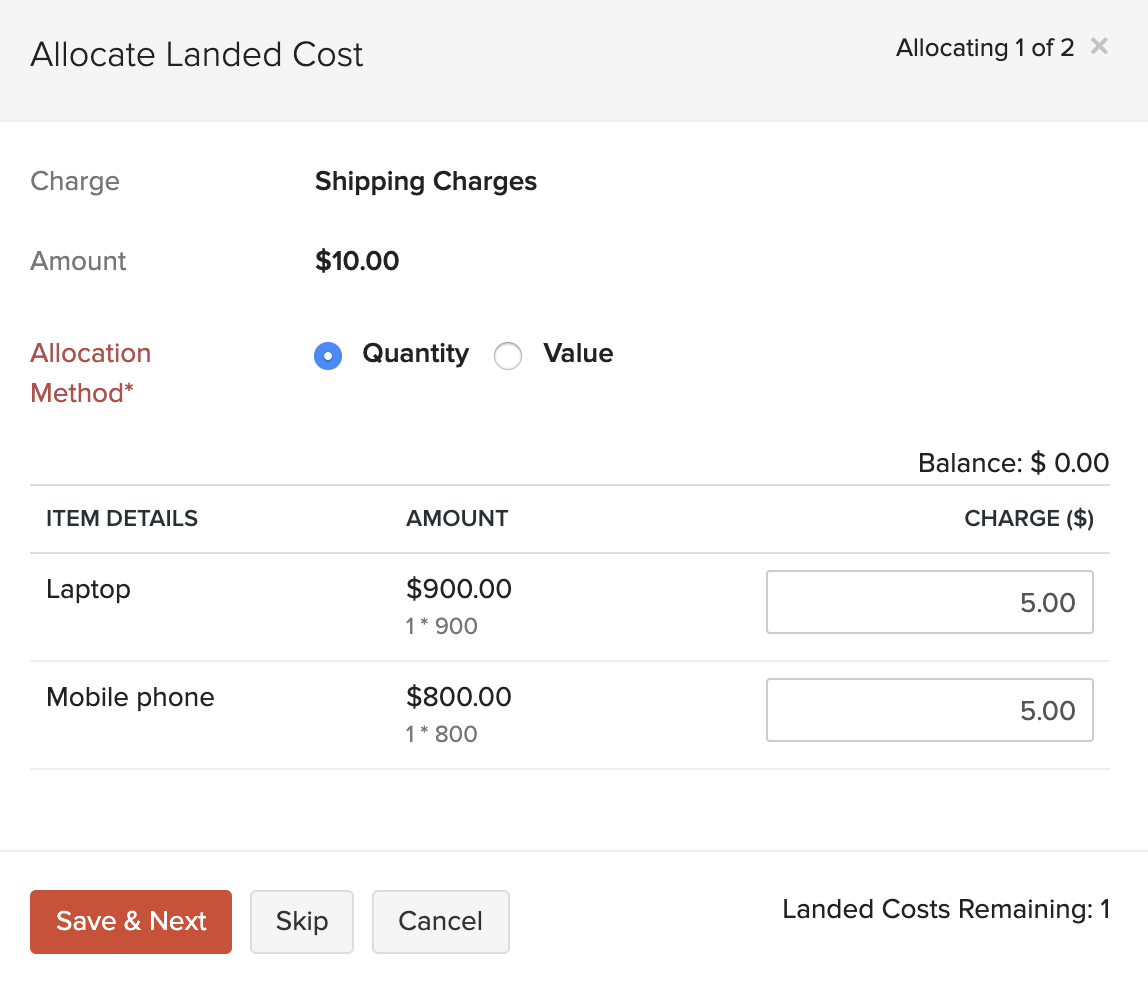
- Click Save.
Note:
You can also choose not to allocate any landed costs to that particular bill and allocate them to other bills.
- Allocate landed costs to an existing bill
If you have already added landed cost(s) to a bill but not yet allocated them to its items, you can choose to allocate it.
- Select a bill for which you have added landed cost(s) but not yet allocated them to its items.
- Click the Allocate Landed Costs button on your bill details page to allocate it to a bill.

- Allocate the charges proportionately and click Save.
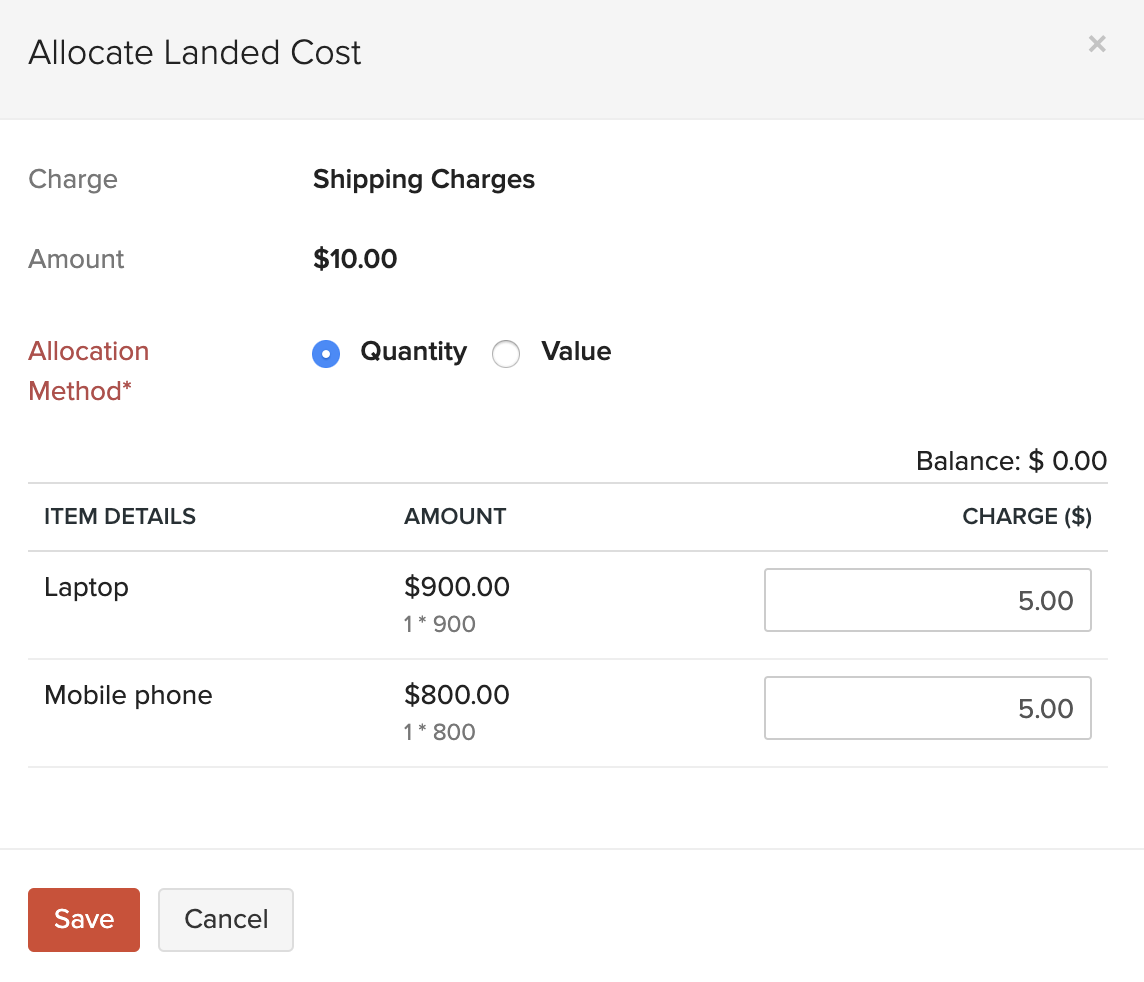
- You can Edit the allocated cost or delete it by clicking the Delete icon.

Pro Tip: You can also edit bills created earlier to add landed costs to them and allocate it.
Allocating Landed Costs from One Bill to Another
There may be cases where your vendor does not offer any shipping for the product and you get it shipped by another shipping agency. In such a case, you can create a separate bill with just the landed costs and apply them to your vendor’s bill. You can also apply any unused landed costs from other bills. To do this:
- Select the bill to which you want to allocate the landed cost(s).
- Click More > Add Landed Costs.
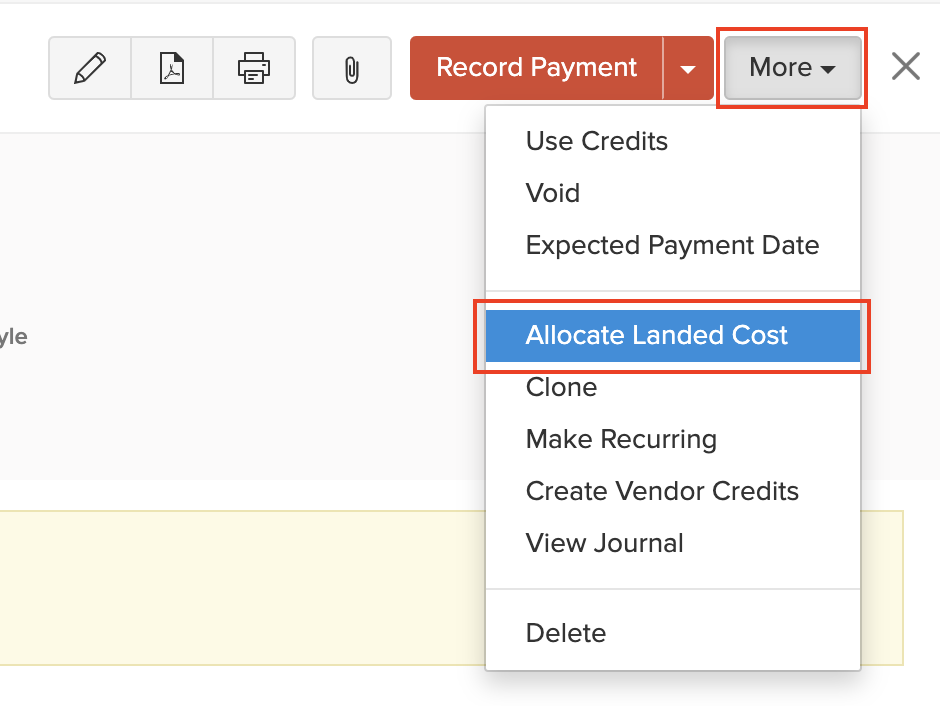
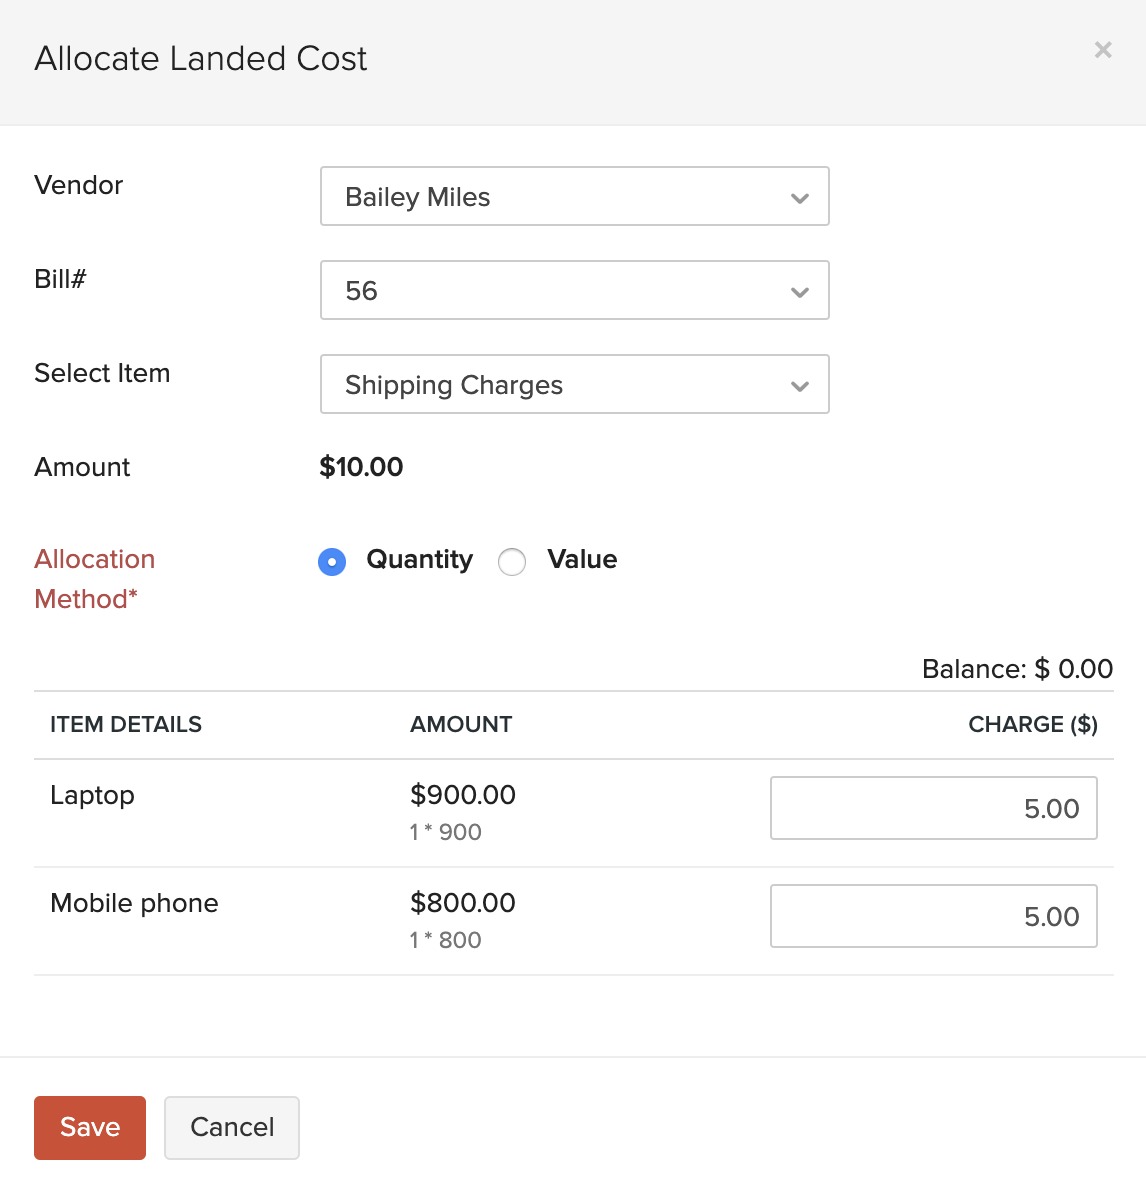
- Select the Vendor, the Bill# from which you would like to allocate the cost, and the landed cost.
- Allocate the landed costs proportionately and click Save.
- Allocate Landed Costs to another bill.
Next >
Manage Bills
Related


 Yes
Yes