Basic Functions in Payments Made
Let us take a look at the core functions that can be performed in the Payments Made module.
View Payments Made
If you have already recorded payments for your vendors, you can view them in the Payments Made module. Here’s how:
- Go to Purchases > Payments Made.
- Select the payment you wish to view.
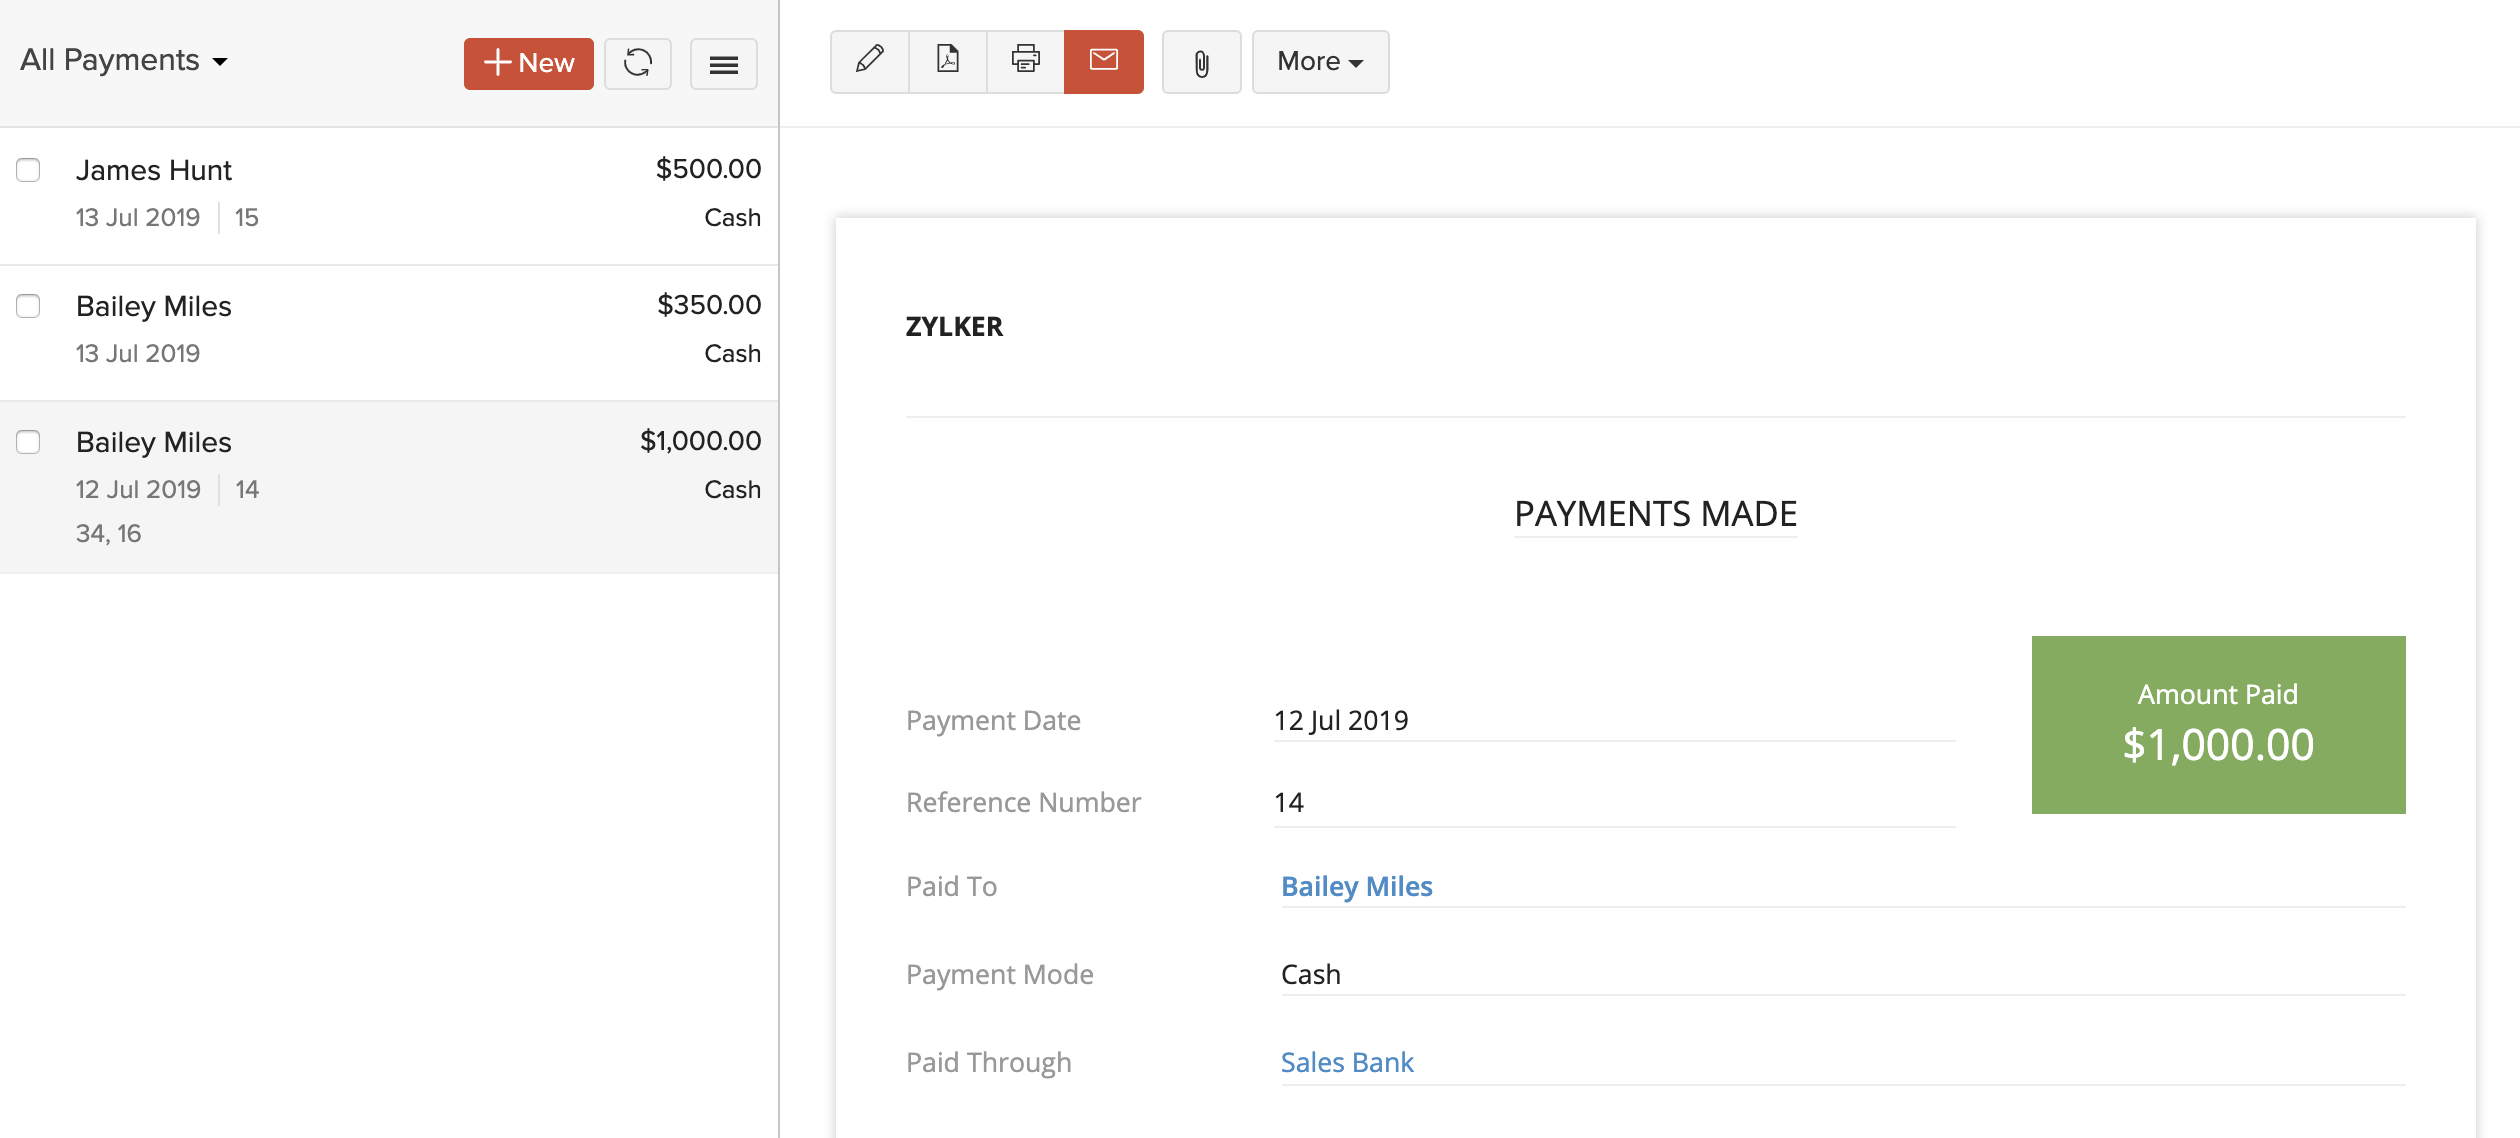
Payment Statuses of a Vendor Payment
Depending on whether you’ve enabled approvals for payments or not, a bill payment or vendor payment goes through the following statuses:
| Payment Status | Description | Applicable When | |
|---|---|---|---|
| Draft | The vendor payment is created but not yet processed. | Approvals is enabled or disabled | |
| Pending Approval | The vendor payment is waiting for approval. | Approvals is enabled | |
| Approval Rejected | The vendor payment is rejected for approval. | Approvals is enabled | |
| Approved | The vendor payment is approved and can now be applied to bills. | Approvals is enabled | |
| Paid | The vendor payment is recorded. | Approvals is enabled or disabled | |
| Void | The vendor payment is marked as void and will not be processed. | Approvals is enabled or disabled |
Record Payments Made
When recording payments for your vendors, you might come across the following cases:
Record and Split Payment
The payments you record for your vendors can be applied to their outstanding bills. The total paid amount can be split among a vendor’s outstanding bills either in full or in part. Let’s understand this better with a scenario.
Scenario: Patricia makes a payment of 500 to her vendor Bailey for two outstanding bills whose values are 300 and 450, respectively. Patricia can split the payment of 500 into 300 for the first bill (full amount) and 200 for the second bill (partial amount). So, the second bill will still have a balance of 250 to be paid.
Excess Payments
The total amount that you enter in any payment made can be applied across the different outstanding bills of the vendor. If there is any balance amount left after you’ve applied this amount, then you can save it as an excess payment. Let’s understand this better with the help of a scenario.
Scenario: Patricia makes a payment of 1000 to her vendor Bailey. She records a payment and splits only 898 of that amount to apply it on different outstanding bills for Bailey. Now, she still has 102 remaining (1000 - 898). She can record this as an excess payment.
You can record payments made to your vendors manually in Zoho Books. Here’s how:
- Go to Purchases > Payments Made.
- Click the + New button in the top right corner of the page.
- Enter the payment details.
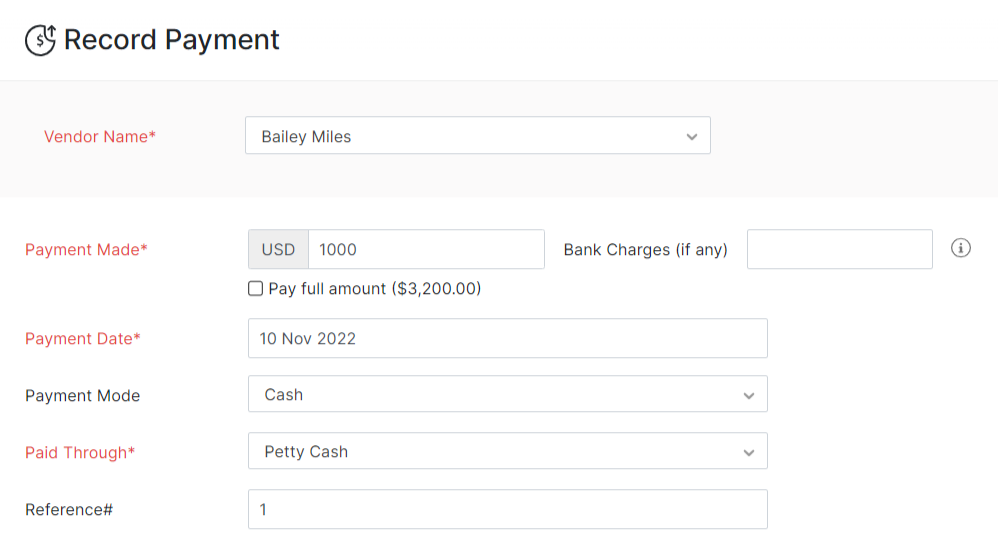
| Fields | Description |
|---|---|
| Vendor Name | Select the vendor to whom you’re making the payment. |
| Amount | Enter the amount to pay the vendor. Mark the box Pay full amount to record the full payable amount to the vendor. |
| Payment Date | Enter the date you make the payment. |
| Payment Mode | Choose from the different payment modes or configure one of your own. |
| Paid Through | Choose the account which tracks this payment. |
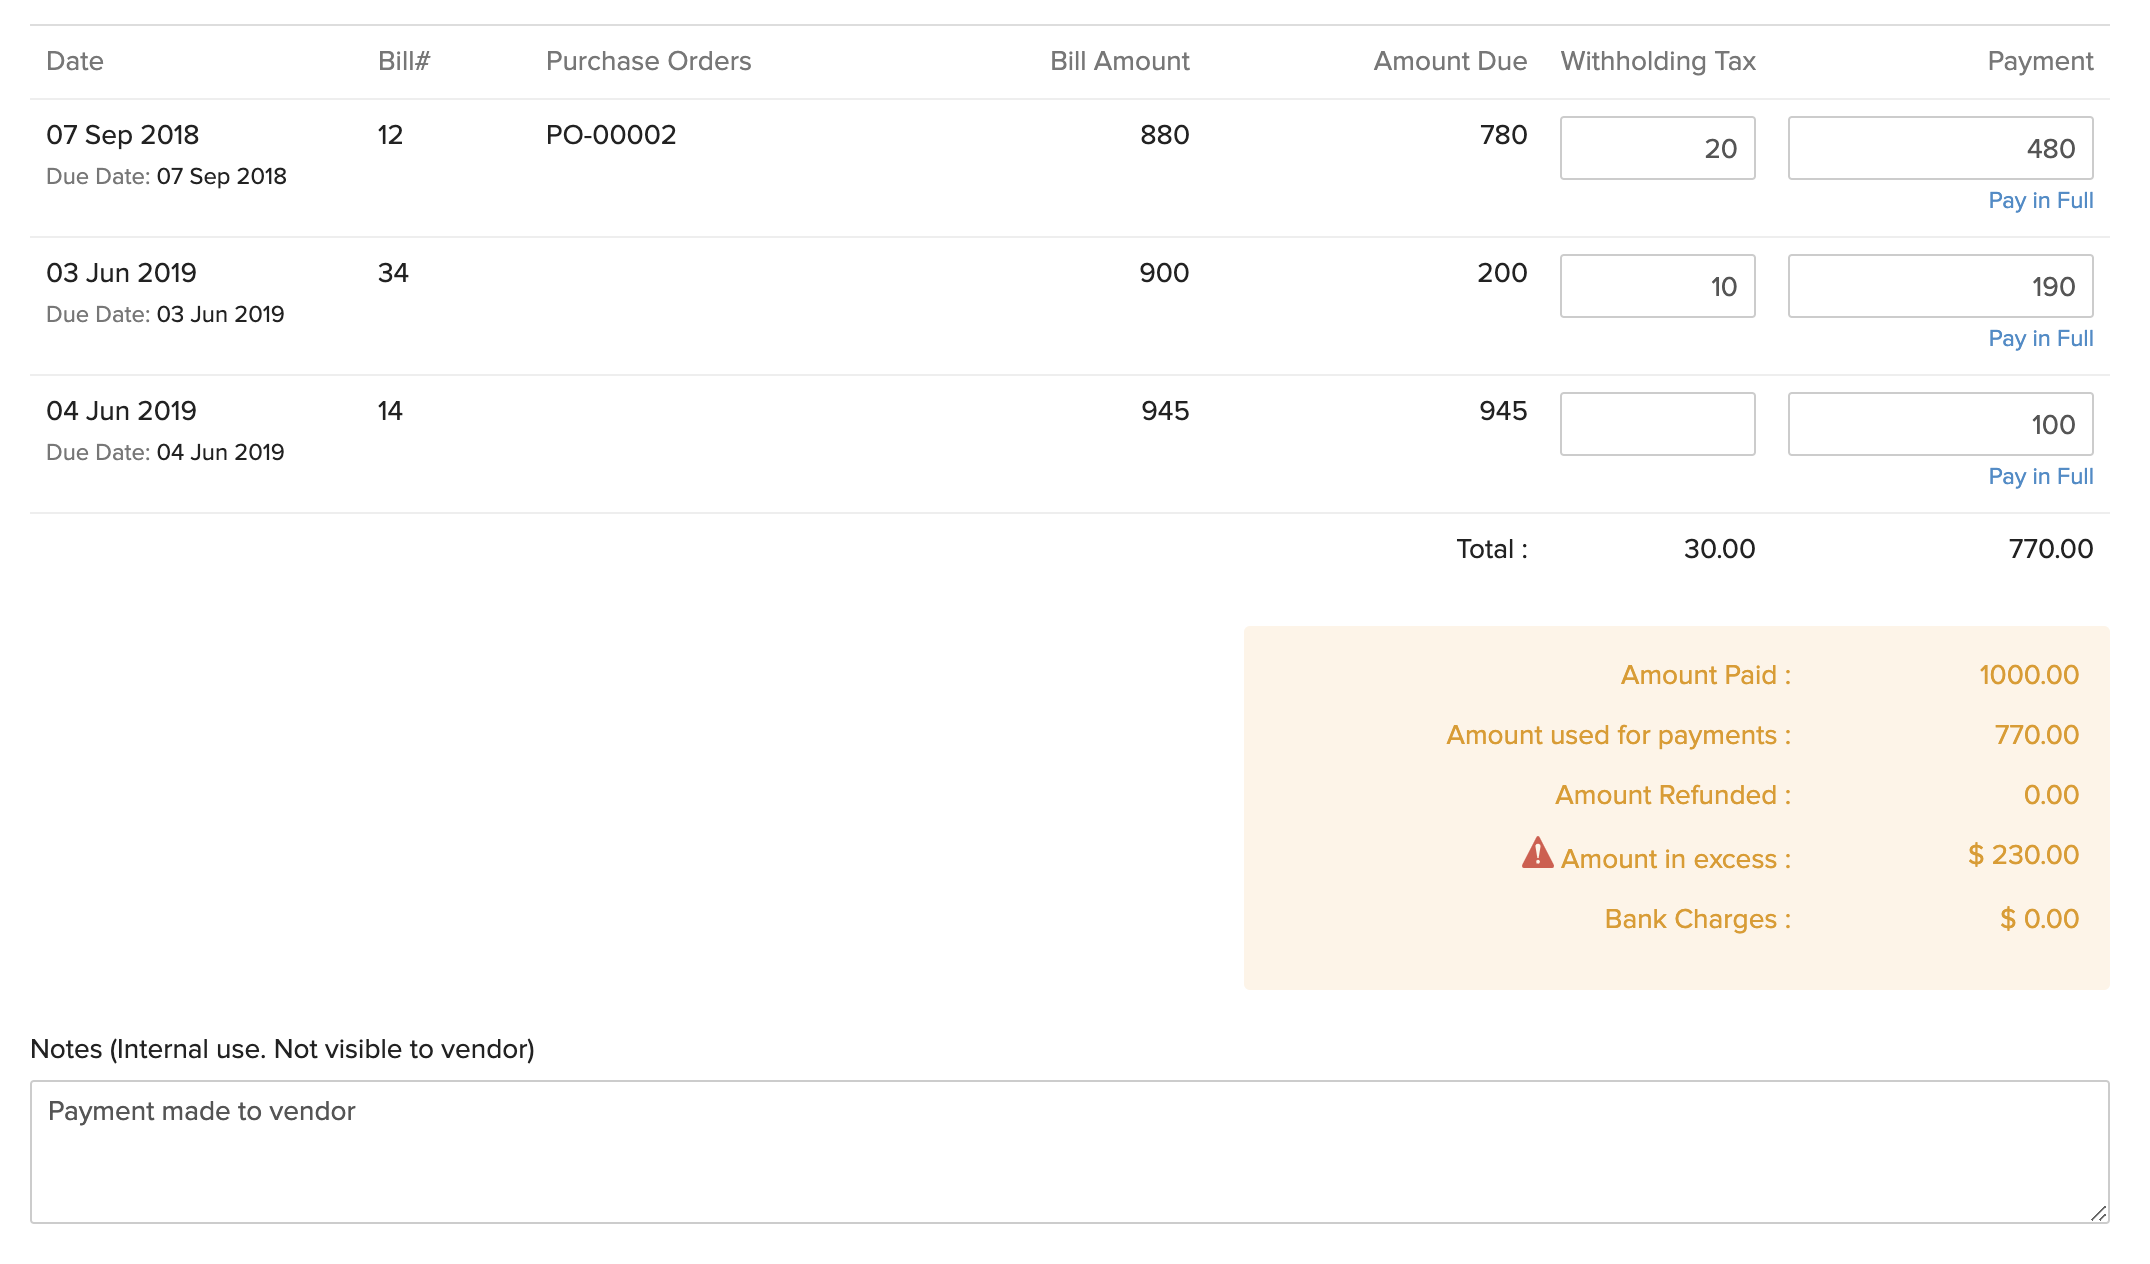
| Fields | Description |
|---|---|
| Pay in Full | Click this to enter the entire payment due for the bill. |
| Amount Paid | Total amount paid to the vendor. |
| Amount used for payments | Amount applied on the bills. |
| Amount in excess | Any excess payment of the vendor, i.e. the amount that is not applied on the bills. |
- Split the amount among the various outstanding bills for the vendor. You can split the amount in full or in part.
- Enter any notes for the payment.
- After adding the required details, click Save.
Excess Payments
If you have not applied the entire amount on the vendor’s bills, you’ll be left with some extra amount. This amount is called the excess payment. While saving the bill, you can choose to save the excess payment for the payment made.
The excess payment will be tracked under the Prepaid Expenses account by default. To change this account:
- Click Settings on the top right corner of the page.
- Click Accountant under Preferences.
- Select the account to track under Vendor Advance.
Insight: You can view the amount used for payments and the available balance (amount in excess) from the Total section.
Pro Tip: Payments that have excess payments will have different values for the Amount and the Unused Amount fields in the Payments Made page.
Import Payments Made
If you already have a list of all the bill payments of your vendors, you can import them into Zoho Books in CSV, TSV or XLS format.
To know the format of the import, i.e. the columns and data to be included in the import file, you can download the sample import file which we’ll be looking at in the steps below:
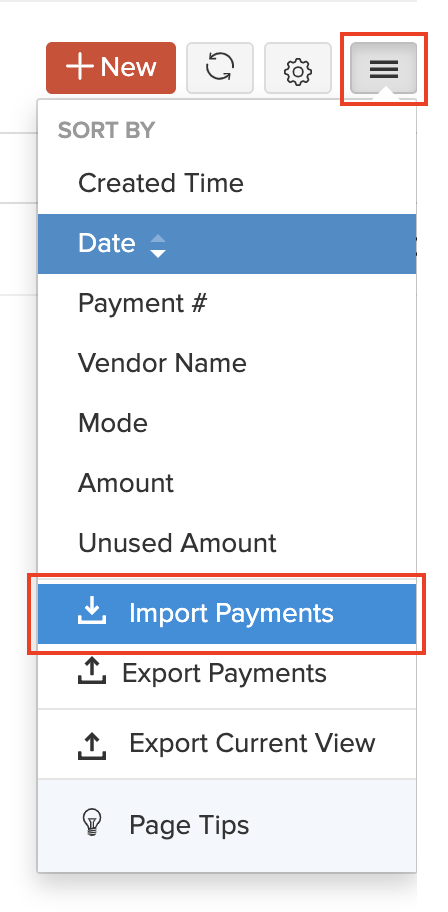
- Go to Purchases > Payments Made.
- Click the More icon in the top right corner of the page.
- Select Import Payments.
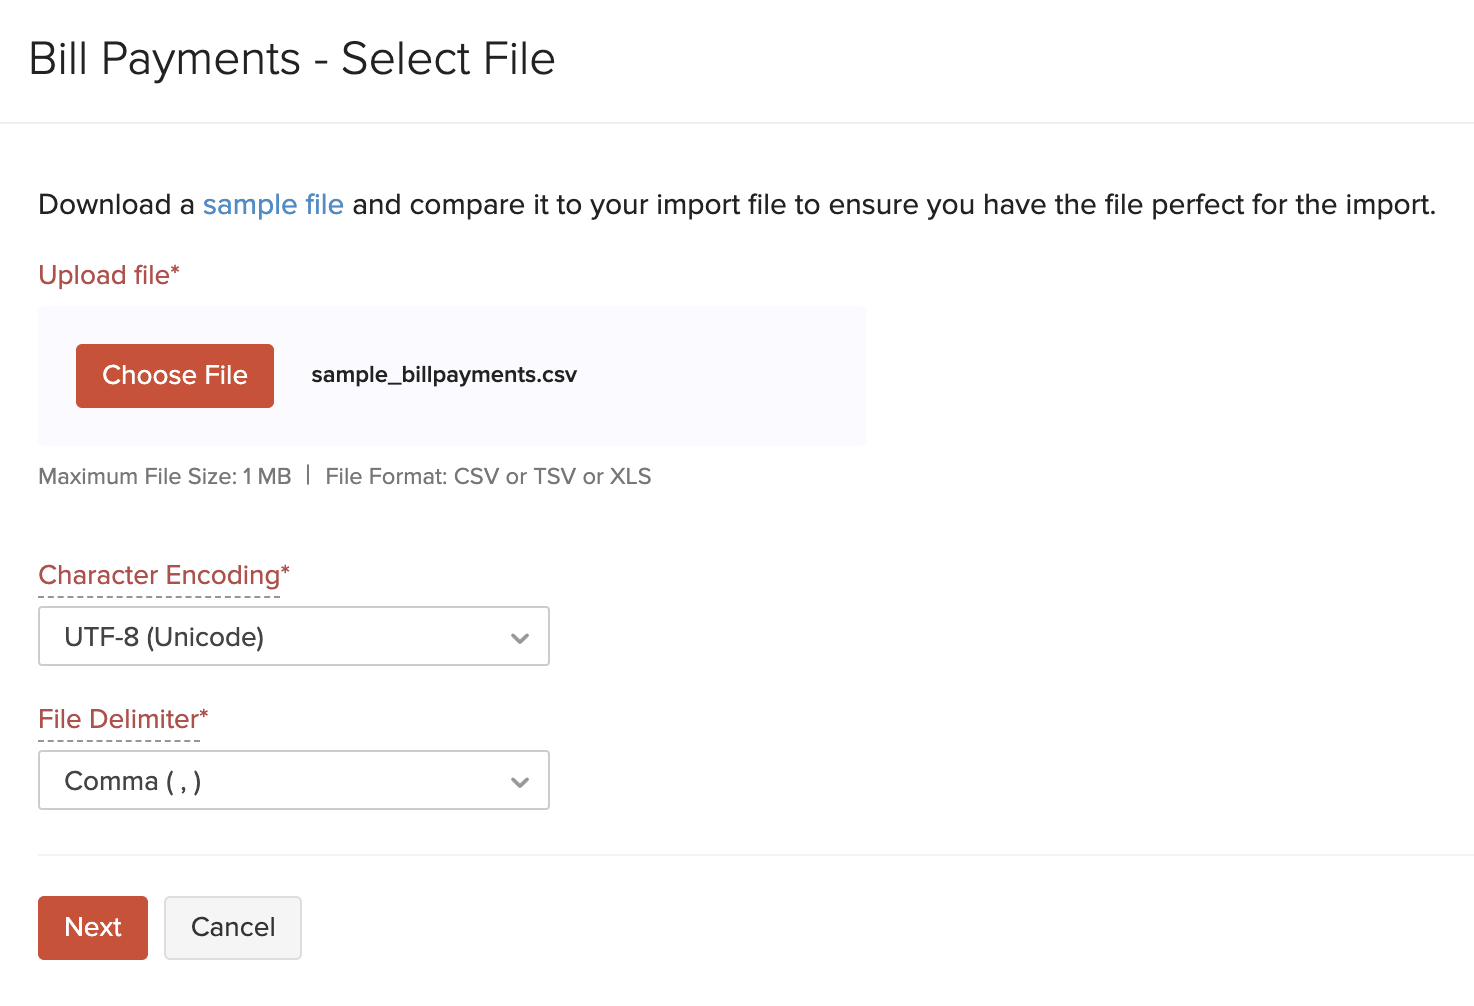
Click the Choose File button under Upload File. You can download the sample CSV file for your reference by clicking sample file.
Insight: The file size cannot be more than 1 MB.
- Choose the Character Encoding and File Delimiter for your file.
Insight: Character Encoding is used to pair numbers with characters. By default, the Unicode Transformation Format (UTF-8) encoding is used which supports a wide range of characters that go beyond 8 bits.
Insight: The Field Delimiter is used to separate two values in a row. While importing payments made, the default file delimiter is comma (,) .
- Click Next.
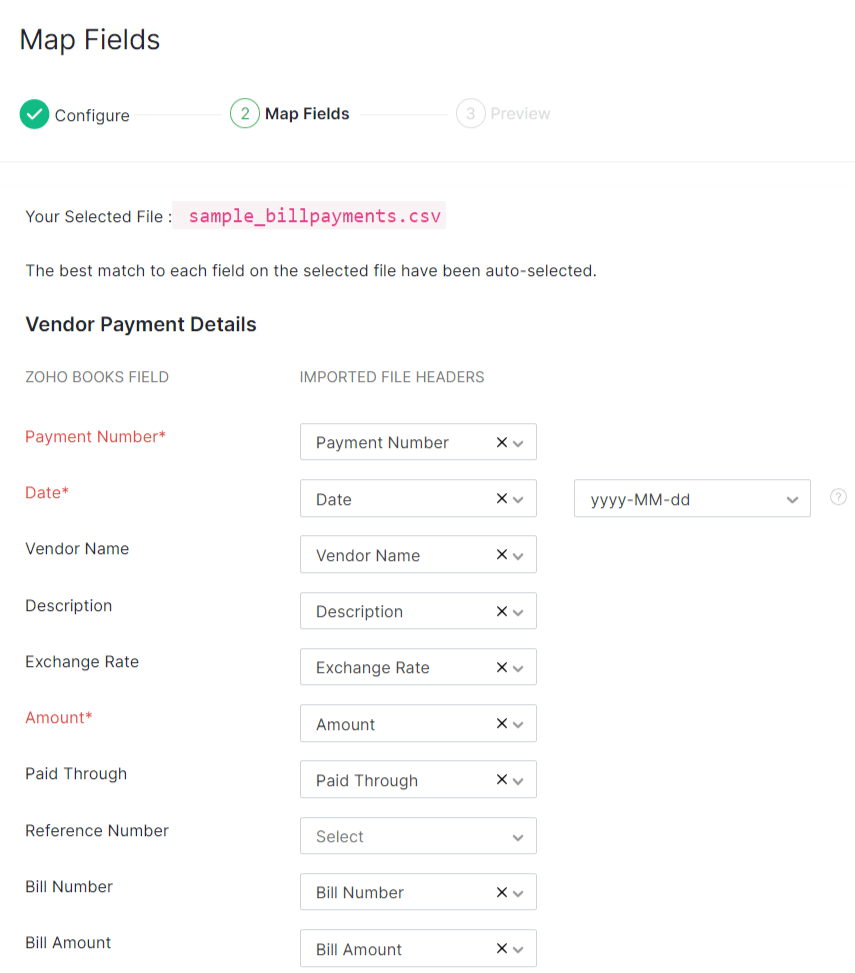
- Ensure that all the fields are mapped correctly in the Map Fields page.
- Mark the box Save these selections for use during future imports if you want to use the similar import format next time.
- Click Next.
- In the Preview window, click Import.
Next >
Functions in Payments Made
Related


 Yes
Yes