Other Actions for Expenses
Edit Expense
To change the details of an expense that you’ve created in Zoho Books, you’ll have to edit it. Here’s how you can do it:
- Go to Purchases > Expenses (or press shift + x).
- Select the expense you want to edit.
- Click the Edit icon in the top right corner of the page.
- Make the necessary changes and click Save.

Make Expense Recurring
If you incur an expense repeatedly over a period of time, you can choose to make it recurring in Zoho Books. Recurring expenses are generated automatically after an interval of time. Here’s how you can mark an expense as recurring:
- Go to Purchases > Expenses (or press shift + x).
- Select the expense you want to make recurring.
- Click the Make Recurring button ion the top right corner of the page.

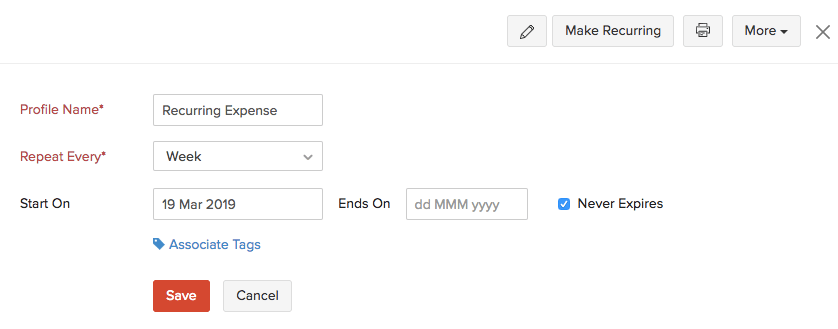
- Enter the following details:
| Fields | Description |
|---|---|
| Profile Name | Enter a name for the recurring expense or profile. |
| Date Range | Select a Start On date and an End On date. Mark the box Never Expires if you want the recurring expense to be generated forever. |
| Repeat Every | Choose a time interval for the recurring expense or set a Custom time period. |
| Assocaite Tags | Associate tags you’ve created in Zoho Books (Settings > Customization > Reporting Tags) to the recurring expense. |
- Click Save.
Convert an Expense into an Invoice
If you had associated a customer to an expense and had marked it as billable, you can convert the expense into an invoice. Here’s how:
- Go to Purchases > Expenses.
- Select the expense that you’ve marked as billable which you want to convert into an invoice.
- Click the Convert to Invoice button in the top bar. You will be redirected to the invoice creation page.

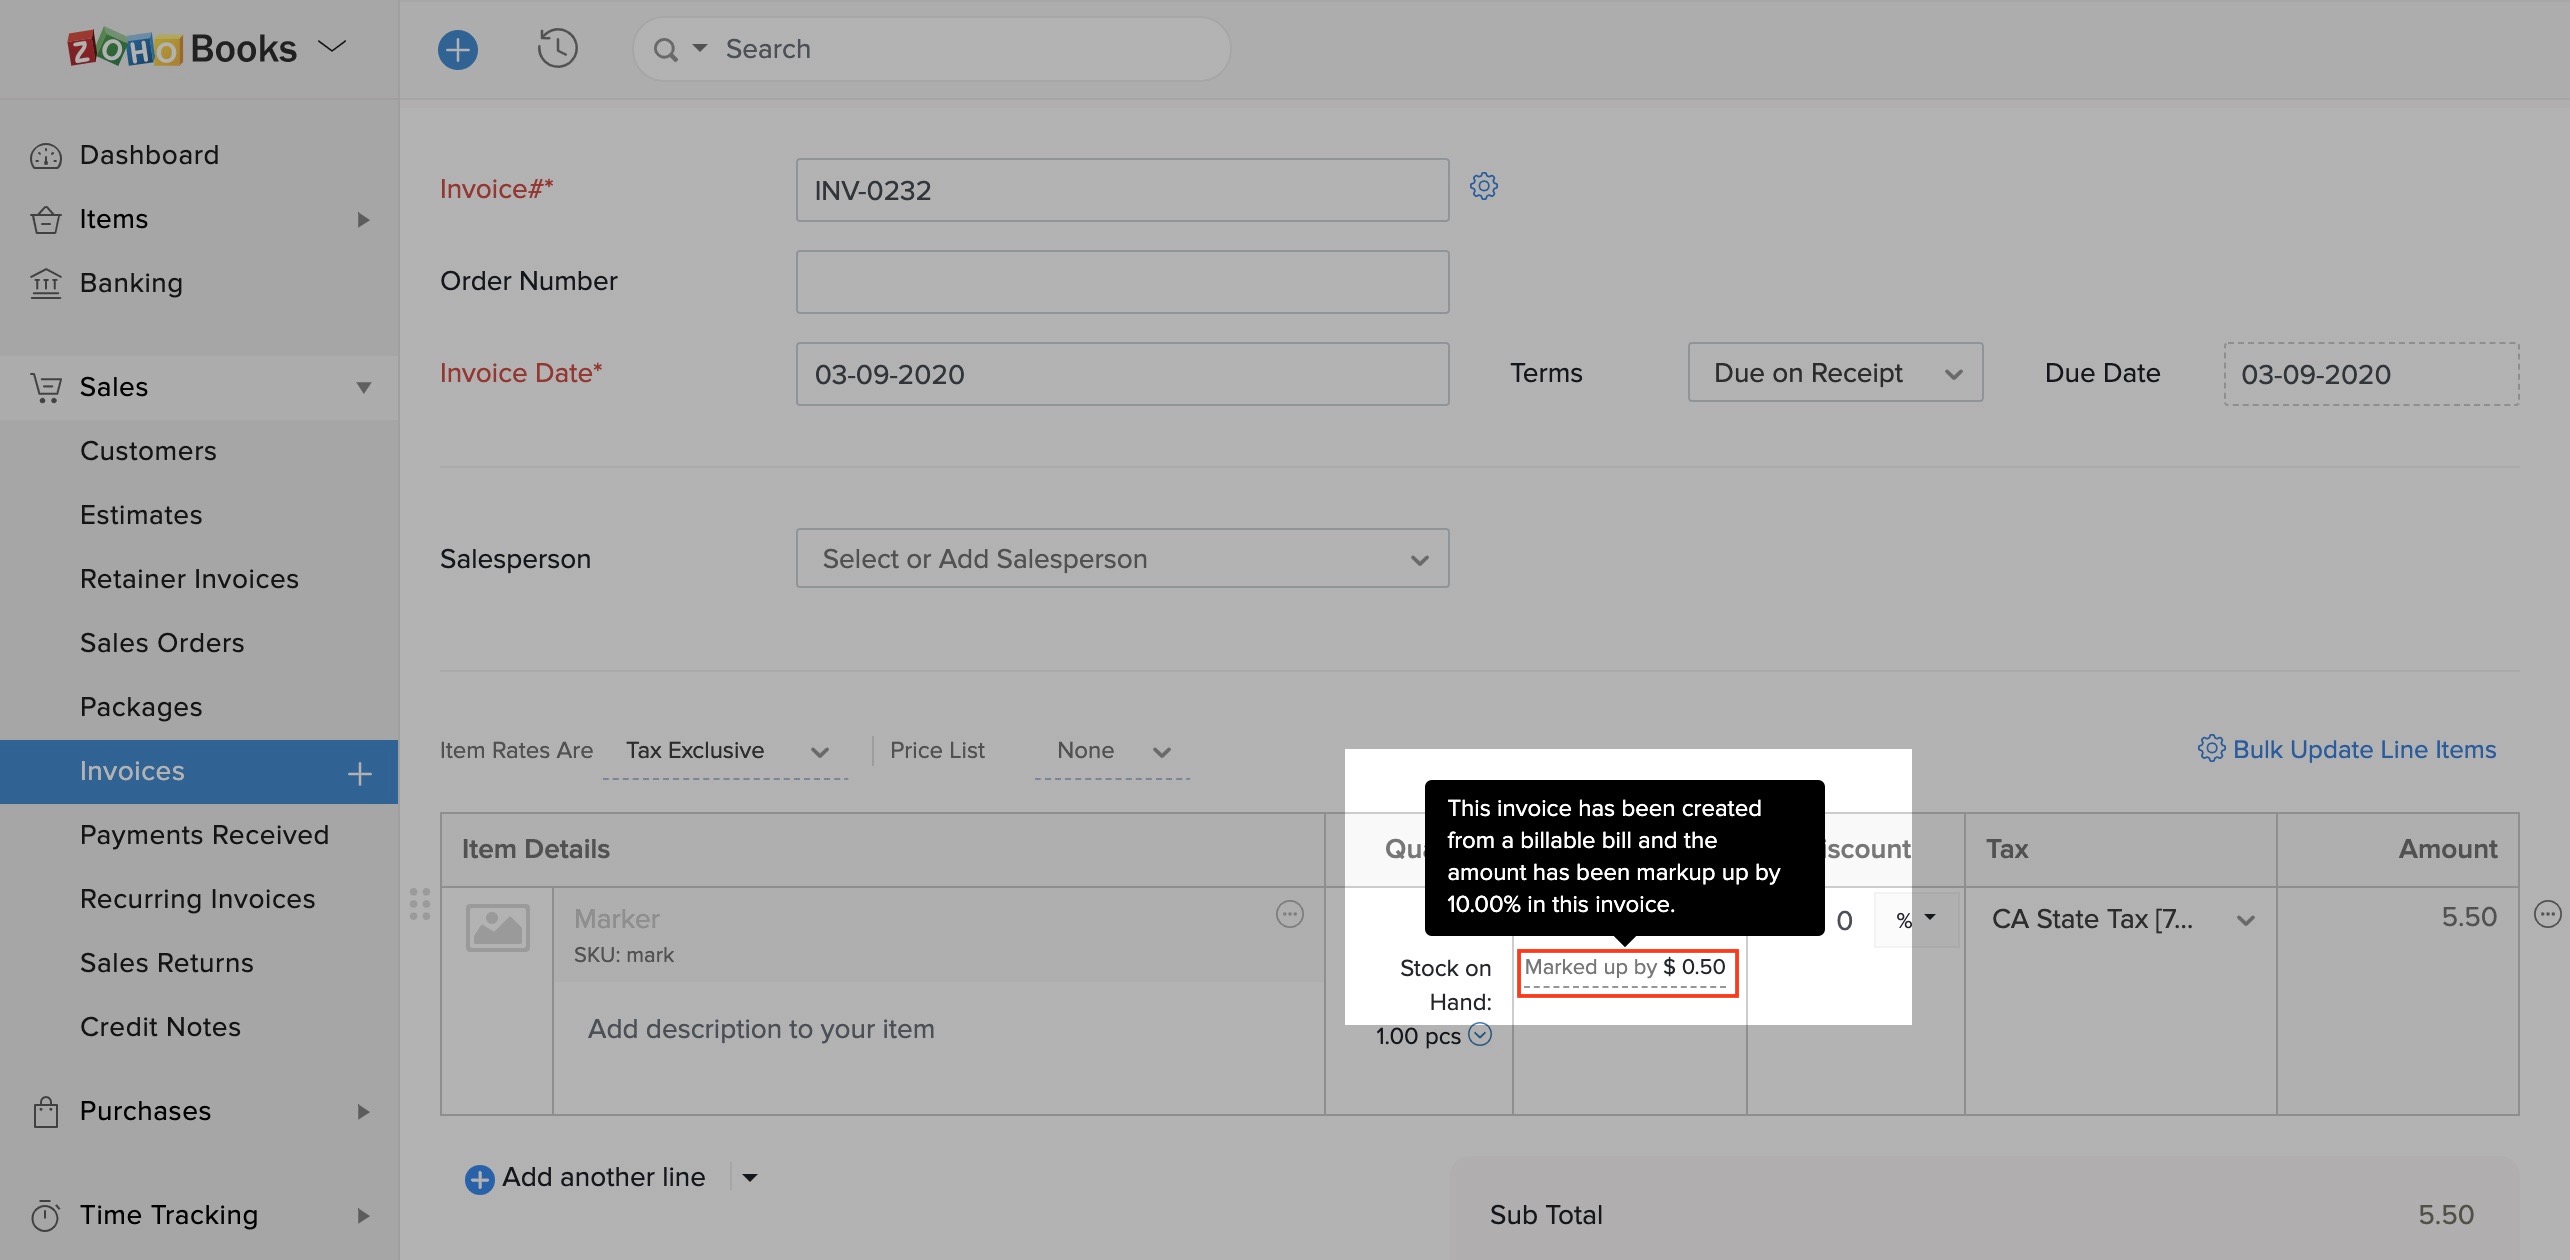
If you had given a markup percentage for the billable expense, the marked up amount will be displayed along with the rate of the line item in the invoice.
- Click Save as Draft or Save and Send.
Clone Expense
If you want to create an expense which has details similar to an existing expense, you can clone the existing expense. Here’s how you can do it:
- Go to Purchases > Expenses (or press shift + x).
- Select the expense you want to clone.
- Click More > Clone.
- Go through the expense and click Save.

Print Expense
You can print an expense in Zoho Books. Here’s how:
- Go to Purchases > Expenses (or press shift + x).
- Select the expense you want to print.
- Click the Print icon on top of the page.
- Check the expense preview and click Print.

Bulk Actions
With bulk actions, you can perform an operation on multiple expenses or profiles in a single step. For example, you can bulk delete multiple expenses or bulk update fields in expenses.
To perform a bulk action:
- Go to Purchases > Expenses (or press shift + x).
- Select the expenses you want to update in bulk.
- You can print multiple receipts by clicking Print Receipt, or delete multiple expenses by clicking the Delete icon.
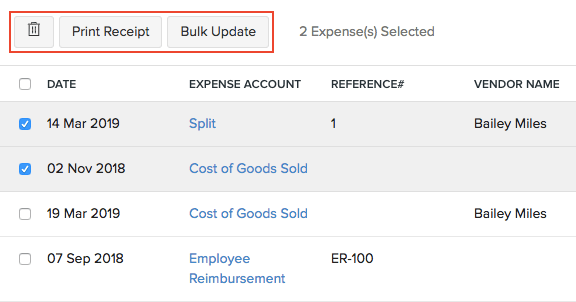
- To update fields in the multiple expenses, click Bulk Update.
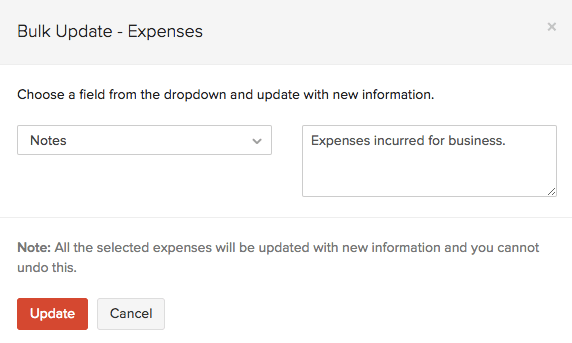
- Select the field to update and enter the value.
- Click Update.
Delete Expense
You can delete an expense you have created in Zoho Books. Here’s how:
- Go to Purchases > Expenses (or press shift + x).
- Select the expense you want to delete.
- Click More > Delete.

Export Expenses
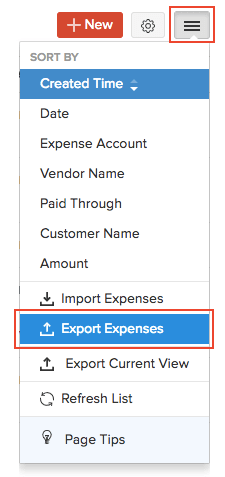
You can export all your expenses in Zoho Books to your system in the CSV, XLS or XLSX format. Here’s how:
- Go to Purchases > Expenses (or press shift + x).
- Click the More icon in the top right corner of the page.
- Select Export Expenses.
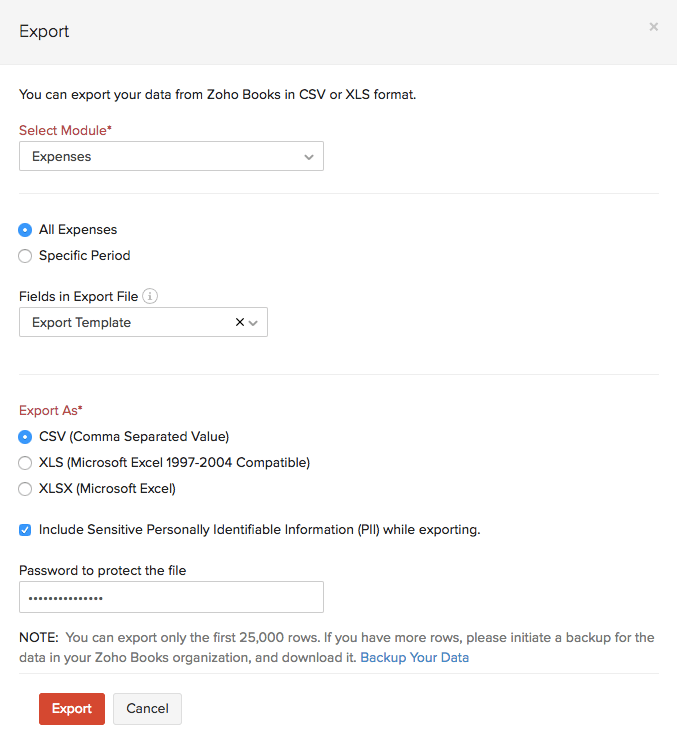
- Fill in the following fields:
| Fields | Description |
|---|---|
| Select Module | By default, the Expenses module will be selected. |
| Date Range | Export All Expenses or select a Specific Period for which you want to export the expenses. |
| Fields in Export File | If you want to export only certain fields, you can select a template under Fields in Export File. If you don’t have an export template, you can create a new one by clicking + Add New. |
| Export As | Select the format of your export. |
| Personally Identifyable Information (PII) | If you have any PII that you are exporting, mark the box Include Sensitive Personally Identifiable Information (PII) while exporting. |
| Password | Enter a password to secure your export. |
Insight: The PII fields include your customer’s address, email address, phone number, bank account number and any sensitive custom field.
- Click Export.
Next >
Expense Preferences
Related


 Yes
Yes
