Refund Credits
Let’s say you have created a credit note for a customer. Now, your customer might request for a refund of the credit note, so you decide to pay them offline. In such a case, you would have to refund the credit note.
Create Refund
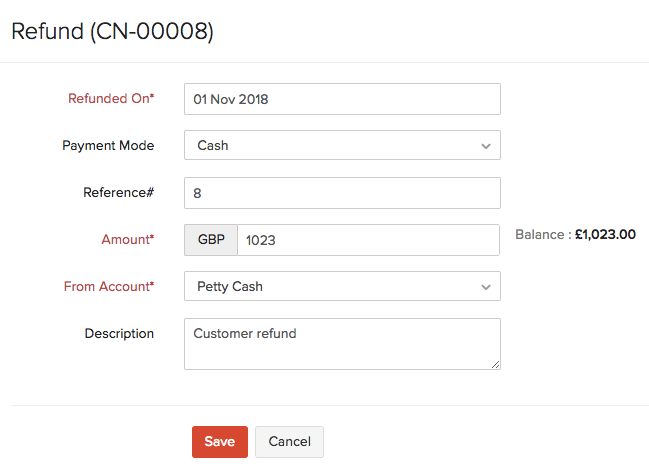
To refund a credit note:
- Go to Sales > Credit Notes.
- Select the credit note you want to refund.
- Click More > Refund.

- Enter the amount to refund.
- Click Save.

Note:
You can enter the whole refund amount or even choose to enter it partially.
View Refunds
To view all the refunds you recorded for a credit note:
- Go to Sales > Credit Notes.
- Select the credit note for which you’ve recorded a refund.
- Click the Refund History tab on the top right side of the page.

You can either Edit or Delete the refunds by clicking the icons next to them.
Import Refunds
You can import the refunds that you have in your system in CSV, TSV or XLS format. Here’s how:
- Go to Sales > Credit Notes.
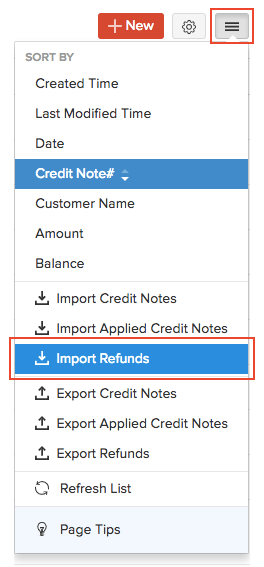
- Click the More icon in the top right corner of the page.
- Select Import Refunds.

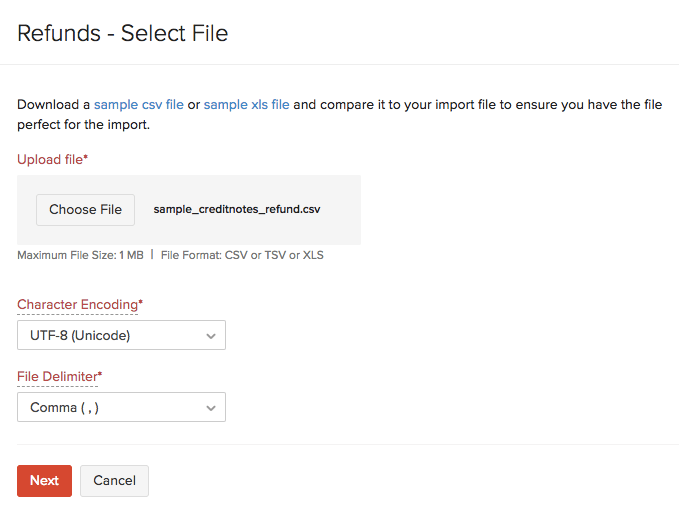
- Click the Choose File button under Upload file. You can download a sample CSV or XLS file for your reference by clicking sample csv file or sample xls file.
- Click Next.

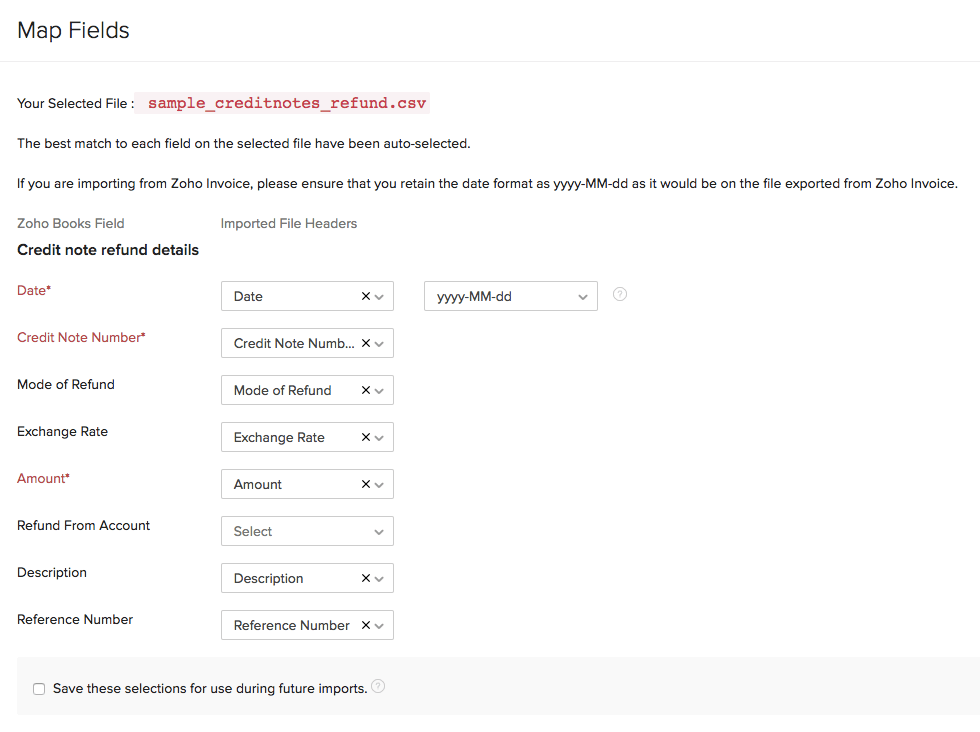
- Ensure that all the fields are mapped correctly in the Map Fields page.
- To import using the same format next time, mark the box Save these selections for use during future imports.
- Click Next.

- Click Import.
Next >
Delete Credit Note
Related


 Yes
Yes