Functions in Vendor Credits
Apply Credits to Bills
Vendor credits can be applied to bills that are created for the same vendor. Doing so will reduce the bill amount accordingly. To do this:
- Go to Purchases > Vendor Credits.
- Open the vendor credit you want to apply to bills.
- Select the button Apply to Bills in the top right corner of the page.
- A list of the bills created for that vendor will be displayed. Enter the amount against the desired bill balance. The amount can be split among multiple bills.
- Click Save.
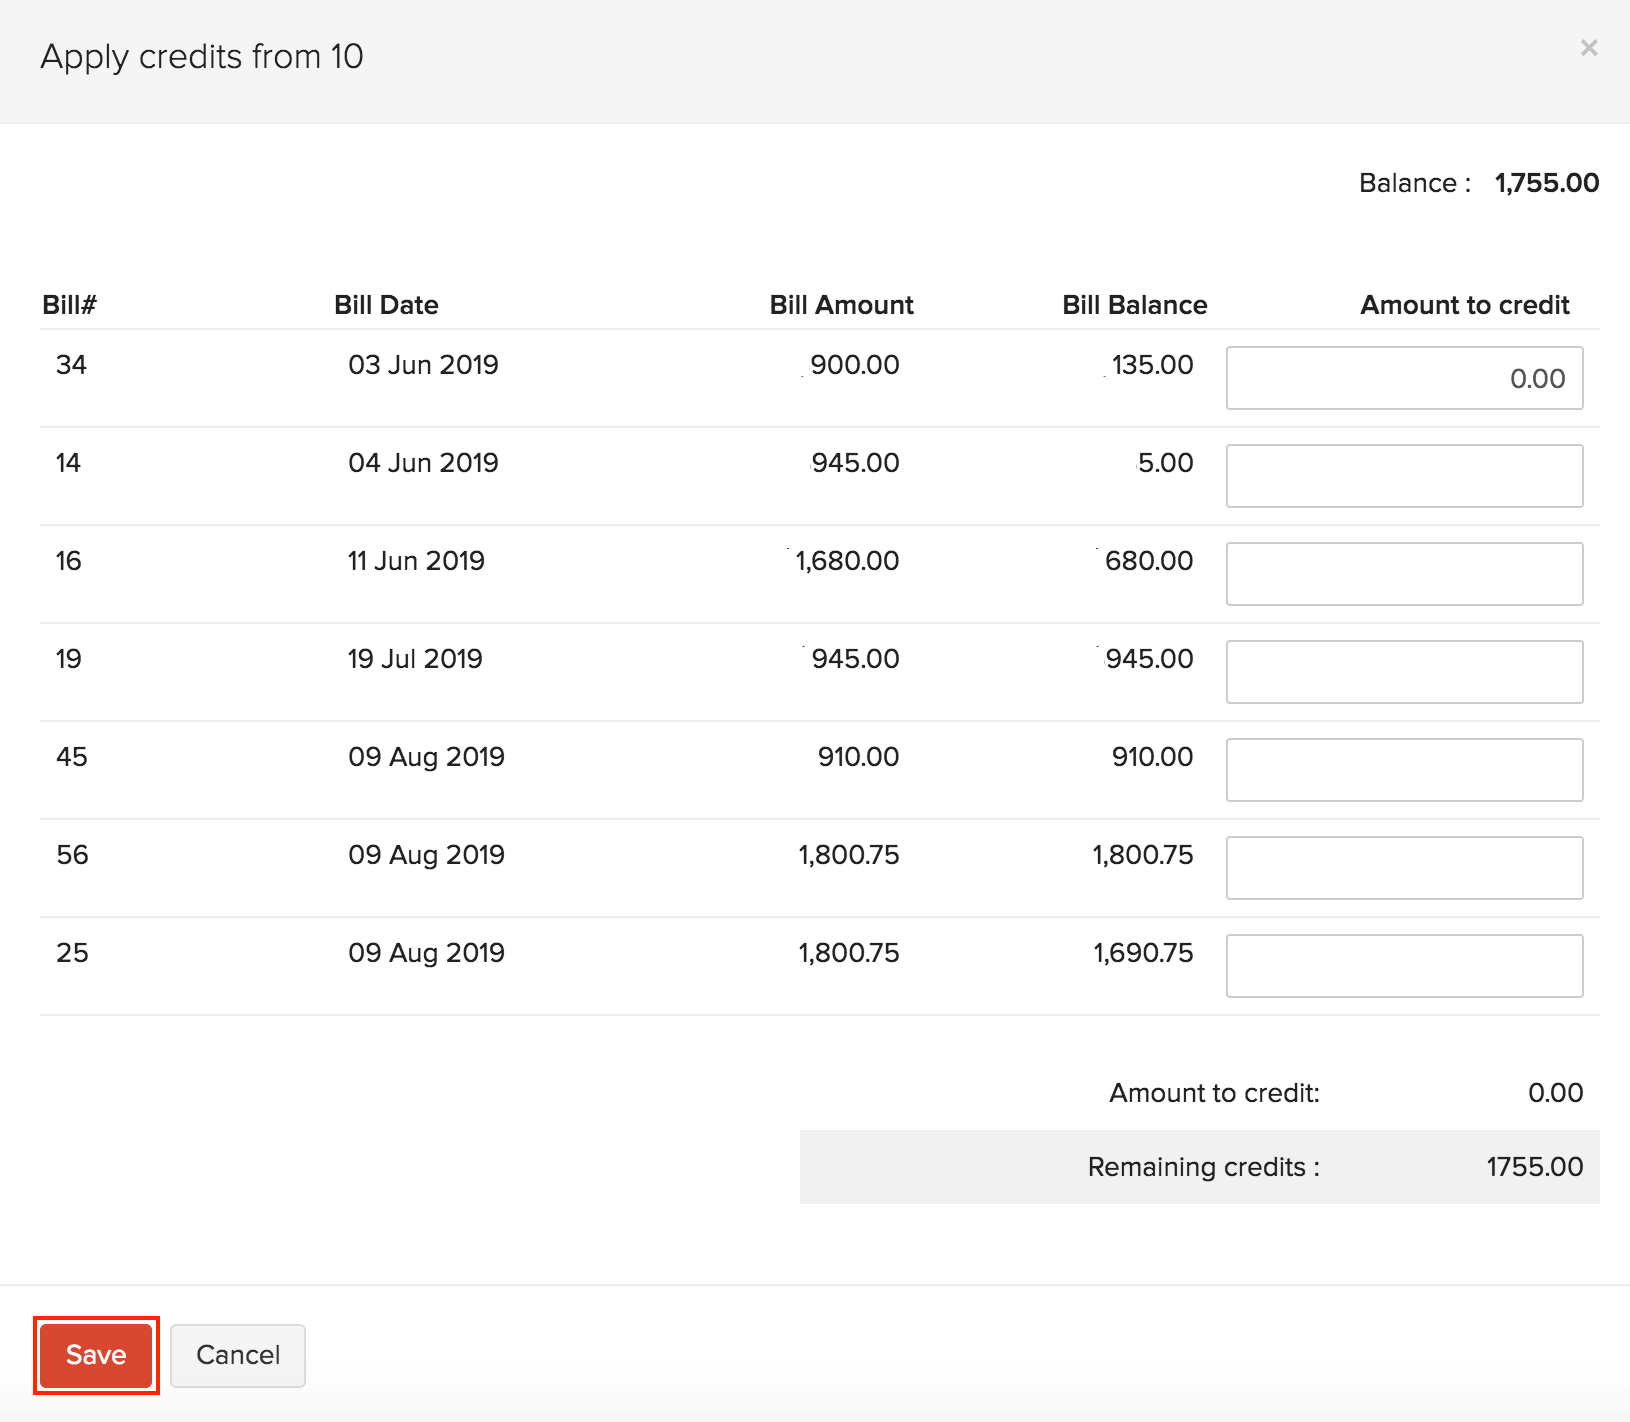
- If all the credits are used up, the status of the vendor note will change to Closed.
Pro Tip: You can also apply credits by opening the corresponding bill and selecting Use Credits.
Refund Credits
To refund a vendor credit :
- Go to Purchases > Vendor Credits.
- Select the vendor credit you want to refund.
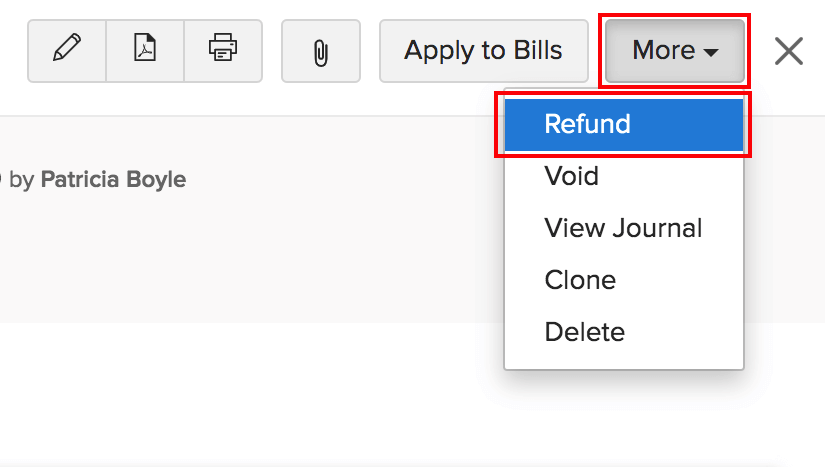
- Click More > Refund.
- Enter the amount to refund and select the account which tracks the refund.
- Click Save.
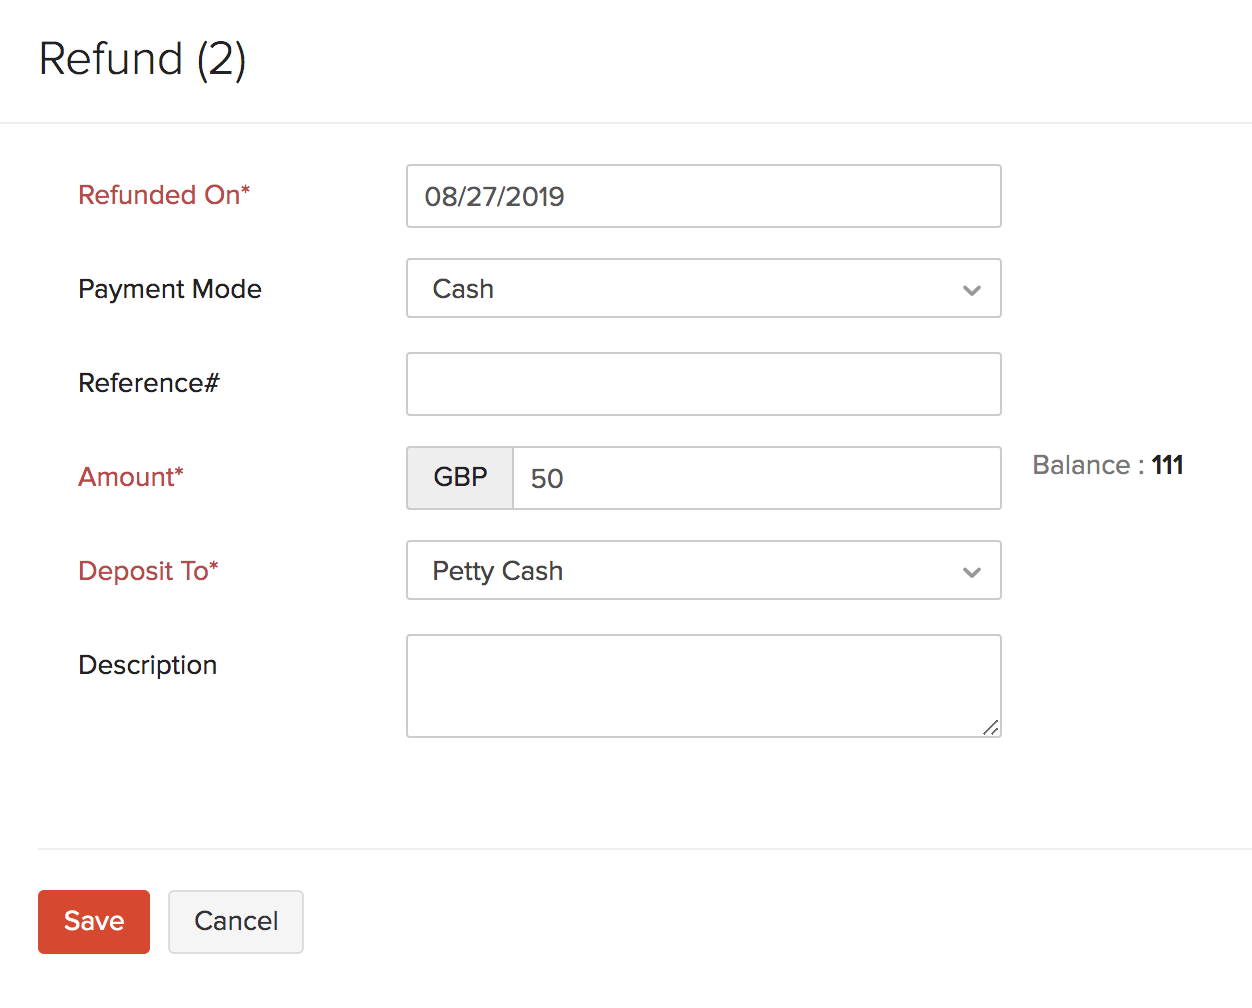
Insight: You can enter the entire refund amount or even choose to enter it partially.
View Refunds
To view all the refunds you recorded for a vendor credit:
- Go to Purchases > Vendor Credits.
- Select the vendor credit for which you’ve recorded a refund.
- Click the Refund History tab.

Import Refunds
If you have a list of the refunds made to vendors, you can import them into Zoho Books in CSV, TSV or XLS format. Here’s how:
- Go to Purchases > Vendor Credits.
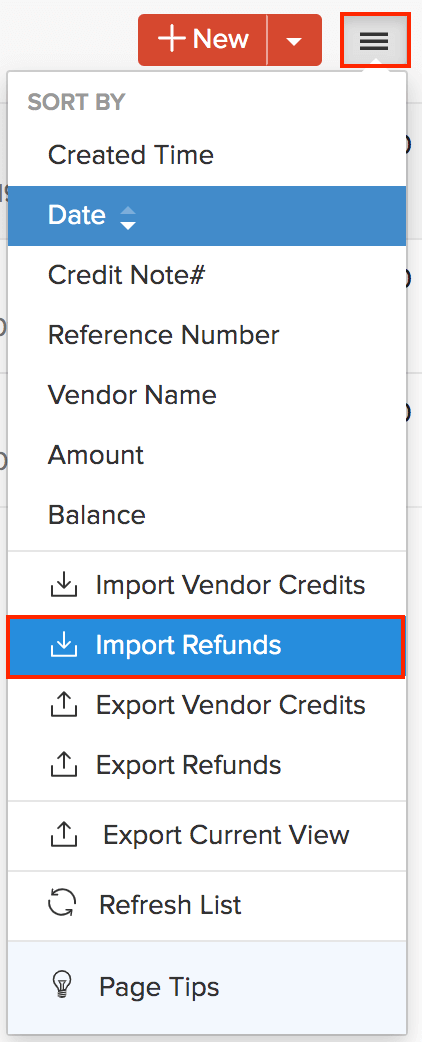
- Click the More icon in the top right corner of the page.
- Select Import Refunds.
- Click the Choose File button under Upload file. You can download a sample CSV for your reference by clicking sample file.
- Click Next.
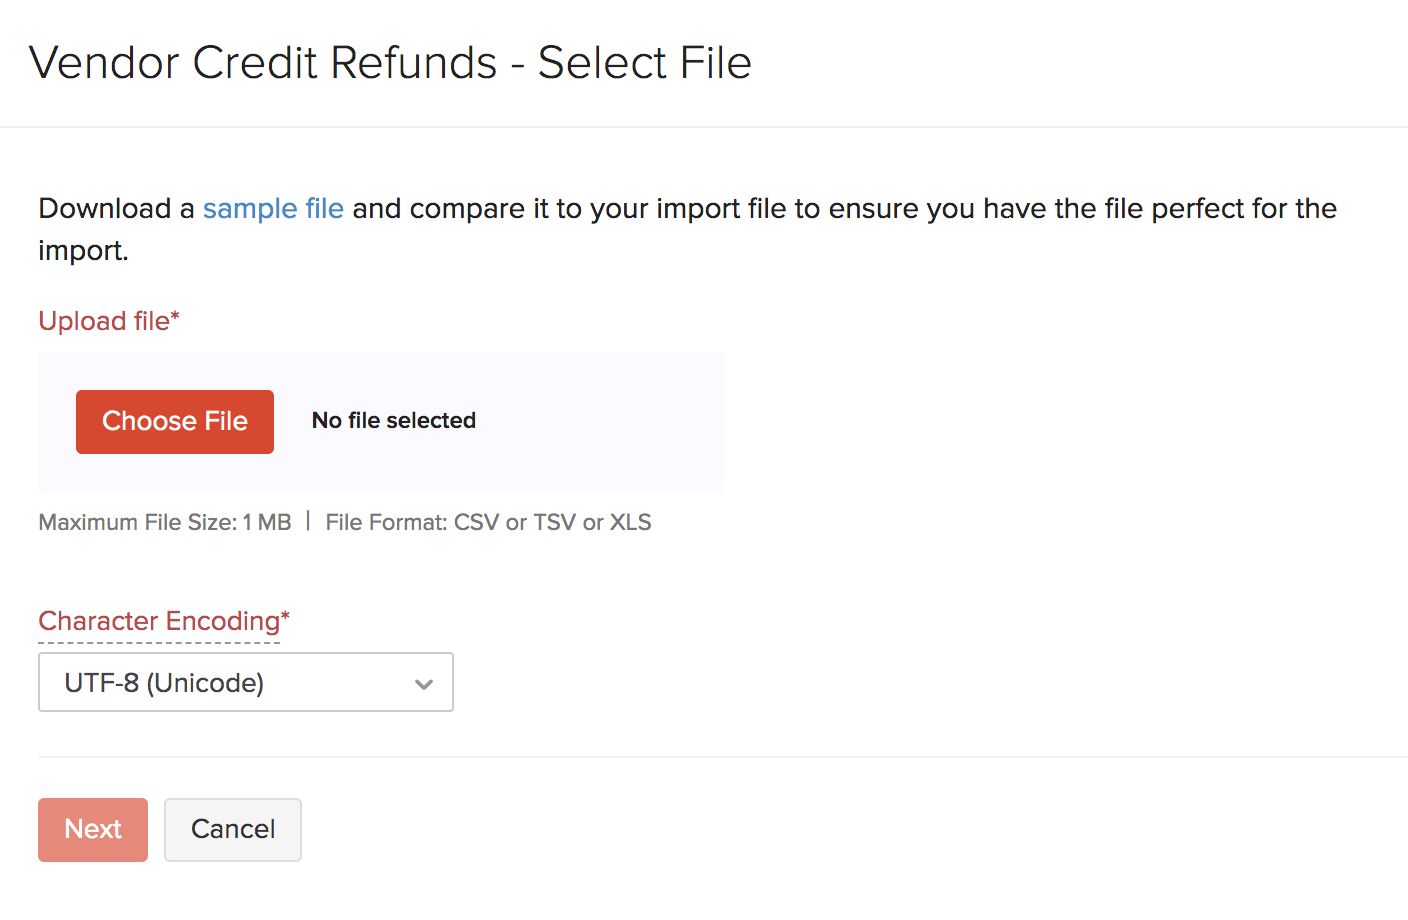
- Ensure that all the fields are mapped correctly in the Map Fields page.
- To use the same import format next time, mark the box Save these selections for use during future imports.
- Click Next.
- In the Preview window, click Import.
Customize Template
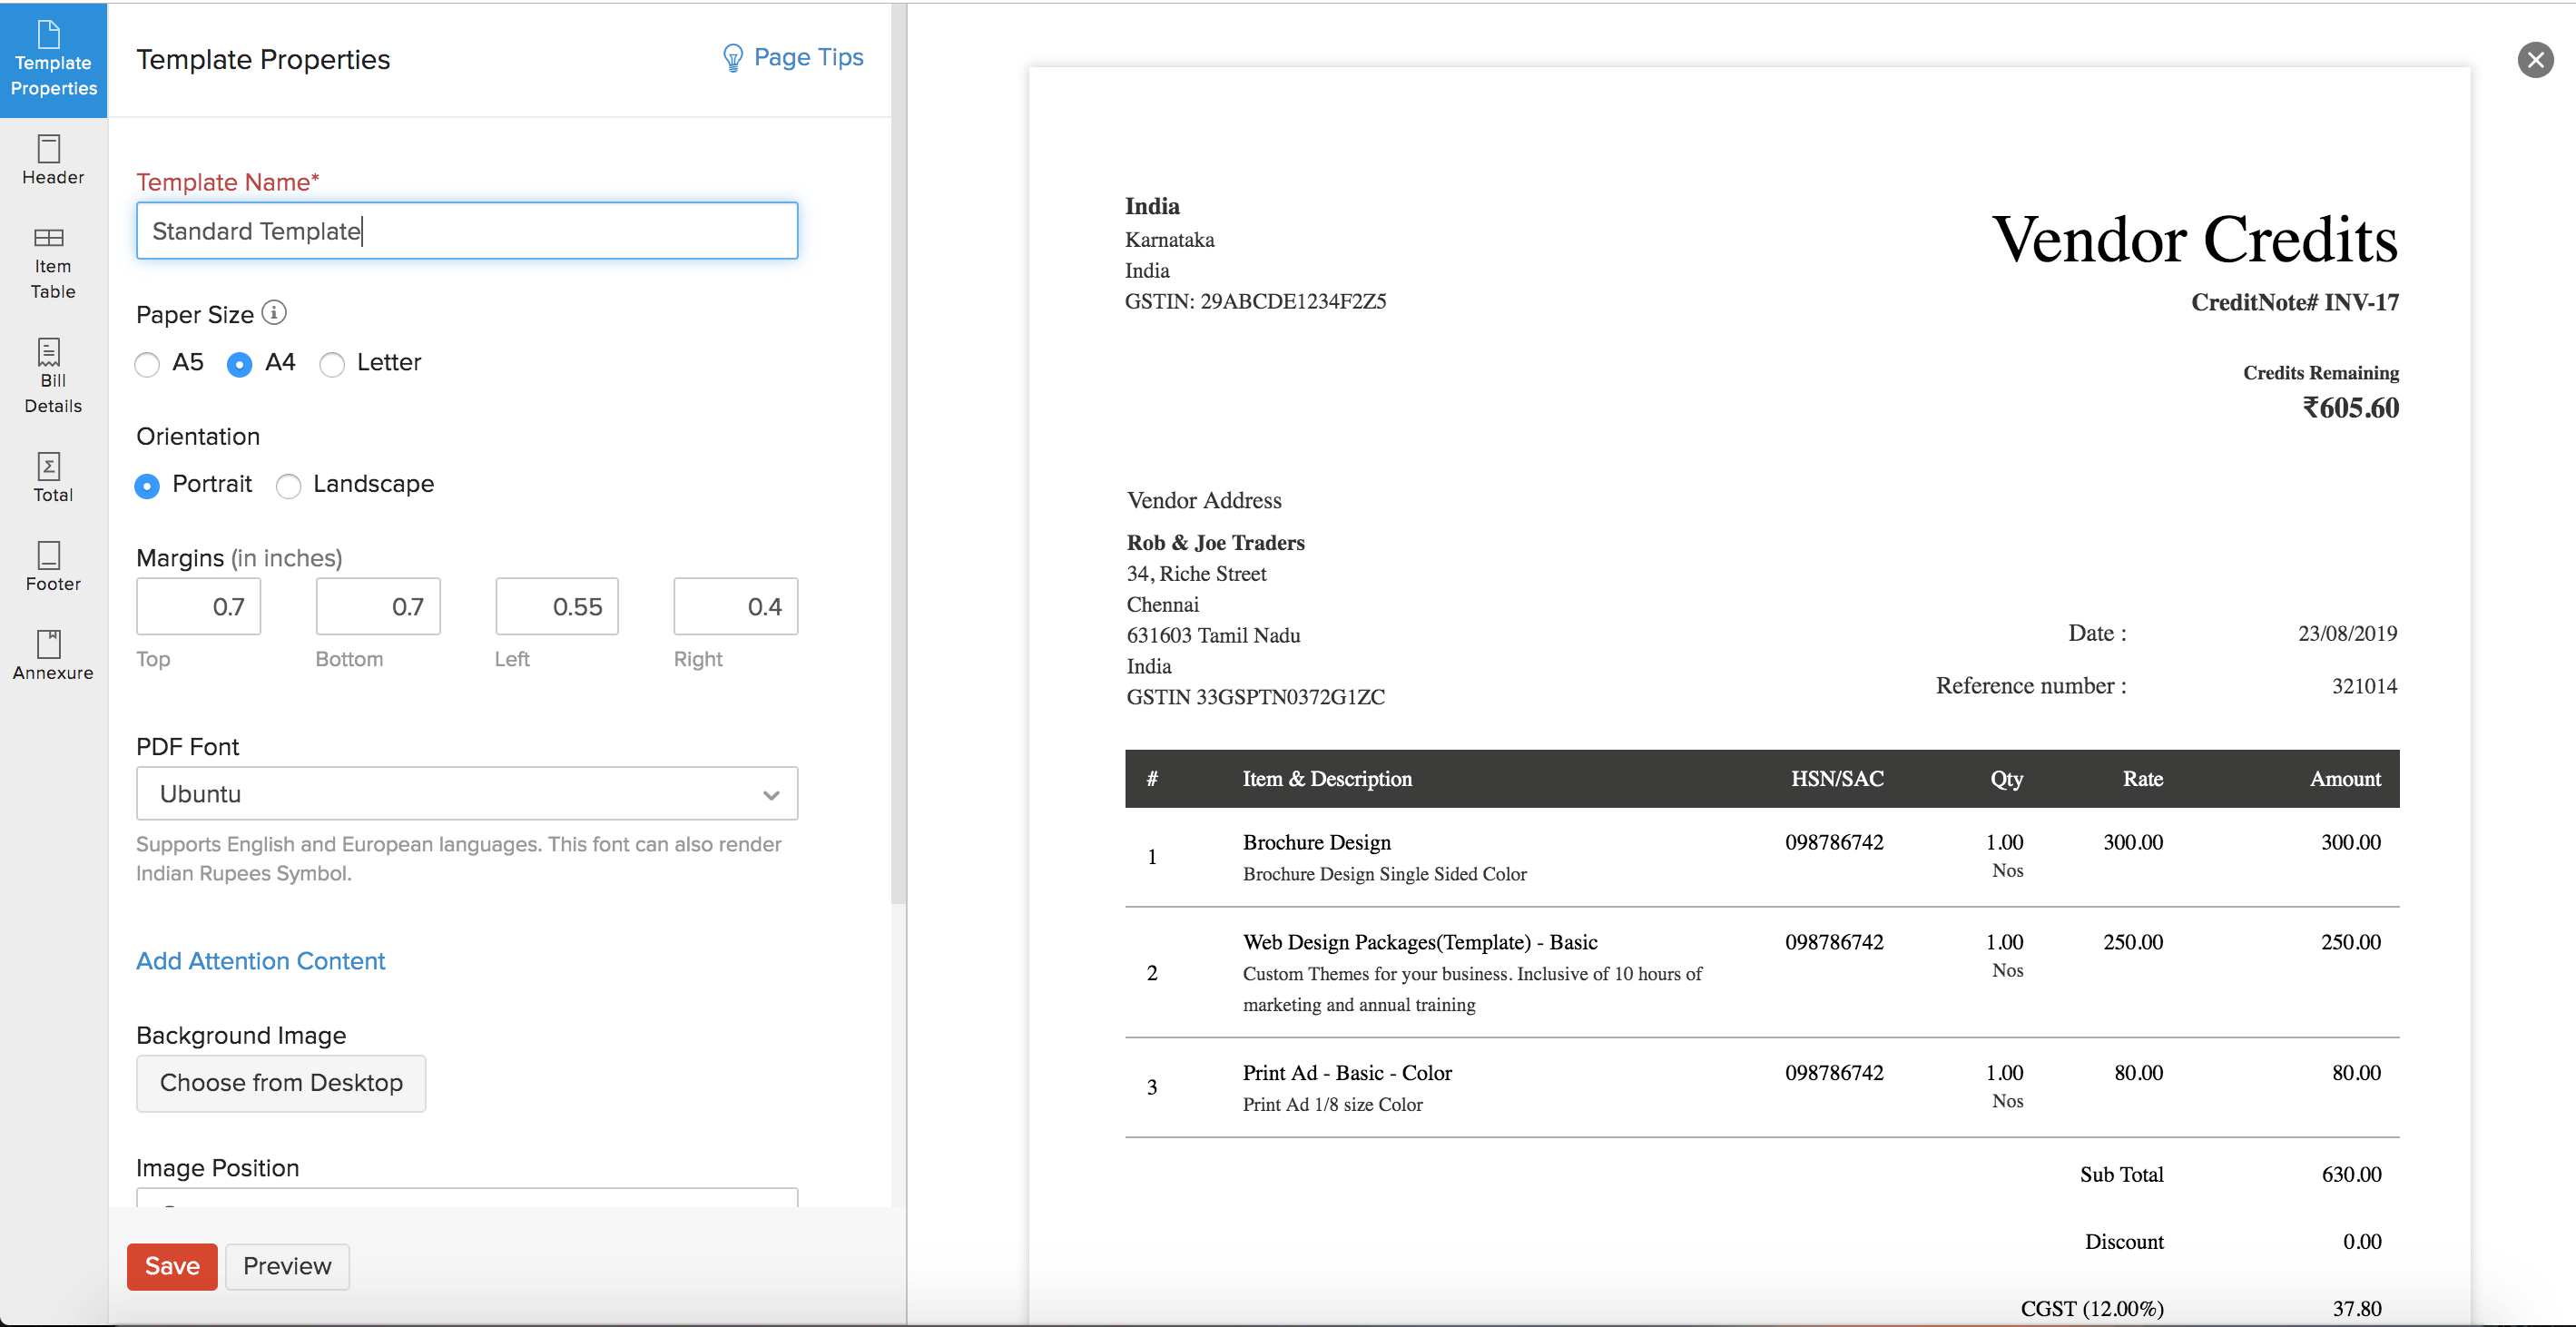
You can change the overall look and feel, such as the font, background, orientation and size of your templates. Here’s how:
- Go to Settings on the top right corner of the page.
- Select PDF Templates under Customization.
- In the Templates pane, select Vendor Credits.
- Hover over a template and click Edit.
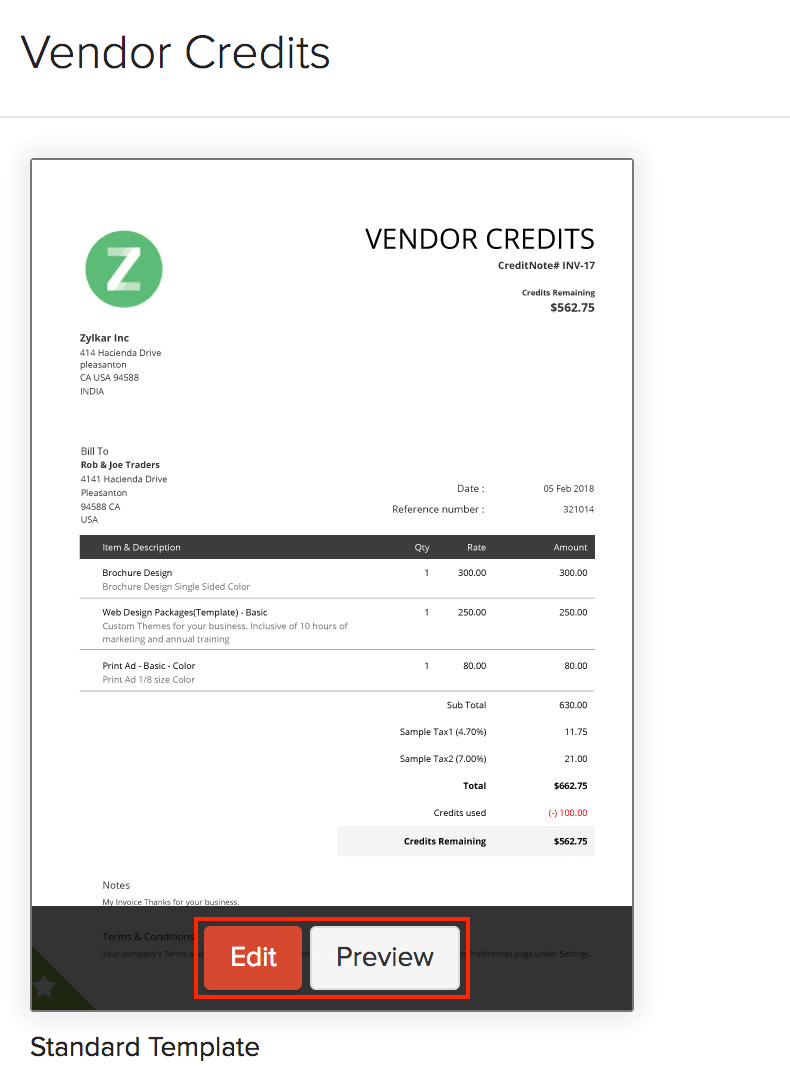
- Make the necessary changes.
- Click Save.
Add Comments
You can add comments to your vendor credits. However, these comments are only for internal use and the vendor cannot view them. Here’s how:
- Go to Purchases > Vendor Credit.
- Select the vendor credit you want to add a comment for.
- Click the Comments and History tab.
- Click + Add Comment option below the history.

- Type in your comment.
- Click Add Comment.

Next >
Manage Vendor Credits
Related


 Yes
Yes