Sub-Accounts
What are Sub-Accounts?
Sub-accounts are child accounts created under a parent account. It helps to track the income and expense(s) of the parent account effectively.
When do I use Sub-Accounts?
Sub-accounts are used to record and track transactions for any particular purpose. For example, if you want to track all your travel expenses exclusively, you can create a sub-account ‘Travel’ under the parent accunt ‘Expense’. You can create similar sub-accounts like Lodging, Tickets, Cab charges etc.
The creation of sub-accounts also helps you to view certain reports in detail through a drill down of the report.
Few other scenarios are described below where sub-accounts are beneficial to precisely track income or expense.
Scenario 1
Expense account
You maintain an Expense account for all the Insurance you pay. You wish to track all the Insurance payments individually. You can create a sub-account ‘Insurance’ under the parent account ‘Expense’. You can also create sub-accounts like Property Insurance, Automobile Insurance, Other Insurances etc. under the parent account to track the amount paid for each Insurance.
Scenario 2
Income account
You have a business and there are several ways in which you earn Income. You create sub–accounts as Sales Revenue, Interest Received, Rentals Received, Other Income etc. under the parent account ‘Income’. You can further create a sub-account under ‘Rentals Received’ such as Beach View Property, Housing flats etc. This helps you to track your Income in detail.
Scenario 3
Cost of Goods Sold account
You have a Book Shop and want to track the cost for different genres of books that are sold such as Fiction, Comedy, Drama, Horror, Romance etc. For this, you can create sub-accounts based on the respective genre name, the parent account being ‘Cost of Goods Sold’.
Create Sub-Accounts
You can create sub-accounts under a parent account either from Chart of Accounts or directly from certain other modules in Zoho Books.
To create a sub-account from Chart of Accounts, please follow the steps mentioned below:
- Navigate to the Accountant tab on left navigation bar and click on
 .
. - A pop-up page is displayed. Select the appropriate Account Type and give an Account Name.
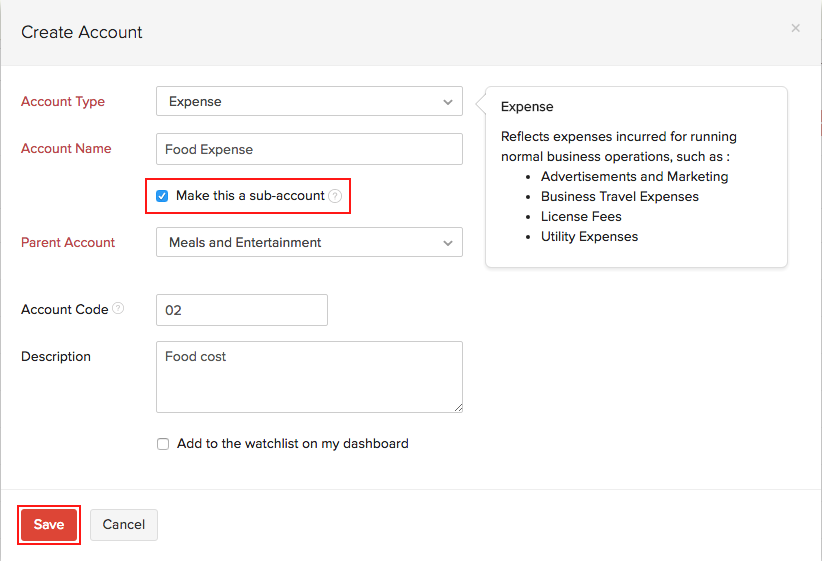
- Check the Make this a sub-account option.
- Choose a suitable Parent Account and fill in the other details.
- Click on Save.
For instance, let us create a sub-account named ‘Food Expense’ with the account type ‘Expense’ and the parent account being ‘Meals and Entertainment’.
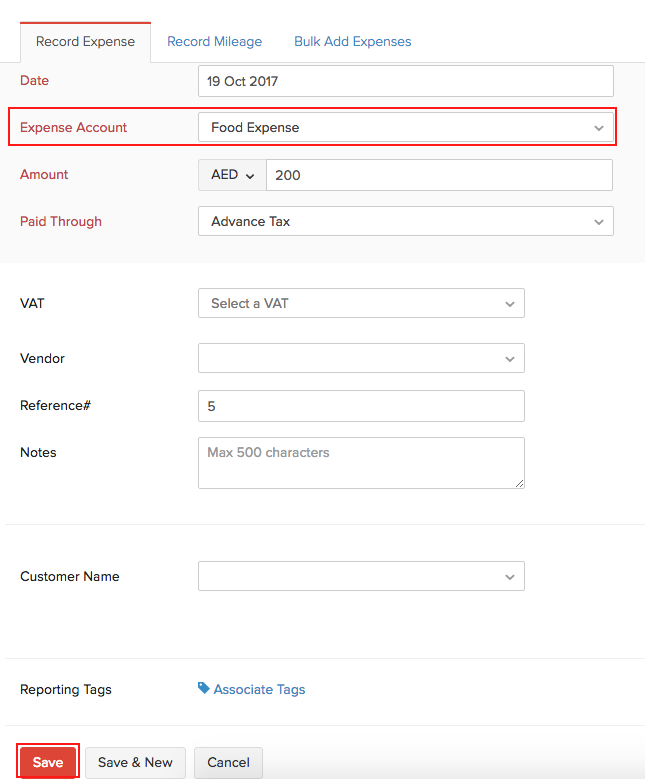

Once a sub-account is created, you can Edit, Mark as Inactive or Delete it by clicking the Settings icon.

You can attach files to the sub-account by clicking the Attachment icon.

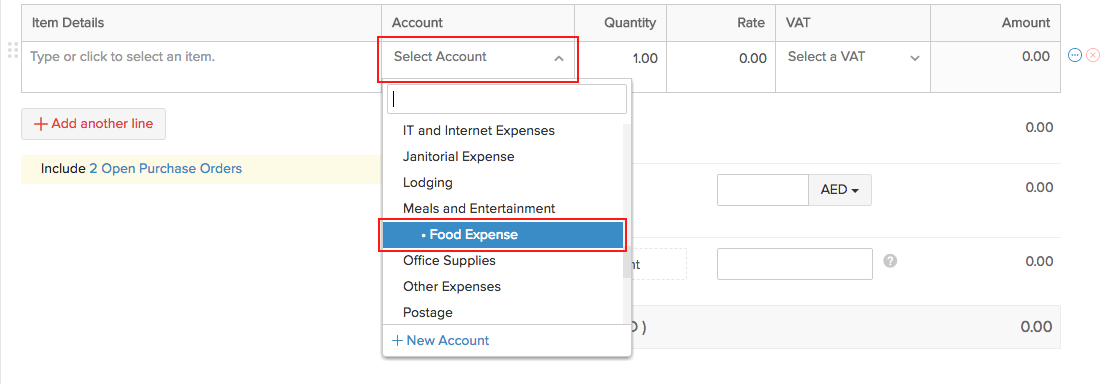
Once this is done you can see the sub-account under the Select Account drop-down while creating purchase transactions such as bills.
Bills
Sub-accounts can also be created when creating a new Bill.
- Go to the Bills module under the Purchases on the left navigation pane and click on the +New button.
- Click on the Select Account drop down menu.
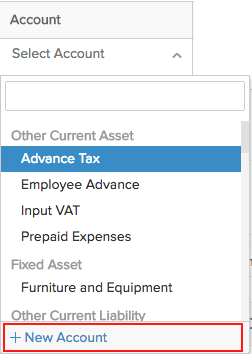
- Click on + New Account and a pop-up page is displayed.
- Select the appropriate Account Type and give an Account Name.
- Check the Make this a sub-account option.
- Choose a suitable Parent Account and fill in the other details.
- Click on Save to create the sub-account.
In the same way, you can create sub-accounts in the modules such as Expenses, Recurring Expenses, Purchase Orders, Bills and Recurring Bills.
The newly created sub-accounts will be listed under the parent account in the Chart of Accounts.
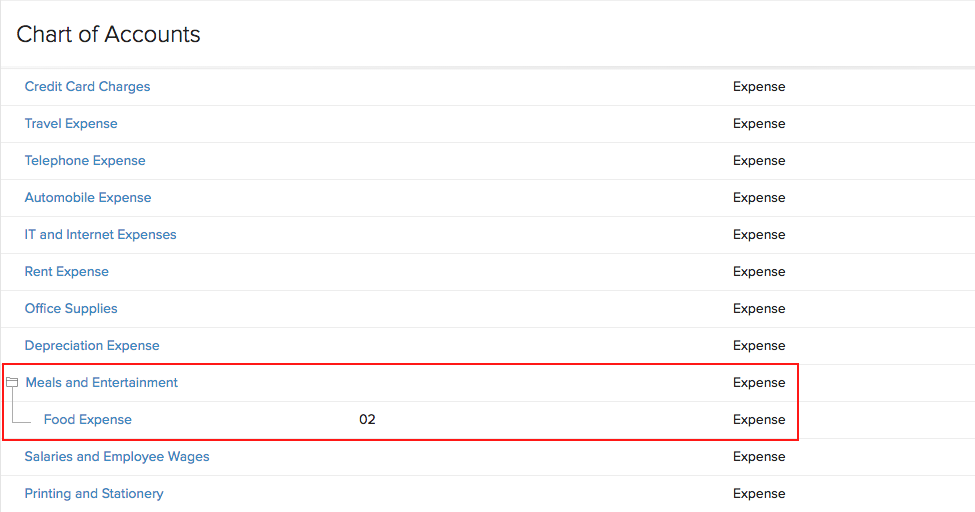
Note: You can create only five sub-accounts under a sub-account. However, you can create multiple sub-accounts under a parent account.
Currently, you can create sub-accounts under all the following Account Types,
- Other Asset
- Other Current Asset
- Cash
- Fixed Asset
- Stock
- Other Current Liability
- Long Term Liability
- Other Liability
- Equity
- Income
- Other Income
- Expense
- Cost of Goods Sold
- Other Expense
Sub-Accounts in Reports
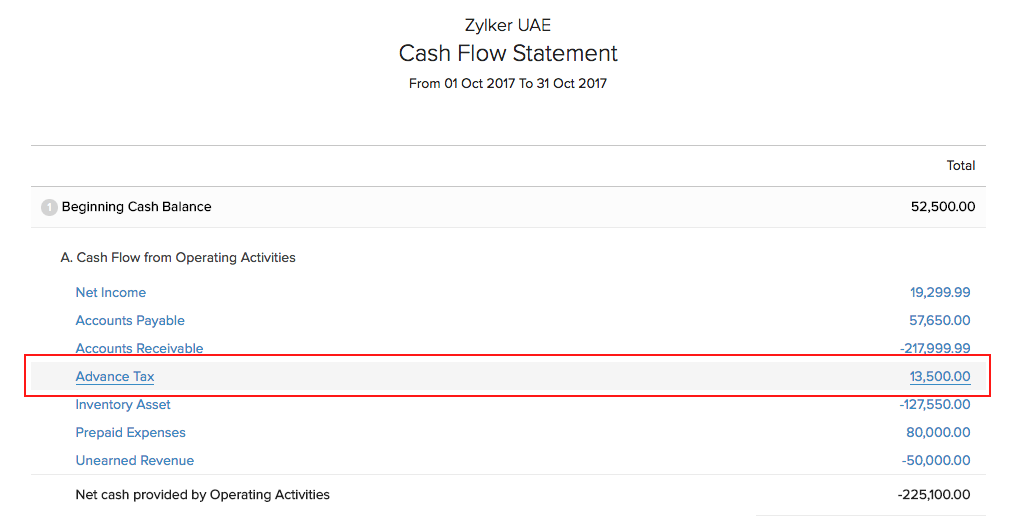
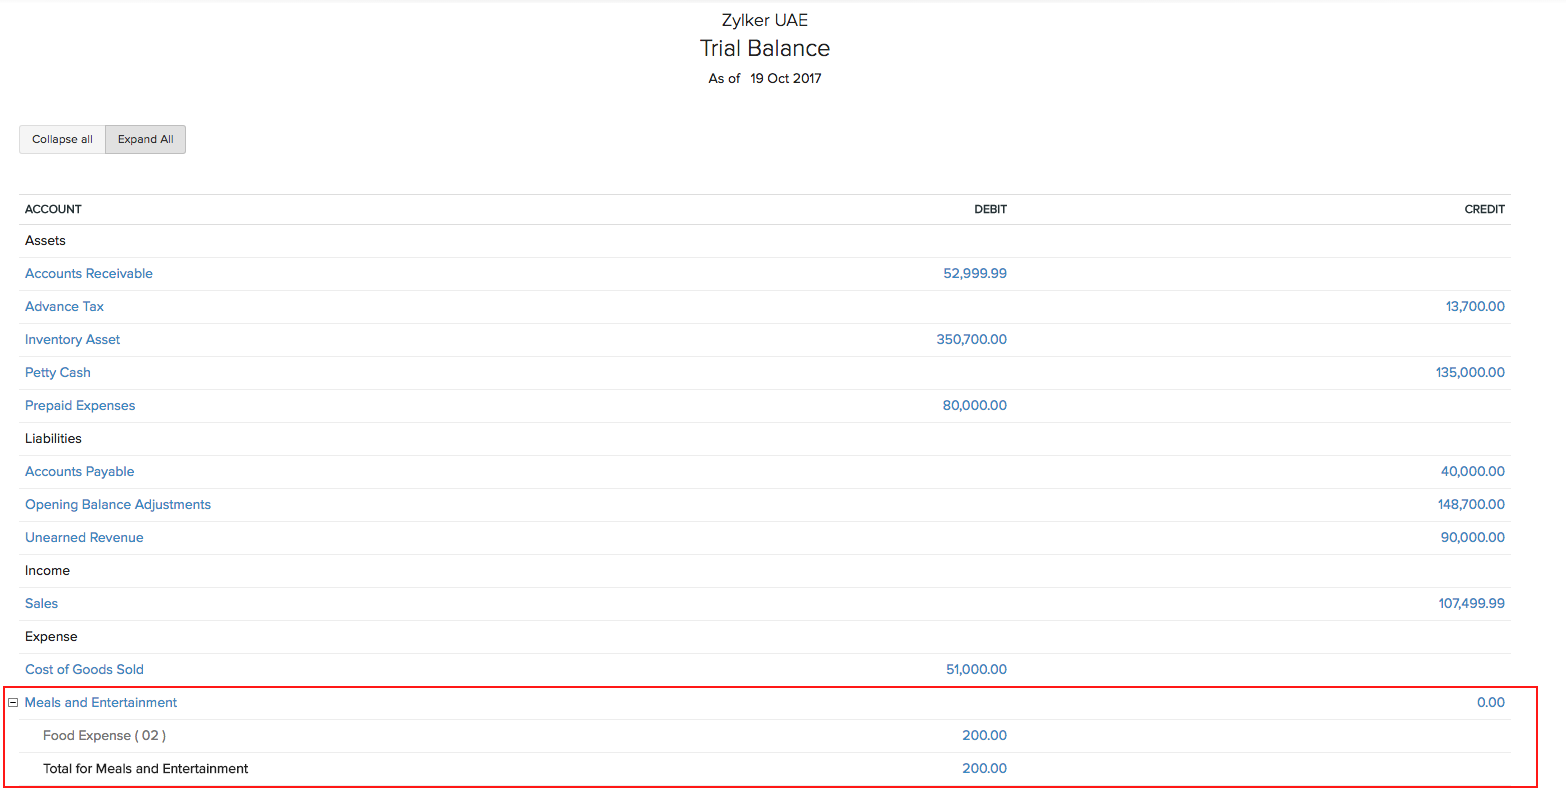
The changes in credit and debit of the sub-accounts will be directly reflected in the Profit and Loss Report, Cash Flow Statement, Balance Sheet, Trial Balance and General Ledger.
Zoho Books allows you to view the reports either in Collapsed view or Expanded view. Collapsed view displays the parent accounts while the Expanded view displays a drill down report along with the sub-accounts.
- To view the effect of Sub-Accounts in the Profit and Loss Report, navigate to Reports > Business Overview > Profit and Loss.
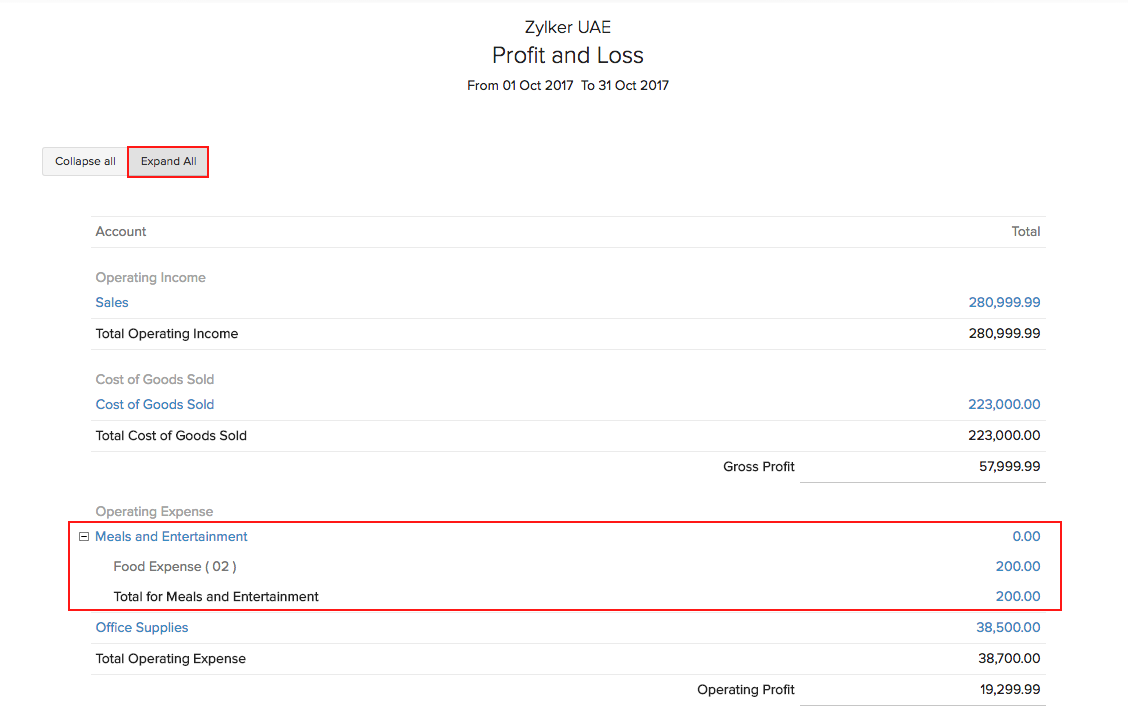
Click Expand All to view a drill down report of the parent account along with the sub-accounts.
Click Collapse All to see only the parent accounts.
- You can view the effect of Sub-Accounts in the Cash Flow Statement by navigating to Reports > Business Overview > Cash Flow Statement.
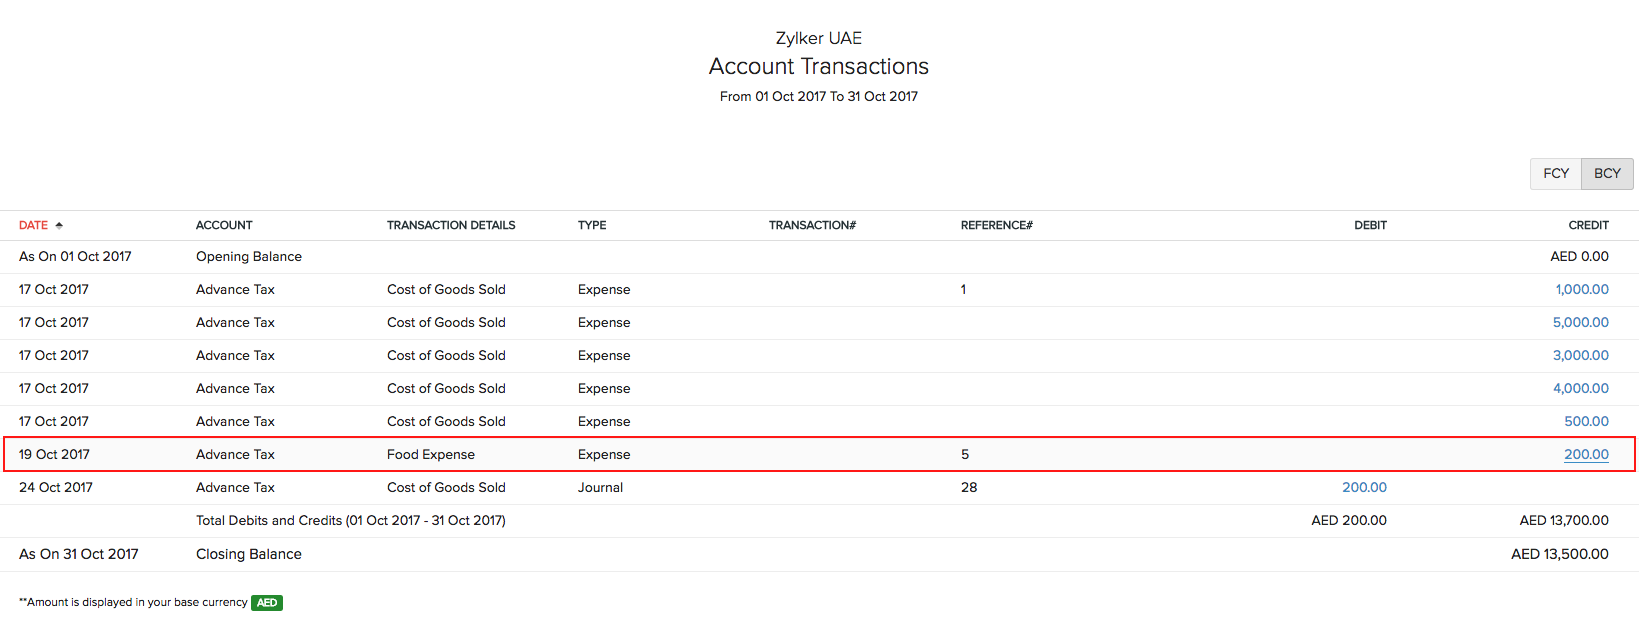
- To view the effect of Sub-Accounts in the Balance Sheet, navigate to Reports > Business Overview > Balance Sheet.
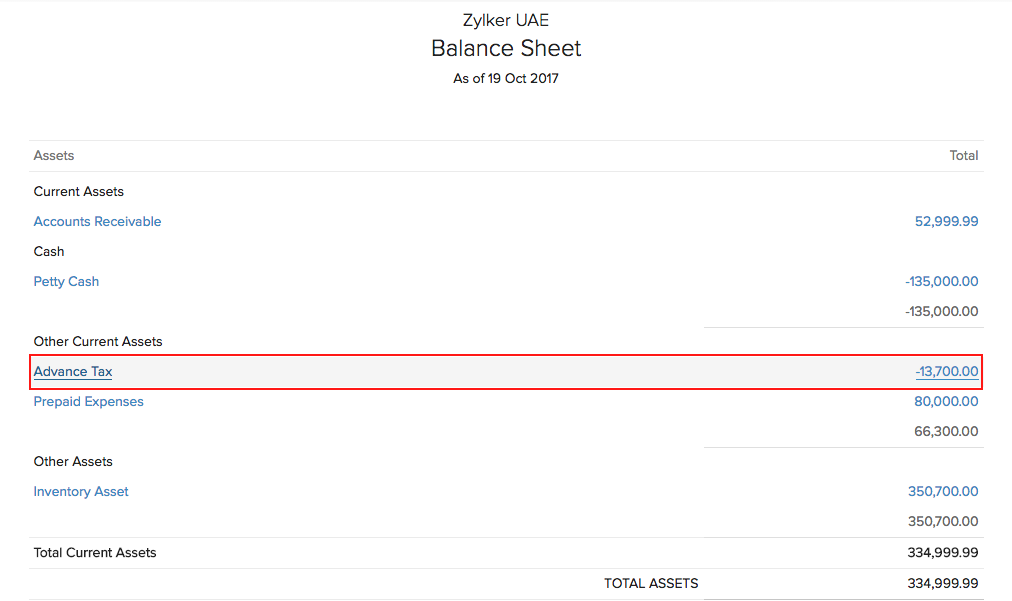
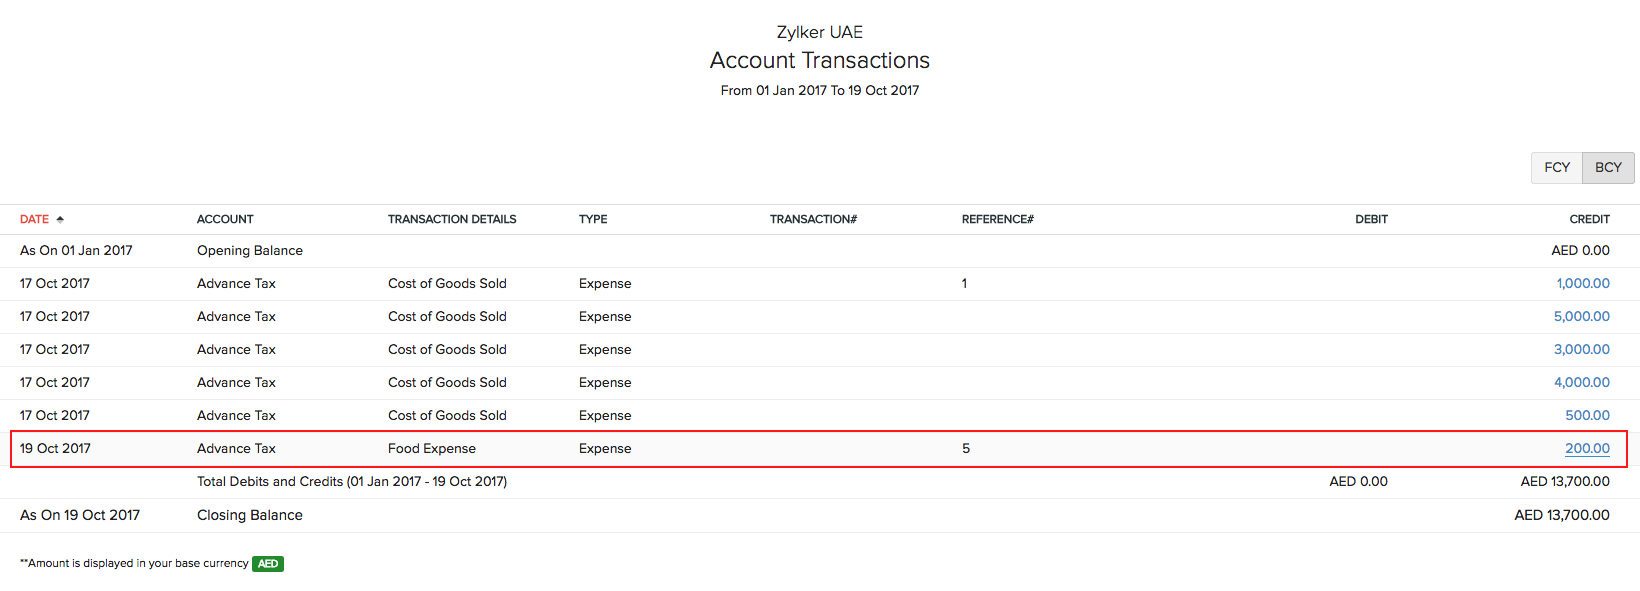
- The changes reflected by sub-accounts in the General Ledger can be viewed by navigating to Reports > Accountant > General Ledger.


- To view the effect of sub-accounts in the Trial Balance Report, navigate to Reports > Accountant > Trial Balance.
 Yes
Yes
 Thank you for your feedback!
