Basic Functions in Projects
Let us have a look at some of the basic functions in the projects module.
IN THIS PAGE…
Enable Time Tracking
Before you can start creating projects, you will have to enable the Timesheet module. Here’s how you can do it:
- Go to Settings on the top right corner of the page.
- Select General under Preferences.
- Check the box near Timesheet under Select the modules you would like to enable.
- Click Save at the bottom of the page.

Create Project
To create a new project in Zoho Books:
- Go to Time Tracking > Projects.
- Click + New Project.

- Enter the name of the project in the Project Name field and provide a Description, if necessary.
- Select the customer from the Customer Name drop down.
- Click the Search icon next to the Customer Name to search for customers based on the name, phone number, email etc.
- Enable your customers to approve the time entries before you invoice them by marking the Enable Customer Approval for the time entires of this project checkbox.

- Select the Billing Method for the project from the drop down.
Billing Method
The billing methods that you can use are:
Fixed Cost for Projects
Fixed cost for projects sets a fixed rate for the project. The project will be invoiced for the amount set in this field.
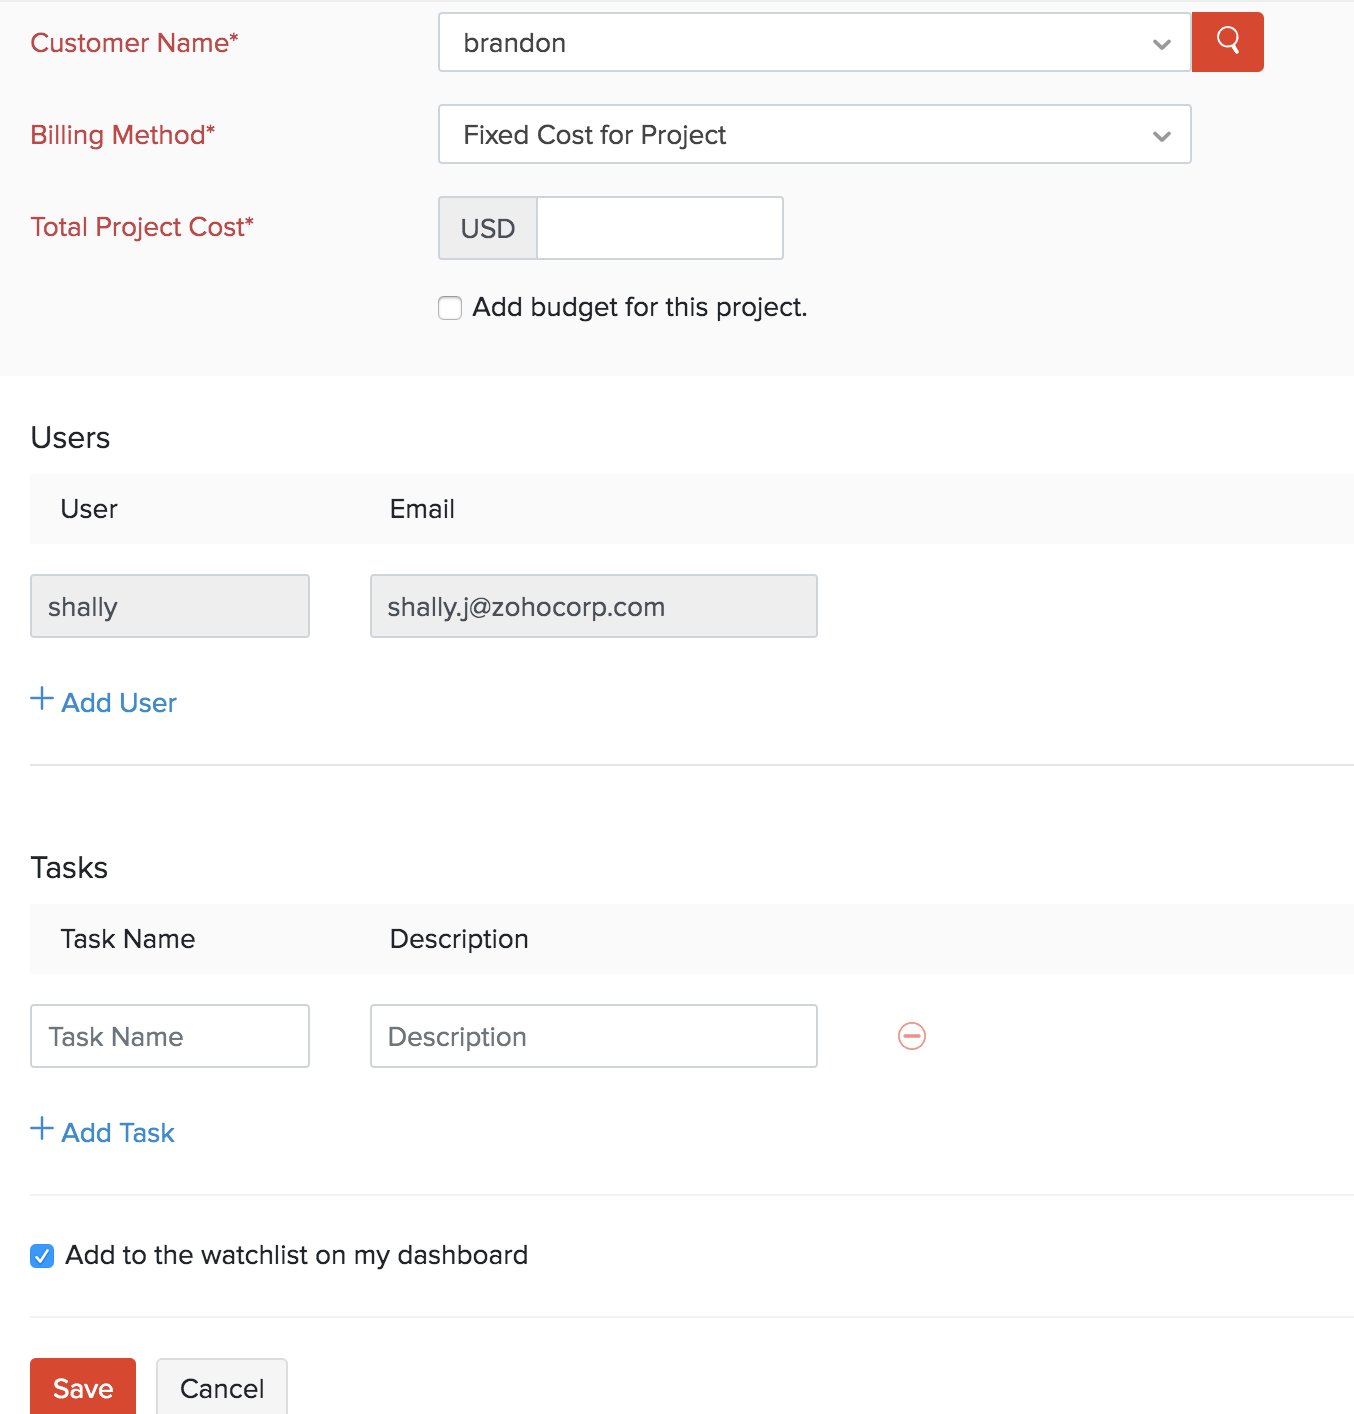
- Enter the Total Project Cost.
- Check the Add budget for this project checkbox if you wish to add a budget.
| Fields | Description |
|---|---|
| Total Project Cost | Enter the project’s total cost for which you will be billing your customer. |
| Users | Select a user to work on the project. You can also add an extra user by clicking + Add User. |
| Tasks | Enter the tasks that need to be done to complete the project. You can add more tasks by clicking + Add Task. |
| Tasks can also be created later for the project. |
Based on Project Hours
This option will calculate the number of hours spent on a project and the customer will be invoiced accordingly.
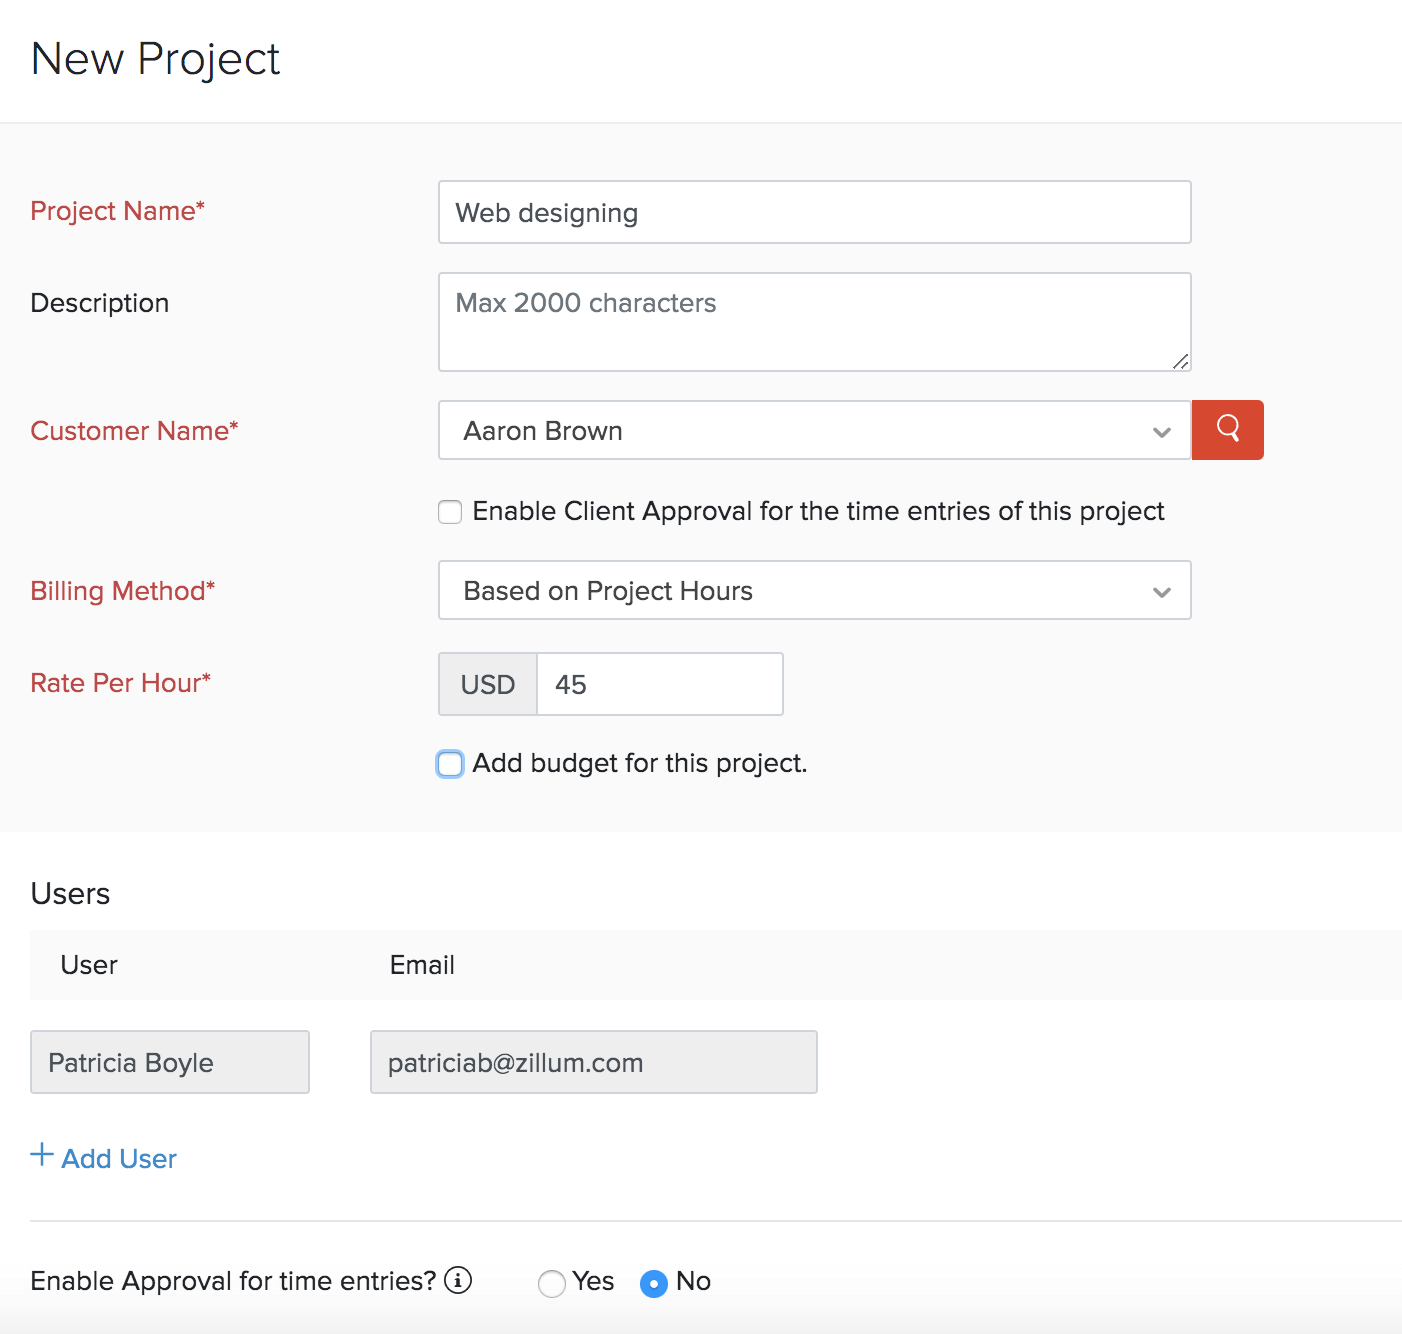
- User and Task fields are the same as the above type.
- Enter the rate that will be charged for an hour of work that goes into this project in the Rate per hour field.
At the completion of the project, you can charge your customers based on the number of hours logged for the project.
Based on Task Hours
The project will be billed based on the hourly rates of the task and the customer will be billed accordingly.
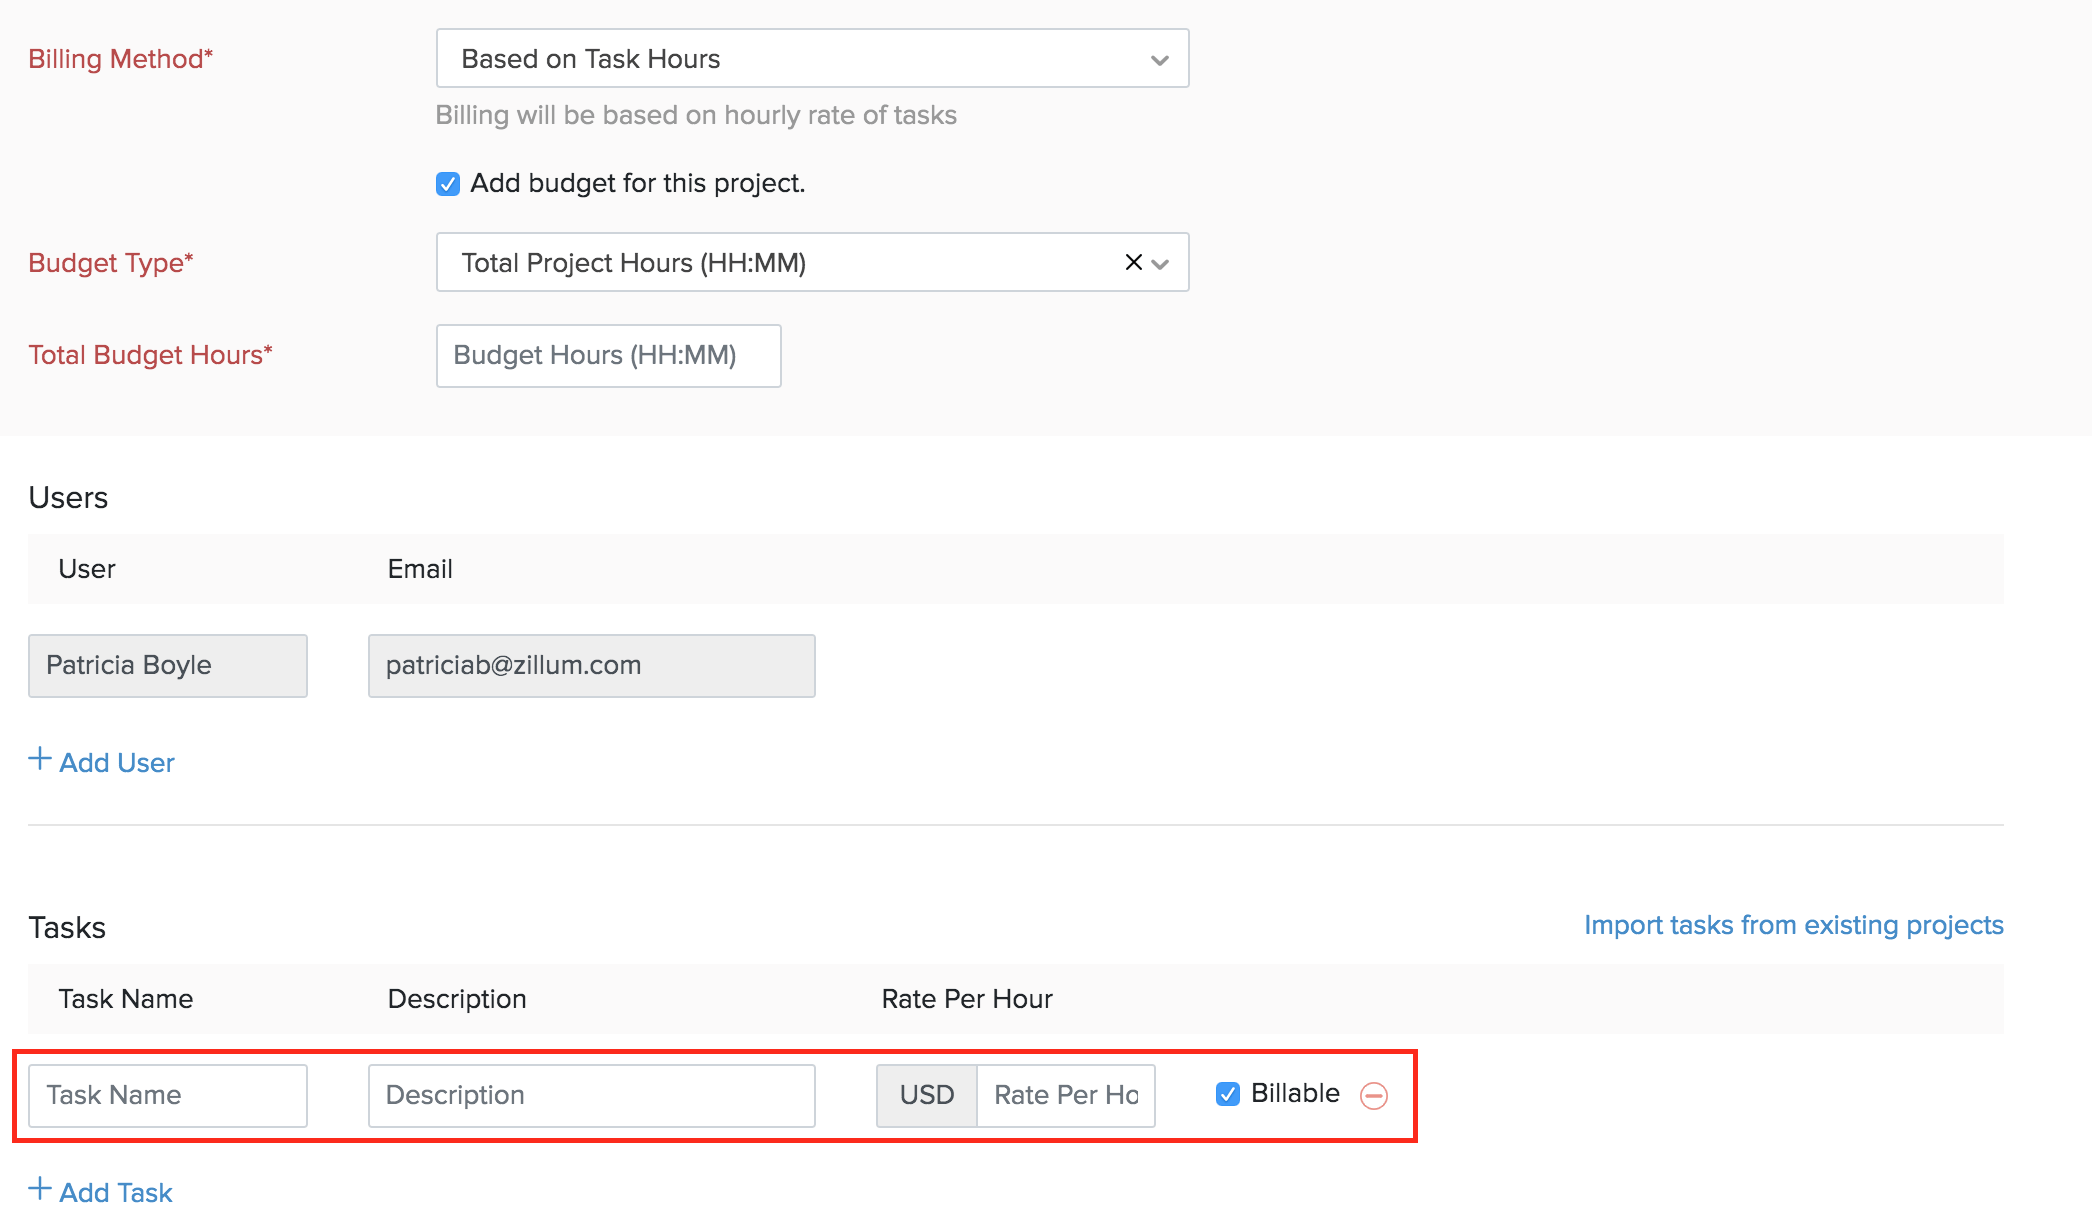
- User field is same as for the above sections.
- Enter the Tasks and the Rate Per Hour to finish that particular task.
- Marking the Billable checkbox will add this cost to the invoice and the customer will be billed for it.
At the completion of the project, you can charge your customer based on the tasks completed.
Based on Staff Hours
The project bill will be calculated based on the hourly rate of the staff and the customer will be invoiced accordingly.
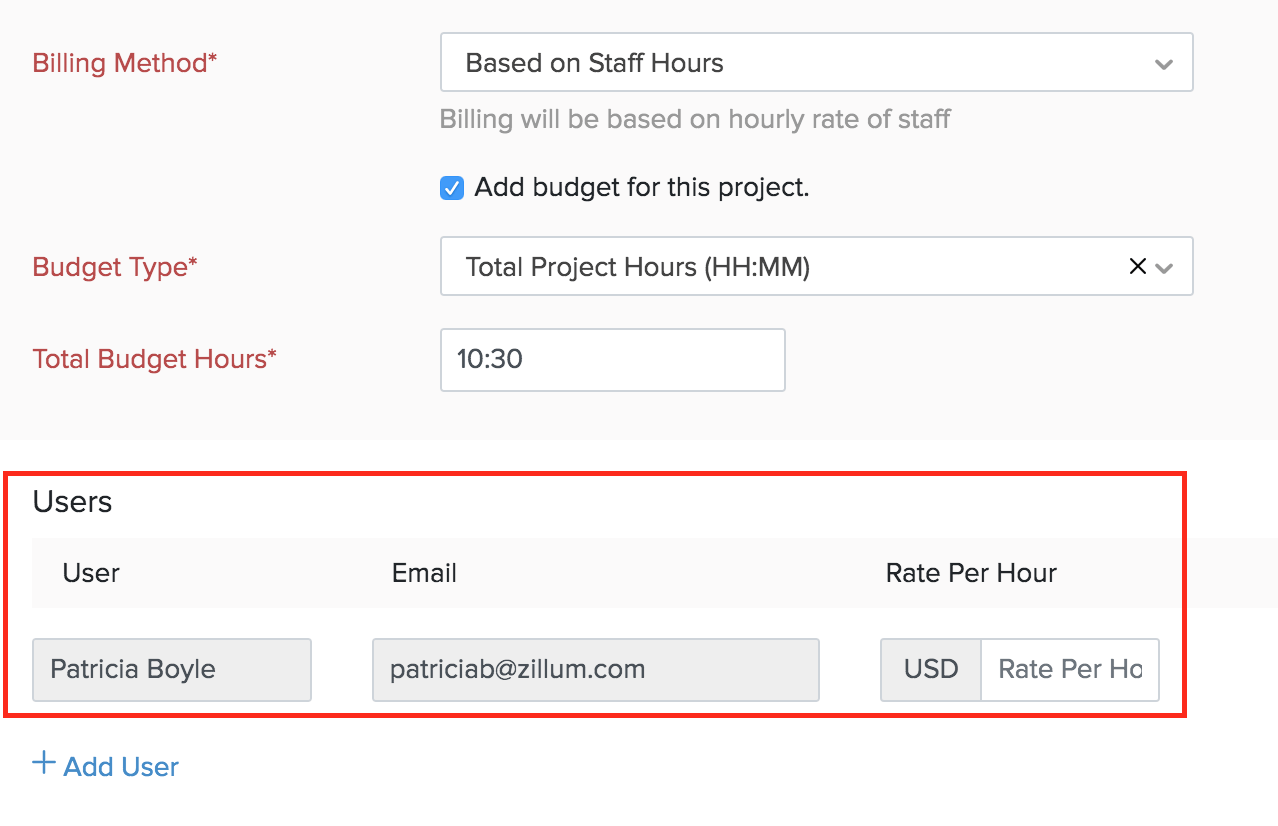
- User field is same as for the above sections.
- Enter the User Name, Email Address and the Rate Per Hour. You can add more users by clicking the + Add User option.
Budget
Cost and Revenue budget
- Cost Budget is the total amount you expect to spend on a project and a
- Revenue Budget is the amount you expect to receive from the client for the project.
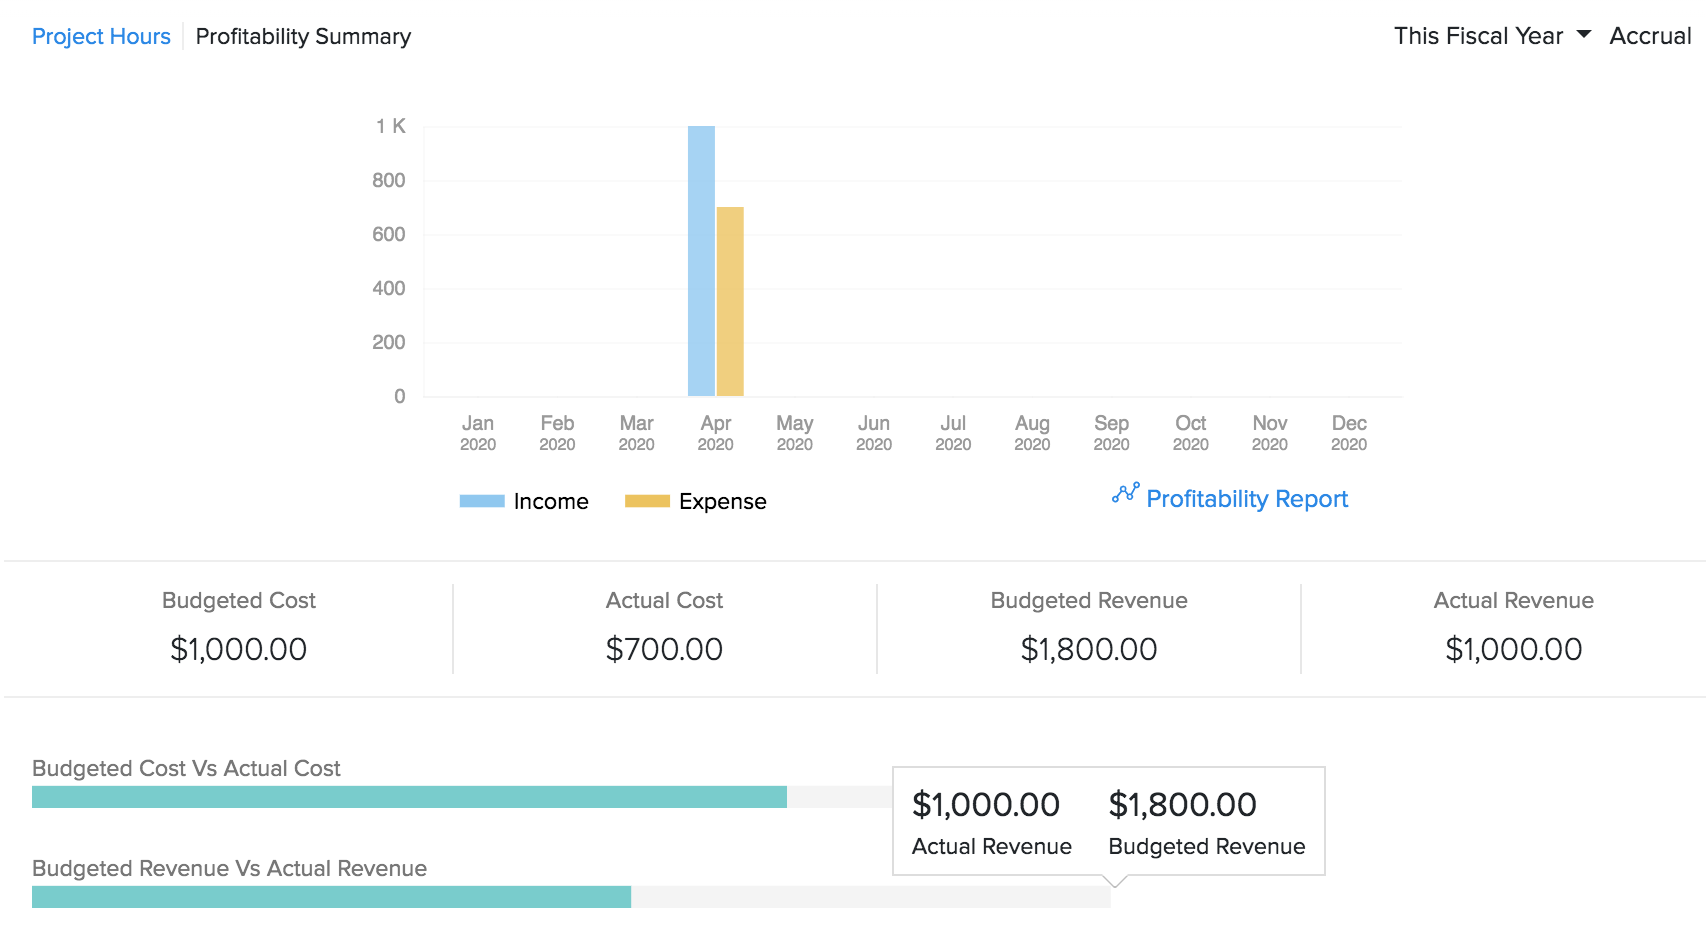
Entering a budget will help you analyse the actual amount spent or earned from the project when compared with the estimated budget. You can also evaluate the project’s performance and progress under the Profitability Summary section of the Project Overview page.
Budget Type
If you have any budgetary constraints and would like to have a report based on the allocated cost or hour and the cost or hour actually spent, you can do it in Zoho Books. Here’s how:
- Go to Time Tracking > Projects.
- Click + New Project.
- Enter all the details.
- Check the Add budget for this project box.
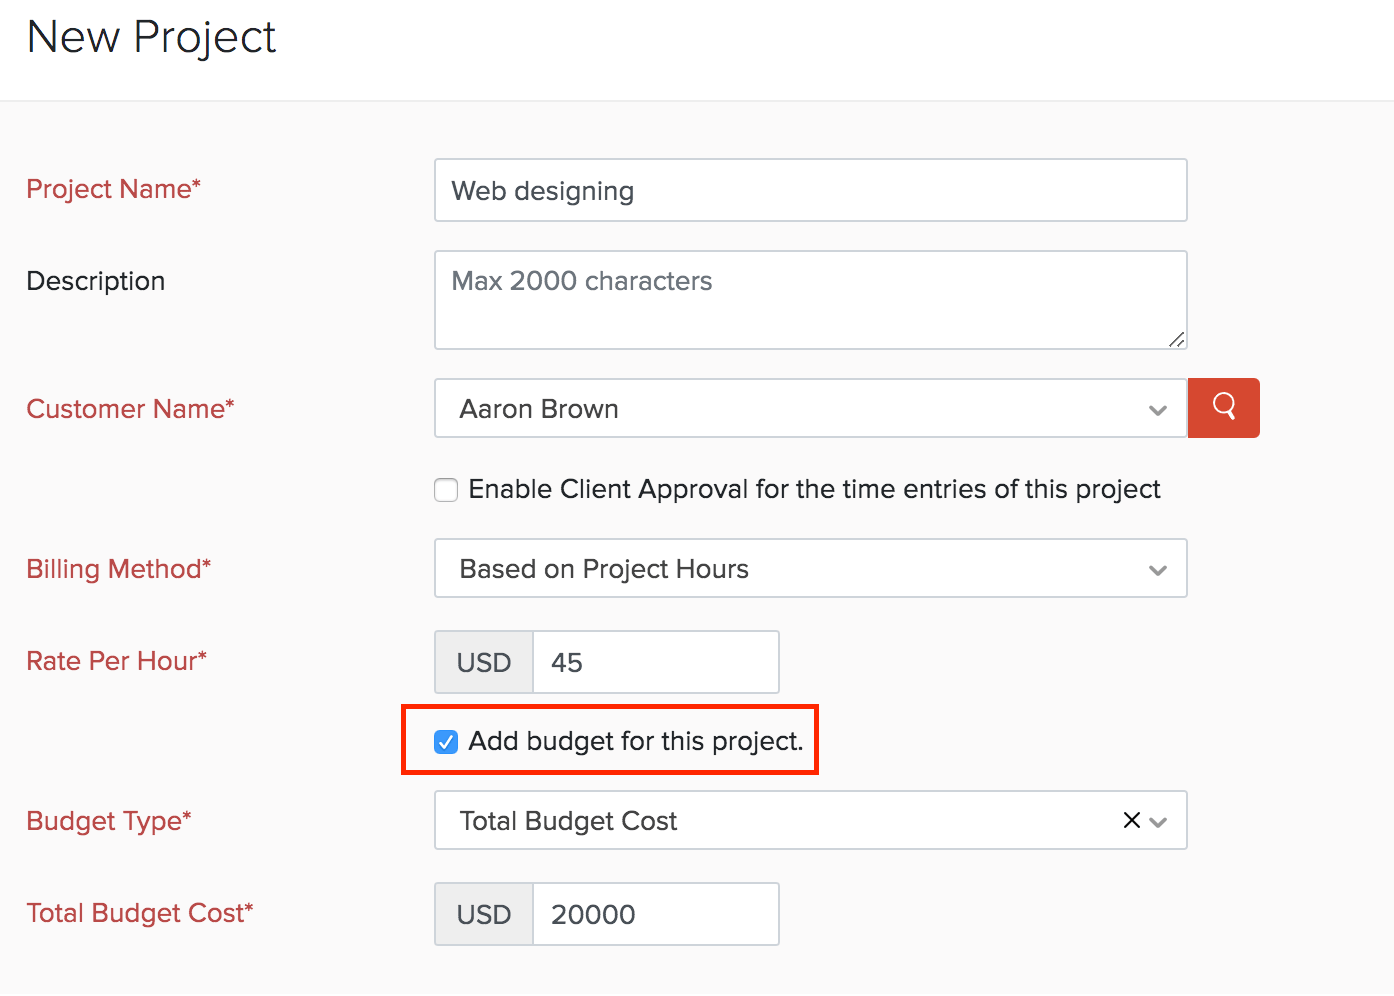
- Select the type of budget you would like to track from the Budget Type drop down.
Total Budget Cost
Enter the estimated amount you’ll be spending on this project. You can then view the estimated amount and the amount spent in the Project Summary.
Total Project Hours (HH:MM)
You can set the number of hours that can be logged for this project. You can also view the budget hours vs the logged hours in the Project Summary report. This will help you understand if the budgeted hours meet the actual hours and you can plan accordingly.
Hours Per Task
You can allocate the number hours that you want to assign for a particular task.
Hours Per Staff
You can add users and allocate the budget hours for each user.
Account Level Budgets
By creating account level budgets, you can plan the amount that you intend to spend on each area of the project. Creating a budget at the account level helps you compare the budget versus actuals for a particular account. You can choose to create an account level budget or multiple account level budgets for a project in Zoho Books.
Scenario: Brandon is a client for whom you’re working on a web development project. He wants you to create an account level budget for this project, as he wants to know if he will exceed the amount that is allocated for this project. In this case, you can select the project and create an account level budget for the project. When transactions are recorded, the amounts are tracked under the respective expense and income accounts for the project. When the project comes to a close, you can run the Actuals versus Budget report. This report will help you know the profit or loss incurred under each account for that project.
Create Account Level Budget
You can create an account level budget for a project you’ve created. To add an account level budget:
- Click Time Tracking in the left sidebar and select Projects.
- Select an existing project or create a new project by clicking + New Project.
- Click the Account Level Budget tab next to the Overview tab.
- Click Create Budget.
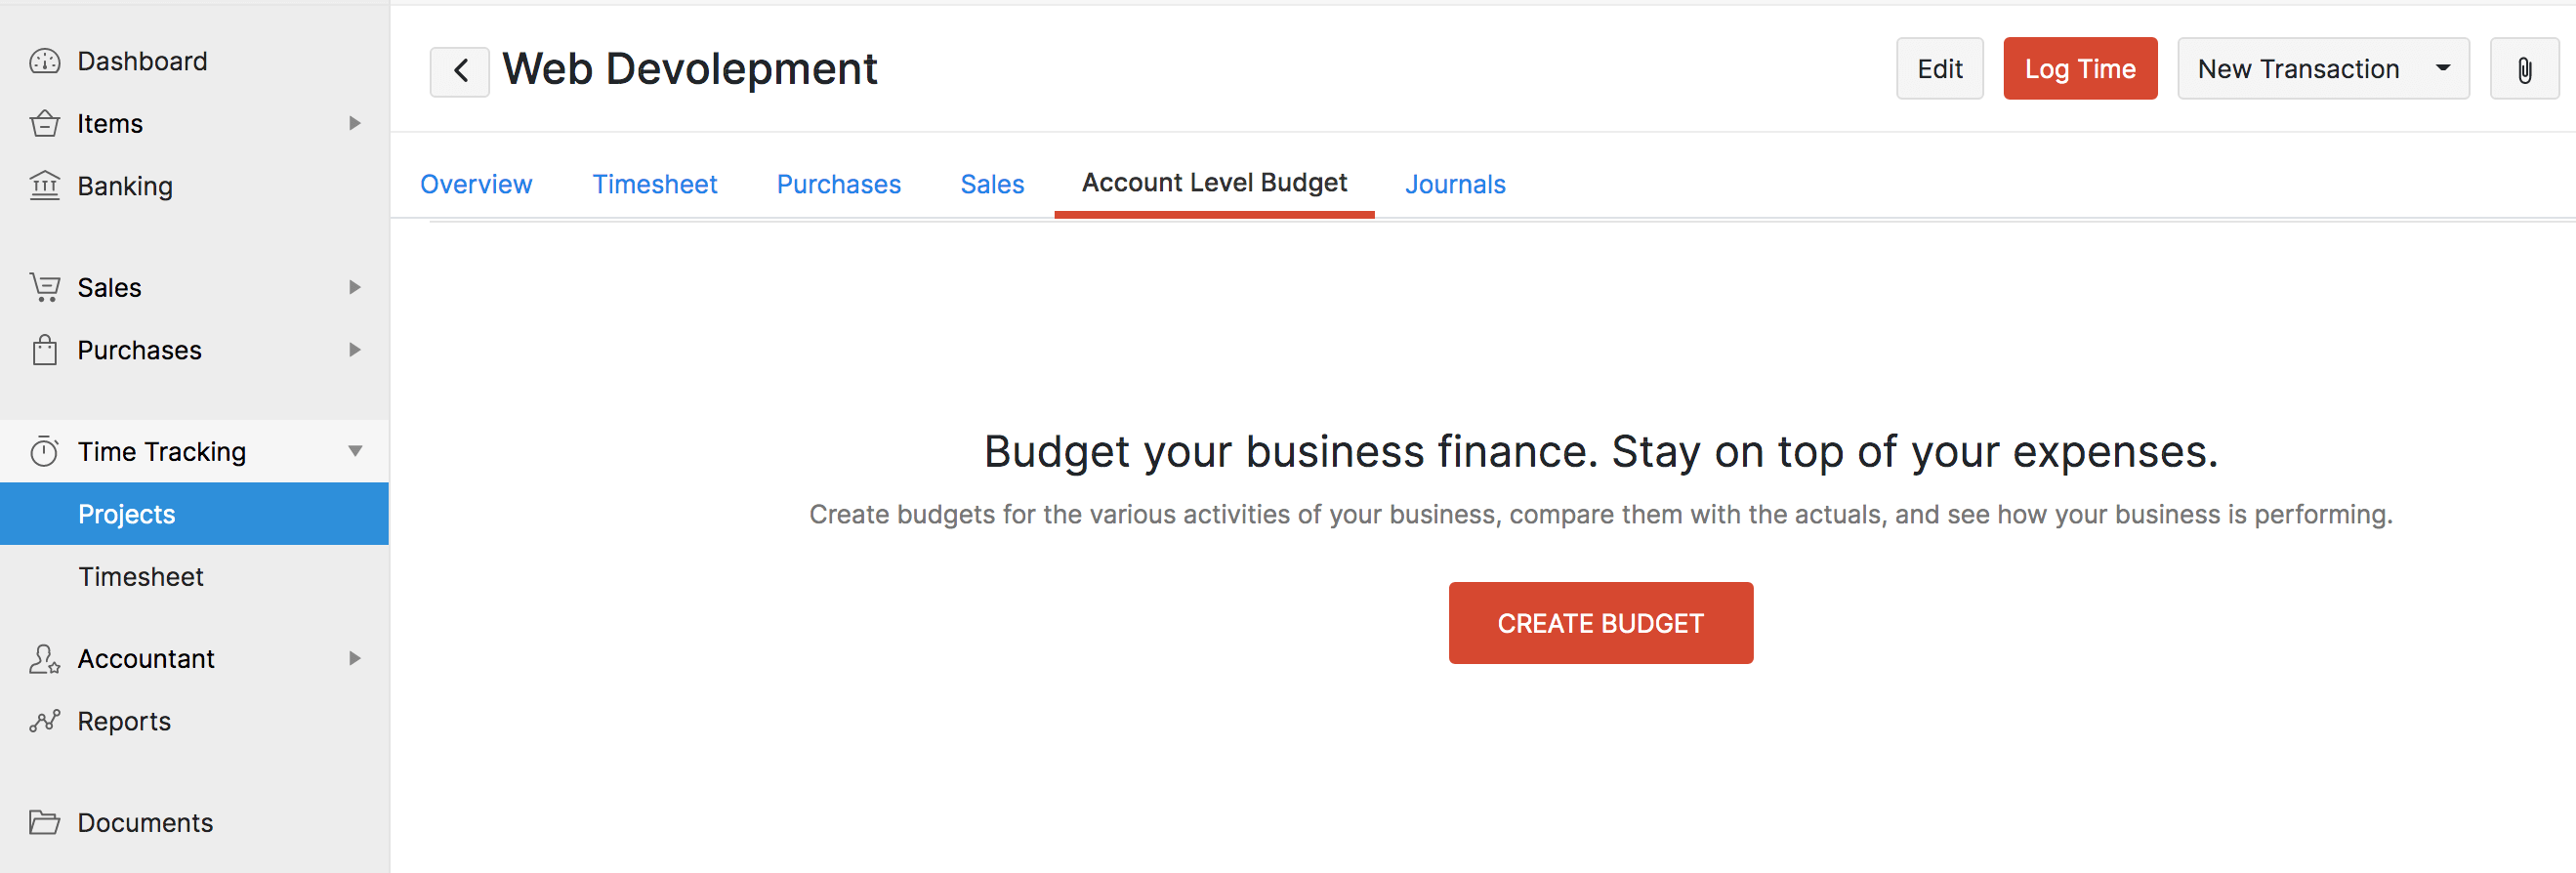
- Next, enter the name for the budget and select the income and expense accounts for the budget.
- Click Create Budget.
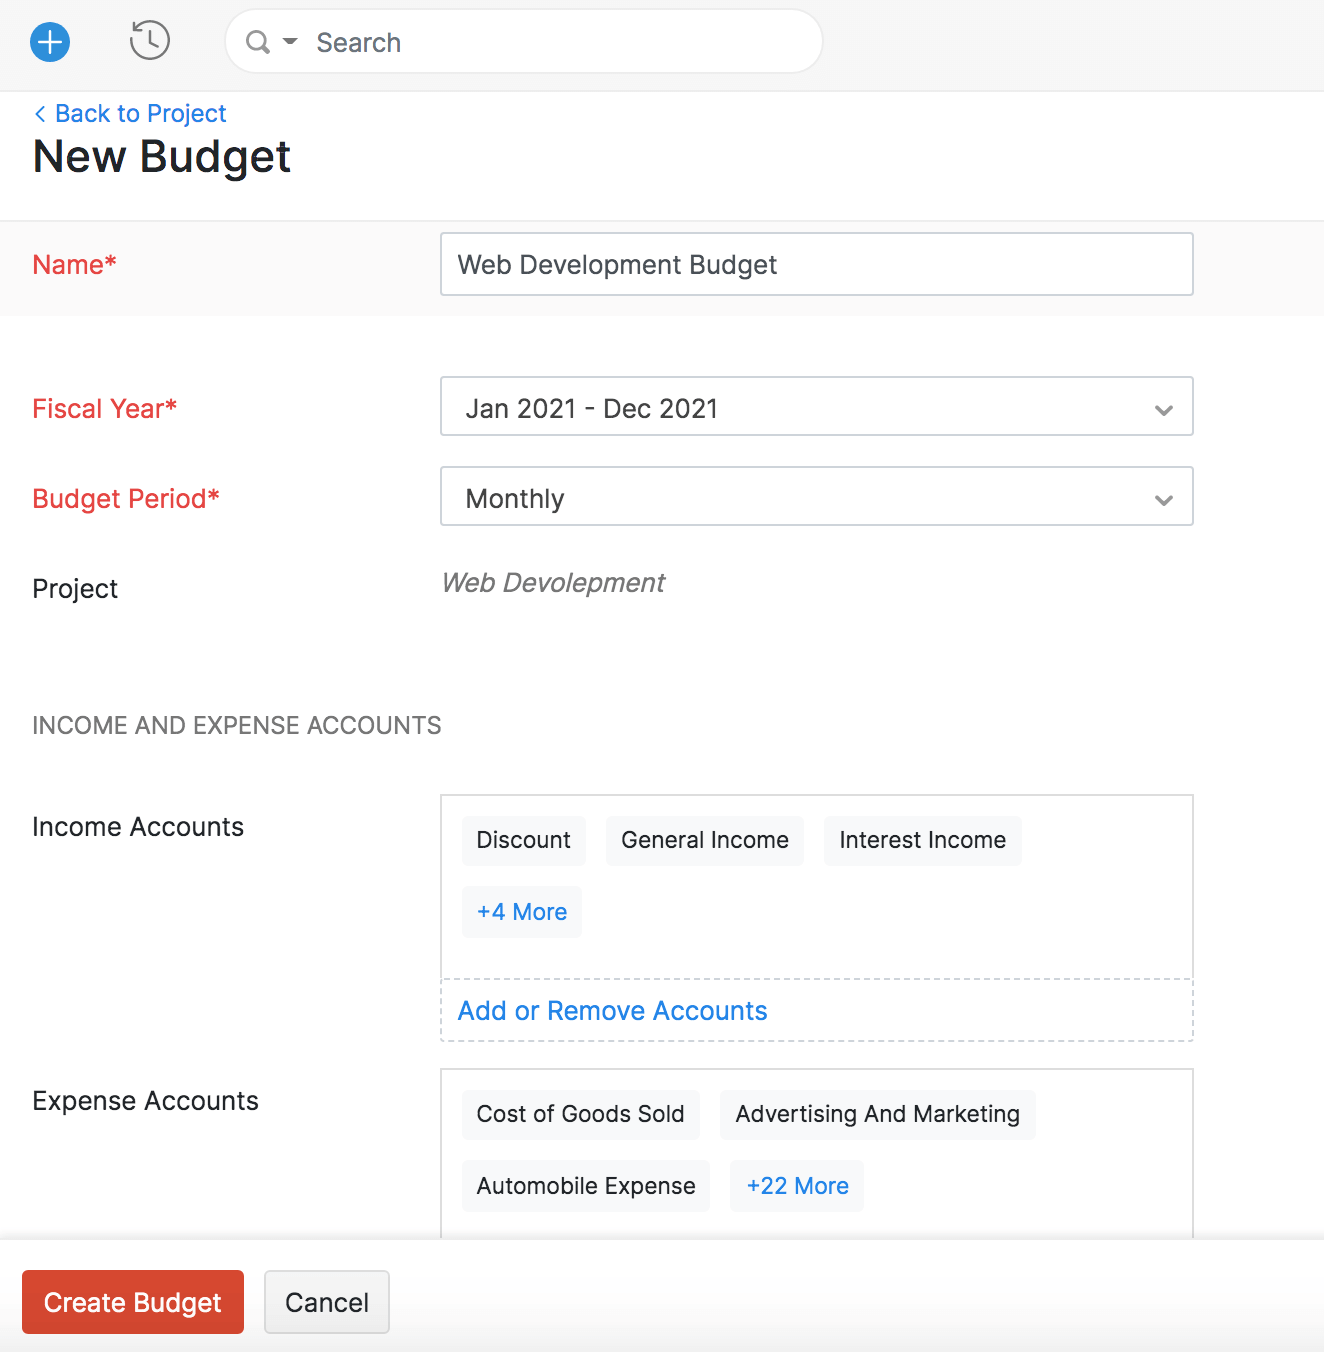
- Enter the budgeted amount for each account.
- Scroll down and click Save.
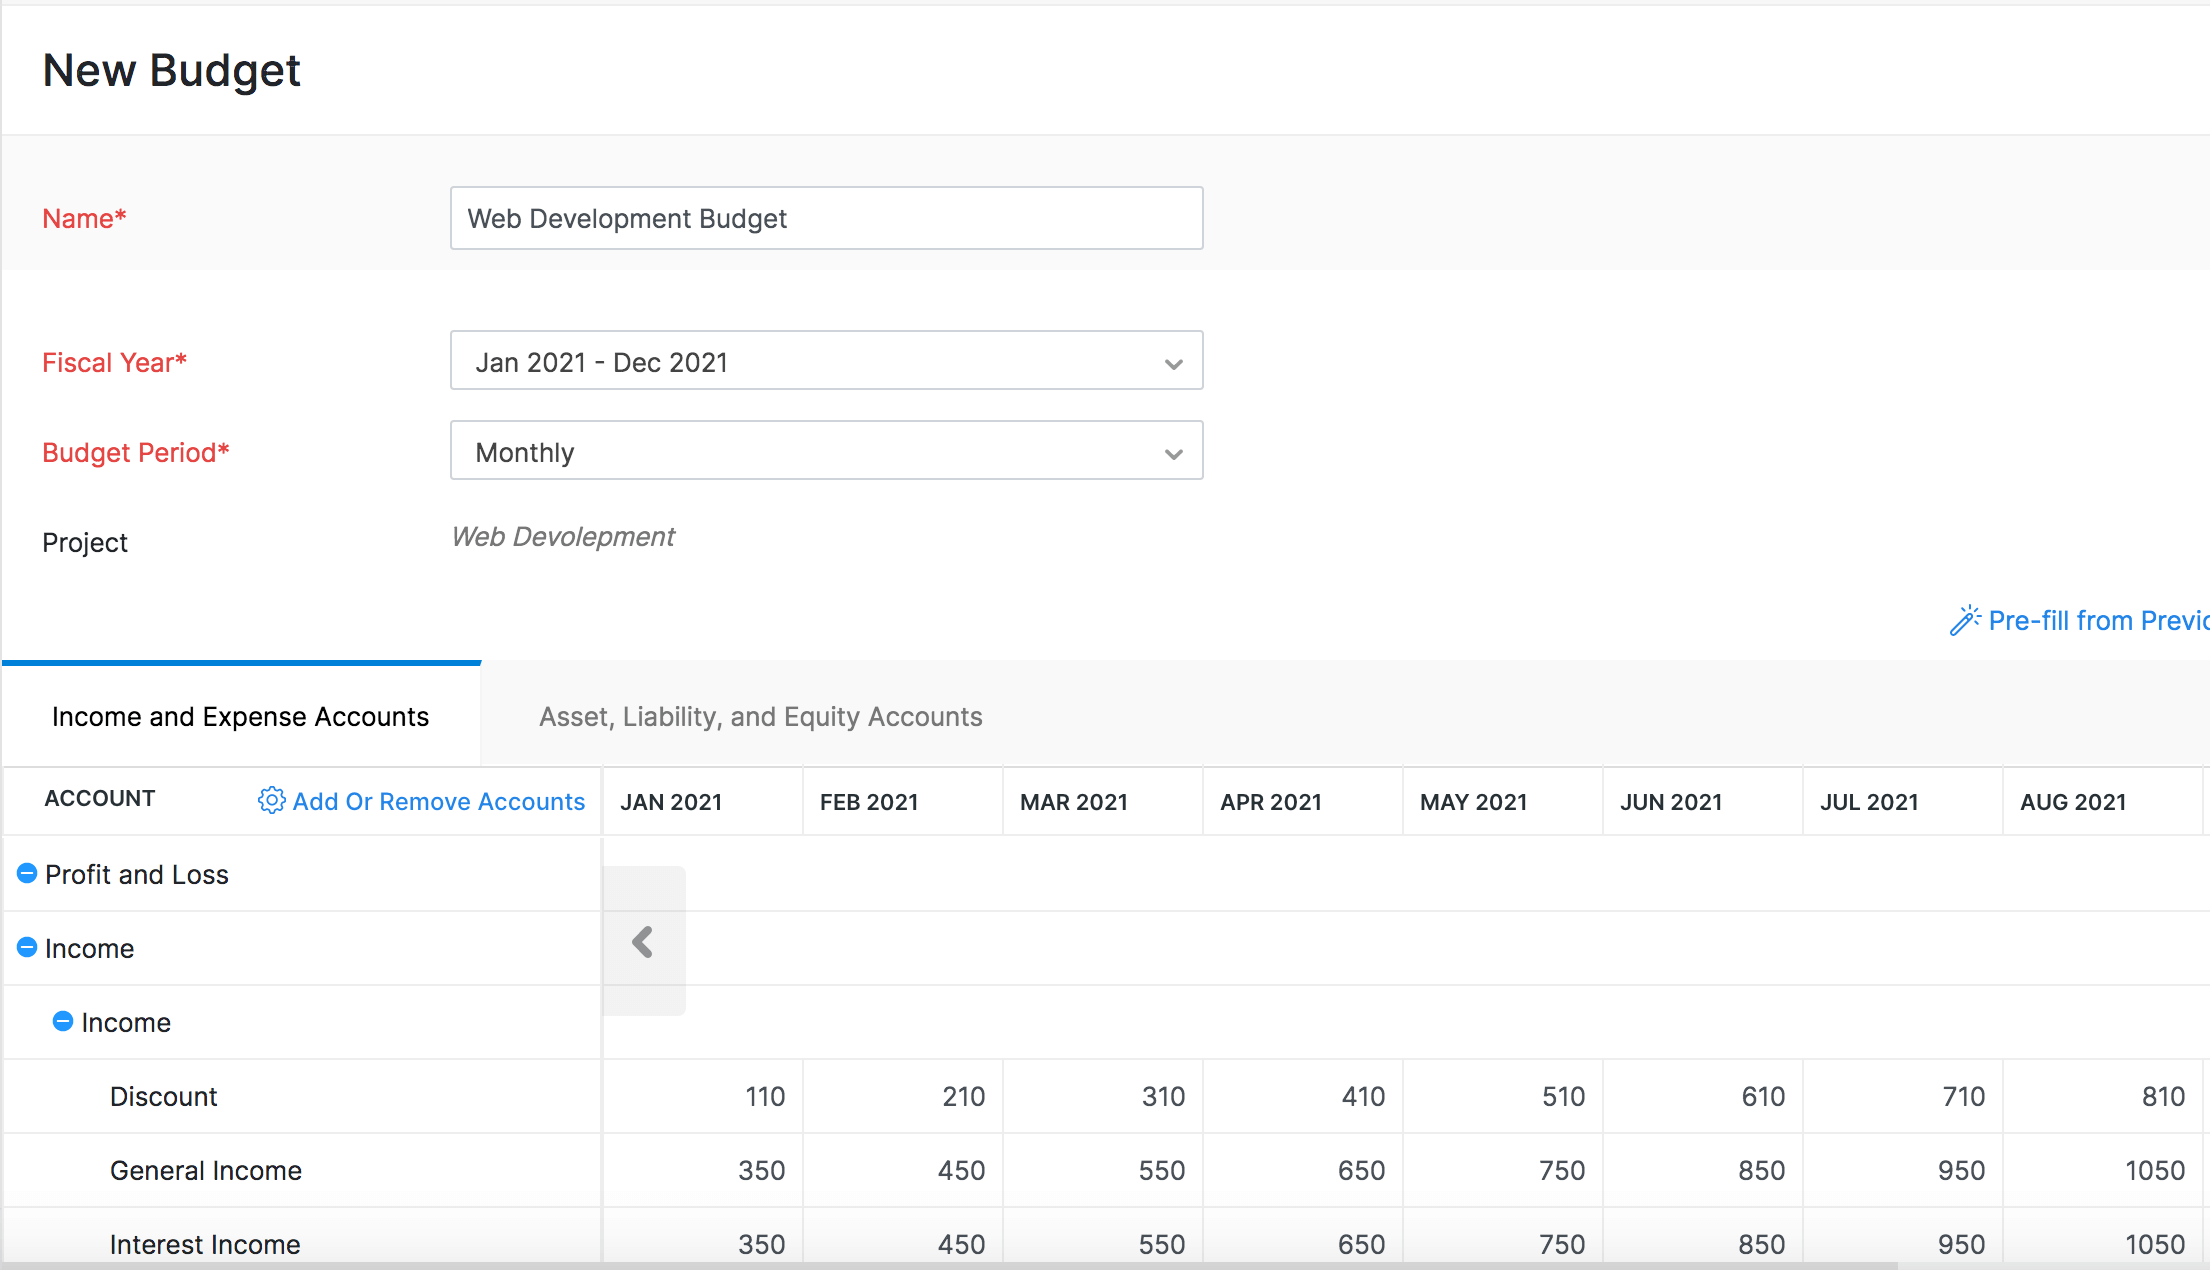
Insight: You can create multiple account level budgets for a single project in Zoho Books.
Pro Tip: You can clone an account level budget to create a duplicate version of the account level budget.
The budget you create will be listed in the Account Level Budgets tab when you select the relevant project.
Budget versus Actuals Report
This report helps you see the difference between the budget and the actuals for each account based on the transactions that were recorded for the project. To view the report:
- Click Time Tracking in the left sidebar and select Projects.
- Select the project for which you want to view the report.
- Click the Account Level Budget tab next to the Overview tab.
- Hover over the account level budget and and click View Budget Vs Actuals.

You will be navigated to the report. You can use the customization options to customize the report and view it.
Tasks
A project can comprise of a single or multiple tasks that need to be completed. You need a task associated to the project before you log time. To add a task:
- Go to Time Tracking > Projects.
- Select the project that you created.
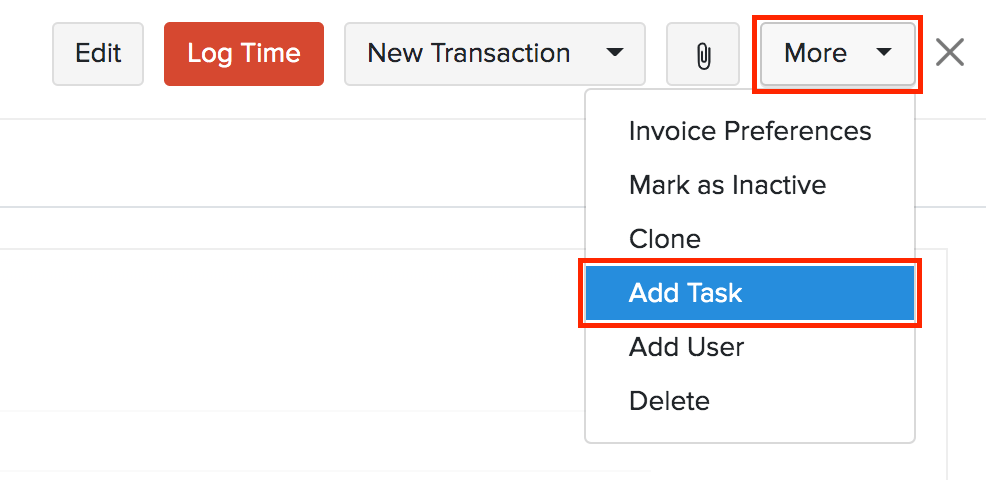
- Click More and select Add Task from the drop-down.
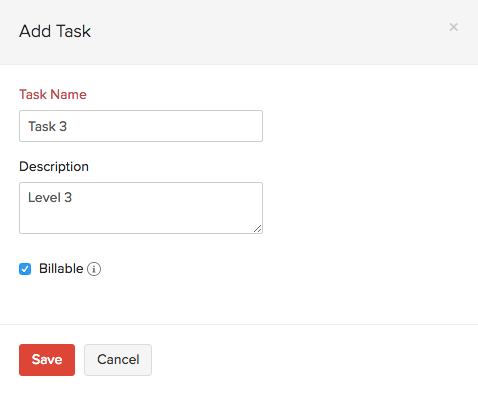
- Enter the Task Name and Description.
- Check the Billable box if you want to charge your customer for the task.
- Click Save.
Import Projects
If you already have a list of projects and tasks in your existing accounting system, you can import them into Zoho Books in the CSV, TSV or XLS format.
- Go to Time Tracking > Projects.
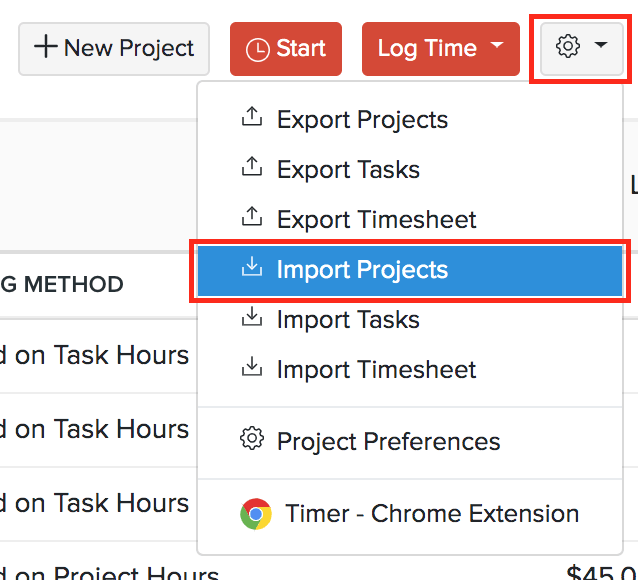
- Click the Gear icon in the top right corner of the page.
- Select Import Projects.
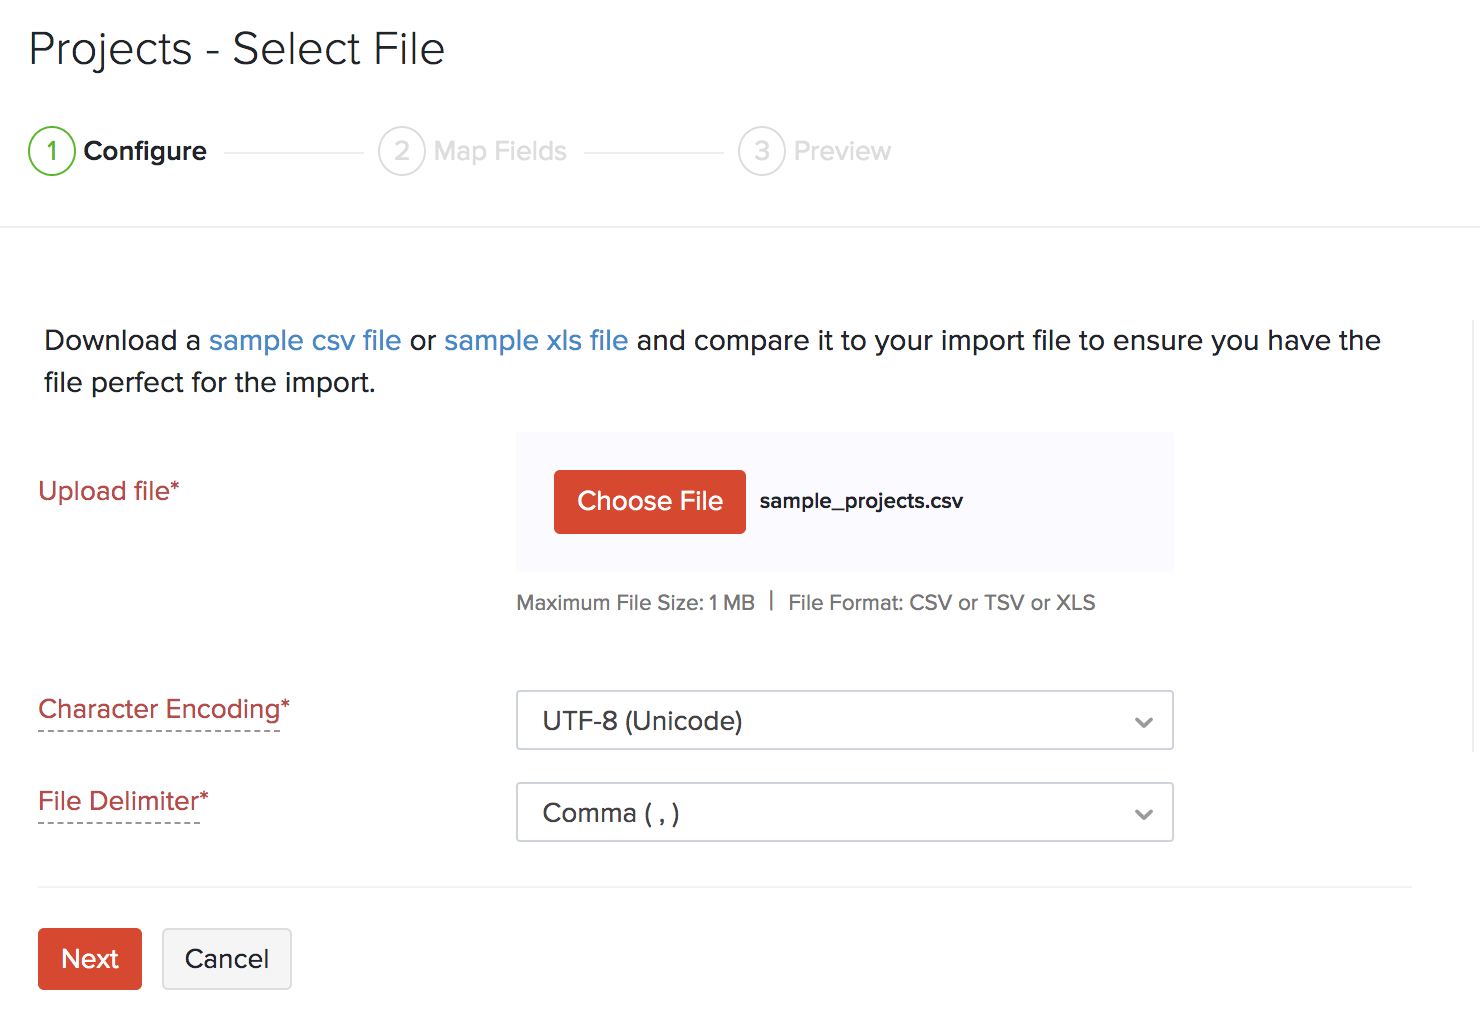
- Click the Choose File button next to Upload file. You can download the sample CSV file for your reference as well.
Insight: The file size cannot be more than 1 MB.
- Choose the Character Encoding and File Delimiter for your file.
Insight: Character Encoding is used to pair numbers with characters. By default, the Unicode Transformation Format (UTF-8) encoding is used which supports a wide range of characters that go beyond 8 bits.
- Click Next.
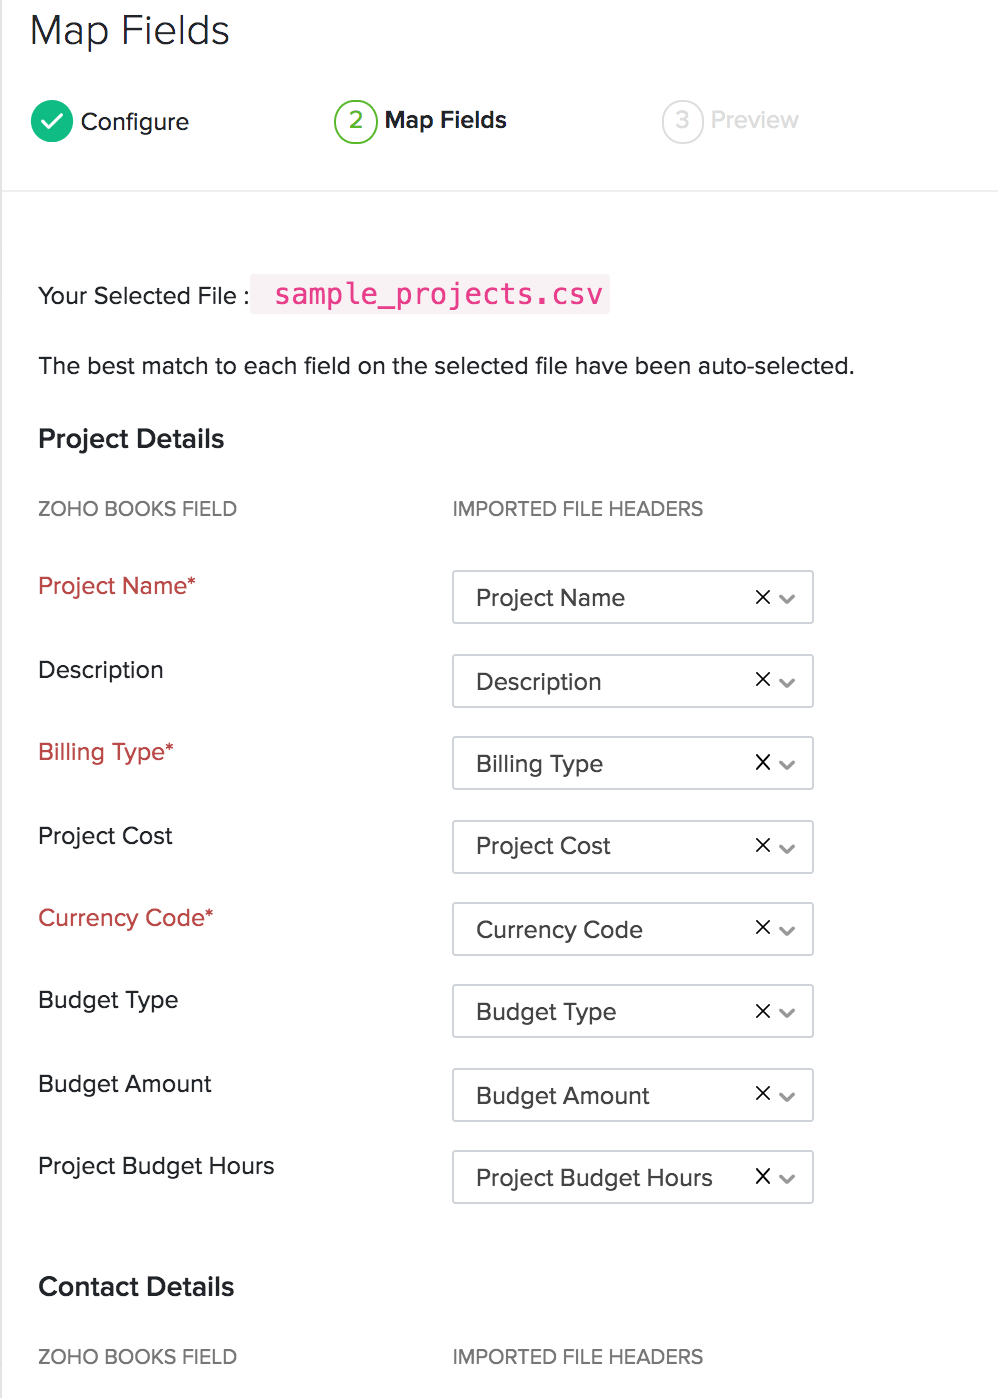
- Ensure that all the fields are mapped correctly in the Map Fields page.
- Mark the box Save these selections for use during future imports if you want to use a similar import format next time.
- Click Next.
- In the Preview page, click Import.
Similarly you can import tasks. Here’s how:
- Go to Time Tracking > Projects.
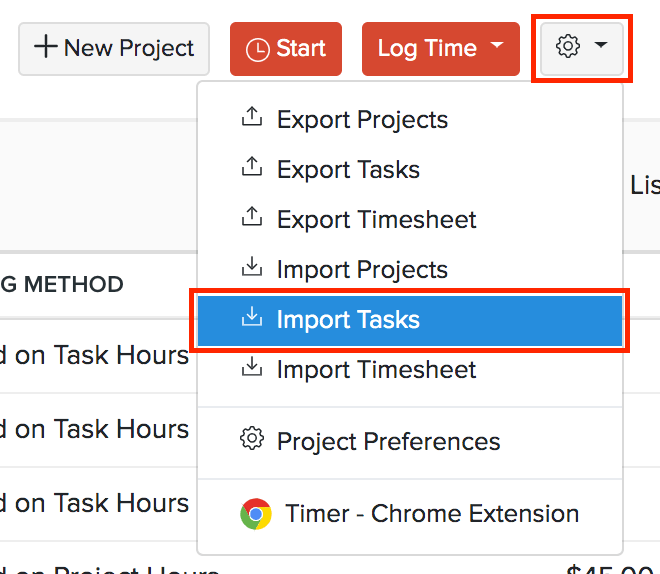
- Click the Gear icon.
- Click Import Tasks.
Insight: Zoho Books will auto-match the file headers of the imported file to the closest matching field in Zoho Books. You can manually edit each field to match the headers, and save these preferences. On proceeding, Zoho Books shows you any unmapped field you may have left out or could not match. You can map these by adding new fields with matching headers.
Next >
Functions in Projects
Related
 Yes
Yes
 Thank you for your feedback!
