Manage Bills
The bills that you record for your vendors can be filtered and sorted in many ways.
ON THIS PAGE
Status of a Bill
A bill in Zoho Books can have any one of the following statuses.
| Status | Description |
|---|---|
| Draft | The bill is created but not yet active. |
| Pending Approval | If you have enabled transaction approval, then every bill that you create has to be approved by someone with appropriate access. Until then, the bill will be in the pending approval state. |
| Open | The bill is active. |
| Overdue | The due date for paying the bill has been crossed. |
| Unpaid | No payment has been recorded for the bill. |
| Partially Paid | The bill amount is recorded partially. |
| Paid | The bill amount is completely paid. |
| Void | The bill is no longer active. |
Filter Bills
You can filter the bills based on their status. Here’s how:
- Go to Purchases > Bills.
- Click the All Bills dropdown on top of the page.
- Select the type of bills you want to filter.
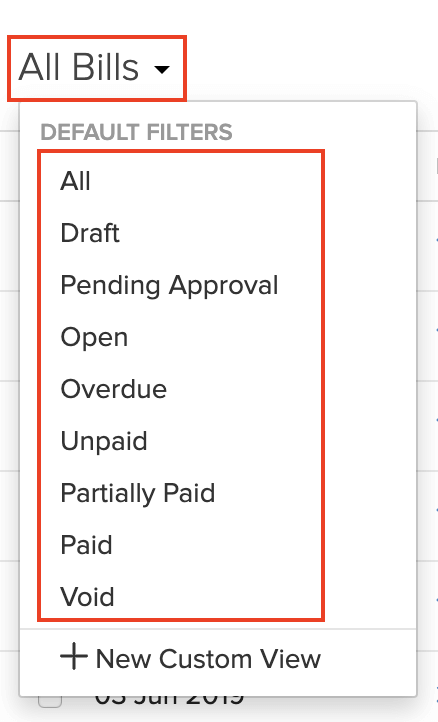
If you want to filter the bills based on certain parameters of your own, you can do it through custom views. Learn more about Custom Views.
Custom Views
Custom Views can be used to filter your bills based on certain criteria that you wish to set.
Scenario: Patricia wants to view all the bills which are overdue and whose amount is greater than 1000. She creates a custom view and sets the criteria as: Amount is greater than 1000 and bill status is overdue.
To create a custom view for bills:
- Go to Purchases > Bills.
- Click the All Bills dropdown on top of the page.
- Select + New Custom View.
- Fill in the required details.
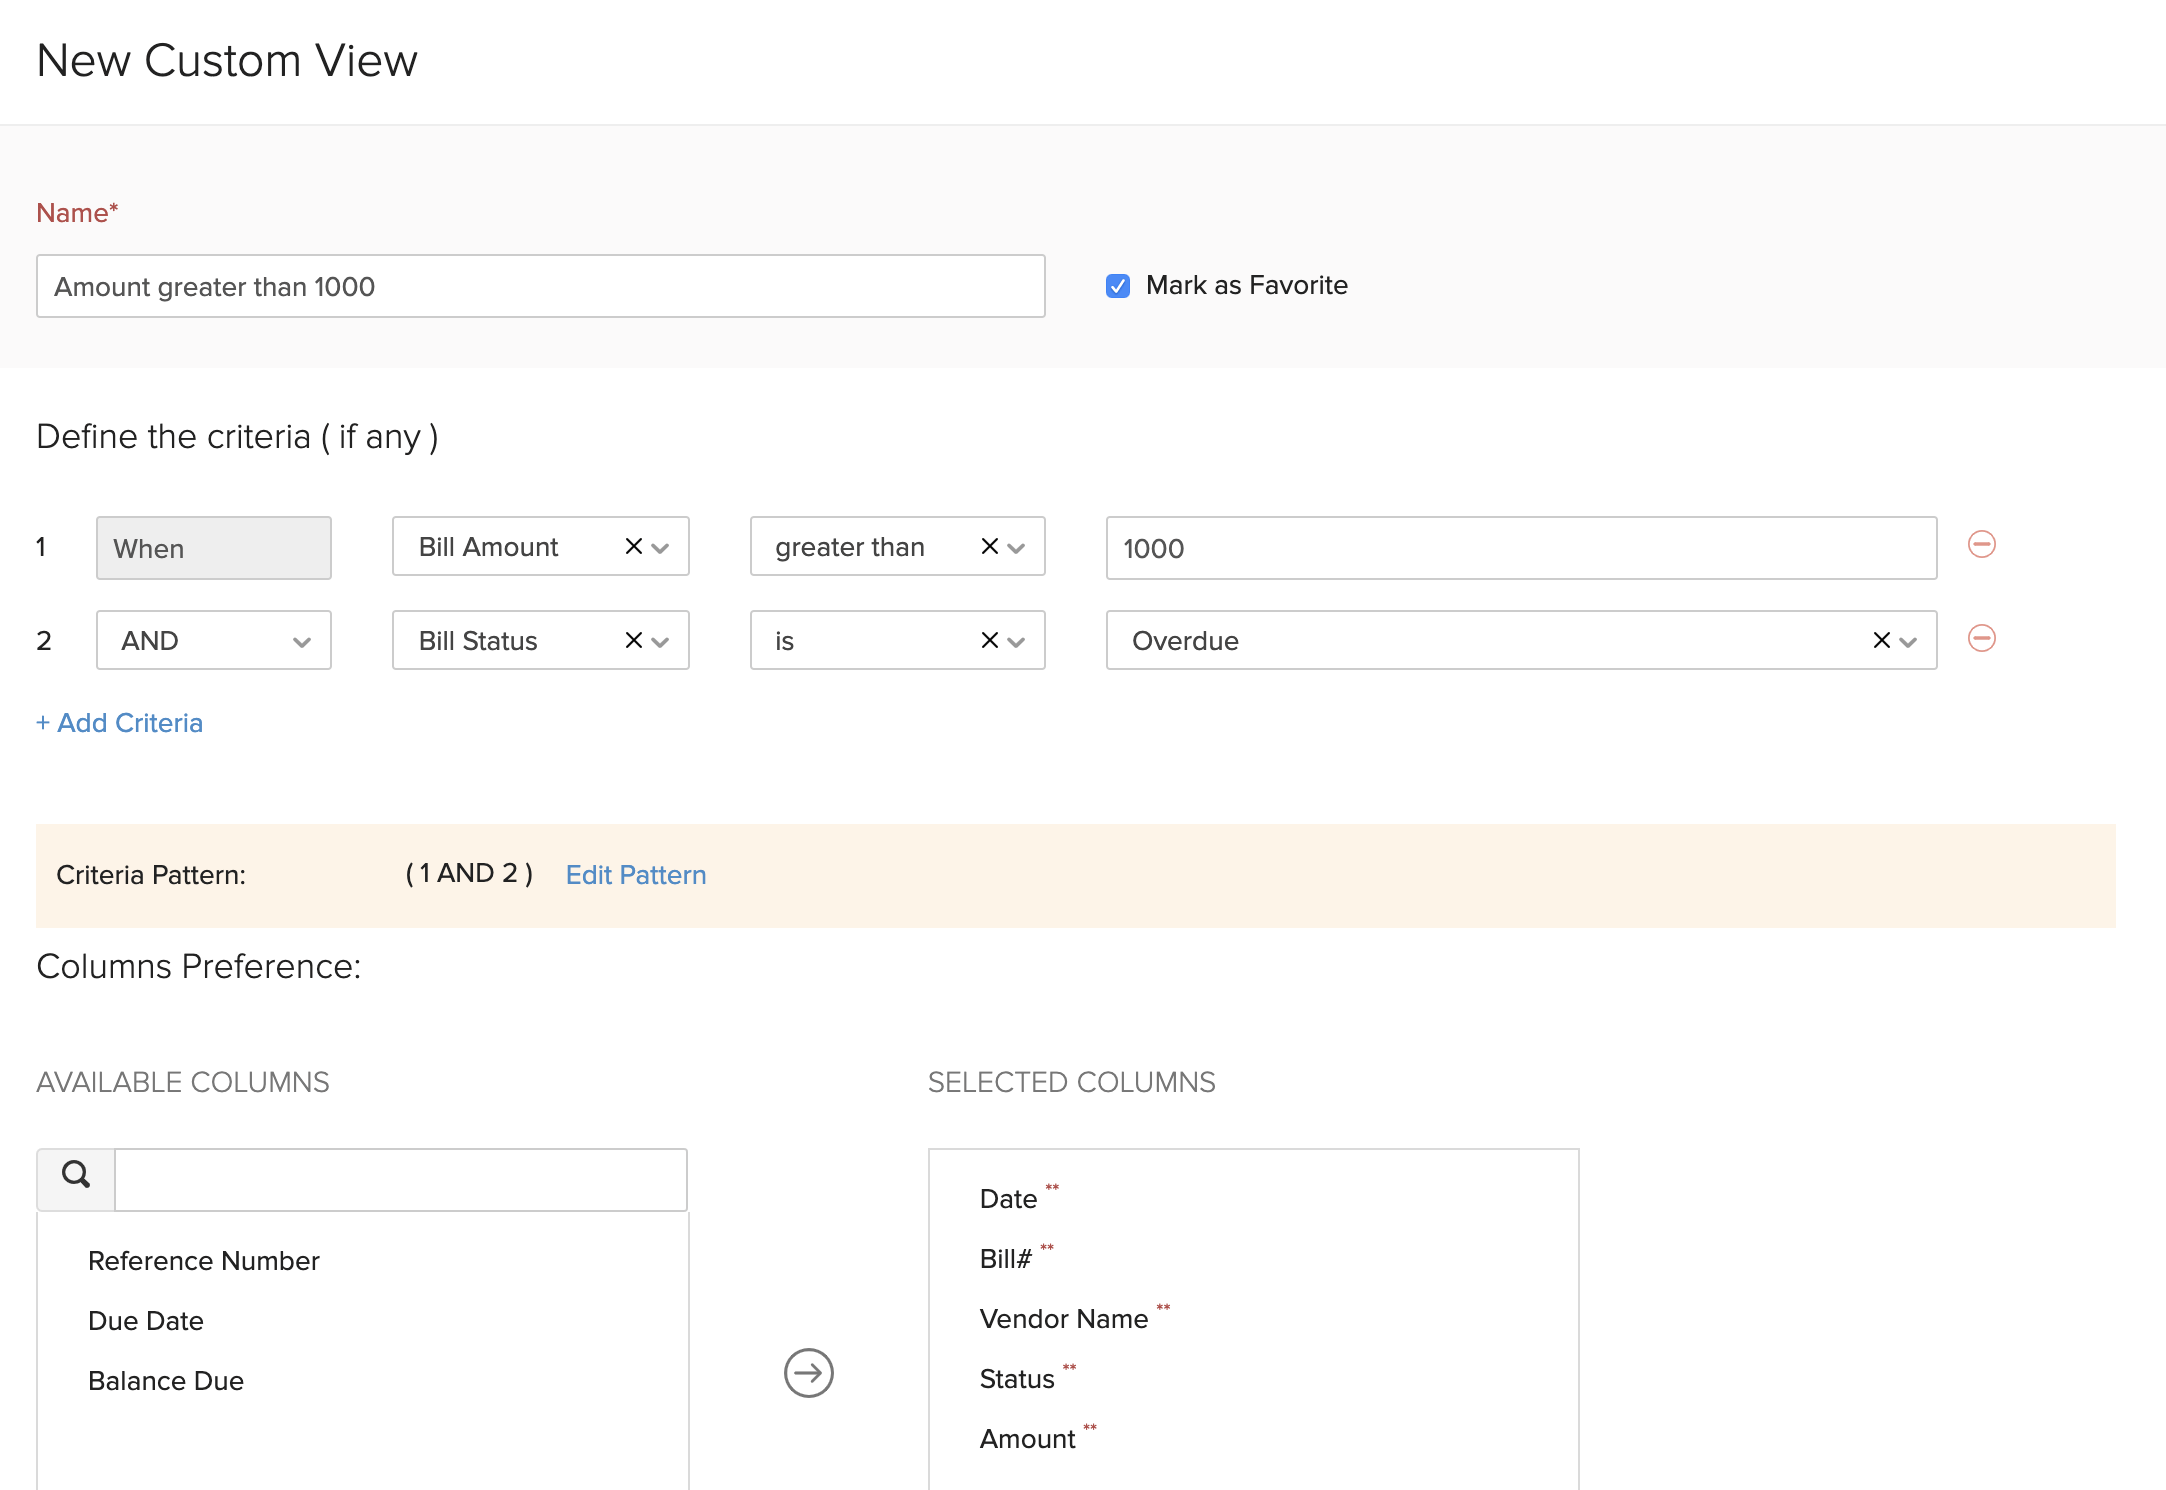
Name
Enter a name for your custom view. If you use this custom view frequently, you can select the Mark as Favorite option.
Criteria
Add criteria for the custom view based on the fields in the bills. You can add multiple criteria by clicking + Add Criteria.
Column Preferences
Choose the fields that have to be displayed in the custom view that you’re creating. You can move fields in the Available Columns to the Selected Columns by clicking the + icon next to them.
Share Custom View
Choose who gets access to this custom view.
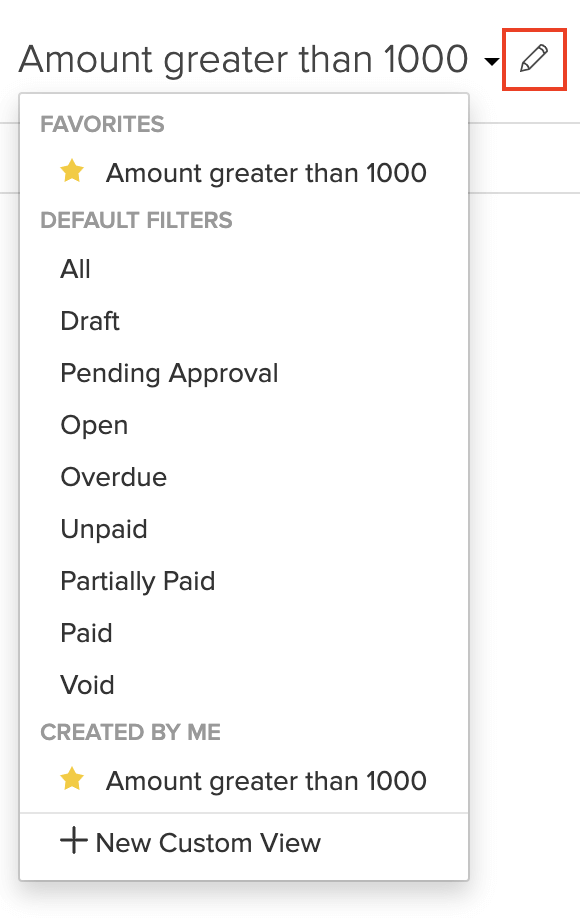
This custom view will be shown when you click the All Bills dropdown in the Bills module.
You can edit this custom view by clicking the Pencil icon next to the custom view.
To delete the custom view:
- Edit the custom view.
- Scroll to the bottom of the page and click the Delete button.
- Click Yes to confirm.

Sort Bills
You can sort bills based on their different columns or fields. Here’s how:
- Go to Purchases > Bills.
- Click the column which you want to sort.
- The sorting can be done based on ascending or descending order (indicated by the arrow). Click the field again to change the sorting order.

Rearrange Columns
In the Bills module, you can choose which fields are to be displayed in the main page. You can also rearrange the order of the columns or fields in the same page. Here’s how:
- Go to Purchases > Bills.
- Click the Table icon on the left side of the page.
- Select the fields that you want to display.
- Rearrange the order of the columns by dragging and dropping the icons next to them.
- After making the changes, click Save.
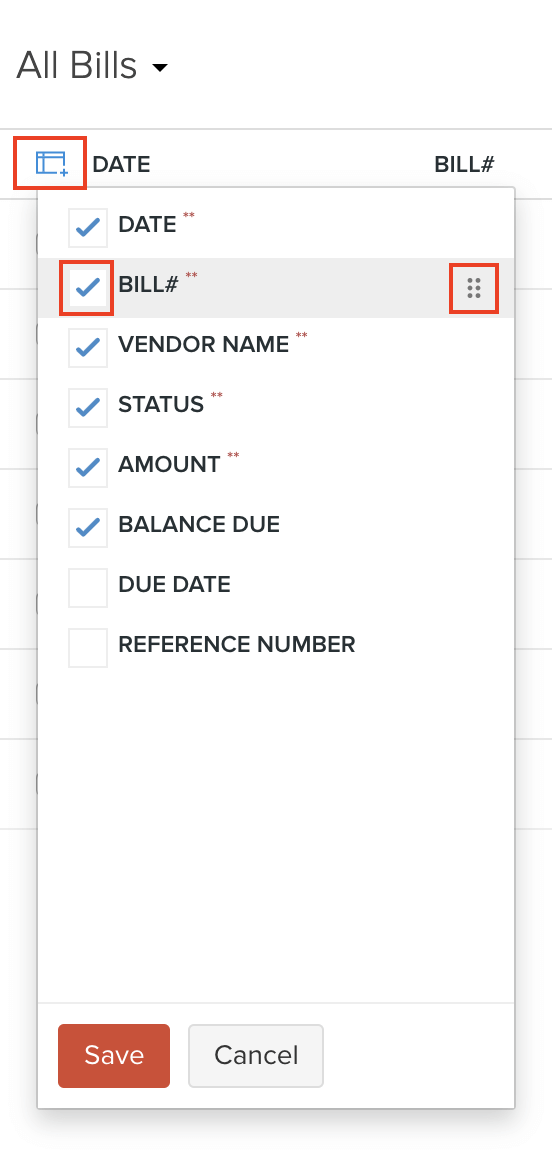
Insight: Fields which are mandatory (marked by **) cannot be unchecked.
Calendar View
You can view all your overdue bills and their overdue amounts in different months of the year in the calendar view. Here’s how:
- Go to Purchases > Bills.
- Click the Calendar icon in the top right corner of the page.
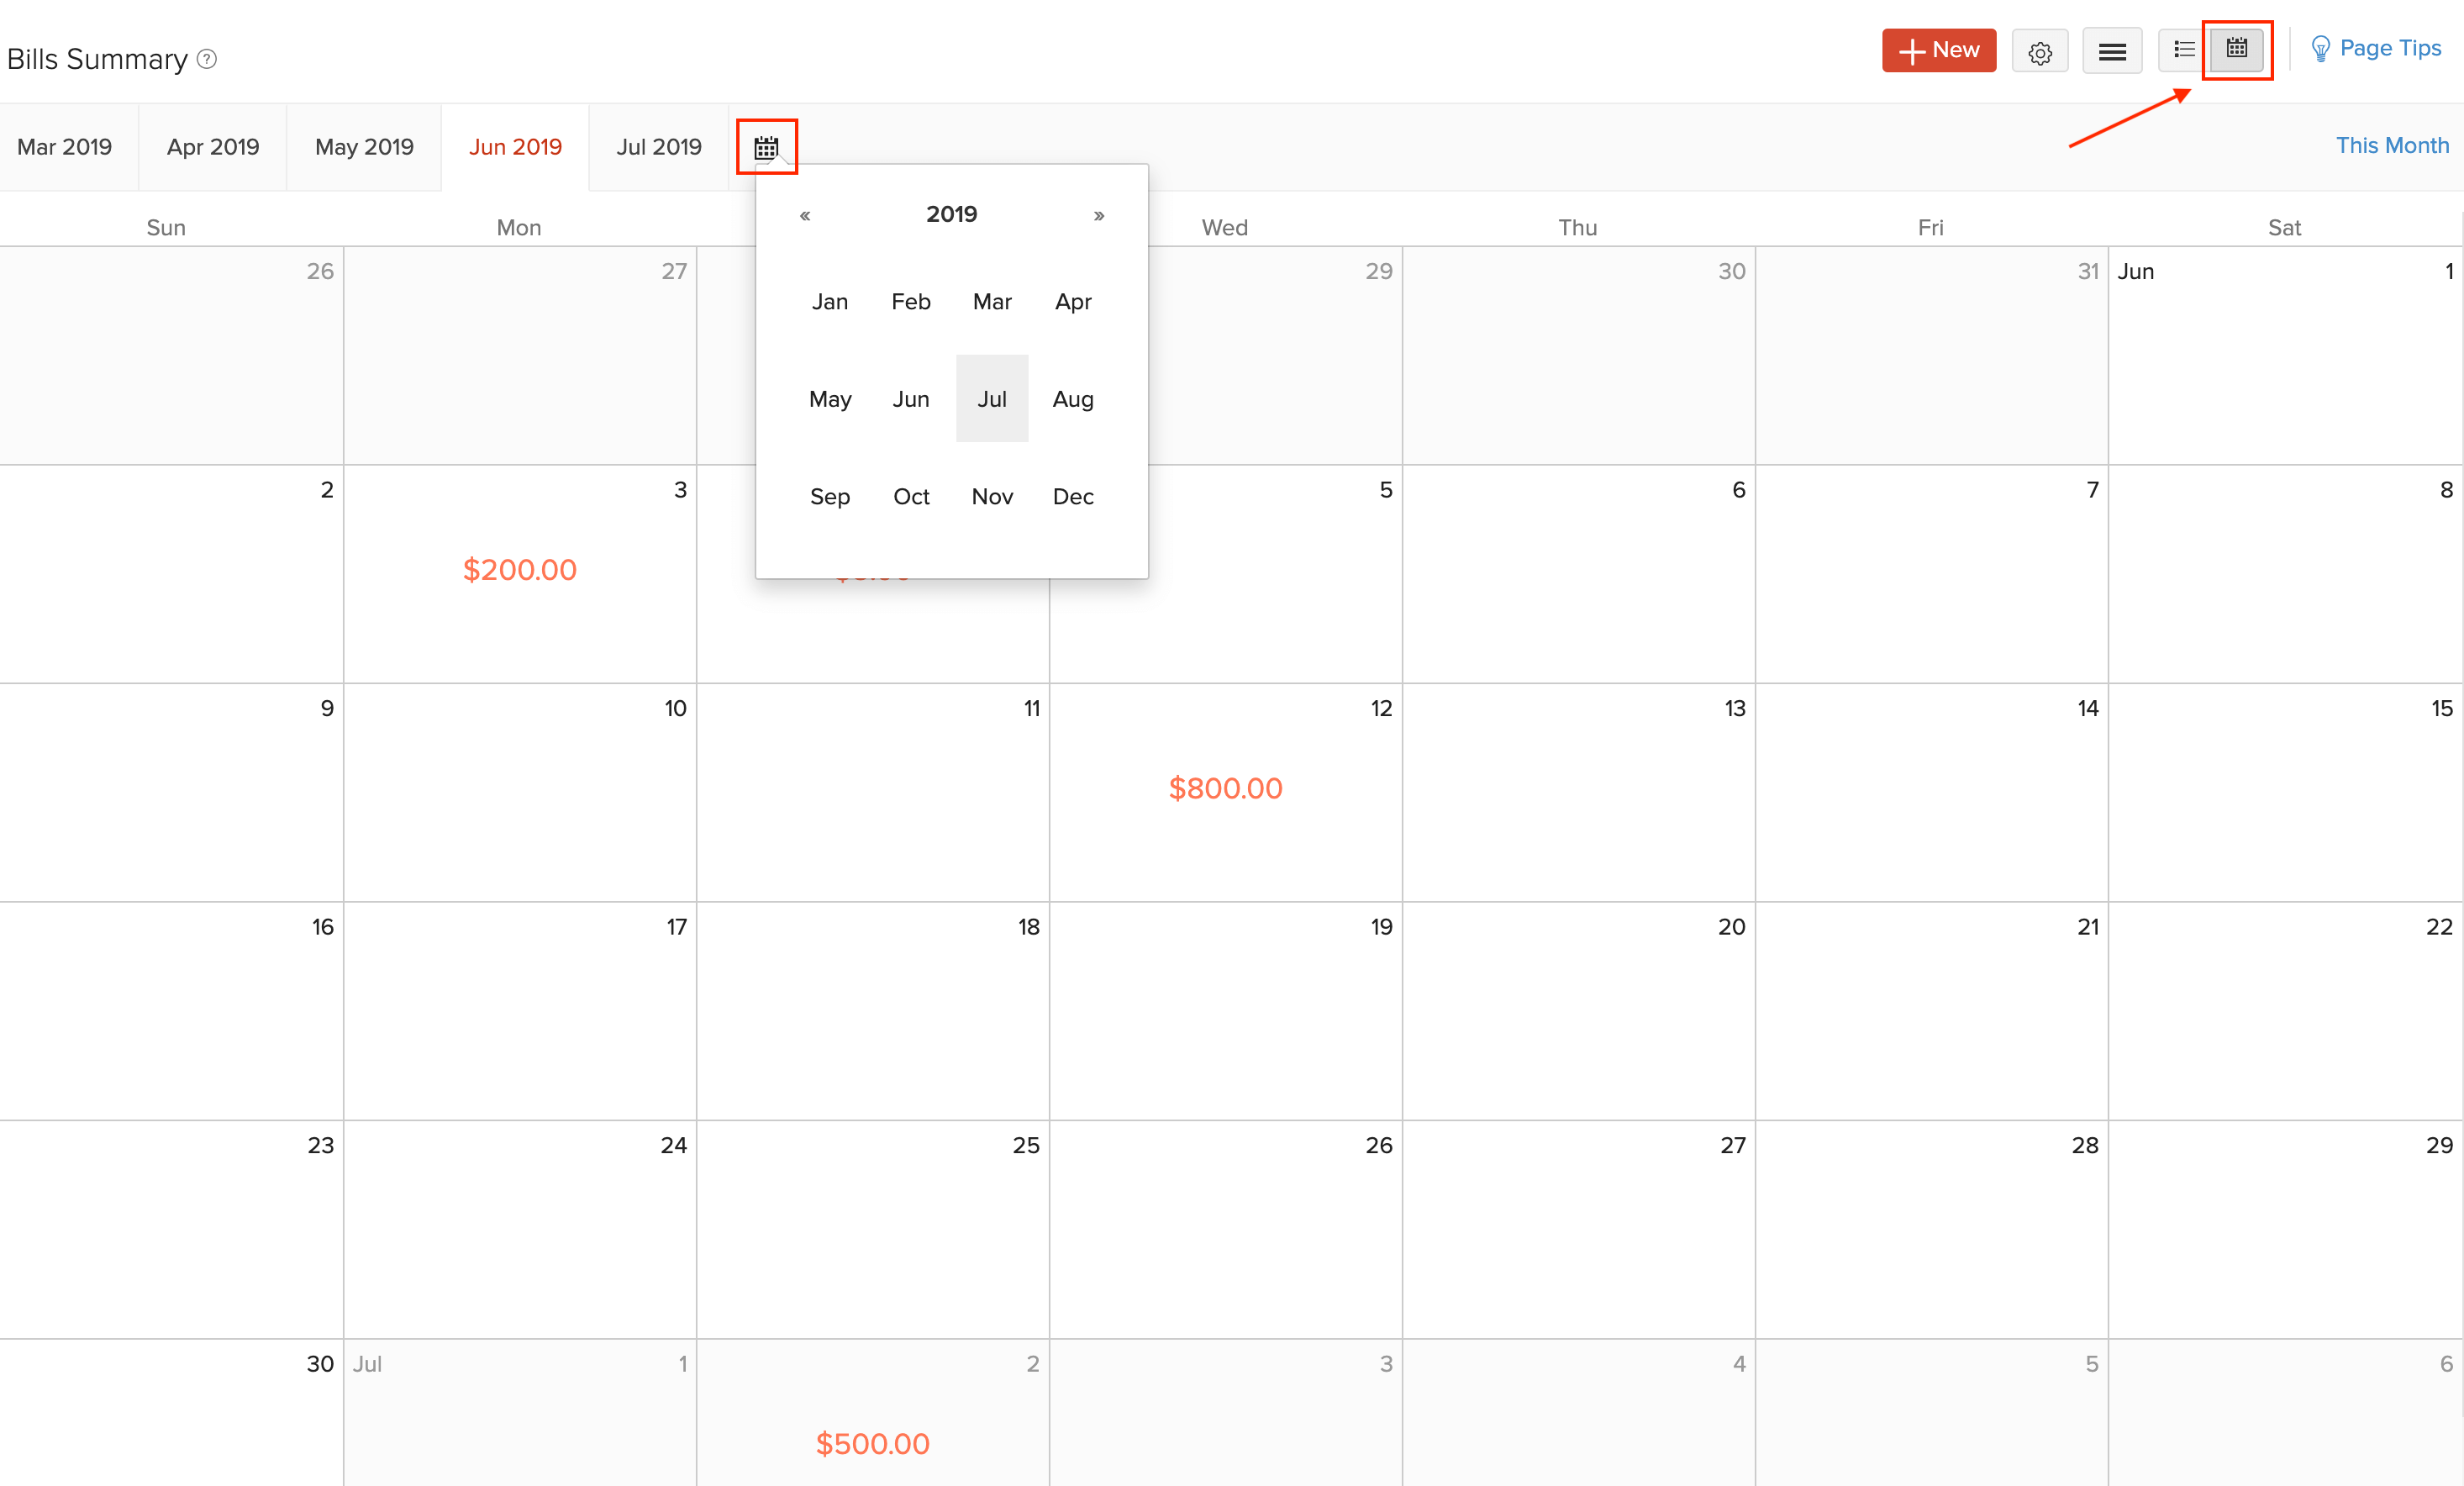
You can switch between different months of different years by clicking the Calendar icon within this view. To go back to the current month, click This month in the top right corner of the page.
To switch back to the regular view, click the List icon next to the Calendar icon.
Export Current View
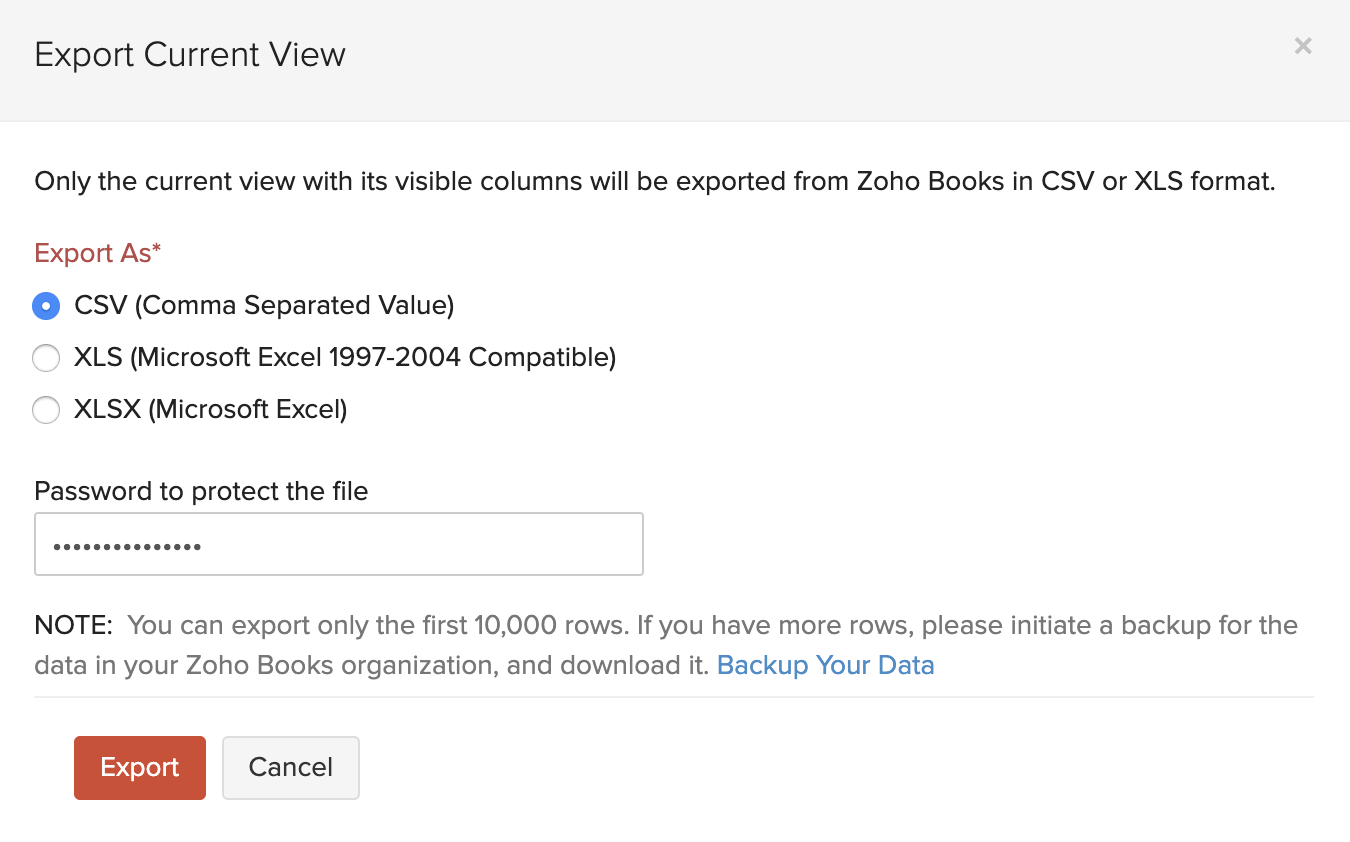
If you have filtered your bills, or rearranged their columns, then you can export that particular view of your bills. Here’s how:
- Go to Purchases > Bills.
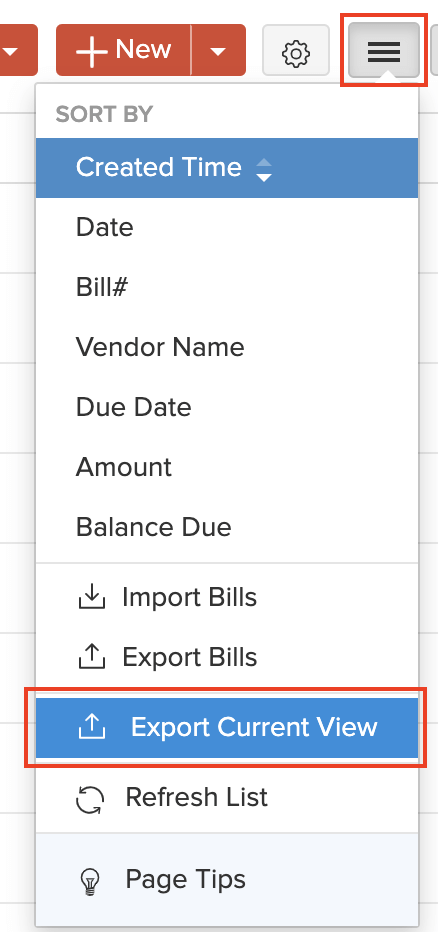
- Click the Hamburger icon in the top right corner of the page.
- Select Export Current View.
- Select the format for export under Export As and enter a Password to secure your export file.
- Click Export.
Refresh List
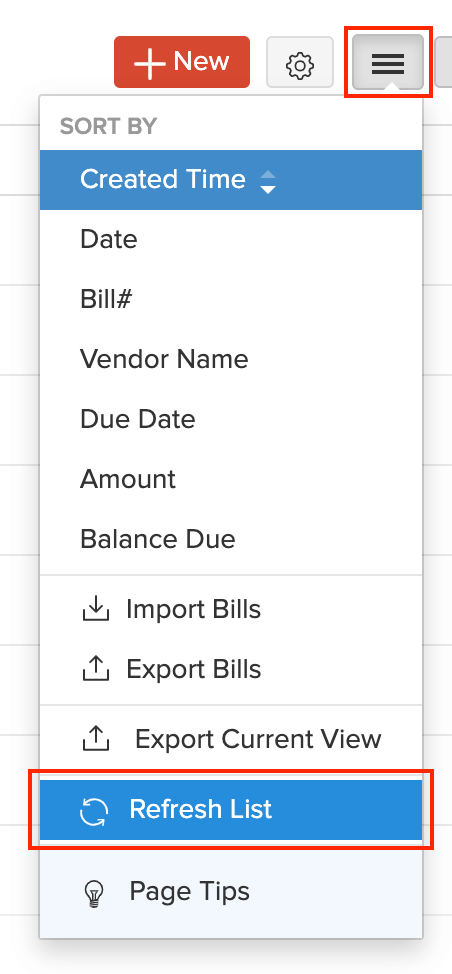
To get the updated list of bills, you can refresh the list of your bills. Here’s how:
- Go to Purchases > Bills.
- Click the Hamburger icon in the top right corner of the page.
- Click Refresh List.
Next >
Other Actions for Bills
Related
 Yes
Yes
 Thank you for your feedback!
