What is Leave Grant?
Leave grant is a special leave that employees can request. The organization can approve or reject the leave grant on a case-to-case basis.
Why is it useful?
It is typically useful when the leave requirement is not covered under fixed entitlements or is needed in excess beyond the current entitlement.
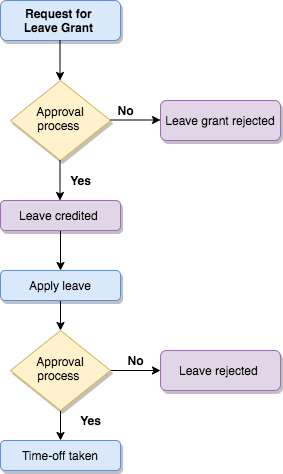
This is the flow an organization can adopt for their leave grant process.
How do we configure Leave grant?
Leave grant can be configured in a similar manner as adding a new leave type.
- Start by navigating to Leave > Settings > Leave Type > Add.
- Enter all the basic details of the leave type such as Name, Image and Code.
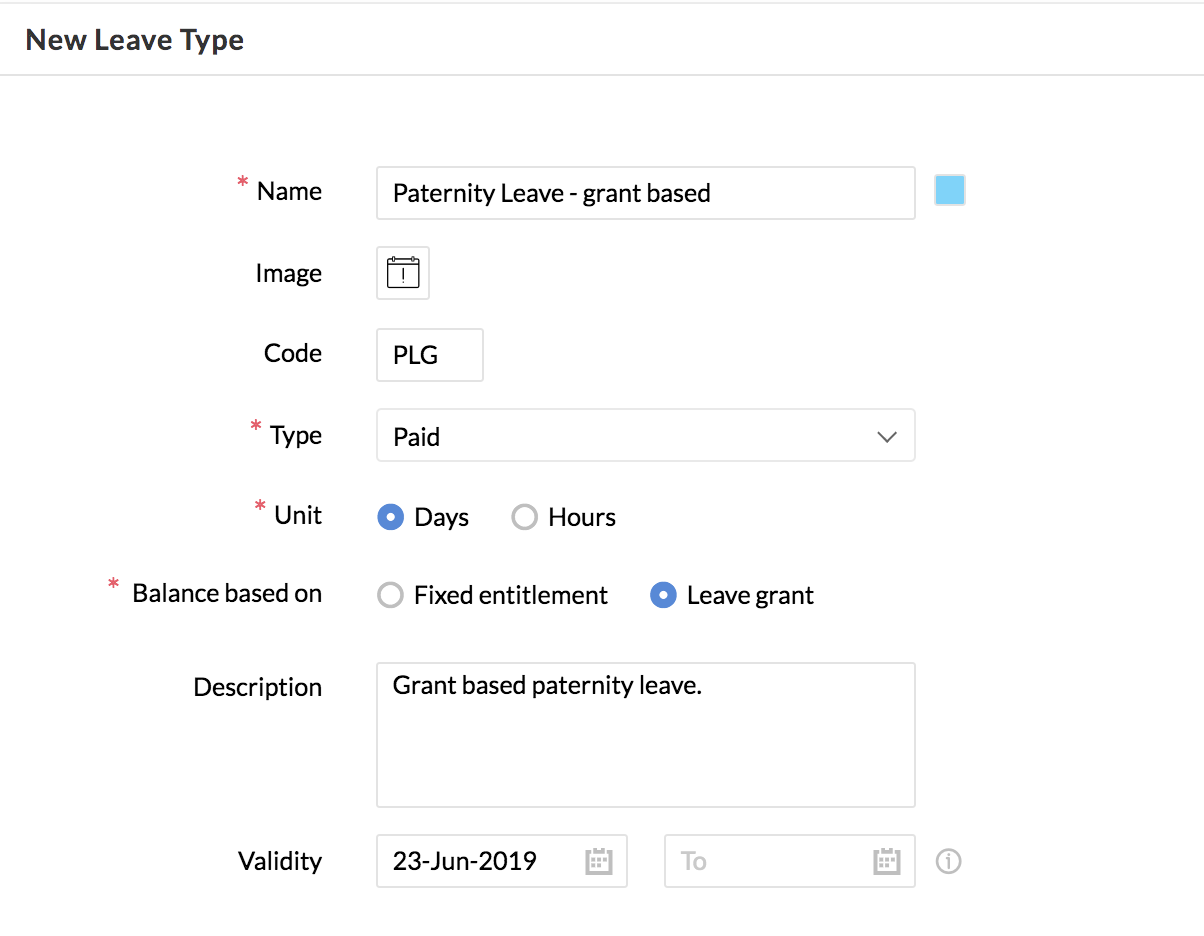
- Select Paid, Unpaid, On Duty, or Restricted Holiday under Type.
- Select Days or Hours under Unit.
- Select Leave grant under Balance based on.
- Enter the description and validity of this leave type.
- Enter the time from when this leave is applicable.
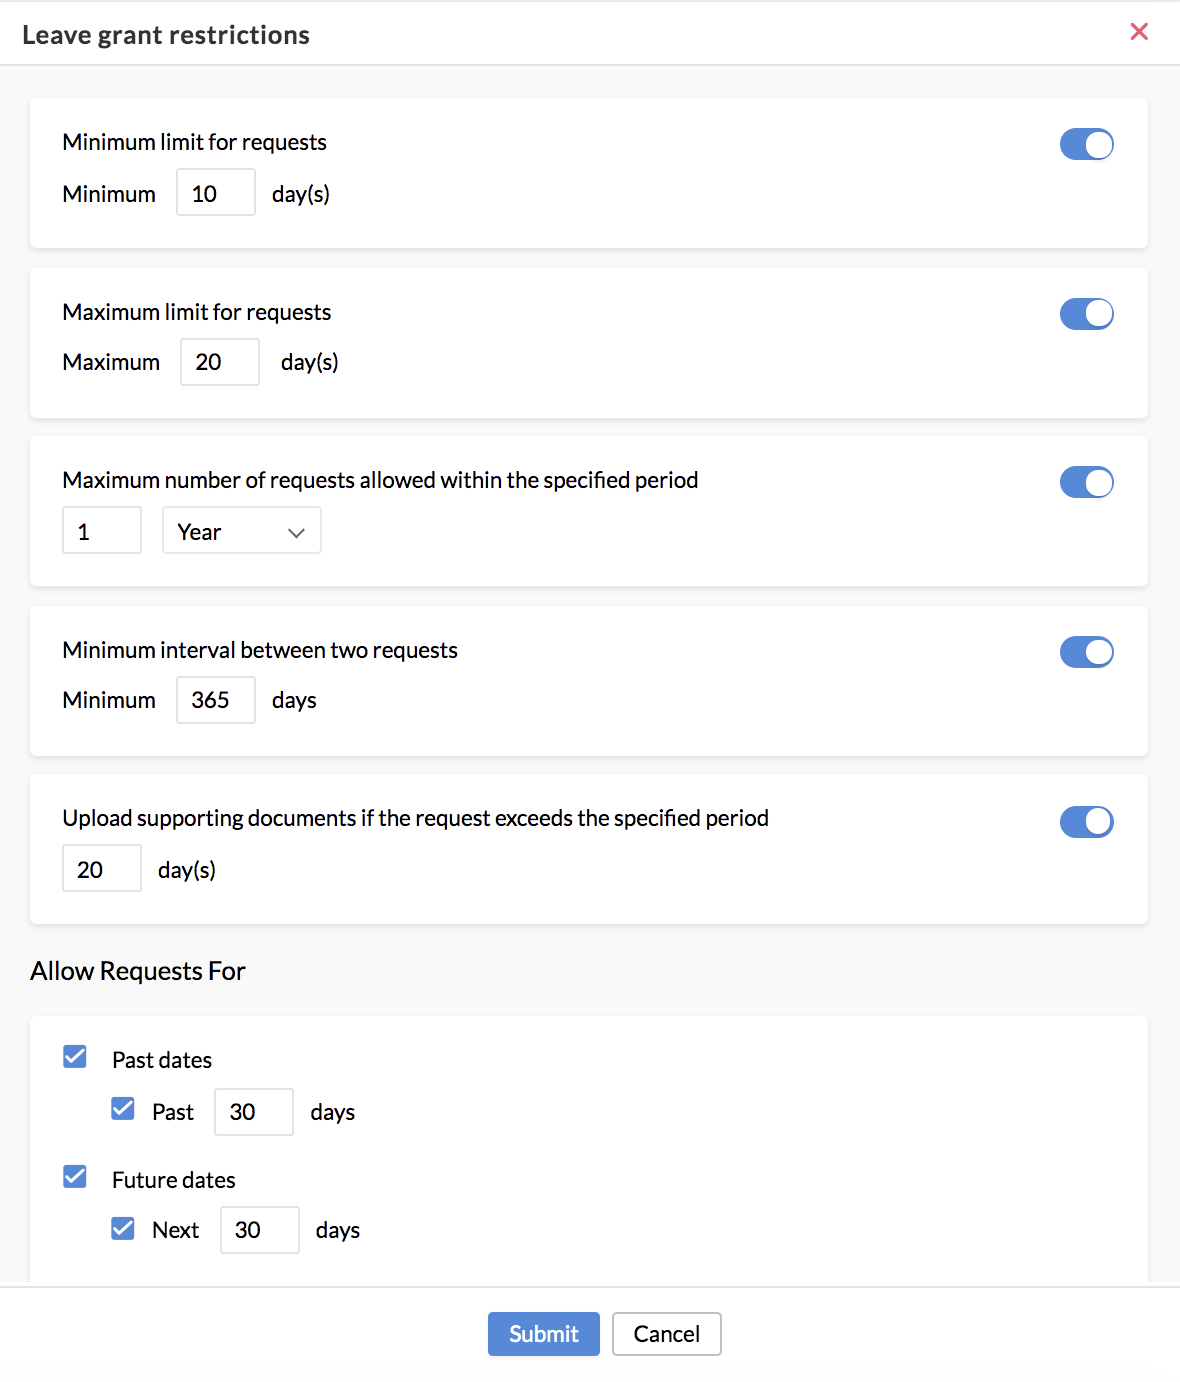
- Under Entitlement, Leave grant click Set leave grant restrictions. These restrictions apply while an employee is requesting for leave grant.

- Enable the required restrictions and enter the appropriate values for each.
- Click Submit.
- Define Applicability for this leave type.
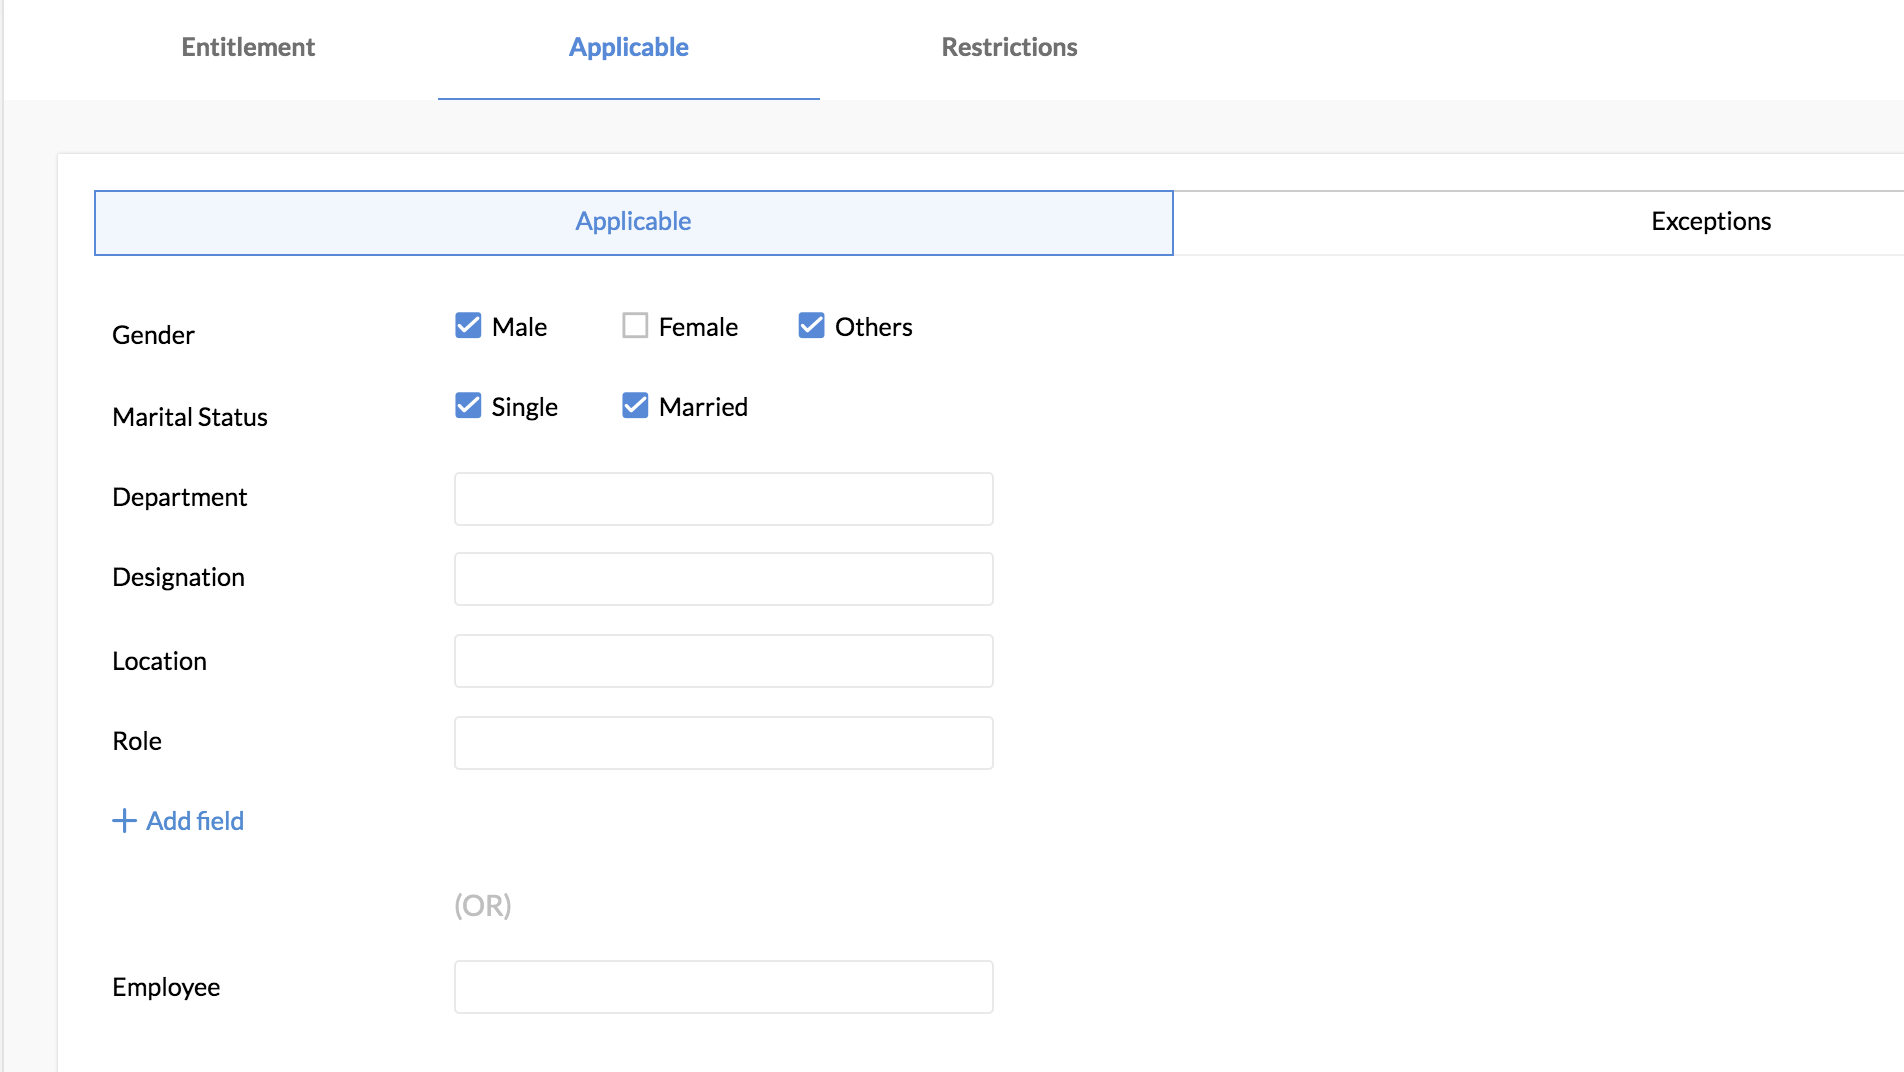
- Enter the other restrictions that apply while an employee applies leave under this leave type.
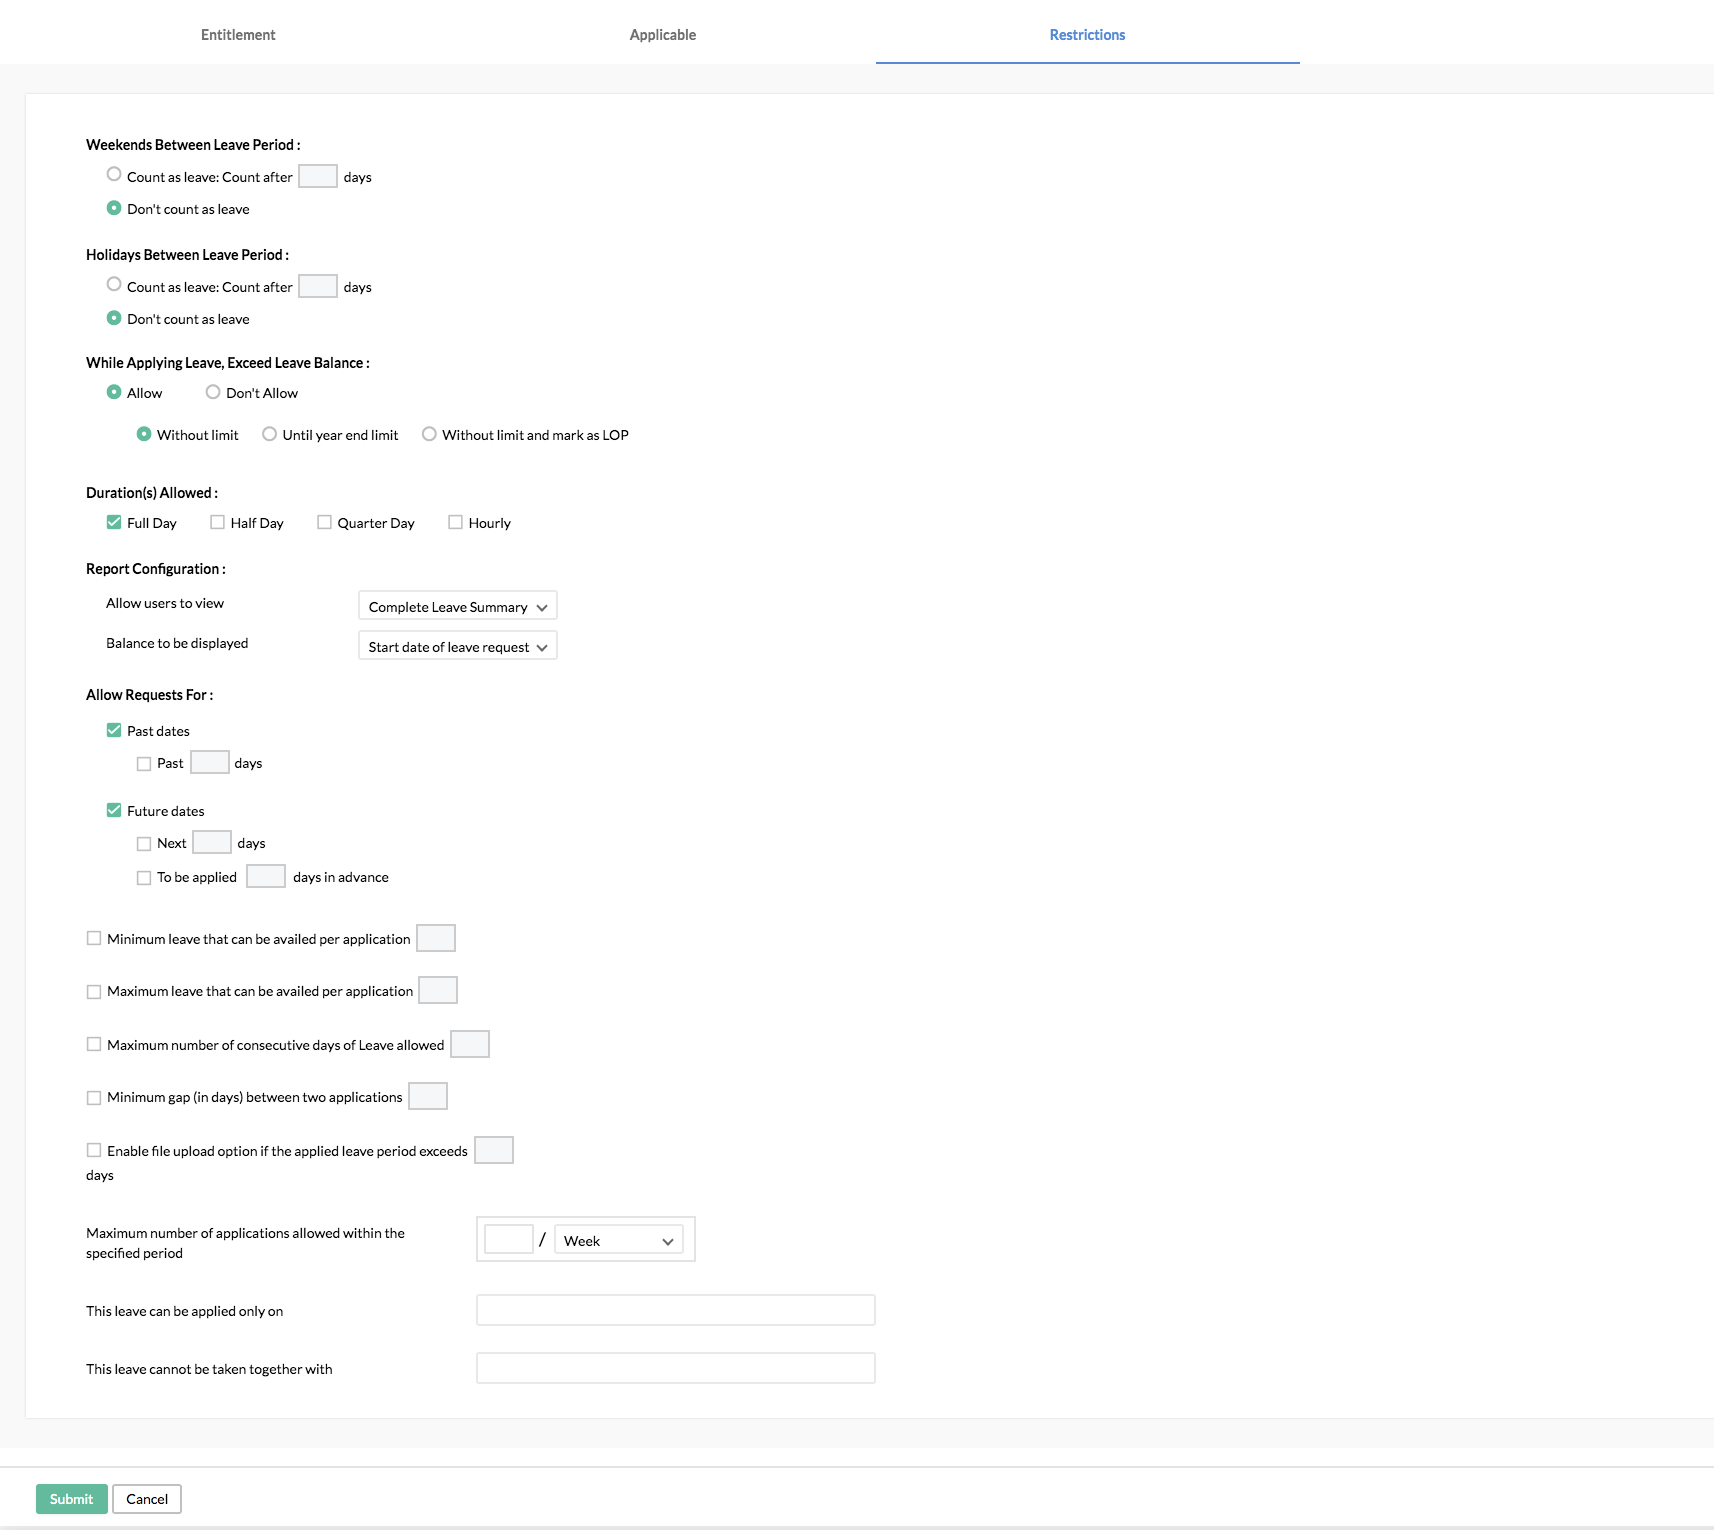
- Click Submit.
Learn more about configuring advanced leave policies.
Leave grant approval
If you leave grant to go through an approval process, here are the steps to configure it.
- Go to Settings > Approvals.
- Select the Leave Grant form from the drop-down.
- Click Add Approval.
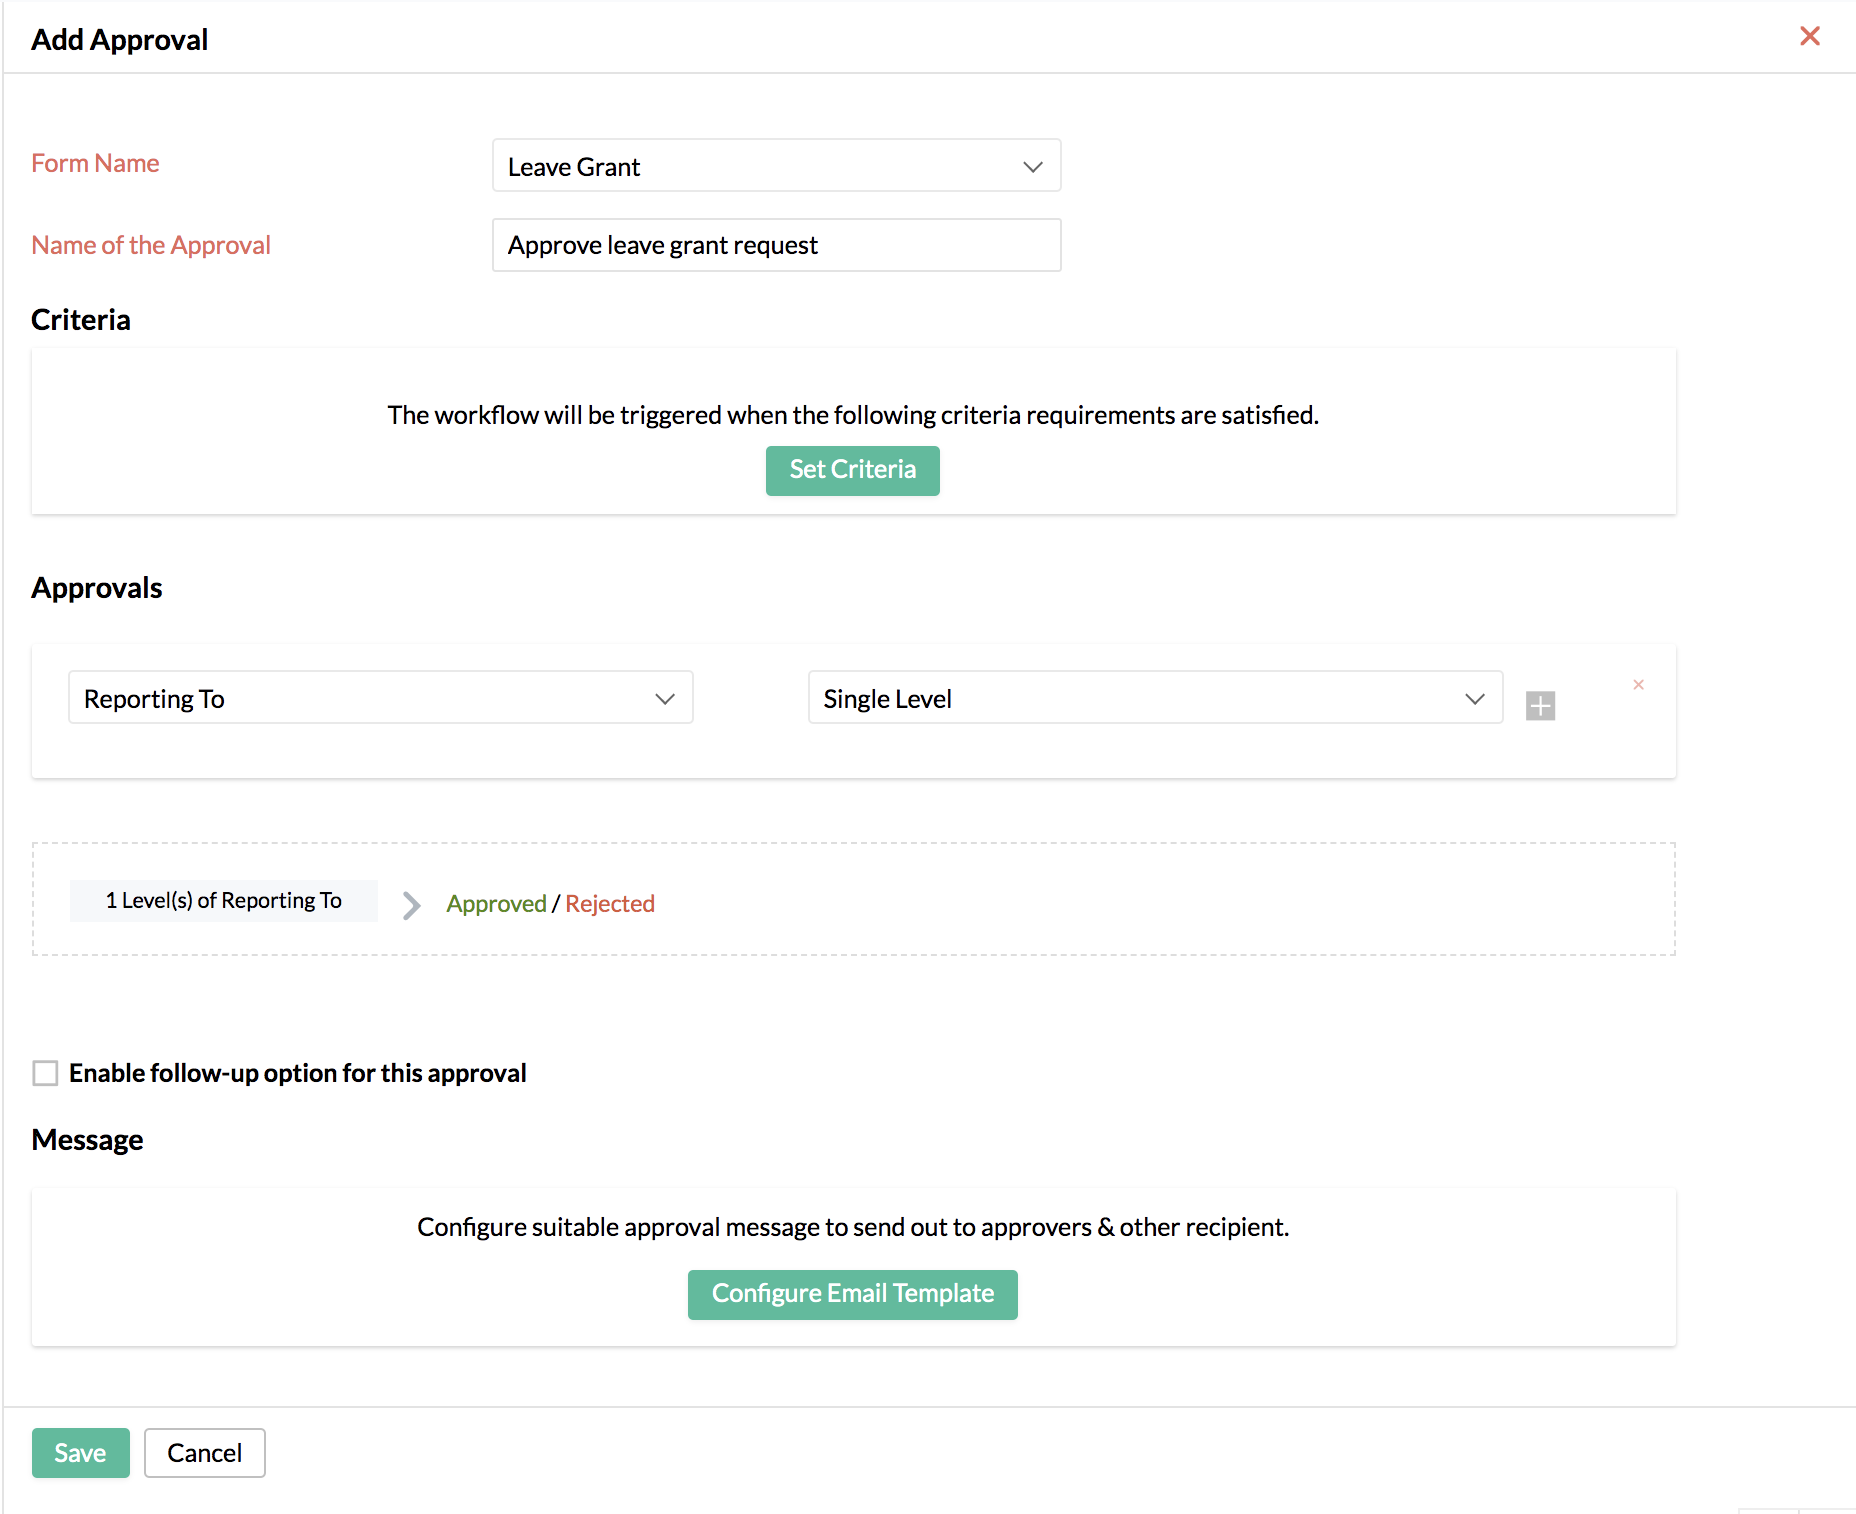
- Enter the name of the approval.
- Under Approvals, select the required options.
- Set additional criteria and configure emails to be triggered, if required.
- Click Save.
Applying for Leave Grant
An employee seeking leave through leave grant must first request for leave grant.
- Navigate to Leave > Leave Grant > Add Request.

- Select the applicable leave type.
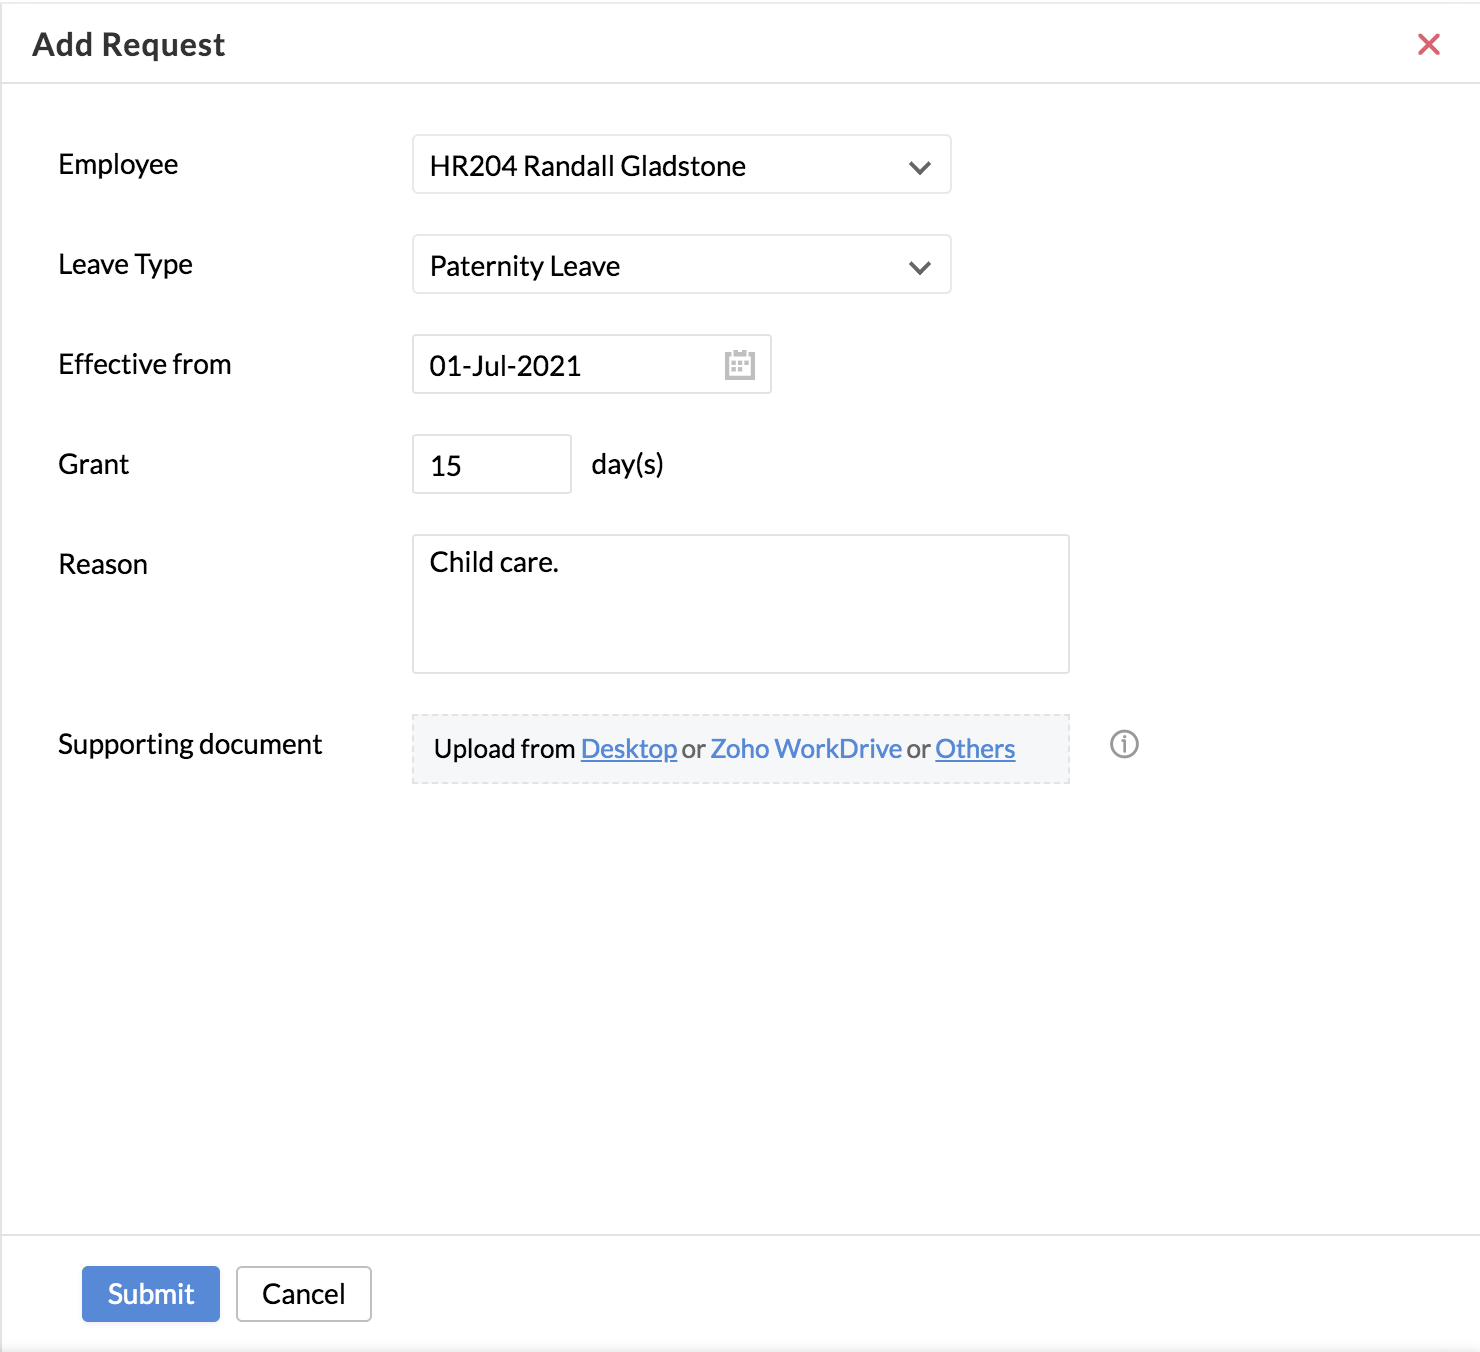
- Enter the Effective from date.
- Enter the number of days needed for this leave grant.
- Enter the reason for requesting this leave.
- Attach supporting documents as proof.
- Click Submit.
Based on what is configured in the organization, the leave grant request will go for approval or will be auto-approved if the request meets the set restrictions.
Usecase
An organization wants to create a day based maternity leave type with balance being credited based on leave grant approval.
The leave type will also have the following limitations:
- A minimum of 120 days and a maximum of 182 days are allowed.
- A request can be made only once a year.
- There must be a minimum of one year interval between two requests.
- If more than 150 days is requested, supported documents must be submitted.
- Up to 30 days for past date requests and up to 60 days for future date requests are permitted.
- The reporting manager must approve or reject the request.
Let us see how to configure a leave type for this scenario.
- Navigate to Leave > Settings > Leave Type > Add.
- Enter all the basic details of the leave type such as Name, Image and Code.
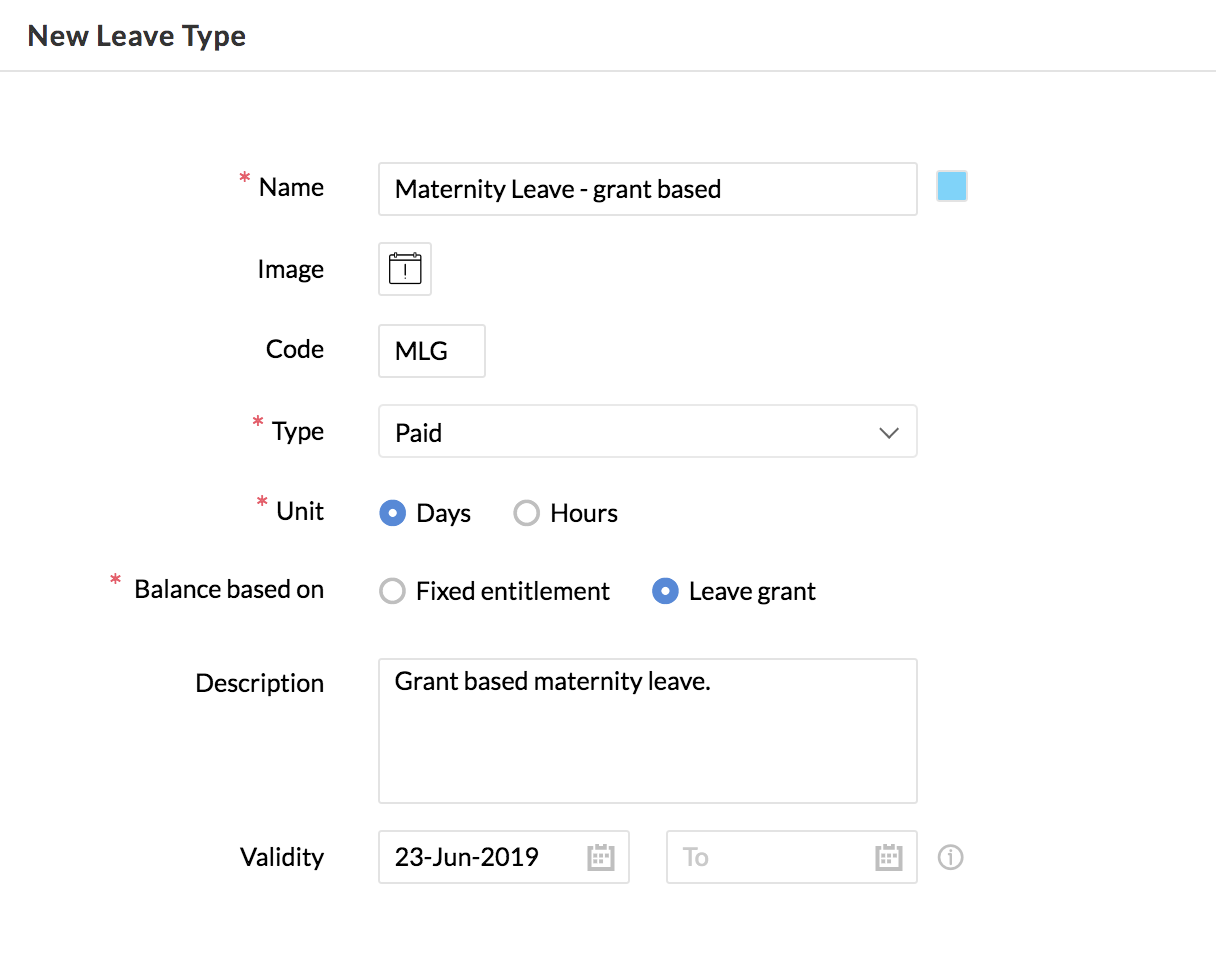
- Select Paid under Type.
- Select Days under Unit.
- Select Leave grant under Balance based on.
- Enter the description and validity of this leave type.
- Enter the time from when this leave is applicable.
- Under Entitlement, Leave grant and click Set leave grant restrictions.
- Enable and enter the required restrictions as stated above in the use case.
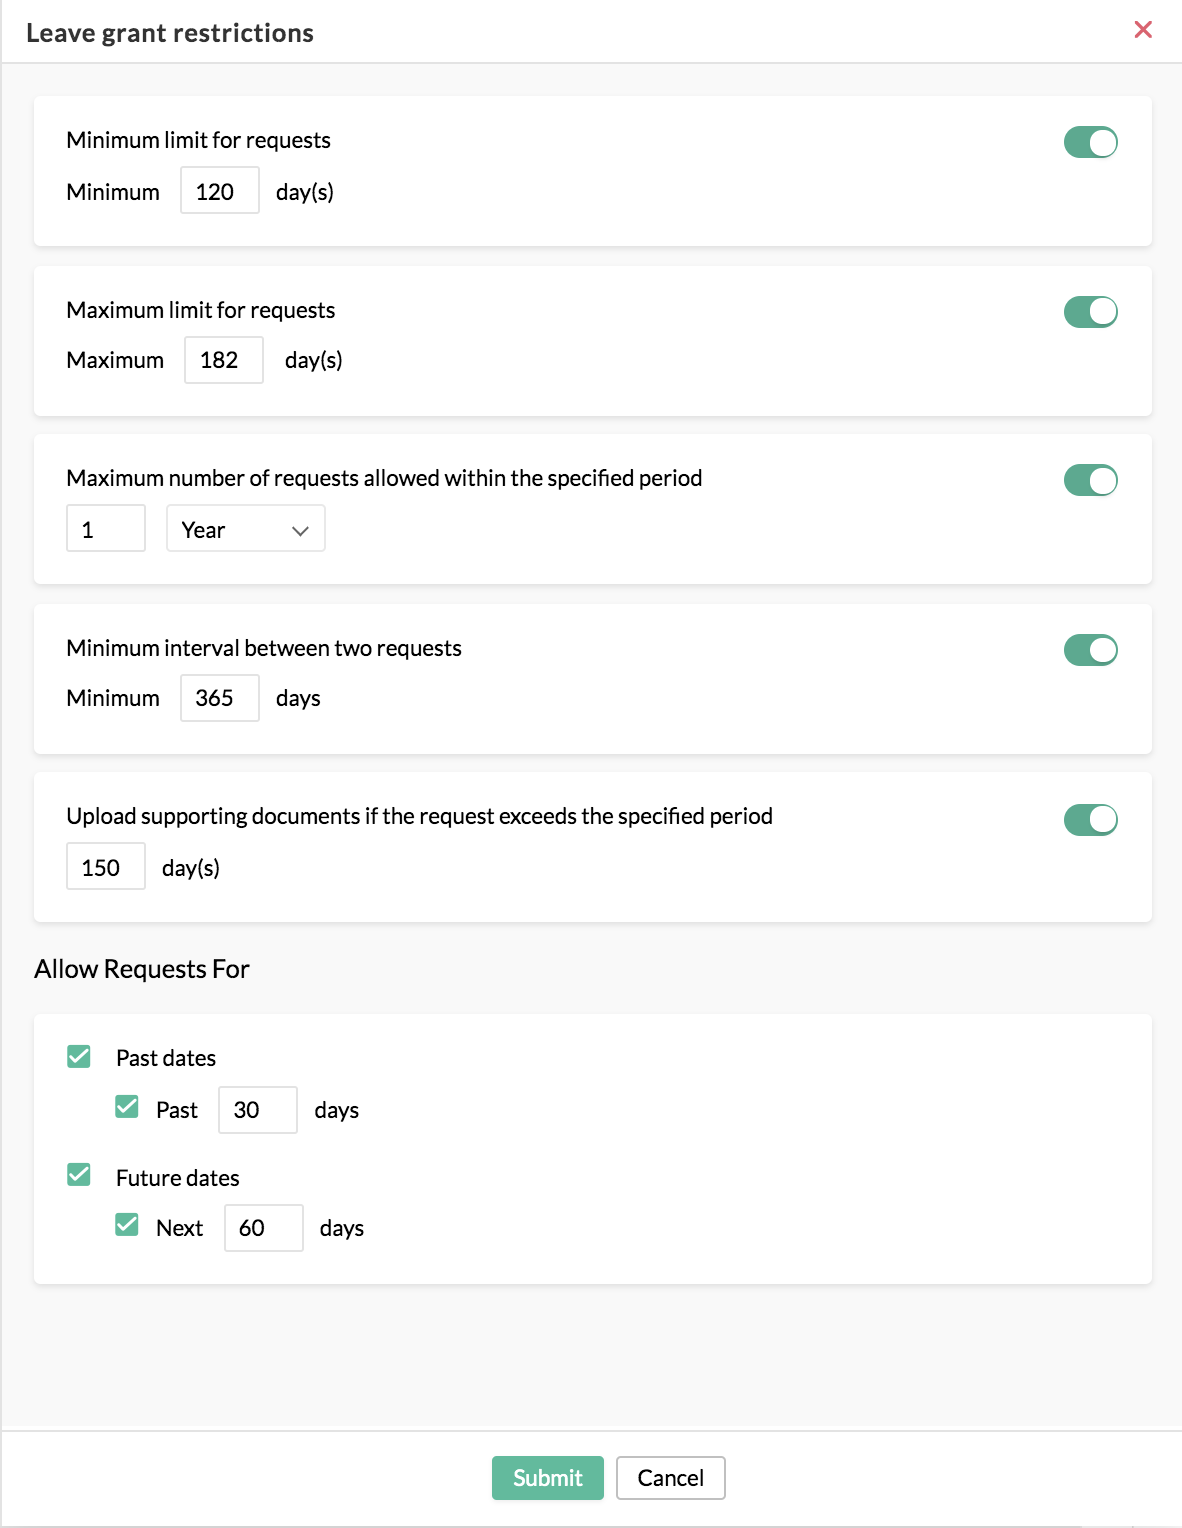
- Define Applicability, Restrictions and click Save.
Next, configure the approval process for the leave type.
- Go to Settings > Approvals.
- Select the Leave Grant form from the drop-down.
- Click Add Approval.

- Enter the name of the approval, Approve leave grant request in this case.
- Under Approvals, select Report To, Single Level.
- Set additional criteria and configure emails to be triggered, if required.
- Click Save.

