Settings
General Settings
- Inclusion of weekends or holidays as leave
- Compensatory off
- Permissions
- Payroll report settings
- LOP report settings
- Export settings
- Leave request settings
- Leave cancellation settings
- Leave calendar sync
- Bradford score settings
- Holidays settings
Inclusion of weekends or holidays as leave

This option can be used to define the number of consecutive days after which, intervening holidays or weekends will also be considered as leave. This option is especially useful when you want to club more than one leave type for this inclusion.
Scenario
An employee has applied for Annual leave for Thursday and Friday and for Casual leave on the following Monday and Tuesday. If you want to apply this restriction in such cases,
- Set 2 as the number of consecutive days, after which weekends or holidays are to be considered as leave.
- Add Annual leave and Casual leave under the applicable leave types.
Configure the number of days based on the common leave patterns that occur in your organization to restrict employees from taking excessive leave.
When employees work on a weekend or on holidays, they will be able to mark the days worked to be taken later as compensatory off, provided the organization allows it. Learn more about compensatory off settings.
Define access of the user availability report here. Select the appropriate option from the drop-down.
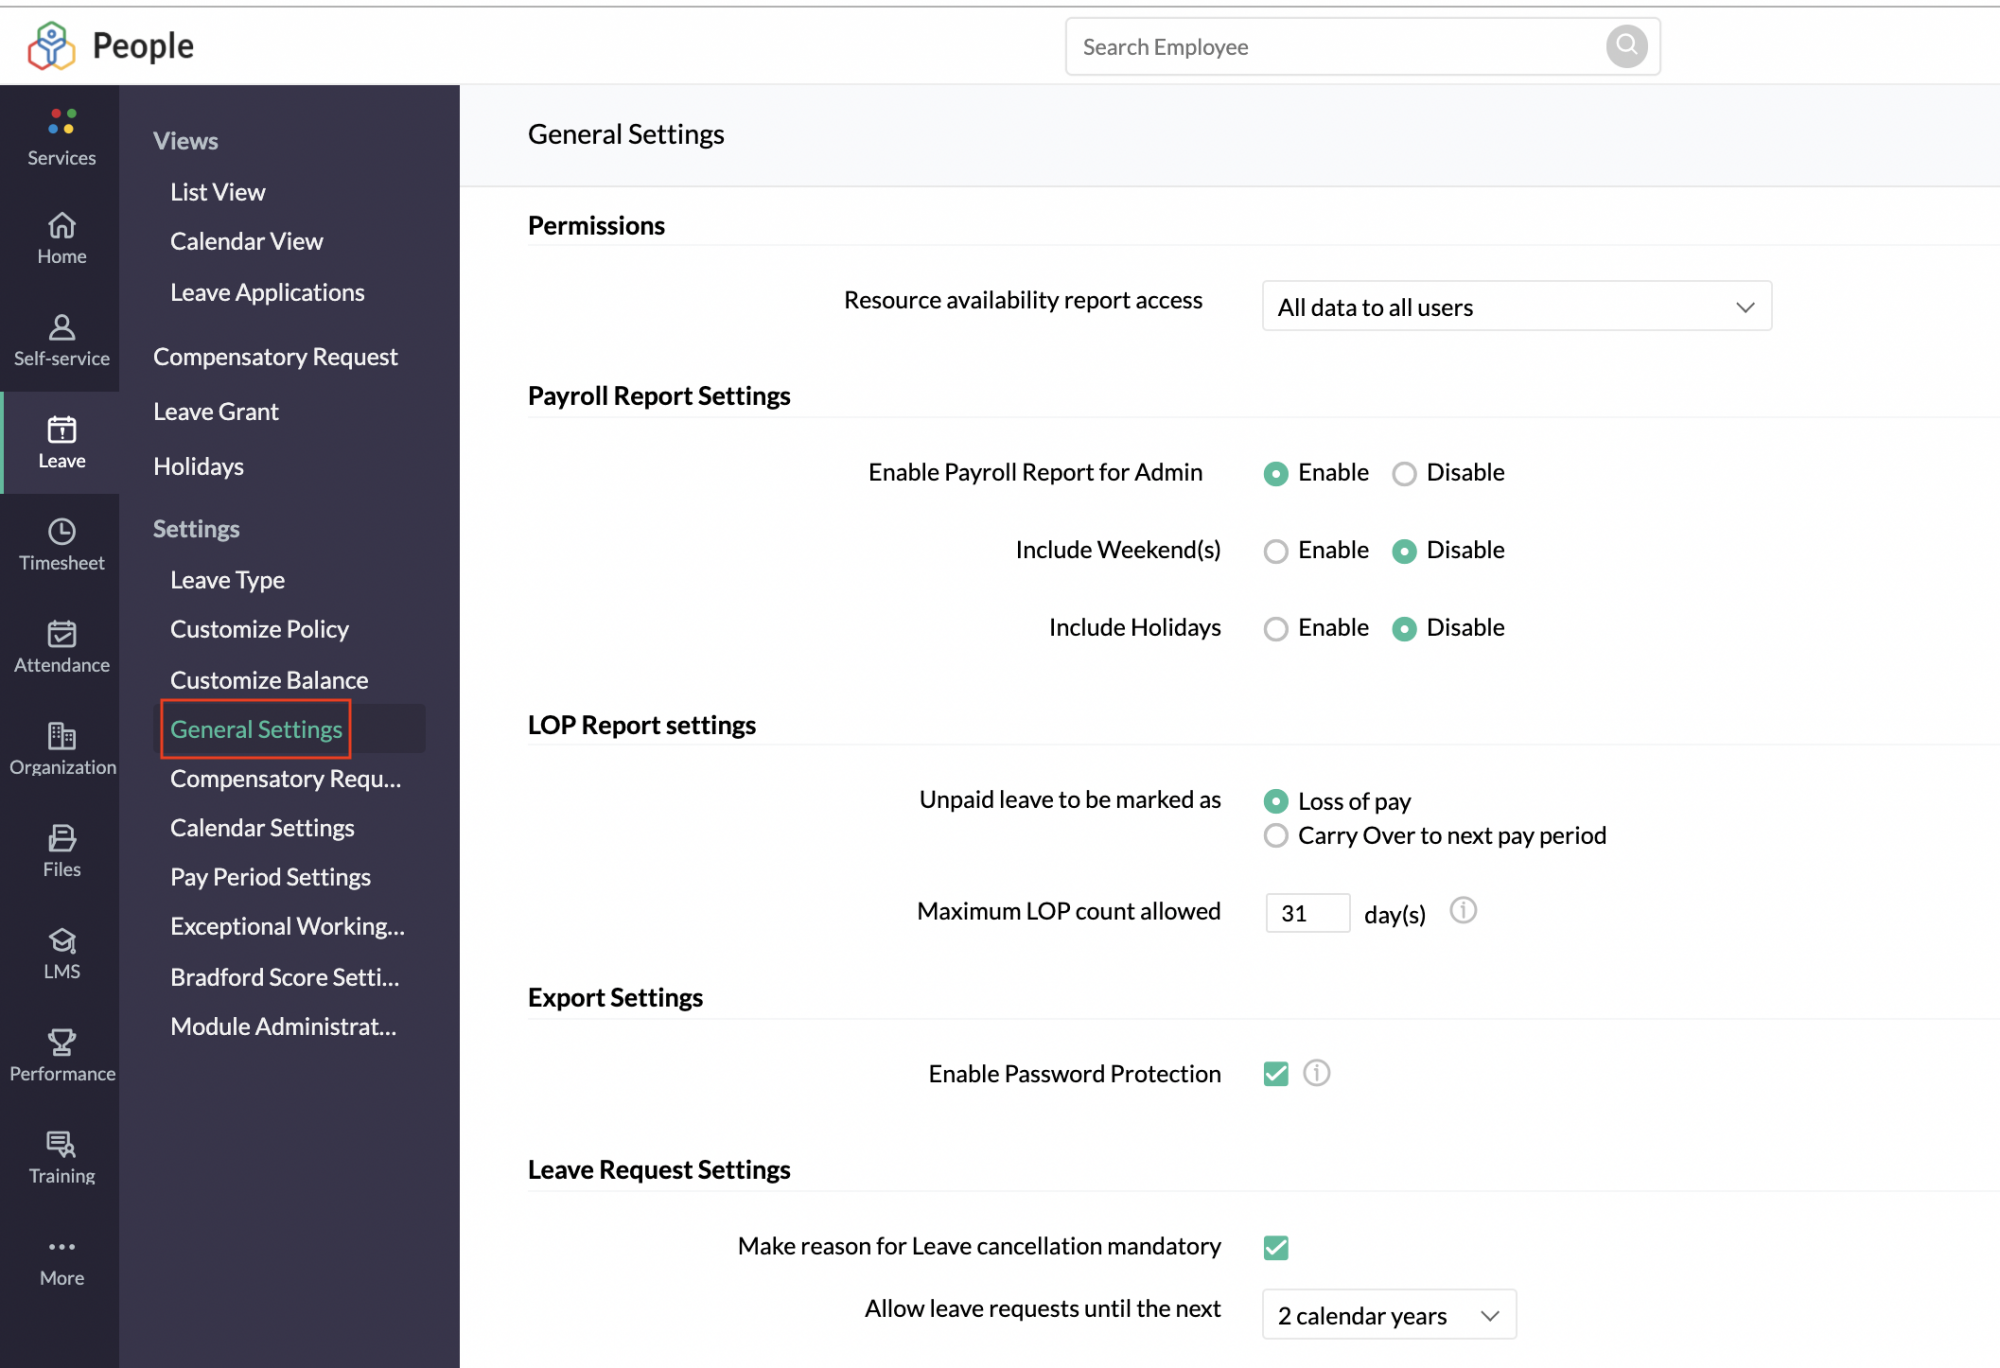
Define if you want to enable the payroll report for the admin.
If yes, select if you want to include holidays and weekend while payroll processing, as part of your organization's payroll policies. If included, holidays/weekends will be included as payable days.
The settings done here will get reflected in the Payroll Report under Leave > Reports > Payroll Report.
Note: These settings will be visible only for users who have disabled or who have not purchased the Attendance service. If you are only using Leave to process payroll, you can enable these settings to include weekends and holidays while processing payroll. In case you are using Attendance to process payroll, you can either keep the setting unchanged or disable it as well.
Under LOP Report Settings, you can specify whether to mark unpaid leave as either Loss of Pay or Carry Over.
Loss of pay : If Loss of pay is selected, enter the Maximum LOP count allowed. Any unpaid leave exceeding the count given here will be captured as Carry Over. The default allowed count is the no of days in the Pay Period.
Now the unpaid leave of your employees will be marked as Loss of Pay and will be reflected as Loss of Pay in the LOP report also.
Carry over to next pay period: If Carry over to next pay period is selected, then the unpaid leave of your employees will be marked as Carry over and will be reflected as Carry Over in the LOP report also. If required, you can manually edit the Loss of Pay based on the carry over data, under Leave > Reports > LOP Report.
Note: The default allowed count is the total no of days in the Pay Period. For example, if the total no of days in the pay period is 28 days and the maximum LOP count allowed is 31, then the maximum LOP count marked by the system will be total no of days in the Pay Period i.e 28 days.
Define if you want to password protect the data when you are exporting it. If enabled, a password will be sent to your mail, which must be entered to view the exported information.
To define a specific number of calendar years up to which leave requests can be allowed, use Allow leave requests until the next and select from options 1 calendar year, 2 calendar years or 3 calendar years.
Configure permissions related to who can cancel leave requests and specify if a reason is mandatory for cancelling a leave request
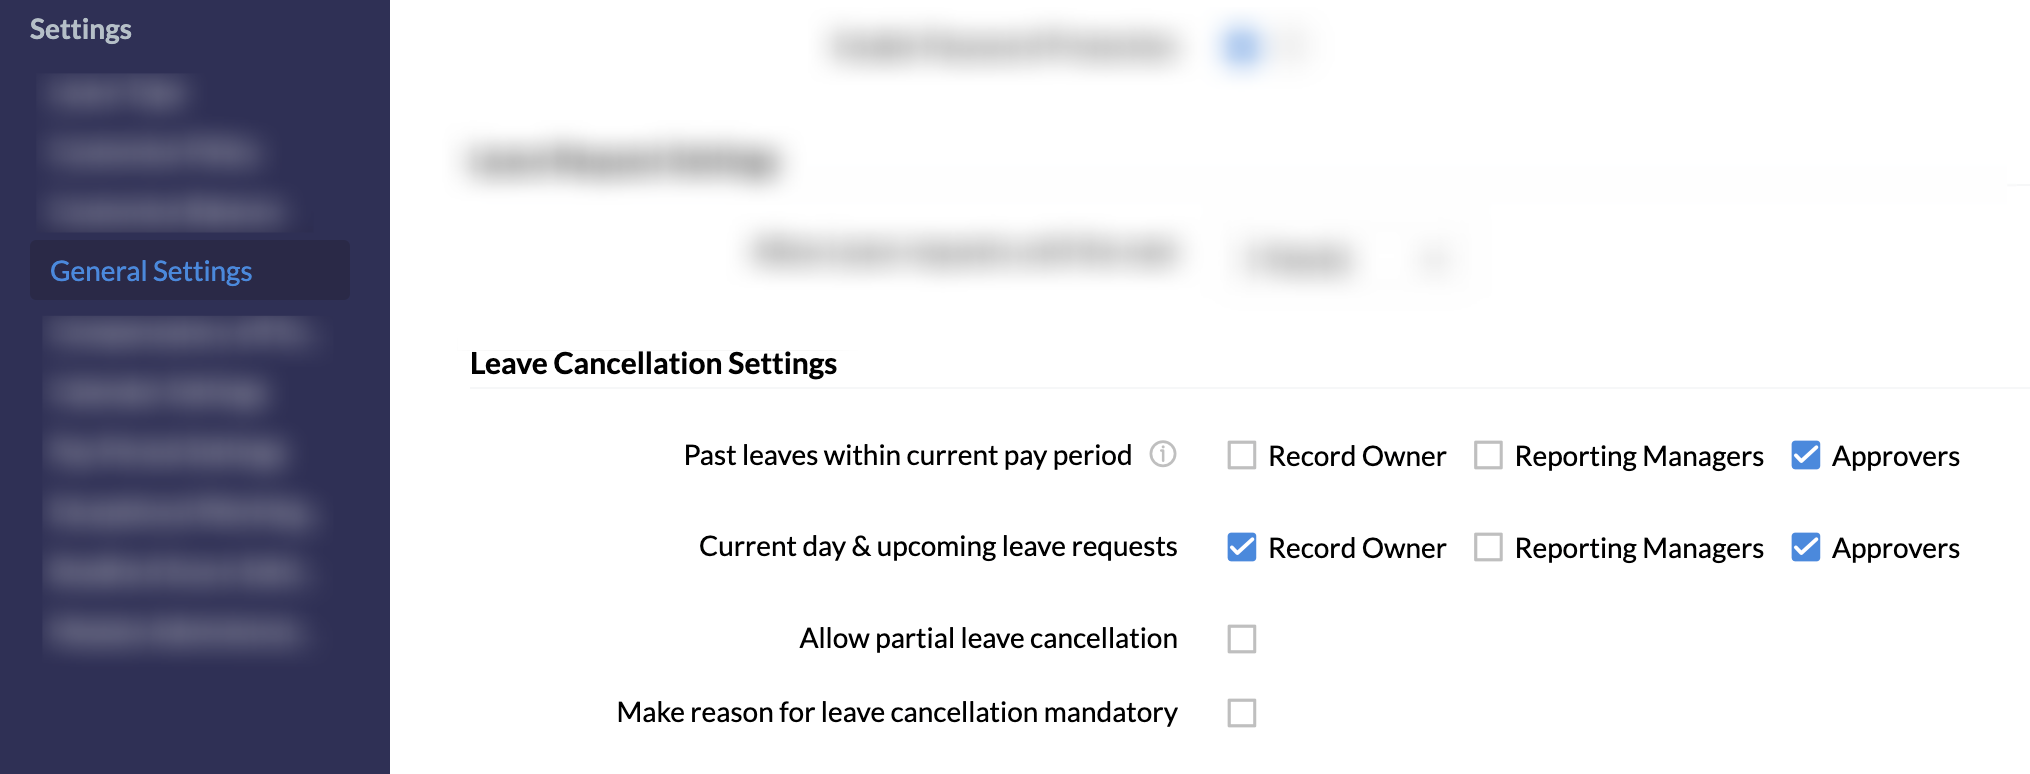
Some important points to note regarding leave cancellation
- Navigate to Leave > Settings > General Settings and scroll down to Leave Cancellation Settings section to access these settings.
- Grant leave cancellation permission to the record owner, reporting managers, and approvers by enabling the corresponding checkboxes.
- When approvers are permitted to cancel leave requests, the permission is valid for all level approvers who have already approved the leave cancellation request.
- If you want to allow employees to cancel leave requests partially, then enable Allow partial leave cancellation
- If a leave request is yet to be approved, it can be canceled by the employee. Partial leave cancellations are only possible for approved leave requests.
- Both full and partial leave cancellations will comply with the past/current/future leave cancellation settings defined.
- If a reason is to be made mandatory for leave cancellation, enable the Make reason for leave cancellation mandatory checkbox.
- By default, administrators can cancel any leave requests.
- If the organization is not following a pay period, then permitted employees can cancel past leave requests within the current month.

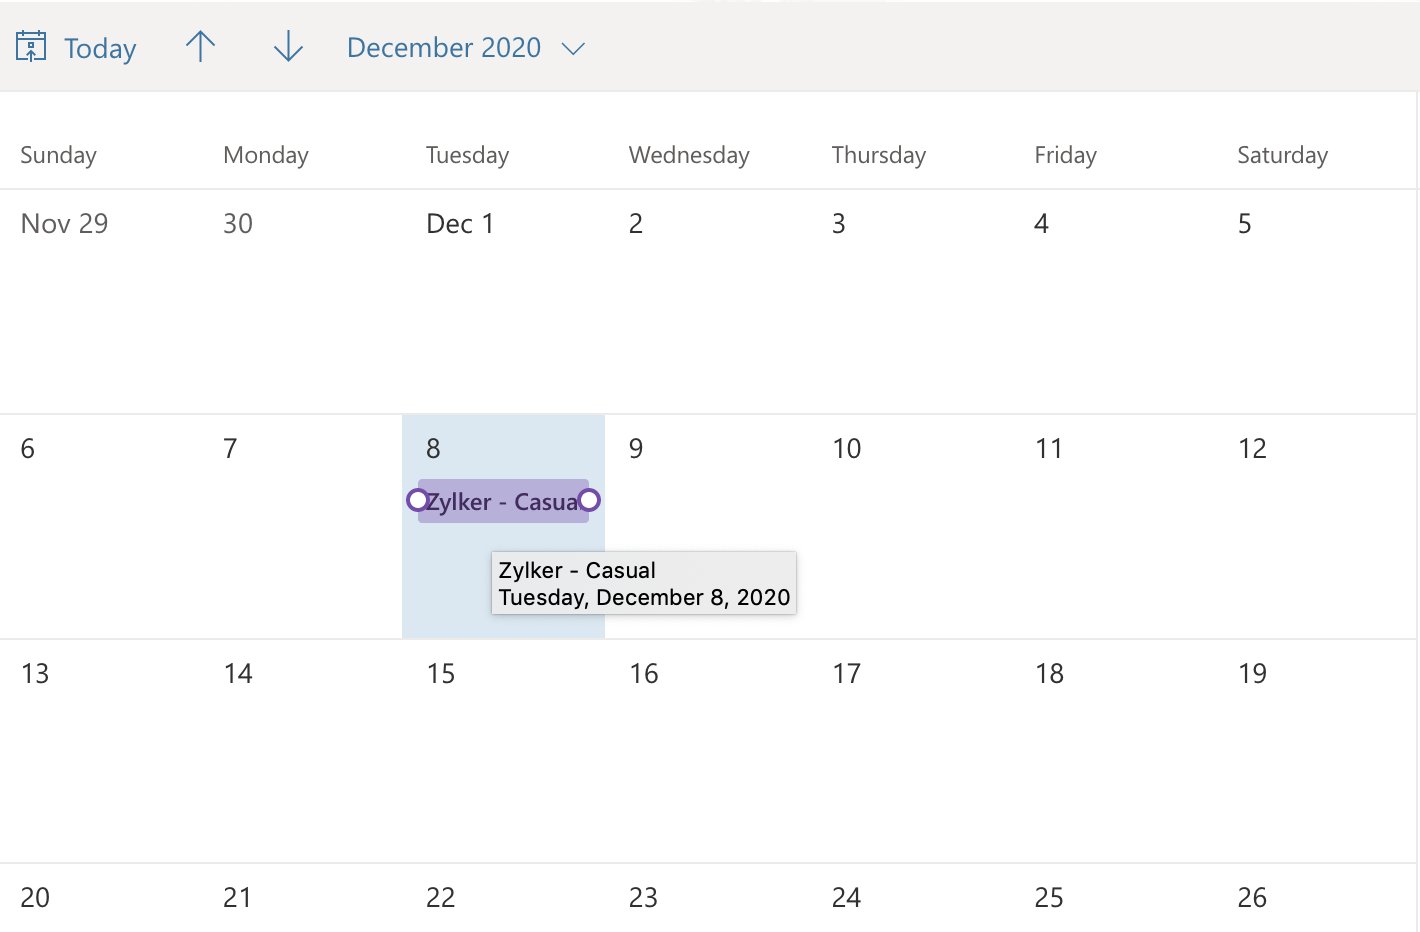
Select the format in which you want the leave that are synced to be displayed in Google and Office365 calendar. For example, if Employee Name - Leave Type name is selected, this is how it will be displayed:
Learn more about Bradford Score.
Customize the holiday reminder email by clicking Customize email template.

The default template will be shown in the popup.
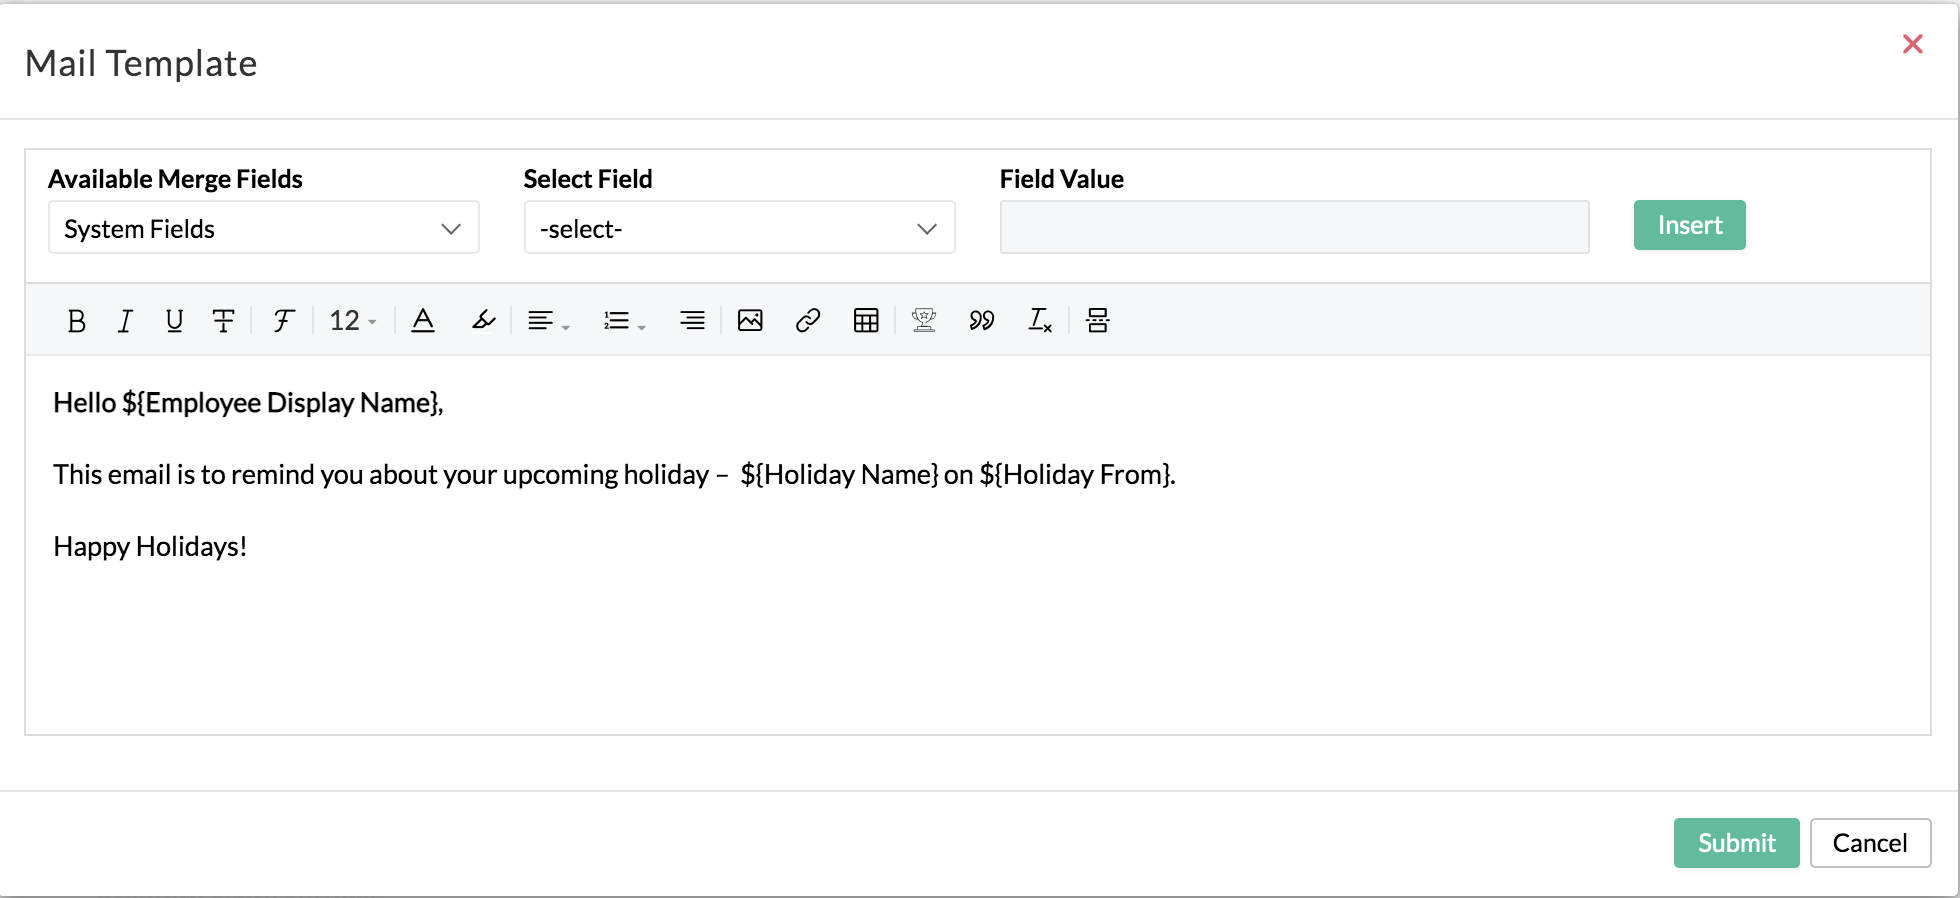
Make the necessary changes to the template and click Submit.
Calendar Settings
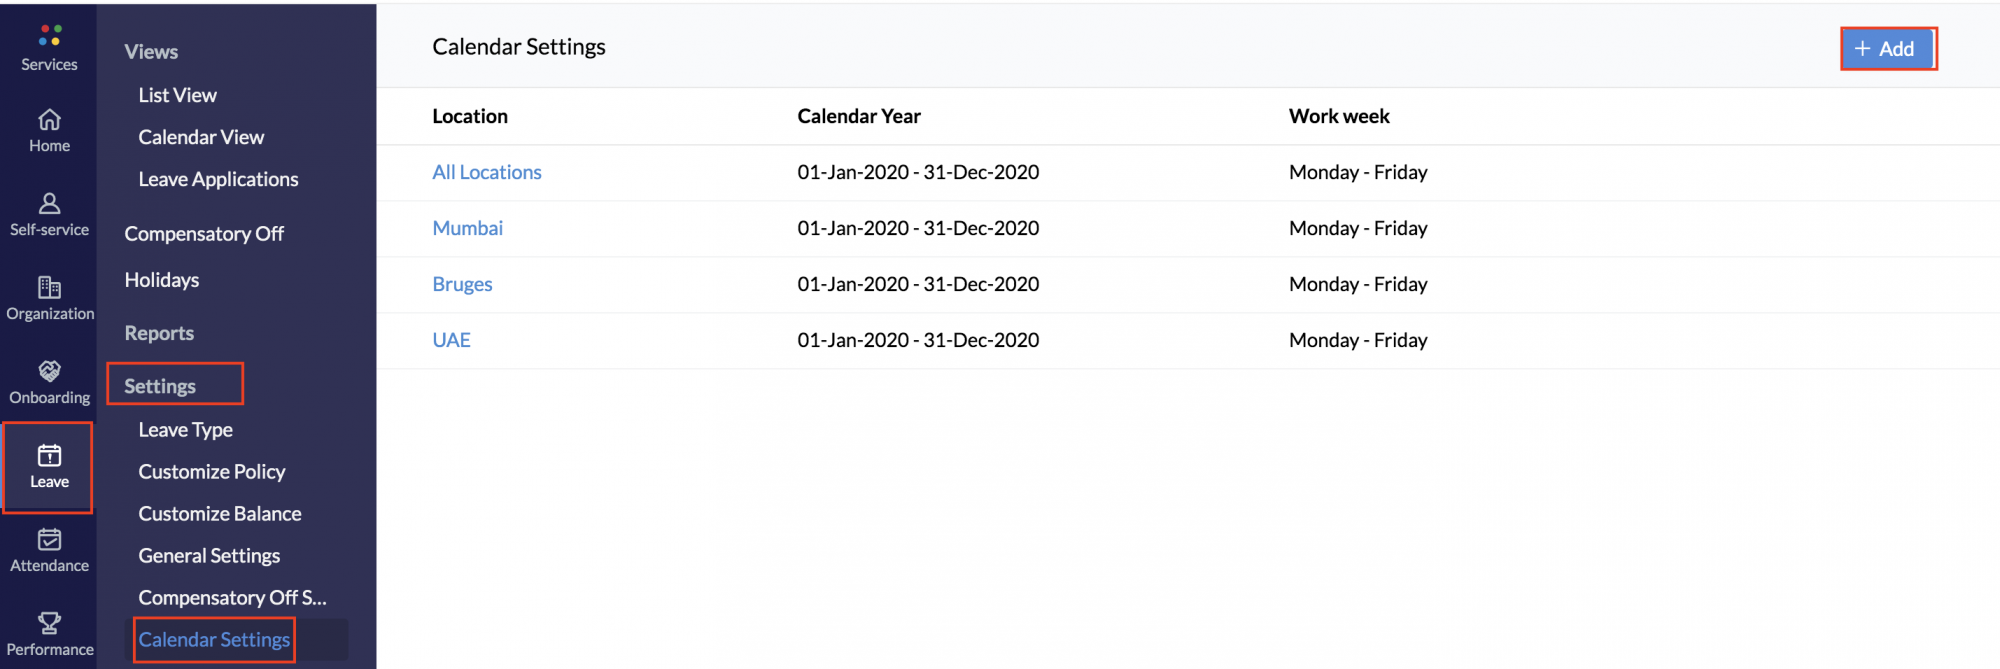
These settings are crucial as they help you define the work days, weekends, year and statutory weekends of your organization. You can setup multiple calendar settings for each geographical location of your organization.
To configure the calendar settings for your organization,
- Go to Leave > Settings > Calendar Settings > + Add.
- Select the location the calendar settings apply for, from the drop-down at the top center of your screen.
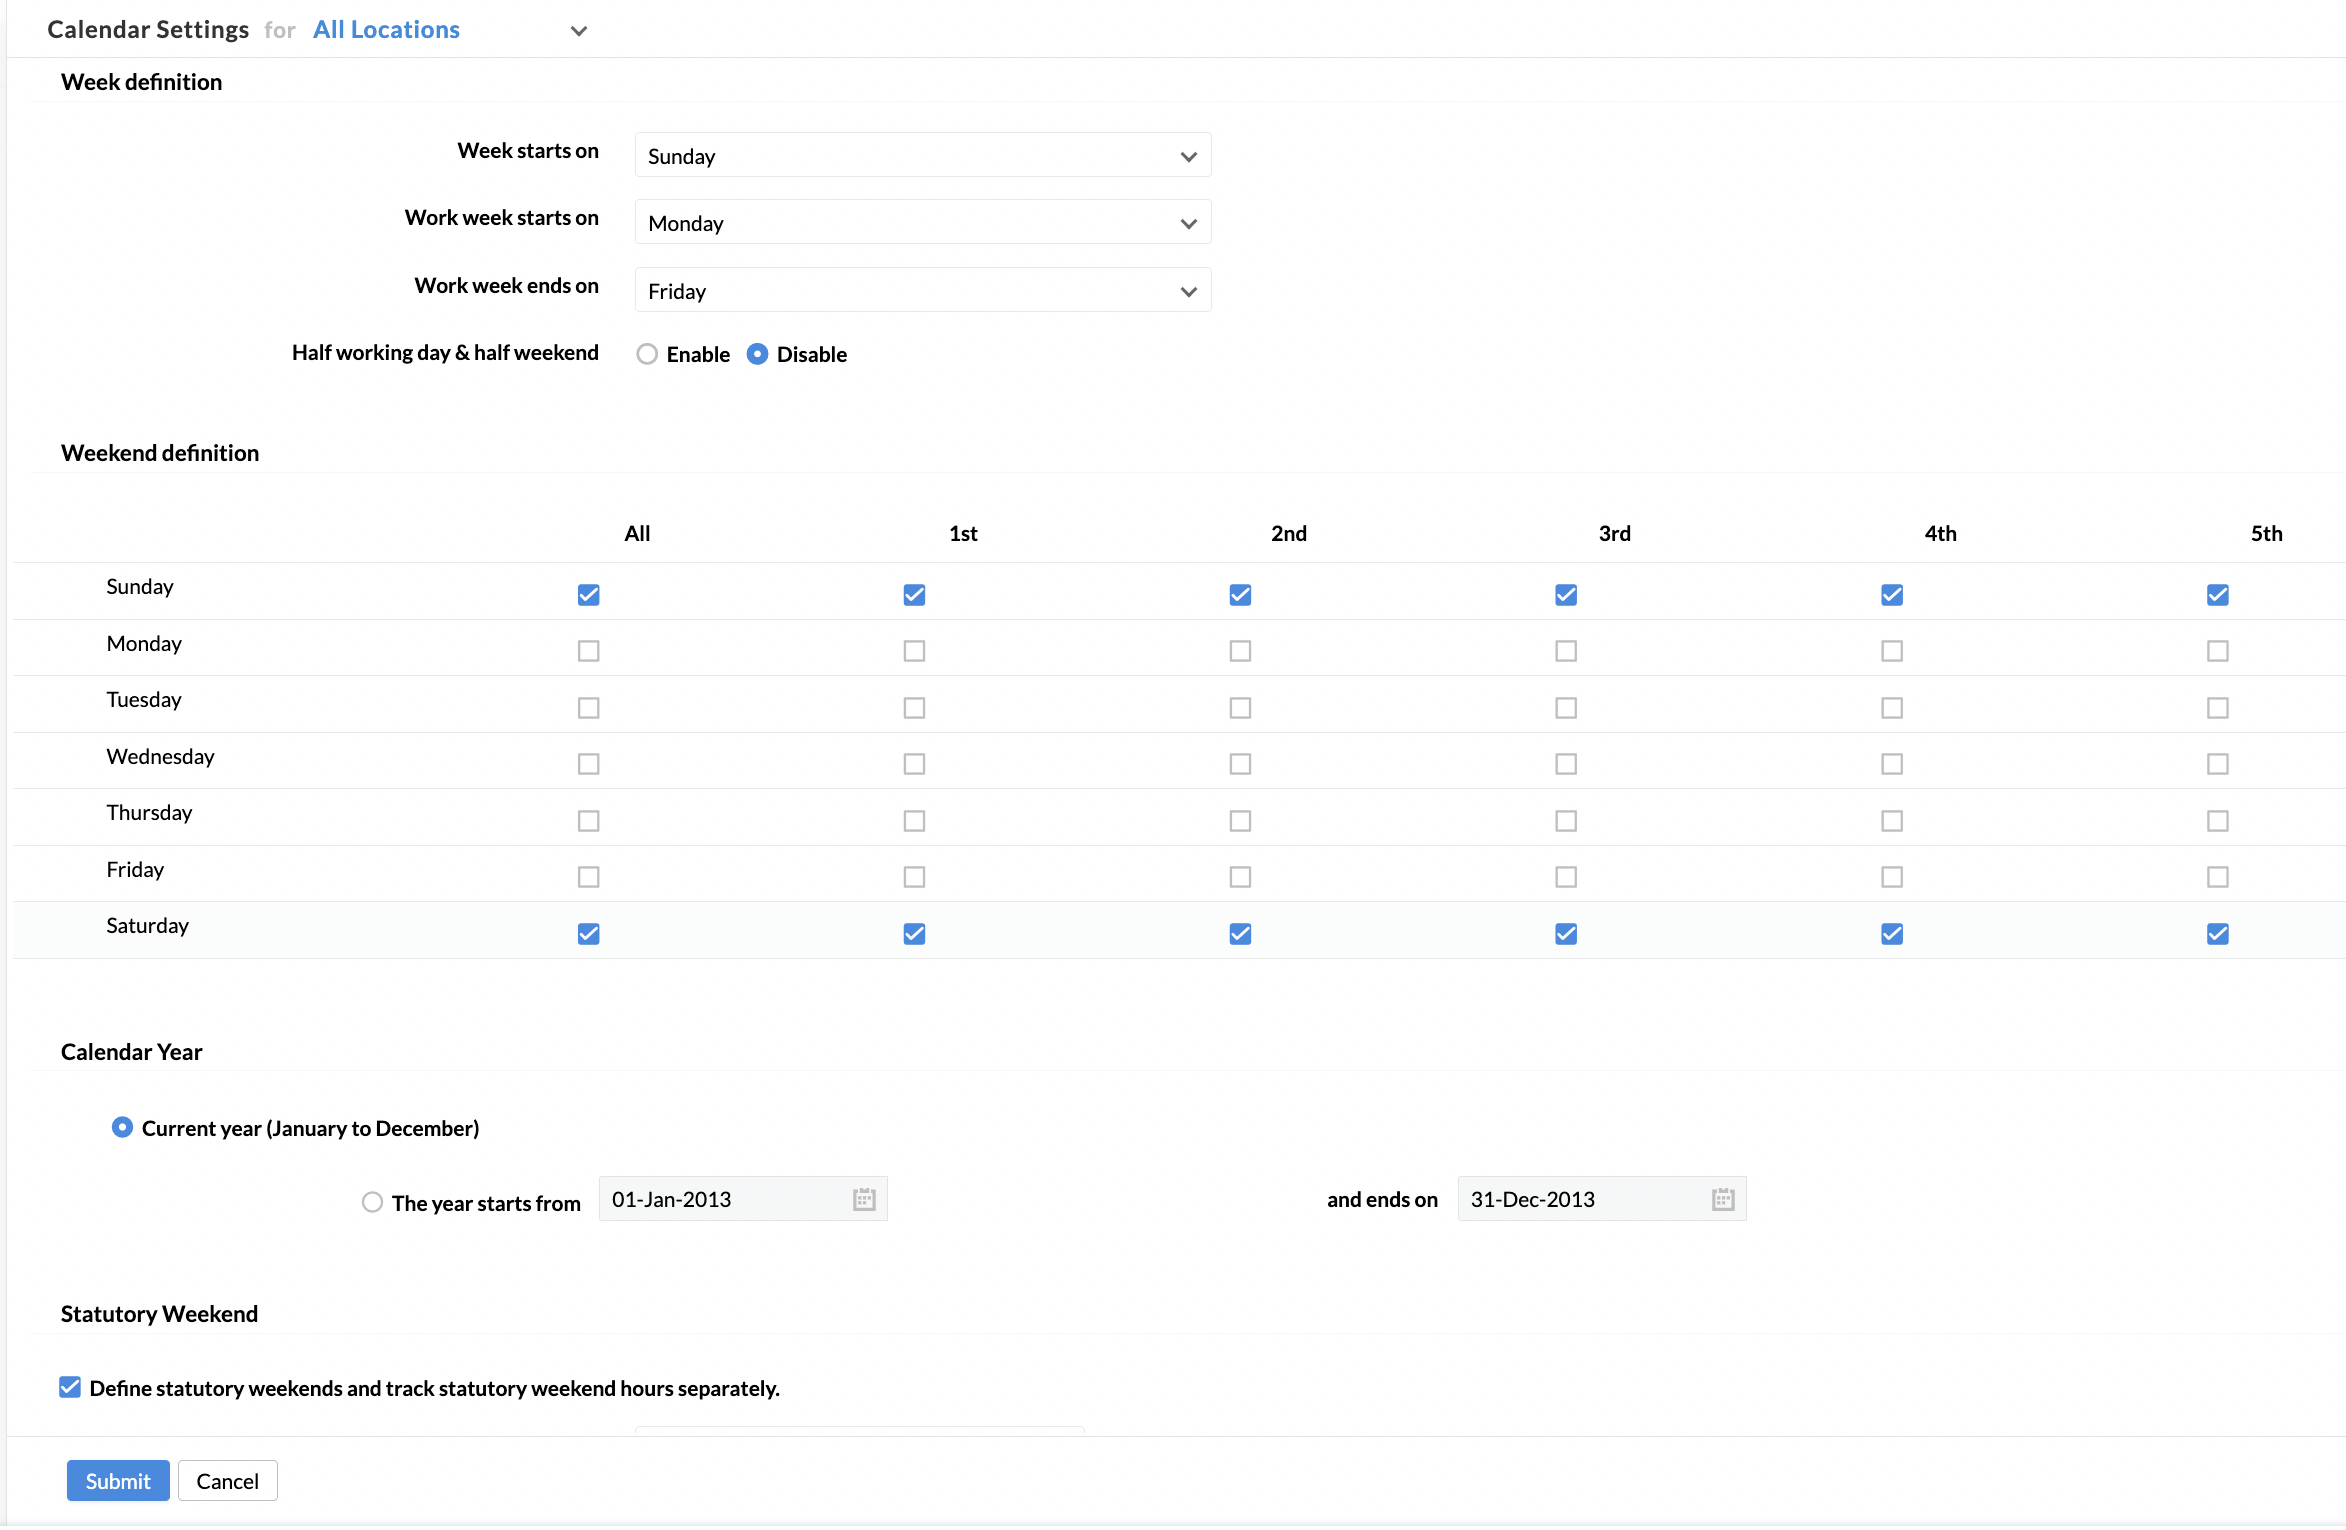
- Under Week definition, select the days when the week starts, when work week starts, and when work week ends, respectively,
- Under Weekend definition, check the days you want to consider as weekends.
- Under Calendar Year, select the applicable year format. If you want it to be January – December, select Current year ( January to December), else select your own period in the second option.
- Under Statutory Weekend, select the specific days within the defined weekend (Sunday in this example).
- Click Submit.
Half working day & half week end
If you wish to have half working days during weekends, wherein the first or second half of a weekend day can be a half working day then enable Half working day & half week end feature.
For example, Here Sundays are defined as weekend (full day) whereas Saturdays are half working days as the second half is defined as weekend.

Note 1: Weekends can be defined within shift settings or within calendar settings as well.
Note 2: When defining weekends, you have the option of specifying if it is a full day weekend or a half day (by selecting a specific half).
Note 3: When defining weekend, if 1st half or 2nd half is selected (half weekend), then the other half is treated as a working day
Note 4: This feature does not affect grace period settings.
Note 5: If strict mode is used in attendance, the minimum hours required for a day requirement is halved when a particular day is a half weekend.
Statutory weekend
Statutory weekend is a subset of the defined weekend, that you define to be tracked separately. The days that do not fall under the defined statutory weekend are considered as non-statutory weekends.
If you have defined Sundays and Saturdays as weekend and Sunday as a statutory weekend, then Saturday becomes a non-statutory weekend.
Defining a statutory weekend within the defined weekend helps in the following cases:
- To differentiate pay given on statutory and non-statutory weekends.
- To process payroll differently for statutory and non-statutory weekends.
- To track work done on statutory weekends separately in reports.
- To calculate overtime differently for statutory and non-statutory weekends.
To include or exclude statutory and non-statutory weekends as part of pay days/hours calculation, go to Attendance > Settings > General Settings > Pay Days/Hours calculation.
Pay Period Settings
Creating a pay period can help you define set timelines for your payroll to be processed and for the payroll report to be generated in the set periodicity. Learn more about Pay Period Settings.
Exceptional Working Day
Using this option, a day in a weekend can be declared as an exceptional working day for a specific set of employees. An exceptional working day can be declared, as the name suggests, due to exceptional circumstances such as meeting an important project deadline. In such a case, the exceptional working day can be declared only for those applicable employees.
To add an exceptional working day,
- Go to Leave > Settings > Exceptional Working Day > +Add.
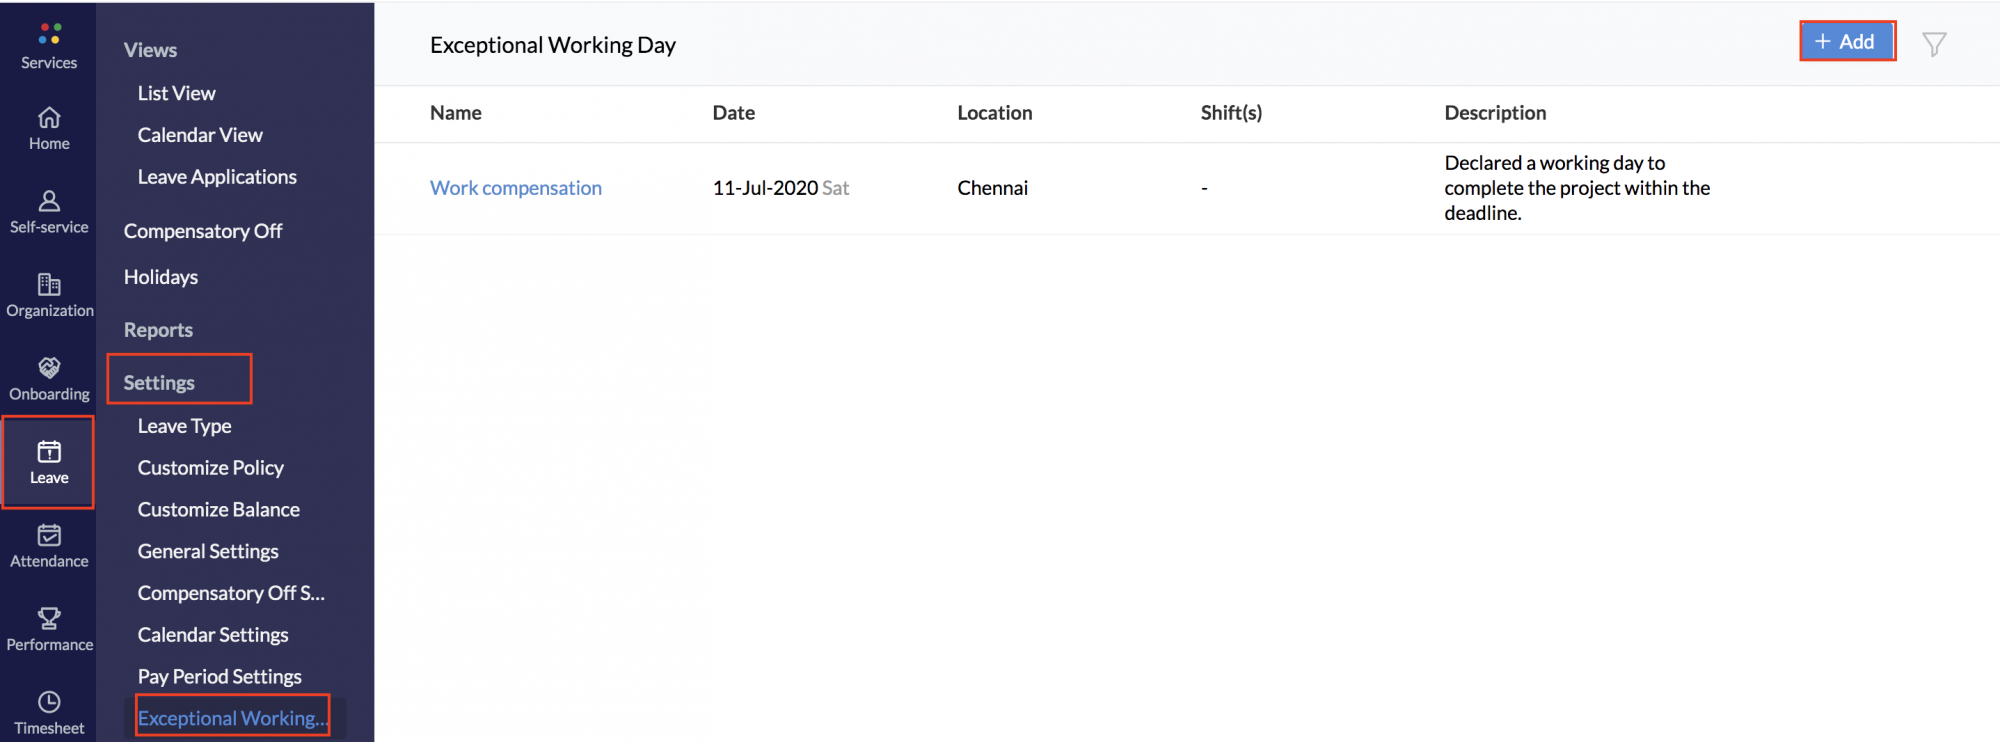
- Give a name for the day you are declaring as exceptional working day.
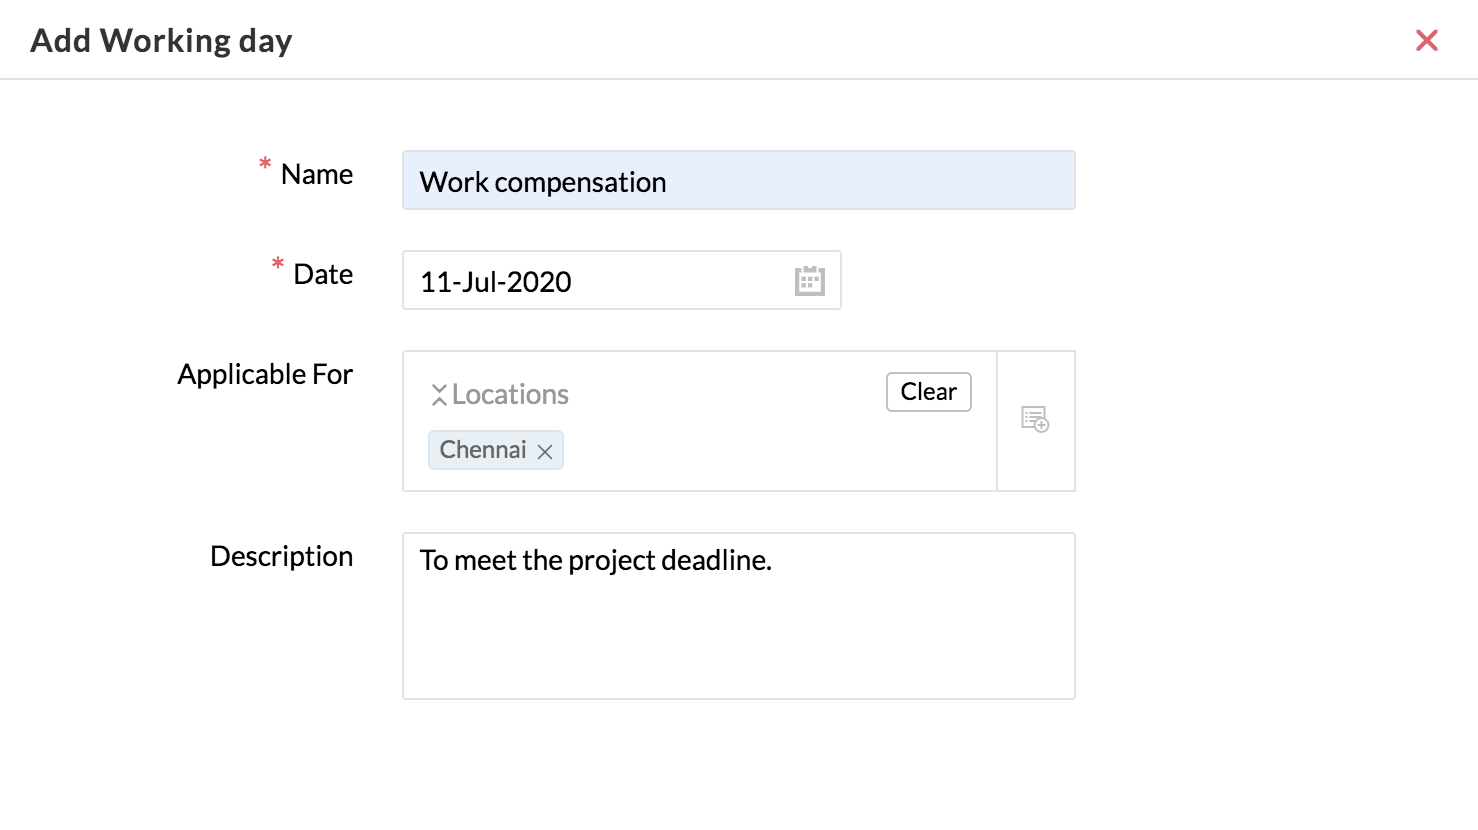
- Select a date. The date you select must fall on a weekend.
- Select for whom this date is applicable for based on shifts or locations.
- Give a description to explain why this day is being made a working day, if required.
- Click Submit.