Connections
Connections is a simple and secure authentication mechanism to connect your Zoho People account with a third-party application. Connections can be used to invoke any third-party applications’ REST APIs and to get access to your authenticated data.
Technical Details
- There are 3 modes of authentication, basic, OAuth 1.0 & OAuth 2.0.
- Administrator privilege is required to use Connections.
- Rest API and Deluge script knowledge is essential.
Creating a connection using Default Services
There are default services that are pre-configured by Zoho. These services are listed under Settings > Connections > Services > Default Services. You can use these services to create connections.
Before any connections are created, you will first see this screen:
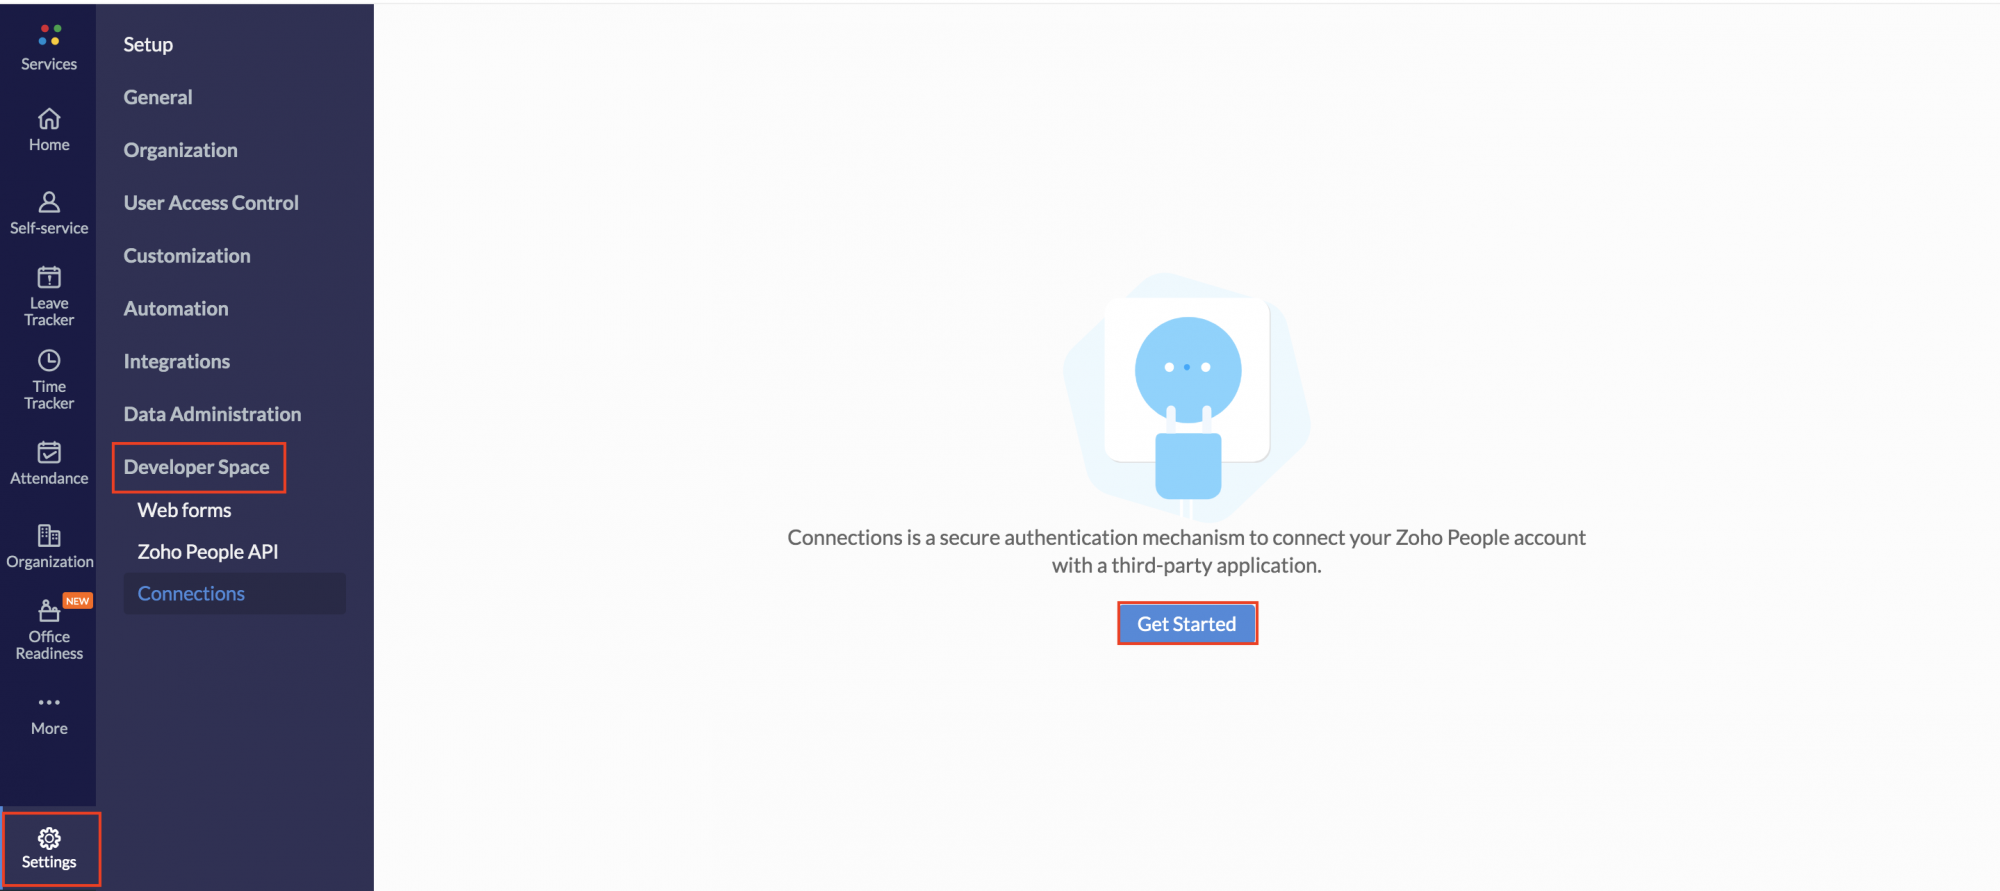
Click Get Started.
Click Create Connection in the next screen.
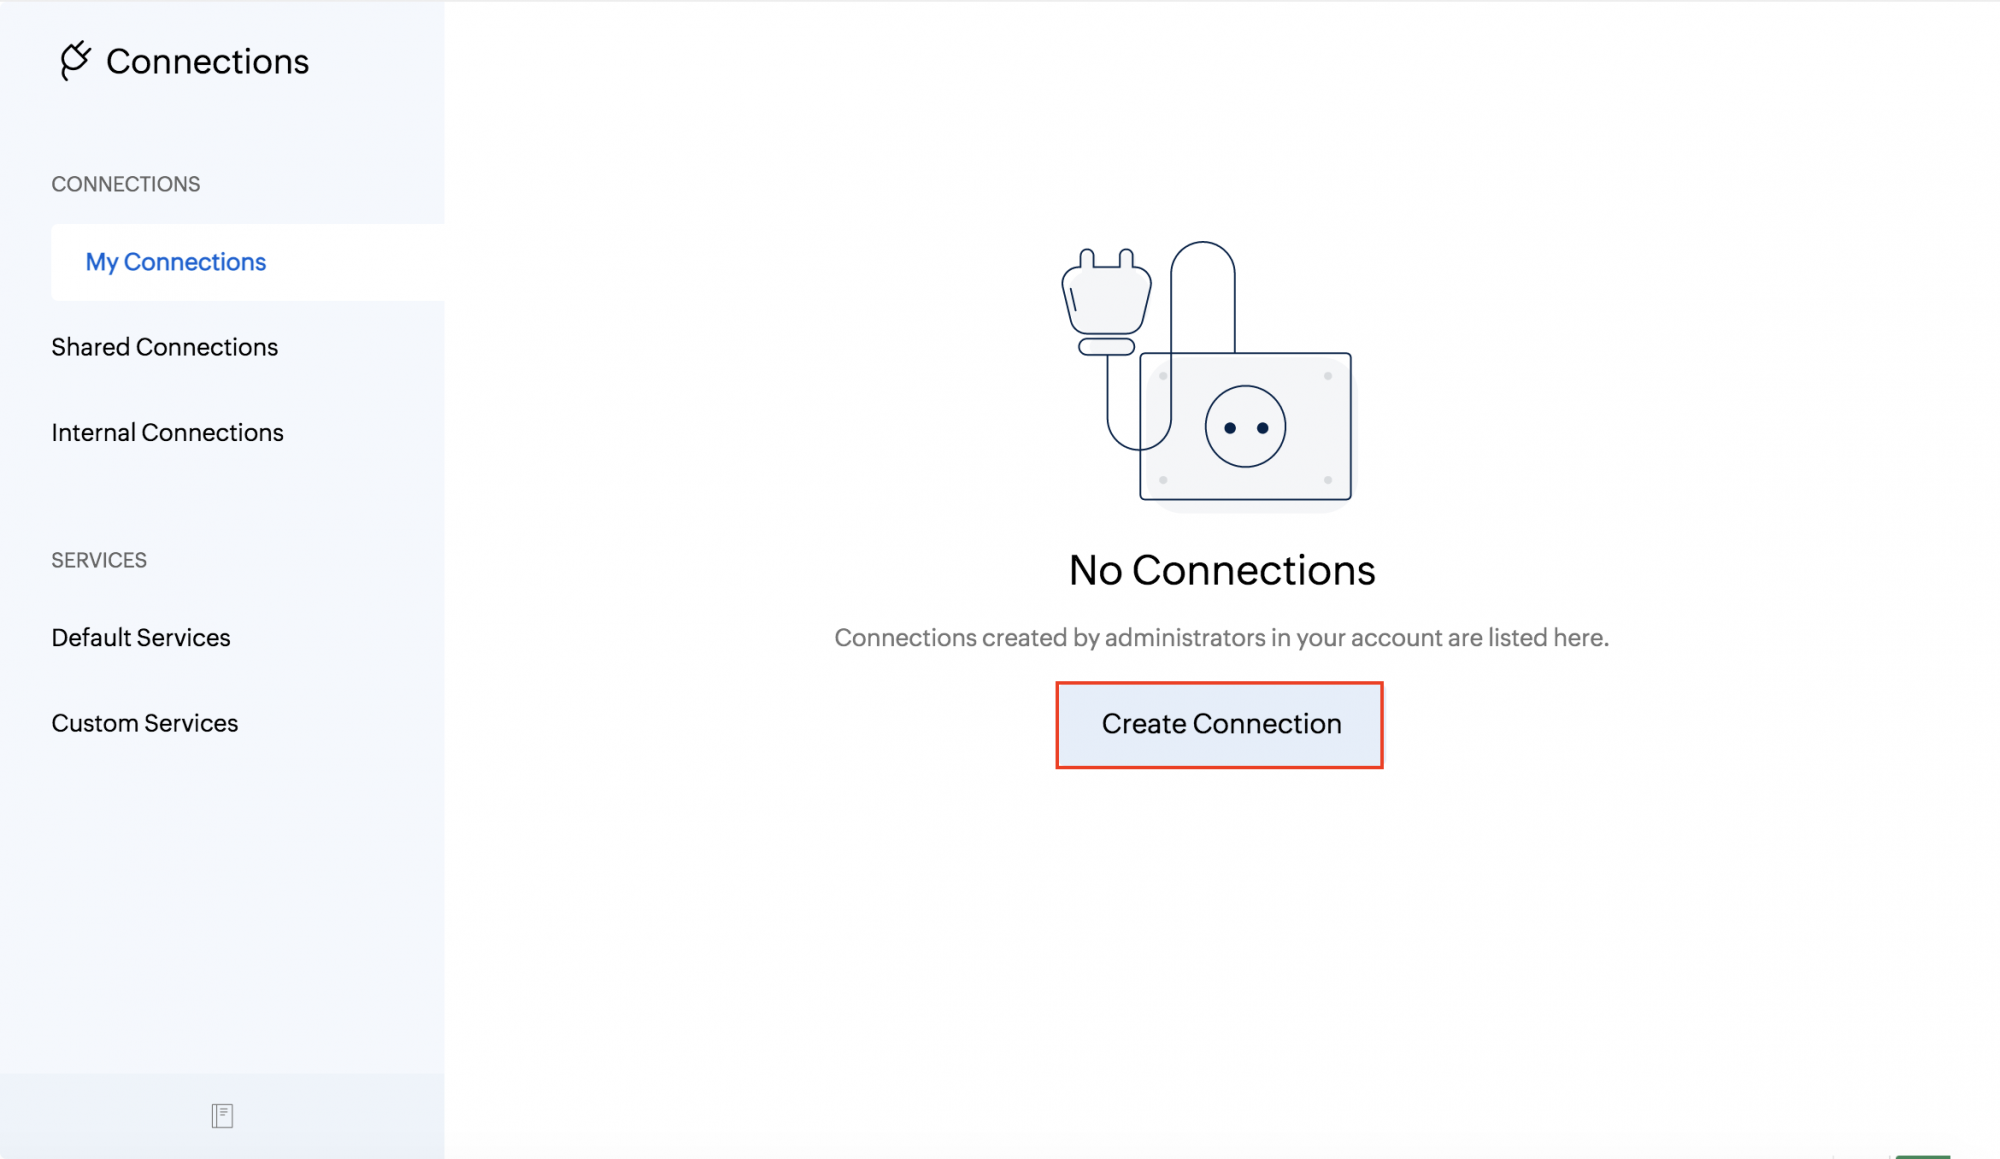
The Pick your Service tab contains the list of available connections that are ready to use. You can select an existing connection or select a connection you created from the Custom Services tab. The connections are to be used by invoking them within functions.
Let's have a look at how to use a connection within the function
- Go to Settings > Developer Space > Connections > + Add Connections
- Select the required Connection from the Pick Your Service tab.
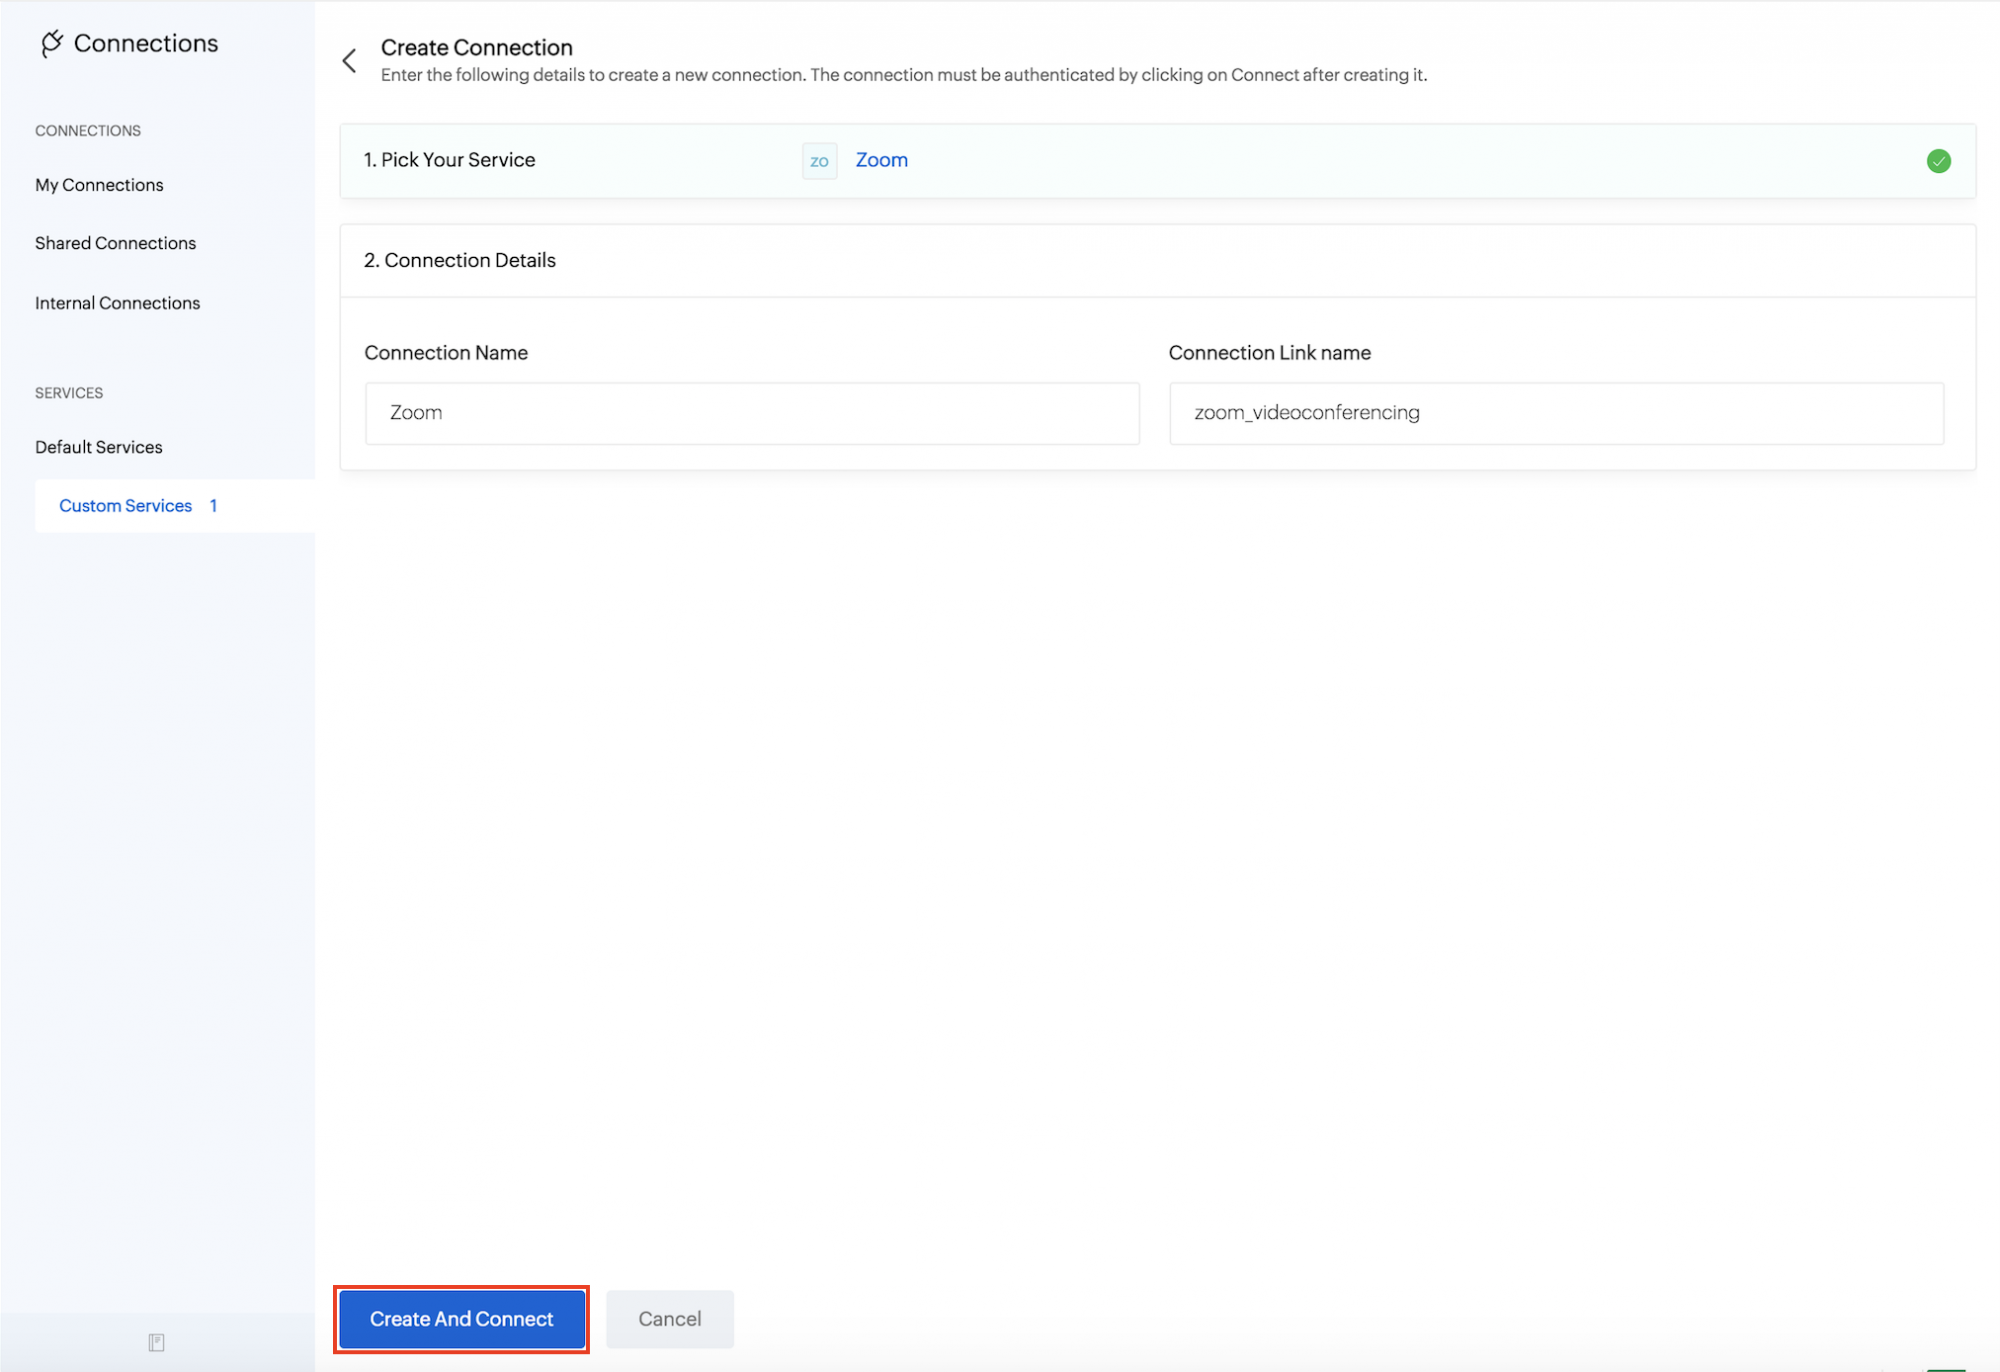
- Enter Connection Name and Link Name, Click Create and Connect
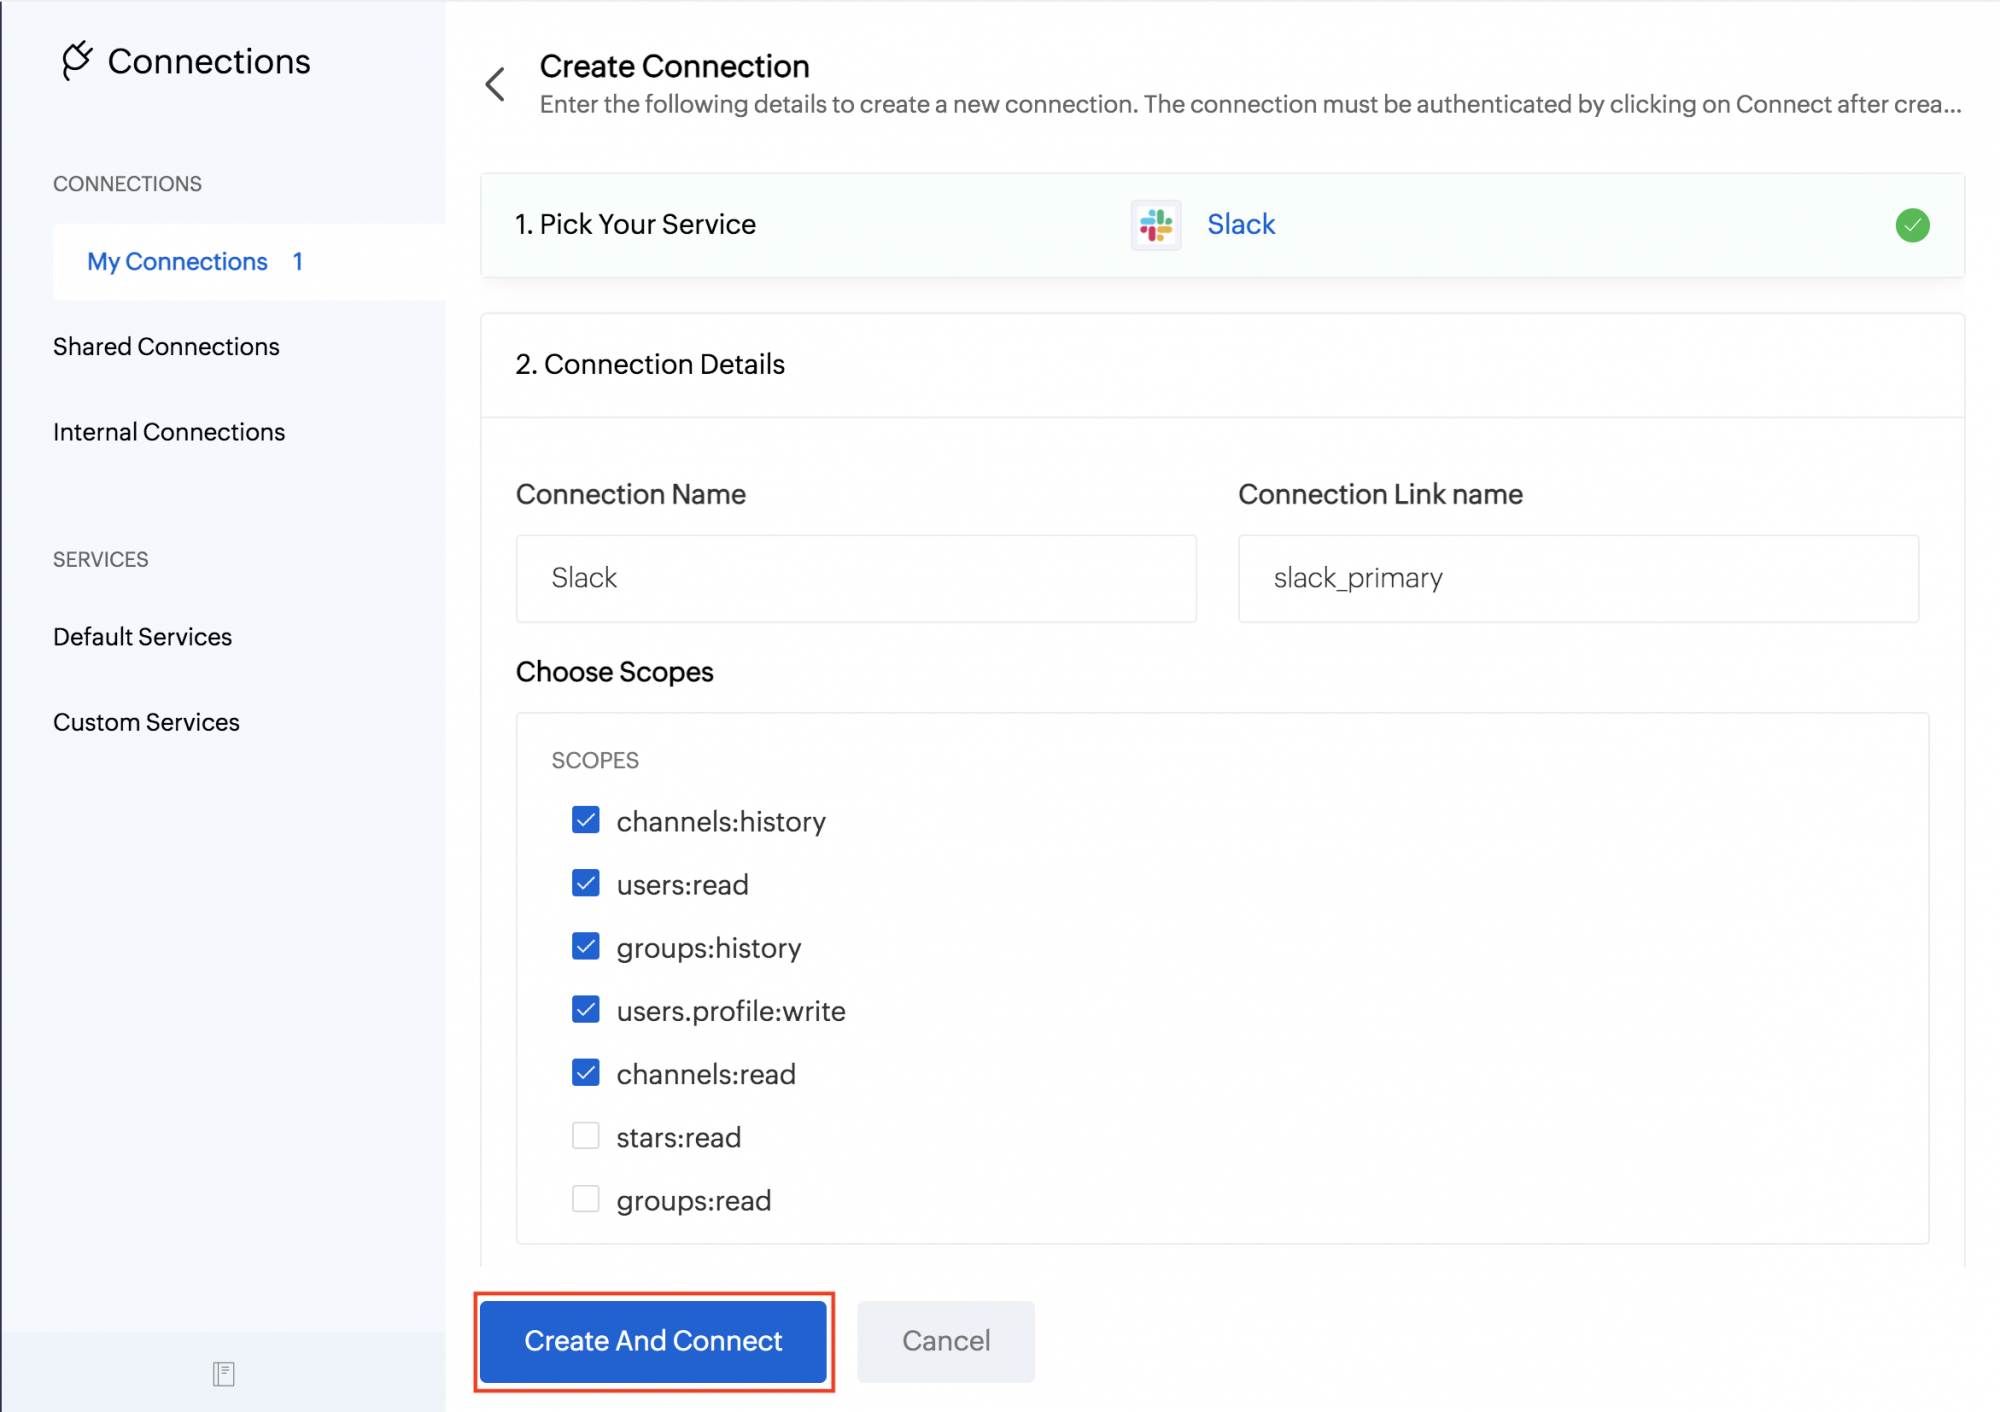
- Click on Connect.
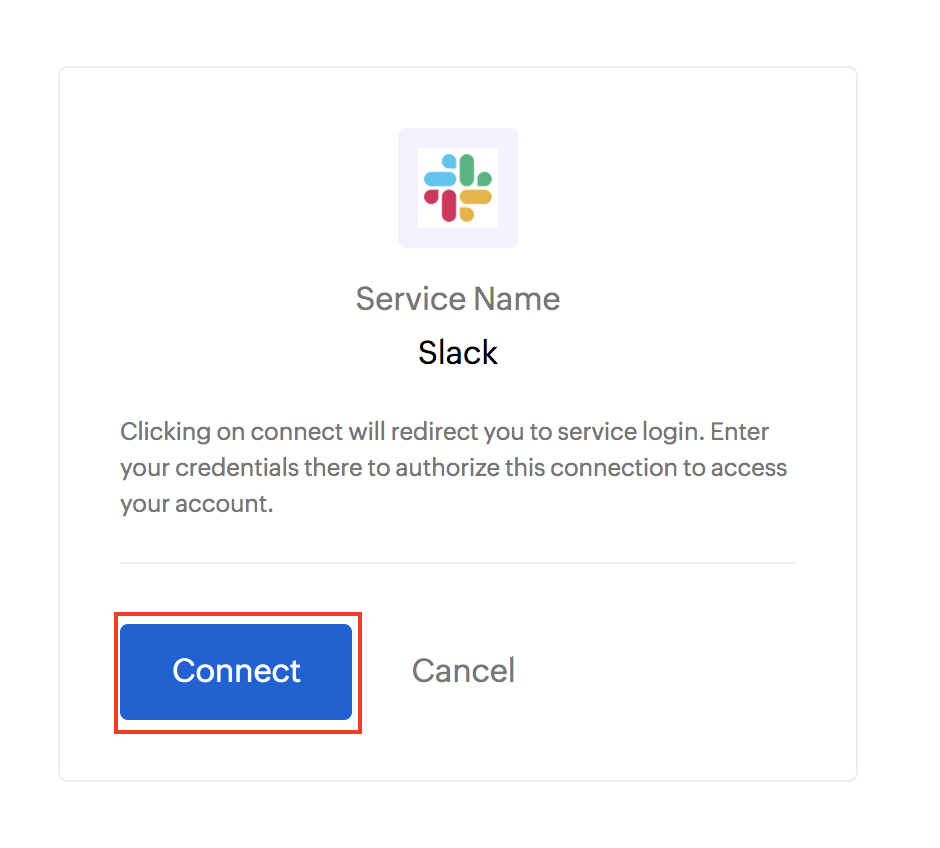
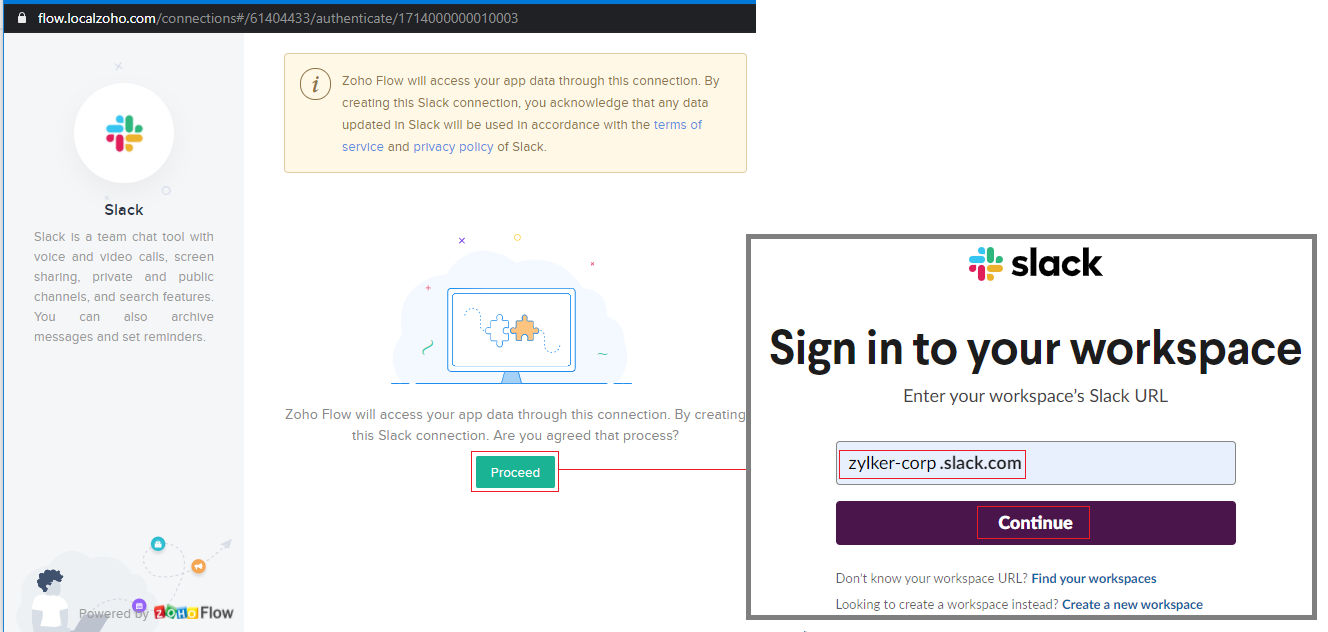
- Next, you will be prompted to Proceed and Sign in (in this case, you need the Slack workspace URL). Click Continue.
- In the following page, the Link name, Service name and Status of the Connection is shown.
- Additionally, the code to be used in a function to invoke the connection is also given in a box.
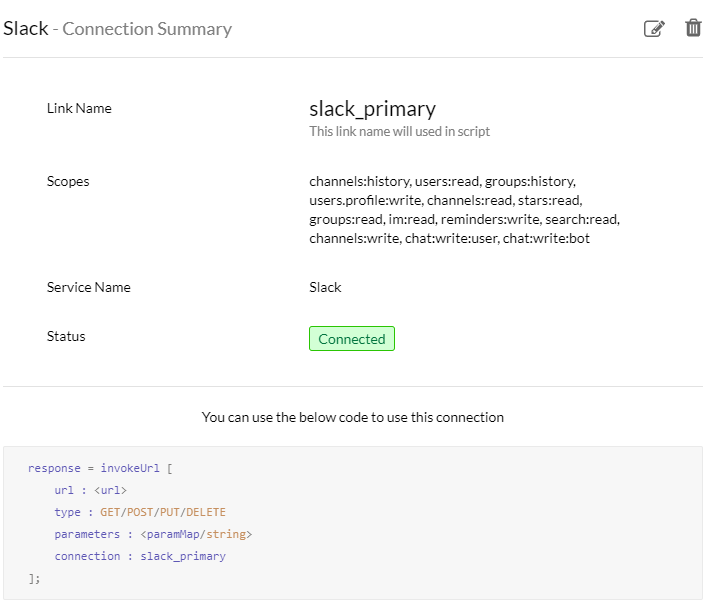
- The URL can be obtained from the third-party service.
- The Types POST, PUT, GET, and DELETE are the HTTP methods that determine the type of action that request performs.
- The Parameters are used by the function to replace dynamic values present in the API with user-specific values. For example, if the API must fetch the lead's details such as name, email address, contact number, etc., these values will be represented by a dynamic value in the API. This dynamic value can be replaced with the actual value from the Leads Details page using the parameter function. Examples given later in this document will give more detailed information about this function.
- The Connection in the code is the link name.
You can use the above block of code to invoke the URL and integrate the third-party app with Zoho People.
Creating a Custom Service to create Connections
Here are some important terminology you'll need to understand for the process of creating a custom service:
- Resource - The application or service that the client is trying to access. In our case, the resource is the third-party service (ex: MailChimp) you are trying to integrate.
- Request Token URL - This URL is used to send authorization requests to the resource server. The resource server prompts the resource owner (user) to authorize this request.
- Access Token URL - Once the request is authorized by the resource owner, the server sends an access token to the client. This token has to be exchanged every time the clients wants to access the resource data.
- Refresh Token URL - Some access tokens are valid only for a limited period of time. When an access token expires, the client has to get another access token from the resource, using the refresh token URL.
- Client ID - A unique identifier provided to every client application. This ID is provided by the resource owner (ex: MailChimp).
- Client Secret - Every client application has a secret code mapped to it. This is done to prevent unauthorized access to the resource.
- Redirect URL - This is the URL to which the end user will be redirected, once data access has been authorized. The client application will generate a redirect URL automatically.
Registering a Zoho Client
Since Zoho People APIs are authenticated with OAuth2 standards, you should register your client app with Zoho. To register your app:
- Visit this page https://accounts.zoho.com/developerconsole.
- Click on Add Client ID.
- Enter Client Name and Client Domain.
- Enter the Redirect URI as "https://deluge.zoho.com/delugeauth/callback".
- Select the Client Type as Web based.
- Click Create.
- Your Client app would have been created and displayed by now.
- The newly registered app's Client ID and Client Secret can be found by clicking Options → Edit (Options is the three dot icon at the right corner)
Note: Please note that this step has to be followed for Apps only when you want to add a Custom Service in Connections.
Steps to create a custom service
You can create a custom service by creating a service from scratch and then create a connection.
- Go to Settings > Developer Space > Connections > + Add Connection
- Click the Custom Service tab.
- Provide a name for the service to be connected (ex: Zoom).
- Select the type of Authentication that is supported by the third-party application or service.
- Provide the following details about the third-party server:
- Client ID and Client Secret.
- Request Token URL: This allows the connector to request authorization to access data on the resource server.
- Access Token URL: Once authorized, the Request Token and Token Key will be exchanged for the Access Token, allowing the connector to draw specific information from the third-party server.
- Refresh Token URL: Some applications increase security by limiting the duration of time a particular token is valid. In these cases, you will need to provide the Refresh Token URL to allow the connector to reauthorize access.
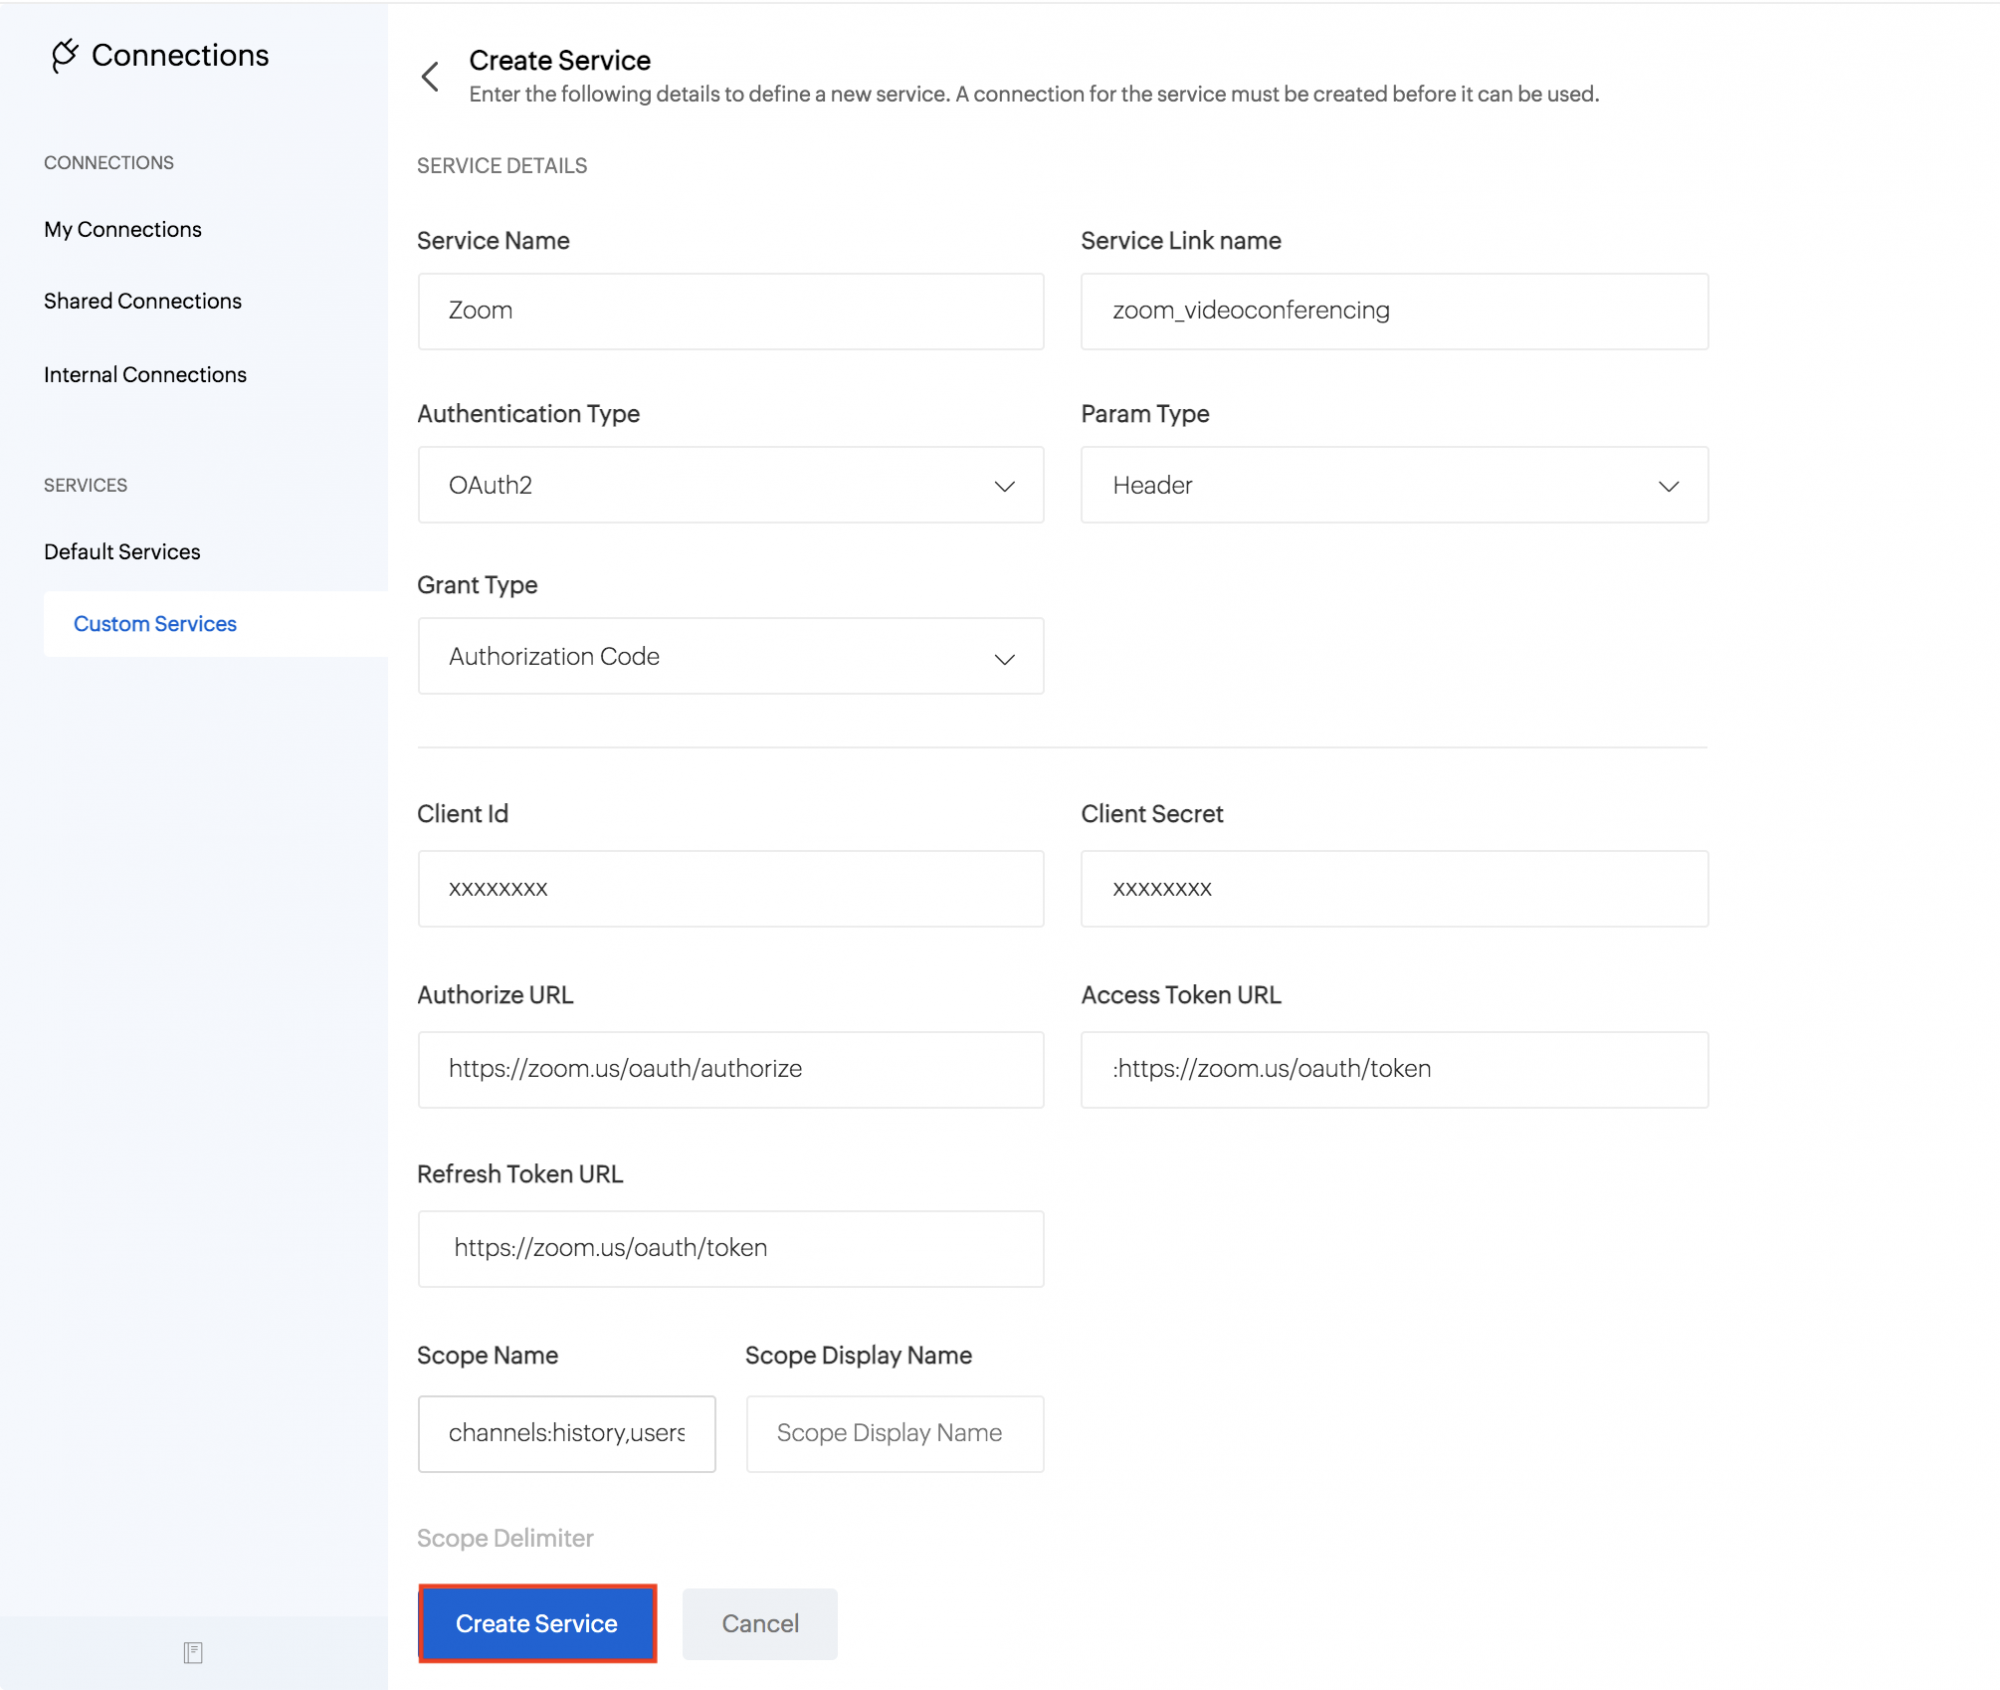
- Give a Scope Name and Scope Display Name for the Connection. Scope for each connection is given by the third-party service. Please check the help for the respective third-party service to know about their provided scopes.
- Enter the Scope Delimiter as a comma.
- Provide Scopes for the connection. Scope for each connection is given by the third-party service. Please check the help for the respective third-party service to know about their provided scopes.
- Click Create Service.
- Click Create Connection on the top right corner of the Service Summary.
- Once the connection is created, it will be available in the Pick Your Service tab.
- Click Create and Connect.
Sample Connection
Let us take an example of setting up a connection with Zoom video conferencing app. Here are the steps:
- Go to Settings > Developer Space > Connections > + Add Connection.
- Click the Custom Service tab.
- Give the Service name as Zoom Meeting.
- Enter a Service Link Name.
- Set Param Type as Header, Grant Type as Client Credentials.
- Set the Authentication type as OAuth 2.
- Provide the following information:
- Client ID : {your_client_id}
- Client Secret : {your_client_secret}
- Authorize URL : https://zoom.us/oauth/authorize
- Access Token URL : https://zoom.us/oauth/token
- Refresh Token URL : https://zoom.us/oauth/token
- Give a name for the Connection.
- Provide the Scopes for the connection as specified by Zoom.
- Click Create Service.
- Click Create Connection in the service summary.
- Click Create and Connect in the connection details page.
- Now the connections will be established and a success message should be displayed. The code displayed in the connection summary screen can be used in custom functions.
- You can now create a custom function to invoke this connection. The code displayed above can be used. GET/POST/PUT/DELETE operations can be performed.
Note: Connections is available to all paid plans.

