 Inventory
Users & Roles
Bring in your workforce, delegate tasks, analyze and ensure that your objectives are met. Zoho Inventory being an online application, allows multiple users to access it from any location.
You as the admin, can do the following operations with Users.
- Predefined User Roles
- Creating custom User Roles
- Adding Users
- Editing Users
- Deleting Users
- Deactivating & Reactivating Users
Predefined User Roles
Users can access the modules based on their role. The following predefined roles are currently available:
- Admin: has unrestricted access to all the modules. Usually this role is assigned to owners, partners and store supervisors.
As for other roles, you can create your own user roles by defining access levels & permissions within Zoho Inventory.
Creating custom User Roles
To create a custom user role,
- Click on the Settings icon(gear icon) from the top-right corner.
- Select the Users & Roles option from the drop-down.
- Switch to the Roles tab.

- Click on the New Role button.
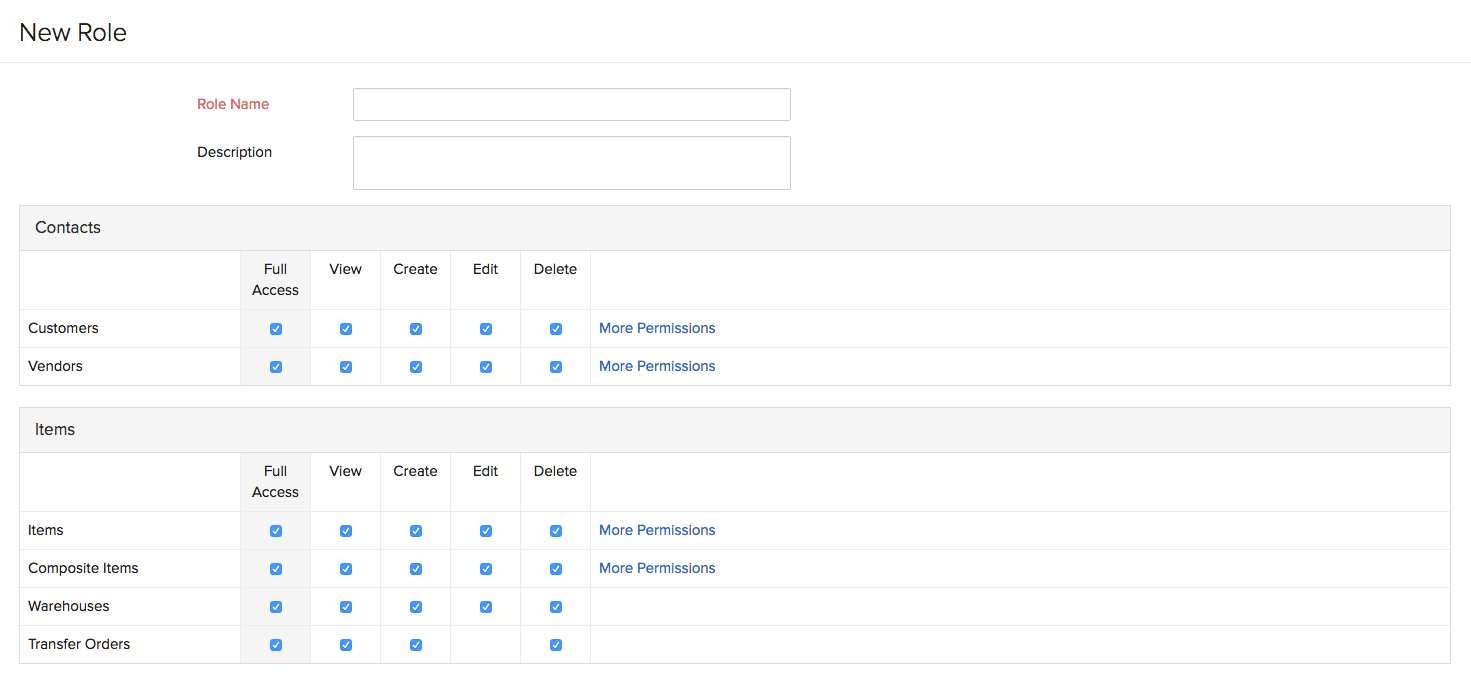
- You will be redirected to a role creation page.
- Specify a Role Name.
- Add a description for the role and proceed to control access rights & permissions.
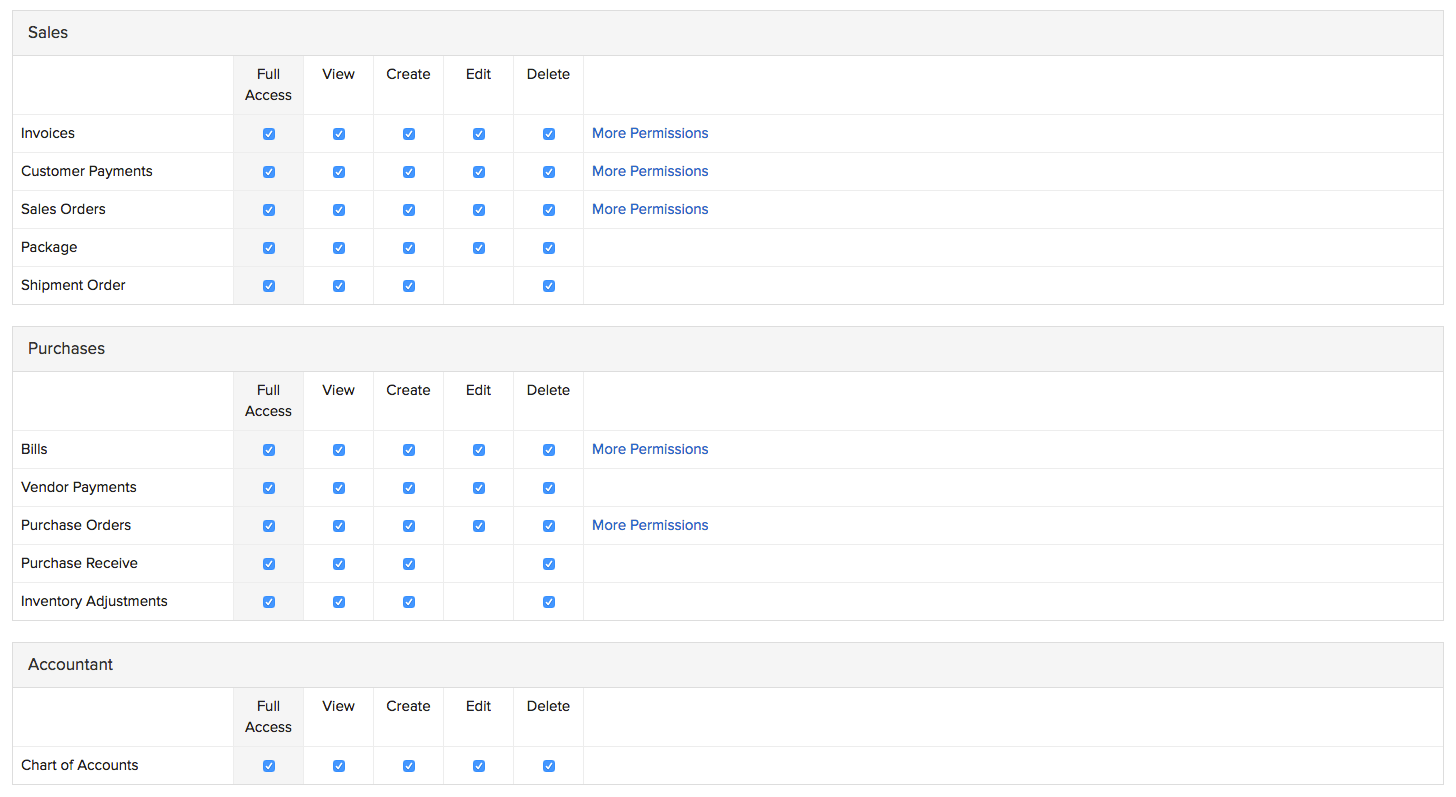
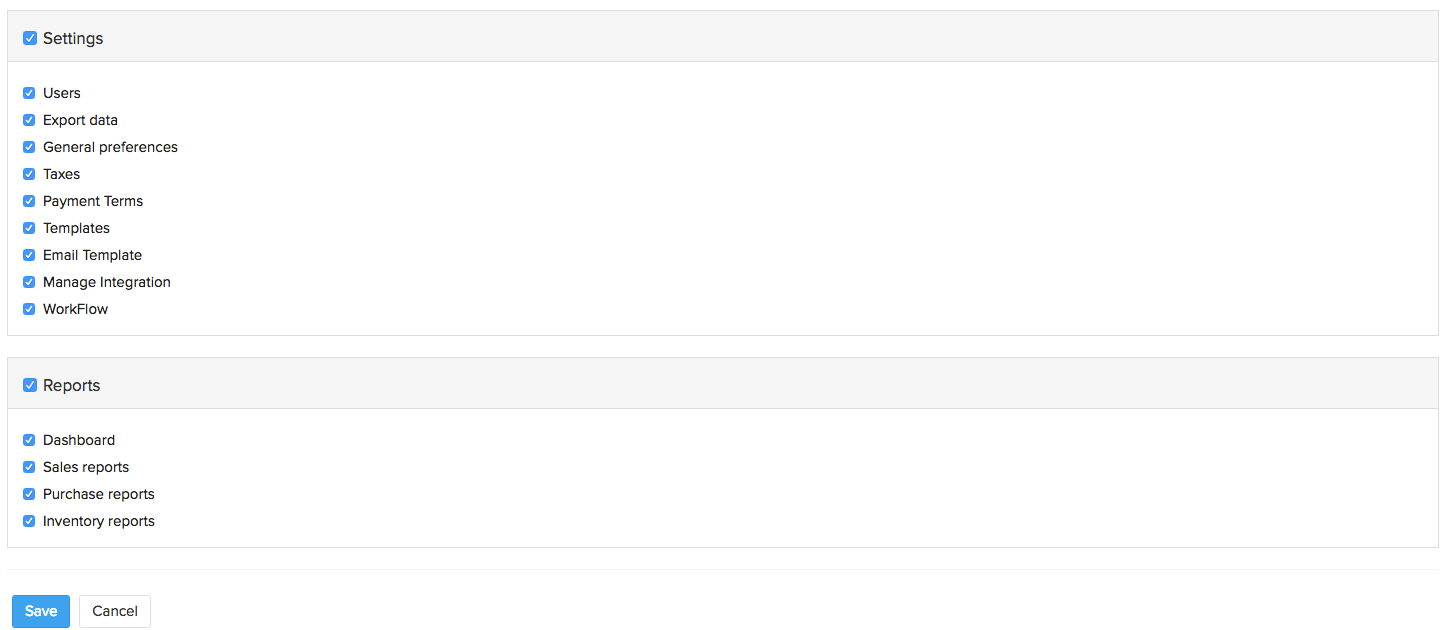
- Speaking of access rights & permissions, these can be set for your Contacts, Items, Sales, Purchases, Accountant, Settings and Reports in Zoho Inventory.
- You can either grant full access to a module or control it by configuring permissions to View, Create, Edit, Delete & some advanced actions which are specific to that module.
- You can also completely block access to/visibility of certain modules for a role.
- To finish, click on Save.
- Henceforth, you as an admin, can assign this role for other users of your choice.
Adding Users
To add new users:
- Click on the Settings icon(gear icon) from the top-right corner.
- Select the Users & Roles option from the drop-down.
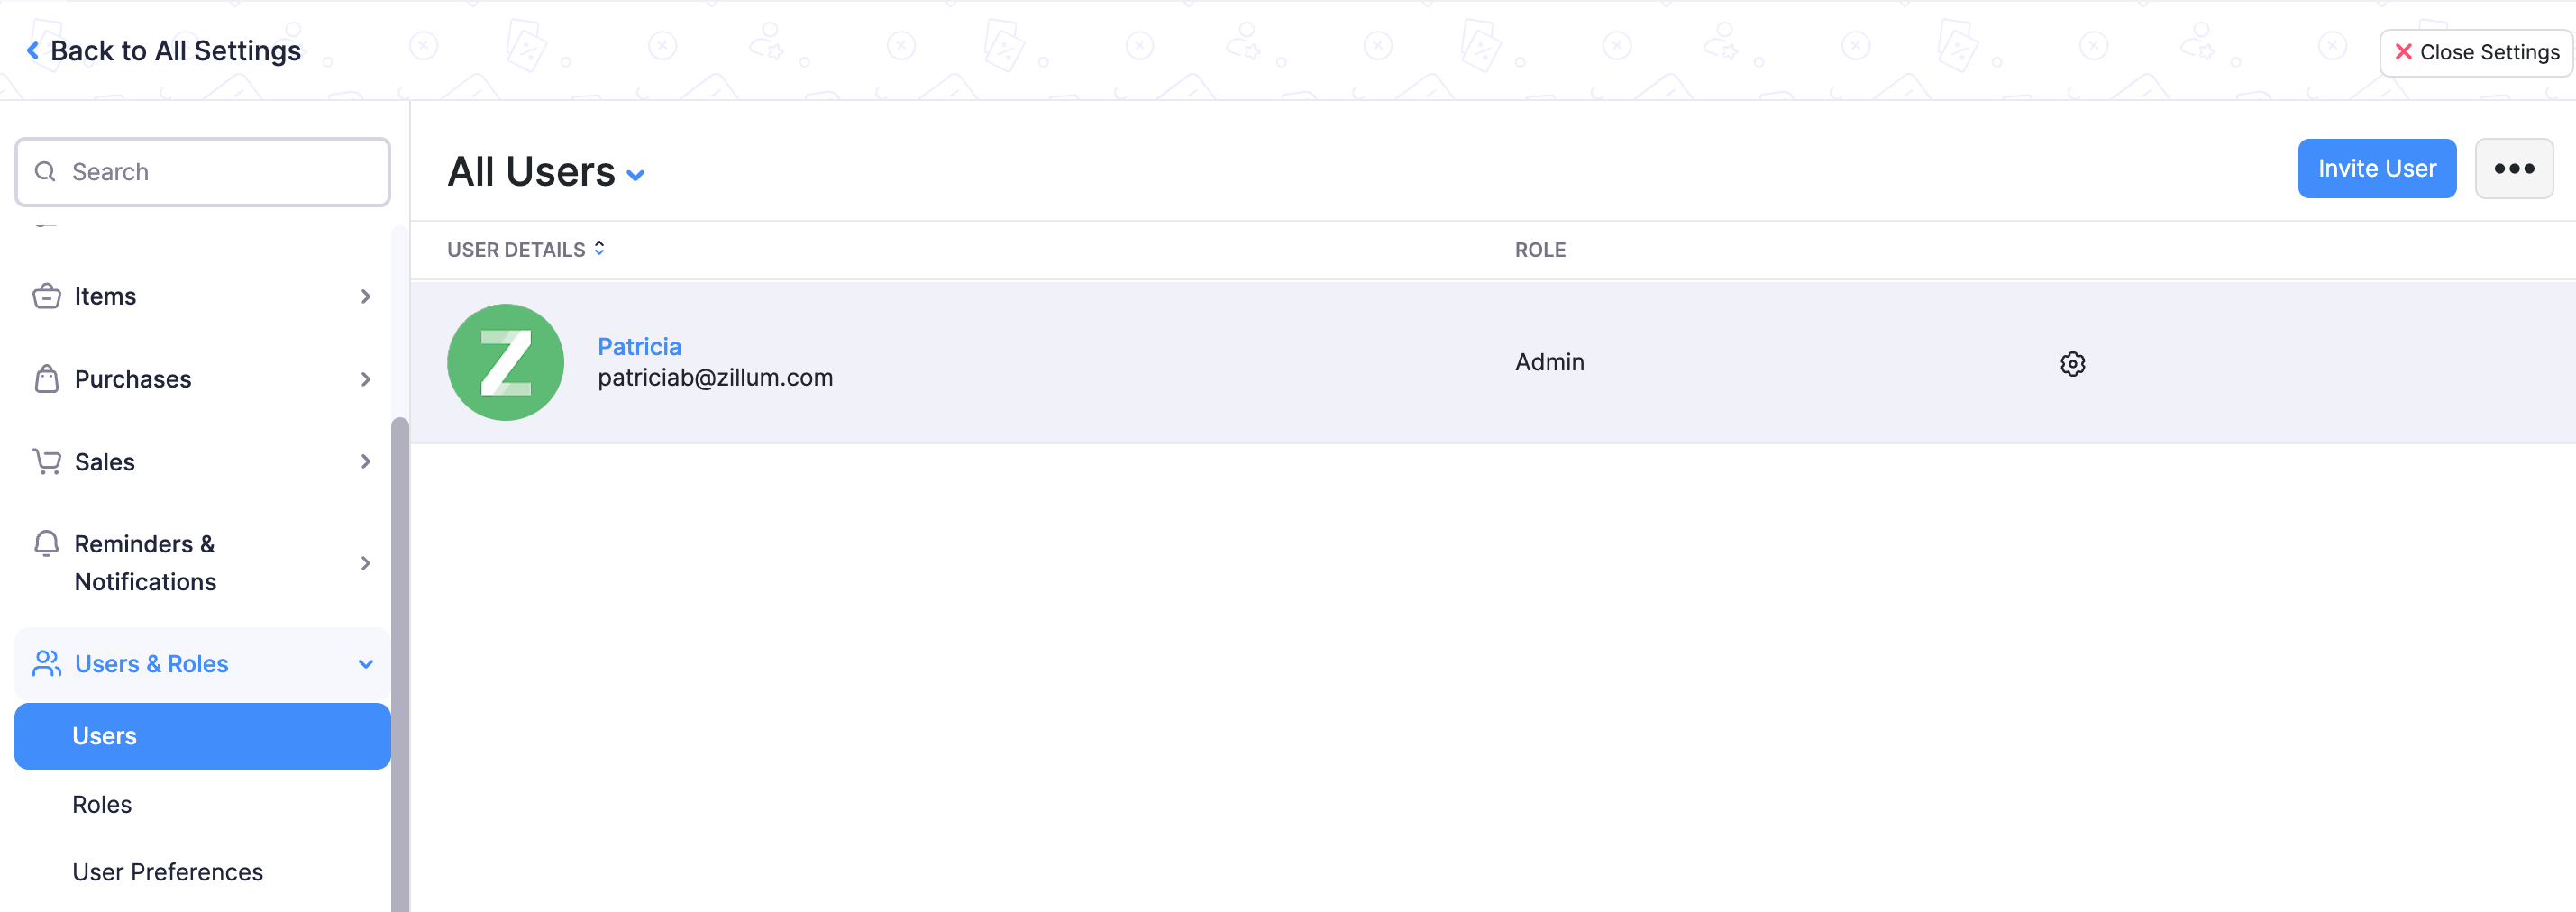
- Click on the Invite User button from the top-right corner of the users page.
- On the invite user pop-up:
- Enter email address and name of the user(your team member).
- Choose a role.
- Click on the Send button to send an email invitation.
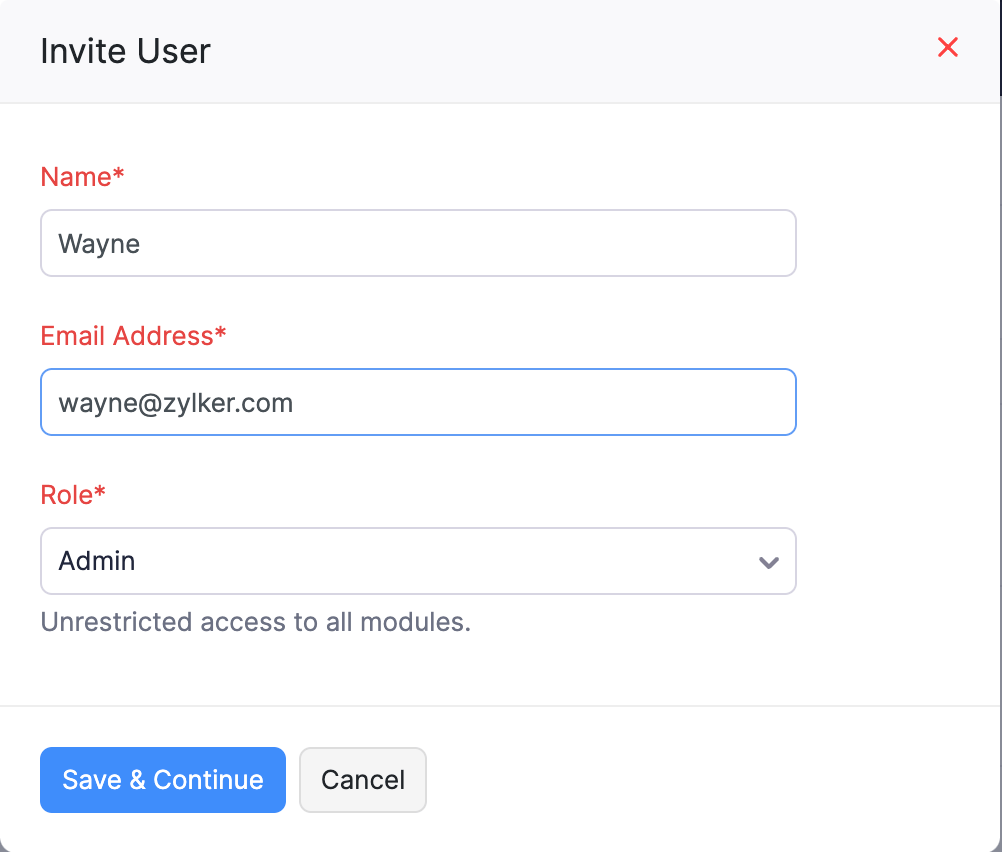
- Following this, the person who is being invited will receive an email invite.
- The user has to navigate his/her email address and open the invitation mail.
- By clicking on the Join Account link provided in the email, the user can gain access to your organization inside Zoho Inventory.
- In case the user has already registered with Zoho Inventory, he/she can login straight away into their account using his/her credentials.


Additonal Note: Once you have setup your organization and invited your employees/team members as users, you can now start migrating your existing data from your old system into Zoho Inventory. To know more, click here.
Editing Users
To make changes to an existing user,
- Click on the Settings icon(gear icon) from the top-right corner.
- Select the Users & Roles option from the drop-down.
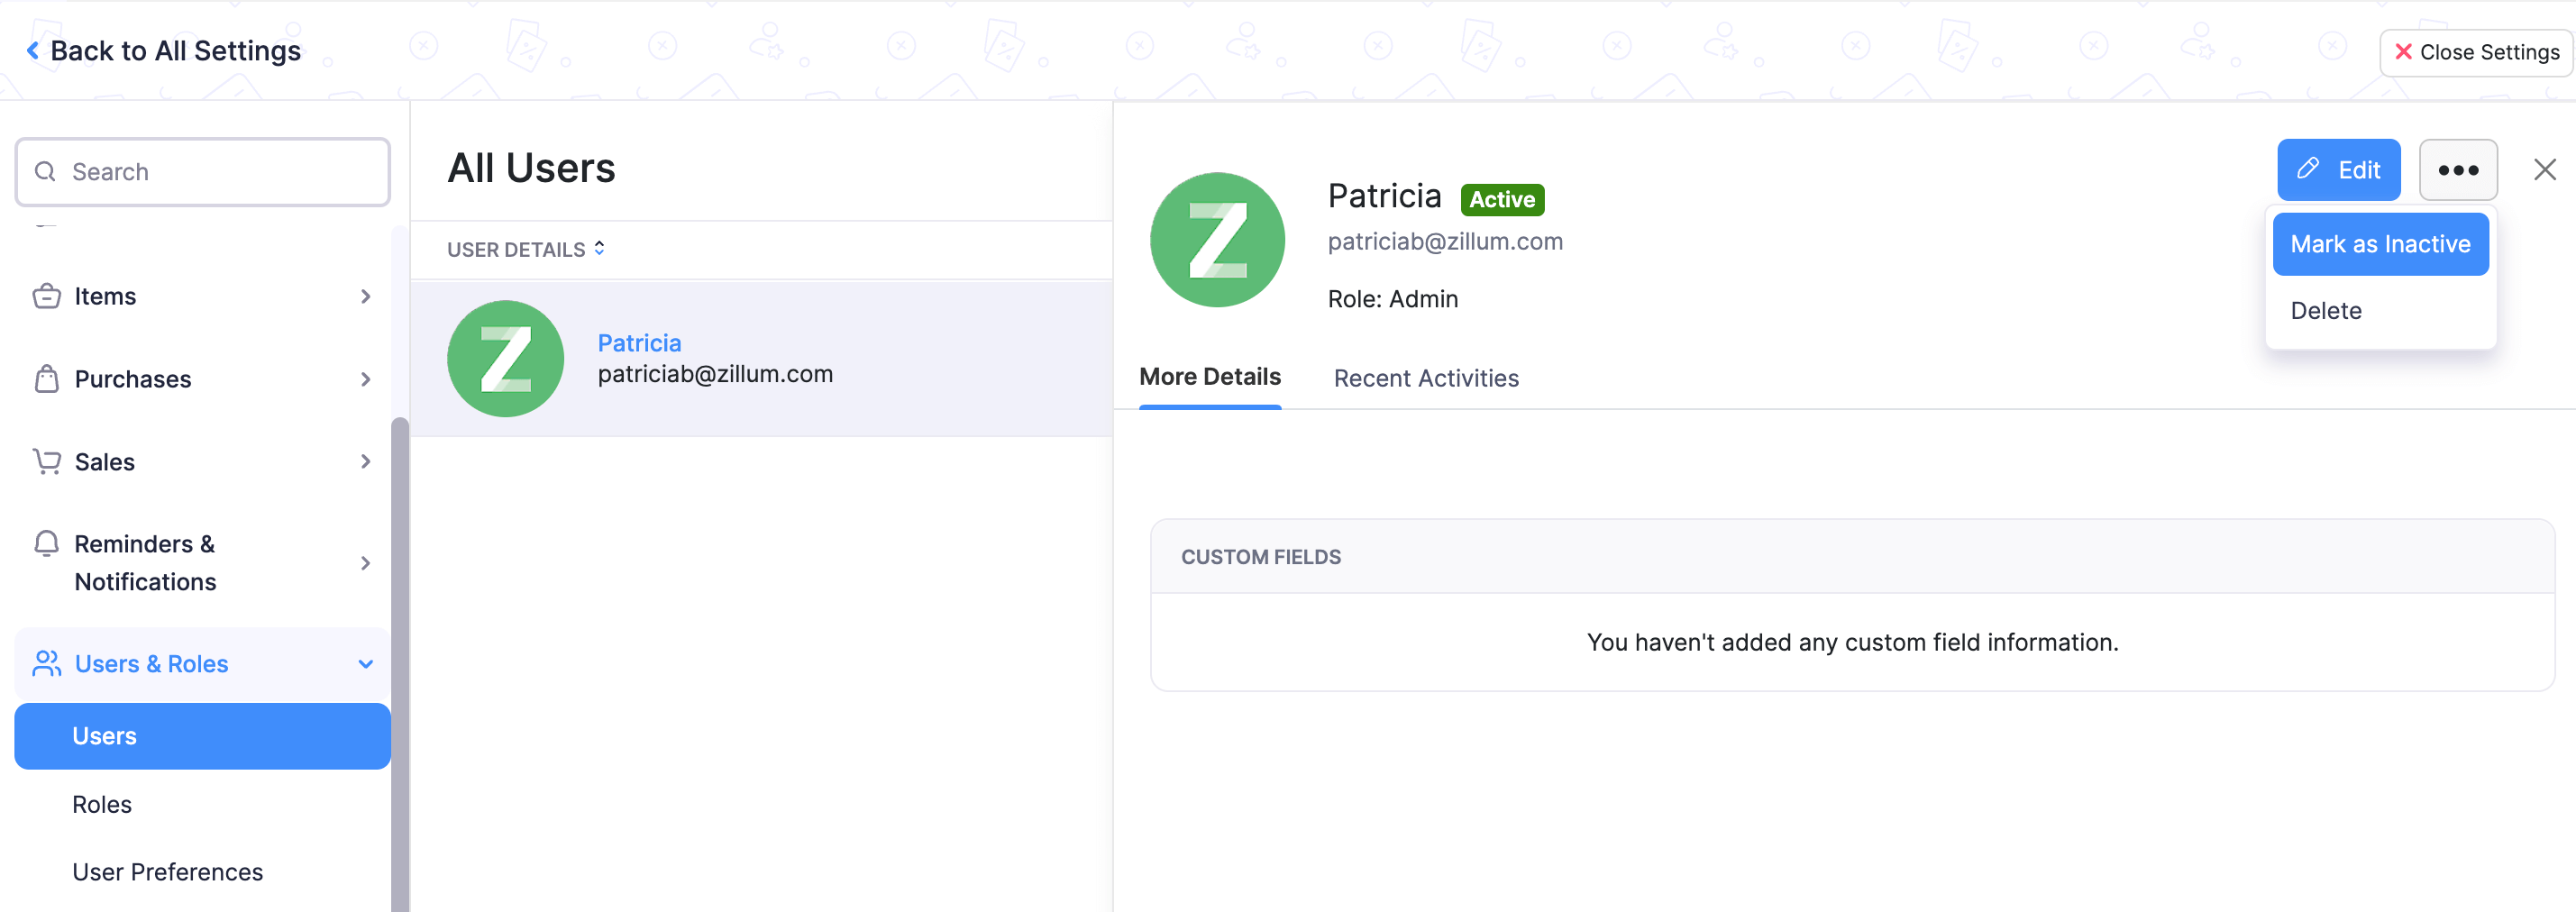
- Navigate to the preferred user.
- Hover your cursor over the preferred user to unravel a special cog wheel button for this user.
- Click on the Cog Wheel button.
- Select the Edit option from the drop-down.
- This will trigger an edit user interface in the form of a pop-up.
- You can update the following fields - Name, Email Address and Role.
- Update your changes and then click on the Save button to finish.

Deleting Users
To delete a user:
- Click on the Settings icon(gear icon) from the top-right corner.
- Select the Users & Roles option from the drop-down.

- Navigate to the preferred user.
- Hover your cursor over the preferred user to unravel a special cog wheel button for this user.
- Click on the Cog Wheel button.
- Select the Delete option from the drop-down.
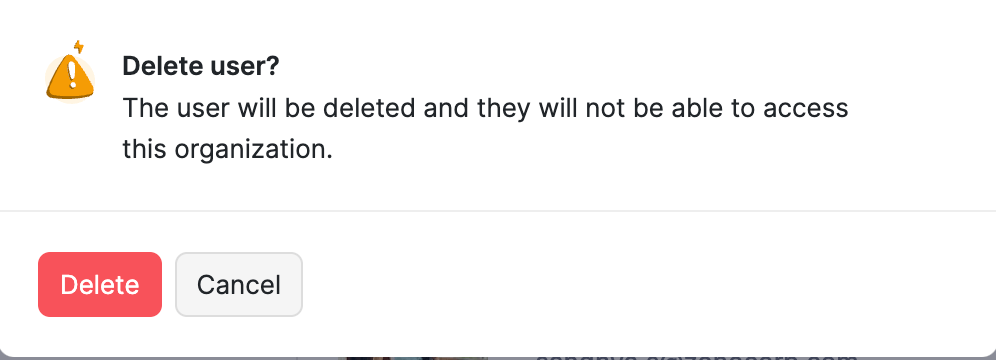
- A confirmation pop-up window will appear.
- To confirm your action, click on the OK button.
Please Note:
- Only an admin can delete other users. An admin cannot delete his or her own account.
- At any given point of time there has to be atleast one active admin for an active Zoho Inventory organization.
Deactivating & Reactivating Users
In circumstances where you don’t want to permanently delete an user but would like to prevent or restrict the user from accessing Zoho Inventory, you can deactivate the user’s status by marking the user as inactive. You can also reactivate inactive users if you want them to use Zoho Inventory again.
To deactivate a user,
- Click on the Settings icon(gear icon) from the top-right corner.
- Select the Users & Roles option from the drop-down.

- Navigate to the preferred user.
- Hover your cursor over the preferred user to unravel a special cog wheel button for this user.
- Click on the Cog Wheel button.
- Select the Mark as inactive option from the drop-down.
- The user will be deactivated and will no longer have access to your Zoho Inventory organization.
- To reactivate the user again, follow the same steps and click on the Mark as active option from the Cog Wheel drop-down.


