 Inventory
Importing & Exporting purchase modules
Purchase Orders
Bills
Importing Purchase Order
Data import can be carried out for each entity in Zoho Inventory including Purchase Orders. To import purchase orders into Zoho Inventory:
- Navigate to the Purchase Orders tab.
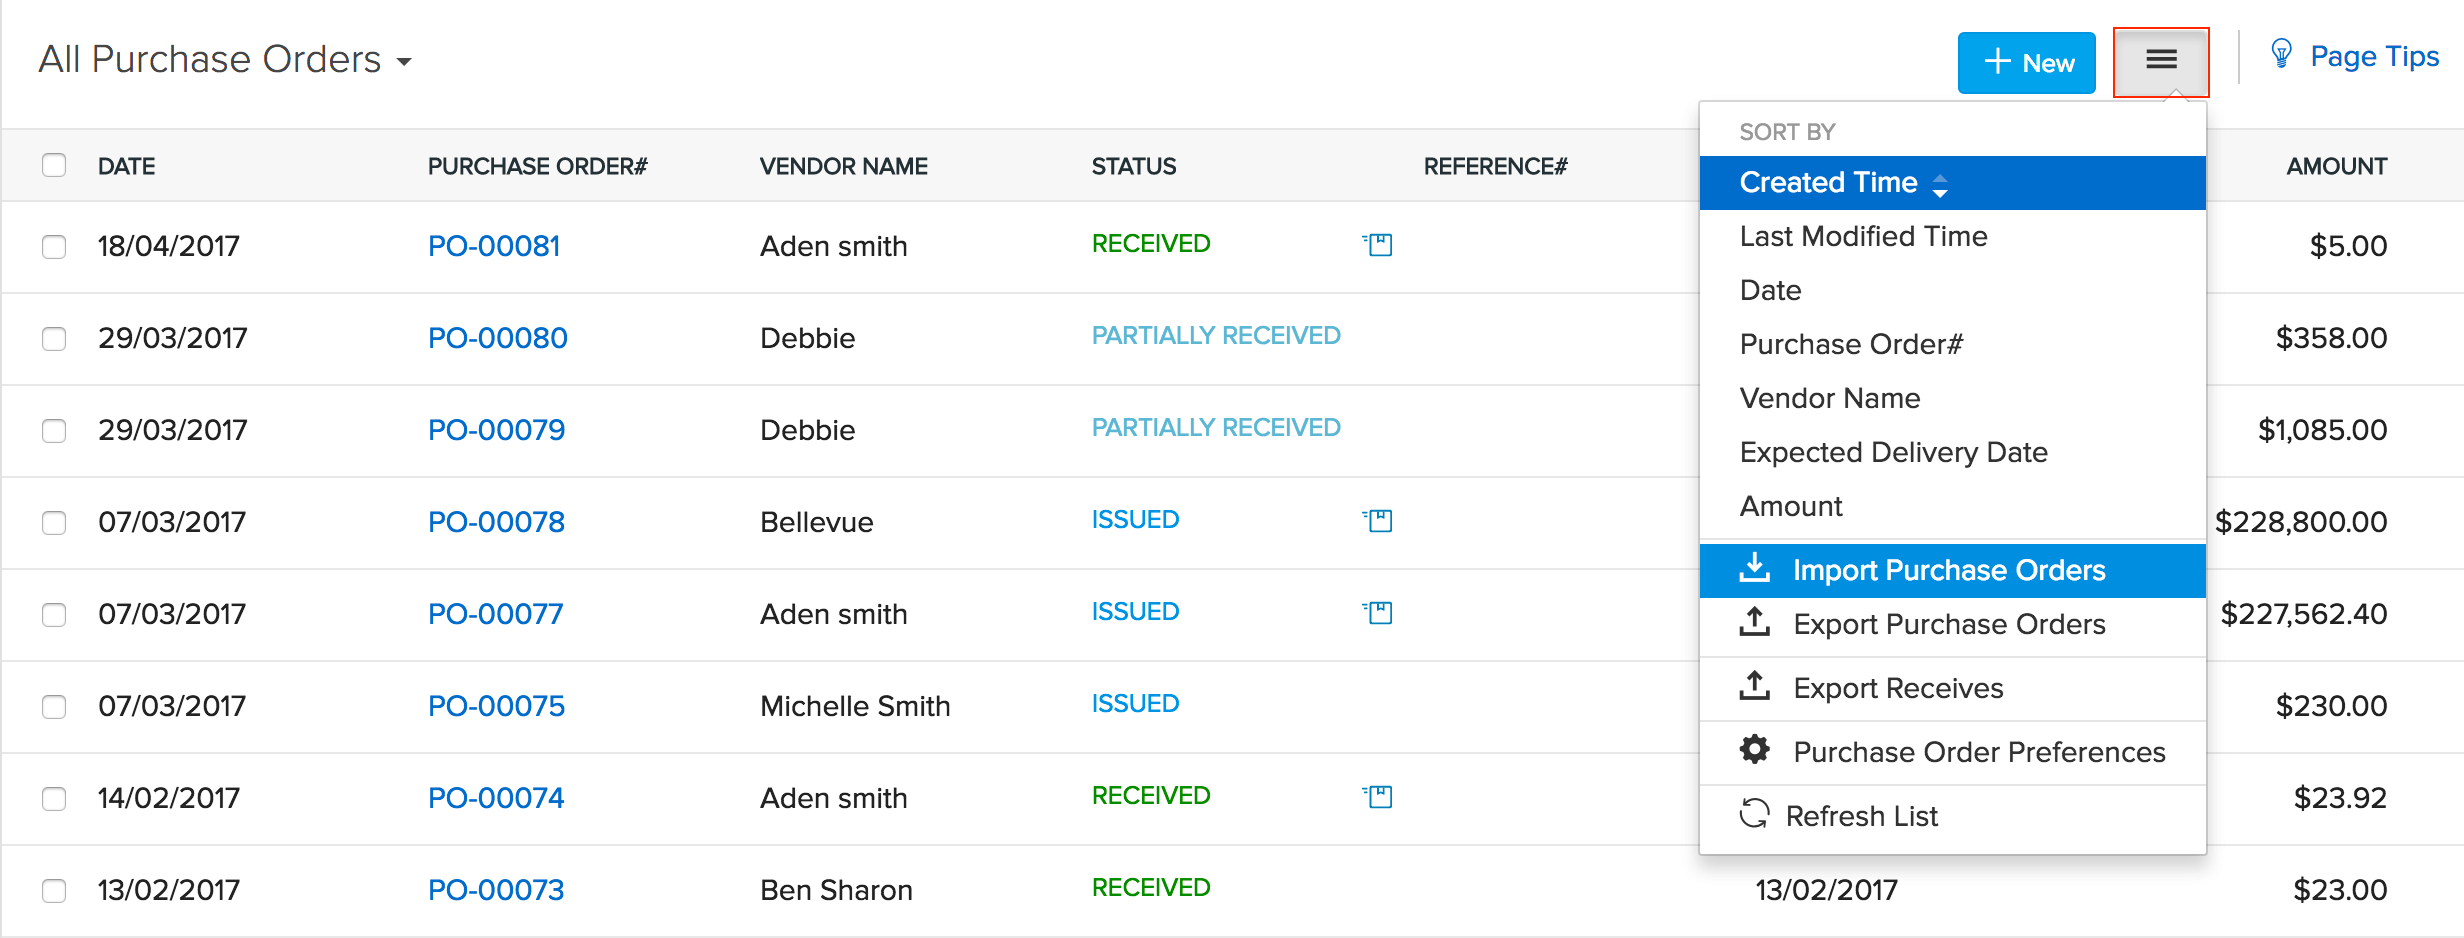
- Click on the Menu button.
- Select the option ‘Import Purchase orders’.
- The import page opens up.
Note: From here you can download a sample file to check the proper format for upload and ensure your purchase order file matches that format, or directly proceed to upload that file.
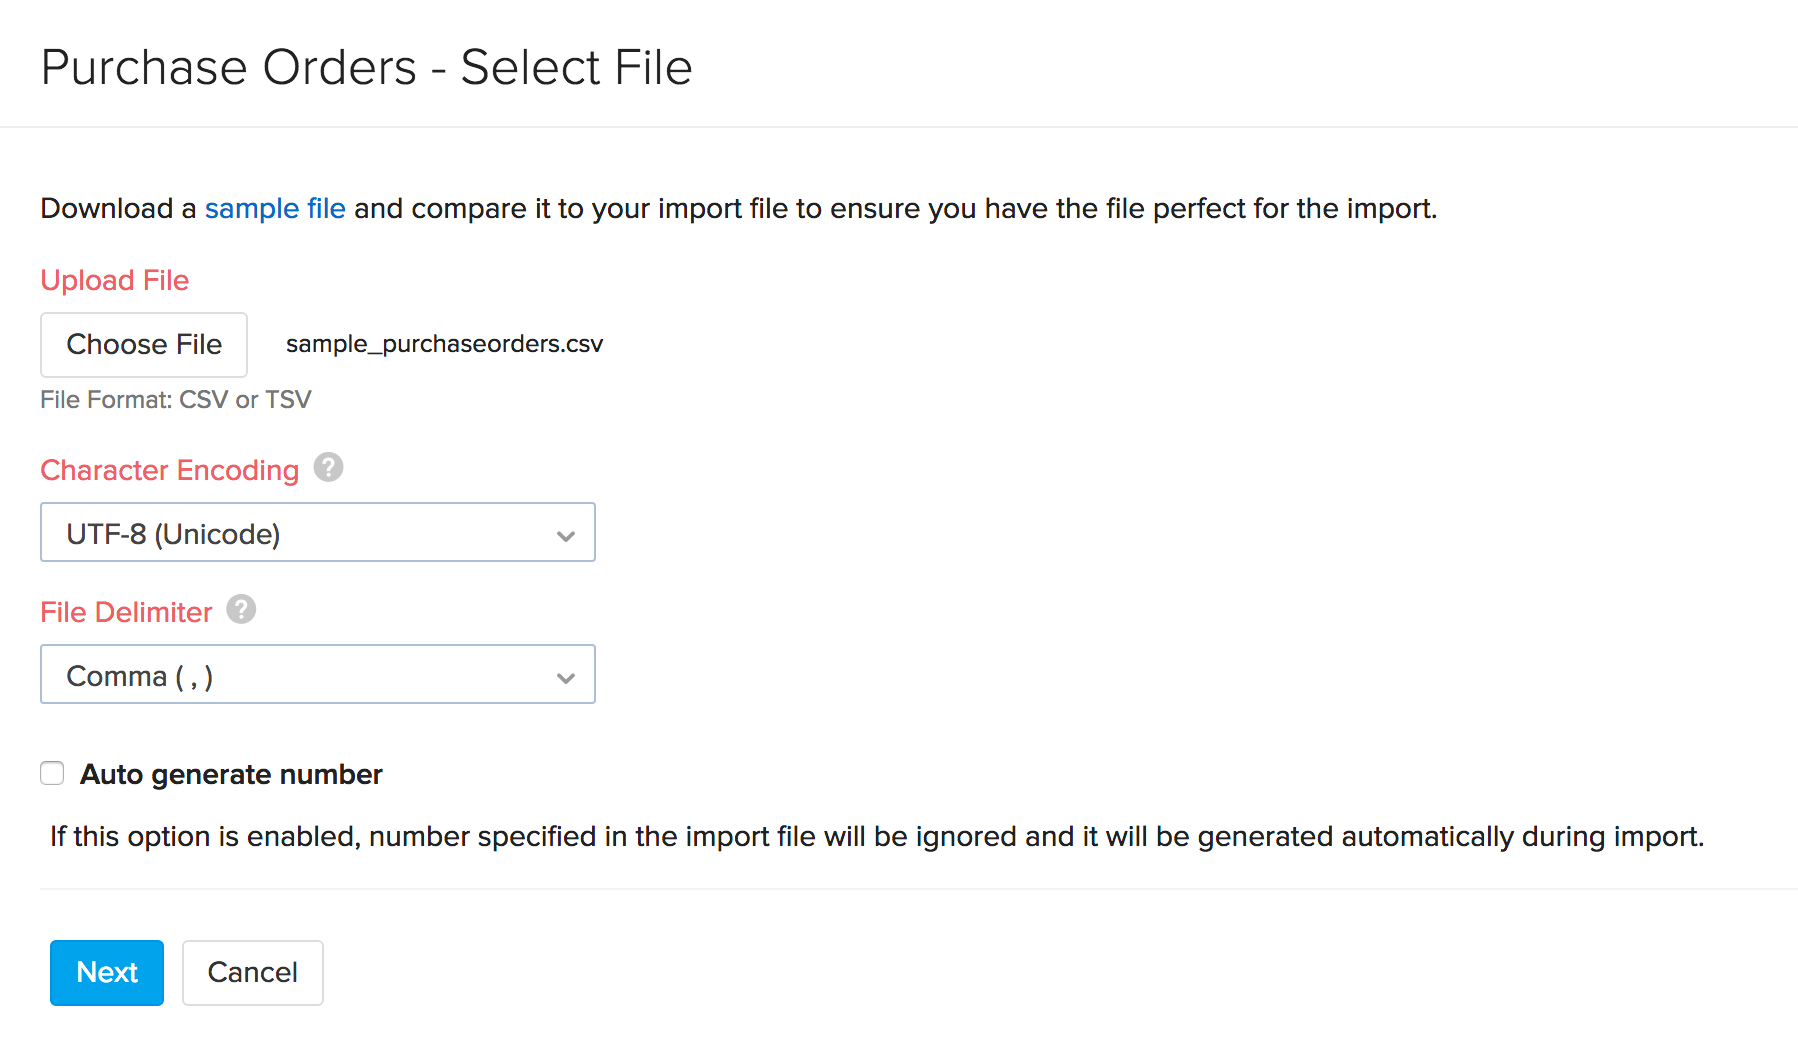
- Choose the file(s) to be imported.
- Choose the appropriate character encoding. By default it will be UTF-08 Unicode.
- Choose the File delimiter(comma or semicolon).
- Click Next to proceed to map the fields.
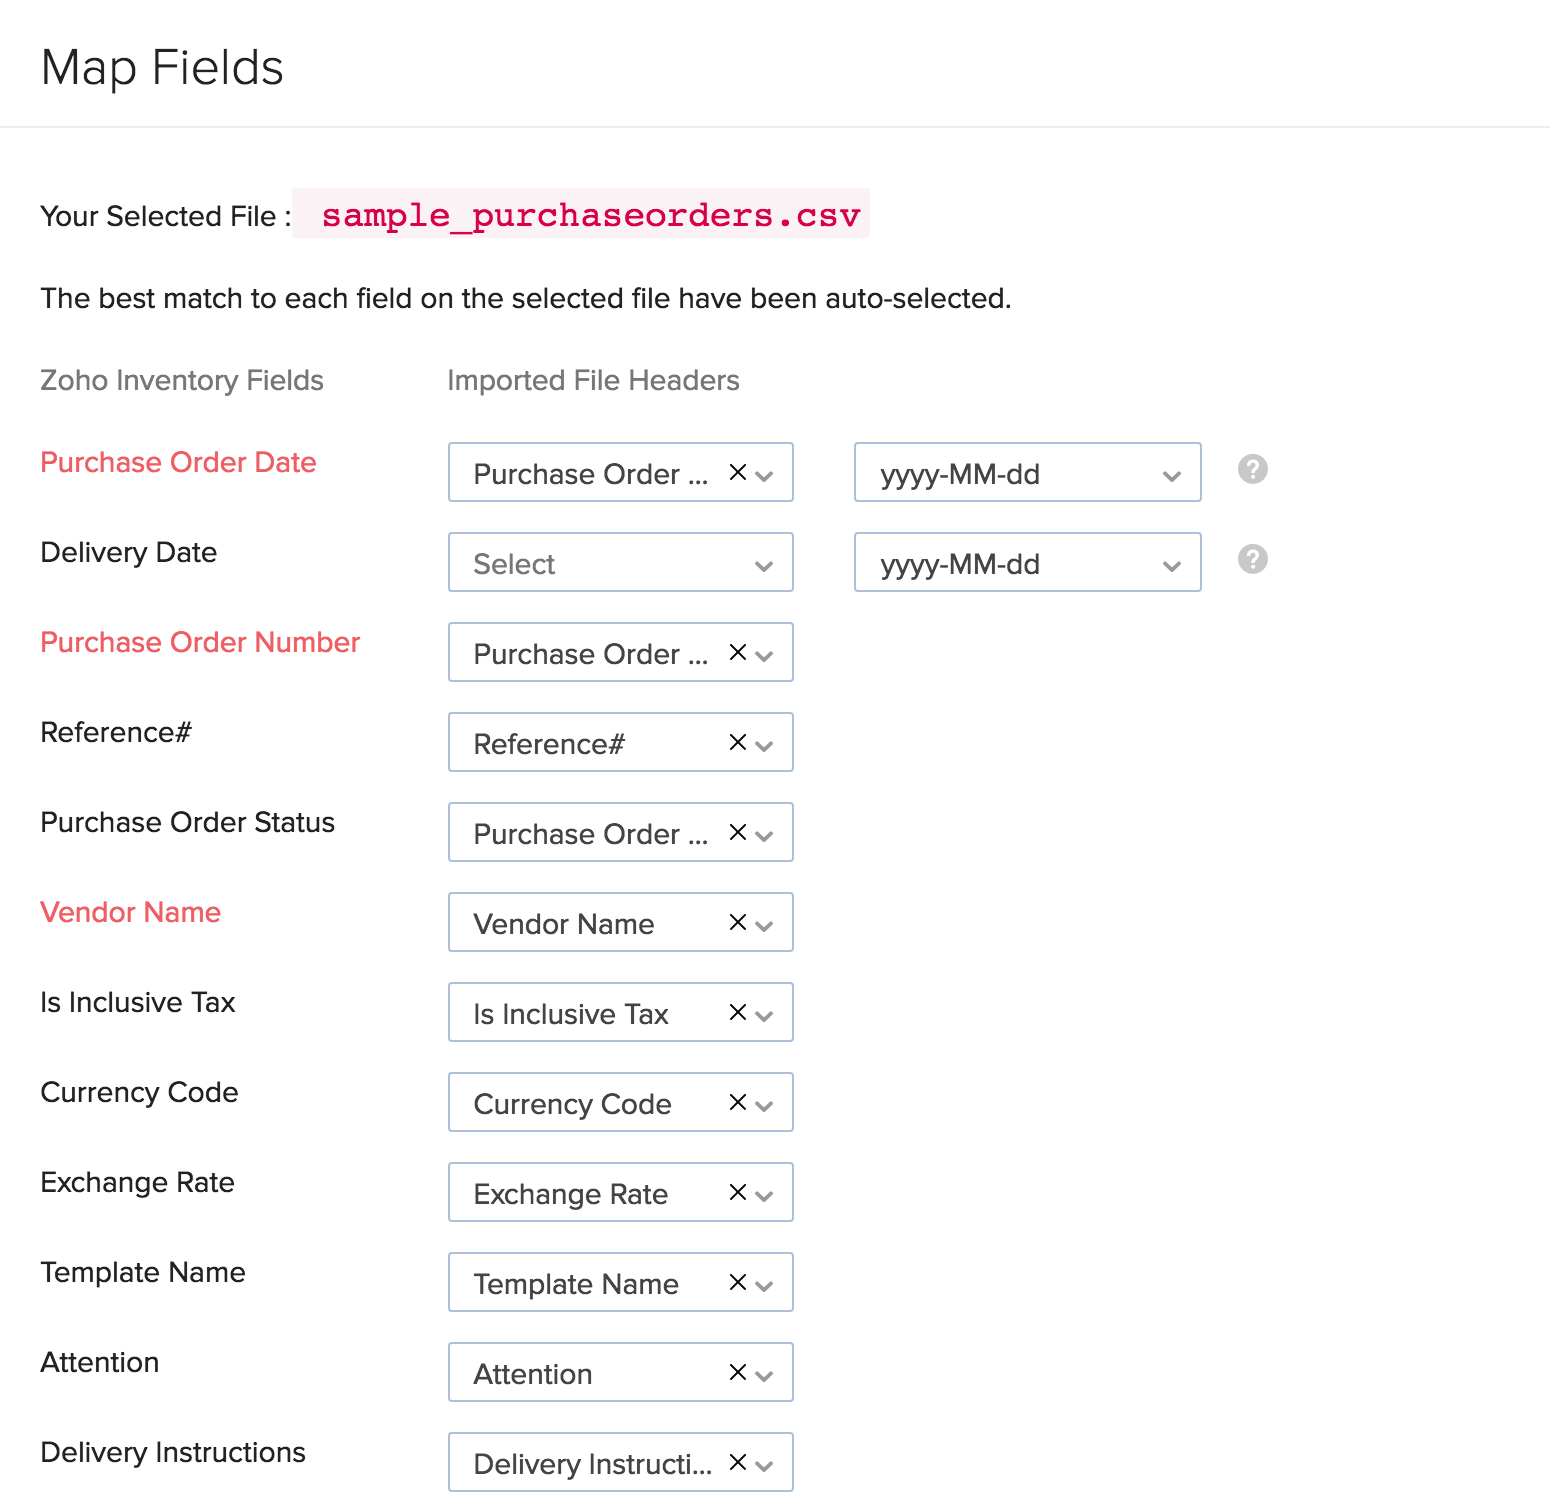
- You also have an option to enable auto generation of PO number for the file you’re about to upload.
- Zoho Inventory will auto match the file headers of the imported file to the closest matching field in Zoho Inventory.
- You can manually edit each field to match the headers, and save these preferences for future use.
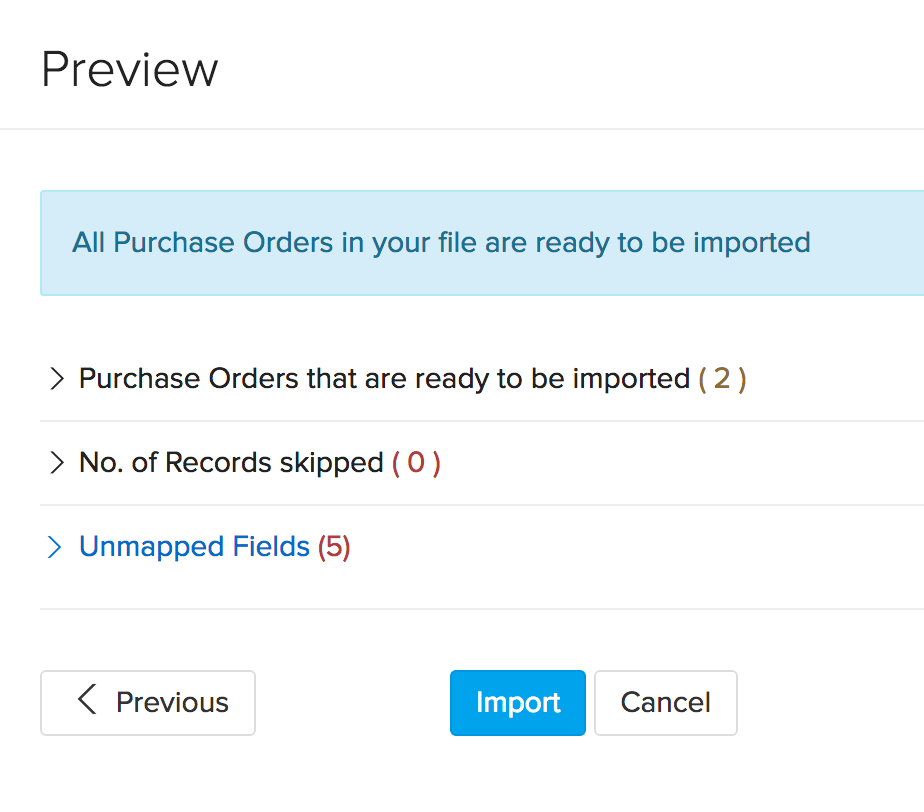
- Click Next to proceed to previewing your import. On proceeding, Zoho Inventory shows you any unmapped field you may have left out or could not match.
- You can map the unmapped fields by adding new fields matching the respective headers.
- Click on the Import button to import the file(s).
Exporting Purchase Orders
To export the purchase orders in your organization:
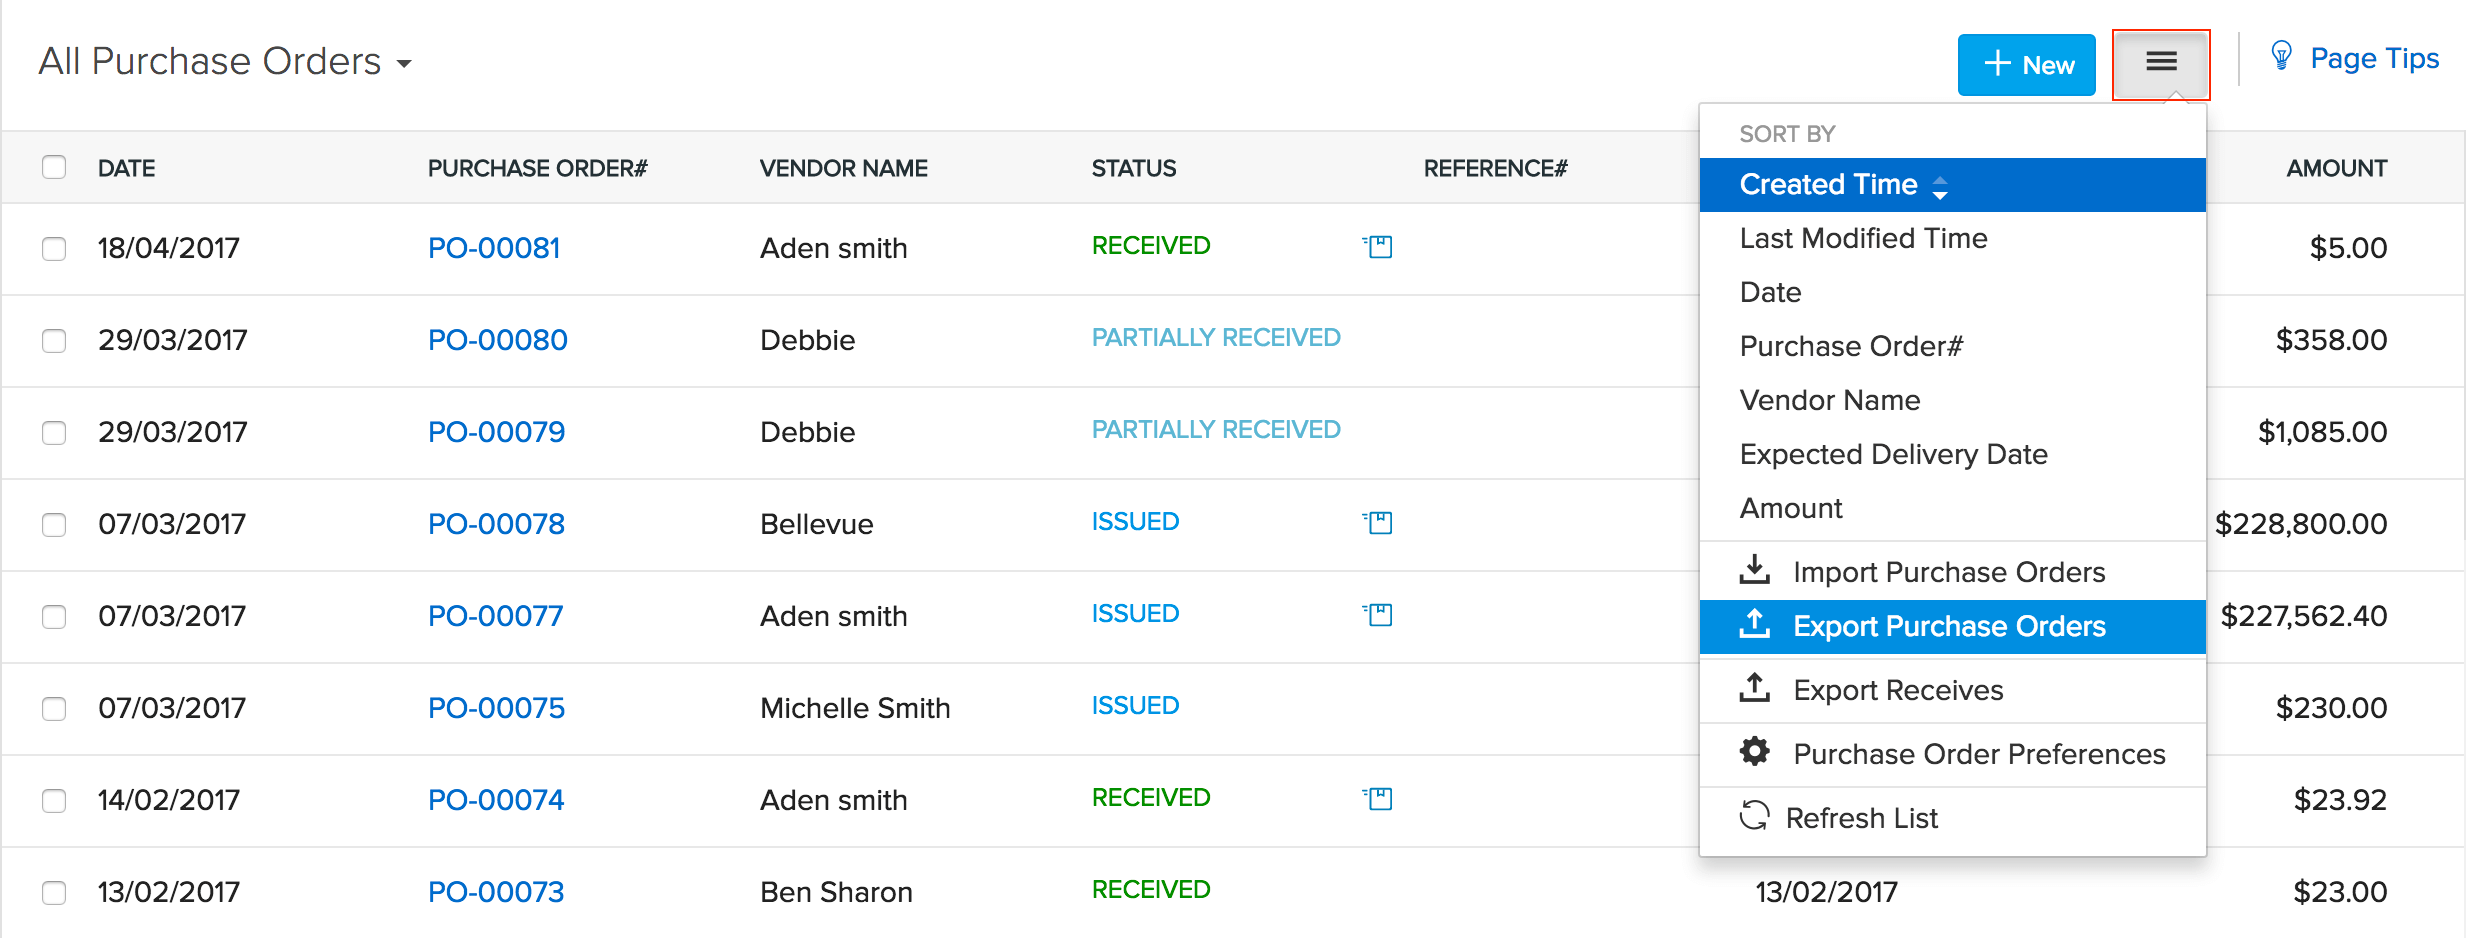
- Navigate to the Purchase Orders page.
- Click on the Menu icon at the right top corner.
- Choose Export Purchase Orders option.
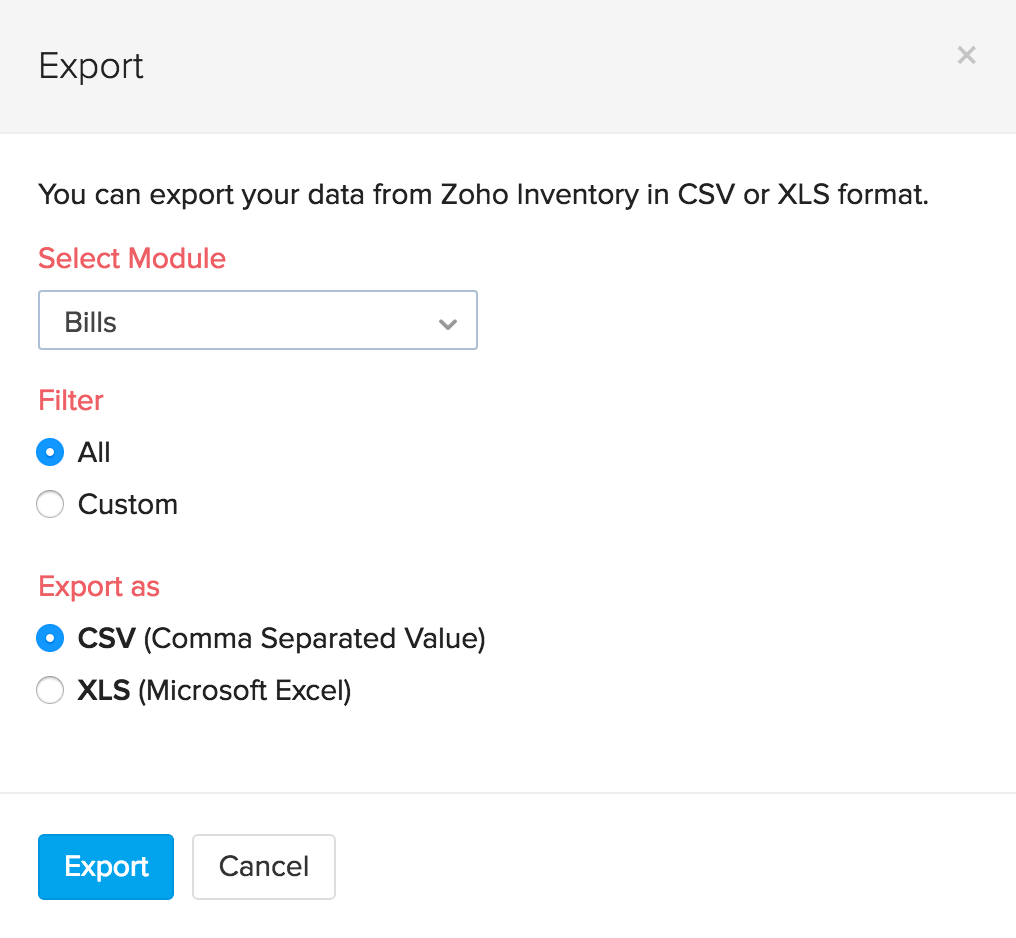
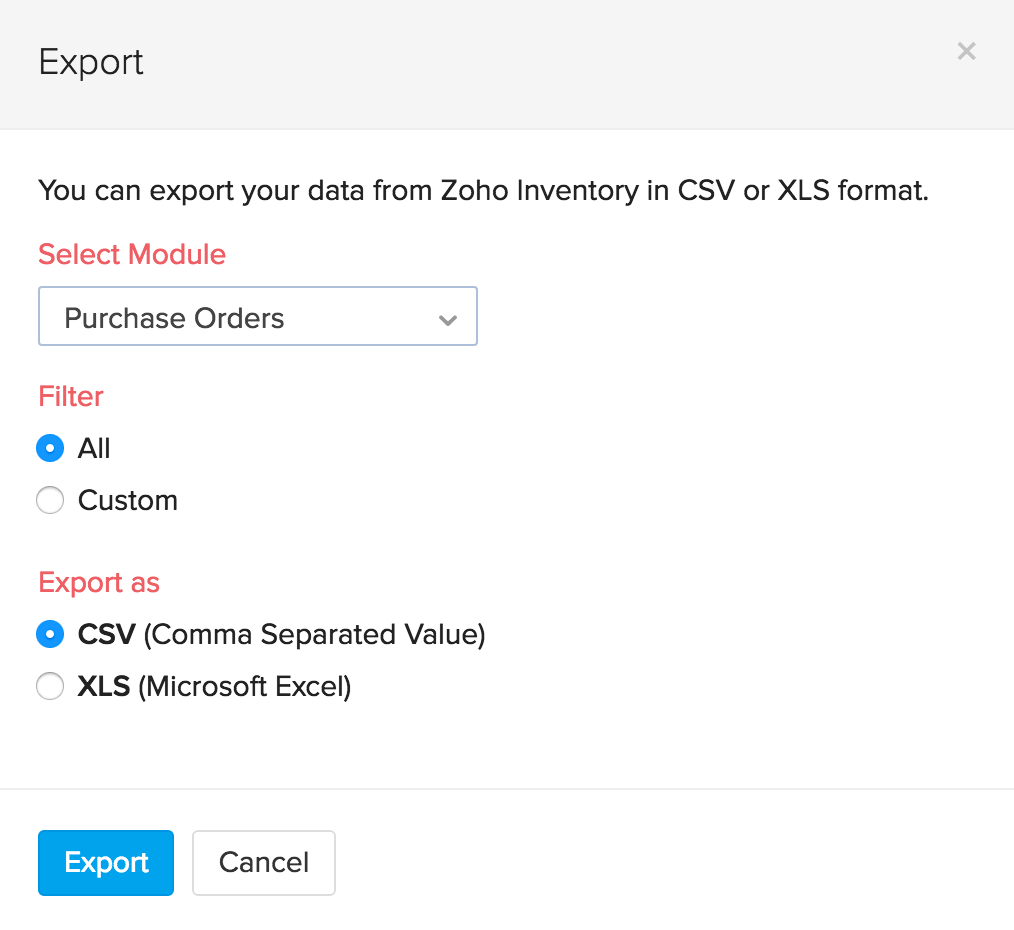
- A pop up for exporting the file(s) appears.
- The entity will by default be Purchase Orders.
- Choose the format in which you wish to export your purchase orders.(.XLS or .CSV)
- Click on the Export button.
Note: The file will be downloaded and stored in your default download folder.
Importing Bills
To import a Bill, follow this route map:
- Go to Bills tab by clicking on the Bills option in the side bar.
- Click on the Menu button to the right hand top corner of the bills page.
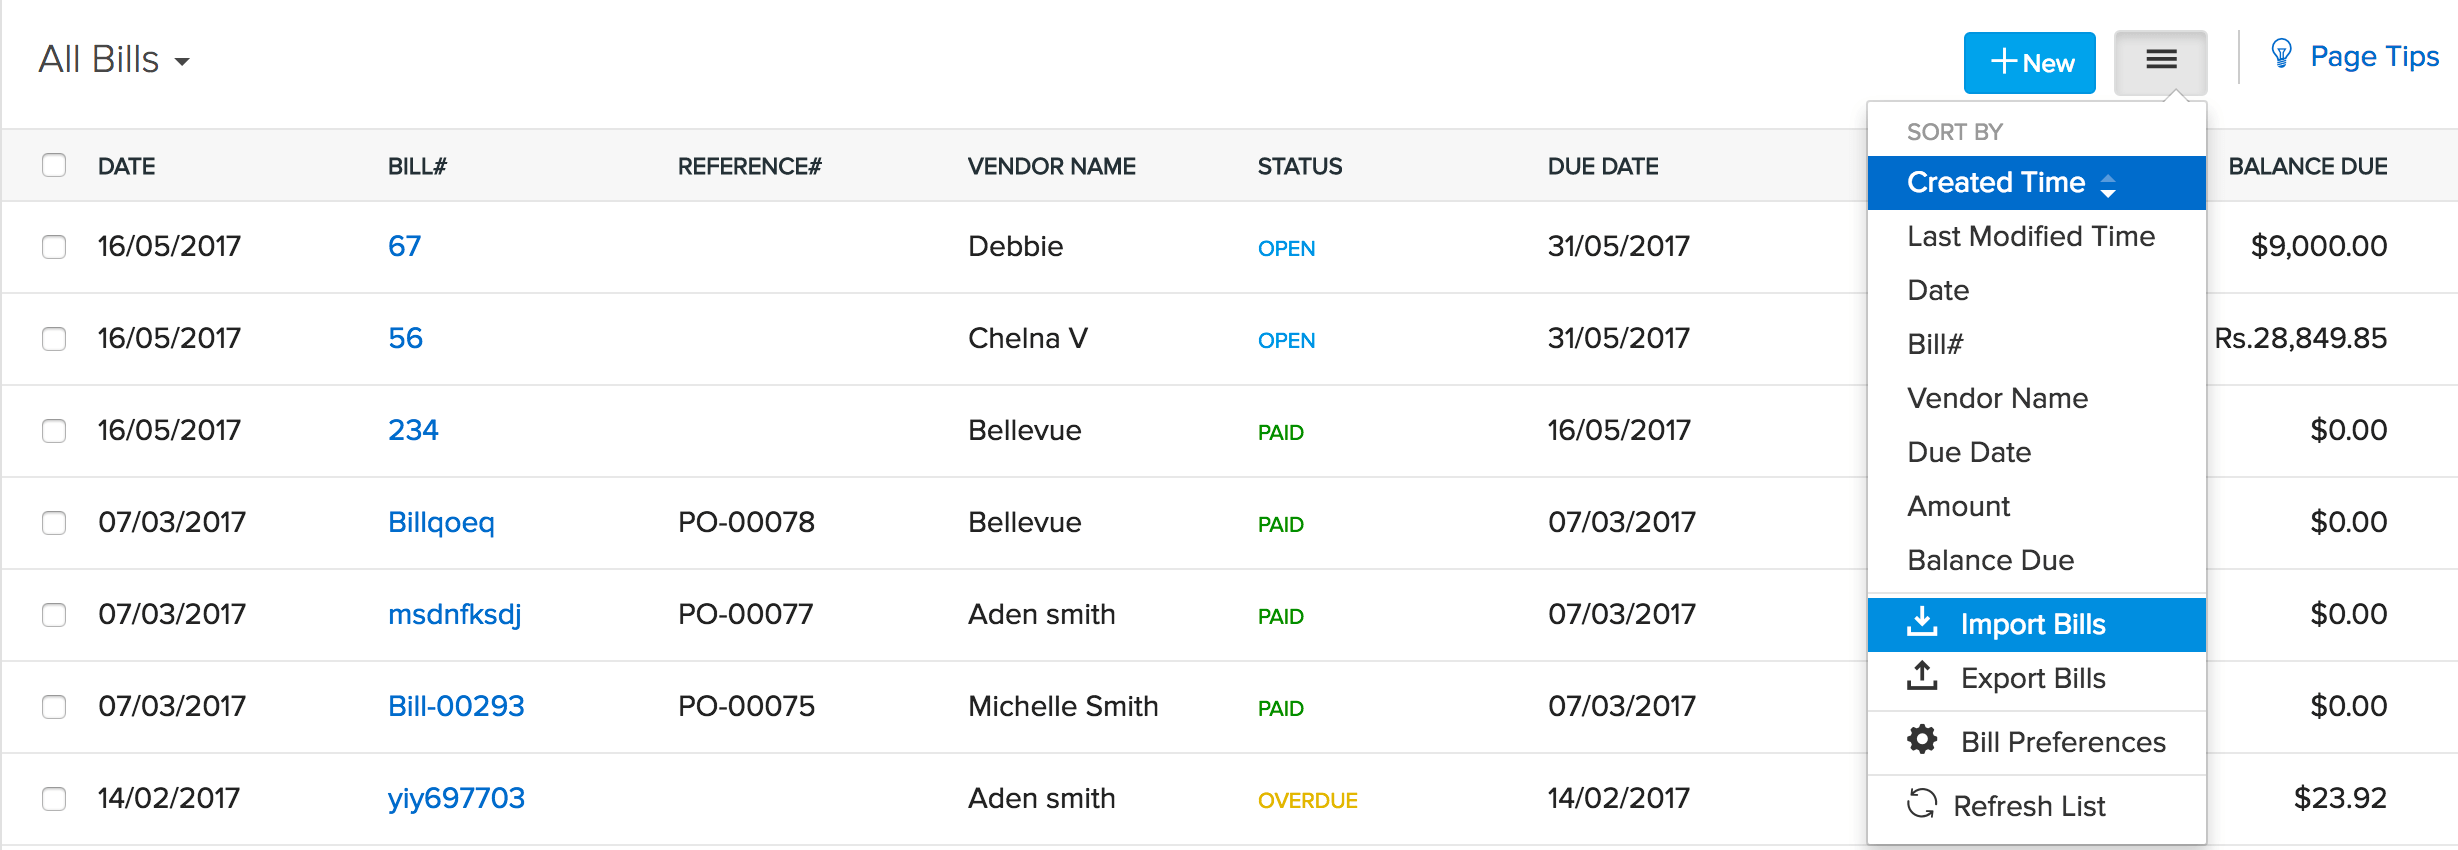
- Choose the Import Bills option from the drop down.
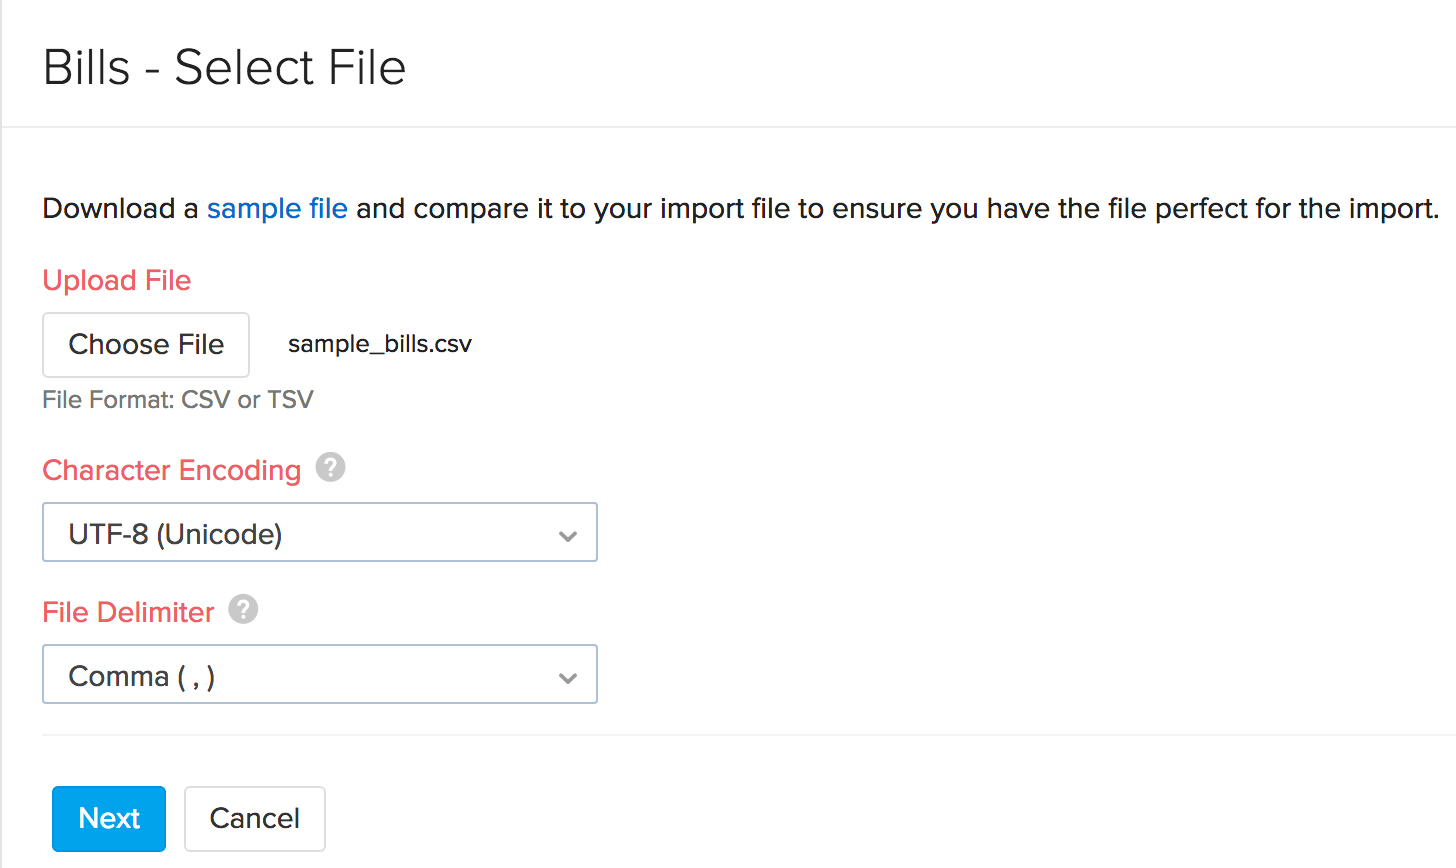
- A new page where you can import a bill in .CSV or .TSV format opens up.
- Choose the file and select the type of character encoding as applicable. By default the character encoding will be UTF-8 Unicode.
- Select the File Delimiter.(comma or semicolon)
- Click on the Next button, to proceed to mapping the fields of the Bill.
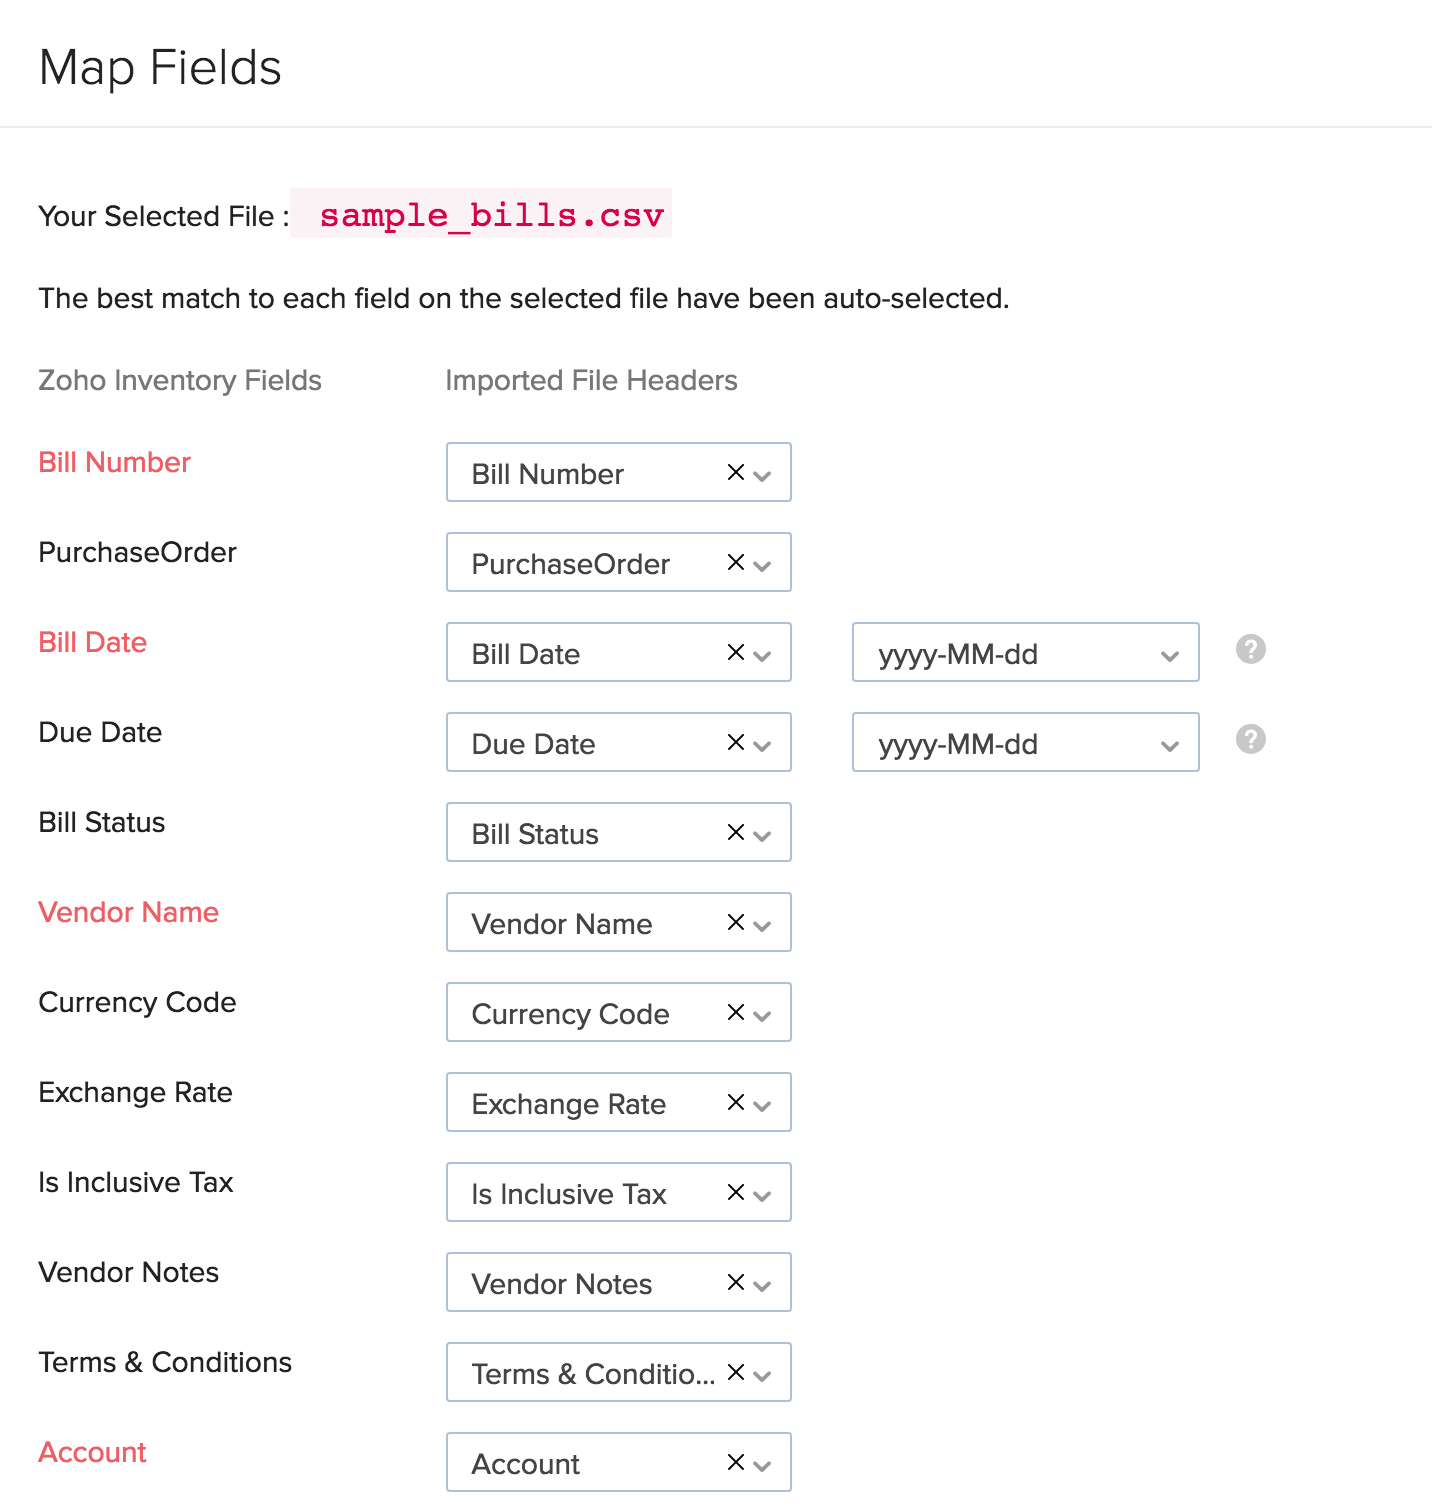
- By default, Zoho Inventory maps the closely similar and related fields.
- You can also manually map any field or alter any already mapped field.
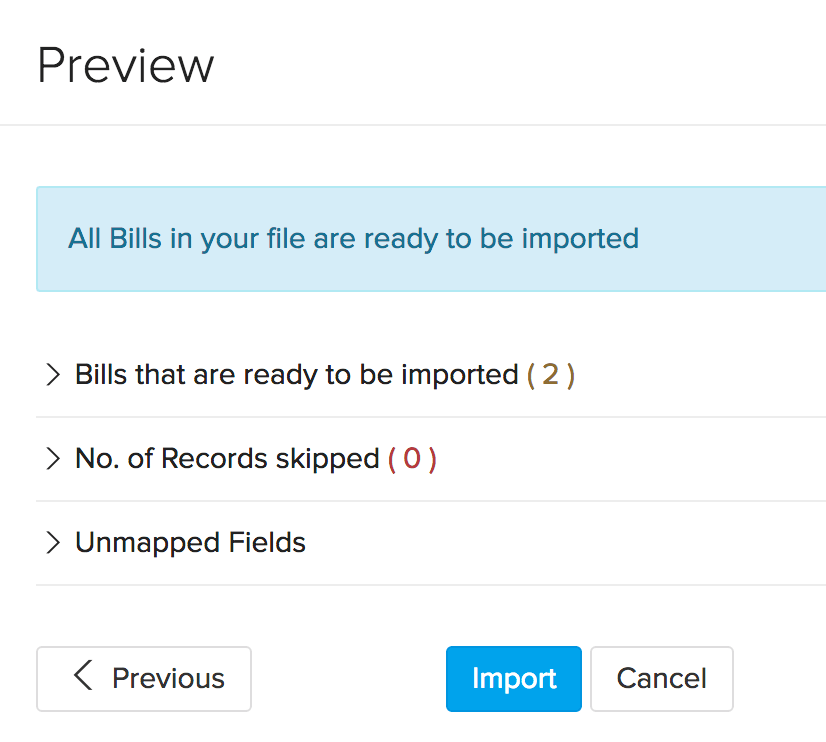
- Click Next to proceed to preview the import.
- Check if there are skipped records or unmapped fields.
- Click on the Import button to successfully import the bills.
Linking Bills to Purchase Orders
You can link your bills to its corresponding purchase orders in bulk while importing them. To do so,
- Go to the Bills module.
- Click on the Menu icon - Import Bills.
- Browse and upload the relevant file.
- Check the option - Link bills to its corresponding purchase orders.

- Click Next.
- Map the Purchase Order field with the corresponding purchase order number column from your import file. This step is mandatory to successfully link the bills to its purchase orders.

- Click Next, preview your changes and click Import if everything is ready.
Note: The purchase orders that are in the Draft status will be moved to Issued status automatically when you link bills to them.
Exporting Bills
To export bills, follow this route map:
- Go to the Bills tab
- Click on the Menu button that is situated in the right top corner.
- Choose the Export Bills option from the drop down.
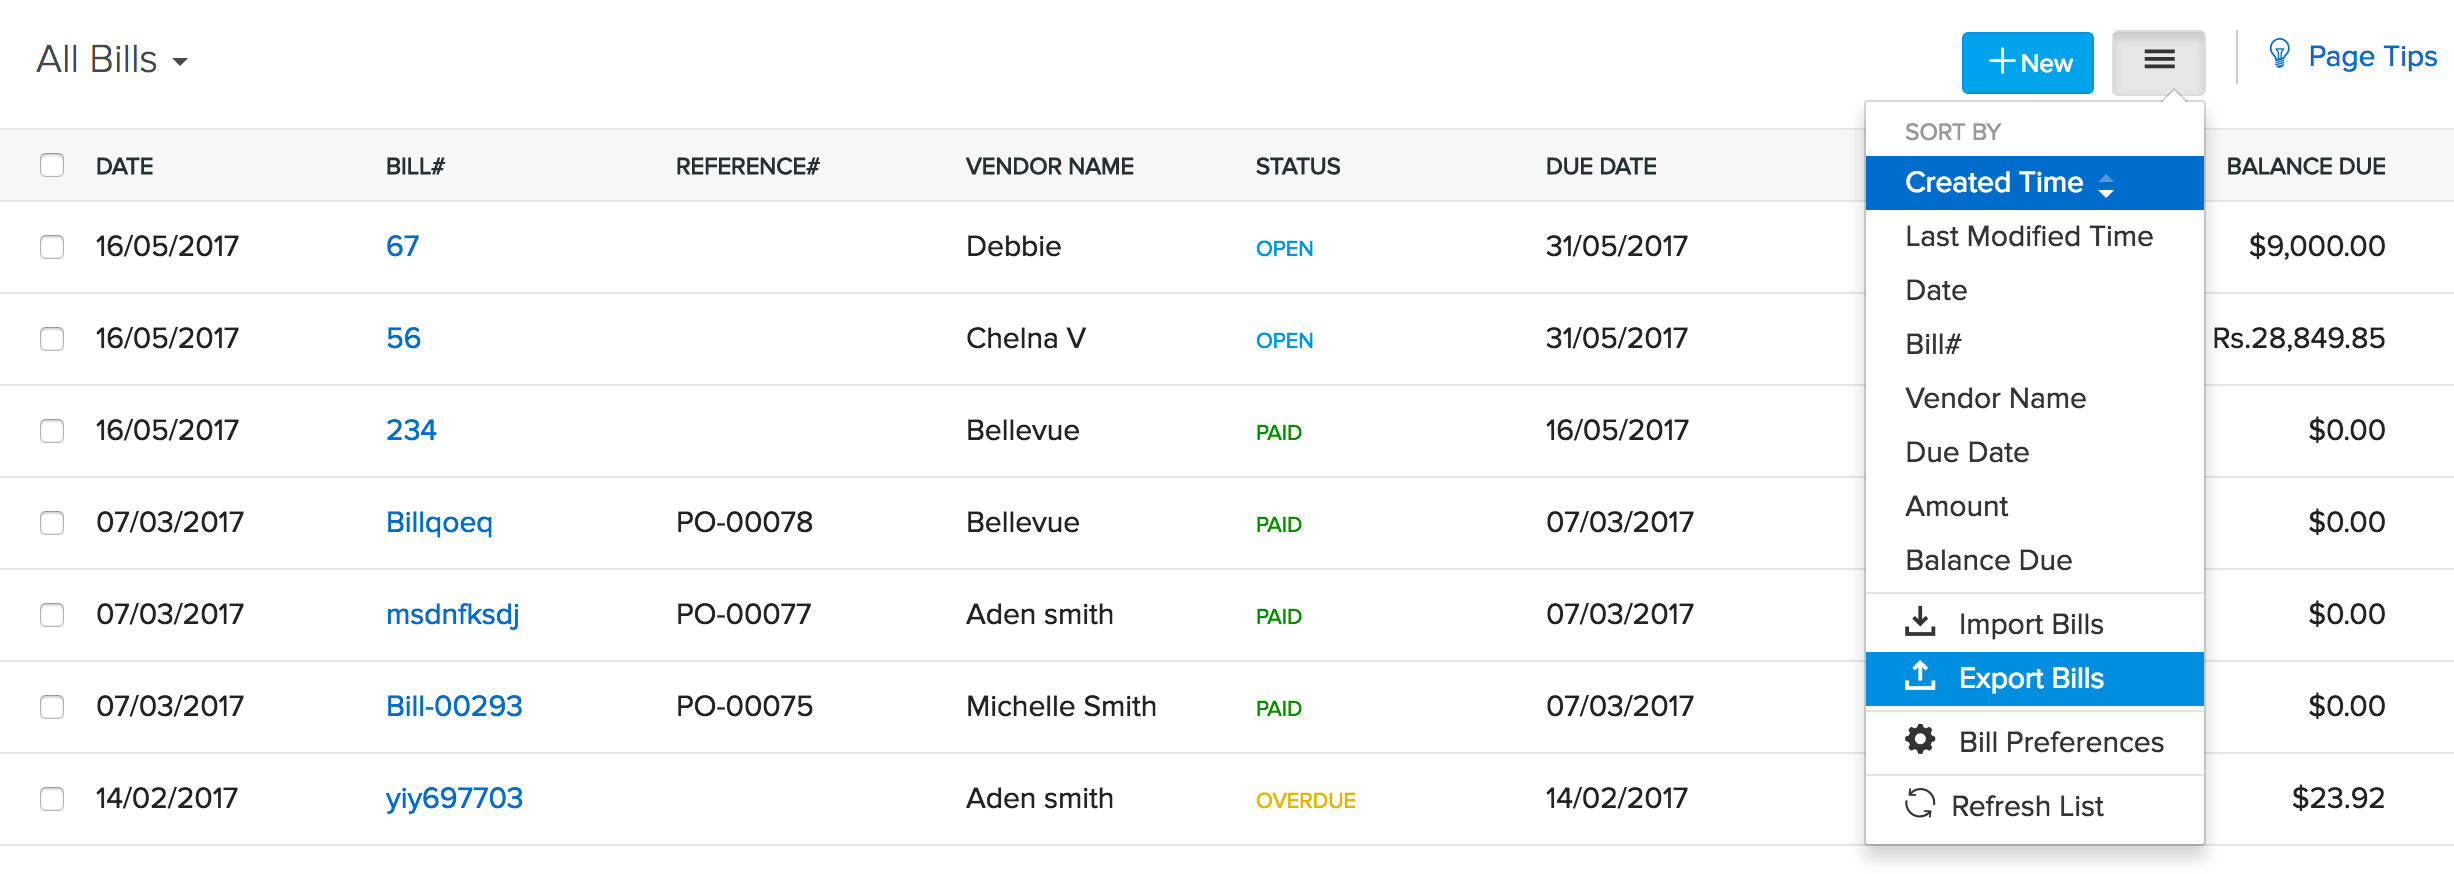
- A new page, with all options to export bills, opens up.
- Configure how you wish to export your bills.
- Click on the Export button, to successfully export your bills.
