 Inventory
Payments Received
Any payment that you receive from a customer can be recorded and applied across their various outstanding invoices. You can also view the payments recorded for the invoices.
View Payments Received
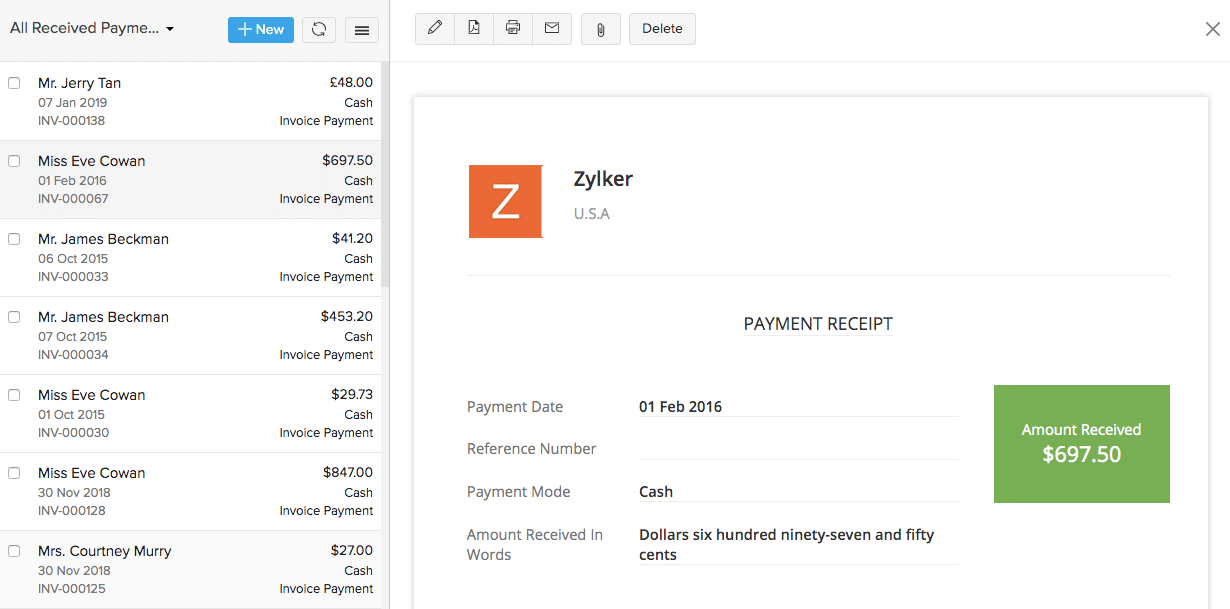
If you have already recorded payments from your customers, you can view them in the Payments Received module. Here’s how:
- Go to the sidebar and click the Payments Received module.
- Click on a payment receipt to view its details.
Record New Payment
While recording a new payment from a customer, you can choose to split the amount received on their outstanding invoices either in full or in part.
Scenario: Patricia receives a payment of $500 from her customer, who has two outstanding invoices of value $300 and $450, respectively. Patricia can split the payment of $500 into $300 for the first invoice (full amount) and $200 for the second invoice (partial amount). So, the second invoice will still have a balance of $250 to be paid.
- Go to the Payments Received module on the sidebar.
- Click the +New button on the top-right corner.
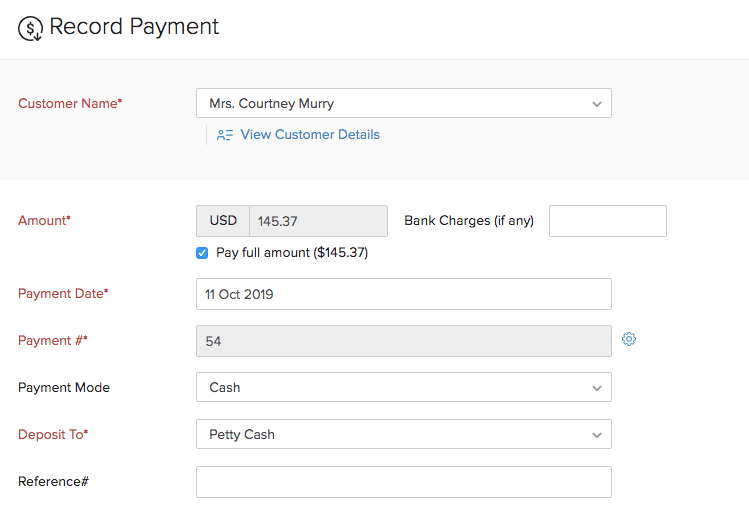
In the Record Payment page:
- Select the customer from whom you’ve received the payment.
- Enter the total amount received in the Amount field, or, click the Pay full amount checkbox to record the full outstanding payment for the customer.
- Choose the account to which the payment should get deposited to.
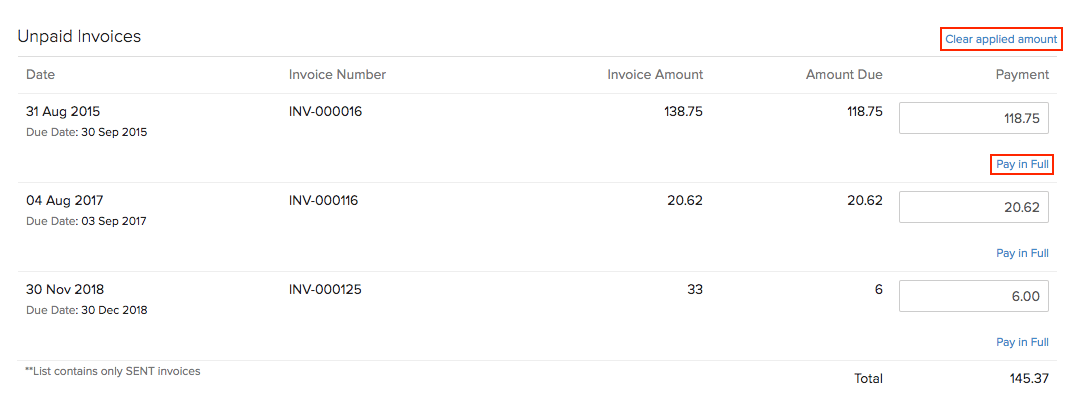
- Split the amount received from the customer (entered in the Amount field) among the outstanding invoices.
- Click Clear applied amount to clear all the amount entered.
- Click Pay in Full to auto-fill the Payment field with the entire amount due for each invoice.
-
You can view the amount used for payments and the available balance (amount in excess) in the Total section.
- Amount Received: Total amount received from the customer.
- Amount used for payments: Amount applied on the invoices.
- Amount in excess: Any excess payment by the customer, i.e. the amount that is not applied on the invoices.
-
Add notes and attach files for the payment. You can also send a thank you note to the customer for the payment.
-
Click Save at the bottom of the page.

Edit Payment
You can edit the details of any payment received. Here’s how:
- Go to Payments Received on the sidebar.
- Click the payment receipt you want to edit.
- Click the
 icon on top of the page.
 - Make the changes.
- Click Save.

Delete Payment
- Go to Payments Received on the sidebar.
- Click the payment receipt you want to edit.
- Click the Delete button on top of the page.
- Click OK to confirm.

Import Payments Received
If you already have a list of all the invoice payments from your customers, you can import them into Zoho Inventory in CSV, TSV or XLS format.
To know the format of the import, i.e. the columns and data to be included in the import file, you can download the sample import file which we’ll be looking at in the steps below.
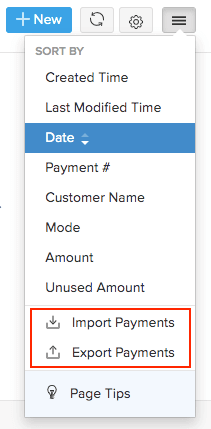
- Go to Payments Received on the sidebar.
- Click the
 icon.
icon. - Click the Import Payments option.
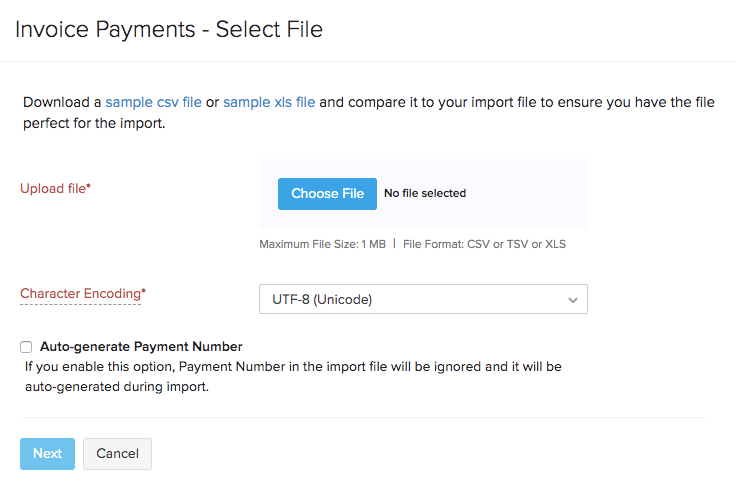
- Click the Choose File button to browse and upload your import file. You can download the sample CSV or XLS file for your reference.
- Click Next to proceed to the field mapping page.
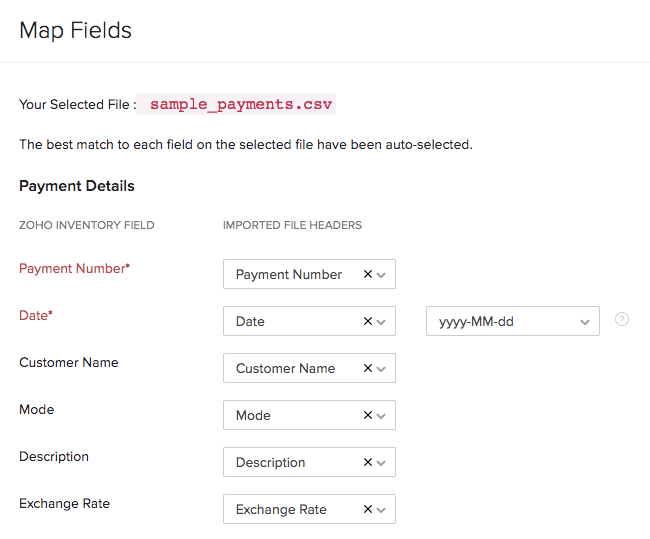
- Map the columns in Zoho Inventory with the appropriate column in your import file.
- Click Next to proceed to the preview section.
- In the preview page, you can view the summary of the records that can be imported.
- Click Import if you’re ready, or click Previous if you need to make any changes.


