Charging the Customer
After recording the time spent on tasks, you can convert those projects into invoices to get paid for the work done.
Scenario: Peter has logged time for the work done. But he’s unsure of the amount of money he should charge. So he first raises an estimate and sends it to the customer. Once the customer accepts it, he will convert it to an invoice. He also wants to record and reimburse expenses incurred while working on the project . So he records all the expenses and adds them to the invoice as well.
Similarly, if the need be, you can also convert your projects into estimates or invoices and record expenses for the same.
Send an Estimate
Send Estimates of your projects to your customers.
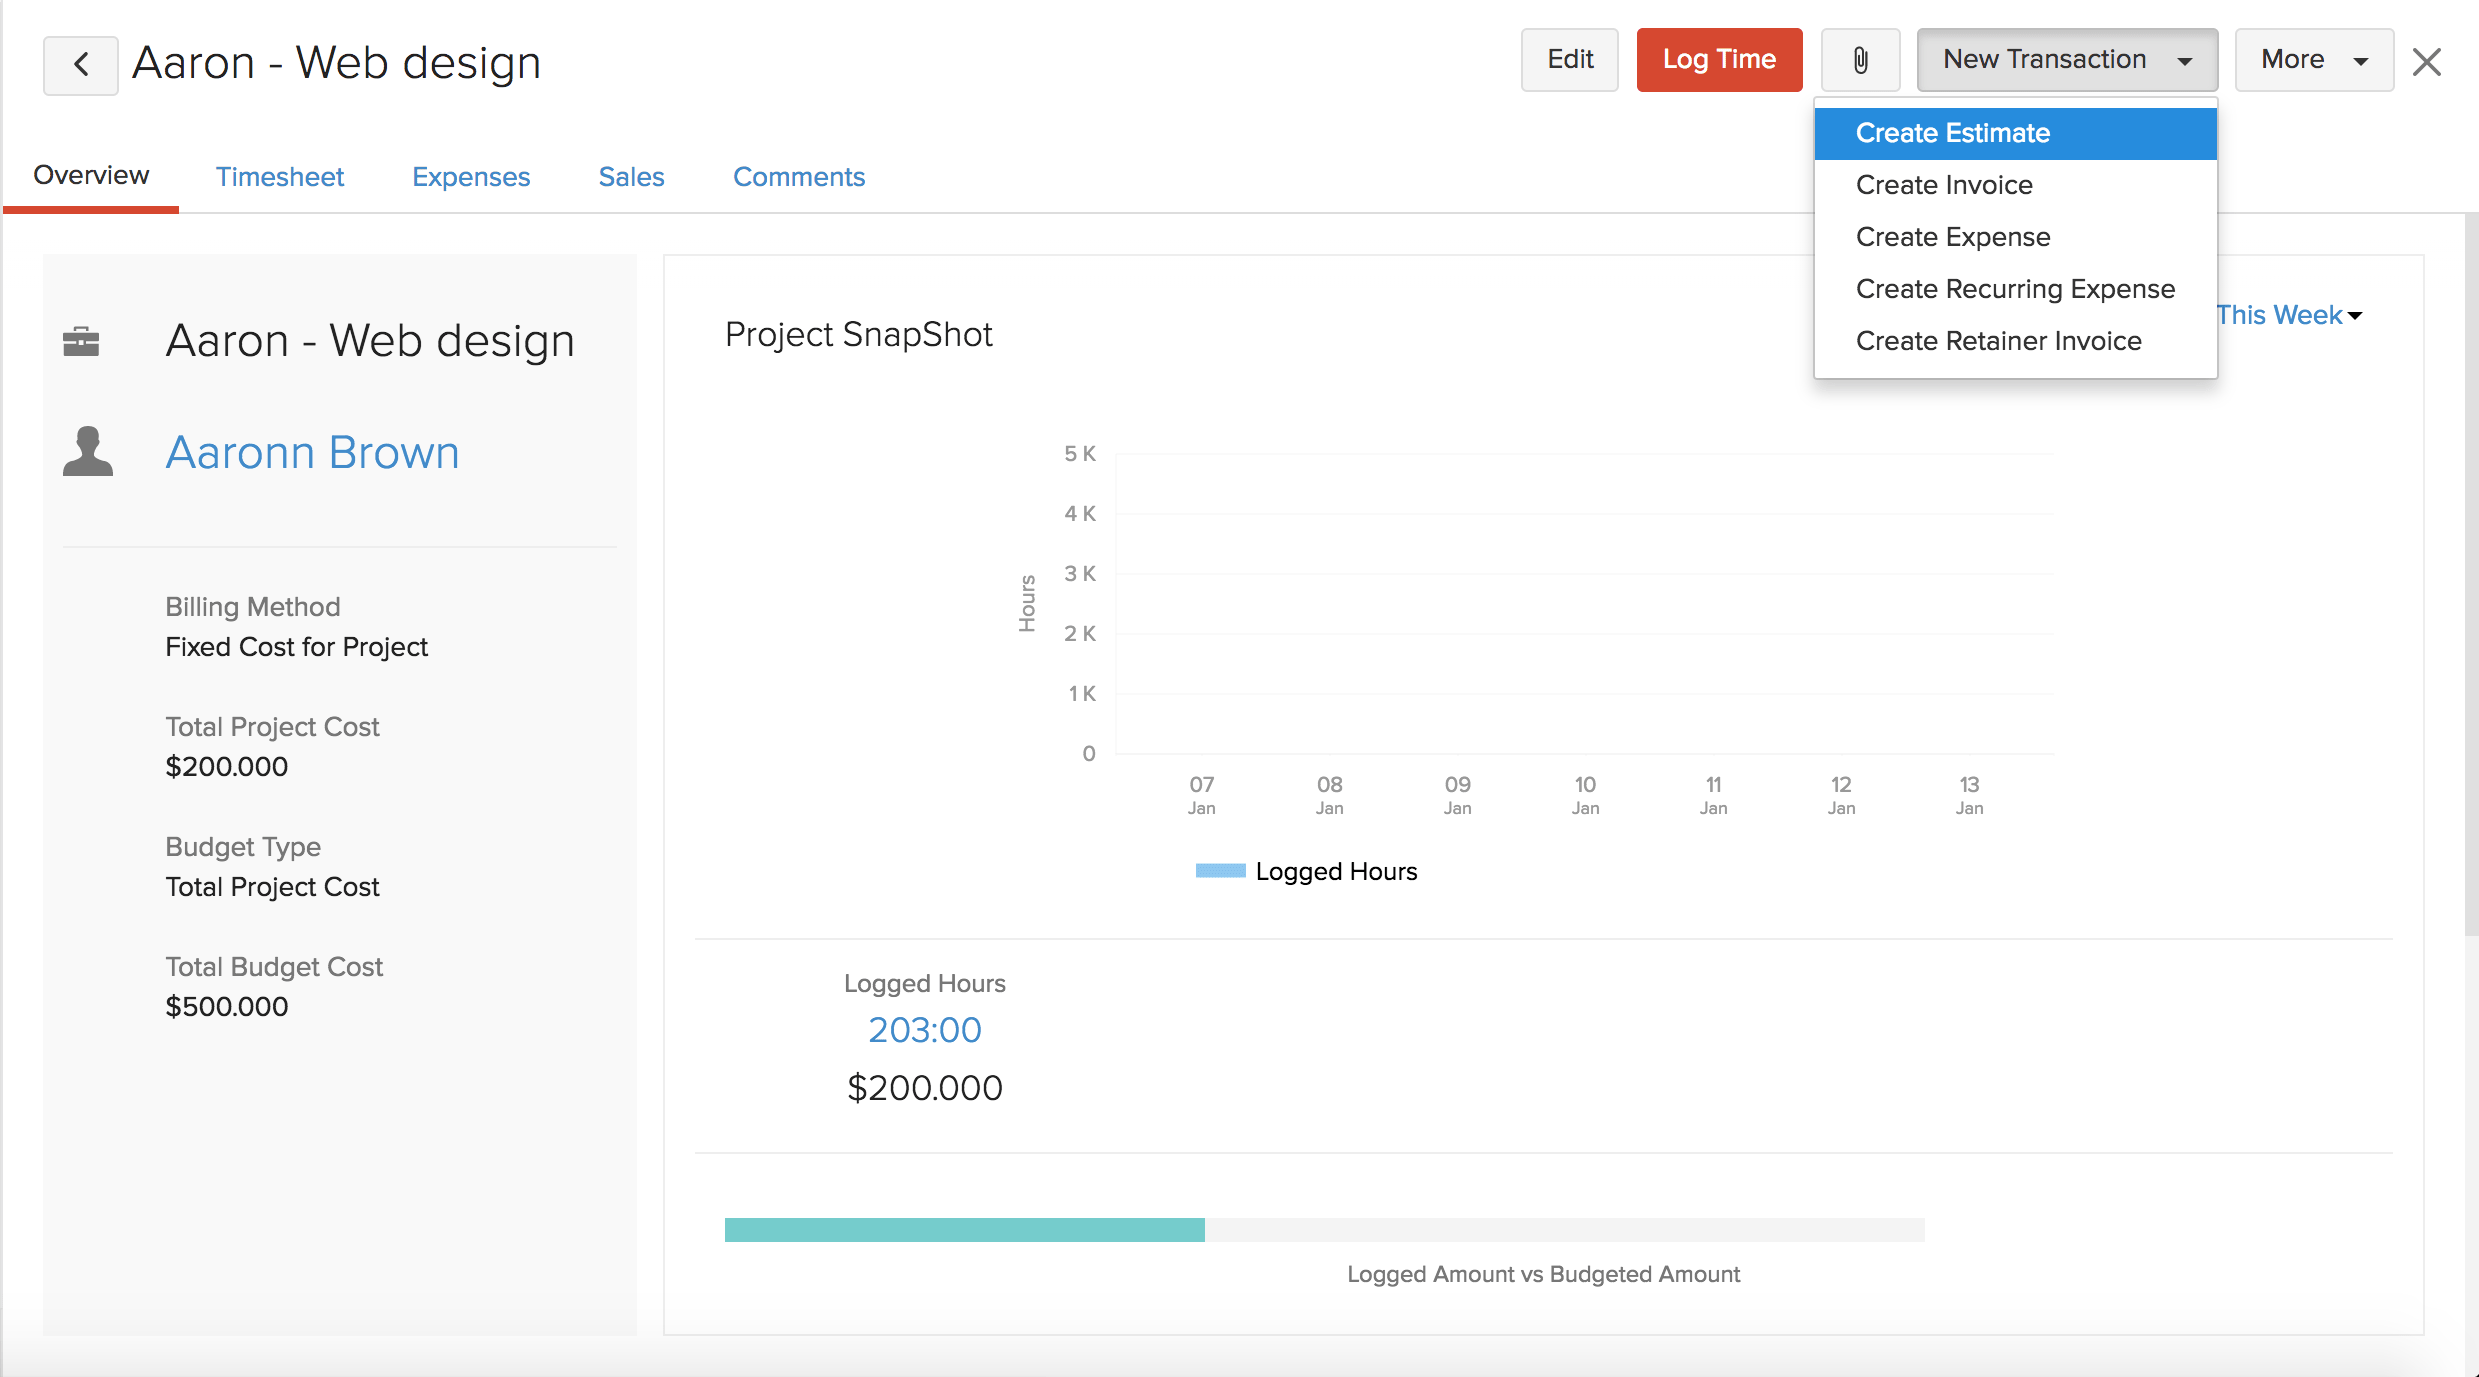
- Select the project from which you wish create an estimate.
- Click the New Transaction drop down placed on top of the window and select Create Estimate.
- You will be taken to the new estimate creation form where the customer details will be automatically populated.
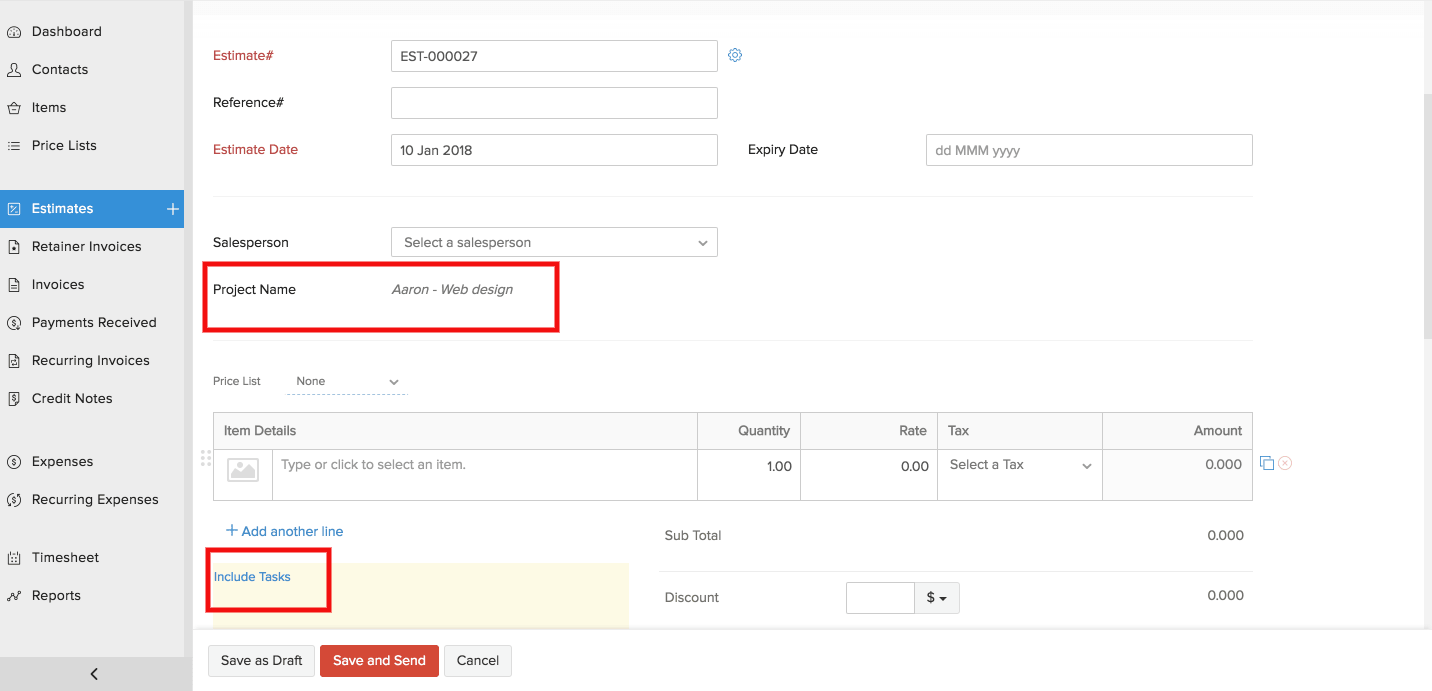
- You can add project task(s) to Item Details by clicking the Include Tasks option.
Send an Invoice
Charge your customers for the time you have spent on projects.
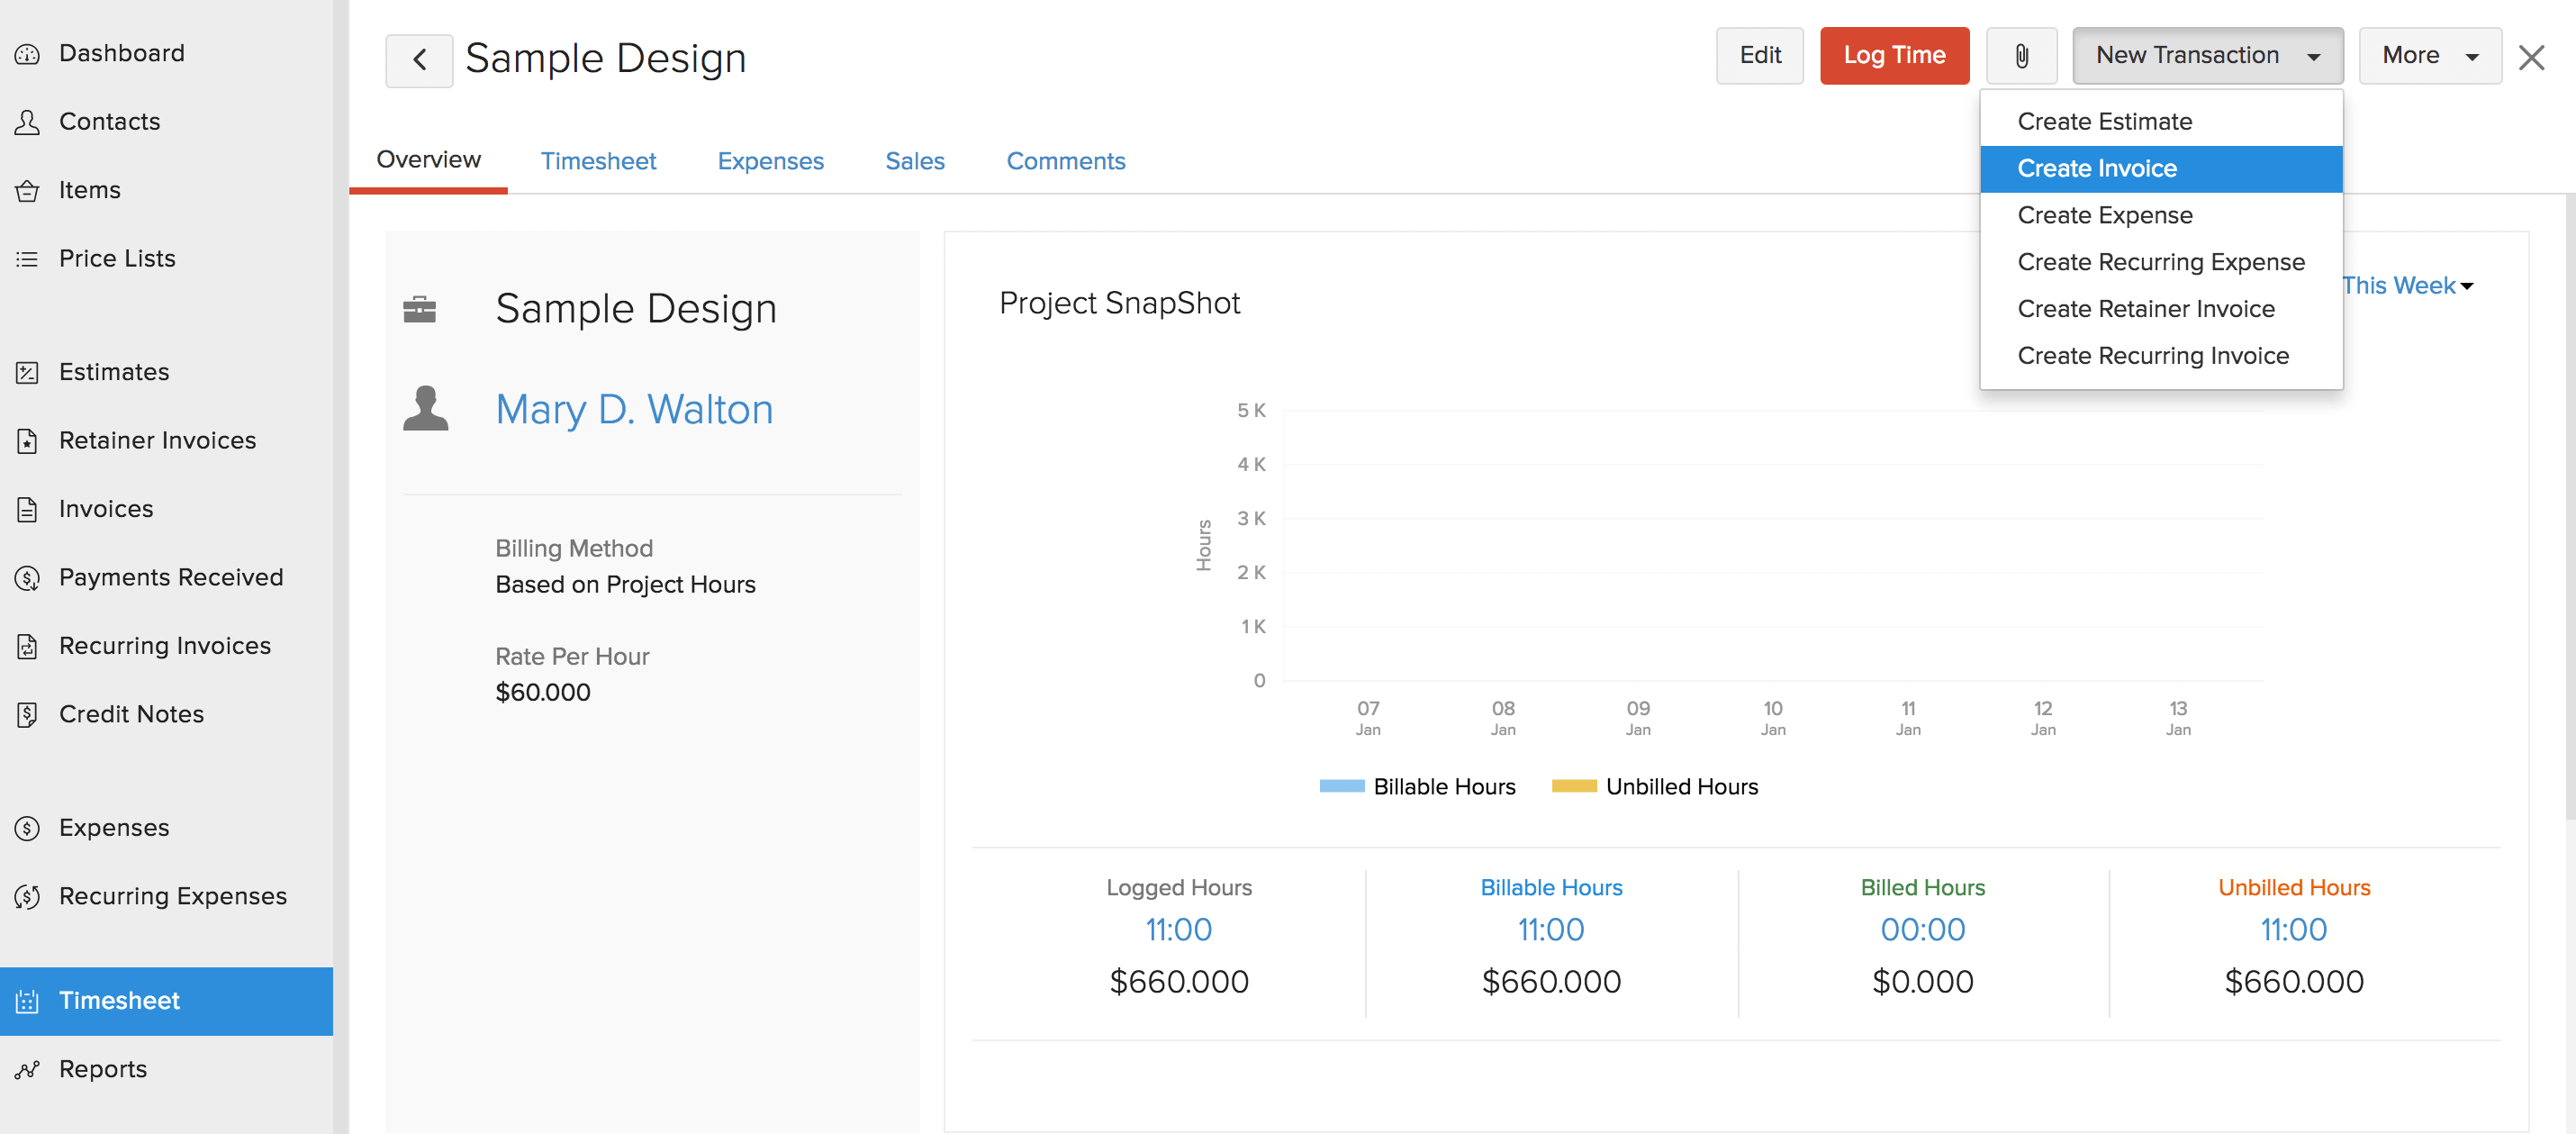
- Select the project from which you wish to raise an invoice.
- Click on the New Transaction drop down placed on top of the window and select Create Invoice.
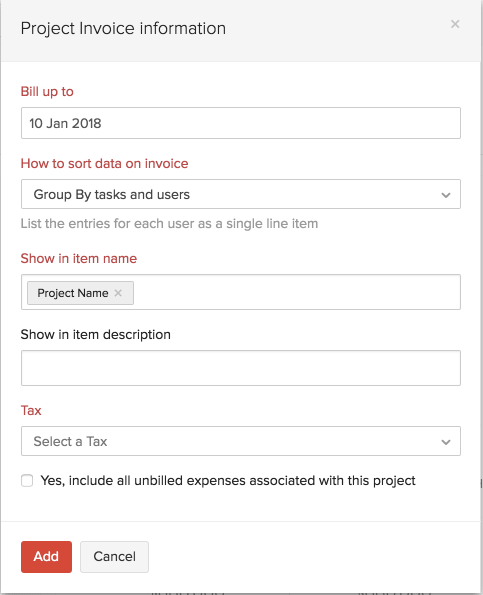
- In the Bill up to field, enter the date up to which you wish to bill your customer.
- Select the method in which you like the data on invoice to be sorted from How to sort data on invoice drop down.
| Options | Description |
|---|---|
| Single line for the project | This will show the entire project information in a single line on the invoice. |
| Show all timesheet entries individually | All the unbilled timesheet work item will be individual entries on the invoice. |
| Group by tasks | Every task worked on will be a separate line item. |
| Group by users | Every task worked by an user will be in a single line item. |
| Group by tasks and users | Individual users and their tasks will be shown in a single line item. |
- Under the Show in item name section, the default name and description provided are the Project Name and Project Description. Options will be provided according to the selection you made from the How to sort data on invoice drop down.
- You can also include all the unbilled expenses that were recorded in this project by checking the Yes, Include all unbilled expenses associated with this project box.
- Click on Add and you will be taken to the new invoice form where all the necessary data is filled. Add or remove data according to your necessity and click on Save and Send.
Note:
- For projects with billing method Fixed Cost for Projects, only Single line for the project option will be shown.
- For projects with billing method Based on Task Hours, the option Group by users will not be shown.
- For projects with billing method Based on Staff Hours, the option Group by tasks will not be shown.
- For projects with billing method Based on Project Hours, all the options will be shown.
You would also be able to customize the invoice you send your customers. Click here to learn more.
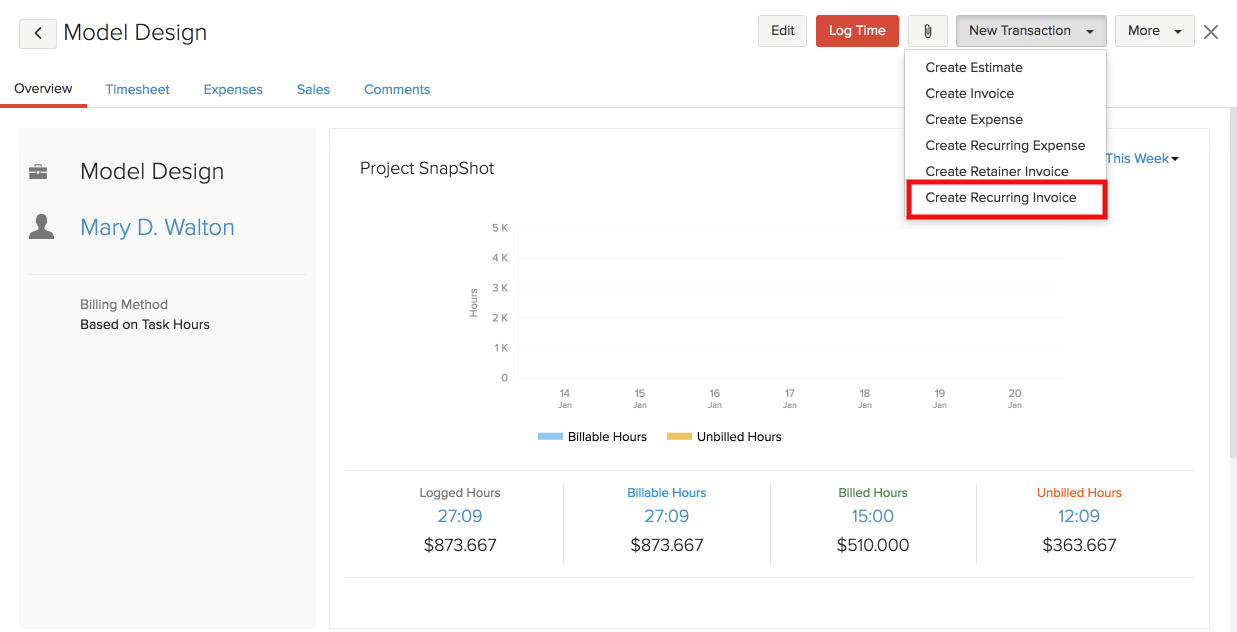
Recurring Invoices
If would you be working on the same project for the same amount of hours again and again, then you can make this recurring so that invoice would be generated automatically in the fixed time interval without you having to manually raise it every time.
Record an Expense
Projects do have expenses. It can be anything from buying a simple coffee for your user to purchasing tools for a task. Record these expenses for your projects.
To learn more about expenses, click here.
- Select the project for which you need to record an expense.
- Click the New Transaction drop down placed on top of the window and select Create Expense.
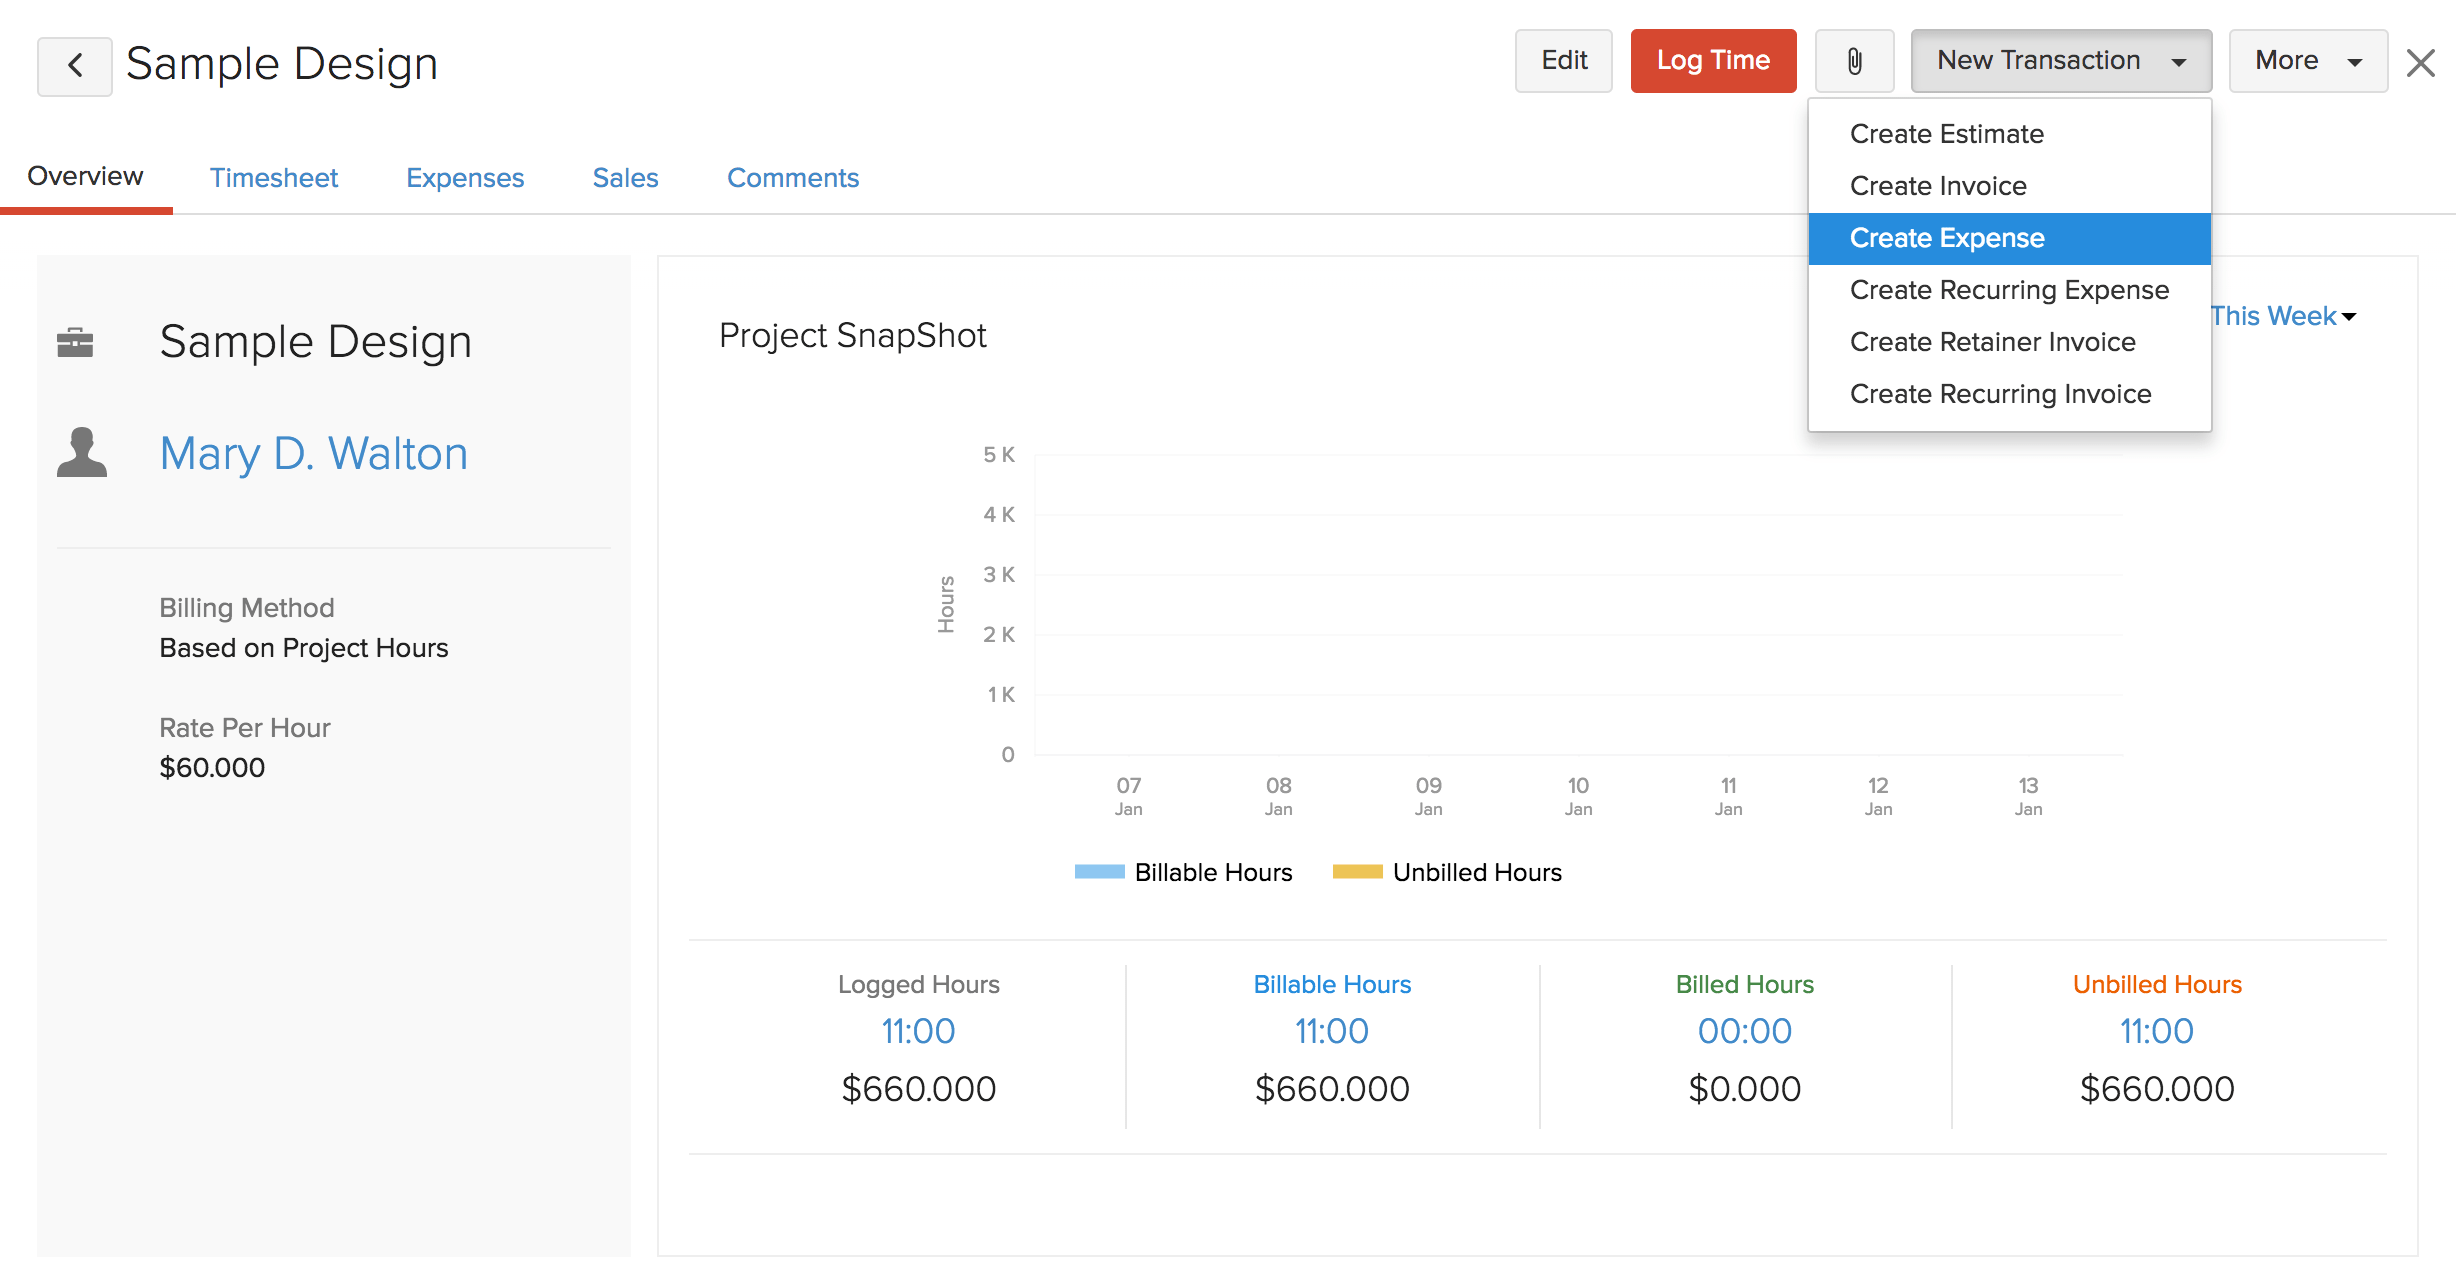
- You will be taken to the new expense from where you can fill in details about the expense for the project. The Customer and Projects fields will be automatically populated.
- Click on Save.
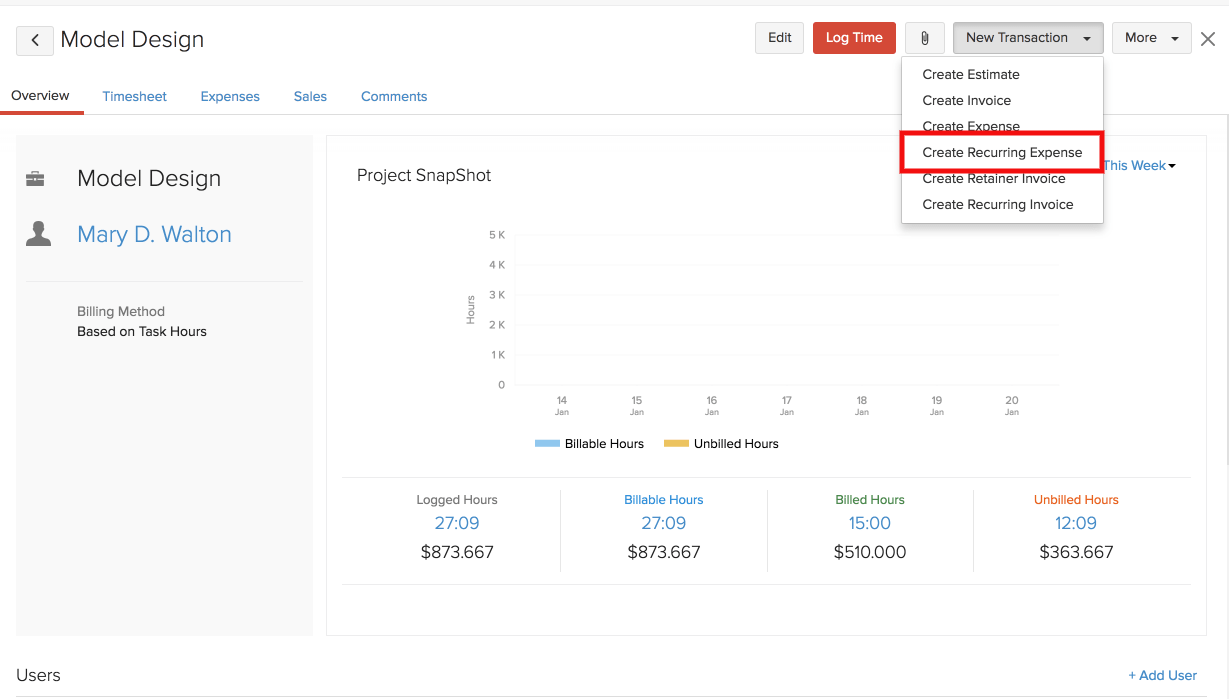
Recurring expense
- If the same expenses are likely to be incurred every time, you can make use of the Recurring expenses option so that you don’t have to create an expense manually every time.


 Yes
Yes