Online Payments
Zoho Invoice is integrated with major online payment gateways to help you receive payments for your invoices online. This ensures faster and hassle free receipt of payments and further automates your cash flow and its book keeping.
When you integrate a payment gateway with your Zoho Invoice organization, your merchant account information will be shared with the gateway. Zoho Invoice will store only the last four digits of your customer’s card details.
IN THIS PAGE…
Payment Gateways
Click on a payment gateway to find out how you can use it along with Zoho Invoice.
Razorpay
Razorpay is an Indian Payment Gateway that accepts and validates online payments via Credit Card, Debit Card and Net banking.
Set up the Razorpay Integration
To set up Razorpay for receiving payments,
- Go to Settings > Integrations.
- Navigate to Online Payments.
- Click the Set up Now button under Razorpay.
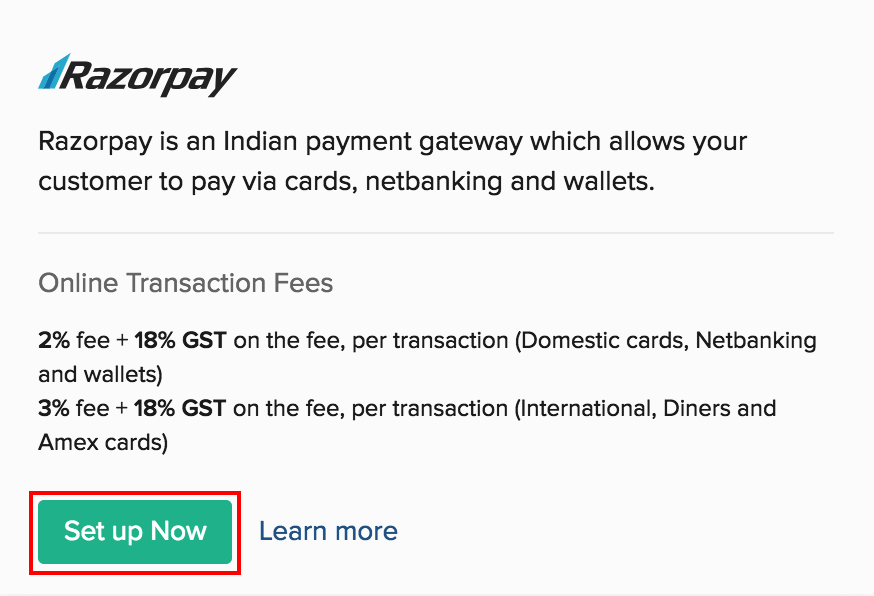
You will be redirected to the Razorpay website.
- Enter the email and the password of your Razorpay account.
- Click Login.
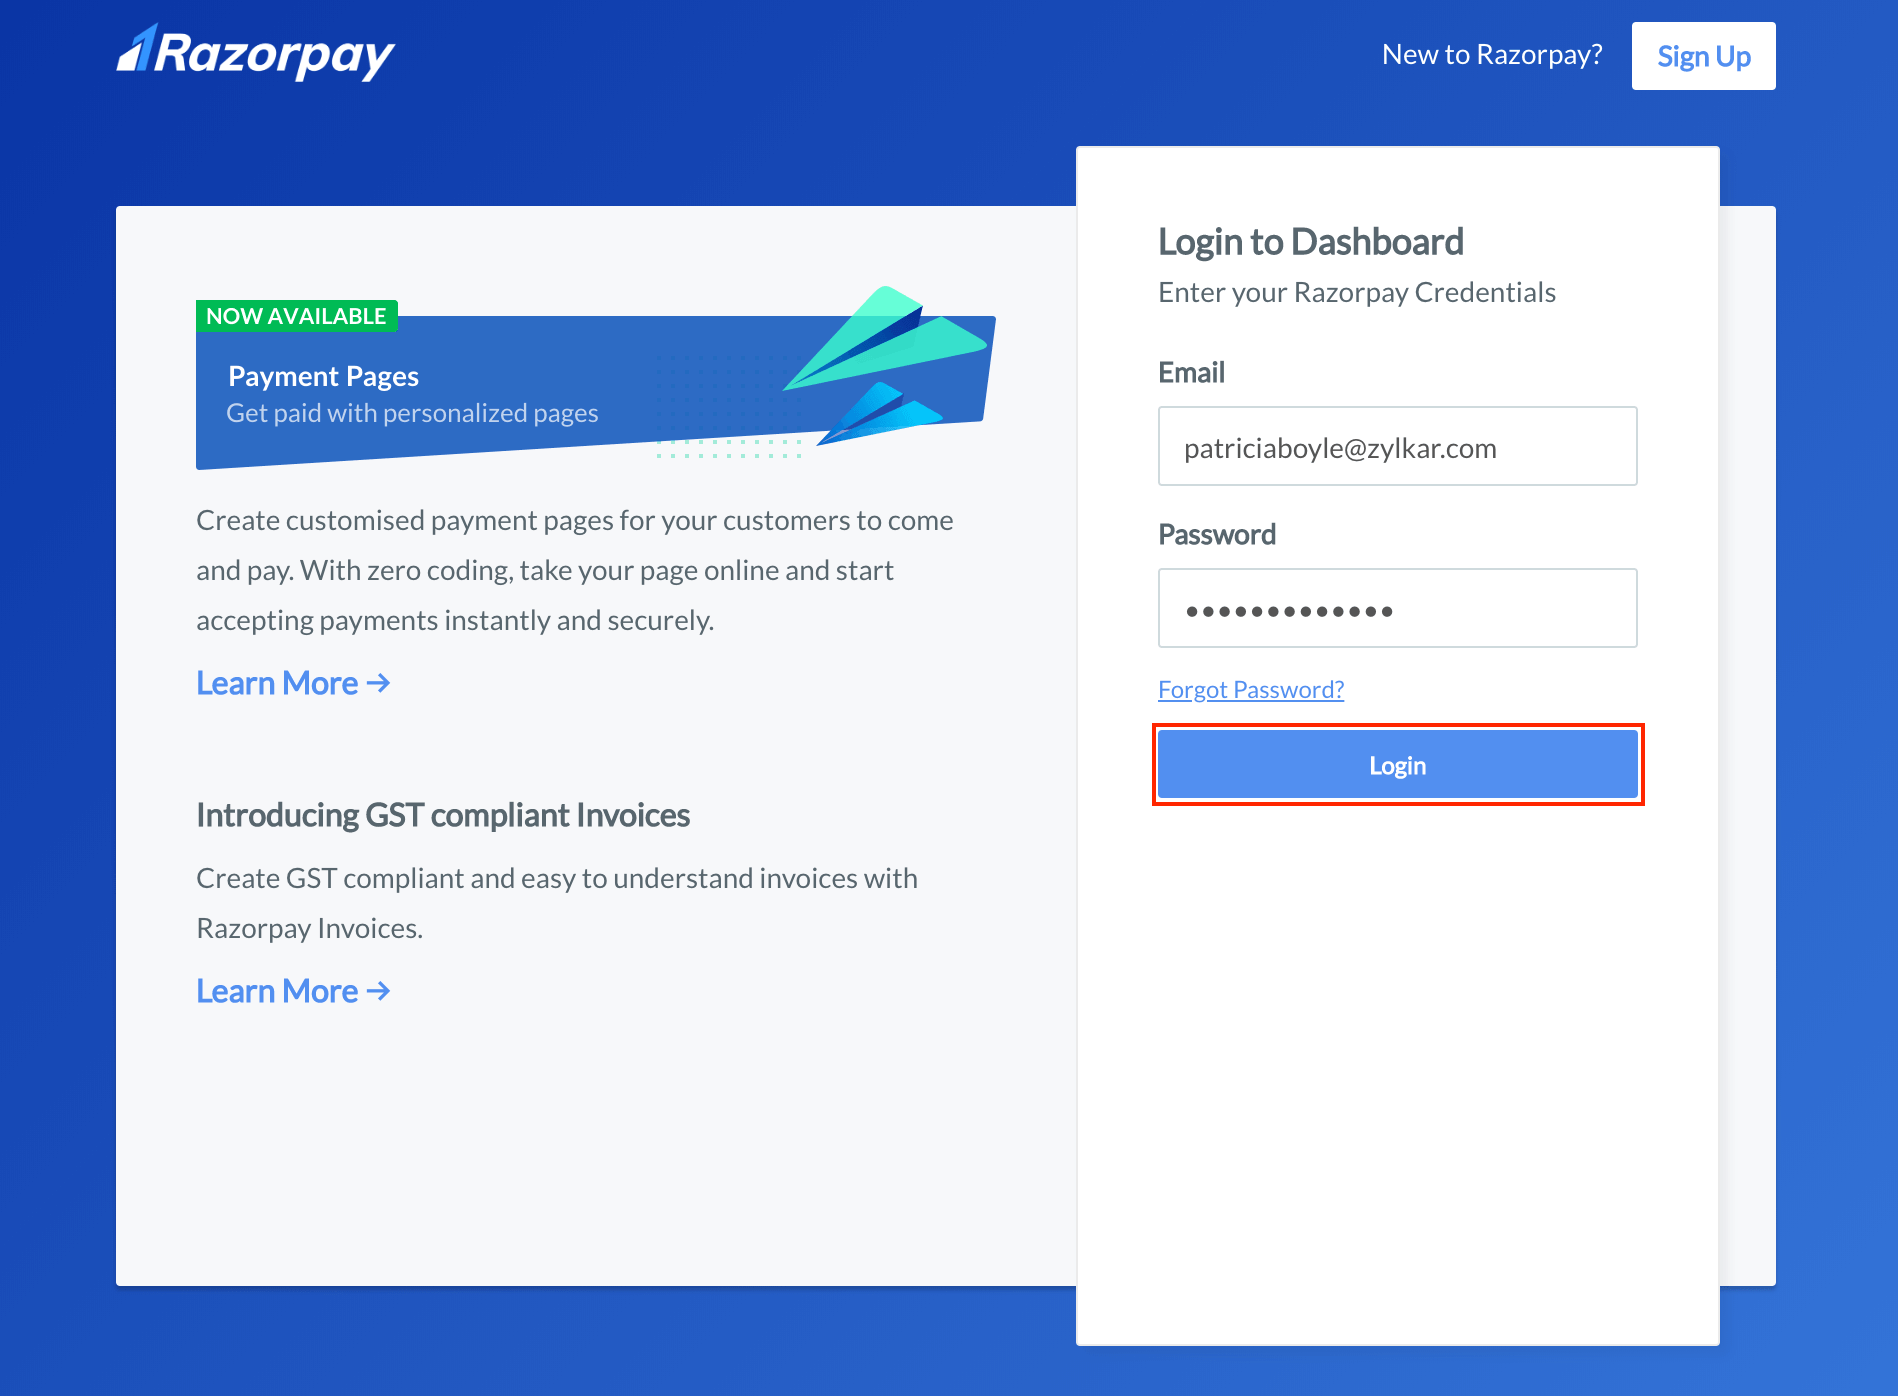
Note: If you don’t have an existing Razorpay account, click the Sign Up button in the top right corner to create a new account.
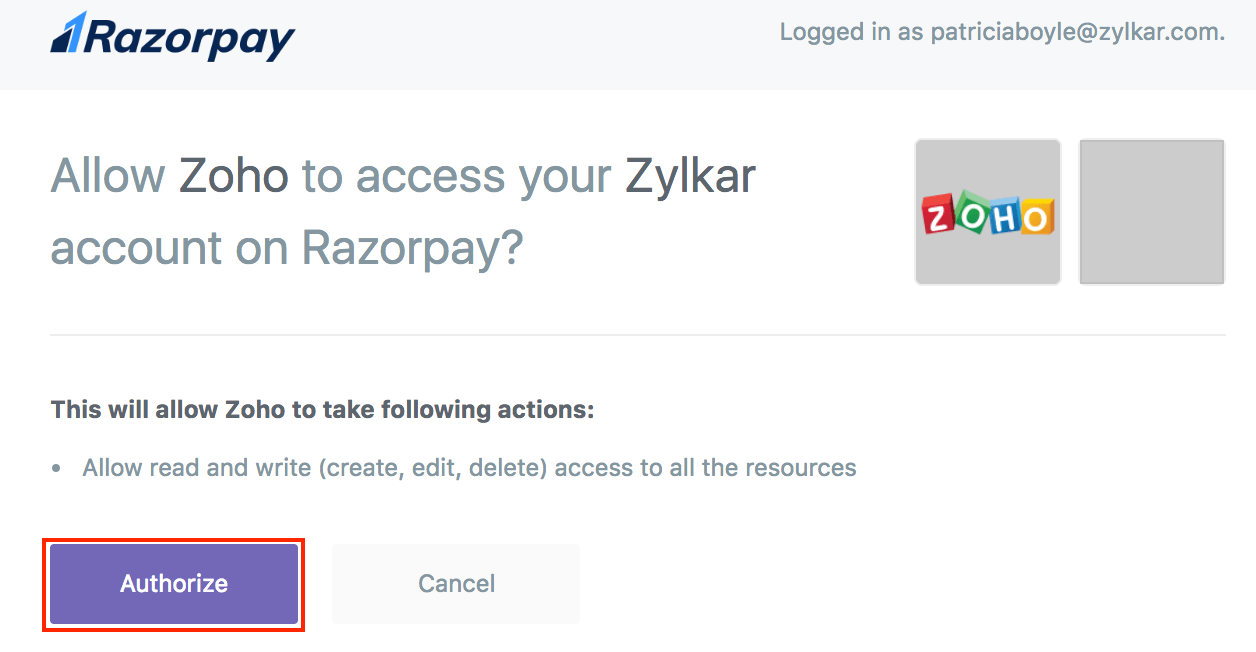
- Once you’ve logged in to your Razorpay account, click Authorize to complete the setup.
Disable the Razorpay Integration
To disable the Razorpay integration:
- Go to Settings > Integrations.
- Navigate to Online Payments.
- Click the Trash icon on the right side of Razorpay.

- Confirm by clicking OK.

Note: If you disable the Razorpay integration and want to enable it again, you would have to re-enter your Razorpay credentials.
2CheckOut
To configure 2CheckOut,
-
Click the gear icon on the top right corner of the screen and select Integrations.
-
Select Online Payments and click the Setup Now button below 2Checkout logo.
-
Enter your 2CO Account number in the 2CO Account No field . Ensure that you configure your 2CheckOut account by logging in to the 2CO control panel.
-
Enter the secret word (Password) in the Secret Word field and hit the Save button.
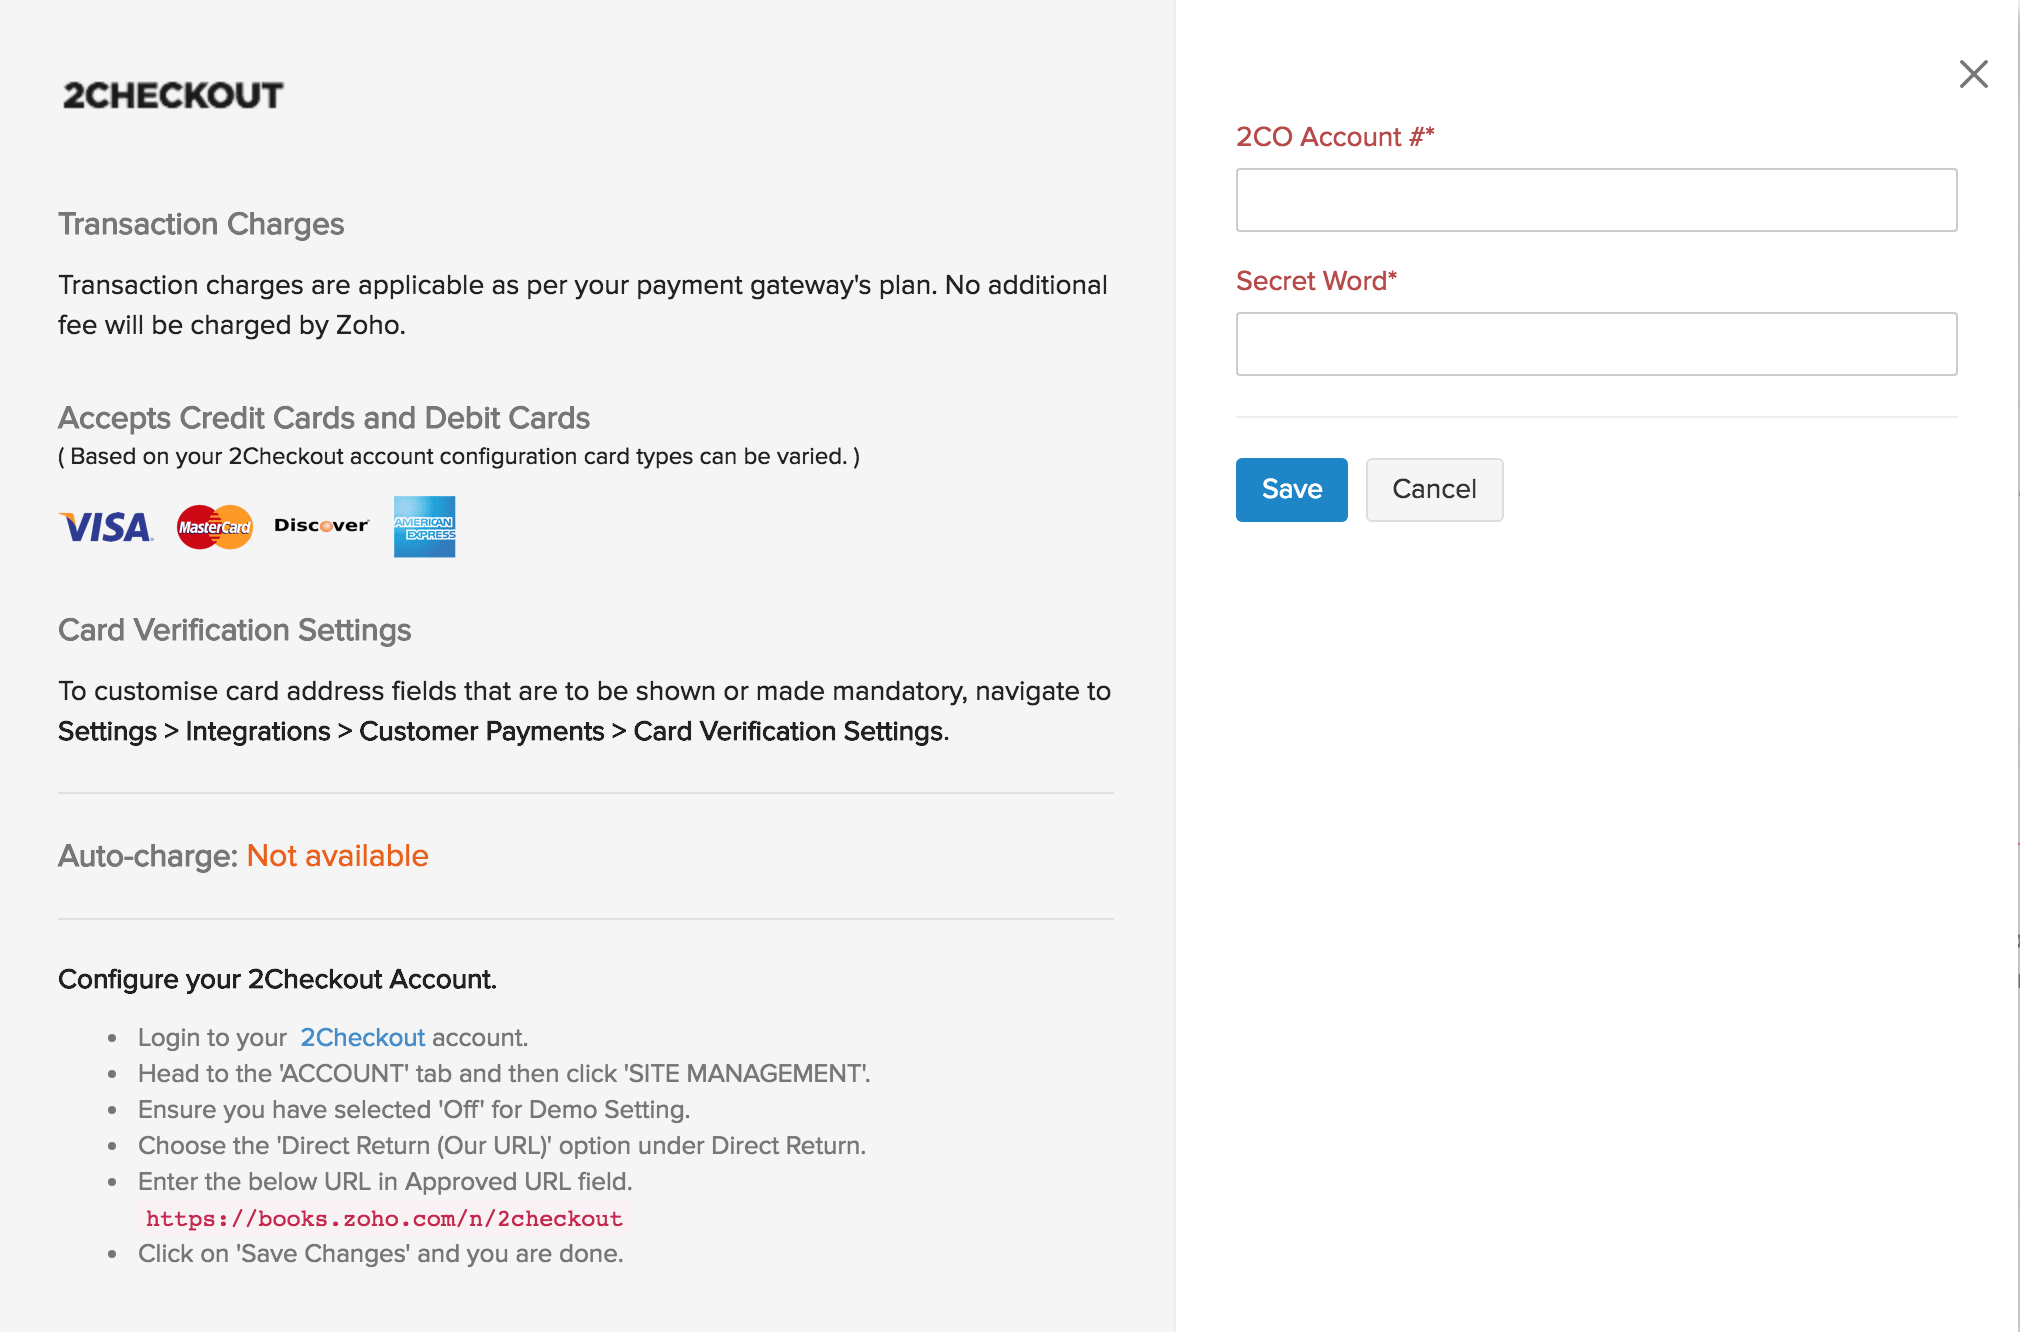
If you haven’t created a 2Checkout merchant account yet, click here to sign up now.
Card Verification Settings
Initially card address was made mandatory in Zoho Invoice. This was initiated by us to avoid confusions with respect to various payment gateways as different payment gateways have different validations. But now you are given that option to decide on whether the card address needs to be shown or not.
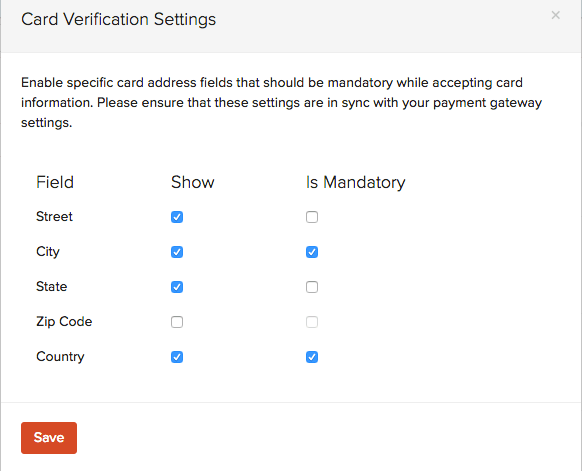
Depending on your choice of gateway you can enable the necessary fields of the card address to be shown or to be made mandatory by making the preferences in Card Verification Settings.
Kindly follow the steps below to make card address related changes:
- Click the Gear icon present at the top right corner of the screen.
- Go to Integrations and select Online Payments and click the Card Verification Settings button.
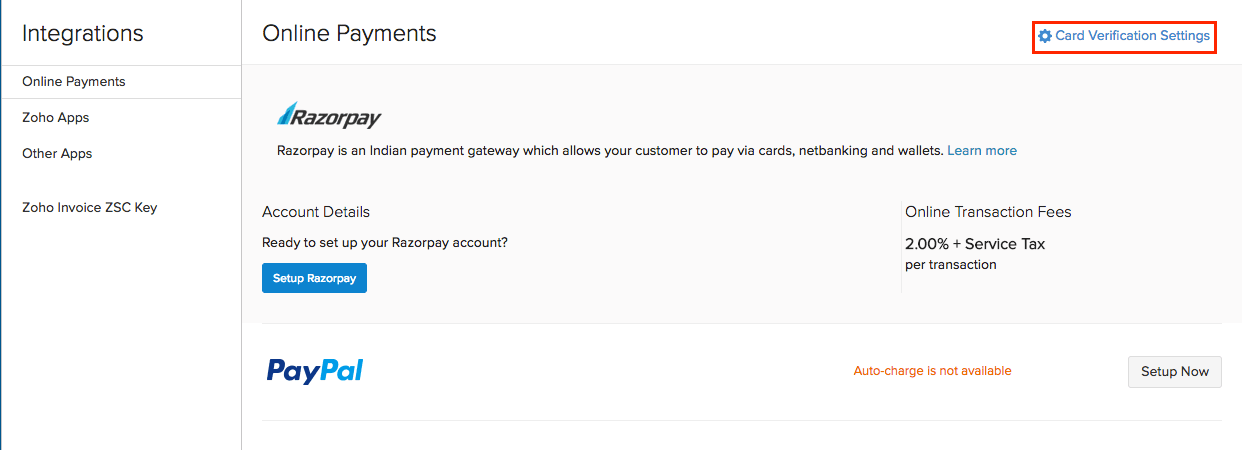
- Here you can customize card address details accordingly.
Transaction Fee of All the Payment Gateways
- PayPal - 2.5% + Fixed Fee
- 2 CheckOut - As per the chosen plan.
- razorpay - 1.75% for Indian Credit Cards, Indian Debit Cards, Net Banking from 58 Banks, UPI, Wallets including Freecharge, Mobikwik and 2.75% for Diners and Amex Cards, International Cards, EMI.

 Thank you for your feedback!