More with Customers
There’s more to Customers than what meets the eye. In this section, we’ll look into all the important things that we’ve not explained before.
IN THIS PAGE…
Associating Templates
The invoices, estimates, notifications mails etc. that you send out to your customers can be unique to each client. In Zoho Invoice, you can personalize your templates such that their design is different and very client-specific. These specifications are not only useful to meet business expectations, but also to bring about the perception of a personal touch among your clients.
- Setting default PDF and mail notification templates
- Selecting PDF Templates
- Selecting Email Notification Templates
Setting default PDF and mail notification templates
You can associate pre-defined default or customised pdf and email templates to your customers as desired. This includes the ones you have created and added to the Zoho Invoice template gallery.
To associate templates to a customer:
- Go to the Customers module in the left sidebar.
- Select the customer for whom you want to associate a template.
- Click the More dropdown in the top-right corner of the Customer Details page.
- Select Associate Templates from the dropdown.
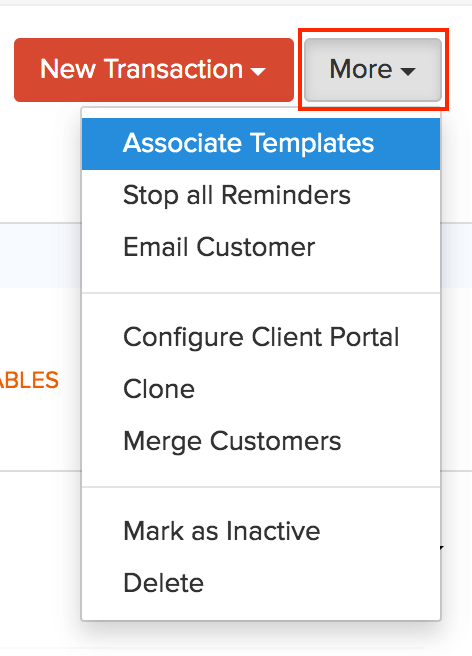
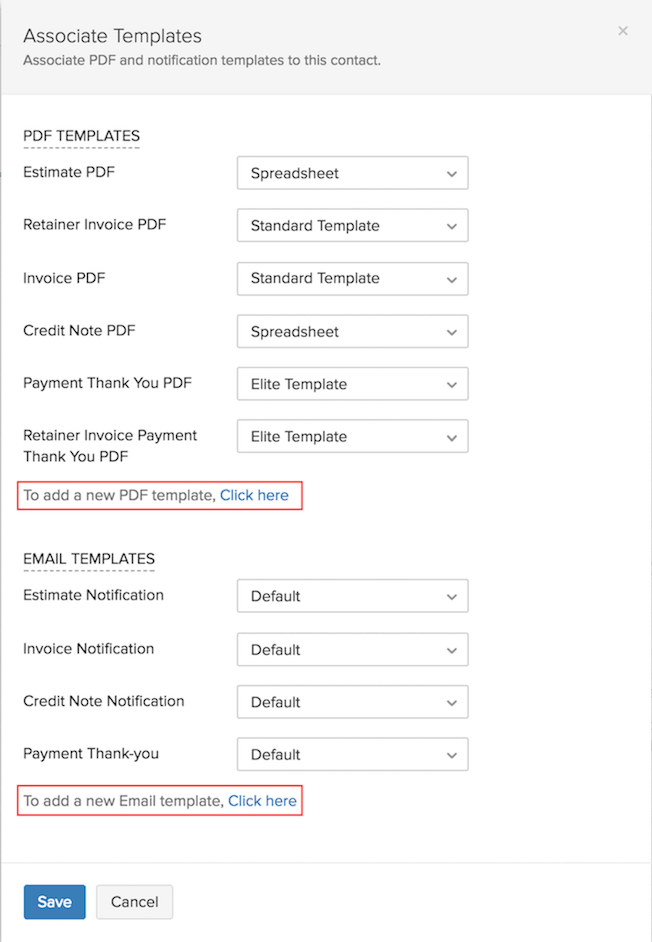
In the Associate Templates pop-up page, you can create, select and assign a customised PDF or Email Notification templates for your customer as you desire.
Selecting PDF Templates
-
Under the PDF Templates section, you can select a template from the dropdown options corresponding to each module. All the templates including the ones added by you to the template gallery will be listed in the dropdown. You can assign the template for each of the following items:
- Estimate PDF
- Retainer Invoice PDF
- Invoice PDF
- Credit Note PDF
- Payment Thank You PDF
- Retainer Invoice Payment Thank You PDF
-
Once you’ve associated these templates to the respective module PDFs, they will be the default templates for all future transactions carried out with the selected customer.
-
If you do not want to select a template from the dropdown but want to create a template on your own, you can create a new template. To add a new PDF Template:
- Click the Click Here link at the end of the section to go to the Template Creation page.
- Click the + New button.
- Select a template from the existing templates apart from standard templates that are available.
- Hover your mouse over the template you want to use and click the Use This button. Also, you can click the Preview button to see a perview of the template.
-
After selecting the template, you can customise the template as per your preference. Hover your mouse cursor over the template and click the Edit button.
- The template customisation can be done in the following sections: Template Properties, Header, Item Table, Total and Footer. Each section has elements or properties that can be edited and customised by selecting from the options provided on the customisation pane. Learn more about Template Customization.
- After customising, click the Preview button to preview your customisation.
- Click the Save button once you finalize the changes.
Selecting Email Notification Templates
- Under the Email Templates section, you can select and assign a template from the dropdown corresponding to the module PDF. All the templates including the ones you’ve created and added are listed in the dropdown. You can assign the template for each of the following items:
- Estimate Notification
- Invoice Notification
- Credit Note Notification.
- Payment Thank You Notification
- Once you associate a template to each notification, they will be set as the default templates for all future mail notifications sent to that customer.
- If you do not want to select a template from the dropdown but want to create a template on your own, you can create a new template. To add a new Email Template:
- Click the Click Here link at the end of the section to go to the Email Template creation page and create a new email template. Learn more about email templates.
- After creating a new email template, click Save to confirm associating templates and proceed.
Stopping All Reminders For A Customer
Zoho Invoice allows you to send automated payment due reminders to your customers. These reminders can be configured in the Settings module for selective durations as you desire. Now, if you do not want to send these reminders to a specific customer you can stop them.
To stop reminders for specific customers:
- Go to the Customers module in the left sidebar.
- Select the customer for whom you wish to stop the payment reminders.
- Click the More dropdown on the top-right corner of the customer details page and select Stop All Reminders.
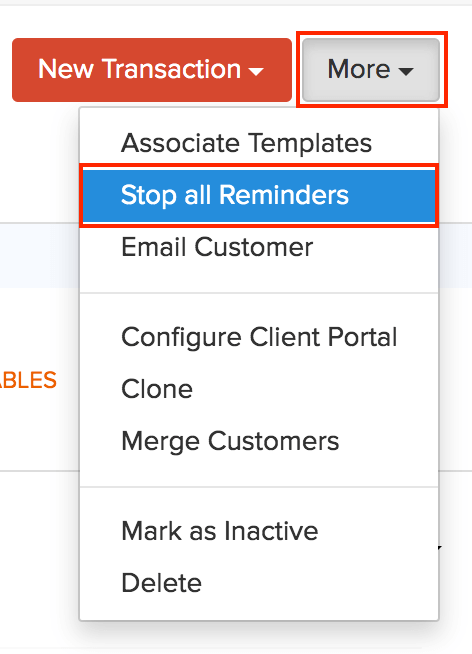
Payment reminders will be stopped for this customer immediately. Later, if you want to re-enable the reminders for this customer, you can do so.
- Select the customer for whom you want to enable the payment reminders, click the More dropdown, and select Enable All Reminders.
Sending Email To A Customer
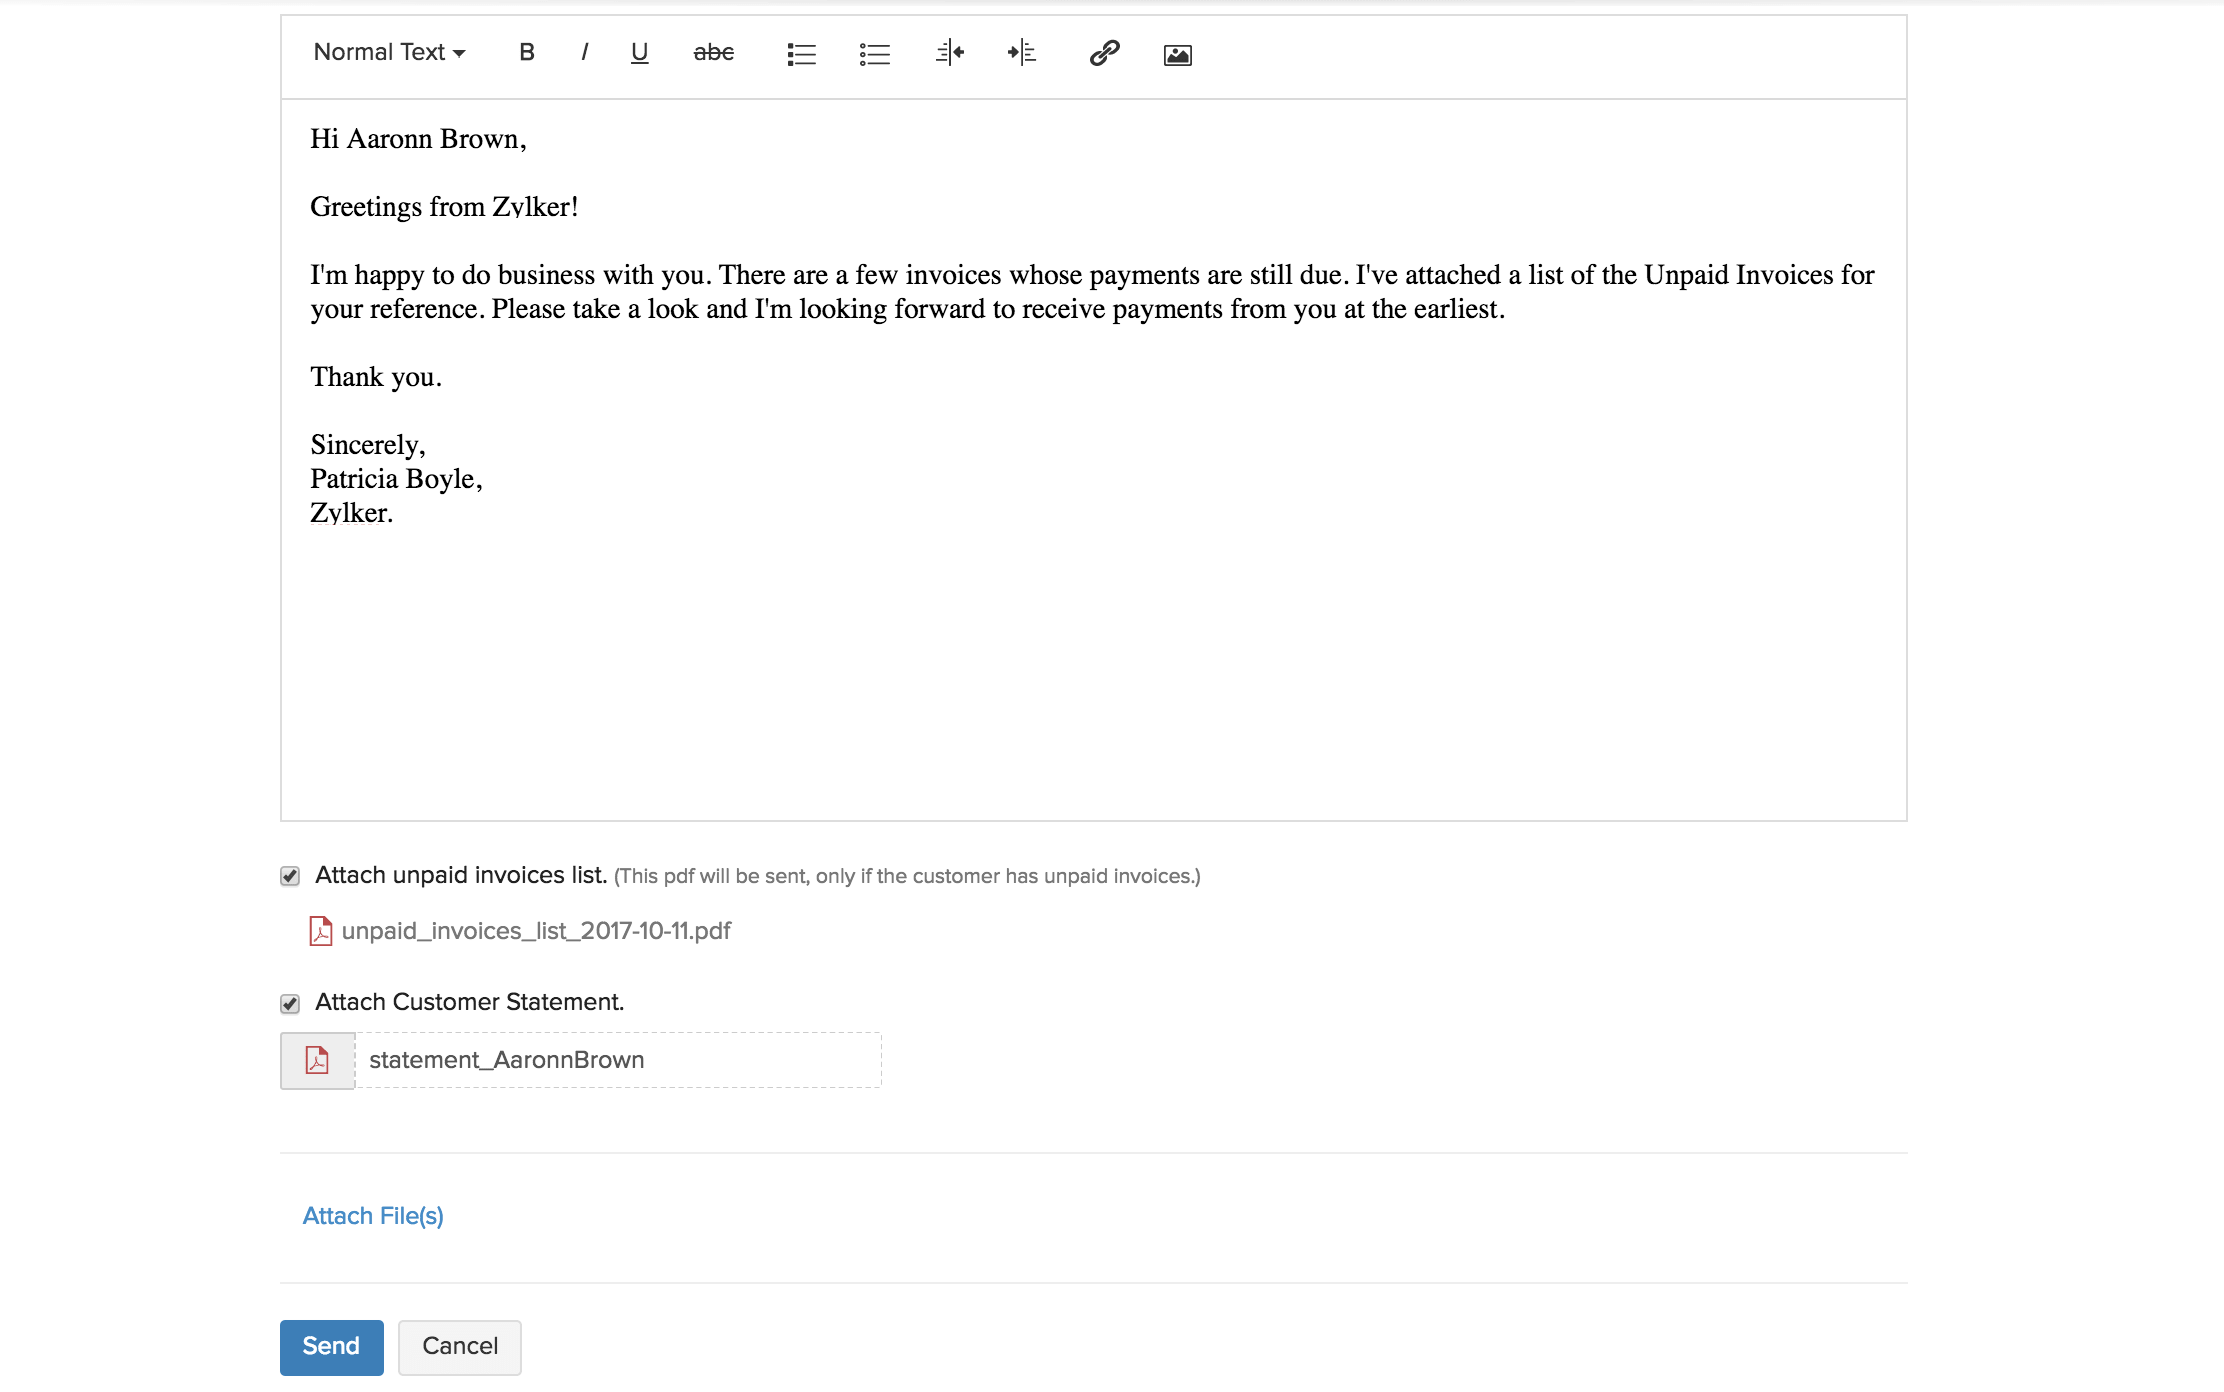
While doing business with your customers, you might want to communicate something important related to your business to your customers. You can send such emails directly from Zoho Invoice, easily. Additionally, you’ll be able to attach a list of unpaid invoices list to the email and send it to your customers.
To draft emails and directly send them to your customers:
- Go to the Customers module in the left sidebar.
- Select the customer to whom you want to send an email.
- Click the More dropdown on the top-right corner of the window and select Email Customer.
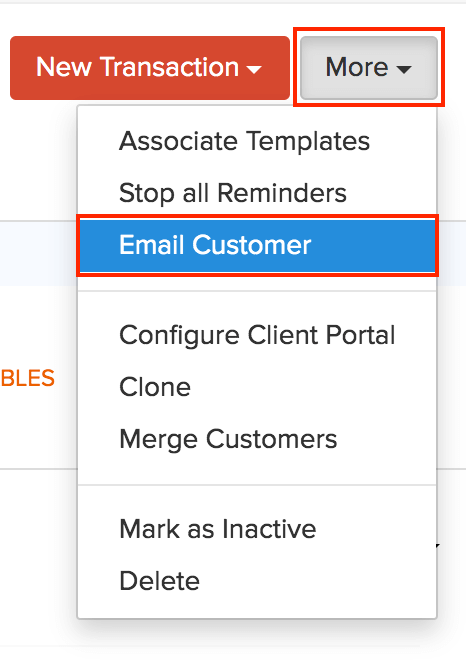
- In the email draft page, click the Send To dropdown and select the customer’s email address.
- Click the Cc dropdown and select another email address pertaining to the customer to carbon copy the email.
Insight: Only the email addresses that you’ve added to the customer will be shown in the dropdown of Send To and Cc. If you want to instantly add an email address, click + Add Contact Person in the Send To dropdown; enter the contact person’s details and click Save and Select.

- Enter the content you want to send to your customer.
- Check Attach unpaid invoices list to attach and send a PDF of all the unpaid invoices list along with the email. The PDF will be attached only if there are unpaid invoices for that customer.
- Check Attach Customer Statement to attach and send the customer statement of the present month to your customer. Learn more about sending customer statements.
- Click the Attach File(s) link to attach any other document you might want to send to your customer.
- Click Send.
Cloning a Customer
At times, you may find yourself in a case where a certain customer wants to maintain two different email addresses in your organization. In that case, just clone the customer account and assign the second email adresses to the cloned one.
To clone a customer:
- Navigate to the Customer module in the left sidebar.
- Click the customer you want to clone.
- Click the More dropdown in the top right corner and select Clone from the drop-down.
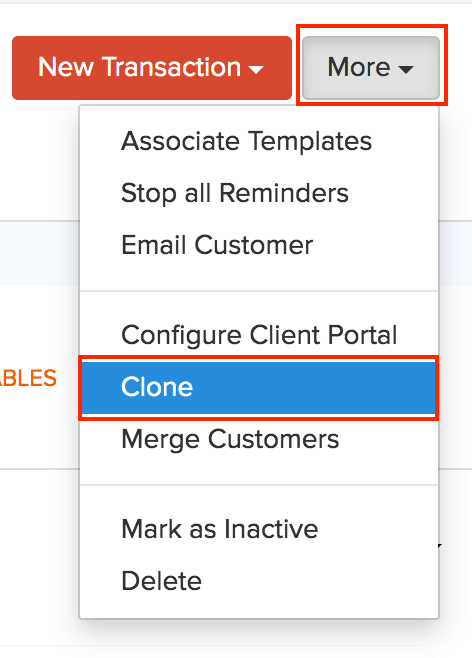
A Clone Customer screen will open where all the details of the customer will be auto-populated. Make sure all the details are correct and click Save.
Pro Tip: If you have not activated the customer portal for the original customer, then you can activate it for the cloned customer.
Merging Customers
When you import customers from other systems, it is possible to have multiple customer profiles for the same person in the Customers module. You can merge them together to make them as a single customer and bring all the transactions under a master customer.
Warning: Once you merge customers together, they cannot be separated back as individual customers. All transactions associated with them will be listed under the master customer and the other customers will be marked as inactive. You can mark the inactive customers as active again, but the transactions under them will be erased.
Prerequisites: The customers you are merging must have the same currency to merge them together.
There are two ways to merge customers in Zoho Invoice depending upon your preference:
Merging Multiple Customers
It’s best to follow this method, when you want to merge more than two customers together.
To merge multiple customers:
- Go to the Customers module in the left side bar.
- Select the customers that you want to merge together.
- Click the More Actions dropdown and select Merge.
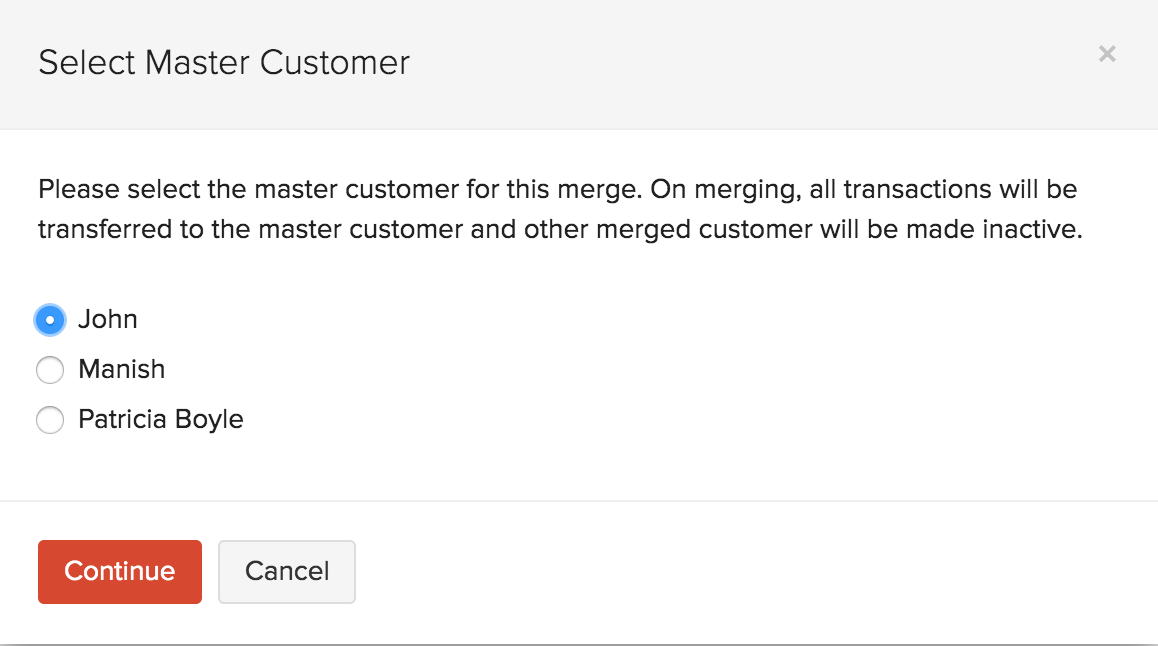
- Select the master customer from the customers displayed and click Continue.
- Click Confirm in the next pop-up page.
Merging two customers
When you want to merge only two customers, follow this method.
To merge two customers together:
- Go to the Customers module in the left sidebar.
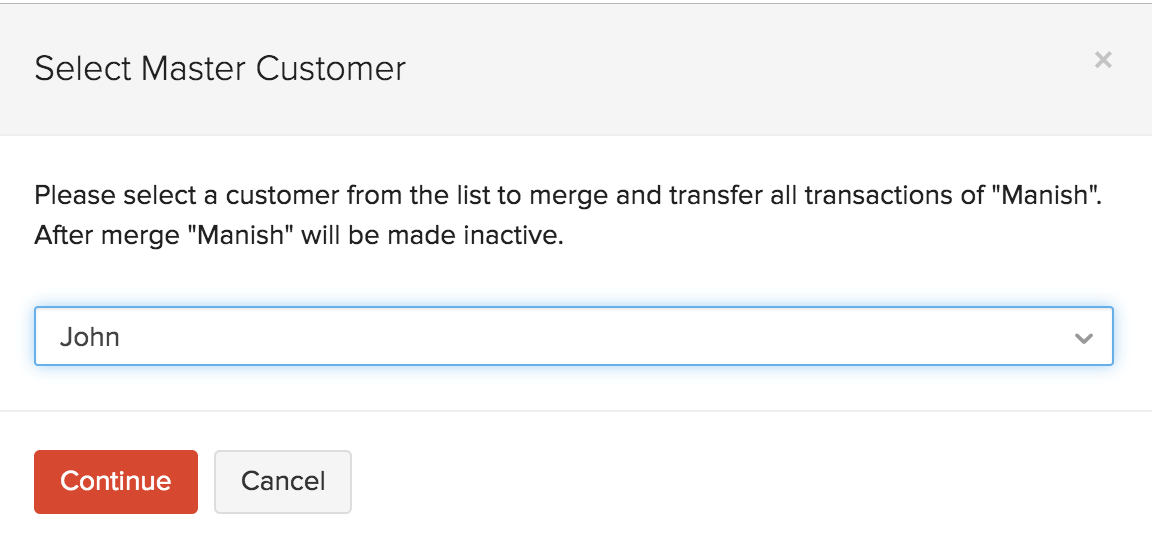
- Select the customer you want to merge with the master customer.
- Click the More dropdown and select Merge Customers.
- Select the master customer from the dropdown and click Continue.
- Click Confirm in the next pop-up page.
Marking a Customer as Inactive
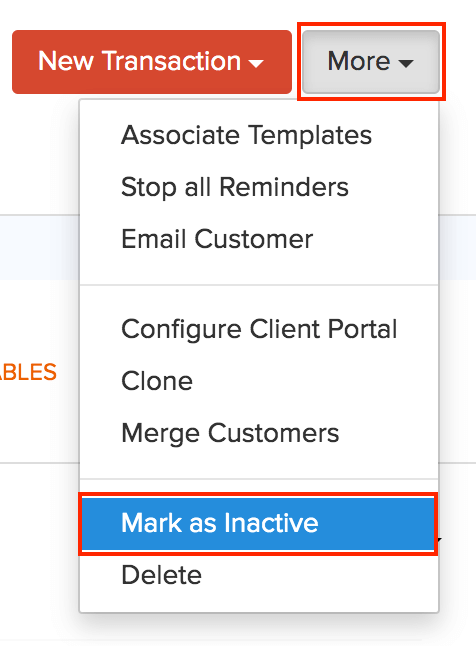
To mark a customer as inactive:
- Go to the Customers module.
- Select the customer to be marked as inactive by clicking the check-box. You can select multiple customers as well to mark them as inactive.
- Click the More Actions dropdown and select Mark as Inactive.
Deleting a Customer
You might want to delete a customer when it has become obsolete. However, you cannot delete a customer if transactions are recorded under it. You must delete all the transactions before you can delete the customer. If you want to retain the transactions, you can mark the customer as inactive.
To delete a customer:
- Go to the Customers module.
- Select the customer to be deleted by clicking the check-box. You can select multiple customers as well to delete them.
- Click the More Actions dropdown and select Delete.
- Click the Delete button in the pop-up to confirm and delete.
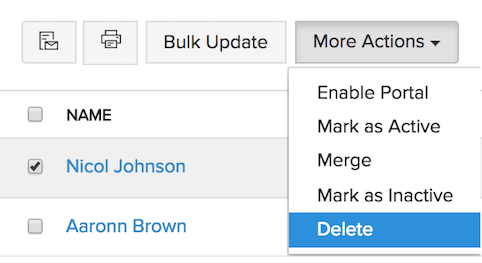
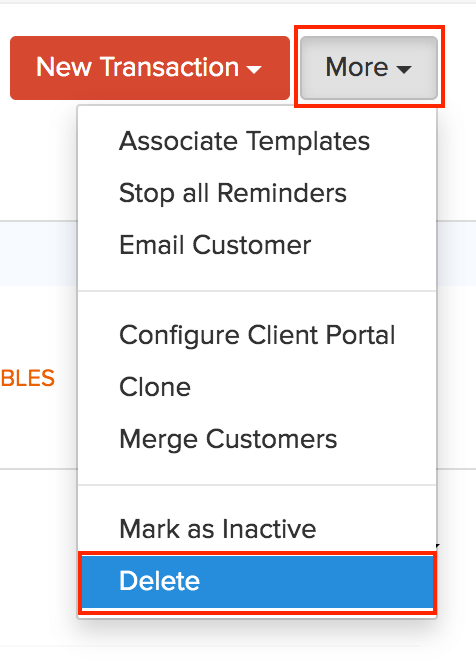
Alternatively, you can also delete individual customers by selecting them.
- Select the customer whom you want to delete .
- Click the More dropdown on top of the details page.
- Select Delete from the dropdown.
Assigning Customer Owners
When you have a large customer base, it is difficult for a single person to handle all of them. Also, it is possible to miss out on some customers when you’re pre-occupied with your business. To help you in scenarios like these, Zoho Invoice offers you the ability to assign one of your employees as a customer owner to a customer or a group of customers. Now, the customer owner can create, view or edit transactions for the customers assigned to them.
Prerequisites:
- You must have at least one of your employees as a user in Zoho Invoice with the Staff - Assigned Customers Only role. This role is available by default under the Roles tab in Settings. Learn more about Users and Roles.
- You must be an admin or an user with access to assign other users as customer owners.
After adding an user with the Staff - Assigned Customers Only role, you can assign them as customer owners, either while adding a new customer or after adding a customer.
Assigning while creating a new customer
- Select one of the users listed in the dropdown against the Customer Owner field.
Assigning after you’ve added a customer
- Go to the Customer module in the left sidebar.
- Select the customer for whom you want to assign a customer owner.
- Click the More dropdown and on the top-right corner and select Assign Customer Owner from the dropdown.
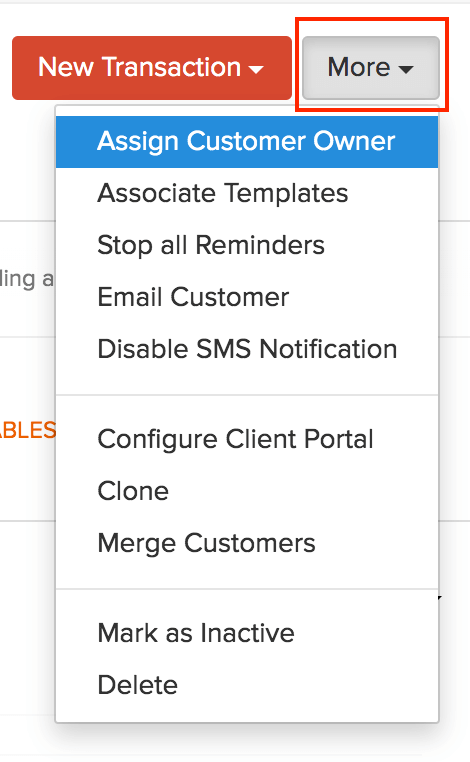
- Select an user from the dropdown and click Assign.
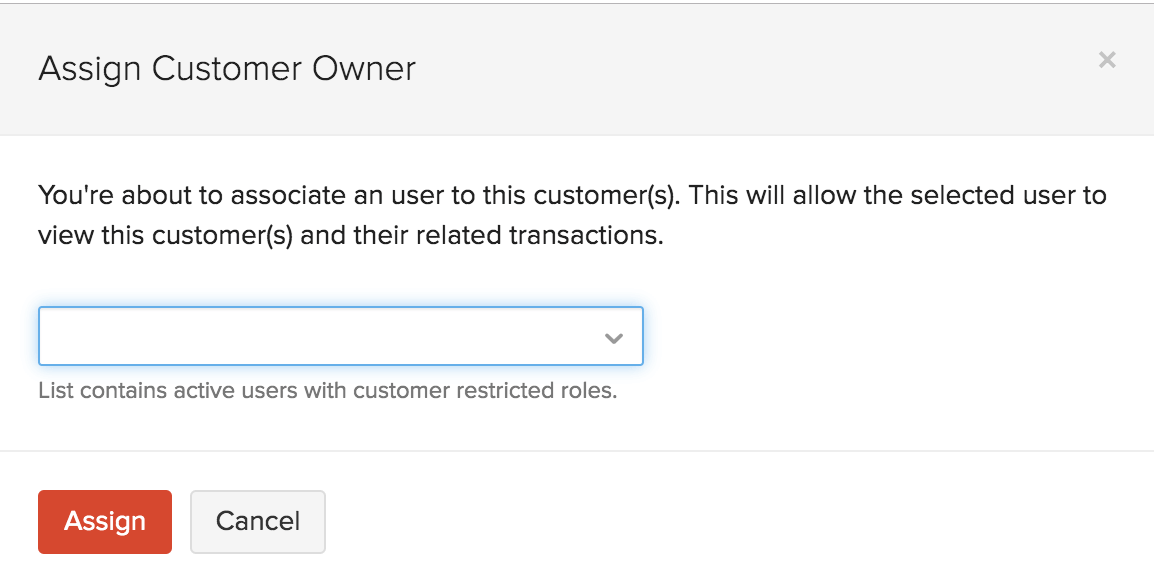
You can assign a customer owner to mutiple customers at a time. To do so:
- Go to the Customers module in the left sidebar.
- Check and select multiple customers.
- Click the Assign Customer Owner button in the top bar.
- Select a user from the dropdown and click Assign.
Sending Unpaid Invoices List To Your Customers
At times, customers might delay in making the payments for the invoices that you’ve issued to them. It could be due to a variety of reasons. However, you can send them a copy of all their unpaid invoices and urge them to make the payments that are due.
There are two ways to send a PDF of unpaid invoices list to your customers in Zoho Invoice:
Attach them while sending a customer statement
To send an Unpaid Invoices List along with sending a customer statement:
- Go to the Customer module in the left sidebar.
- Select the customer to whom you want to send the customer statement.
- Click the Statement tab in the Customer Details page.
- Click the Mail icon on the top-right corner of the page.

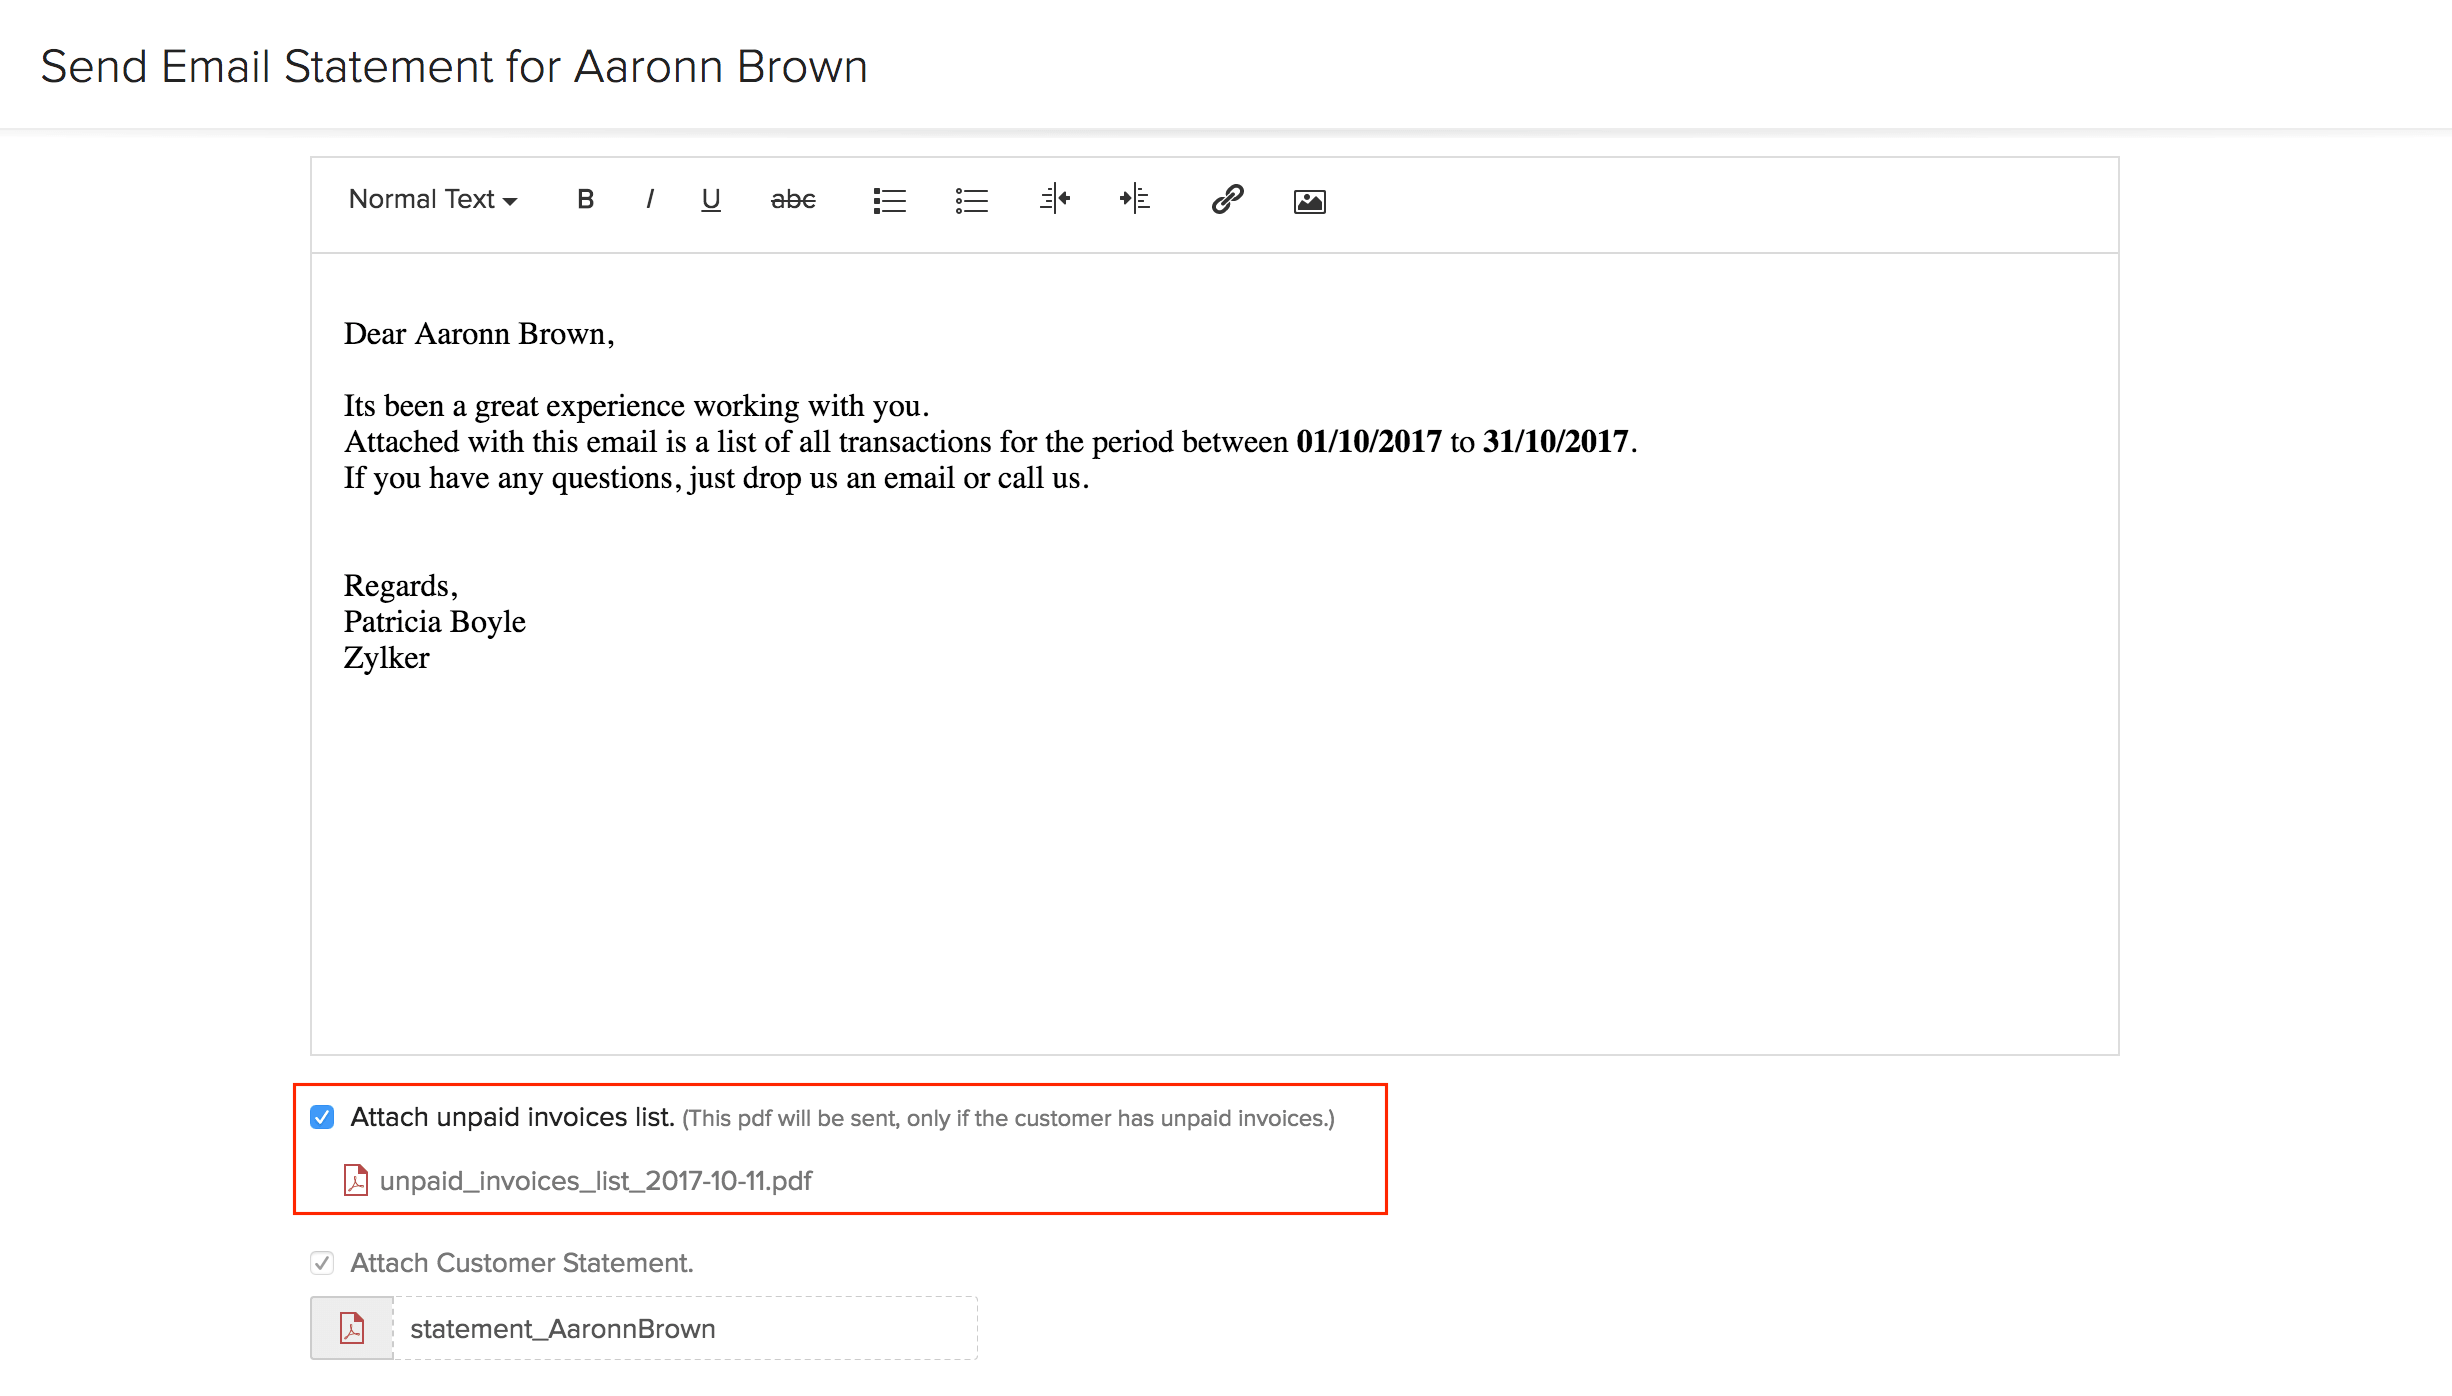
- Check Attach unpaid invoices list to attach a PDF of the unpaid invoices list of the particular customer.
- Click Send.
Exporting Customers
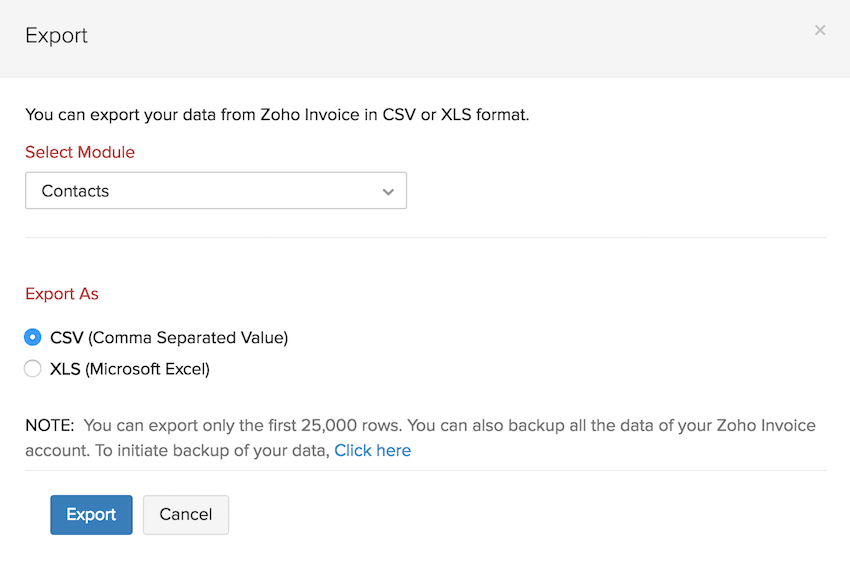
The export option in the Customers module allows you to export the customers and the contact persons in CSV or XLS format. As soon as you export, the data will be downloaded to your system in the format that you’ve chosen.
To export customers:
- Go to the Customers module in the left sidebar.
- Click the Hamburger icon in the top-right corner of the window.
- Select Export Customers or Export Contact Persons option from the dropdown.
- Select the export file format as either CSV or XLS.
- Click Export.
Bulk Actions
Bulk Actions allows you to perform a particular action on a group of customers. You will be able to send or print customer statements of a group of customers in a single attempt, update customers, enable Customer Portal, mark customers as active or inactive and delete customers. Let’s look into how you can perform bulk actions in Zoho Invoice.
Bulk Send Customer Statements
When you select customers in bulk and send bulk statements, each customer’s statement is sent to their email address respectively. The statements that are sent to every customer will be of the same period.
To send bulk customer statements:
- Go to the Customers module in the left sidebar.
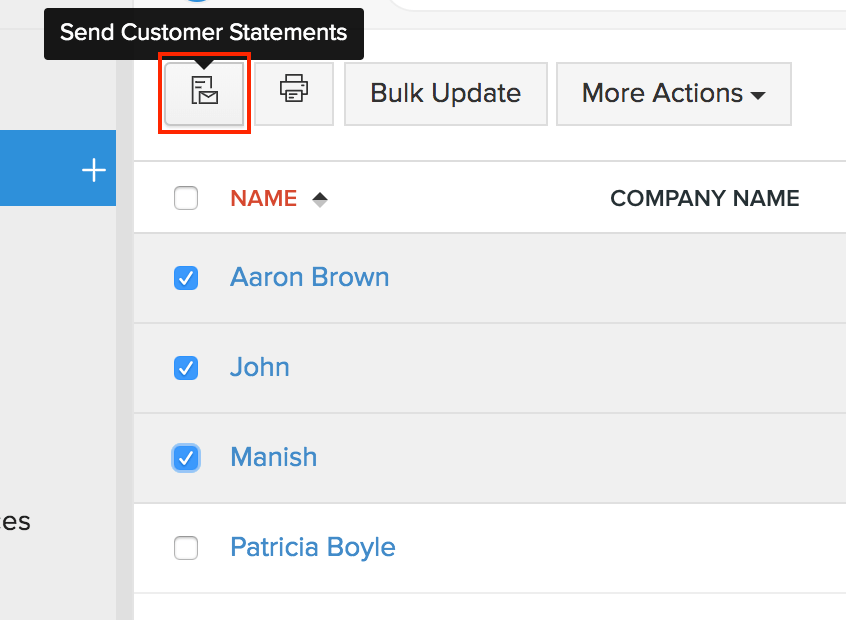
- Select the customers to whom you want to send bulk statements by clicking the check-box.
- Click the Send Customer Statements icon in the top bar.
- Select the period for which you wish to send customer statements.
- Click Send Statements. The emails are scheduled and sent. You will be notified as soon as the statements are sent to your customers.
Insight: You can send a maximum of 25 customer statements at a time. So, it’s best to select a maximum of 25 customers whenever you want to send customer statements in bulk.
!
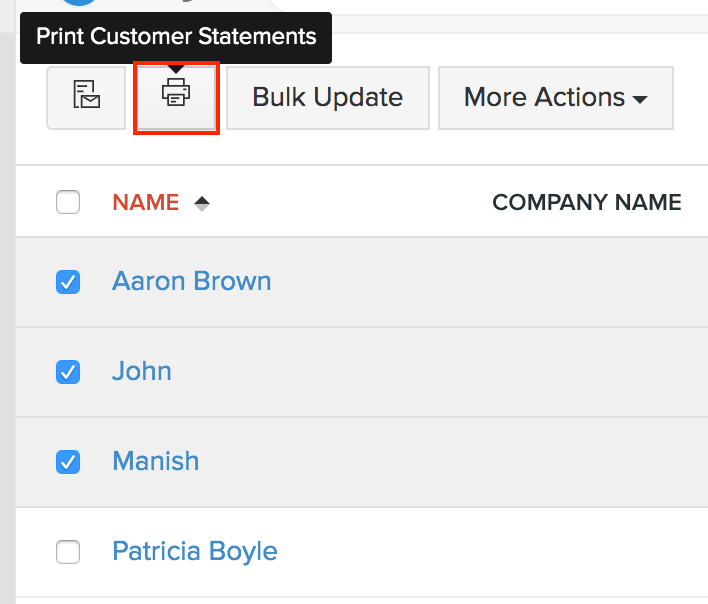
To print customer statements in bulk:
- Go to the Customers module in the left sidebar.
- Select the customers whose customer statements you want to bulk-print, by clicking the check-box.
- Click the Print Customer Statements icon in the top bar.
- Select the period for which you wish to print customer statements.
- Click Print Statements.
Insight: You can print a maximum of 25 customer statements at a time. So, it’s best to select a maximum of 25 customers whenever you want to print customer statements in bulk.
Bulk Update
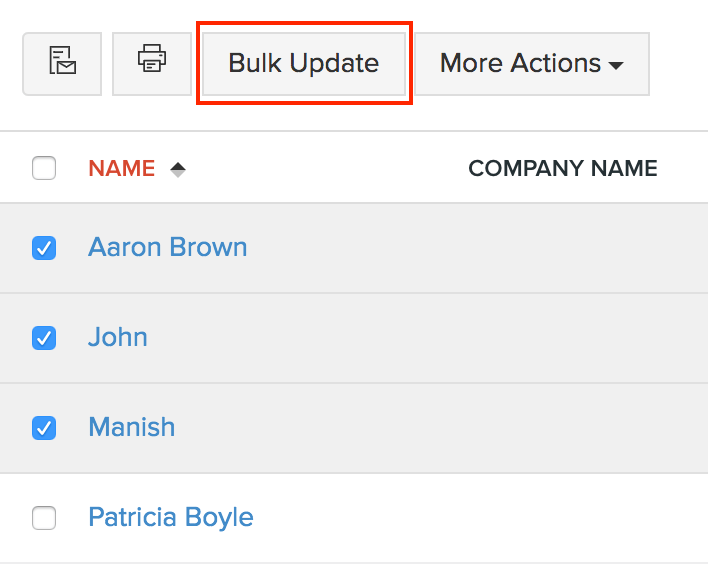
Bulk Update allows you to update fields such as Currency, Payment Terms, Price Lists and Custom Fields in the customers module in a single attempt.
To bulk update:
- Go to the Customers module in the left sidebar.
- Select the customers whose information you want to bulk-update, by clicking the check-box.
- Click the Bulk Update button.
- Select the appropriate Currency and update the new Payment Terms.
- Click the Update Fields button.
More Actions
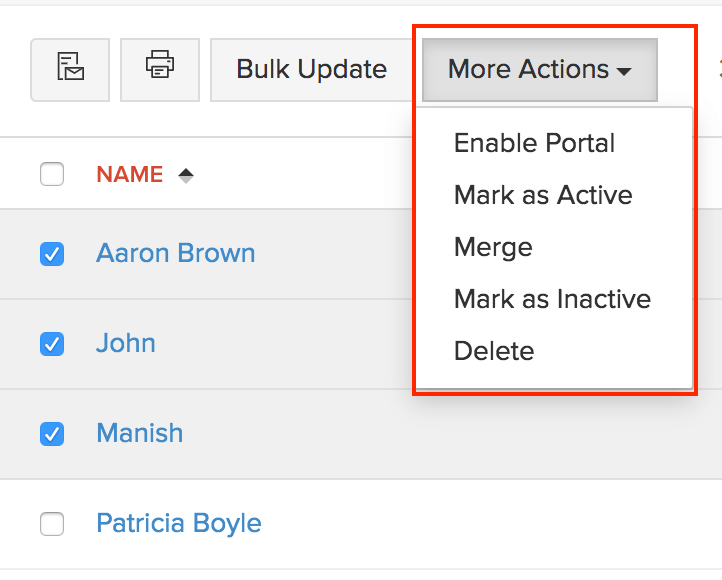
You can enable Customer Portal in bulk for your customers, mark customers active or inactive and delete them.
- Go to the Customers module in the left sidebar.
- Select the customers whose information you want to bulk-update, by clicking the check-box.
- Click the More dropdown.
- Select Enable Portal to enable Customer Portal for all the customers.
- Click Mark as Active or Mark as Inactive to mark all the customers as active or inactive respectively.
- Select Delete to delete customers in bulk.

 Thank you for your feedback!