Manage Organizations
When you sign up for Zoho Inventory, you’ll also be creating your first organization in the process. This will be your primary organization. You can further create more organizations and manage them simultaneously.
Create New Organization
You can create multiple organizations with the same email address you have provided during the signup process to manage each business separately. Every organization you create is independent of other organizations and contains its own set of warehouses, items and transactions. You cannot link organizations to each other.
To create a new organization:
- Log in to your Zoho Inventory account.
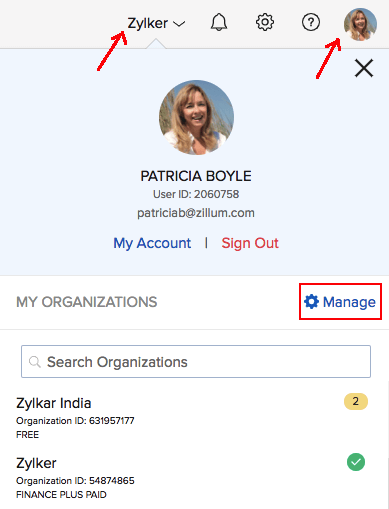
- Click the name of your organization in the top right corner of the page.
- Click Manage.

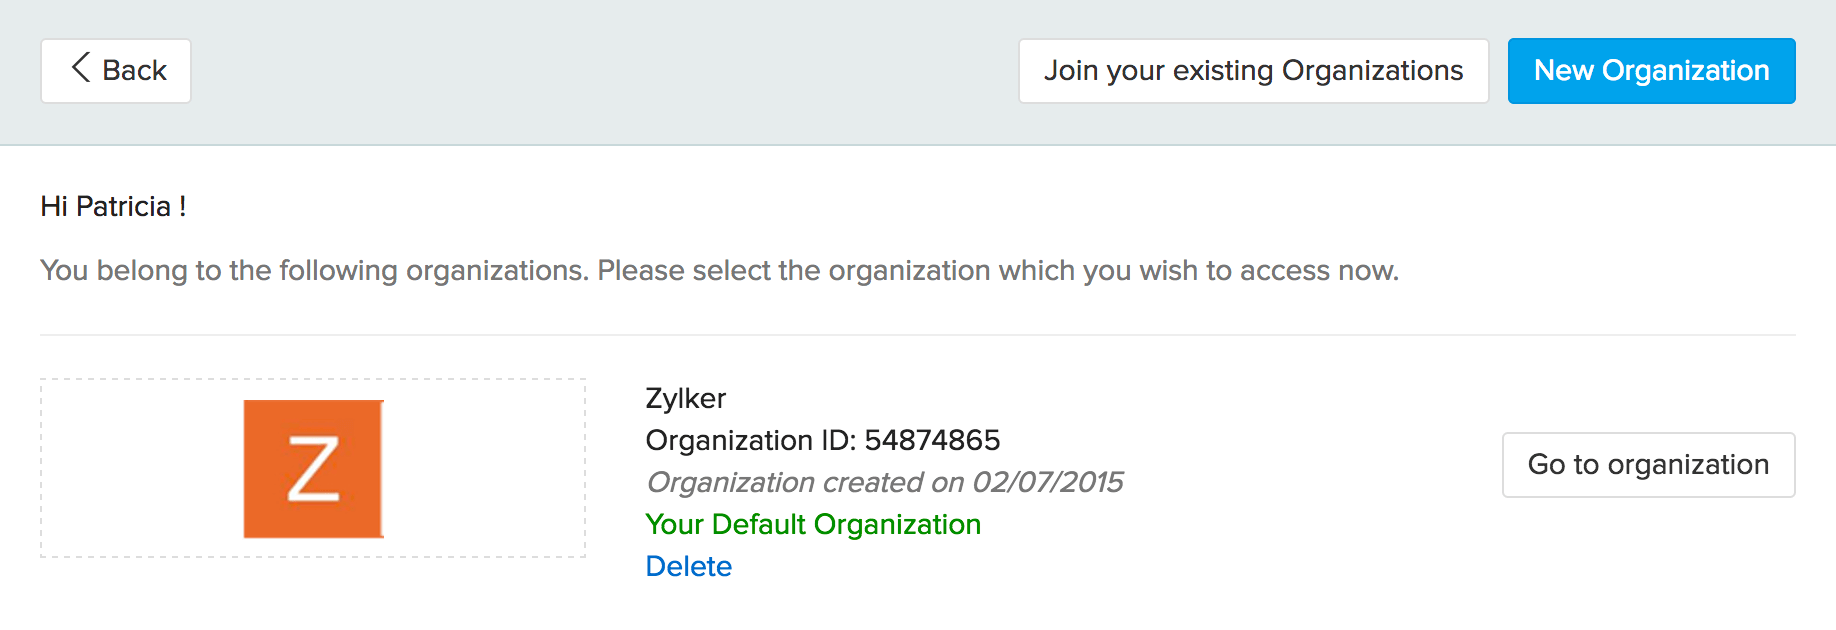
- Click the New Organization button in the top right corner of the page.

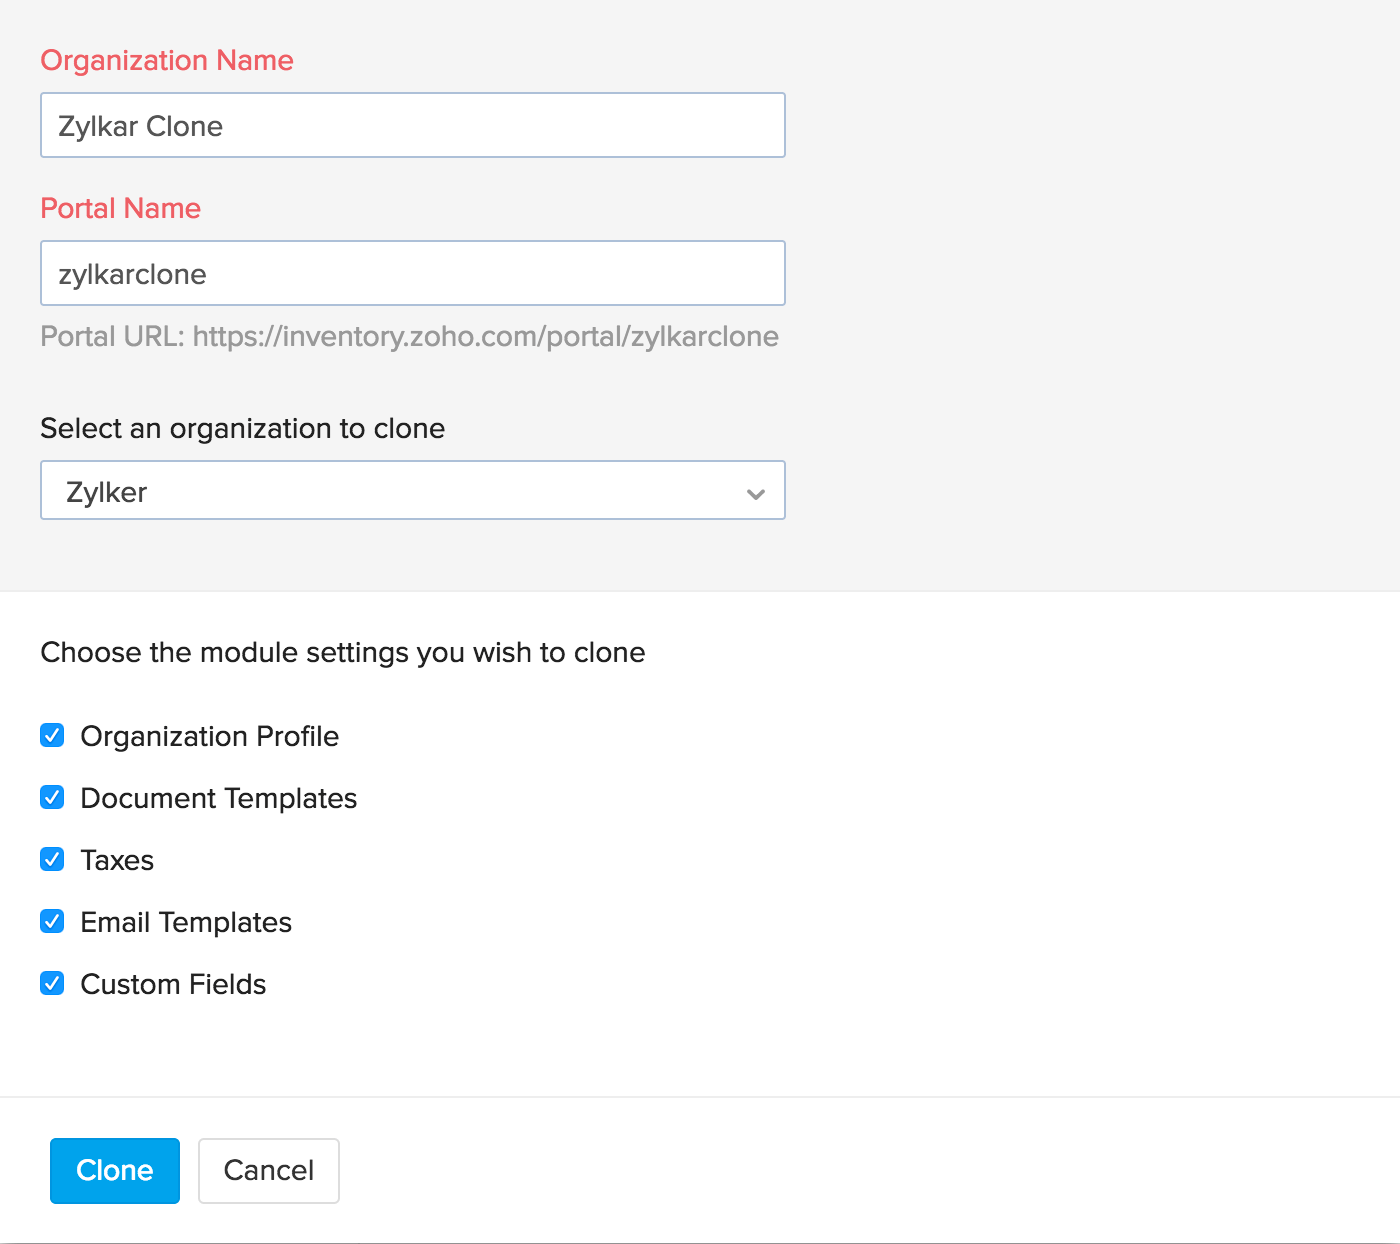
- Choose whether to create a new organization from scratch or clone an existing organization.

- If you choose to clone an existing organization, you will be prompted to select the organization you wish to clone. After this, your new organization will be created.

Insight: When cloning an organization, only the settings and organization type will be cloned. Other details like transactions and items will not be imported to the new organization.
- If you choose to create a new organization from scratch, you will be taken to the quick set up page where you will have to enter the required information.
- Click Save.
Insight: When you create a new organization, you can enjoy a 14-day free trial. When the trial is over, you have to purchase a subscription plan to continue using it.
Edit Organization Details
You can change the details of your organization in Zoho Inventory. Here’s how:
- Log in to your Zoho Inventory account.
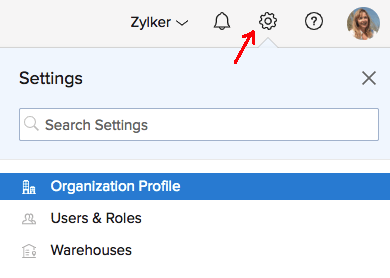
- Go to Settings > Organization Profile.

- Make the necessary changes.
- Click Save at the bottom of the page.
Change Default Organization
When you log in to Zoho Inventory, the default organization will open up if you have multiple organizations. You can choose the organization you would want to view when you first log in. Here’s how:
- Log in to your Zoho Inventory account.
- Click the user picture or your organization name in the top right corner of the page.
- Click Manage.
- Scroll down to the organization you want to mark as default.
- Click Mark as Default below the organization name.

Switch Organizations
If you have multiple organizations in your Zoho Inventory account, you can switch between each of them. There are two ways to do this:
Method 1:
- Log in to your Zoho Inventory account.
- Click the name of your organization in the top right corner of the page.
- Go to the My Organizations. Here, you can view the list of all Zoho Inventory organizations that you’re part of.

Insight: The green tick beside the organization name indicates that you are currently viewing the particular organization.
- Click an organization name to access it.
Method 2:
Log in to your Zoho Inventory account.
Click the name of your organization in the top right corner of the page.
Click the Manage button. After doing so, you’ll be taken to a page containing the list of organizations in your account.
To visit a particular organization, click the Go to organization button adjacent the organization name.

Delete Organization
Few things you should consider before deleting a paid organization:
- Contact support to swap the subscription with another unpaid organization in Zoho Inventory.
- Cancel the subscription.
- Back up your data since you cannot retrieve the organization or any of its data once deleted.
To delete an organization in Zoho Inventory:
- Log in to Zoho Inventory.
- Go to the organization that you want to delete.
- Remove all other users from the organization. Learn how.
- Click the organization name and select Manage. This will take you to the page containing a list of all your organizations.
- Click the Delete button below the name of the organization.

- Confirm your action and the organization will be deleted permanently from your Zoho Inventory account.


