 Inventory
Canada taxes - GST, PST & HST
The Canada tax module is exclusive to Canada. This feature will be available when you select Canada as your country during quick setup of an organization. Below are a list of operations you can perform with tax.
Guide Layout:
- General Information on Canadian Taxes
- Terminologies
- Prerequisites
- Country & Currency requirements
- Enable Tax
- Setting up Taxes for Canada in Zoho Inventory
- Contacts
- Items
- Sales Orders & Invoices
- Purchases
- Additional Functions
General Information on Canadian Taxes
-
GST: Goods and Services Tax. This applies to the supply of goods and services in Canada.
-
PST: Provincial Sales Tax. This is applied on sales & purchase of taxable goods and service in a province where PST is supported.
-
HST: Harmonized Sales Tax. This is applied in provinces who have harmonized both PST and GST into a single tax.
-
In some provinces in Canada, only a GST is collected. i.e: Alberta (5% GST).
-
There are provinces where tax is collected as a group tax, GST + PST. i.e: British Columbia (7% PST + 5% GST = 12%).
-
In provinces usually referred as “Participating Provinces”, HST is applied. In these provinces they only have to pay a single tax. i.e: Nova Scotia (15% HST).
Provinces in which HST is applied:
- New Brunswick
- Nova Scotia
- Newfoundland and Labrador
- Ontario
- Prince Edward Island.
Terminologies
| Name | Description |
|---|---|
| Tax Name | It refers to the name you’d like to assign to a particular tax. Ex: GST in Canada is 5%, hence the tax can be named as GST. |
| Tax Agency | It refers to the agency in charge of collecting taxes for that specific province. Ex: New Brunswick - Department of Finance is responsible for collecting the HST for New Brunswick province. |
| Rate | Refers to the tax rate pertaining to a province in percentage. Ex: GST in Canada is 5%, British Columbia PST is 7%. |
| Exemption Reason | Users have to enter why a customer / transaction / item is exempt from sales tax. Ex: Medicine, Legal aid services, Music lessons etc. |
Prerequisites
- Your organization must have it’s country as Canada and its currency must be Canadian Dollars(CAD).
Enable Tax
To enable tax,
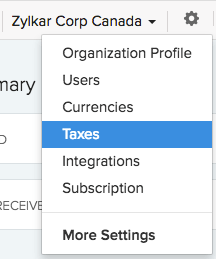
- Click on the gear icon(Settings) from the top-right corner.
- Select Taxes from the drop-down.
- You will be redirected to the Taxes module.
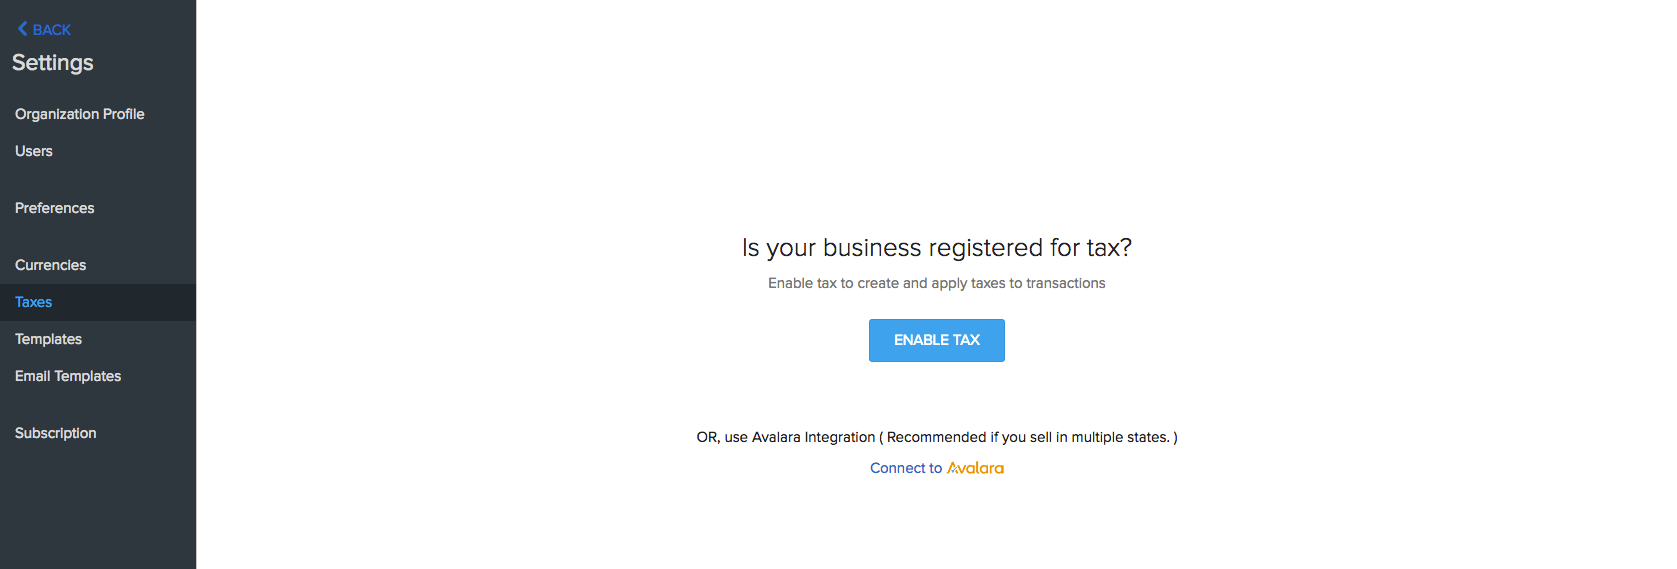
- Click on the Enable Tax button.
- Doing this, will unlock the tax modules.

Setting up Taxes for Canada in Zoho Inventory
Creating Taxes
- Click on the gear icon(Settings) from the top-right corner.
- Select Taxes from the drop-down.

- You will be redirected to the Taxes module.
- If you are accessing the Taxes module for the very first time, click on the Enable Tax button to activate the module.

- Click on the + New Tax button that is placed on top-right corner.
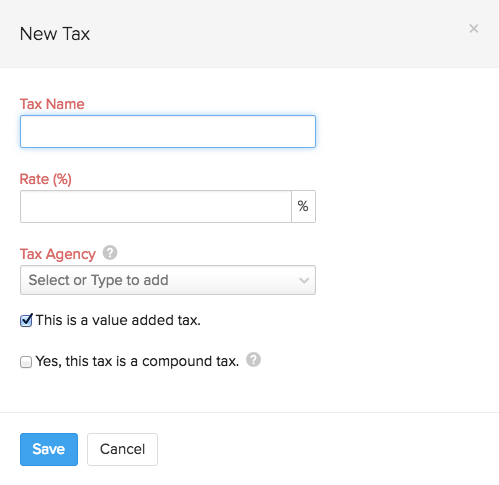
- On the New Tax pop-up, enter the Tax Name, Rate(%) and Tax Agency. Note: Tax agency is the tax authority pertaining to the particular tax.
- Enable the This is a value added tax option if applicable. Disabling this option will classify the tax as a Non-Value Added Tax. In some provinces, tax on purchases cannot be reclaimed. In this case, the tax cannot be treated as a liability but an expense.
- Enable the Yes, this is a compound tax option if applicable. To know more about compound tax, Click Here
Creating Tax Groups
- Click on the gear icon(Settings) from the top-right corner.
- Select Taxes from the drop-down.

- You will be redirected to the Taxes module.

- Select the New Tax Group option from the +New Tax drop-down, placed on the top-right of the module.
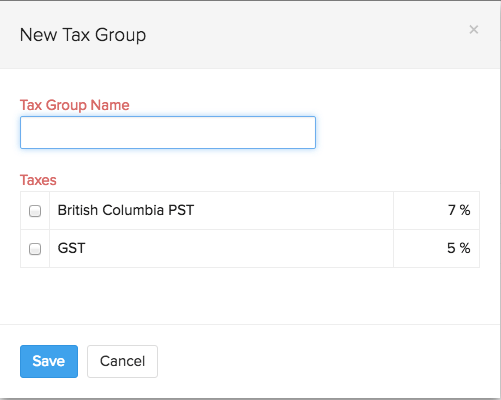
- Important Note: Before you add a tax group, please ensure that you have recorded the necessary taxes.
- Additional Note: For provinces with GST + PST, a tax group can be used.
- Enter the name of the tax group and select the taxes that needs to be added to the group.
- Click on the Save button to complete.
Adding Tax Agencies
- Click on the gear icon(Settings) from the top-right corner.
- Select Taxes from the drop-down.

- You will be redirected to the Taxes module.

- Select the New Tax Agency option from the +New Tax drop-down, placed on the top-right of the module.
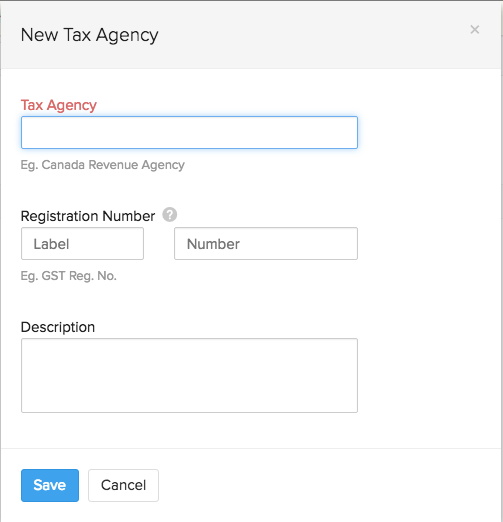
- On the New Tax Agency pop-up, enter the Tax Agency name, the Registration Number provided by the agency and add a Description.
- Click on the Save button.
Recording Tax Exemptions
- Click on the gear icon(Settings) from the top-right corner.
- Select Taxes from the drop-down.

- You will be redirected to the Taxes module.

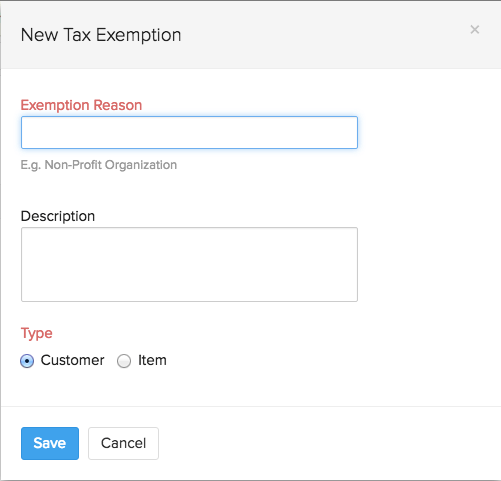
- Select the New Tax Exemption option from the +New Tax drop-down, placed on the top-right of the module.
- Enter the Exemption Reason and add a Description.
- Designate the exemption for your customers or items by choosing the Customer / Item options appropriately.
- Click on the Save button to complete the process.
Setting up your Default Tax
The Default Tax will be applied to transactions for which the tax preference(Taxable/Tax Exempt) is not set for the involved customers. By default, the first tax created by you will be marked as the Default Tax. However, you can change your default tax according to your needs.
Default Tax application scenarios.
- When customers are imported into Zoho Inventory, their tax preference is not set. When you transact with these customers, system will apply the Default Tax to those transactions.
- The tax preference will not be applied to customers who were created before tax was enabled. Once again, the Default Tax will be applied to transactions associated to them.
- Note: Default Tax is not automatically associated with a customer. It is only used when tax preference (Taxable/Tax Exempt) is not set for the involved customers.
Changing the default tax
To mark a different tax as default,
- Navigate to the Taxes module under Settings.
- Hover your mouse over the preferred tax.
- You will find the mark as default button appearing next to the tax.
- Select it to make the tax a default tax.

Contacts
Associating tax for a contact
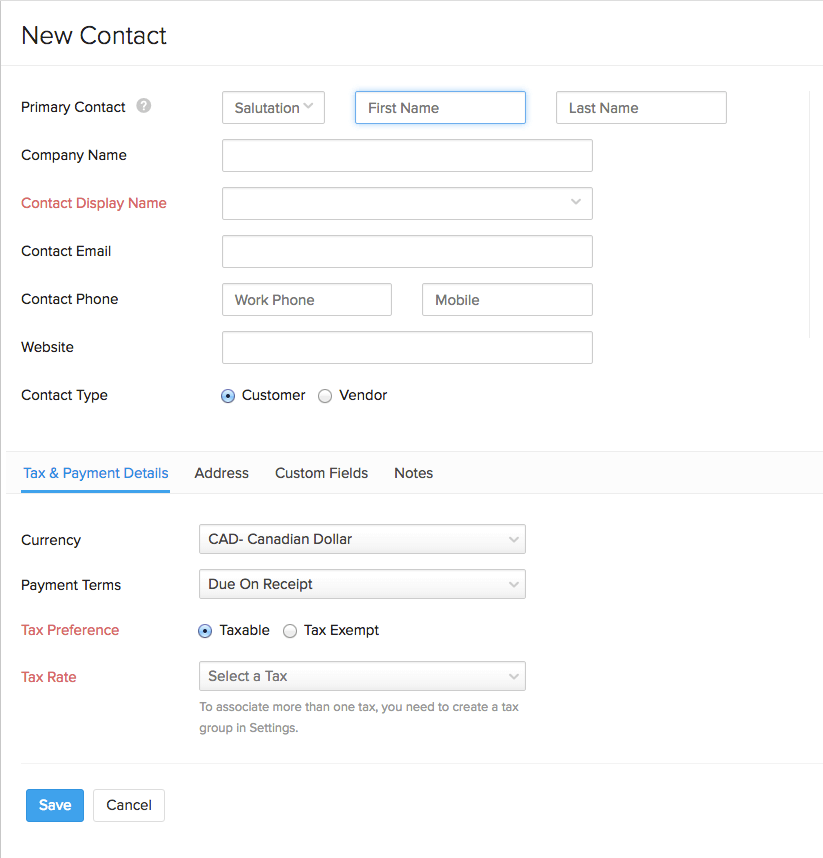
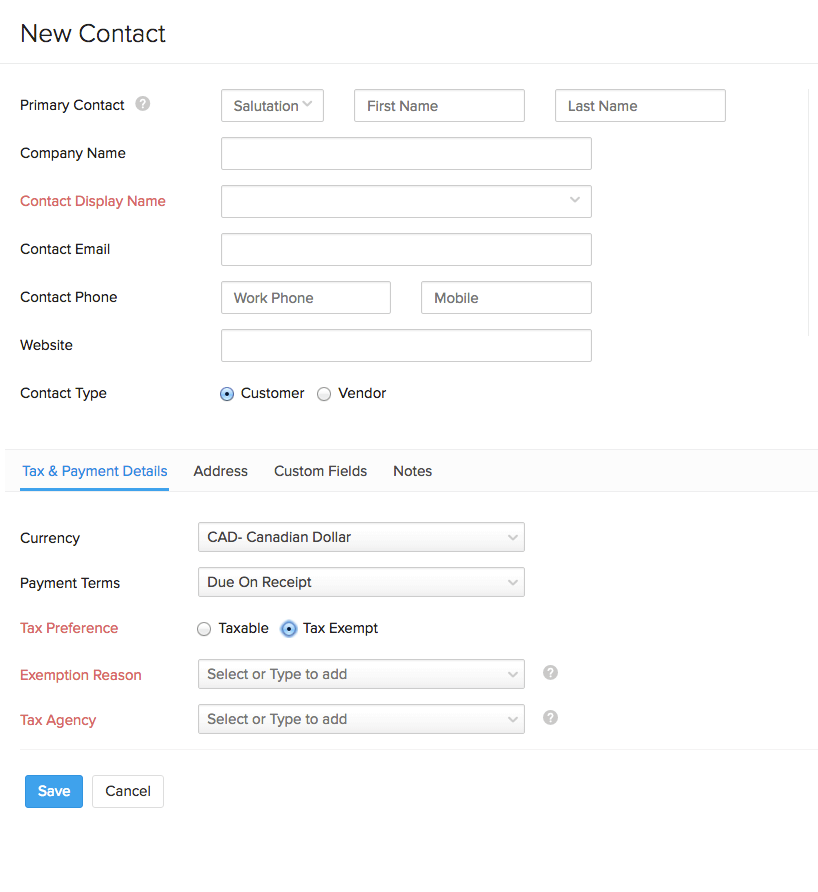
Say for instance, your customer resides in Nova Scotia and you wish to have the tax associated with the customer. Then you can do it this way while recording/creating the contact:
- Navigate to the Contacts module.
- Select the quick create(+) button or the + New to create a contact.
- After filling the customer’s primary details, proceed to the Tax & Payment Details section.
- Under the Tax & Payment Details section, select the Taxable option against Tax Preference.
- For the Tax Rate, select the appropriate tax from the drop down which has already been created. You can also create a new tax by selecting +New Tax in the drop down.
- Click on the Save button to finish.
Making a contact nontaxable
To do so while creating a contact:
- Navigate to the Contacts module.
- Select the quick create(+) button or the + New to create a contact.
- After filling the customer’s primary details, proceed to the Tax & Payment Details section.
- Under the Tax & Payment Details section, select the Tax Exempt option against Tax Preference.
- Select the Exemption Reason and the Tax Agency from the drop-down, or type to add new ones.
- Click on the Save button.
Items
Associating tax to items
While creating an item, you can choose to make it taxable or non-taxable. To make an item taxable:
- Navigate to the Items or Item Groups or the Composite Items module according to the need.
- Create a new item/item group/composite item.
- On the creation page, after entering the relevant details, select the Taxable option and once you are ready, click the Save button. This will make the item taxable.
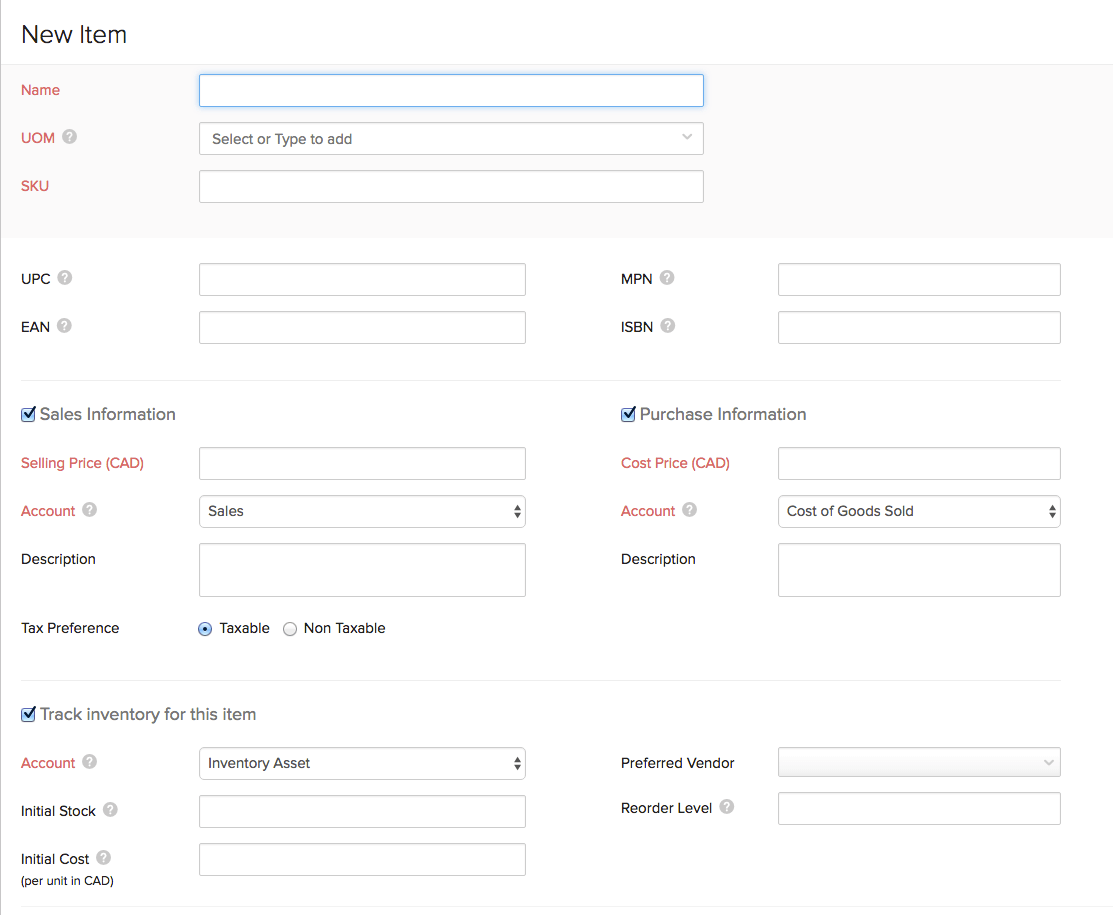
- Note: For item groups, the tax preference selected by you will be applied to all the items under the group.
Making an item nontaxable
While creating an item, you can choose to make it taxable or non-taxable. To make an item taxable:
- Navigate to the Items or Item Groups or the Composite Items module according to the need.
- Create a new item/item group/composite item.
- On the creation page, after entering the relevant details, select the Non Taxable option.
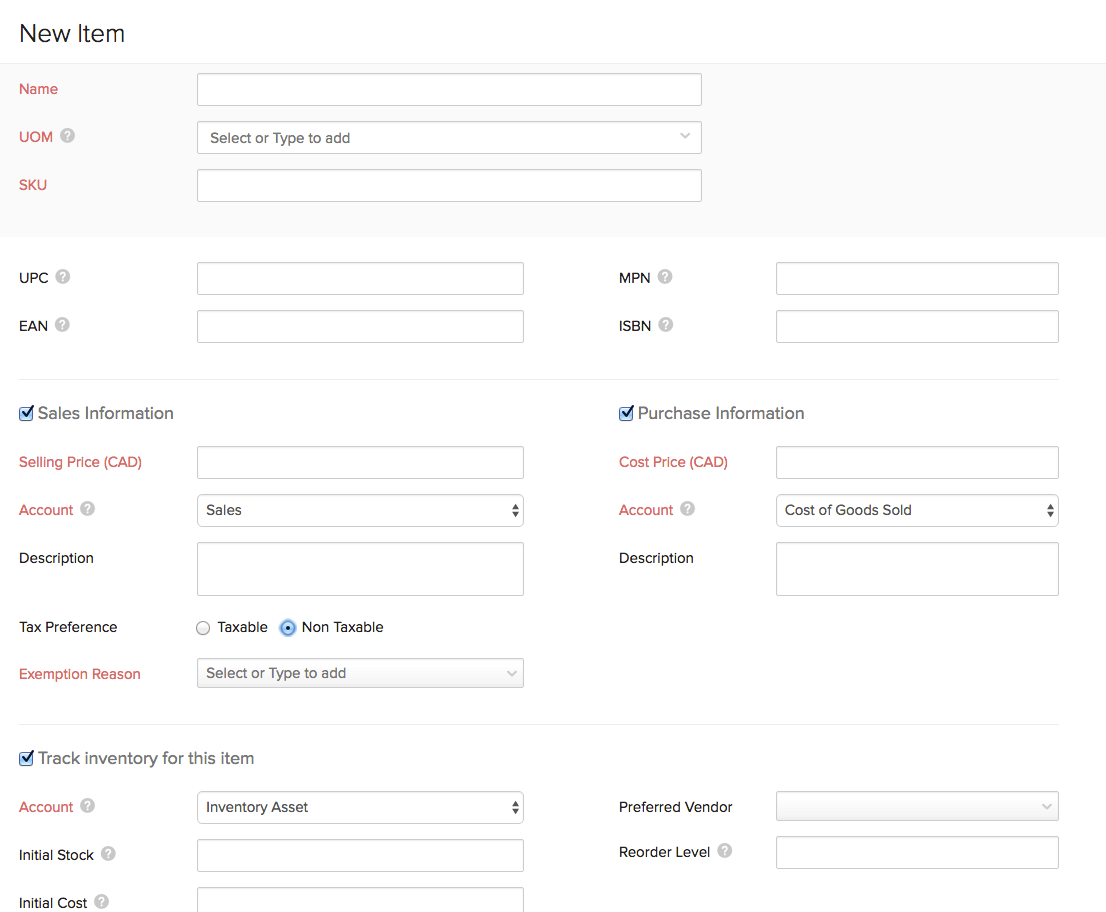
- You will be prompted to select an Exemption Reason, which can be selected from the drop-down or added anew.
- Click Save to finish.
- You now have a non-taxable item.
- Note: For item groups, the tax preference selected by you will be applied to all the items under the group.
Sales Orders & Invoices
Tax Information in Sales Orders & Invoices
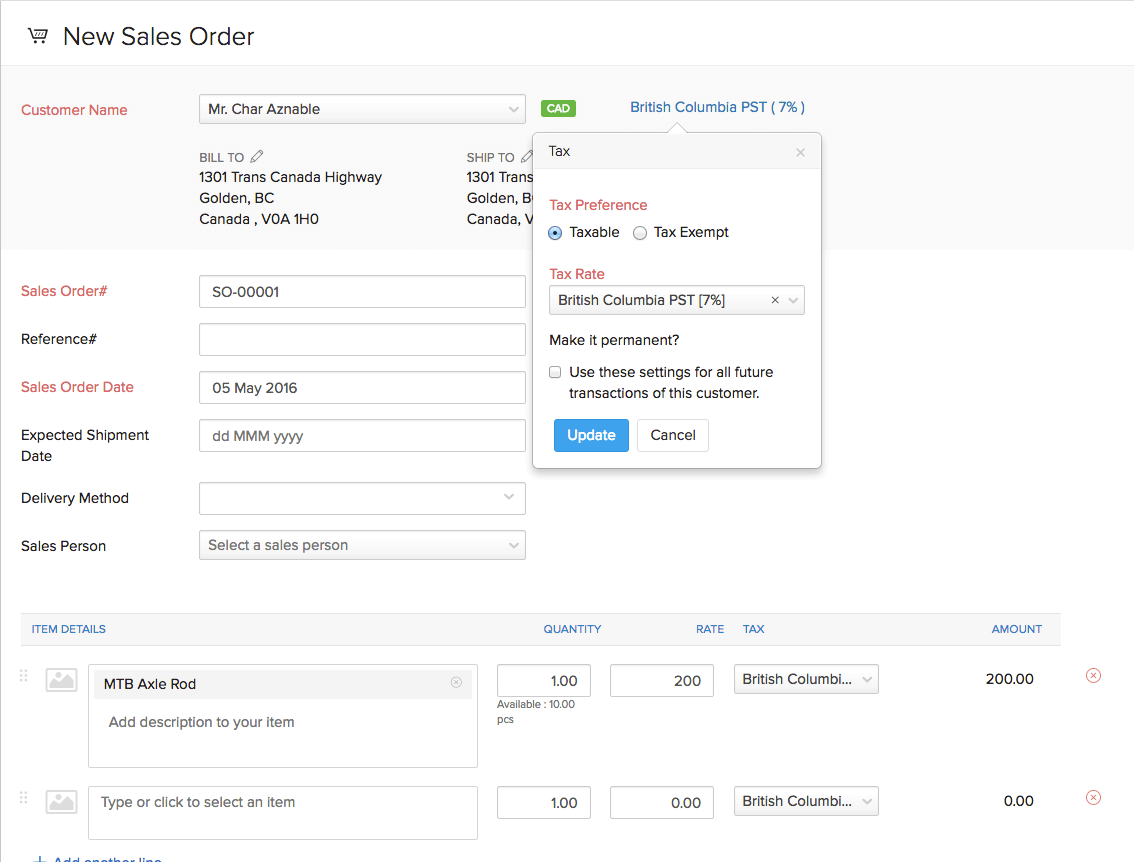
- While creating a sales order or an invoice, the tax information is displayed just below the Customer Name field.
- Here you can change the tax preference for the particular order or invoice and if needed also make it permanent. i.e: you can also make the invoice or order non-taxable by selecting the Tax Exempt option. By making it permanent, the tax preference for the contact will get updated.
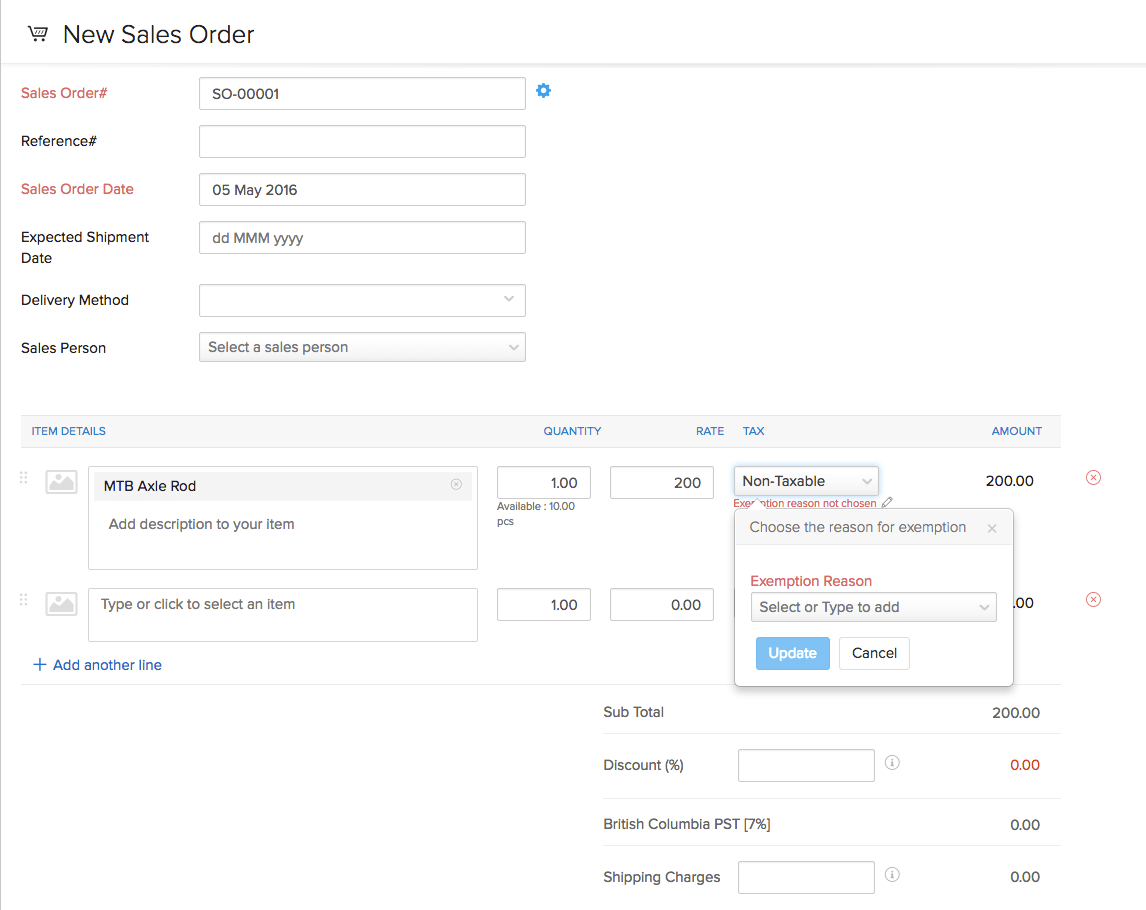
Making an Item Non-Taxable on a Sales Order or an Invoice
- Create a new invoice or an order.
- If you wish to make one or more items in the order or invoice non-taxable, then select the Tax field adjacent to the item(s)and choose the * Non-Taxable option from the drop-down. On the following window, choose the Exemption Reason or type a new one that can be added.
- Click on the Update button.
Purchases
Taxes for Purchases
- Taxes can be applied in bills as usual. But when a Non-Value Added Tax is applied to a purchase transaction in Zoho Inventory, the tax cannot be reclaimed.
- The tax amount will not be shown in tax related reports of the integrated Zoho Books organization and instead will be recorded as an expense. It will be saved under a separate expense account called as Tax Paid Expense.
Additional Functions
GST/HST Returns
This part can taken care by integrating your Zoho Inventory with Zoho Books. Click here to know more about generating GST/HST Returns for your Zoho Inventory organization in Zoho Books.


