Purchase Reports
Access reports associated with the purchases that you have recorded and managed in Zoho Inventory. Analyze your purchase orders, bills, receivables and vendors to plan your restocking workflows efficiently.
Payables
Vendor Balance
To generate a Vendor Balance report,
- Log in to Zoho Inventory
- Navigate to the Reports module.
- Select the Vendor Balance report under the Purchases section of the Reports page.
- This is an auto generated report.(It is automatically generated till date)
- It gets updated with every customer associated transaction.
- From this report, you can further generate drilled down vendor balance reports for each customer. For more information, please refer to the report takeaways section.
Note: The payment amount can be toggled between your base currency and foreign currency by clicking on the buttons BCY and FCY.

Tools: Print - Export report - View in Zoho Sheet - View in full screen
Takeaways
- The vendor balance report contains the following data fields - VENDOR NAME, BILL BALANCE, EXCESS PAYMENT, BALANCE(FCY) and BALANCE(BCY).
- The report data can be sorted as per any of this fields.
- This report displays a list of vendors and the balance amount to be paid to them.
- Clicking on a VENDOR will redirect to the overview page of that contact.
- Clicking on BALANCE will redirect to the Vendor Balance Details report which contains the details of the Bills.
Bill Details
To generate a bill details report,
- Log in to Zoho Inventory.
- Navigate to the Reports module.
- Select the Bill Details report under the Purchases section of the Reports page.
- Select a Date Range for your report. It can be a standard date range from the previous year or the current year and it can also be a custom date range.
- On selecting a standard choice, the From and To date fields, will be automatically derived.
- In case of a custom date range, you can manually change the From and To date fields.
- Once you ready, click on the Run Report button to generate the bill details report for that period.
Note: The price amounts will be displayed in your base currency.

Tools: Print - Export report - View in Zoho Sheet - View in full screen
Takeaways
- The bill details report includes the following data fields - STATUS, BILL DATE, DUE DATE, BILL#, VENDOR NAME, BILL AMOUNT and BALANCE AMOUNT.
- The report data can be sorted as per any of these fields.
- This report displayes a list of all the available bills, their details and their real time statuses for a specific time frame.
- Clicking on a VENDOR of an entry will redirect to the overview page of that contact.
- Clicking on the BILL#, BILL AMOUNT and BALANCE AMOUNT.
Payments Made
To generate a payments made report,
- Log in to Zoho Inventory.
- Navigate to the Reports module.
- Select the Payments Made report under the Purchases section of the Reports page.
- Select a Date Range for your report. It can be a standard date range from the previous year or the current year and it can also be a custom date range.
- On selecting a standard choice, the From and To date fields, will be automatically derived.
- In case of a custom date range, you can manually change the From and To date fields.
- Once you ready, click on the Run Report button to generate the payments made report for that period.
Note: The payment amount can be toggled between your base currency and foreign currency by clicking on the buttons BCY and FCY.

Tools: Print - Export report - View in Zoho Sheet - View in full screen
Takeaways
- The payments made report includes the following data fields - DATE, REFERENCE#, BILL#, VENDOR NAME, PAYMENT METHOD, NOTES, DEPOSIT TO, AMOUNT and UNUSED AMOUNT.
- The report data can be sorted as per any of these fields.
- This report displays a list of records bearing the payments you have made to your vendors for a chosen time frame.
- Clicking on a VENDOR of an entry will redirect to the overview page of that contact.
Purchase Order Details
This report lists the purchase orders created for a given period along with its current status, delivery date, vendor name, and total amount. To generate a purchase order details report:
- Navigate to the Reports module in the left sidebar.
- Select the Purchase Order Details report under the Payables section.
- Click Customize Report option at the top to filter your report based on specific critera. You can do the following customizations:
- Date Range: Select a date range for your report. It can be a standard date range from the previous year or the current year. You can also select a custom date range.
- Purchase Order Status: Select the statuses for which you want to filter the purchase orders in your report.
- Warehouse Name: Select the warehouses whose associated purchase orders you want to view.
- Group By: Choose how you want to group the result of the report.
- Click Advance Filters to add more criteria to filter.
- Go to the Show/Hide Columns menu on the left side bar to select the columns which you want to view in your report. You can also rearrange the fields in the order in which you prefer to view them.
- Click Run Report at the bottom to generate the report.
Note: The amounts will be displayed in your base currency.

Purchase Order by Vendor
To generate a purchase by vendor report,
- Log in to Zoho Inventory.
- Navigate to the Reports module.
- Select the Purchase by Vendor report under the Purchases section of the Reports page.
- Select a Date Range for your report. It can be a standard date range from the previous year or the current year and it can also be a custom date range.
- On selecting a standard choice, the From and To date fields, will be automatically derived.
- In case of a custom date range, you can manually change the From and To date fields.
- Once you ready, click on the Run Report button to generate the purchase by vendor report for that period.

Tools: Print - Export report - View in Zoho Sheet - View in full screen
Takeaways
- The purchase by vendor report includes the following data fields - VENDOR NAME, QTY ORDERED, QTY RECEIVED and QTY TO BE BILLED.
- The report data can be sorted as per any of these fields.
- This report displays all the vendor and their related transaction details for a chosen time frame.
- Clicking on a VENDOR of an entry will redirect to the overview page of that contact.
Purchases & Expenses
Purchases by Item
To generate a purchases by item report,
- Log in to Zoho Inventory.
- Navigate to the Reports module.
- Select the Purchases by Item report under the Purchases section of the Reports page.
- Select a Date Range for your report. It can be a standard date range from the previous year or the current year and it can also be a custom date range.
- On selecting a standard choice, the From and To date fields, will be automatically derived.
- In case of a custom date range, you can manually change the From and To date fields.
- Once you ready, click on the Run Report button to generate the purchases by item report for that period.
Note: The price amounts will be displayed in your base currency.

Tools: Print - Export report - View in Zoho Sheet - View in full screen
Takeaways
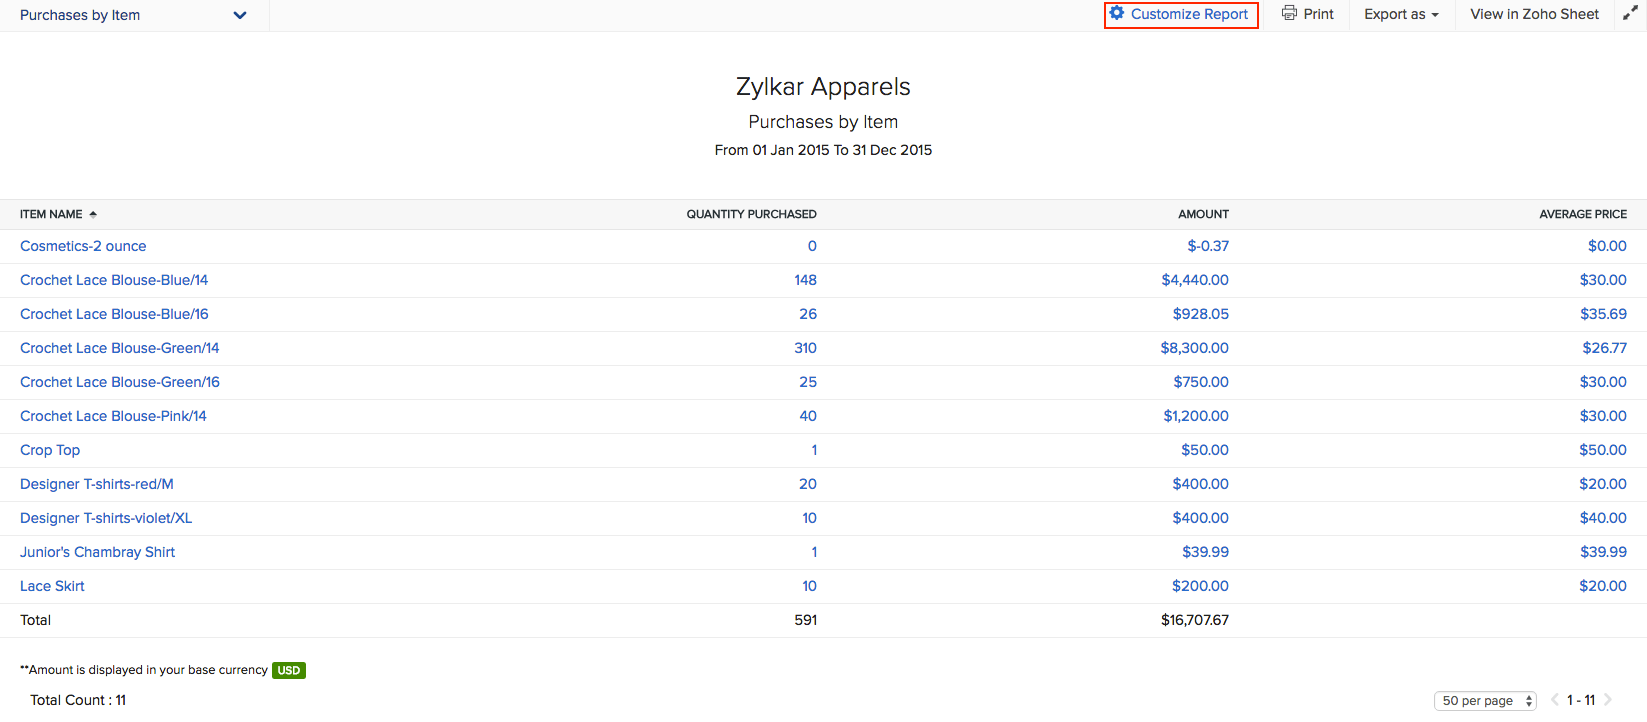
- The purchases by item report includes the following data fields - ITEM NAME, QUANTITY PURCHASED, AMOUNT and AVERAGE PRICE.
- The report data can be sorted as per any of these fields.
- You will be able to obtain purchase statistics for all your inventory tracked as well as your non inventory items from this report.
- All the parameters inside this report are linked to their associated data.

- Clicking on the name of an item will take you to the overview page of that item.
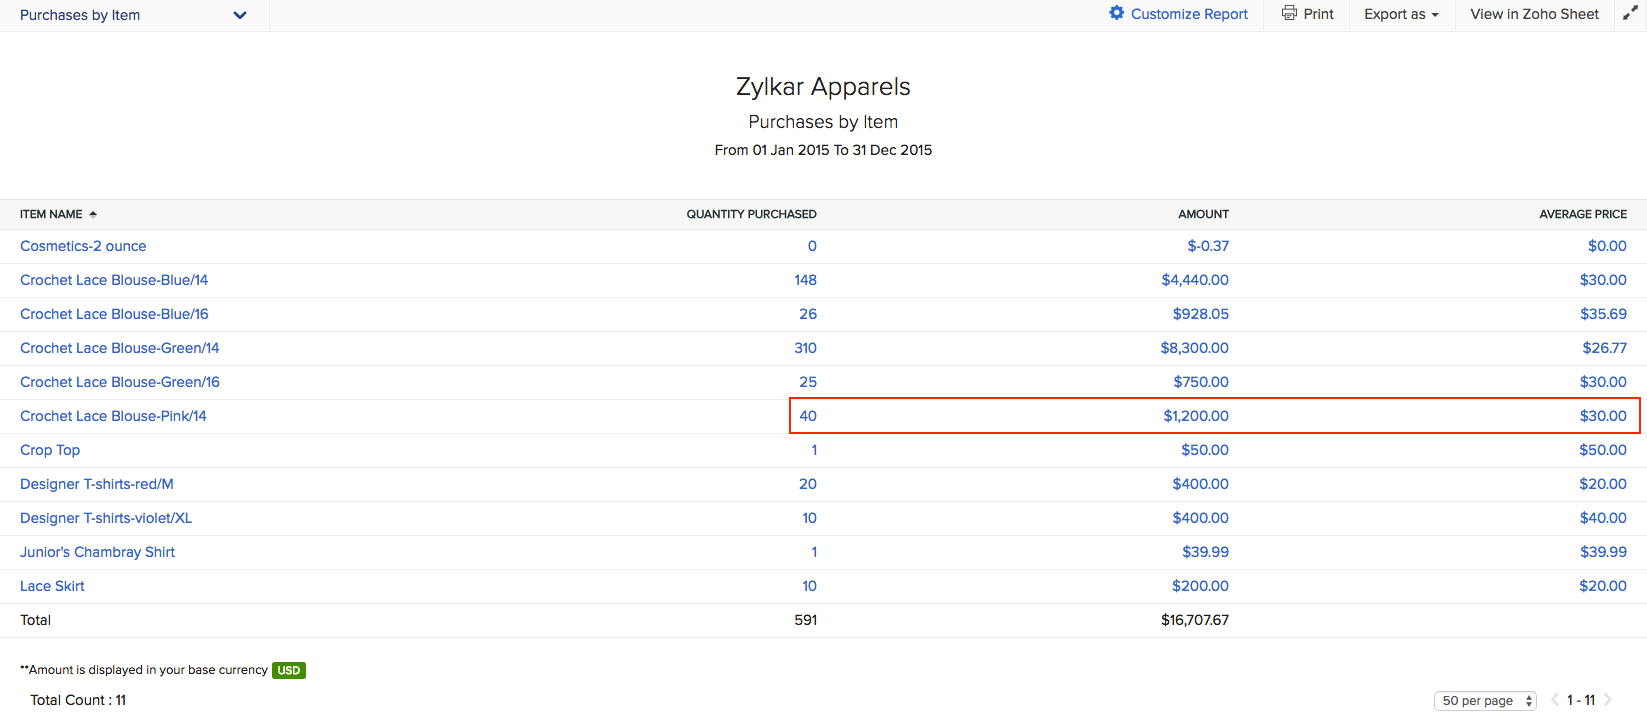
- Clicking on any other parameter such as - quantity purchased, amount or average price will take you to a purchase report page dedicated for that item.

- You will be able to export or print the report for that item.
Receive History
To generate a receive history report,
- Log in to Zoho Inventory.
- Navigate to the Reports module.
- Select the Receive History report under the Purchases section of the Reports page.
- Select a Date Range for your report. It can be a standard date range from the previous year or the current year and it can also be a custom date range.
- On selecting a standard choice, the From and To date fields, will be automatically derived.
- In case of a custom date range, you can manually change the From and To date fields.
- Once you ready, click on the Run Report button to generate the receive history report for that period.

Tools: Print - Export report - View in Zoho Sheet - View in full screen
Takeaways
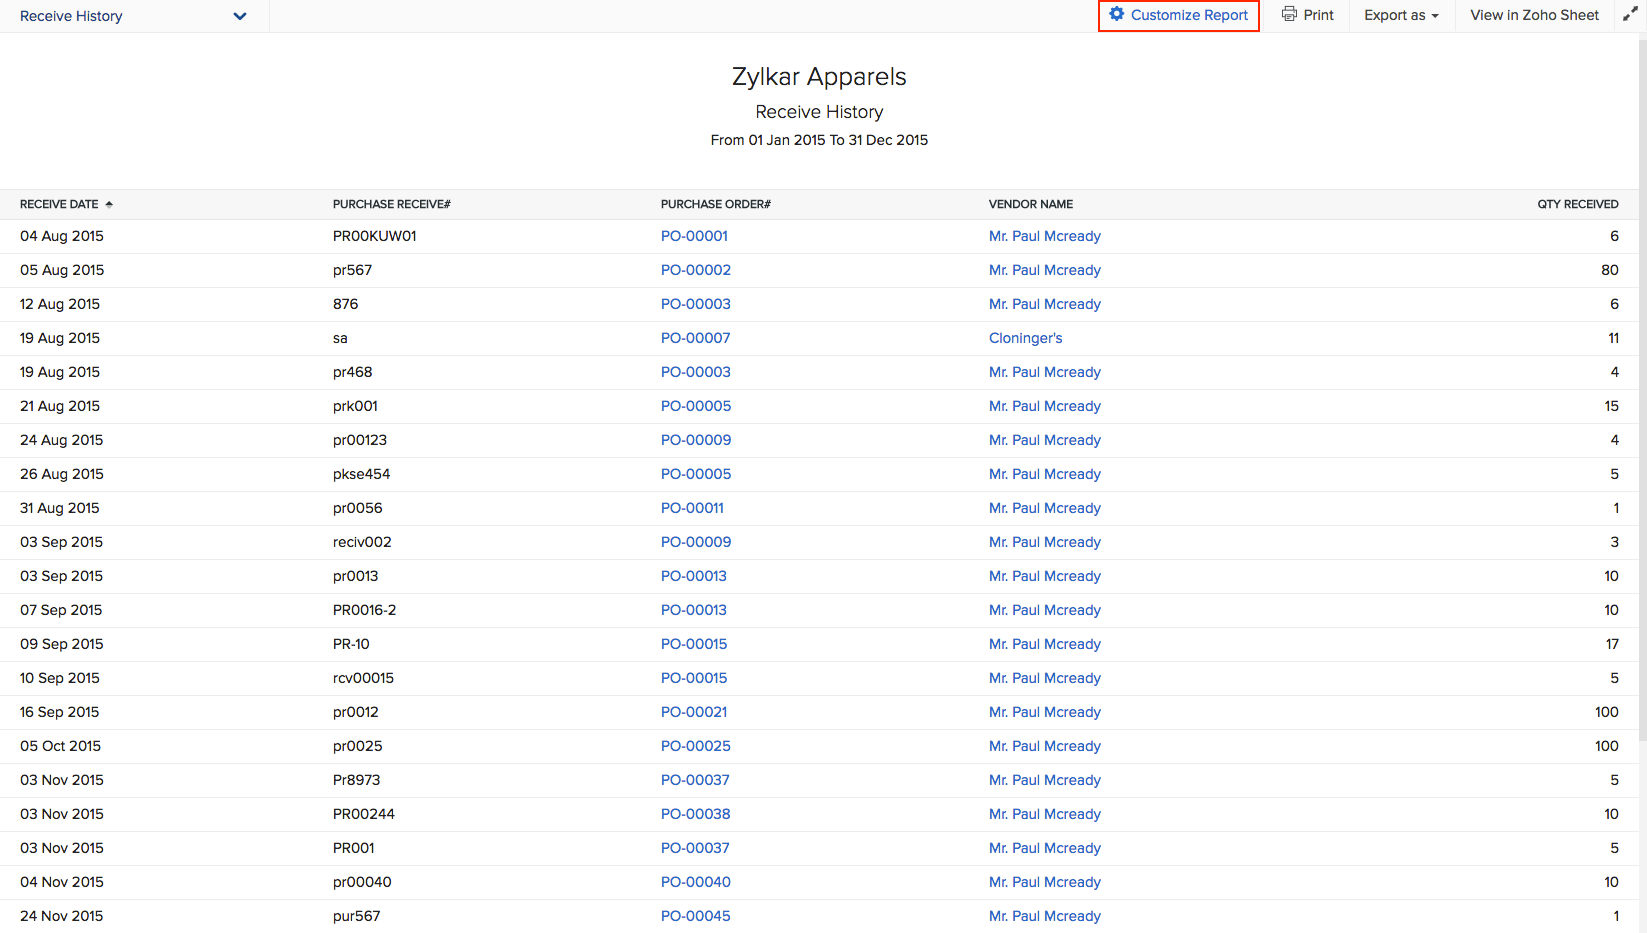
- The receive history report includes the following data fields - RECEIVE DATE, PURCHASE RECEIVE#, PURCHASE ORDER#, VENDOR and QTY RECEIVED.
- The report data can be sorted as per any of these fields.
- This report displays all the available purchase receives and their related details for a chosen time frame.
- Clicking on the PURCHASE ORDER# of an entry will take you to the concerned purchase order.
- Clicking on a VENDOR of an entry will redirect to the overview page of that contact.


