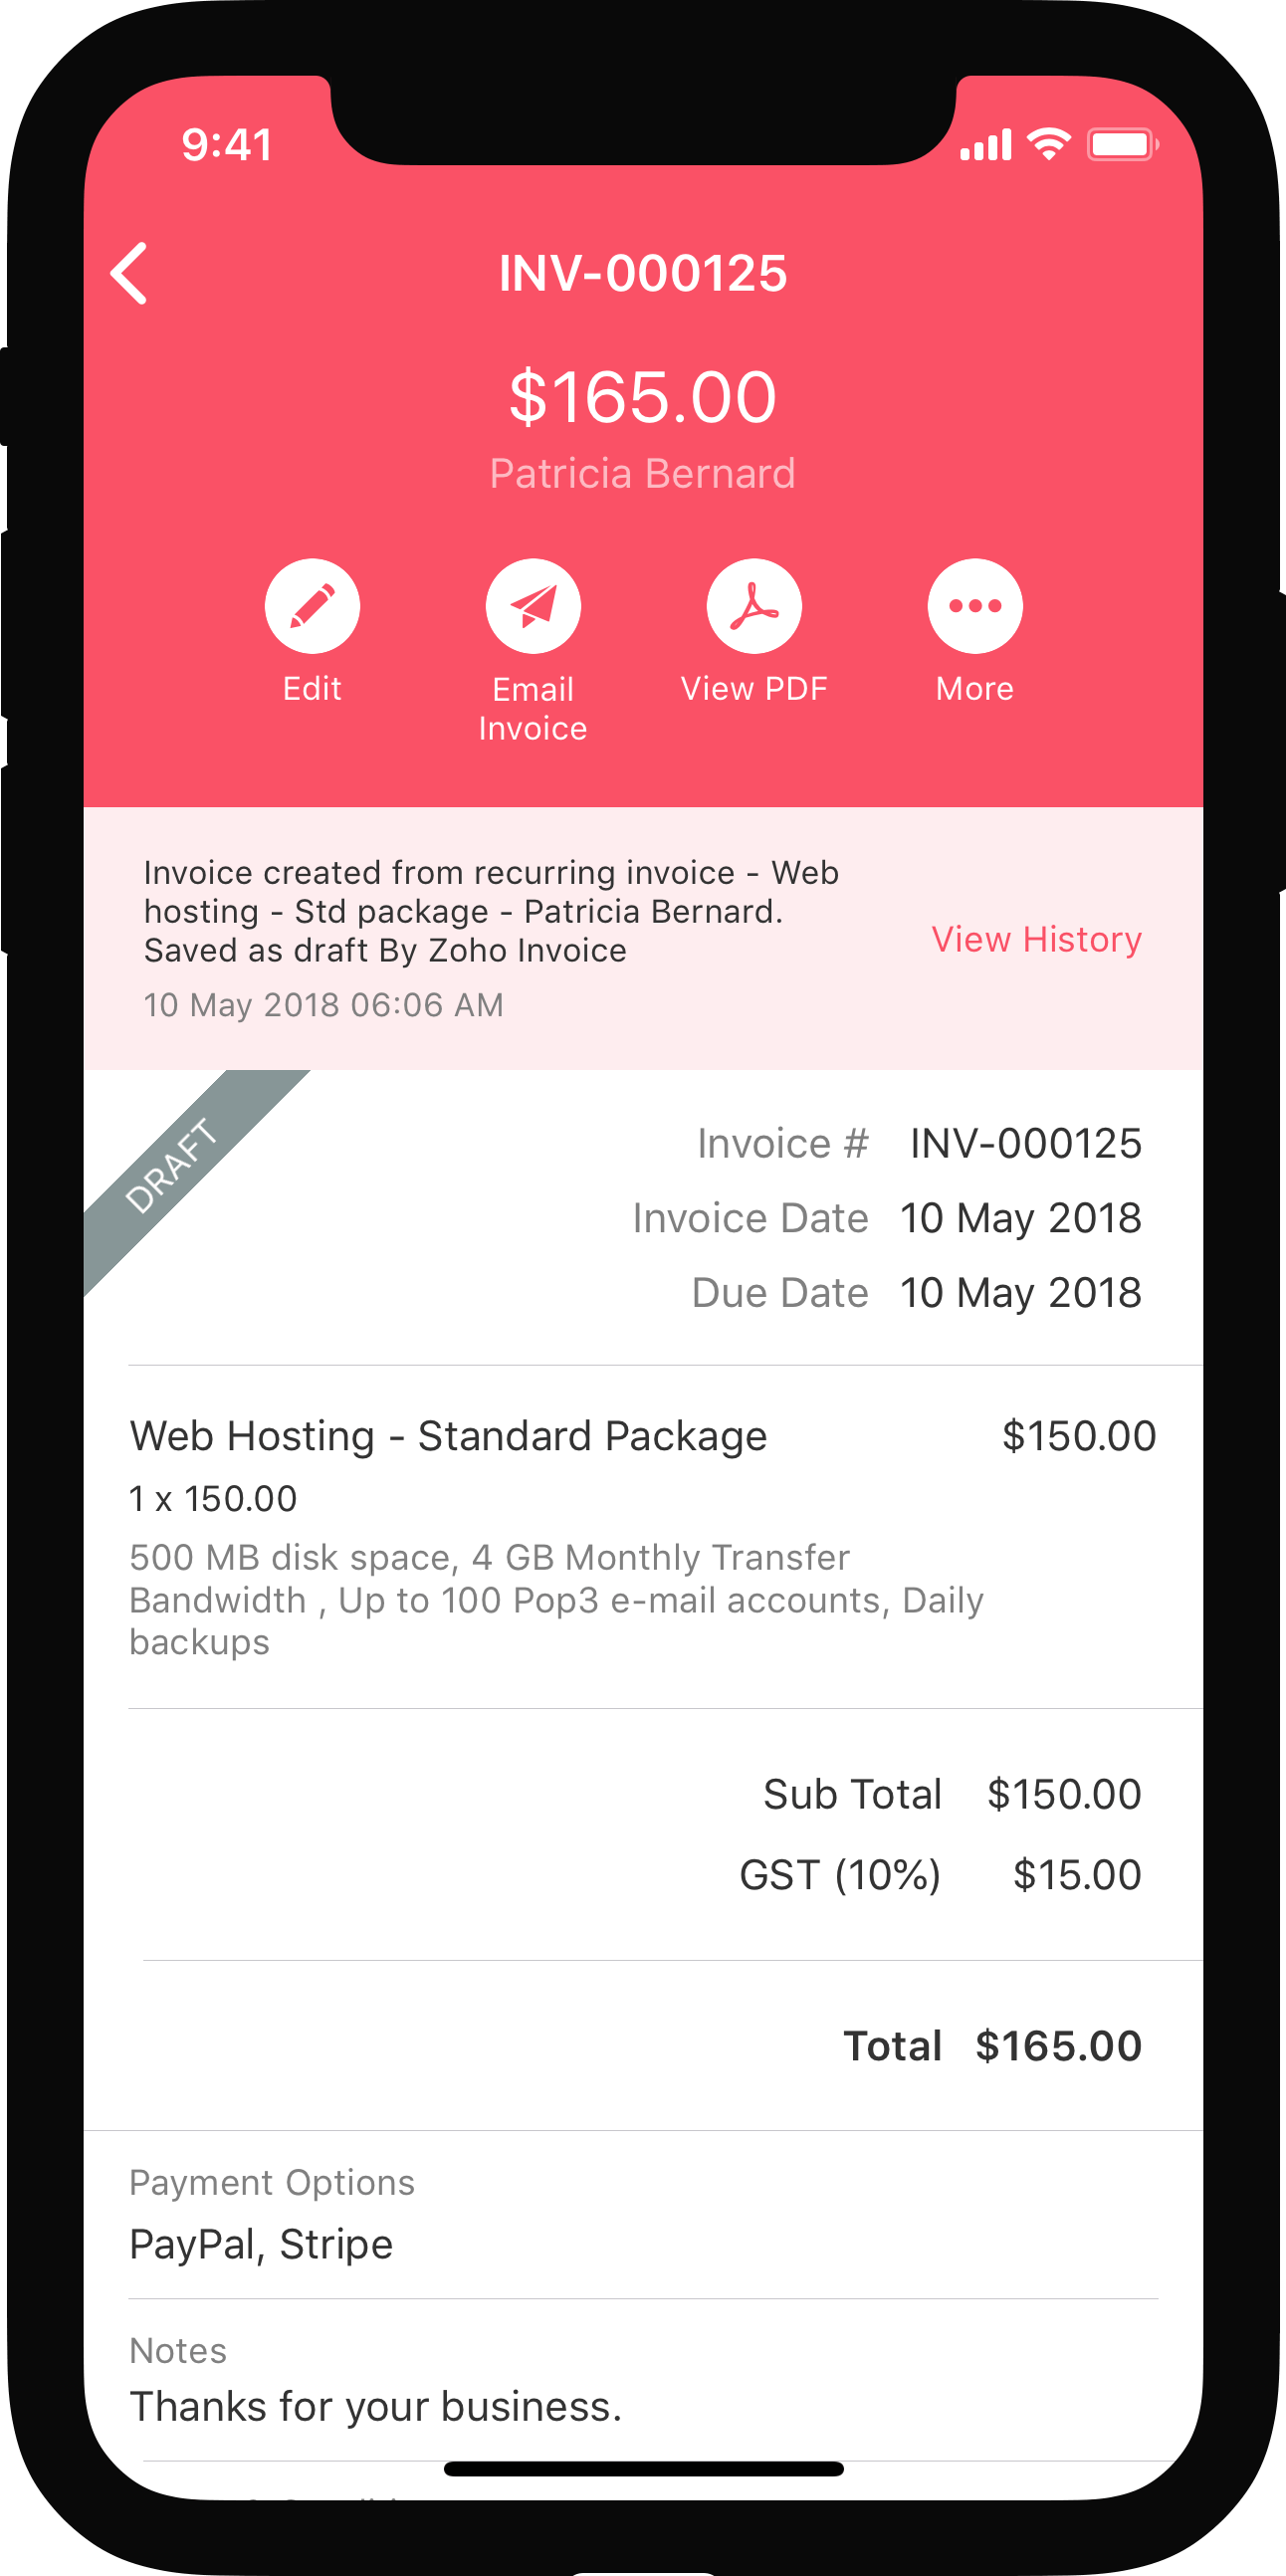
Integrate Zoho Books with ICICI Bank eazypay
Notes: This integration is available only for users of the India edition of Zoho Books created under the zoho.in domain.
ICICI Bank eazypay is an online payment service. Integrating it with Zoho Books allows you to receive payments from your customers via multiple payment modes such as Cash, Cheque, Credit/Debit Card, Internet Banking, UPI, NEFT and RTGS. Your customers can have an account in any bank in India and make payments to you.
Scenario: Peter runs a retail business and delivers goods to some of his customers. In cases where the shipping partner does not provide payment options, customers had to add Peter as a beneficiary, request his bank account details and so on. When one of his customers shared about the bad experience, Peter registers for eazypay using his ICICI Bank account. He now enables payment options in his invoice and allows his customers to make online or offline payments using a payment mode of their choice without any hassle.
In this section:
- Benefits of the Integration
- Register and Integrate with ICICI Bank eazypay
- Enable Payment Options
- Receive Payments from Customers
- Link CIB Portal
- Advanced Settings
- Delete the Integration
Benefits of the Integration
- Receive payments from customers in a quick and easy manner.
- Customers can pay using a variety of online and offline payment modes.
- Automatic reconciliation of the payments received in Zoho Books.
- Be notified when customers have made payments.
Register and Integrate with ICICI Bank eazypay
Prerequisite: A current account in ICICI Bank to associate with eazypay.
To set up the integration, you will have to first register for an ICICI Bank eazypay account from Zoho Books, and then verify and complete the registration in your banking portal. To set up the integration in Zoho Books:
- Go to Settings on the top right corner of the page.
- Select Payment Gateways under Online Payments.
- Click Set up Now next to ICICI Bank eazypay.

- Enter your details in the pop-up that appears to create a new eazypay account.
| Fields | Description |
|---|---|
| Merchant Name | The name of your organisation as mentioned in your bank account. |
| Corp ID | The Corporate ID provided for your organisation. |
| User ID | The user level ID provided to individuals associated to the CORP ID mentioned above. |
| PAN | The Permanent Account Number associated with your CORP ID. |
| ICICI Bank Account | The ICICI Bank account number through which you want to track and receive payments via eazypay. |
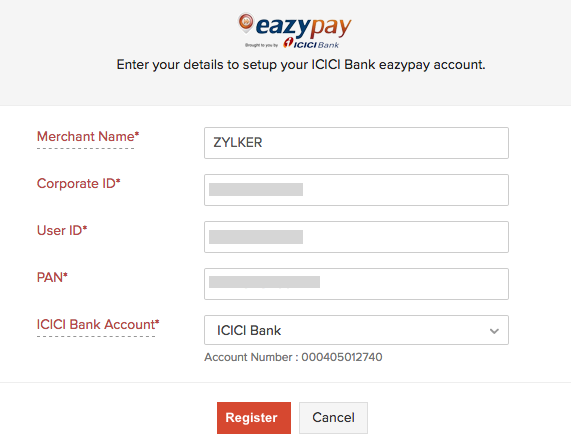
- Click Register and you will be redirected to their website.
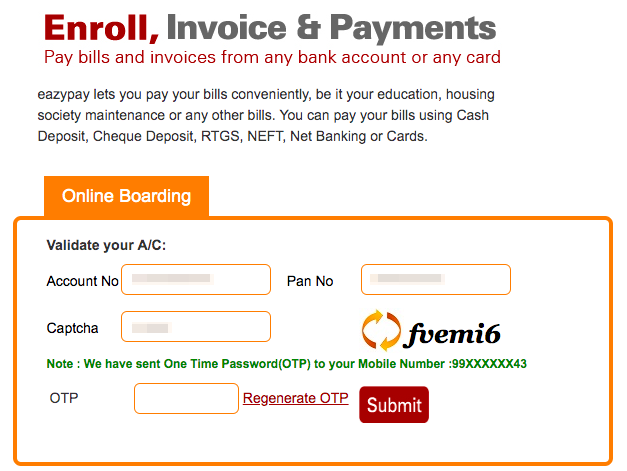
- Enter your Account Number, PAN and the Captcha displayed there.
- Click Submit and a One Time Password will be sent to the mobile number associated with the bank account.
- Enter the OTP and click Submit.
-
Enter your details in the four pages that follow to complete the registration process:
- 1.Options: Choose the Collection Method, Merchant, Collection Mode, Default Collection Mode, Charges Borne (merchant or payer), Business Category and the Nature of the Business.
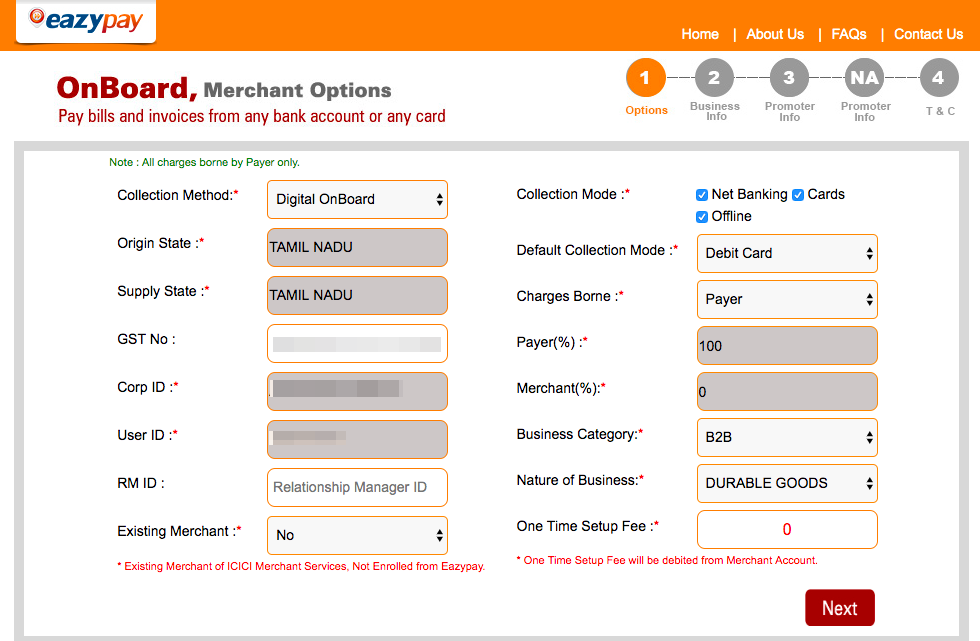
Insight: You will have to enter your GST No to generate GST invoices in eazypay.
If you would like to enable Card Payments, choose the option NO for Existing Merchant.
Your transaction fees will depend upon your Business Category and Nature of Business.
- 2.Business Info: Provide the details on your business such as the Business Name, Start Date, Annual Turnover, Ticket Size, Collection and a summary.
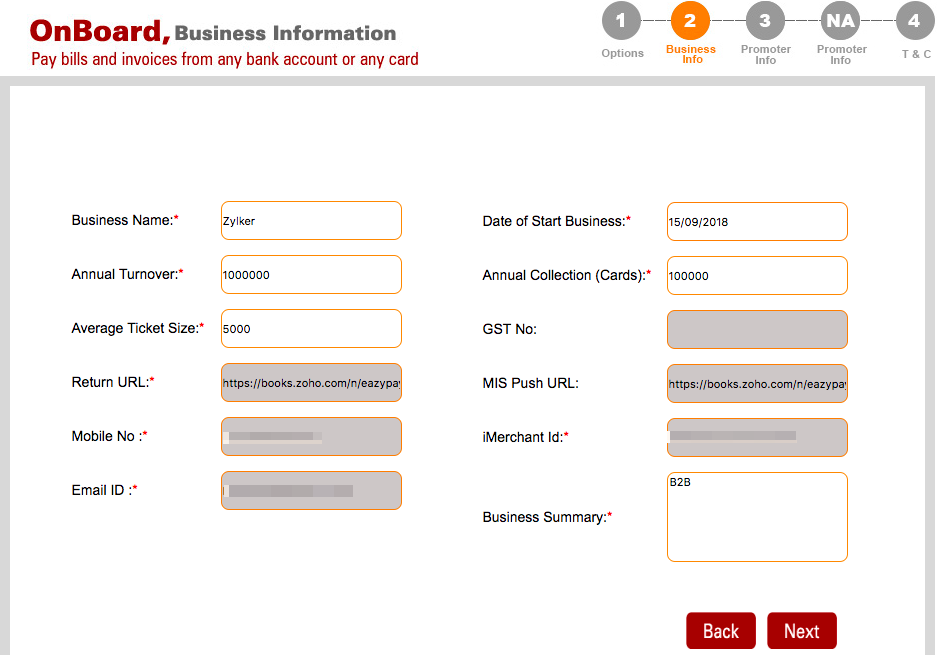
Insight: The Average Ticket Size is the average sale value per transaction in your business.
Annual Collection (Cards) refers to the amount that you expect the business to receive through Debit/Credit card payments in a year.
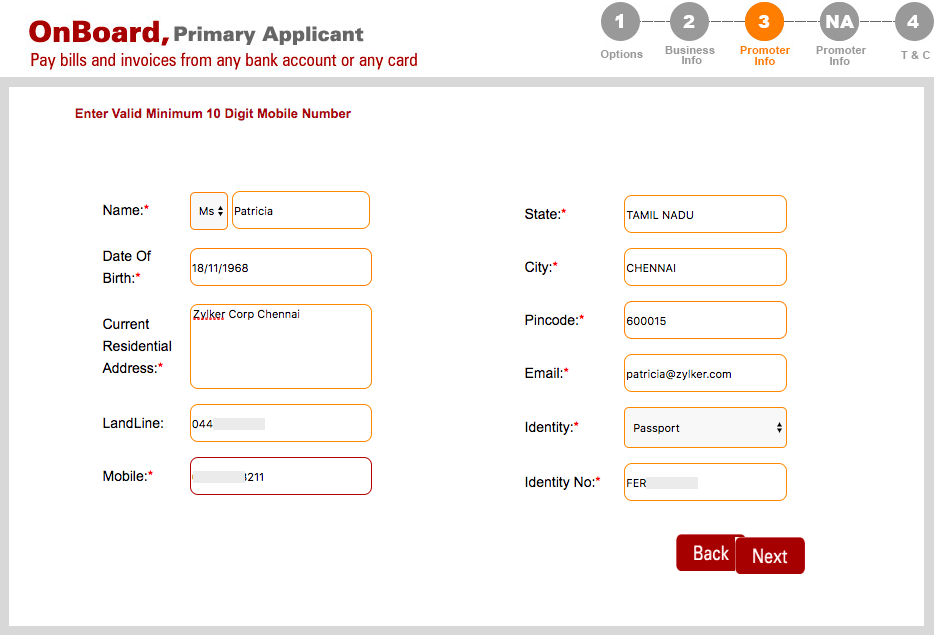
- 3.Promoter Info: Enter the details of the applicant such as your Name, Address and Contact Details.
- 4.Terms and Conditions: Read and accept the Terms and Conditions of ICICI Bank eazypay.
Insight: The activation status of your transaction will be Pending until you accept the terms and conditions. Account activation might take up to 20 minutes. You can click the Check Status button to fetch the status updates from ICICI Bank

Once you accept the terms and conditions, you will be redirected to Zoho Books. Once the integration status is Active, you will be able to collect payments from your customers.
Advanced Settings
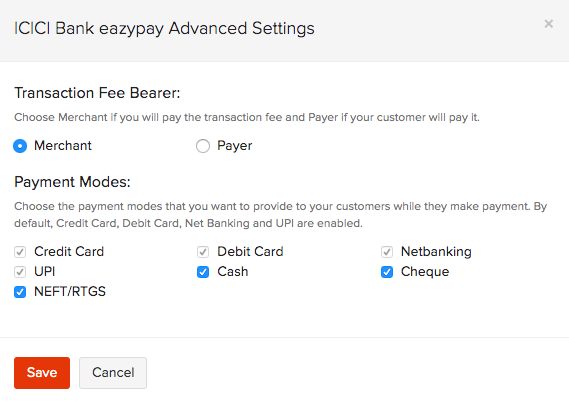
Based on the options you had chosen during your registration, your integration will be configured. Some of these will be listed under the Advanced Settings option in Zoho Books. Here’s how you can edit them:
- GGo to Settings on the top right corner of the page.
- Select Payment Gateways under Online Payments.
- Click Advanced Settings next to ICICI Bank eazypay.

- Enable/Disable payment modes and choose who the transaction fee bearer will be for your transactions.
- Click Save.
Enable Payment Options
After seting up the integration, you can enable payment options in your invoices to allow your customers to make payments. To enable payment options:
- Go to Zoho Books > Sales > Invoices.
- Create a New Invoice for your customer.
- Scroll down and select ICICI Bank eazypay from the Payment Options.
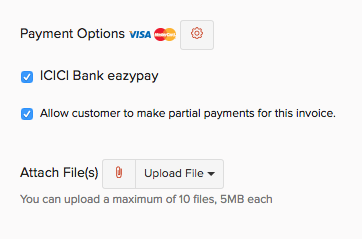
- Save and Send the invoice to your customer.
Receive Payments from Customers
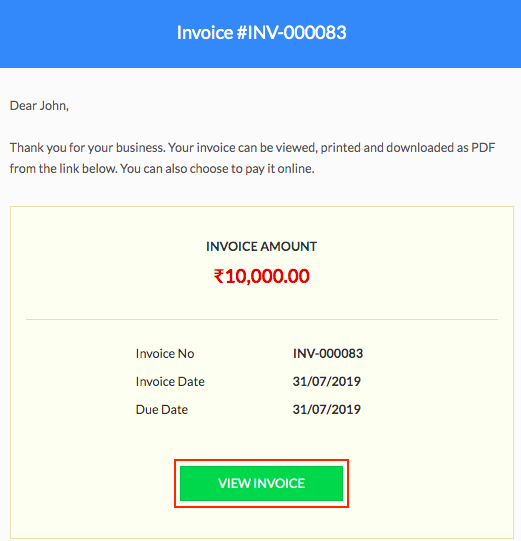
Your customers can view the invoices and make payments in their Customer Portal when they login. If the customer portal has not been enabled, customers can make payments directly from the invoice sent to them via email.
Here’s how customers can make payments:
- Log into the Customer Portal and select the invoice to make payment.
(or)
Go to the invoice link shared to you via email.
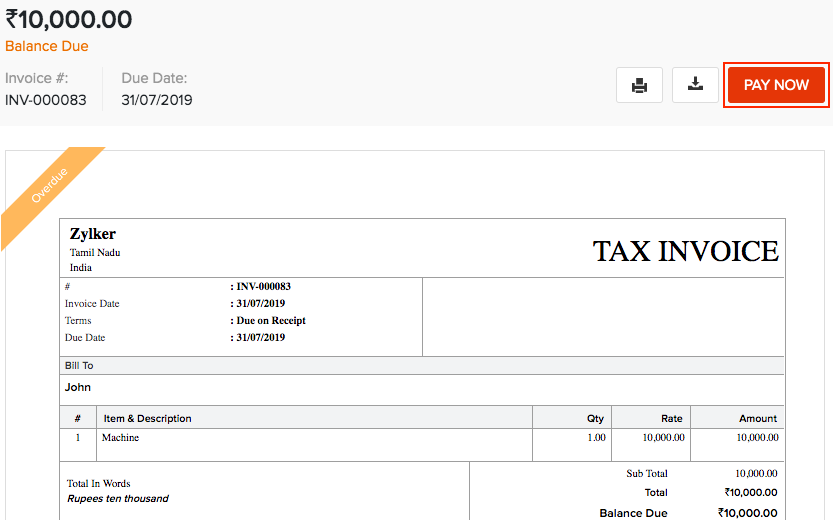
- Click the Pay Now button in the top right corner.
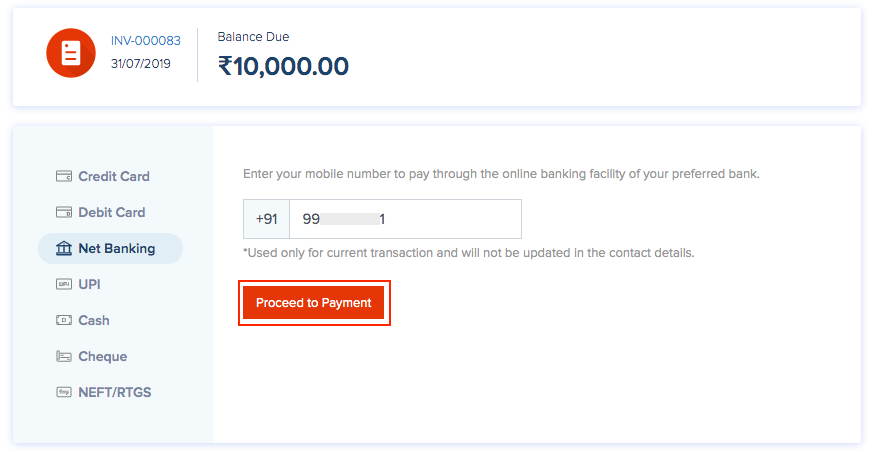
- Select your preferred payment mode from the available options.
- Enter your Mobile Number and click Proceed to Payment.
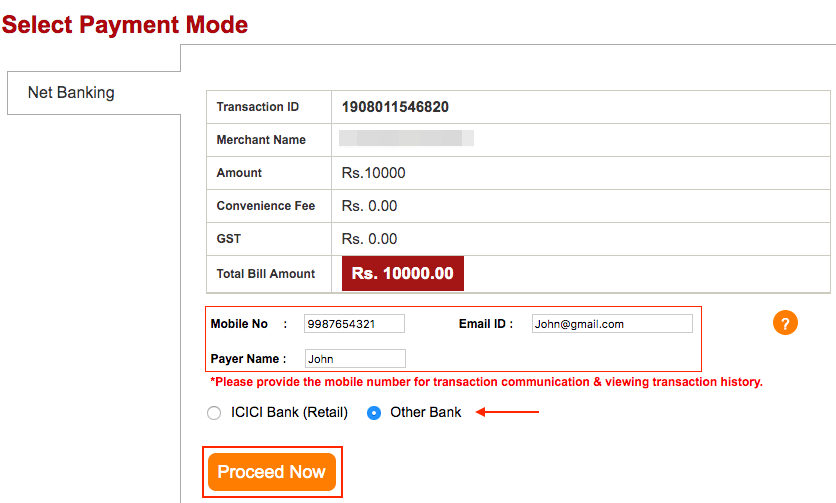
- Enter the Payer Name, Email ID and Mobile Number.
- Enter your Bank/Card details based on the online payment method chosen and click Proceed Now.
(or)
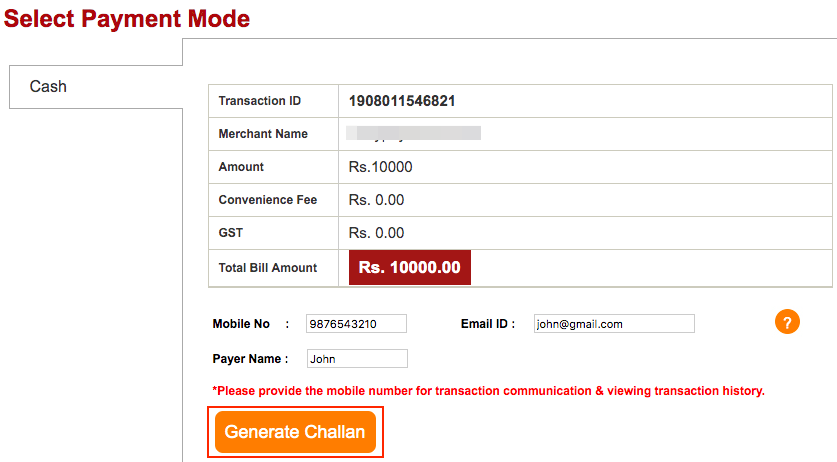
- Click Generate Challan to make an offline payment. A PDF of the challan will be generated and one can make the payment at the bank with the challan.
Link CIB Portal
Your ICICI Bank eazypay account will be linked to your Corporate Internet Banking (CIB) portal in the background. You can login to your CIB portal to:
- View and manage all payments and receivables in your CIB portal.
- Get detailed insights on each transaction. You can view the transaction charges, tax rates, payment mode, settlement details and download tax invoices.
- Initiate refunds for payments received.
To do this:
- Click the option Log in to Portal from the Integrations page in Zoho Books.

- Your account will be linked to the Corp ID and User ID mentioned in the pop-up.
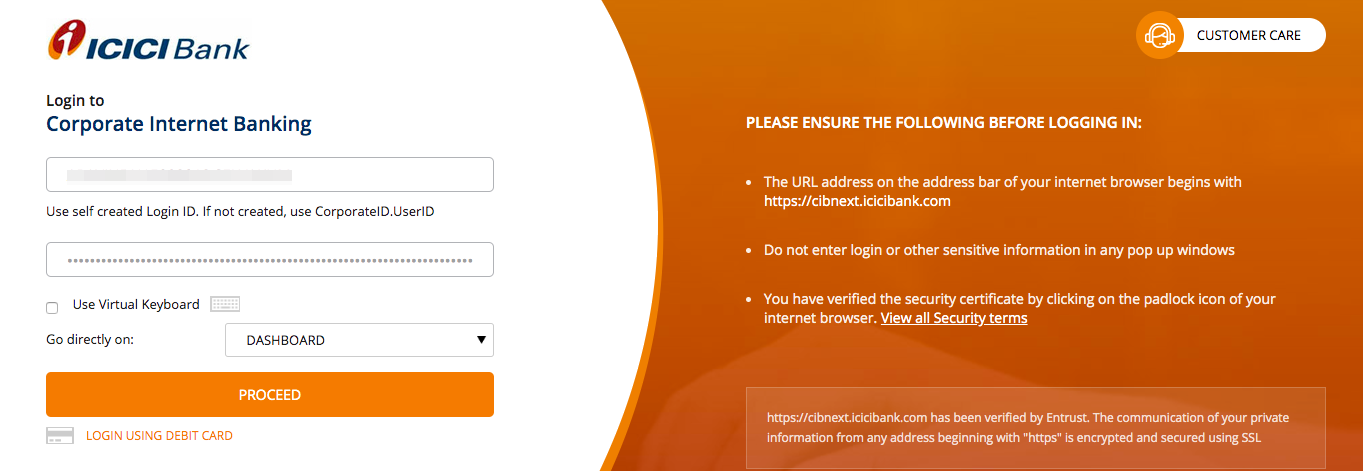
- Click Proceed and log in to your portal using your CIB Login ID and Password.
Insight: If you haven’t created a Login ID for your CIB Portal, enter your CorpID.UserID in the given field.
- Go to Business Essentials and eazypay will be listed under it.
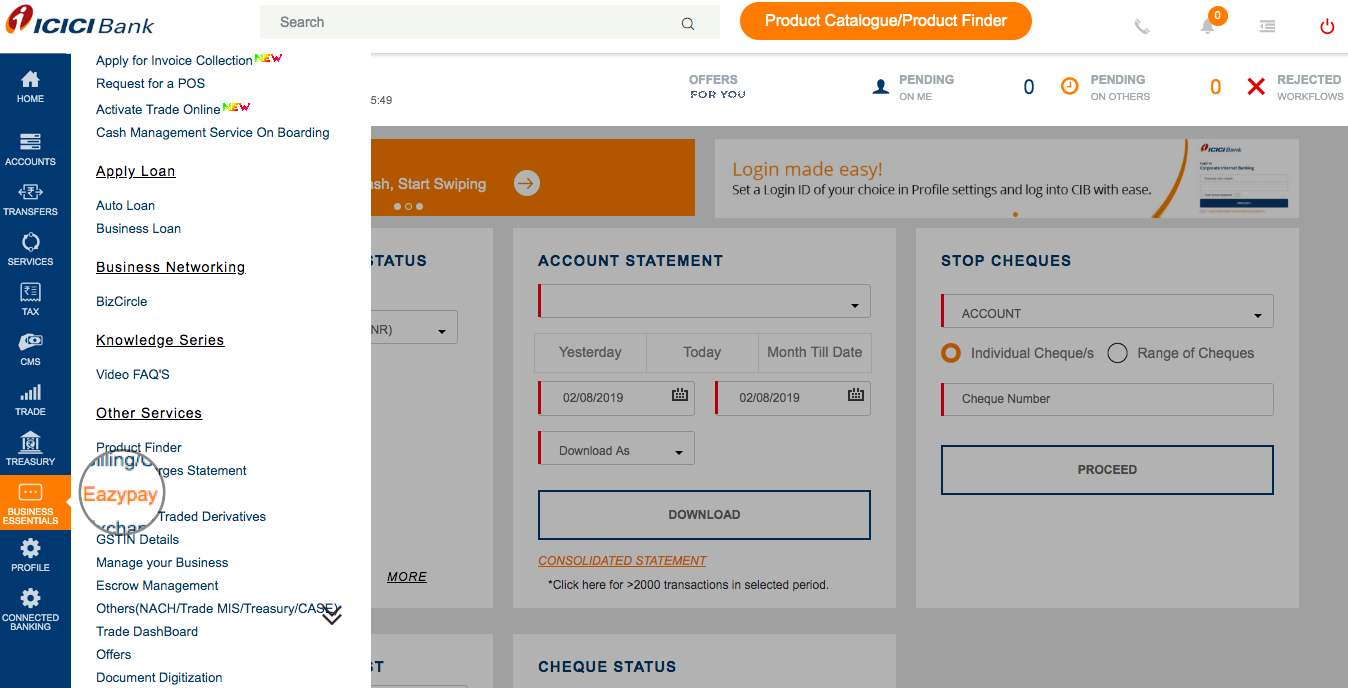
- Click eazypay and a new window will be opened.
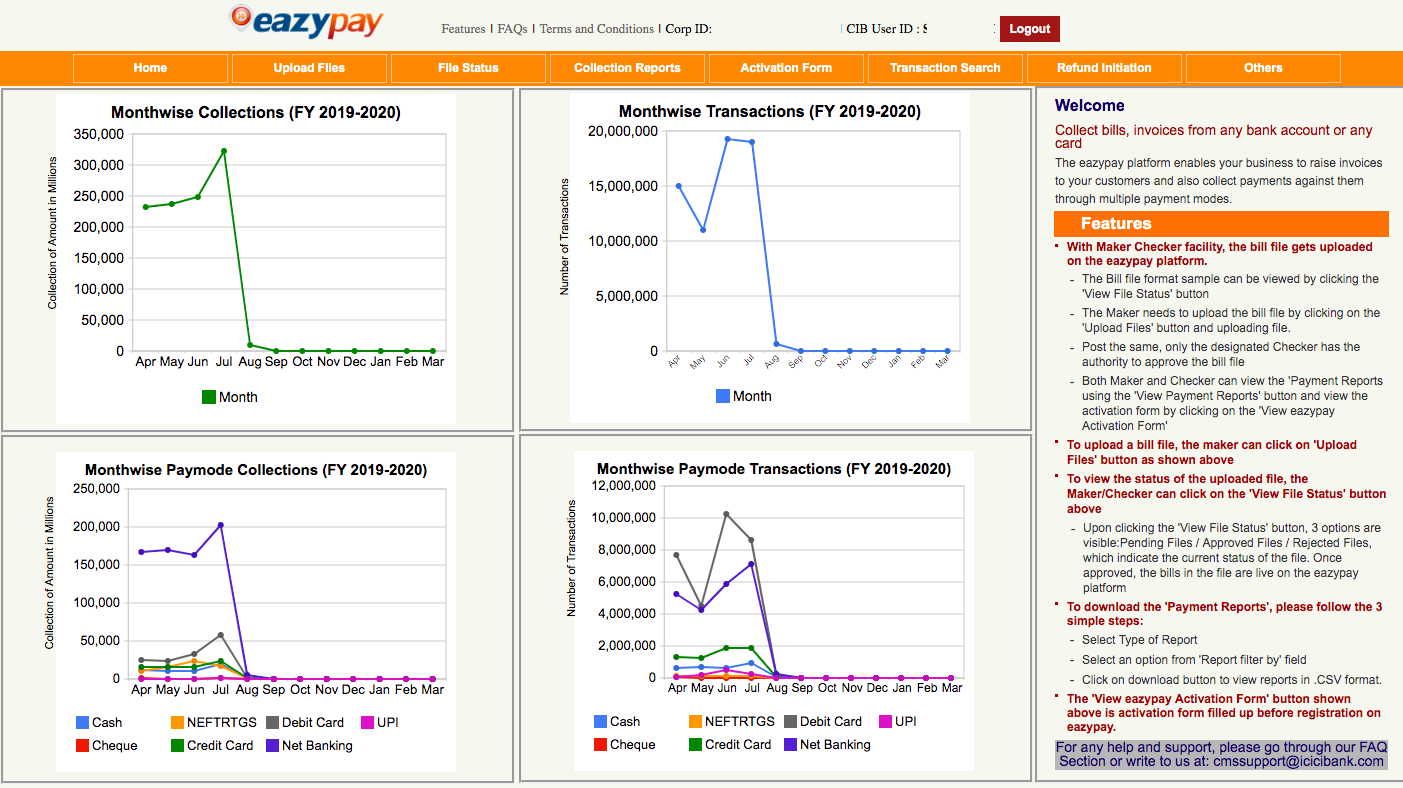
You will be able to view and access all transactions, reports and initiate initiate refunds.
Delete the Integration
You can delete the integration from Zoho Books whenever you want to stop receiving payments through eazypay or when you want to configure a new account. To delete the integration:
- Go to Settings on the top right corner of the page.
- Select Payment Gateways under Online Payments.
- Click the Trash icon next to ICICI Bank eazypay.

Note: Zoho Books does not collect any transaction fee while receiving payments. Transaction fee if any, is collected by the bank based on their norms.

Note: If you have any queries regarding the ICICI Bank eazypay integration, write to us at icici-support@zohofinance.com.
 Yes
Yes
 Thank you for your feedback!
