Zoho Projects Integration
Zoho Projects is a project management software that enables you to create, assign, and manage tasks and collaborate with your team to achieve your goals.Using the Zoho Projects Integration in Zoho Mail, you can conveniently view and manage tasks, bugs, issues, task lists, and forums in the Zoho Mail email preview when you receive Zoho Project and Bugtracker email notifications.
Zoho ToDo inside Zoho Mail, gives you a consolidated view of your personal Tasks and Project Tasks under the Unified view section, enabling you to prioritize and plan better.
Zoho Projects extension in eWidget can be used to create and manage projects, tasks, and much more. Refer here to know more.
Table of Contents
Enable Zoho Projects Integration
When you add email to Project tasks or enable Zoho Projects Integration, the default portal chosen in Zoho Projects will be associated with Zoho Mail. You can choose any default portal from the Project Integration settings. enableprojects
- Login to Zoho Mail
- Go to Settings
- Navigate to Integrations.
- Turn 'ON' the toggle button next to Zoho Projects.
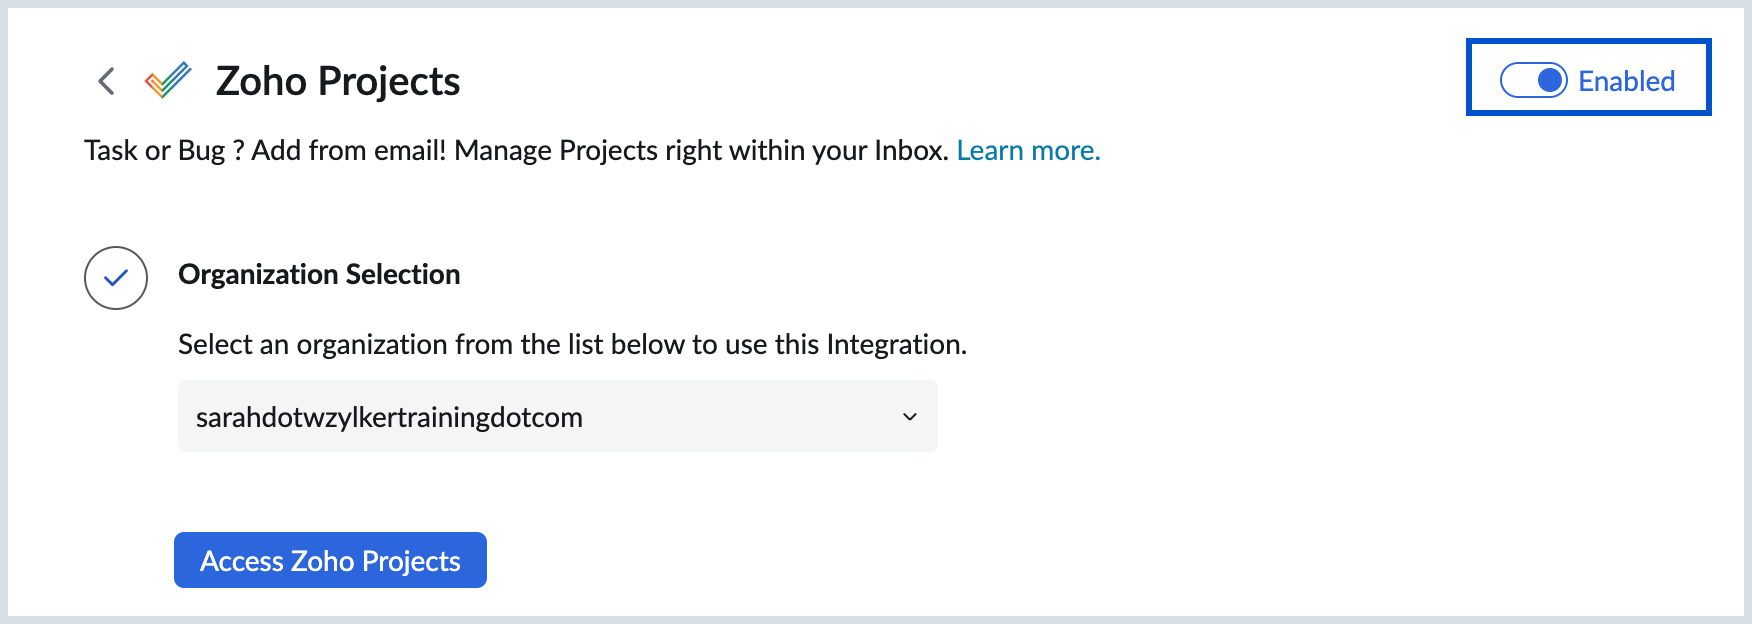
- On enabling Projects Integration, you can select your default portal from the portal name drop-down in the Zoho Projects option.
- Whenever you add emails to Zoho Projects Tasks, it gets added to the chosen portal.
After enabling, click the Access Zoho Projects button to open the Zoho Projects eWidget pane.
Note:
In case you change the portal from the Integration settings, all the prior Tasks associated with the previous portal will not be visible in the emails or in the mail listing. Those tasks can be viewed only if that particular portal is selected as the default portal.
Zoho Projects Preview in Mail
When you receive notifications from Zoho Projects on tasks, updates, issues or forum posts, you can view and edit those in the mail preview in Zoho Projects format rather than switching between multiple apps to manage.
To view Zoho Projects notifications in the Mail preview pane:
- Log into your Zoho Mail account.
- Select the email notification from Zoho Projects.
- On the top right corner of the email preview pane, click on the Projects/ BugTracker icon to view the email in Zoho Projects format.

Zoho BugTracker Preview in Mail
Zoho Bugtracker allows you to report bugs and issues in your project to enhance your product. You can add issues with deadlines, assign users to resolve the problems and carry out other tasks. Additionally, through Zoho Projects Integration, you can receive bug/forum detail notifications from Zoho Bugtracker in the mail preview in Zoho Bugtracker format.
When using Zoho Projects integrations, you can view notification emails from Bugtracker in Zoho Bugtracker format. There is no separate integration for Zoho Bugtracker. When you add or report issues/bugs in BugTracker, they are also listed in Zoho Projects under issues associated with the specific project.
![]()
Edit Details
You can edit project details directly from the email preview. You can add a description, assign it to other users, set the due date, or change the status by clicking on the relevant field and making the necessary adjustments. The updated details will also be reflected in your Zoho Projects application.

Add Email as Zoho Projects Task/ Bug
You can directly add an email to a Project as Zoho Projects Task/ Bug. When you associate an email with Zoho Projects, the Zoho Projects integration is automatically enabled. It can also be enabled from the Integration settings directly.
Steps to add a Task to a Project portal
- Open the email that you want to add as a project.
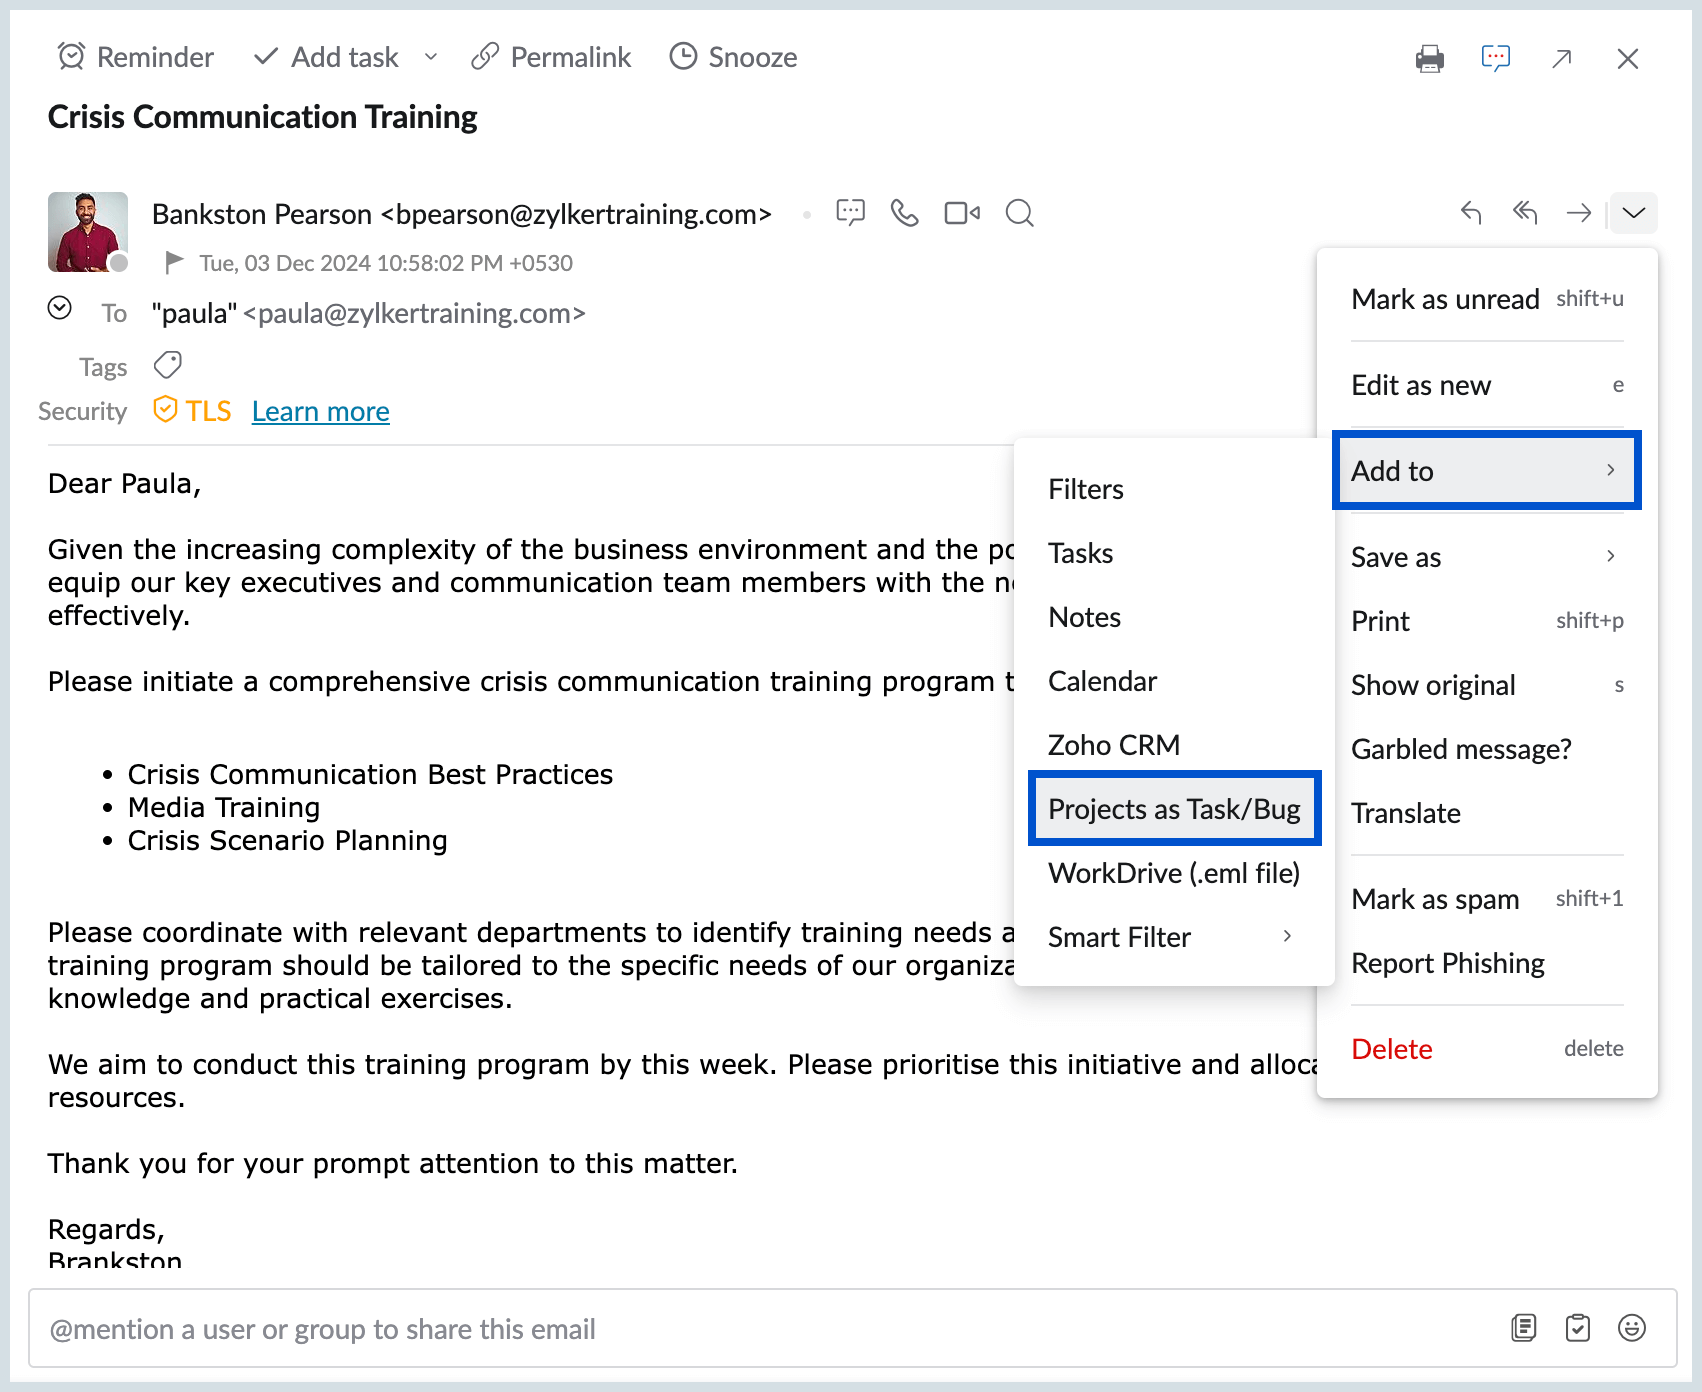
- From the More Actions drop-down, select Add To and choose Projects as Task/Bug.
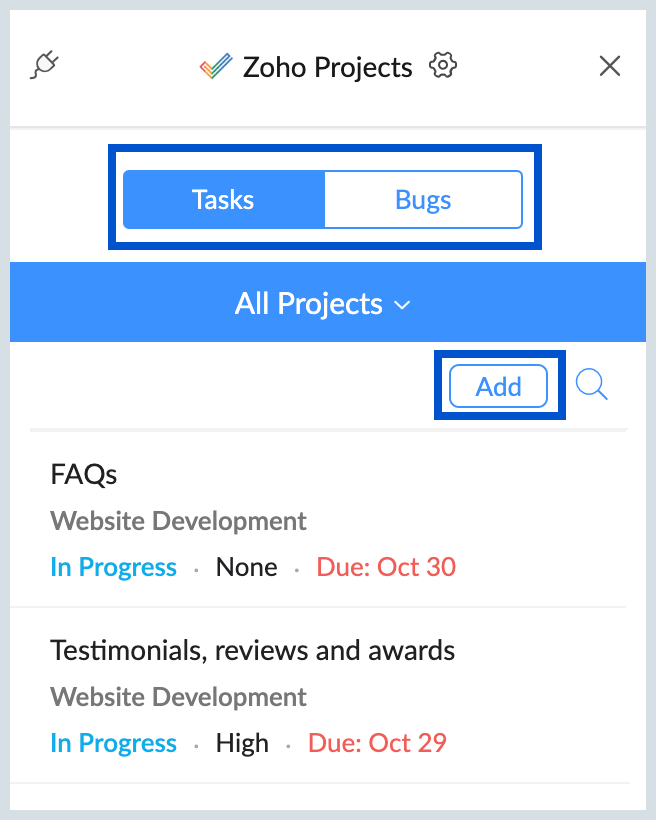
- Opt either to Tasks or Bugs from the header and click on Add.
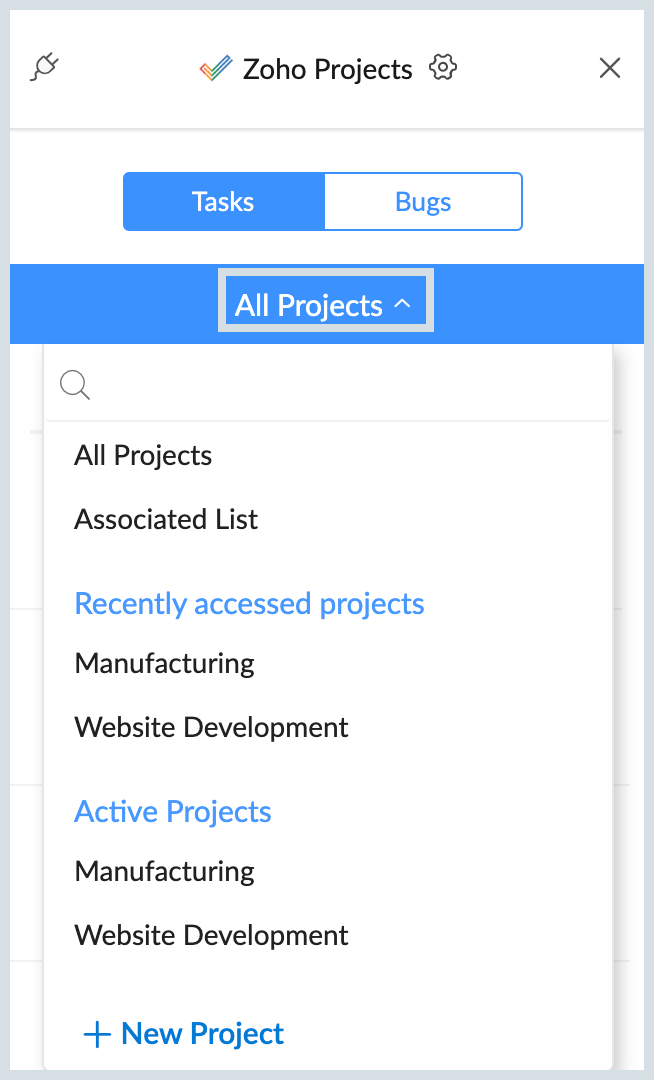
- Select a Project from the options listed, and edit the other preferences as required.
- The subject of the email gets added as the Task/ Bug title, and the email content gets added as the description.
- By default, the attachments that were a part of the original email will also get added. You can remove the attachments which are not required.
- Click Done.
You can also add an email from any of your POP/ IMAP accounts as Projects Tasks/ Bugs. To access the inbox of your POP/ IMAP accounts, click on the Account switcher at the bottom of your left pane. Choose the account you wish to access and add an email as Project task/ bug.

Zoho Projects Tasks
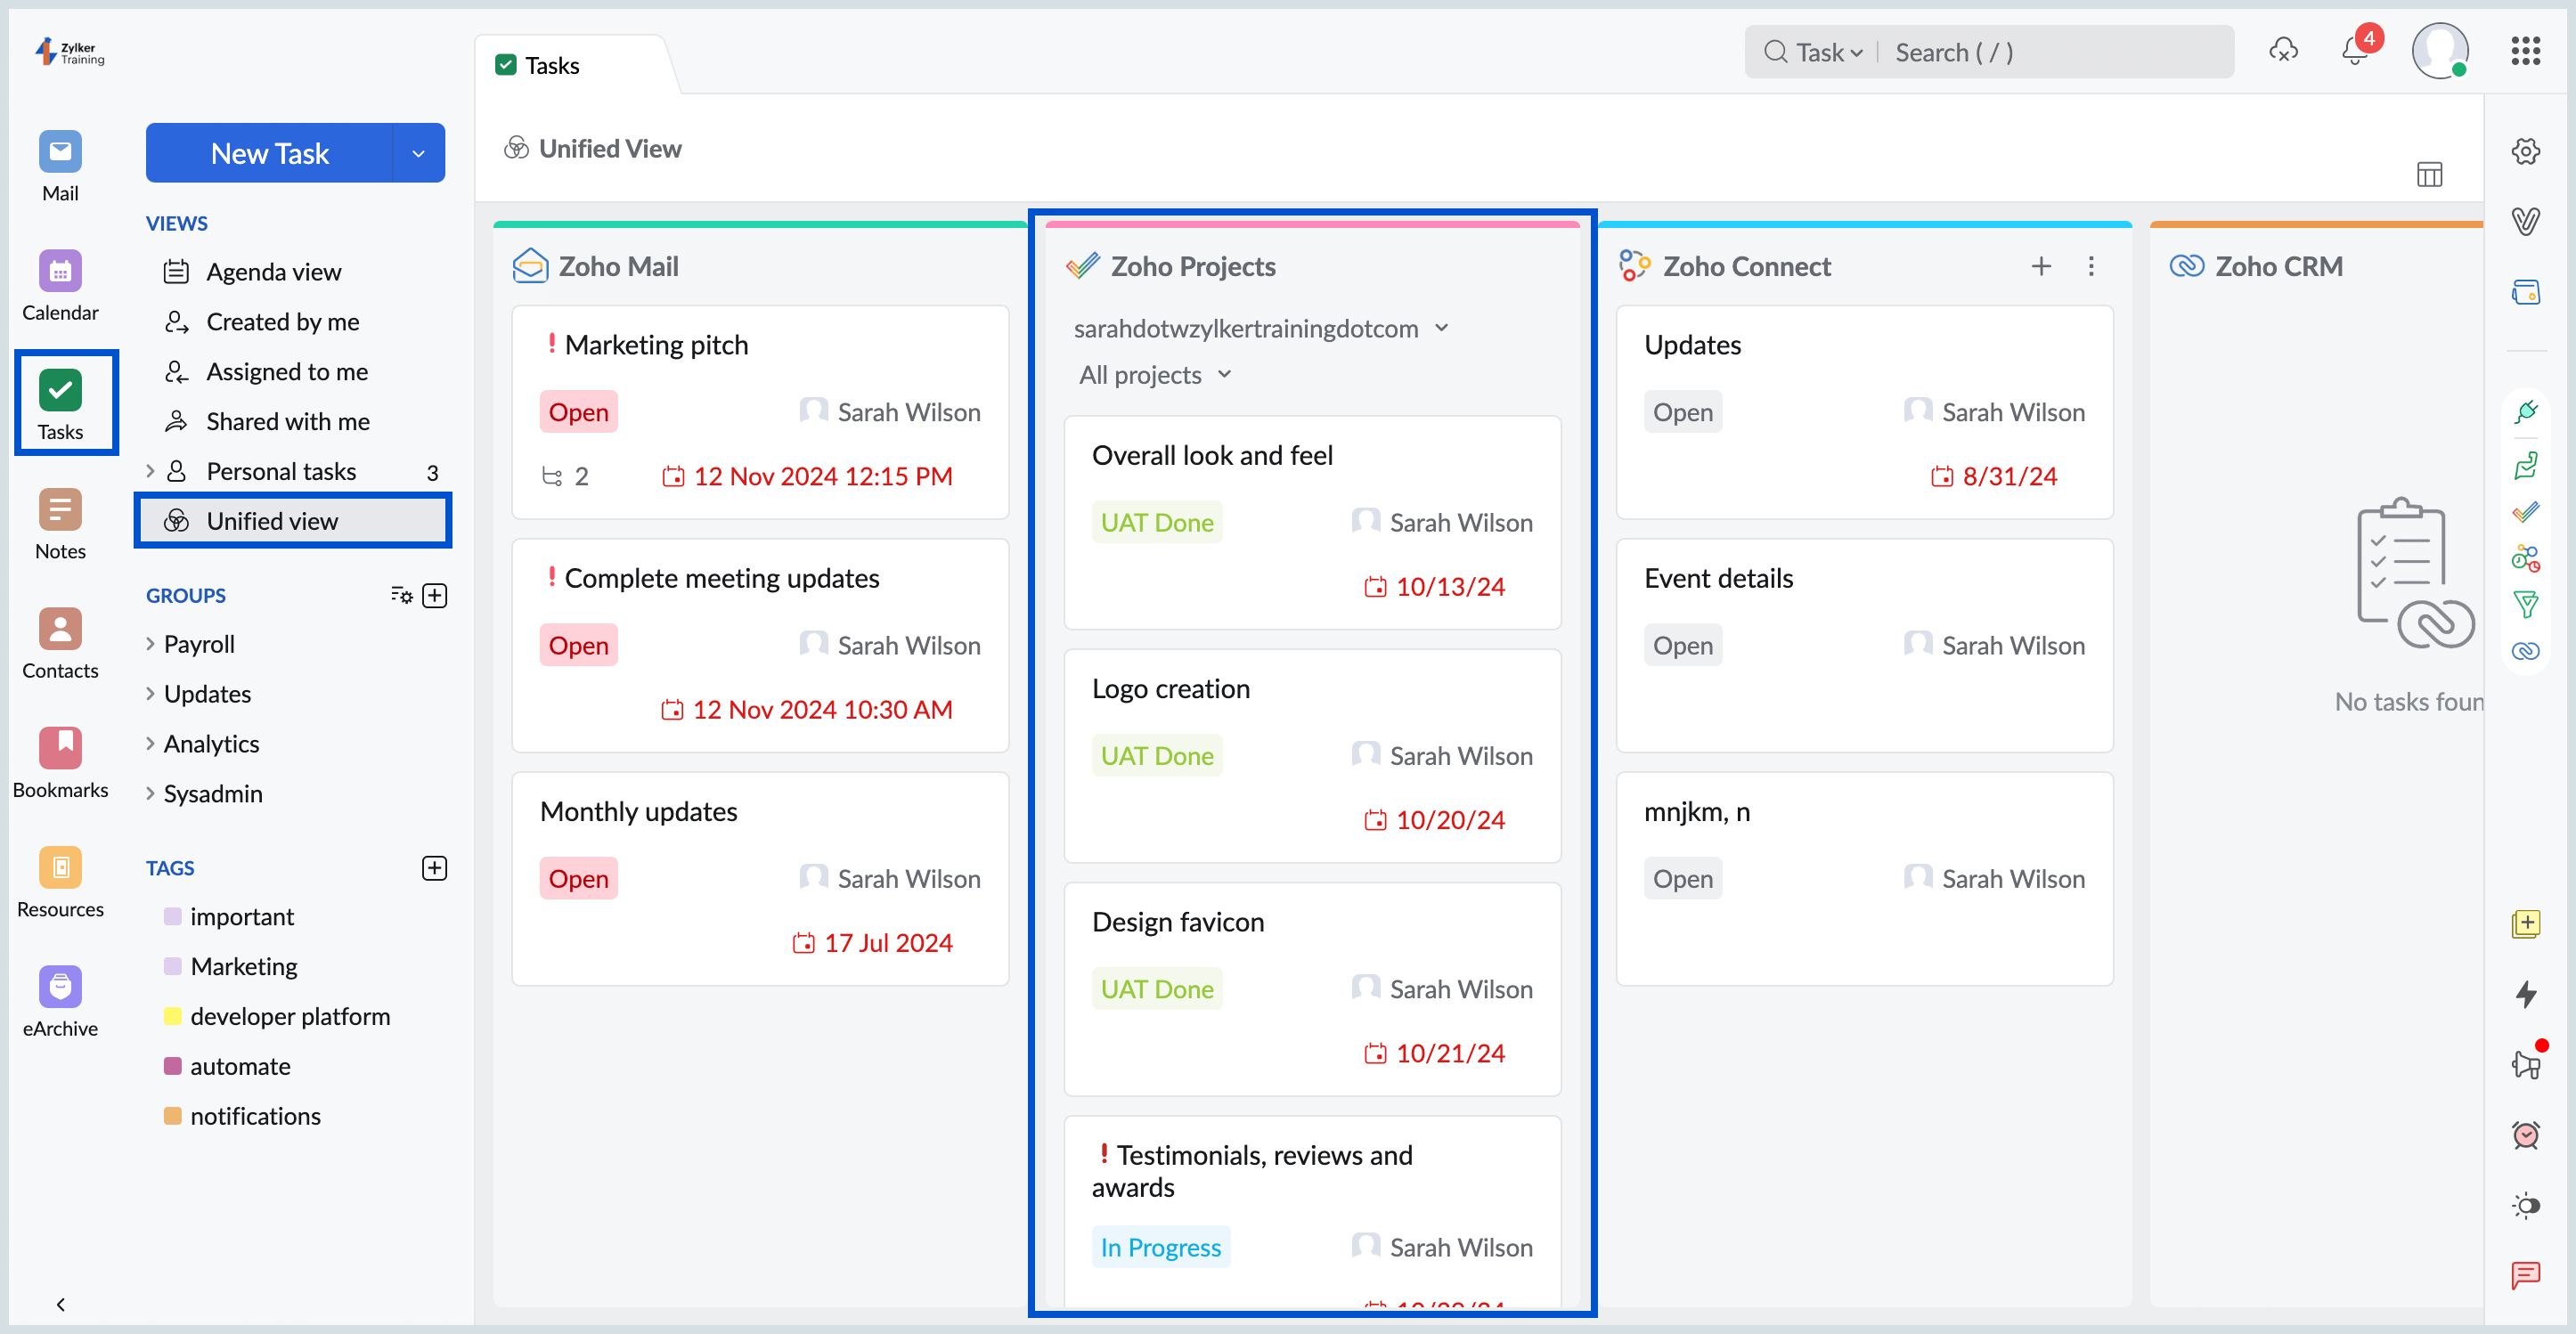
Tasks created directly in Projects or added from email can be viewed in the Zoho Mail Tasks app under Unified View. Moreover, you can manage, edit and update Zoho Projects tasks directly within the Zoho Mail Tasks app, and changes will be reflected accordingly.
Note:
Zoho Projects menu is disabled by default in the Integration Settings. You will still be able to add emails as Tasks to Zoho Project portals and doing so will enable Zoho Projects automatically. On further disabling Zoho Projects manually, Add to Projects as Task/Bug option will not be available.
View/ Access Zoho Project Tasks from the ToDo application
- Login to Zoho Mail
- Click the Tasks icon in the left apps bar or Click here to launch the Tasks app in a new tab.
- In the Tasks App, locate the Unified View section from the left menu.

- The Project Portals, which you are a part of will be listed there.
- Click on Zoho Projects icon from the top bar to get an expanded view.
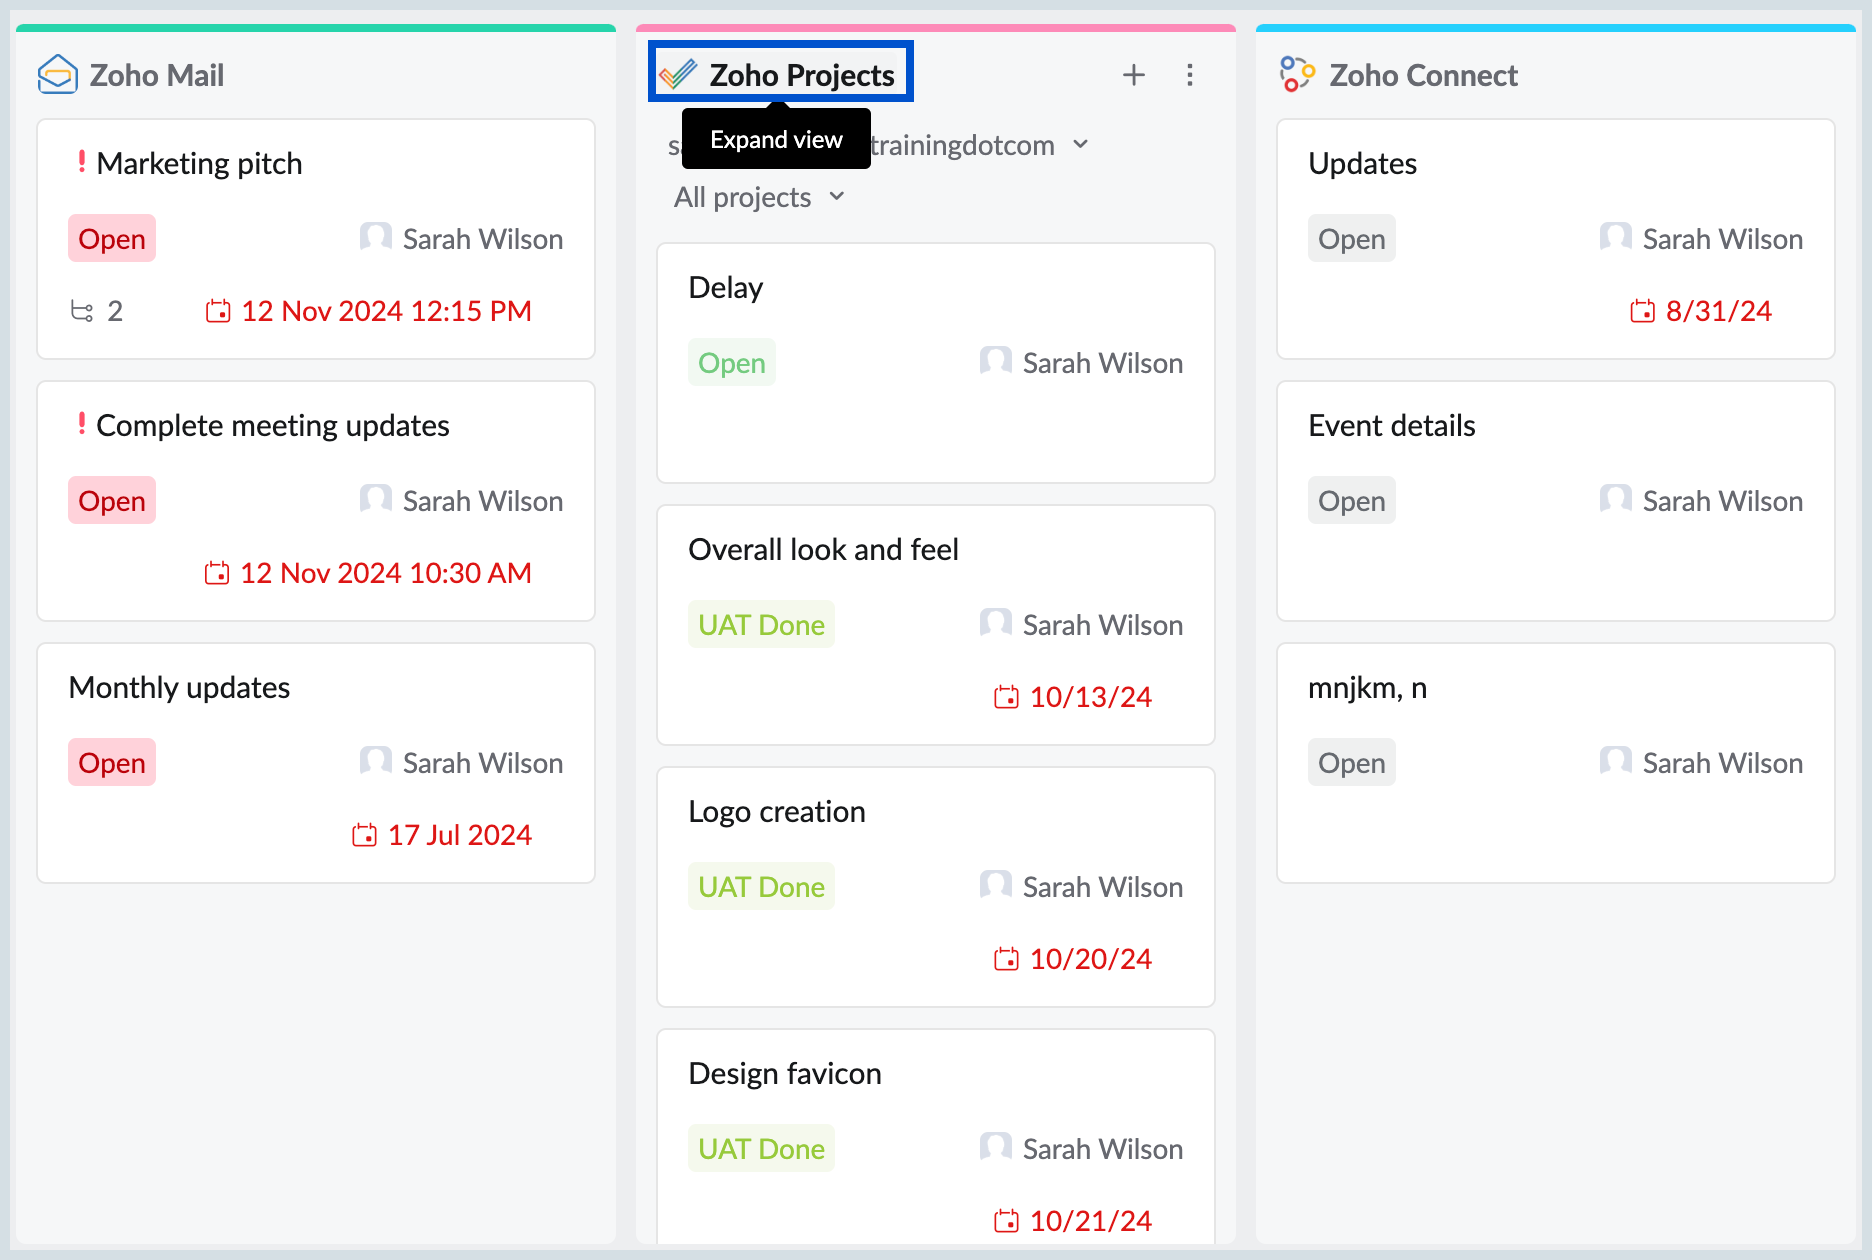
- Select any Portal to view the Tasks associated under the Portal.

- You can further filter the tasks based on individual Projects, from the Projects option.

- Click the Projects option, to select the required Project.
- The tasks under that project get listed on the screen.
- Select a particular task to view the details of the Task in the Preview.
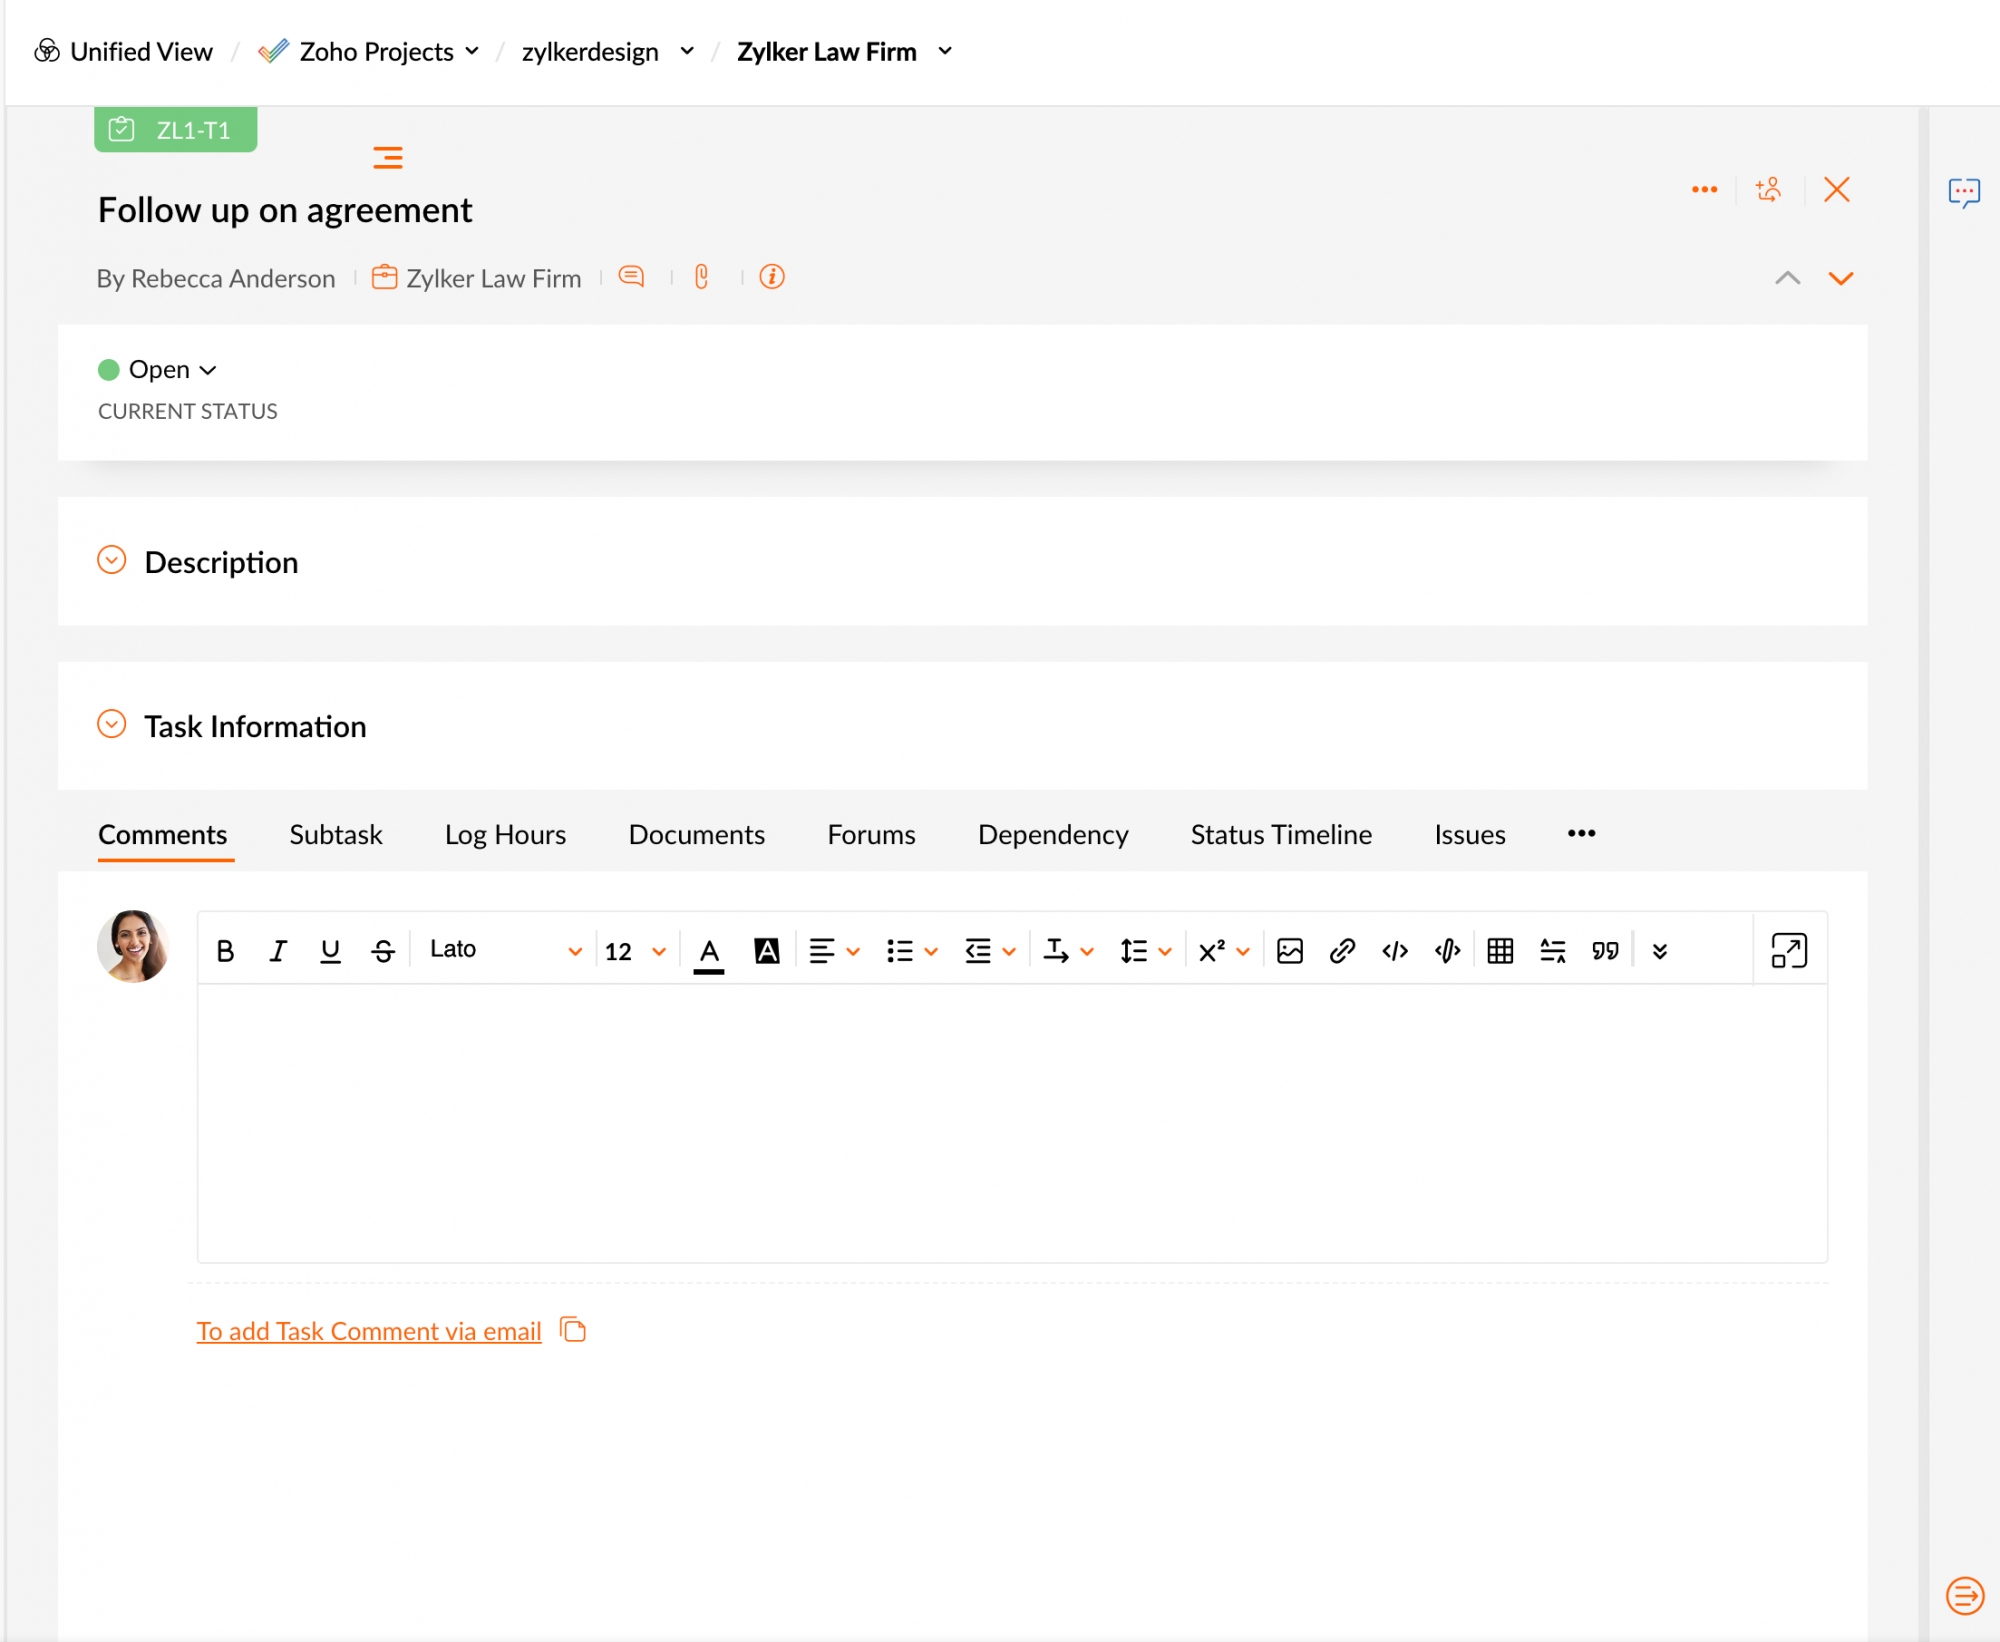
- If you make any changes to the Task or the Task Status, the changes will be updated in the Zoho Projects directly.
Add Tasks to Zoho Projects:
You can also directly create a Task, under any project already created in the Zoho Projects.
- Login to Zoho Mail
- Click the Tasks icon in the left apps bar or Click here to launch the Tasks app in a new tab.
- Click on Unified View to access tasks from all Zoho applications in a single location.
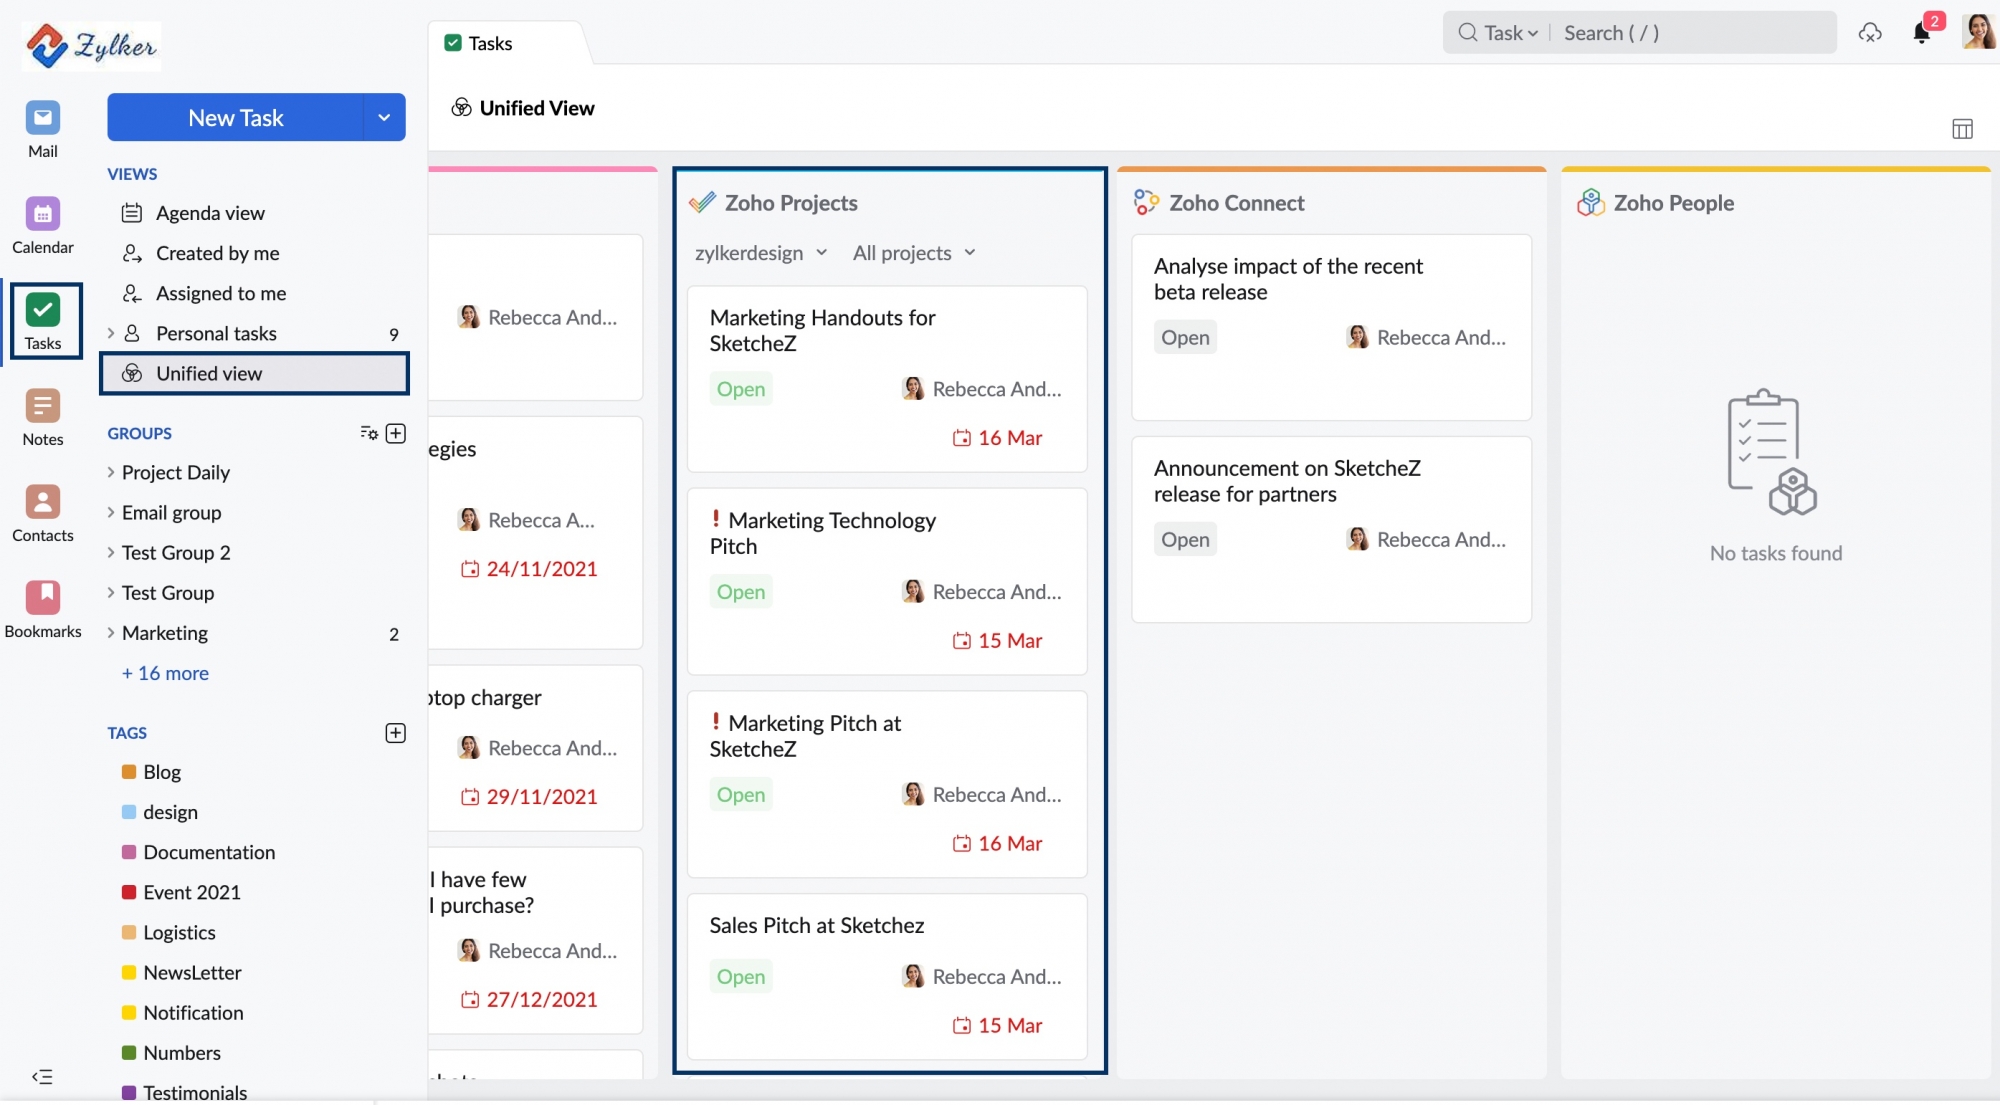
- The Project Portals, which you are a part of will be listed there.
- Click on Projects from the top bar to get an exploded view.
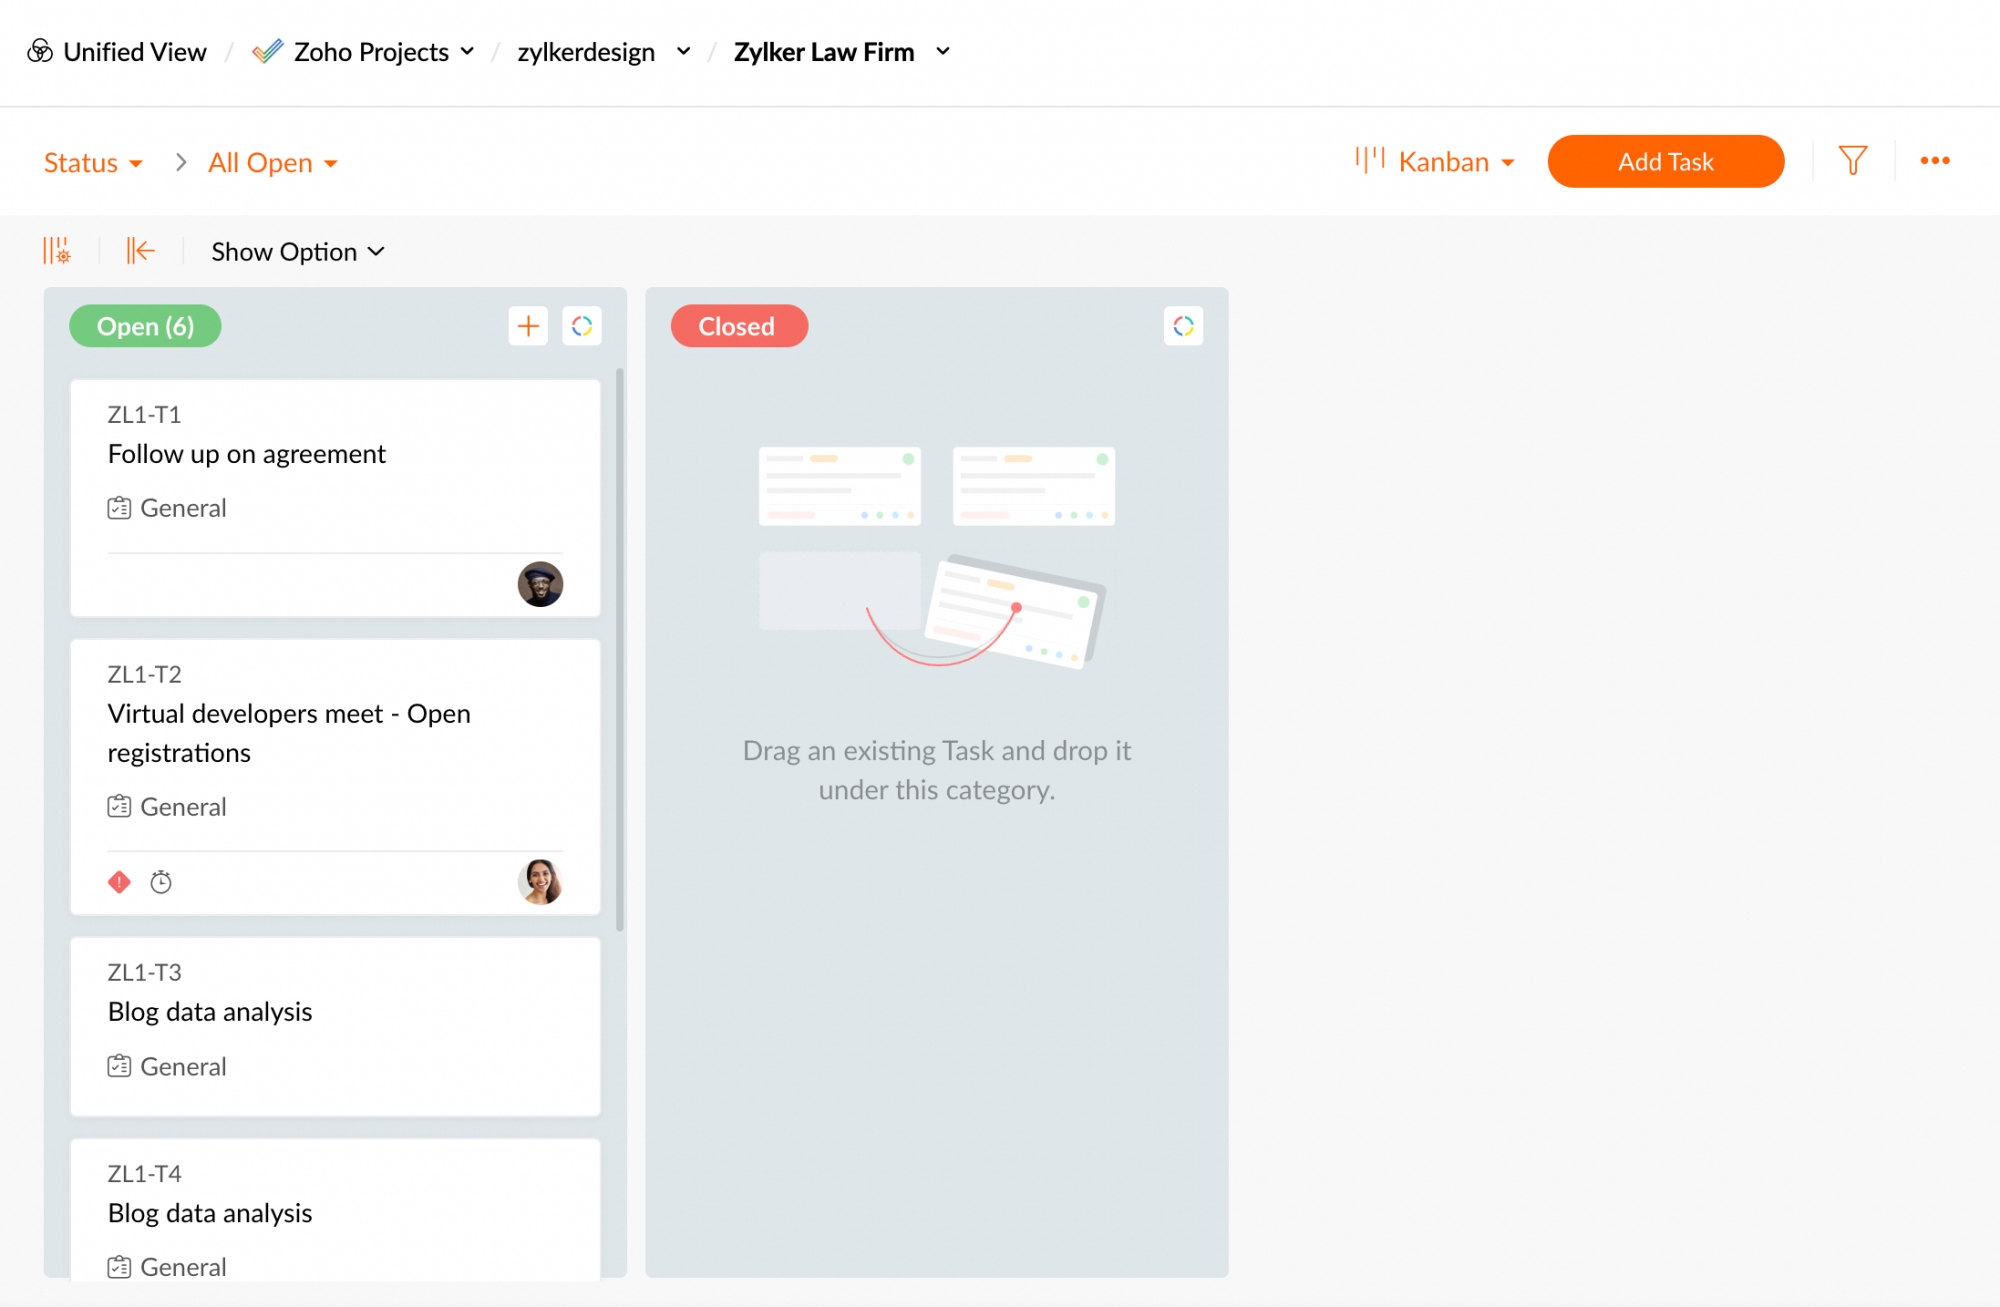
- Select any Portal to view the Tasks associated under the Portal.

- You can further filter the tasks based on individual Projects, from the Projects option.

- Click the Projects option, to select the required Project.
- Click Add Task button on the top menu bar.

- Provide a Task title and choose the Task list from the options listed.
- Provide the respective details for the Task to be added.
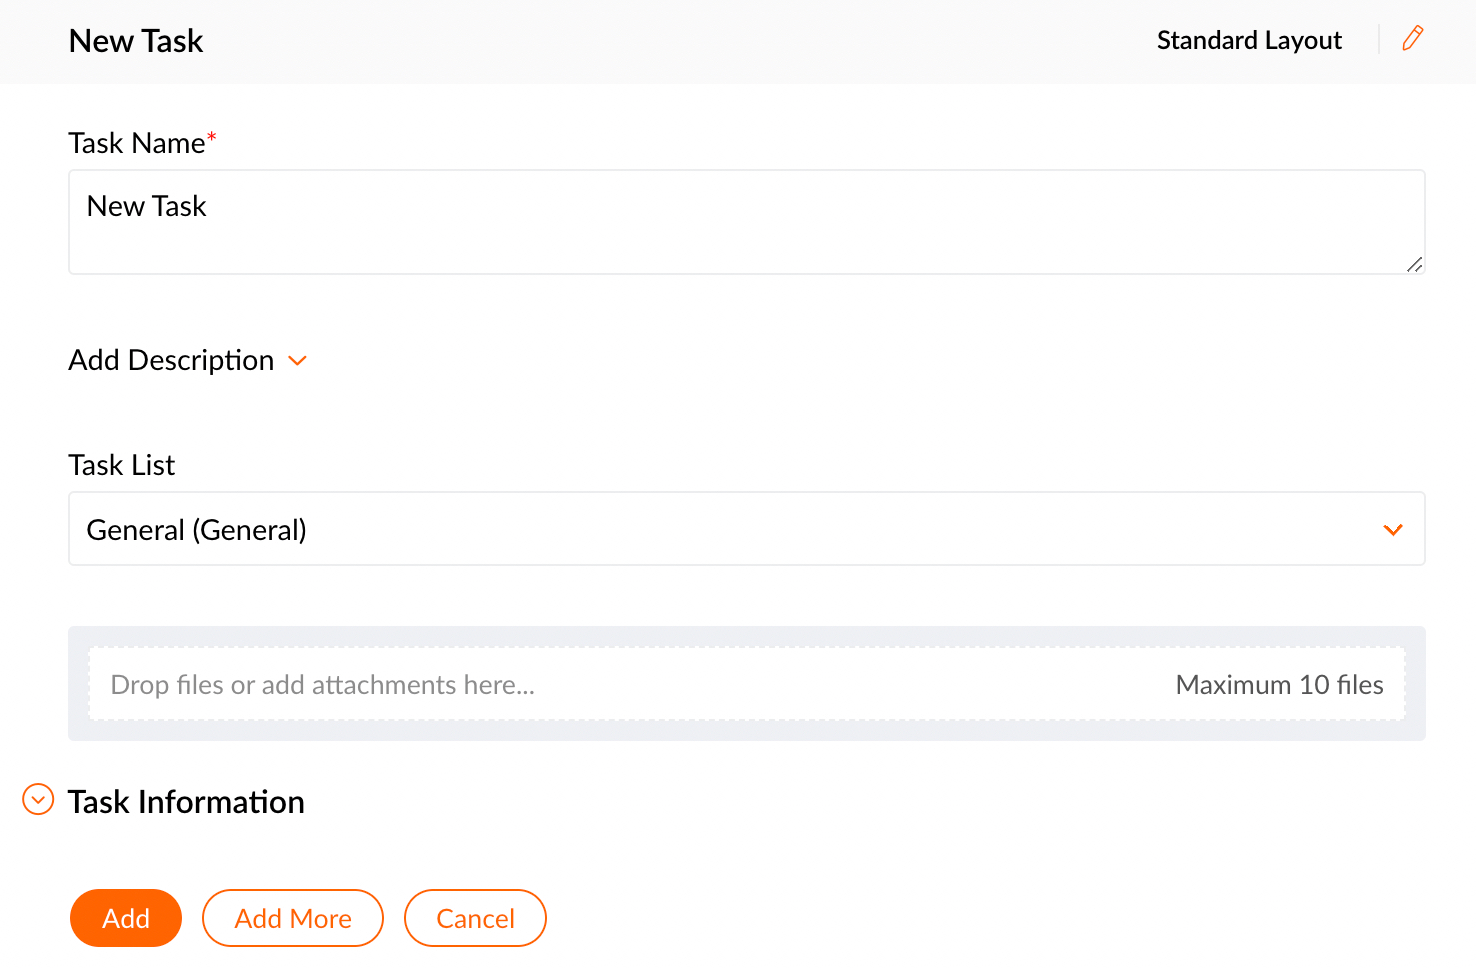
- Click Add to create the Task under the selected Project.
Depending on the user preferences set for that portal, you may or may not be able to edit/ set the preferences for the respective tasks.
Note:
- The tasks under Zoho Projects are exclusive only to this menu, and will not be listed under any of the other views.
- If you are not a part of any Project portal, the Zoho Projects menu will not appear in the left menu pane.
To Edit Tasks
- Log into your Zoho Mail account.
- Navigate to the Tasks app from the left pane.
- Click on Unified View to access tasks from all Zoho applications in a single location.
- Under Zoho Projects tasks, select the task you want to edit.
Hover over the task and click on the edit icon.
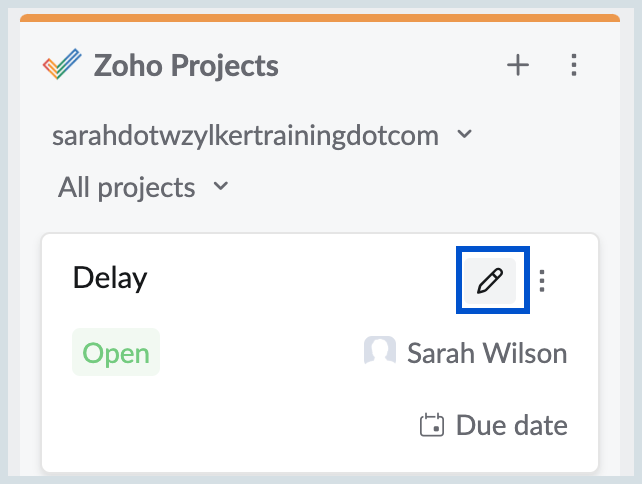
- Make the required changes and save them to edit a task
More options
More Options in Zoho Projects tasks provides a dropdown menu with additional actions for tasks. It allows you to directly open the task in Zoho Projects for detailed editing and management. Additionally, you can also delete the task using the Delete Task option from the dropdown menu.

Troubleshooting
No Project portals
If you are a newly signed up user who is not a part of Zoho Projects, on trying to Add an Email as Task/ Bug, you will be notified that there are no Project portals associated with your account.
Steps to be followed to add a portal
- Click on the Zoho Projects link given in the pop-up error message.
- On the Project portals page that follows, provide the desired portal name.
- Click on Create Your Portal to add the portal.
- Proceed to the Zoho Mail interface and Add Email as Project Task/Bug.
The relevant email will be added as a Task/Bug in the newly created portal.
Default portal
If you have already selected a default portal in Zoho Projects or if you are a part of only one Zoho Project portal, it will be set as your default portal in the Zoho Projects integration. The chosen email will be added as a Task/Bug in that portal.
In case you are a part of multiple Zoho Projects Portals, you will be asked to select one of the portals as your default portal.
Steps to be followed to set the default portal
- Click on the Settings link given in the pop-up error message.
- Turn 'ON' the toggle button next to Zoho Projects.
- Click on the drop-down menu next to portal name option.
- Choose any one of your Project portals as the default portal.
- Proceed to the Zoho Mail interface and Add Email as Project Task/Bug.
The email will be added as Task/Bug to the selected portal.


