Set Up and Manage Zoho Payments in Zoho Billing
Zoho Payments is an online payment solution that lets you seamlessly collect one-time payments from your customers. In the India edition, you can collect payments in INR using UPI, cards, and net banking.
- Zoho Payments is available in the US and India editions.
- Refer to the Zoho Payments’ pricing page to know the transaction charges.
When you configure Zoho Payments in Zoho Billing, it will automatically be available in all other Zoho Finance apps (Zoho Invoice, Zoho Books, Zoho Commerce, Zoho Checkout, and Zoho Inventory). This allows for a unified and seamless payment experience across all apps.
Set Up Zoho Payments
To get started, you’ll have to create a new Zoho Payments account from Zoho Billing or another Zoho Finance application.
Here’s how to create your Zoho Payments account:
- Go to Settings in the top-right corner.
- Select Payment Gateways under Online Payments.
- Click Set Up Now next to Zoho Payments.
- Mark I confirm that I am authorized to share business details, set up and manage Zoho Payments.
- Click Set Up Zoho Payments.
Complete the setup by entering the details in the following sections:
| Section | Content |
|---|---|
| Business Profile | Enter your basic business details such as Business Type, Business Name. Provide the other required business-related details and documents based on the Business Type you select. |
| Business Representative | Share the details of the individual engaged in the direction and control of the business. Enter their details and submit the requested documents for verification. |
| Business Owners | Provide the details and documents of all the business owners with significant ownership (10% or more) in your business. |
| Branding and Public Information | Provide a payment descriptor for customers to identify payments from you and a customer support helpline for them to contact you. |
| Bank Account | Share the details of the bank account in which your payout should be deposited. |
- Enter the required details and click Save and Next at the end of each section.
- Review the details on the Summary page.
- Mark I agree to the Terms of Service and Privacy Policy of Zoho Payments and click Submit.
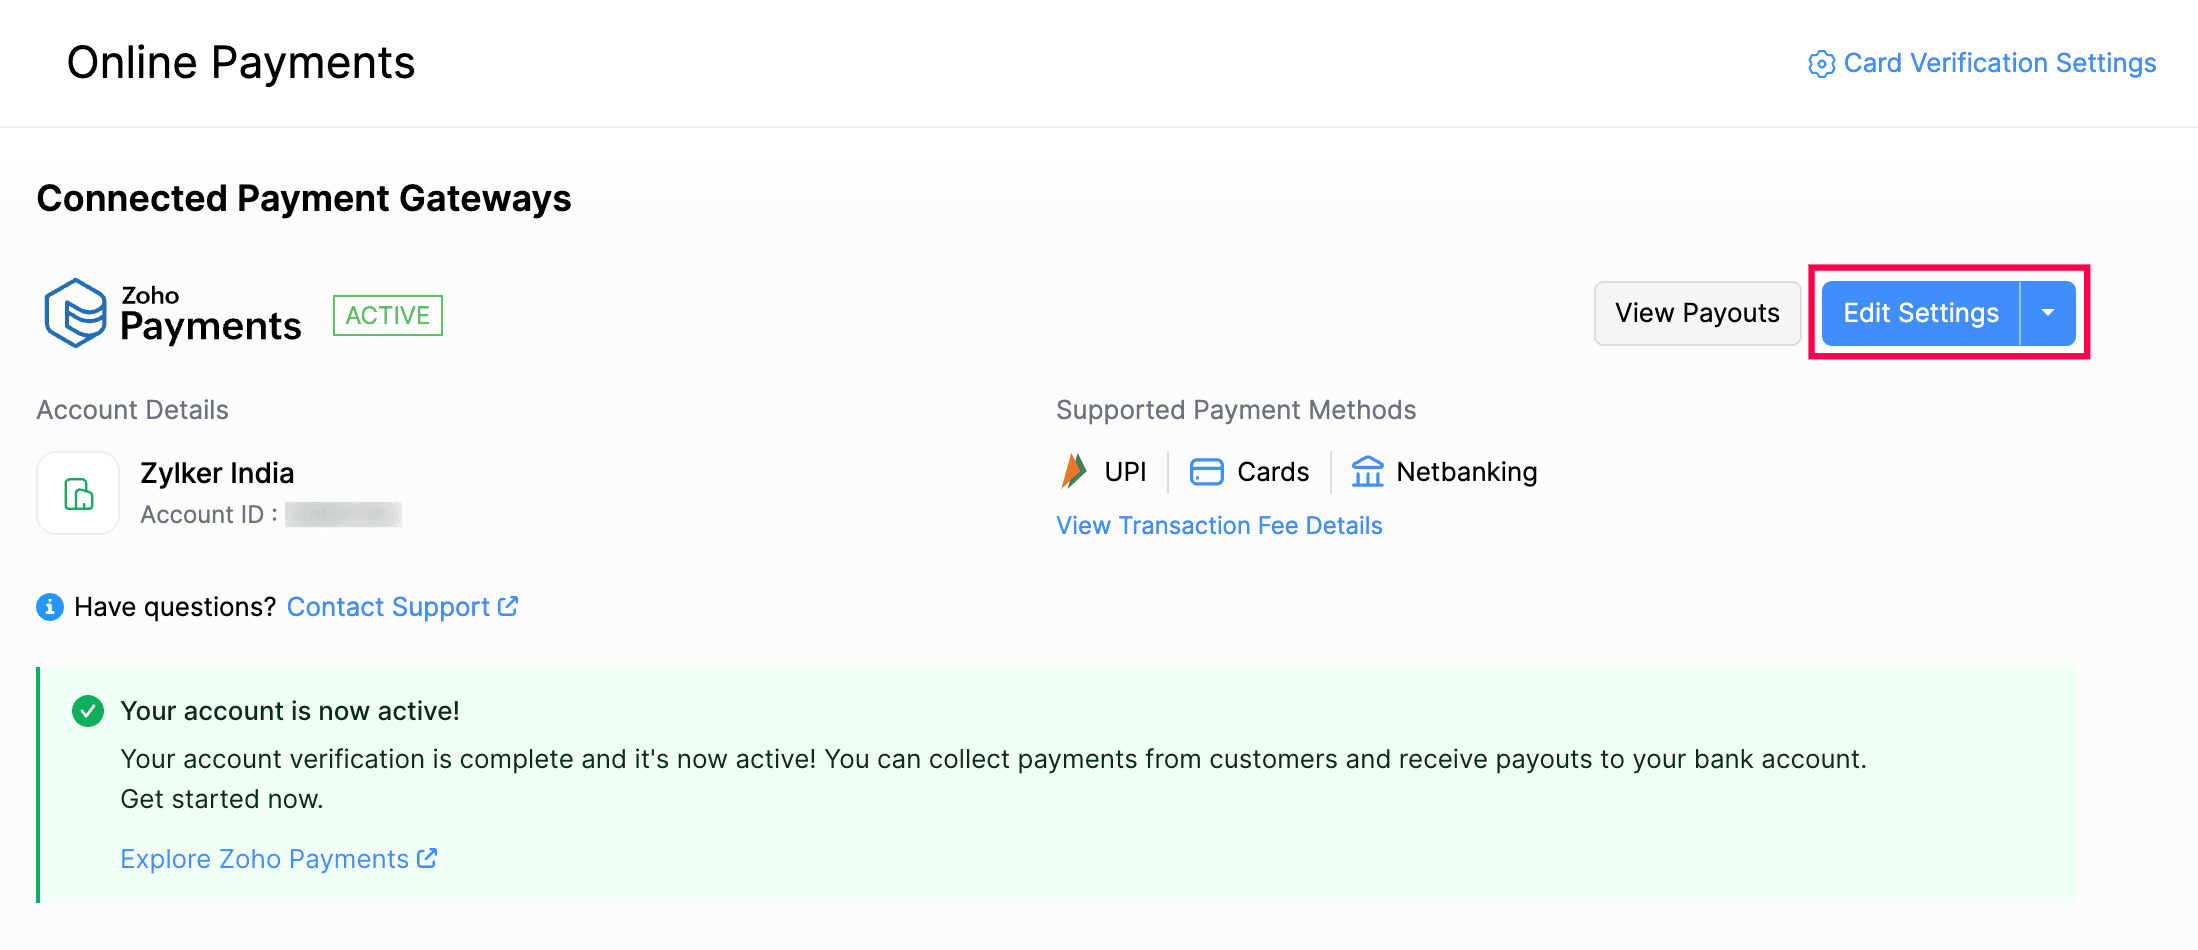
Once done, you will be redirected to Zoho Billing. Here, you can view the details of your Zoho Payments account, like your Account Status and Account ID, and configure your settings.
Learn more about setting up Zoho Payments.
Collect Customer Payments
Enable Payment Options
Your customers can pay you through Zoho Payments if you’ve enabled Zoho Payments as a payment option in the subscriptions and invoices you create.
Here’s how to enable payment options:
Go to Subscriptions under Sales.
Create a new subscription with the necessary details.
Scroll to the bottom of the page and check Collect payment offline next to Payment Mode.
Check Zoho Payments as a payment option.

- Click Save.
Your customers can pay you through the payment methods enabled in Zoho Payments.
Receive Payments from Customers
After you’ve enabled Zoho Payments in the payment options, your customers can pay through the shared link of invoices, hosted payement pages or the customer portal.
To make payments for the invoices, your customers will have to:
- View the invoice from the customer portal or email.
- Click the Pay Now button, and they will be redirected to the payment page.
- Choose the payment method and click Proceed To Payment.
- Enter the credentials or scan the QR and click Pay.
If you want your customers to directly signup for a plan, you can setup a hosted payment page. To make payments, your customer will have to:
- Enter the required details in the hosted payment page.
- Click Checkout with Zoho Payments and select a payment method.
- Enter the card credentials or scan the QR and click Pay.
Once the payment is successful, you will receive an email regarding the online payment made by your customer, and the invoice’s status will be marked as Paid. The payment will be settled in your bank account during the next payout.
Edit Zoho Payments Settings
If you want to update the account details or payment methods, you can edit the settings.
Here’s how to edit:
Go to Settings in the top-right corner.
Select Payment Gateways under Online Payments.
Click Edit Settings next to Zoho Payments. You will be redirected to Zoho Payments.

Make the necessary changes.
Click Save.
Zoho Payments’ settings will be updated.
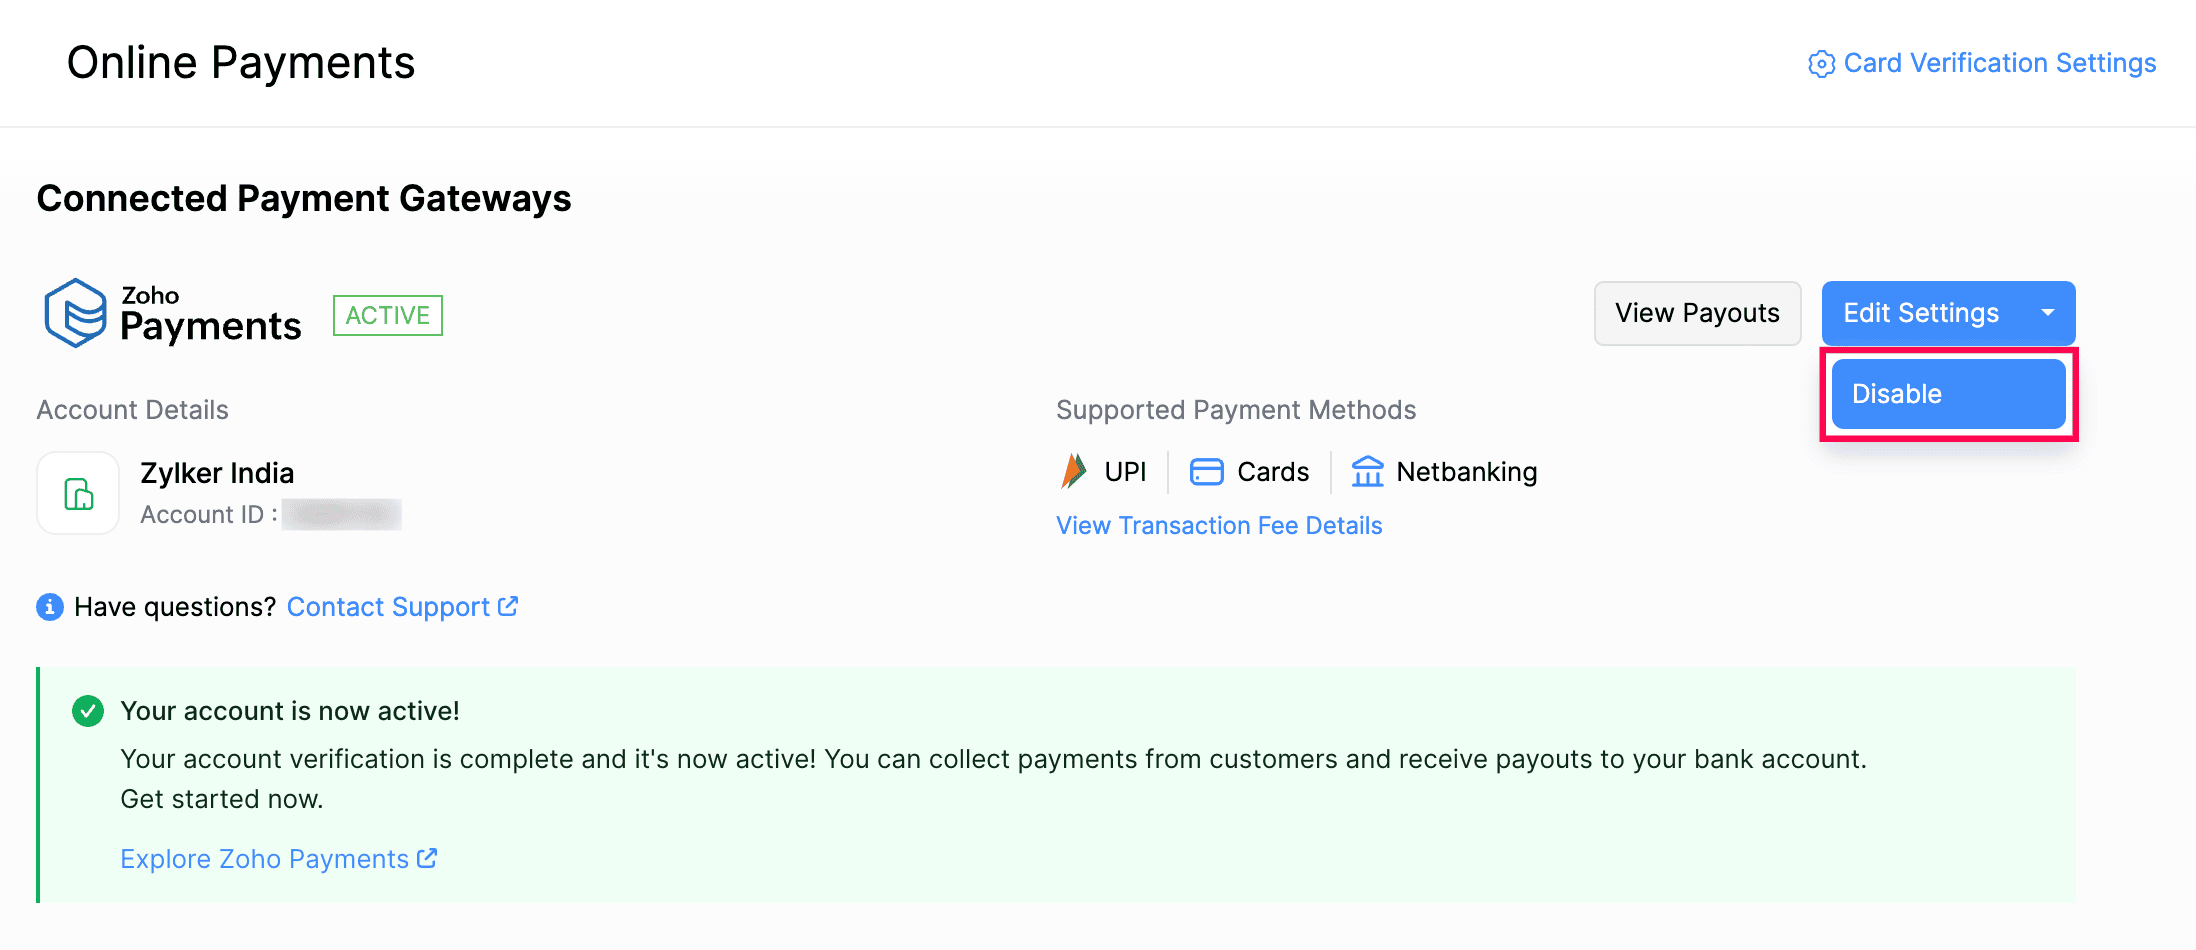
Disable Zoho Payments
If you don’t want your customers to pay you through Zoho Payments, you can disable Zoho Payments.
Here’s how to disable the integration:
Go to Settings in the top-right corner.
Select Payment Gateways under Online Payments.
Click the dropdown next to Edit Settings.
Select Disable.

Provide a reason for disabling Zoho Payments, then click Disable.
Zoho Payments will be disabled across all the Zoho finance apps you use including Zoho Billing.


 Yes
Yes