Price Lists
A simple analogy to understand price lists is to think of them as coupons that only you can apply to a specific set of customers or a set of items to either increase or decrease the price of the items. On applying them to a transaction or customer, the rate of the item changes. Let’s look at how price lists help David in his business.
Price list is a list containing a set of different prices for the items you sell. The prices in the price list can be higher or lower to the normal price lists based on your preference and you can create multiple price lists. Also, you can associate the price lists to transactions or customers and the different pricing will be applied to them. If you do not associate any price list, then the normal price would be charged. In other words, price lists allow you to change the prices of the items in bulk by a certain percentage or change them item-wise. Also, you can sell items to your customers with item rates in their local currency by creating price lists in a foreign currency.
Enable Price Lists
Before you can use price lists in Zoho Billing, you need to enable them in Item Preferences. To enable price lists:
- Go to Settings from the top-right corner.
- Select Products under Product Catalog.
- Mark Enable Price Lists.
- Click Save.
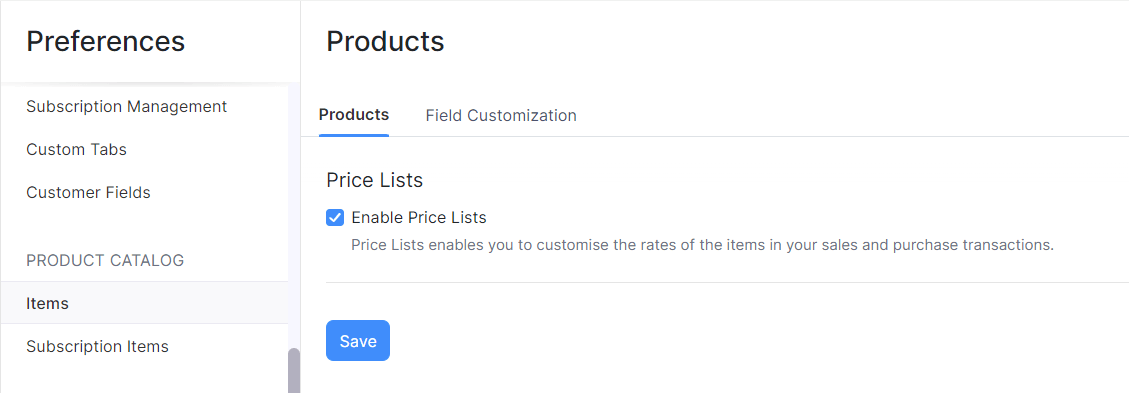
Now you’d have enabled the price lists feature in Zoho Billing. This allows you to create and apply them to transactions and customers.
Add Price Lists
There are two ways to add price lists:
Creating New Price Lists
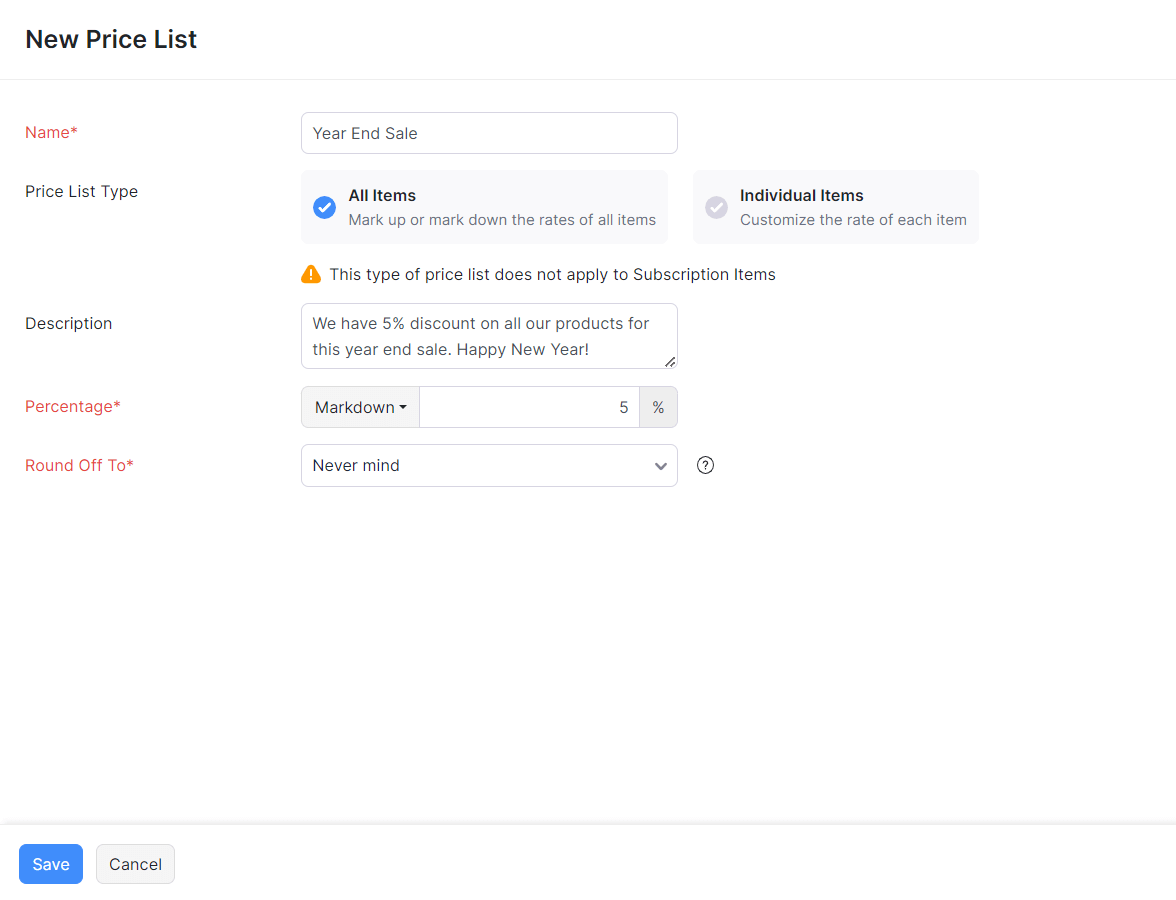
To create new price lists:
- Go to the Price Lists module in the left sidebar.
- Click the + in the module name or the + New Price List button in the top-right corner.
- Enter a name for the price list.
- Choose if you want to change the item rates by a percentage or individually for each item:
- Select Markup or Markdown the item rates by a percentage to change the item rates by a percentage.
- Select Enter the rate individually for each item to enter the item rates individually. Also, using this option, you can add item rates in a foreign currency to sell subscription items to overseas customers in their local currency.
If you’ve selected to markup or markdown by a percentage:
- Select if its Markup or Markdown.
- Enter the percentage at which you want to increase or reduce the rate of the items.
- Choose how you want to round off the item rate from the Round Off To dropdown.
- Enter a description about the price list for internal use.
- Click Save.
If you’ve selected to enter the rate individually for each item:
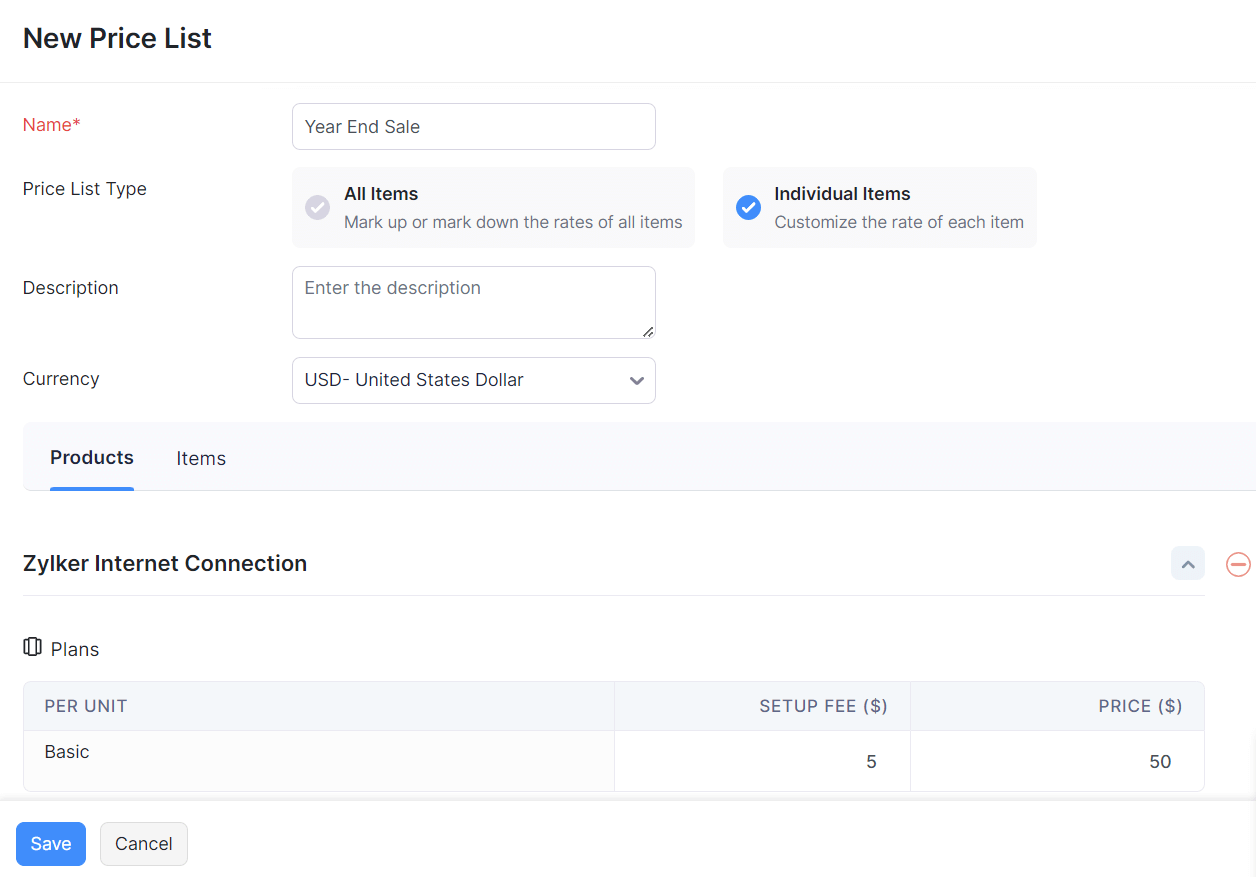
- Select the currency in which you want the new item rates to be.
- Enter the item rate for each item in the table below.
- Enter a description about the price list for internal use.
- Click Save.
Importing New Price Lists
Zoho Billing allows you to import price lists from your previous system so you don’t have to create each price list separately. To import price lists:
- Go to the Price Lists module in the left sidebar.
- Click the Hamburger icon in the top-right corner and select Import Sales Price Lists.
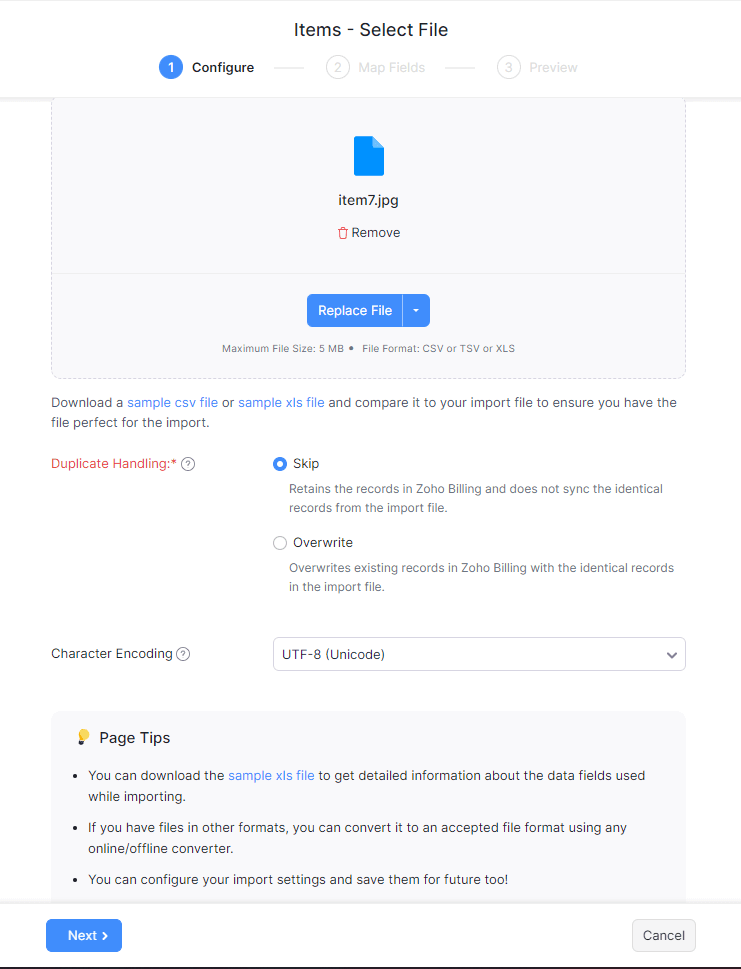
- Download the sample file and compare it with your file. Make sure that the format in your file is similar to the sample file.
- Click the Choose File button and select the import file from your device.
- Choose whether to skip or overwrite duplicate items.
- Select the Character Encoding based on your import file. By default, UTF-8 (Unicode) is selected.
- Choose the appropriate File Delimiter.
- Click Next.
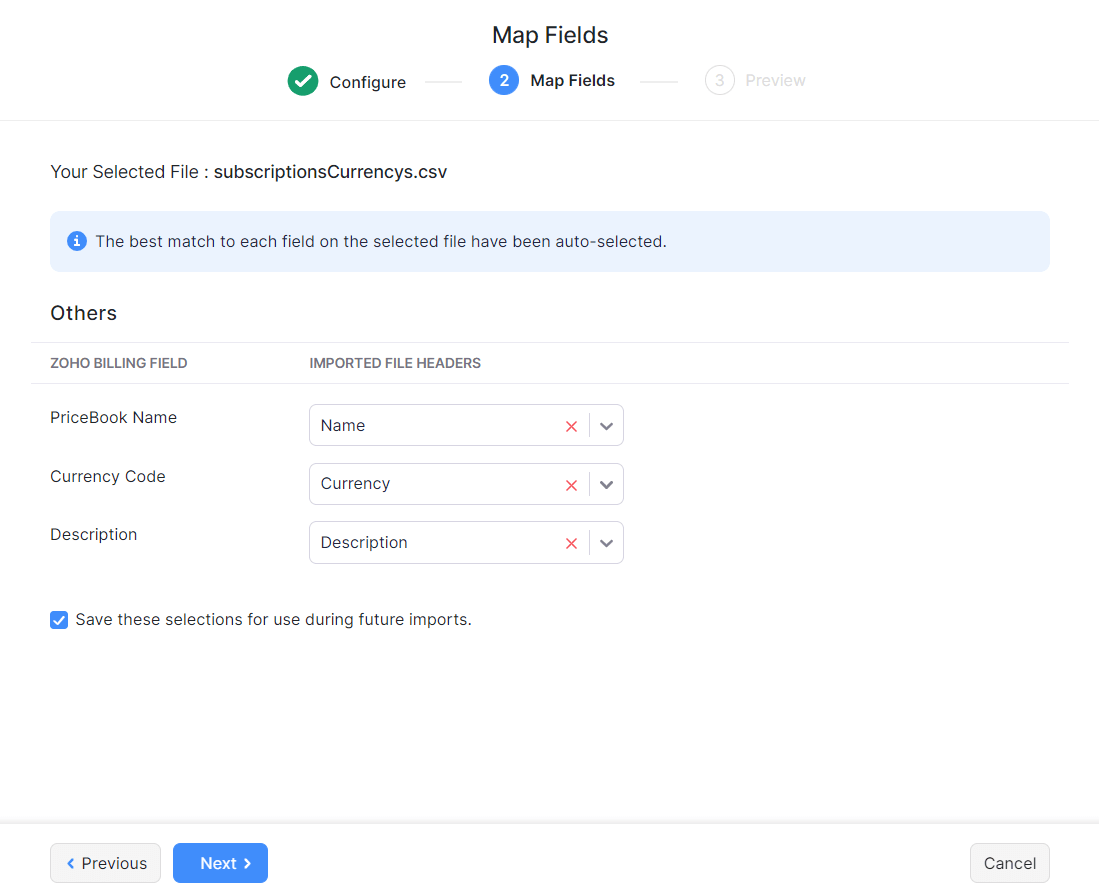
- The field names of Zoho Billing Price List are listed on the left side and the field names in the import file are listed on the right side.
- Match the field names appropriately.
- Check the Save these selections for use during future imports. option if you wish to use the same mapping of fields in future imports.
- Click Next.
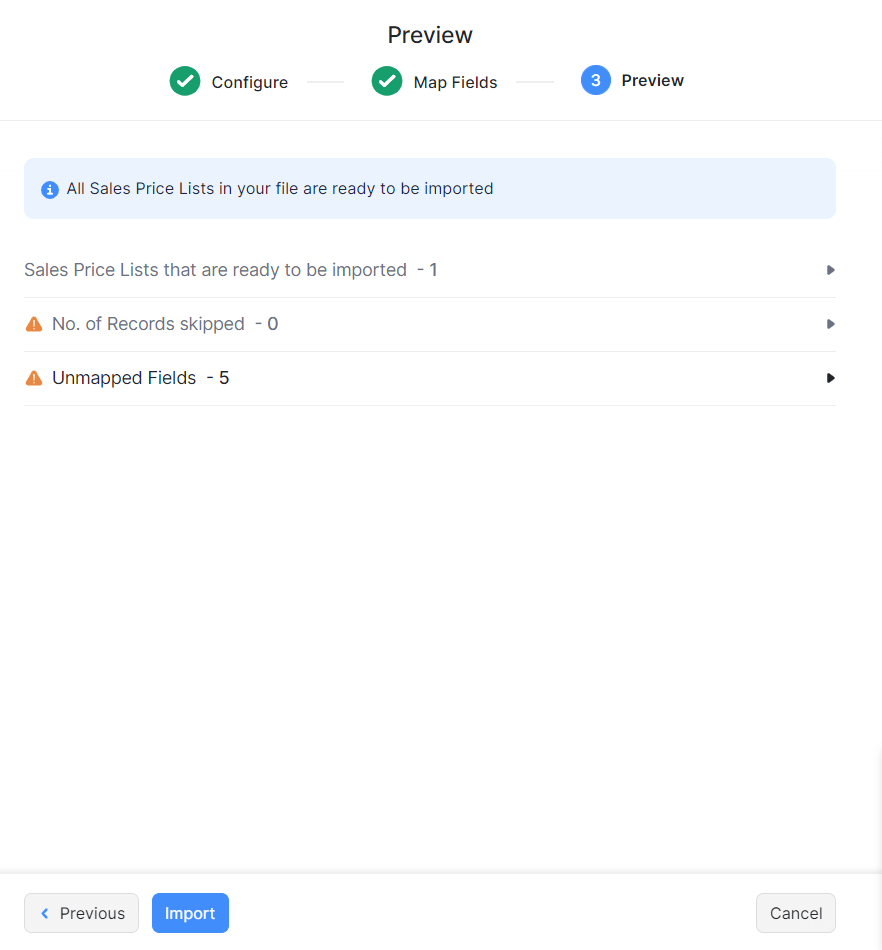
- You can see the status of the sales price lists that are ready to be imported, skipped and the Unmapped Fields. If there are items that are being skipped, edit the import file and repeat the above steps.
- Click Import.
Now, the sales price lists in the import file will be imported into the Price Lists module of Zoho Billing. You can associate the imported price lists to customers or associate them to transactions.
Set Volume Pricing
Volume Pricing is a type of pricing scheme where you can define a unit price for an item based on the quantity sold. That is, you can set price breaks for items depending on their quantity. This is mostly used to offer discounts for bulk purchases.
For example, if a customer purchases only 10 units of product A, you can set each item’s price at $15; but if they purchase over 11 units, then you can set the price at $13 each, and so on. This method also helps you sell slow-moving or excess stock quickly.
In Zoho Billing, you can set custom rates for the different quantity brackets. Here’s how:
- Go to the Price Lists module in the left sidebar.
- Click the + New Price List button on the top-right corner.
- Enter an appropriate name for the price list.
- Select Enter the rate individually for each item.
- Select Volume Pricing as the Pricing Scheme.
- Enter the Start Quantity, End Quantity, and Custom Rate across the required item. You can also search for an item from the list by clicking the Magnifier icon next to Item Details.
- Click + Add New Range to add another range. You can only add up to 10 price range per item.
- Click Save.
Edit Price Lists
You can edit and update the price lists you’ve added to the Price Lists module. If you’ve already associated a price list and it is used in a transaction, you can still edit it. However, the previous transactions will not be affected by the change. To edit a price list:
- Go to the Price Lists module in the left sidebar.
- Hover the mouse cursor over the price list you want to edit and click Edit that appears on the right side.

- Edit the price list.
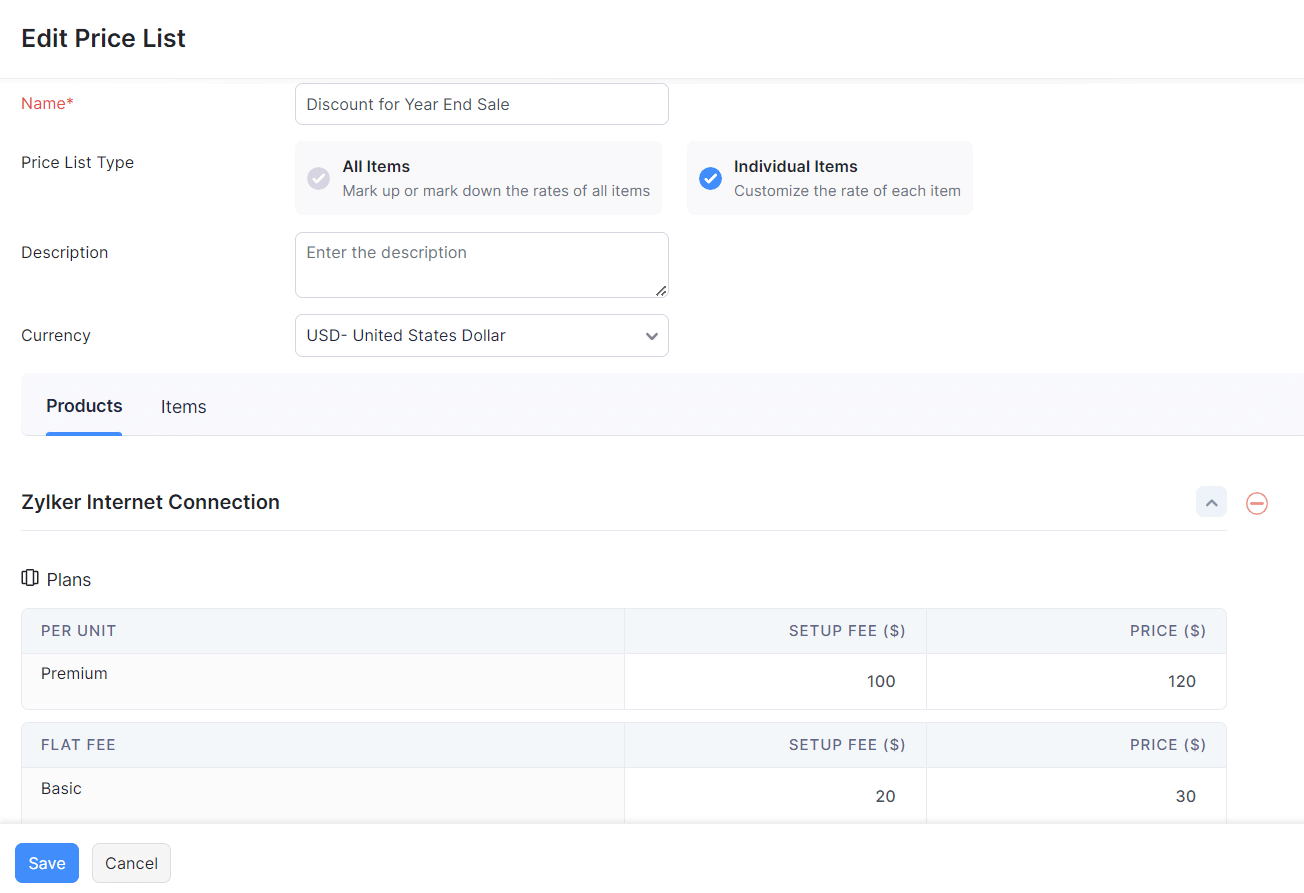
- Click Save to save the changes.
Associate Price Lists
After you add price lists, you can associate them to transactions and customers. Associating price lists can be very useful in many scenarios. Let’s look at how it helps David.
Associating a Price List to a Customer
You can associate a price list to a customer while creating a customer or later by editing them. To associate a price list to a customer:
- Go to the Customers module in the left sidebar.
- Select the customer to which you want to associate a price list.
- Click the Edit button in the top-right corner of the window.
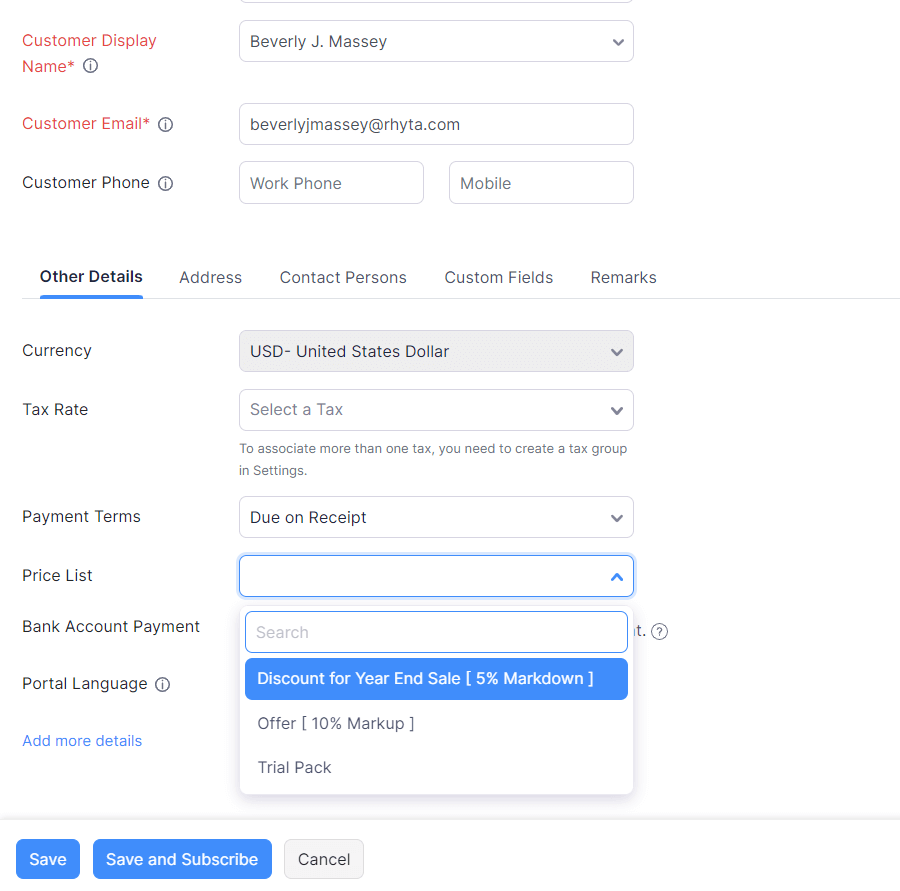
- Scroll down, select the Price List dropdown under the Other Details tab and select the price list that you want to associate with the customer.
- Click Save.
Now, whenever you create a transaction for this customer, this price list will be automatically applied. However, you can change the price list while creating a transaction, if you want to.
Associating a Price List to a Transaction
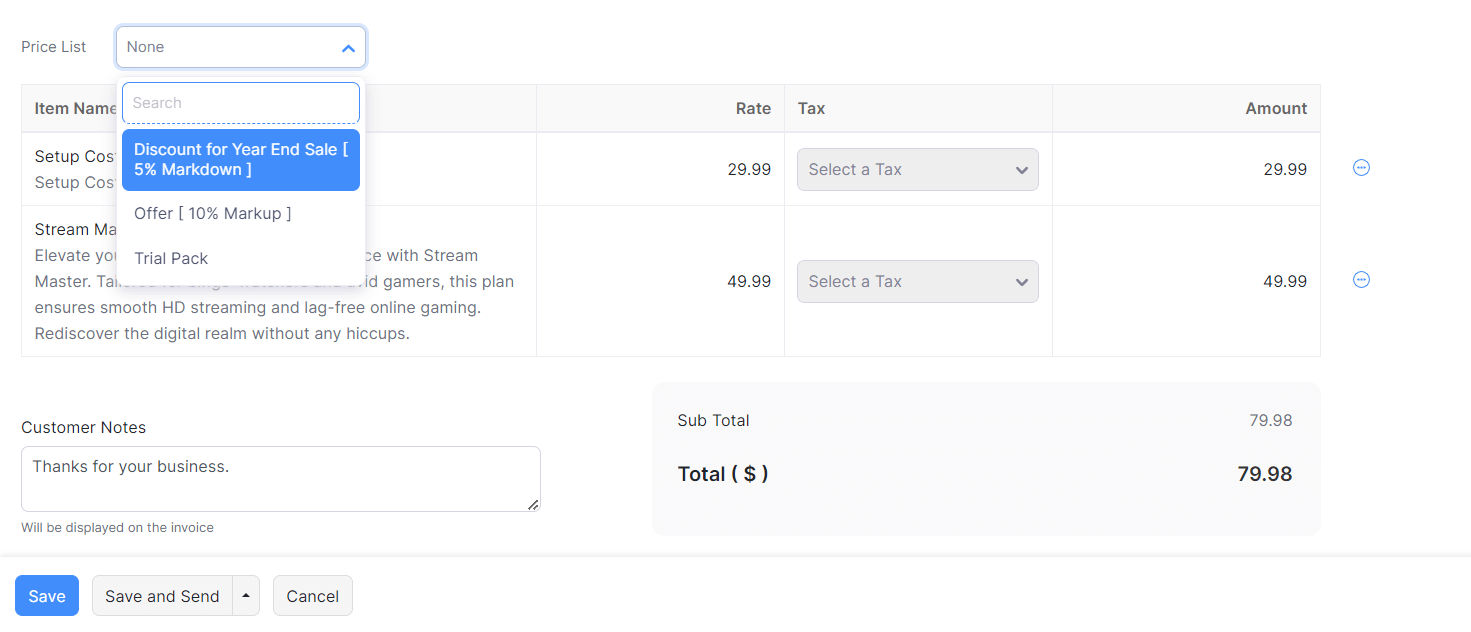
You can associate a price list to an estimate or an invoice while creating them or while editing them. To associate a price list to a transaction:
- Go to the Estimates or Invoices module.
- Click the + New button to create a new transaction or select an already existing transaction and click the Edit icon.
- Click the Price List dropdown above the item table on the left side and select a price list. The rates of the items will be updated as per the rates of the price list.
- Fill in the other details and click Save as Draft or Save and Send.
Manage Price Lists
You would have created price lists for a a festive season and wouldn’t need it after the season has passed. In similar circumstances, when you don’t need price lists for a particular season, you can mark them as inactive. Also, you can delete price lists if you wouldn’t need them any more.
Mark Price Lists as Inactive
- Go to Price Lists module in the left sidebar.
- Hover your mouse cursor over the price list that you want to mark as inactive and click the Mark as Inactive text.

Now, the price list will be marked as inactive and will not show up in transactions or contacts when you want to associate a price list. After you’ve marked a price list as inactive, you can mark it as active again.
To mark an inactive price list as active:
- Go to the Price Lists module in the left sidebar.
- Hover your mouse cursor over the price list that is inactive and click the Mark as Active text.

The inactive price list will be marked as active and the price list will be available when you want to associate it to a customer or a transaction.
Delete Price Lists
You can delete the unnecessary price lists in Zoho Billing easily. However, once you delete a price list, it will no longer be available and it cannot be retrieved again.
To delete a price list:
- Go to the Price Lists module in the left sidebar.
- Hover your mouse cursor over the price list that you want to delete and click the Trash icon.

- Click OK to confirm the delete.

Export Price Lists
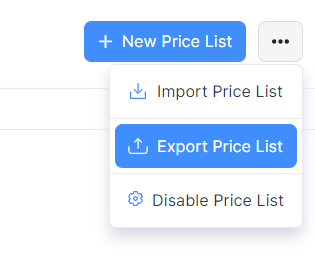
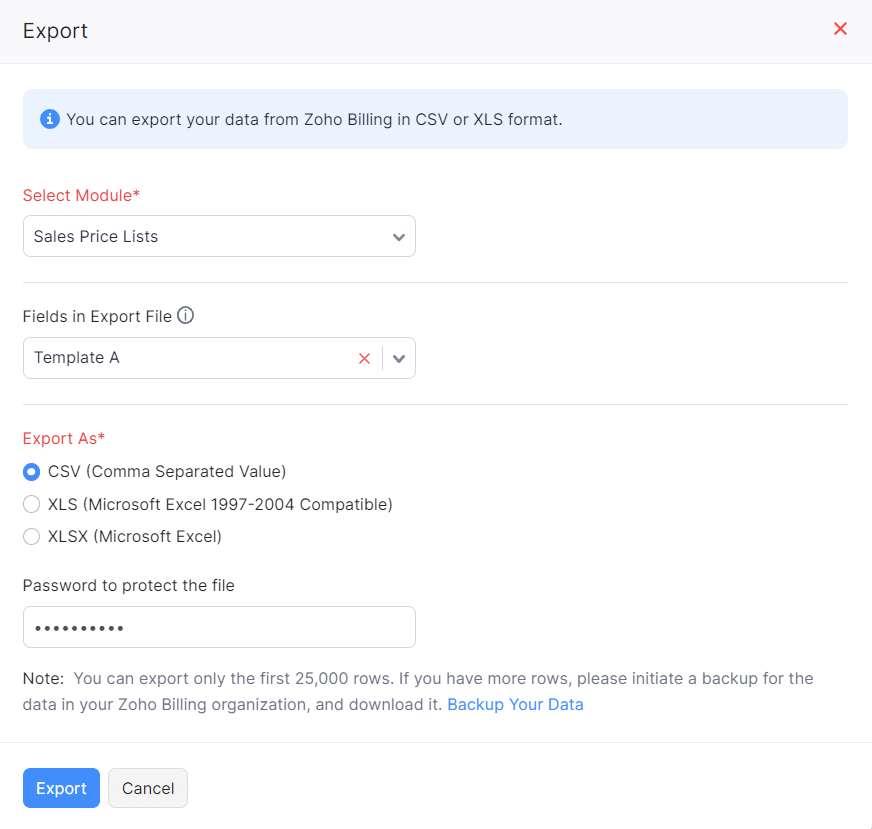
You can export the price lists that are present in Zoho Billing in CSV (Comma Separated Values) or XLS (eXceL Spreadsheet) formats. To export price lists:
- Go to the Price Lists module in the left sidebar.
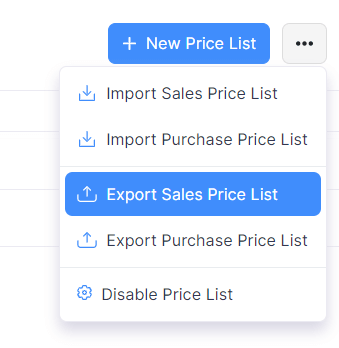
- Click the Hamburger icon and select Export Sales Price Lists.
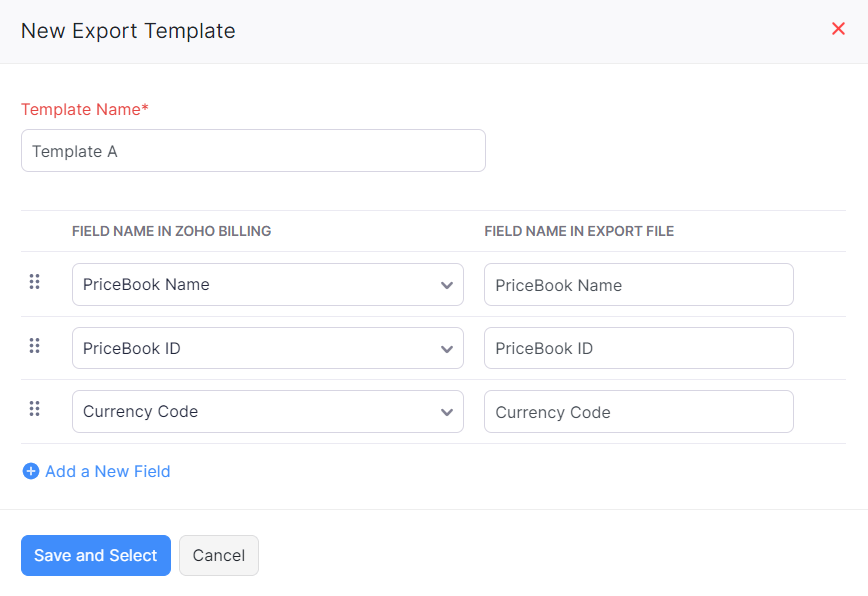
- If you want only specific fields of the price lists to be exported, you can specify them by clicking the dropdown under Fields in Export File and selecting + Add New to create a new template.
- Enter a Template Name.
- Click Add a New Field to select the fields that you want in the export file.
- Also, you can edit the Field Name that will be displayed in the export file.
- Click Save and Select.
- Select the format in which you want the price lists to be exported: CSV or XLS.
- Click Export and save the file in your device.
Disable Price Lists
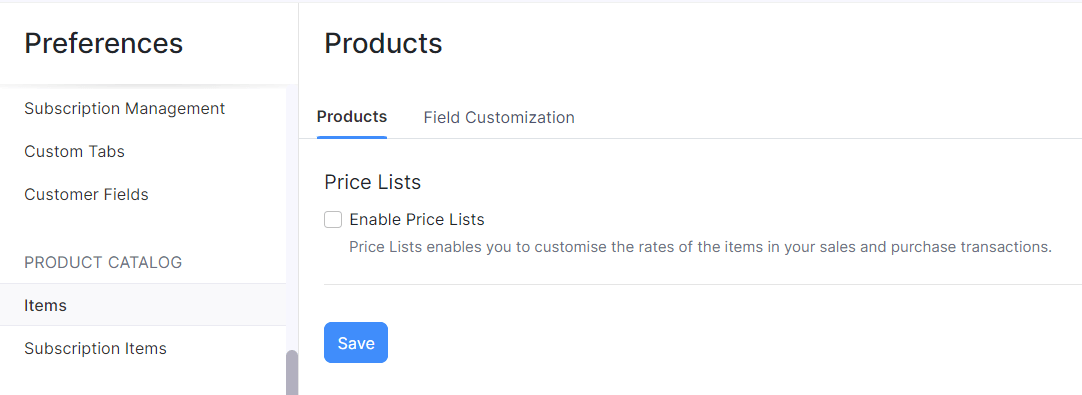
At any point in time, you do not want to use price lists in Zoho Billing, you can disable the price lists feature. To disable the price list feature:
- Click the Gear icon in the top-right corner of the window and select Preferences.
- Select the Items tab.
- Uncheck the Eable Price Lists option under Price Lists.
- Click Save.
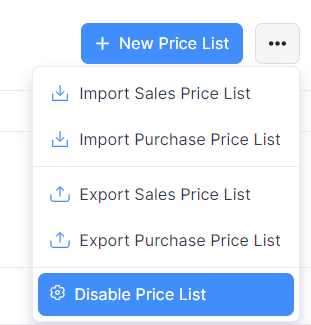
Alternatively, if you’re in the Price Lists module:
- Click the Hamburger icon and select the Disable Price Lists option.


 Yes
Yes