Managing Customers
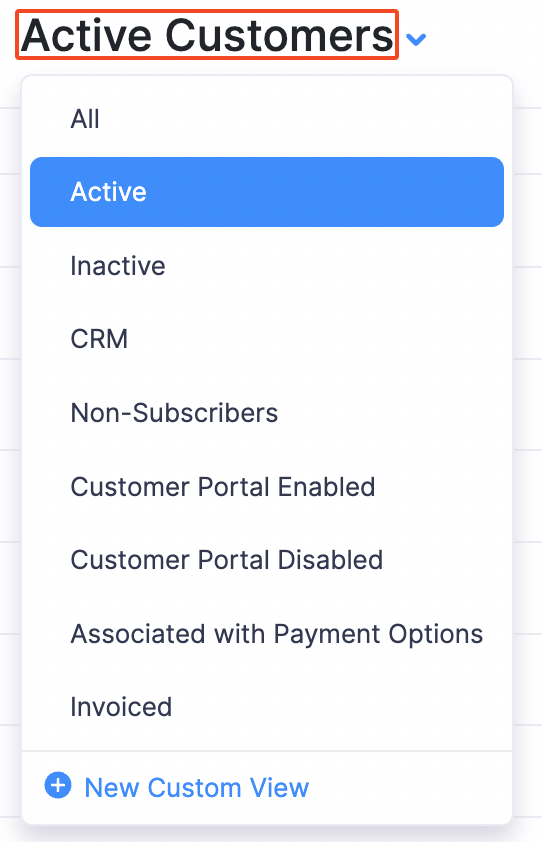
You can filter customers in Zoho Billing based on a particular criterion and view them together. In Zoho Billing, Filters are also called as Views.
Sometimes, you would want to view all the customers who have not paid their invoice amount yet. You can select the filter Unpaid Customers in the Customers module to view them.
Zoho Billing has default filters based on certain criteria. However, if you want to filter the customers based on your own criteria, you can do by creating your own Custom View. In this page, we’ll learn about how to use the existing default filters and how to create new custom views.
IN THIS PAGE…
Default Filters
Default Filters are present in Zoho Billing to help you to quickly filter the customers. We’ve provided a list of default filters which you can apply to filter the customers based on their criteria.
| Filter Name | Description |
|---|---|
| All Customers | All the customers in Zoho Billing will be displayed. By default, the Customers module displays customers using this filter. |
| CRM Customers | All the customers that are linked to Zoho CRM will be displayed when you use this filter. |
| Active Customers | All active customers will be displayed when you use this filter. All customers you create are active unless you mark them as inactive. |
| Duplicate Customers | All the customers that have a duplicate Customer Display Name will be displayed when you use this filter. |
| Inactive Customers | All the customers that you have marked as inactive will be displayed while you use this filter. |
| Customer Portal Enabled | All the customers for whom you’ve enabled Customer Portal are displayed when you use this filter. |
| Customer Portal Disabled | All the customers for whom you’ve not enabled Customer Portal are displayed when you use this filter. |
| Overdue Customers | All the customers with overdue invoices are displayed under this filter. |
| Unpaid Customers | All customers who are yet to make the payment for invoices when the payment term is not yet over are displayed when you use this filter. |

Creating Custom Views
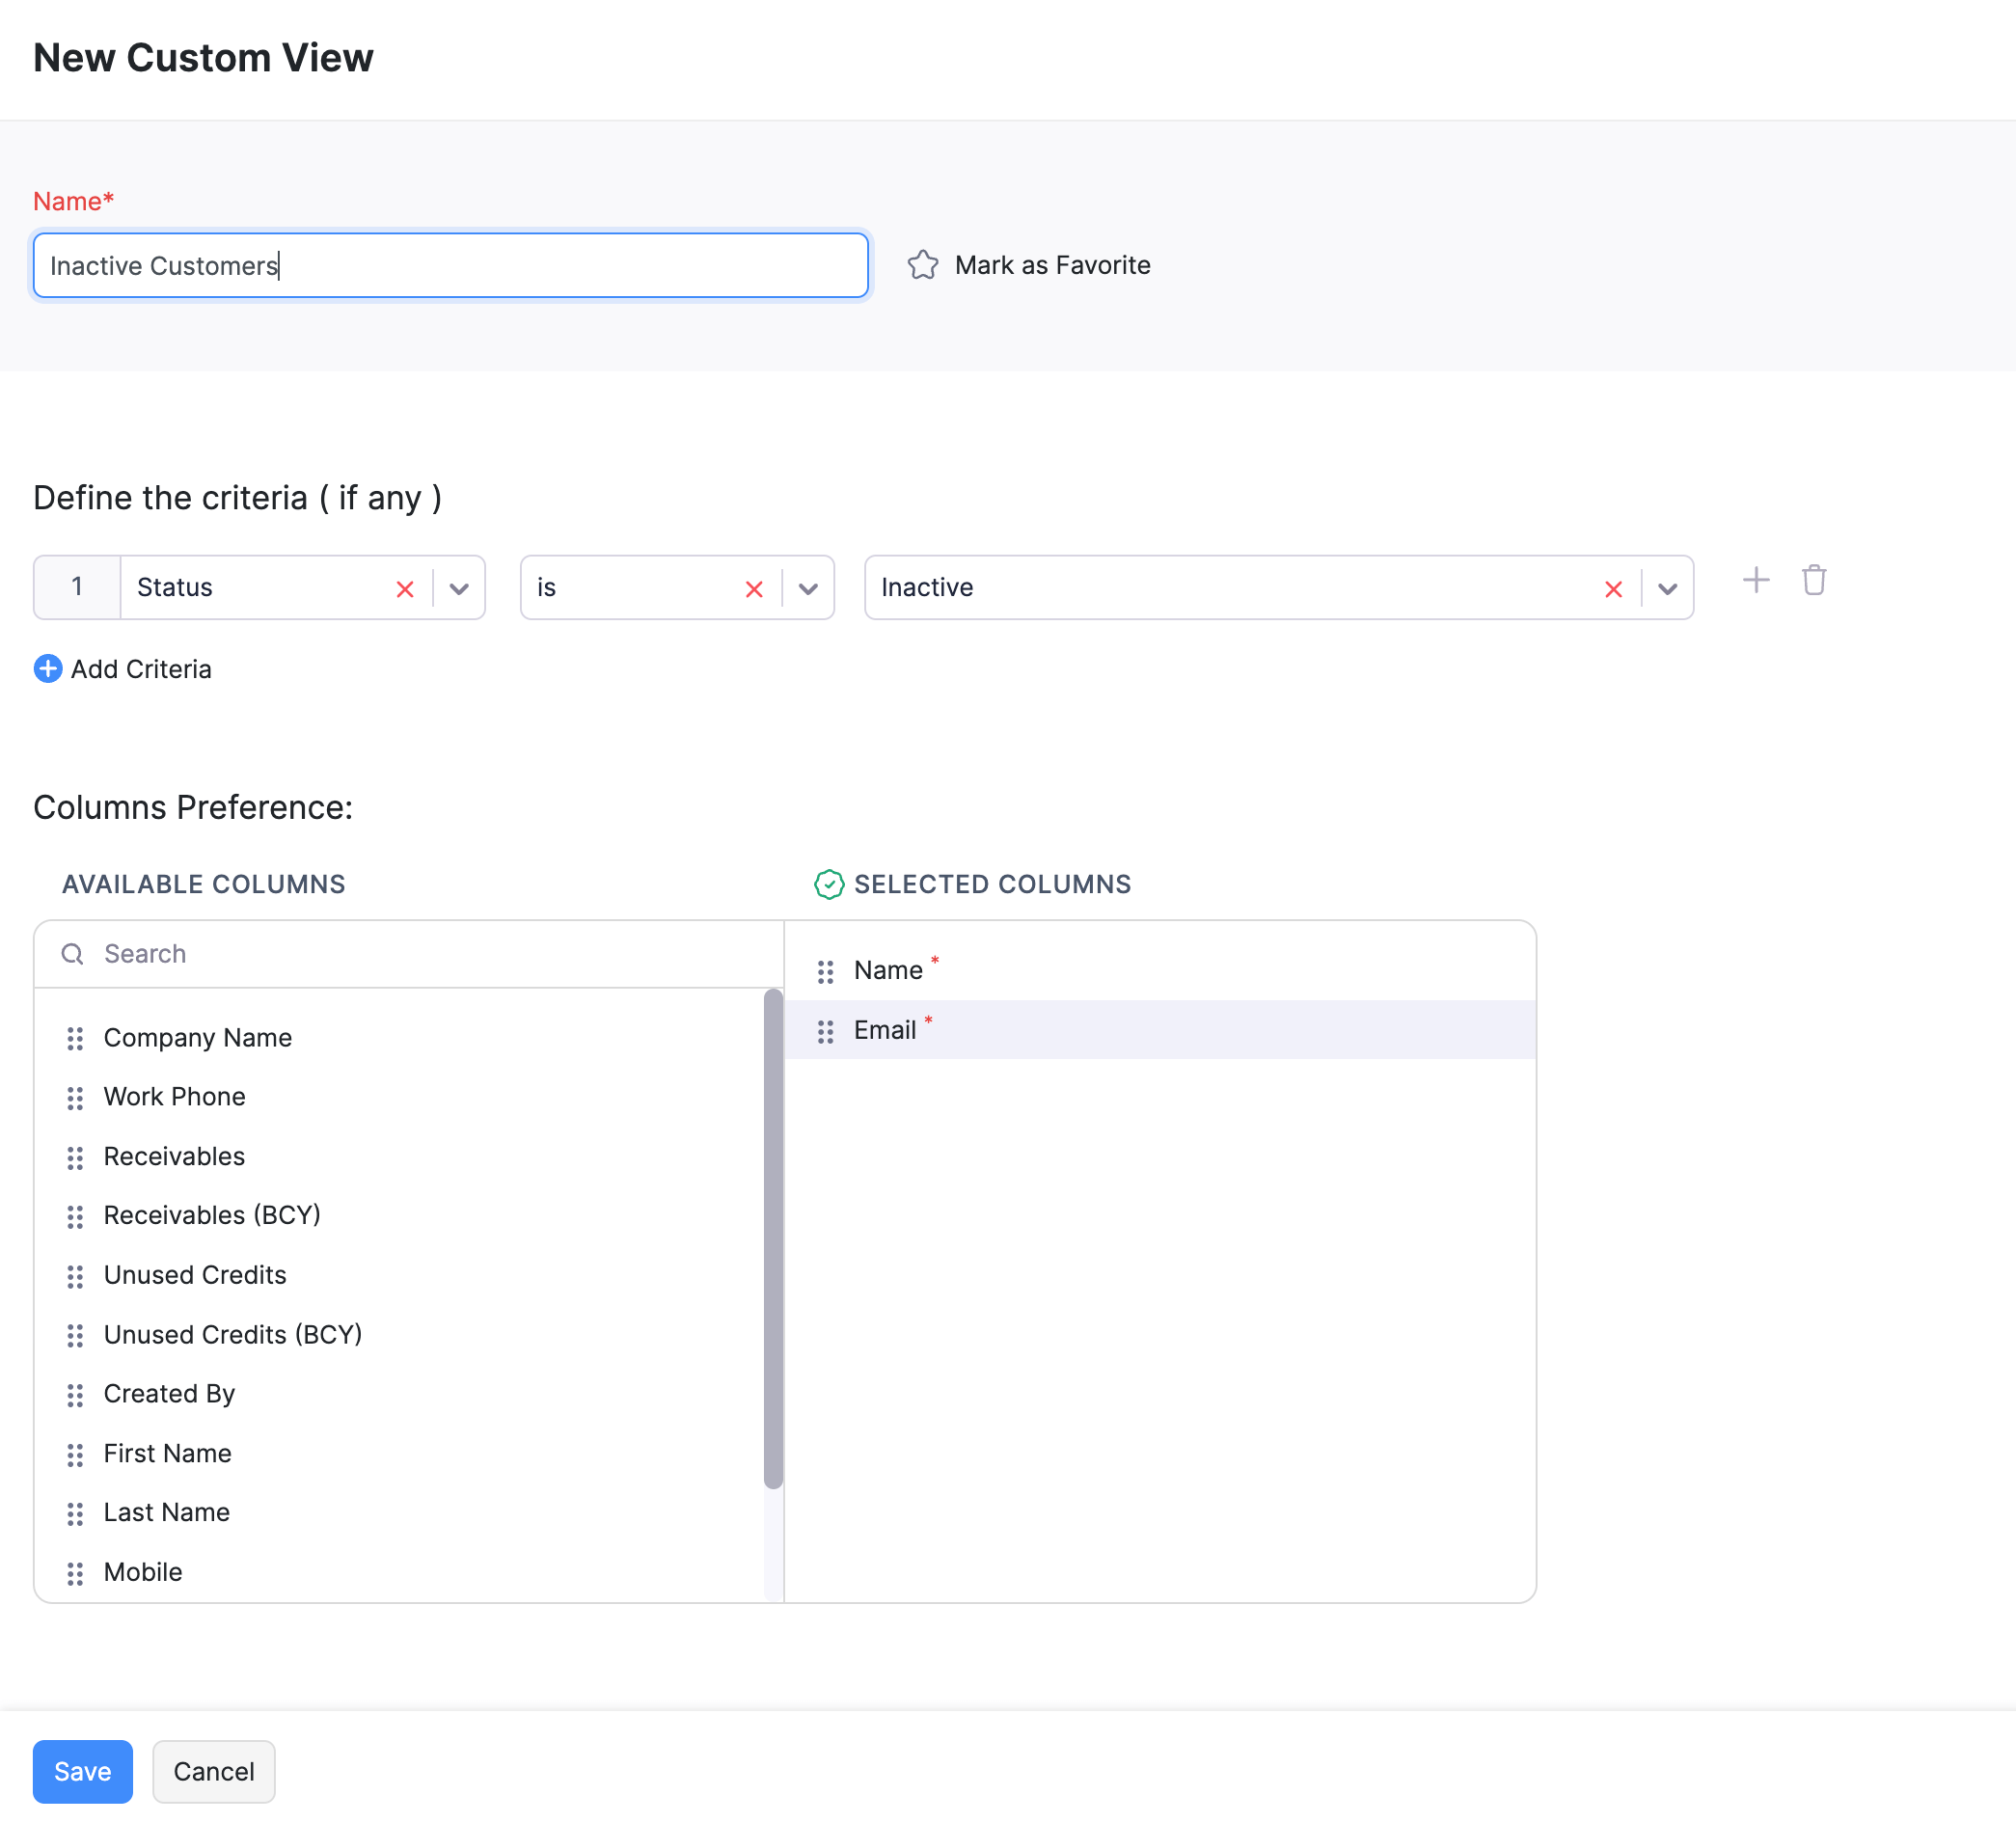
You can create a new custom view to filter the customers based on the specific criteria you mention.
Scenario: Mark wants to view all the customers for whom the receivables due is greater than 5000. He can create a custom view and mention the criteria to filter all customers with receivables greater than 5000. Once, he saves this custom view, he can apply this on his customers and the filtered customers will be displayed.
To create a new custom view:
- Go to the Customers module.
- Click the filter dropdown and select + New Custom View from the bottom of the list.
- Enter a Name for the custom view.
- Click the dropdown under Define the criteria section and select one of the fields from the dropdown.
- Click the next dropdown and select the appropriate condition.
- Enter an appropriate value in the next field.
- Click + Add Criteria to add another criterion and repeat the previous 3 steps.
- Click the + on each field in the listed in the Available Columns table to add them under the Selected Columns table.
Insight: The filtered customers will be displayed with the fields that you’ve added to the Selected Columns table.
- Choose if you want this filter can be displayed to every user in your organization or only to you.
Click Save.

Now, the filter will be displayed under the default filters and you can filter the customers based on the new criteria.
Editing Custom Views
To edit the custom view that you’ve created:
- Go to the Customers module.
- Click the filter dropdown and select the filter you wish to edit.
- Hover your mouse cursor next to the filter name and click on the Edit icon.
- Edit the custom view.
- Click Save.
 Thank you for your feedback!