Custom Workflow Triggers
Custom Workflow Triggers allows you to set up personalized workflow triggers that can be used to trigger a workflow rule in Zoho Books. You can connect these triggers to third-party applications based on your business needs, enabling the third-party application to act as a trigger for the workflow rule.
How Custom Workflow Triggers Work
Custom Workflow Triggers is a component within an extension. So you’ll have to create an extension in Sigma and configure the custom workflow trigger within the extension. Once done, copy the OneAuth or API Key URL and paste it into the third-party application to connect the trigger. Next, create a new workflow rule directly in the Developer Portal and add the custom workflow trigger to it.
After filling in the other necessary details, save and publish the workflow rule as an extension privately. Once published, install the Custom Workflow Triggers extension in your Zoho Books organization. It will appear as a new and separate workflow rule in your Zoho Books organization.
Now, the workflow rule in Zoho Books will trigger and execute the action you set up whenever the activity you configured in the third-party application occurs.
Scenario: Alex, a sales manager, uses Zoho Books to track his company’s invoices. When a customer’s payment is overdue by 30 days in StoreHippo, the custom trigger extension automatically triggers the workflow rule in Zoho Books and sends Alex an email notification, reminding him to follow up with the customer to collect the overdue payment.
Create a Custom Workflow Trigger
Prerequisite: You must create an extension in Sigma for the custom workflow trigger you want to create.
Once you’ve created the new extension in the Sigma portal, you can create a new custom workflow trigger in the extension. Here’s how:
- Go to the Sigma portal, and click Extensions on the left sidebar.
- Hover over the extension you created and click the Edit icon. This will take you to the Zoho Books Developer Portal.
- Click the Build tab at the top of the page.
- Click Automation on the left sidebar, and select Workflow Triggers.
- Click + New Workflow Trigger in the top right corner.

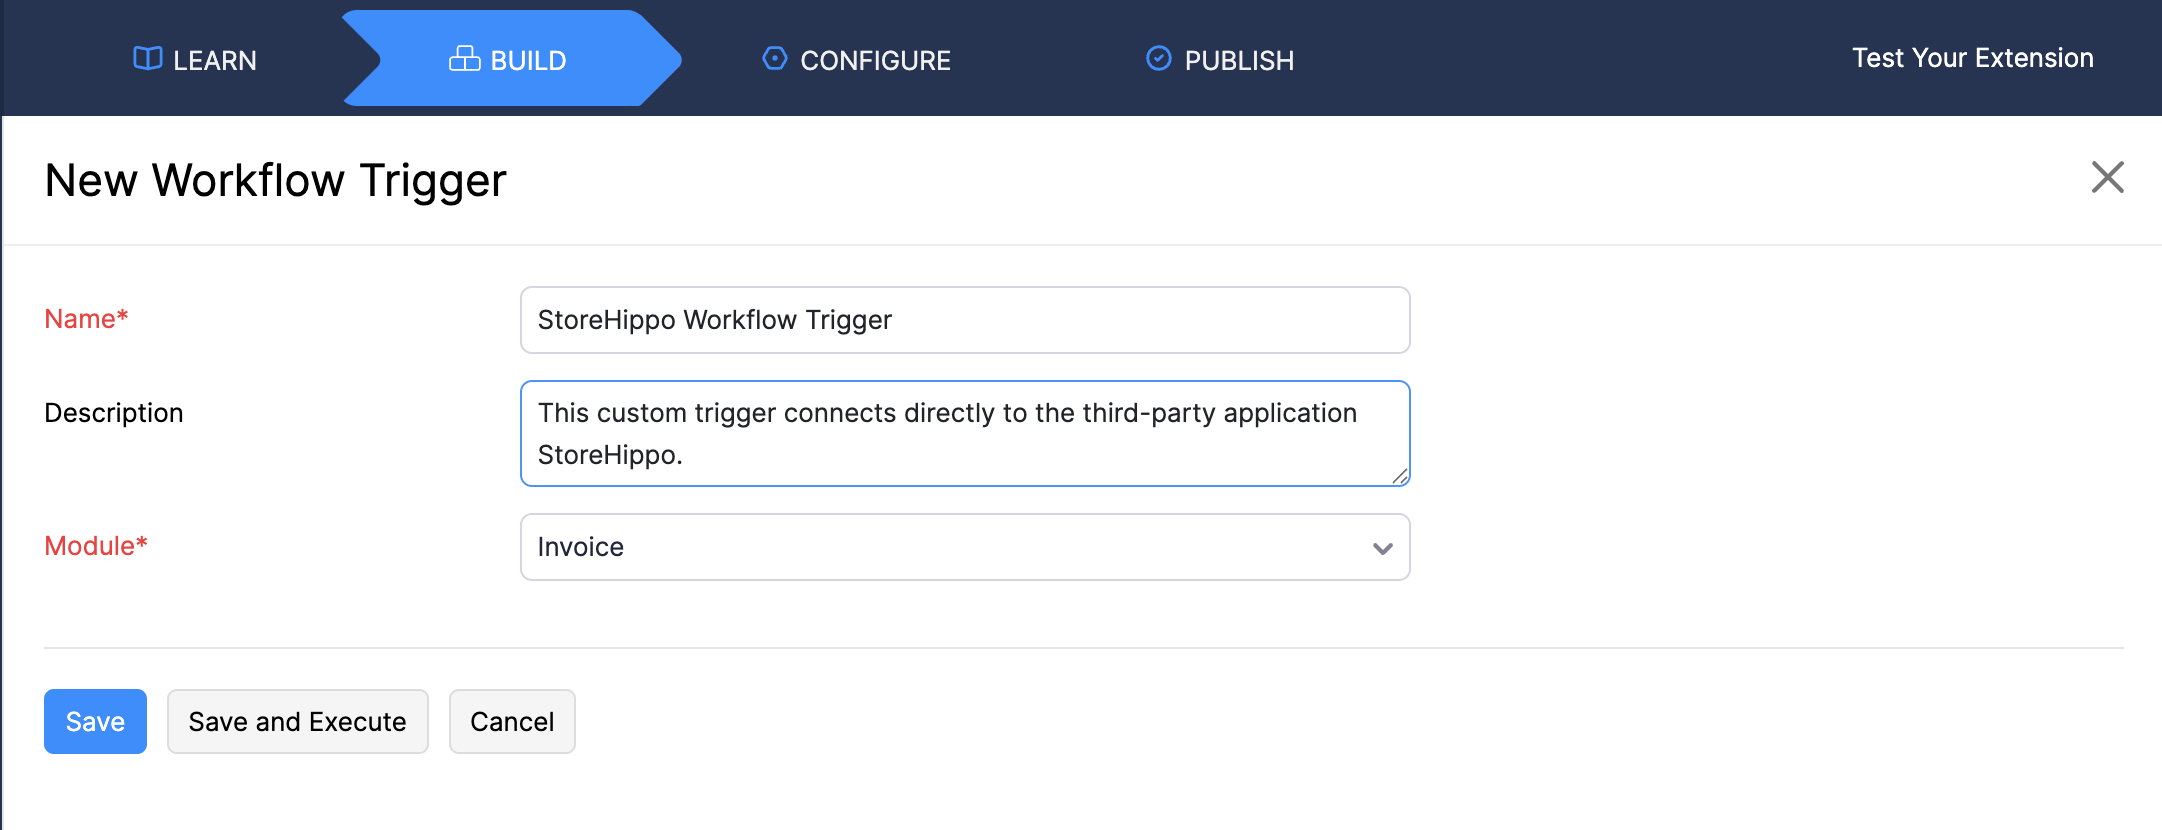
- In the New Workflow Trigger page, fill in the following fields:
- Name: Enter a name for your workflow trigger.
- Description: Add a description if needed.
- Module: Select the module for the workflow trigger.
- Click Save to save the workflow trigger, or Save and Execute to save and run the custom trigger immediately.

The OAuth URL and ZAPI Key URL will be generated and displayed below. Copy these URLs by clicking the Copy icon next to them.
Configure the URL in the third-party application to finish setting up the custom workflow trigger you created and add any necessary attributes in the script during the API call.
| Attributes | Description |
|---|---|
| Header | The header of the API request. |
| Params | Parameters are the variable parts of the script given by the third-party API request. |
| Body | It is a string that contains the request data of the API call. |

Now, you can add this custom trigger to a workflow rule.
Add the Custom Workflow Trigger to a Workflow Rule
Once you finish creating and linking the custom trigger to a third-party application, you’ll need to create a new workflow rule and add the custom trigger to it in the Zoho Books Developer Portal itself. Here’s how:
- In the Zoho Books Developer Portal, click the Build tab at the top of the page.
- Click Automation on the left sidebar, and select Workflow Rules.
- Click + New Workflow Rule in the top right corner.

- In the New Workflow pop-up, fill in the following fields:
- Workflow Rule Name: Provide a name for the workflow rule.
- Description: Add a description for the rule.
- Module: Select the module for which you want to create the workflow rule.
- Click Next.
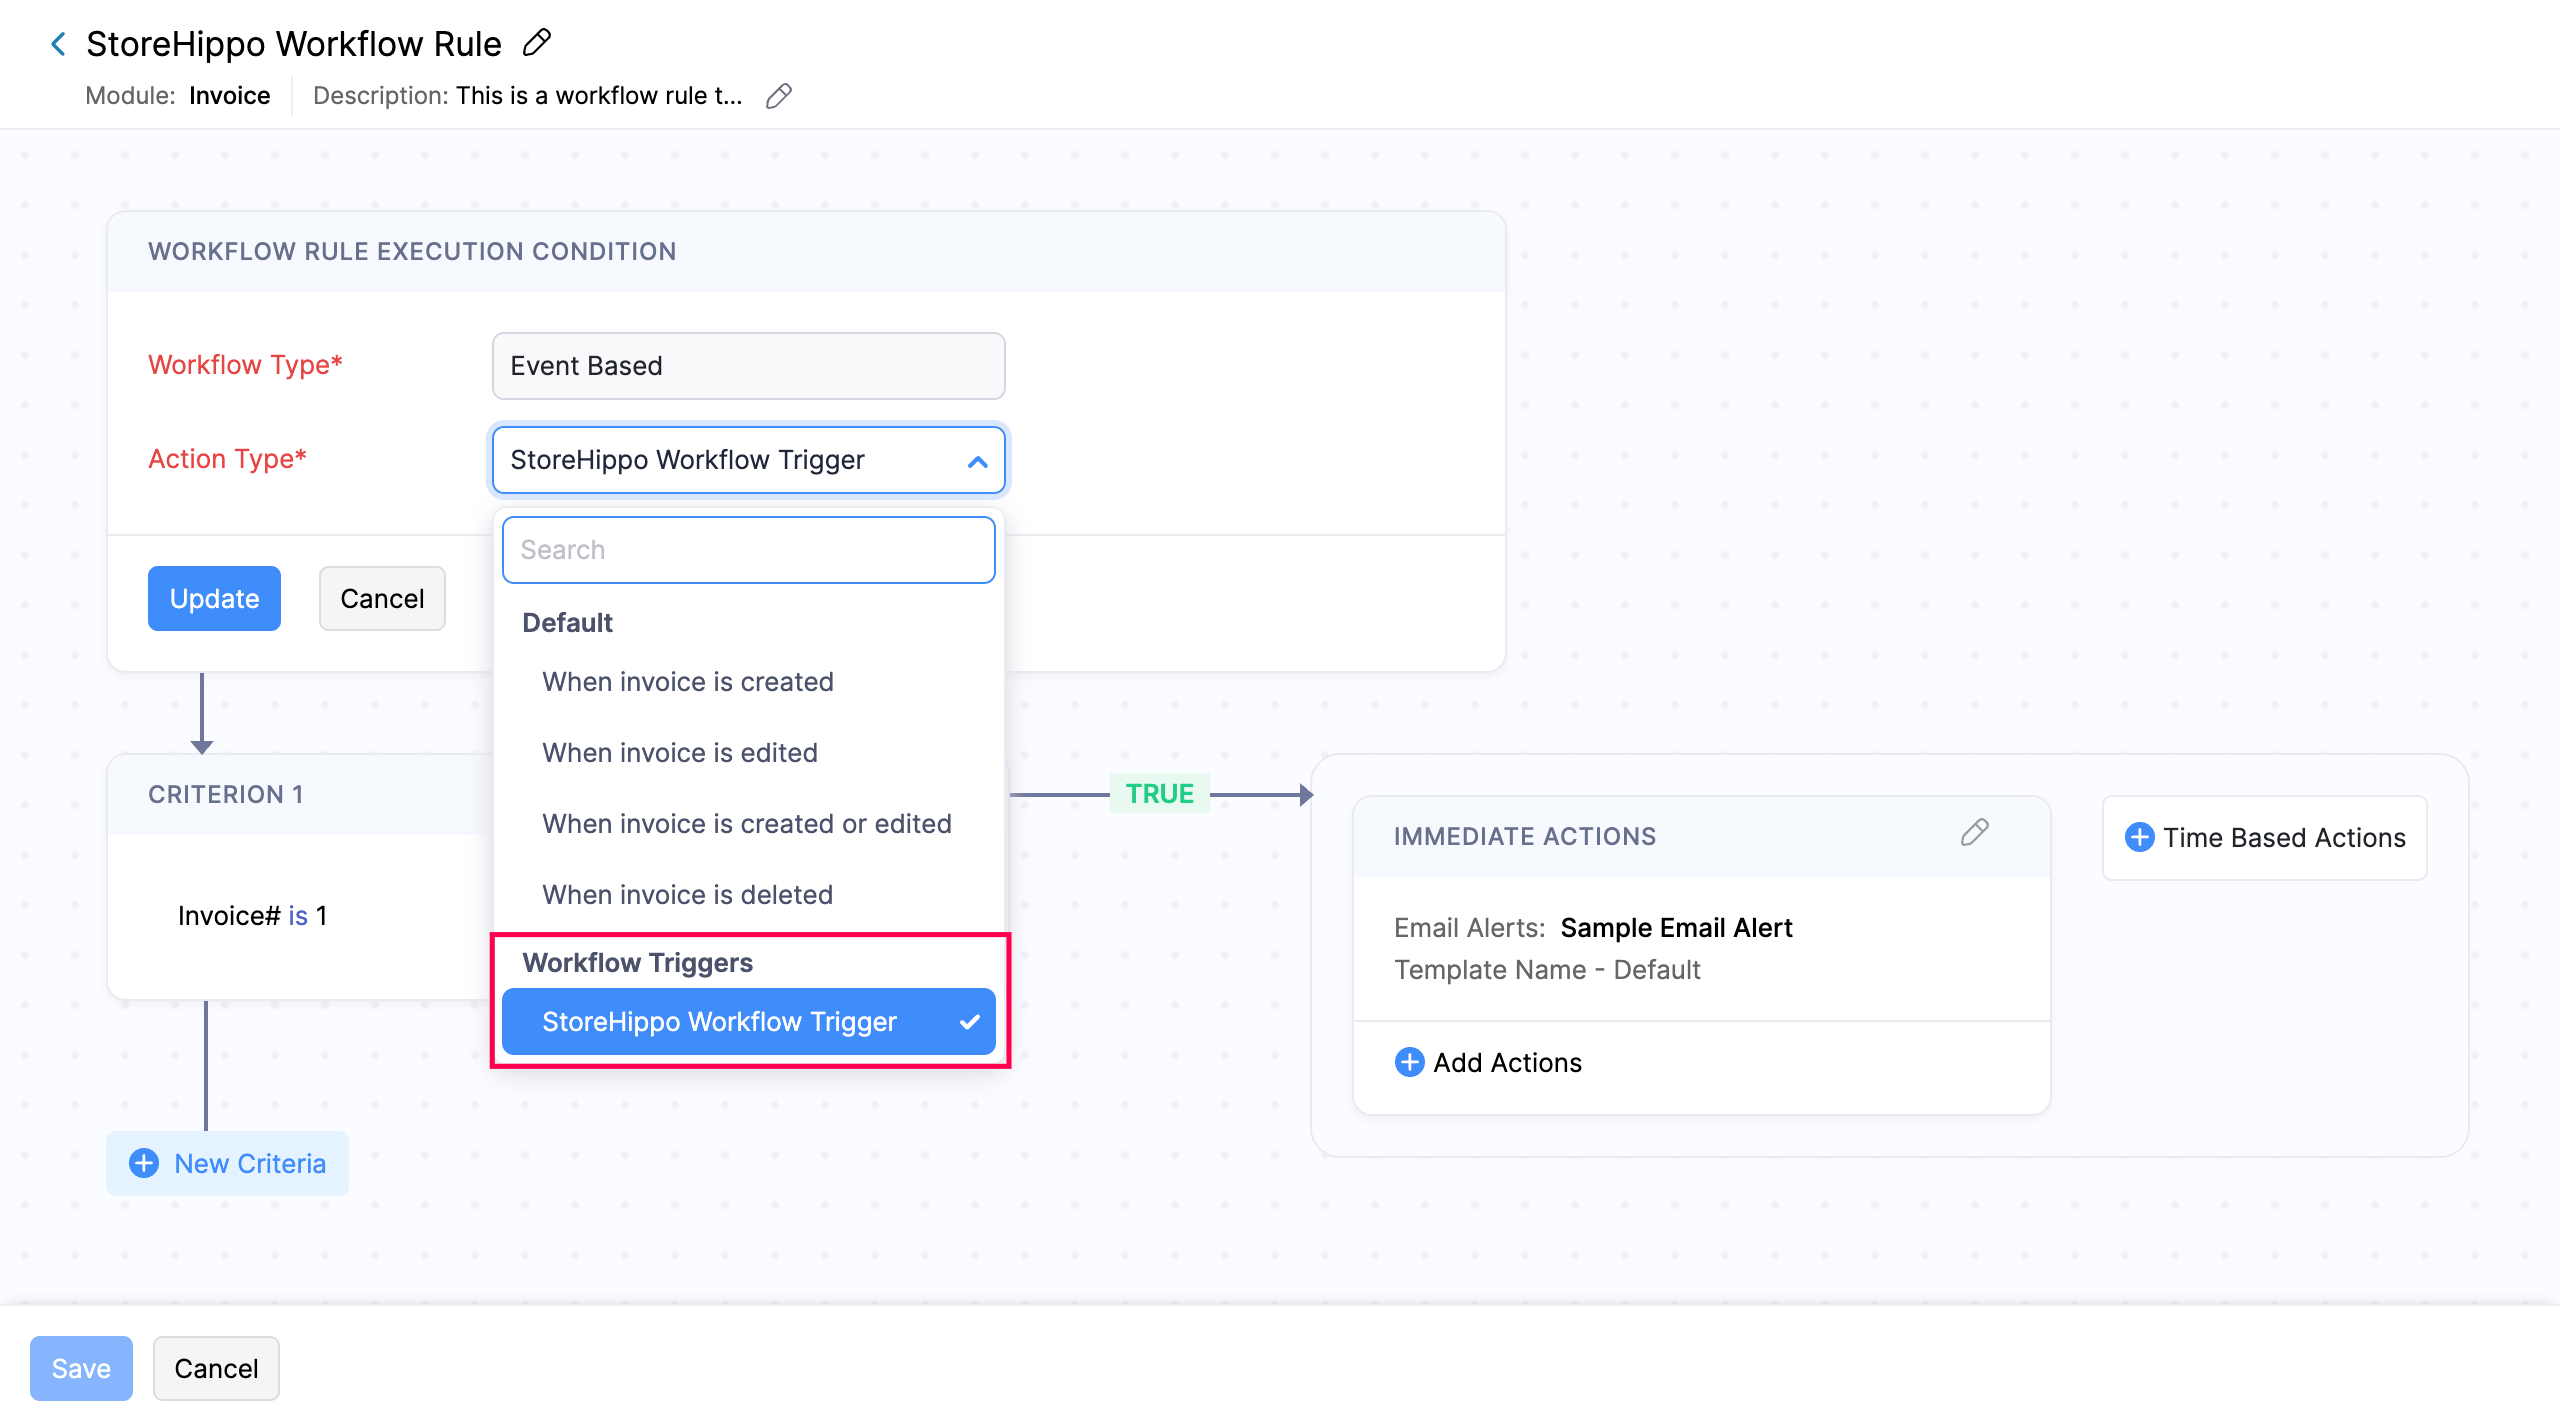
- In the page that follows, under Workflow Rule Execution Condition, choose either Event Based on Time Based from the Workflow Type dropdown. Then, select the custom trigger you created under workflow triggers in the Action Type dropdown.

- Enter the other necessary details, and click Save to save the workflow rule.
Now, after adding the custom workflow trigger to the new workflow rule in the extension, publish the extension and then install it in your organization.
Once the extension is installed in your organization, the workflow rule will be triggered every time the configured action is performed in the third-party application, resulting in the workflow action being executed in Zoho Books.


 Yes
Yes