Note: This help document is for the old version of Transaction Approvals. Read our help document on the new version of Transaction Approvals.
Transaction Approval Process
After setting up transaction approval, the users in your organization can create and submit transactions for their supervisors to approve. Let’s see how transaction approval works for both sales and purchase transactions:
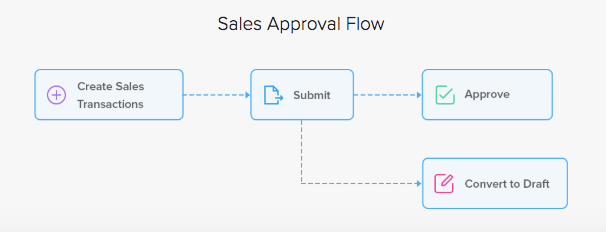
Sales Approval Workflow
Transaction approval for sales modules will be open for Invoices and Sales Orders. Only when a transaction is approved, a user will be able to do the following actions:
- Invoice: Mark Invoices as Sent, Record Payments, Write Off and Email invoices.
- Sales Order: Create Invoice, Convert to Purchase Order, Mark as Confirmed, Email Sales Orders, Create Package and Create Shipments.
Purchase Approval Workflow
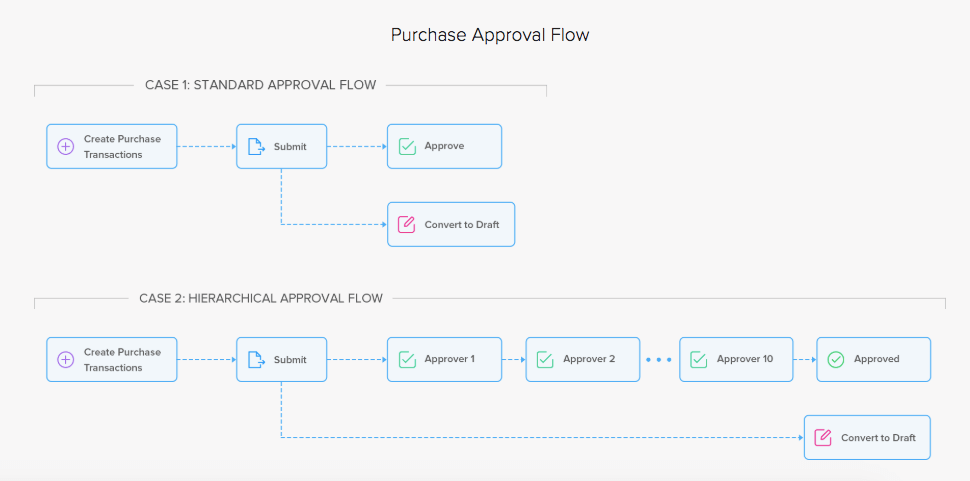
Transaction approval for purchase modules will be open for Purchase Orders and Bills. Only when a transaction is approved, the user will be able to do the following actions:
- Bills: Record Payments.
- Purchase Orders: Convert to Open and Convert to Bill, Create Purchase Receive.
Inventory Approval Workflow
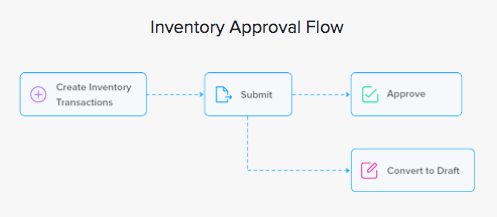
Inventory approval will be open for Stock Adjustments and Transfer Orders.
Submit Transaction for Approval
The first step in transaction approval is to create and submit transactions for approval. To create and submit a new sales transaction:
- Navigate to the desired module (Invoice, Sales Orders, Bills, Purchase Orders or Item Adjustments) from the sidebar.
- Record a new transaction.
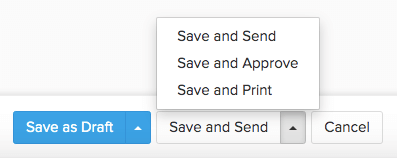
- Click Save as Draft to save the transaction or click Save and Submit to submit the transaction for approval.
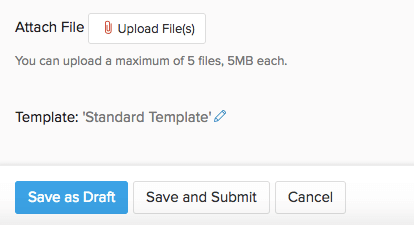
- You can also click Save and Print to print the transaction (In case of an Invoice).
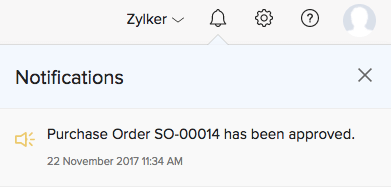
You will receive an in-app notification if your transaction is approved.
Approve Transactions
As soon as transactions are submitted, the respective approvers will be notified of it (as per the configured settings).
To approve the transactions, the approver/admin should:
- Navigate to the respective module (Invoice, Sales Orders, Bills, Purchase Orders or Item Adjustments) from the sidebar.
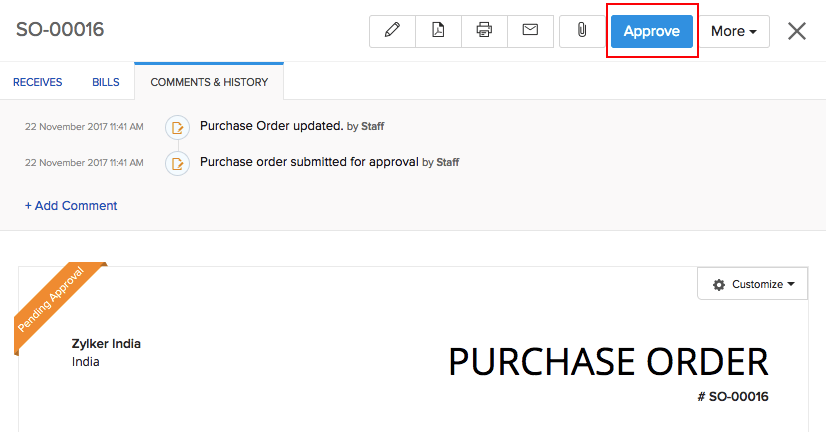
- Click the transaction to view its details.
- Click Approve.
Pro Tip: Learn how you can reject a transaction in case of errors.
Users who are approvers can approve their own transaction instantly by clicking the Save and Approve button from the dropup.
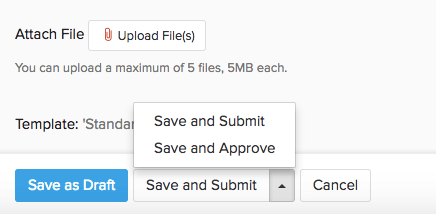
- Approvers can also click the Save and Submit button to get their transaction verified by other Approvers/Admins.
If the transaction has been approved, the submitter will receive a notification and the users of the organization will be able to perform all actions associated with the entity.
Note: Once you approve a transaction, you cannot undo this action. You can however mark the transaction as Void and later convert it to the Draft state.
Reject Transaction
Admins and approvers can reject a transaction in case of any mistakes with the reason for rejection. The submitter can then make the necessary changes and resubmit the transaction for approval.
To reject a transaction:
- Go to the sales/purchase/adjustments module in the sidebar.
- Open the transaction that’s pending for approval.
- Click the Approve dropdown and click the Reject option.
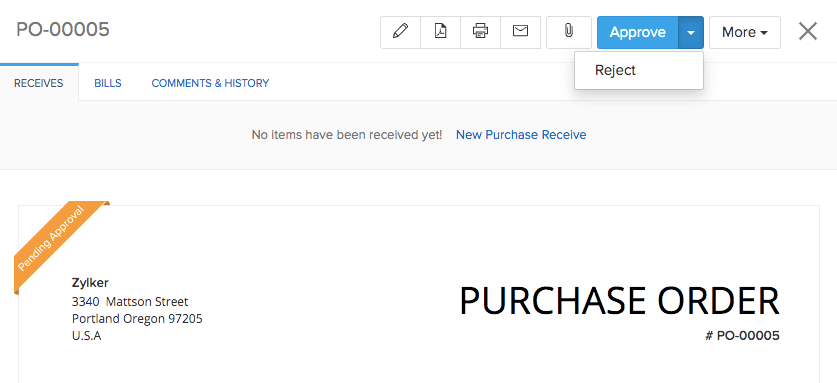
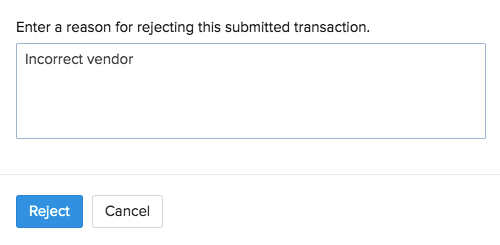
- Enter the reason for rejecting this transaction.
- Click Reject. The transaction will be marked as Rejected and users cannot perform any action on it unless it has been resubmitted and approved.
Resubmit Transaction
If a transaction has been rejected by an approver for specific reasons, the submitter can make changes to it and resubmit it for approval.
To resubmit a transaction:
- Go to the sales/purchase/adjustments module in the sidebar.
- Open the transaction that has been rejected.
- Edit the transaction and make the suggested changes.
- Click the Resubmit button at the top.
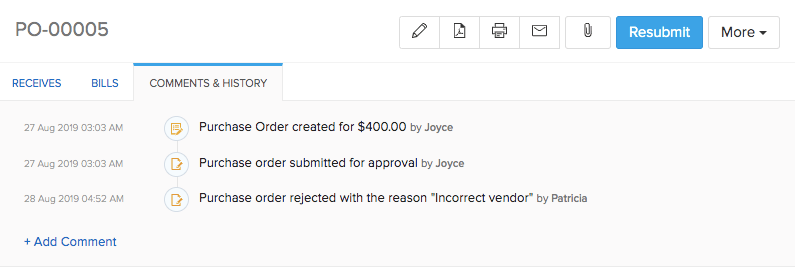
If the approver is satisfied with the changes made then they’ll approve the transaction. You can then carry on with performing more actions to the approved transaction.


