Self-Billed Invoices
This help document is applicable only to the UAE, KSA, Bahrain and the UK editions of Zoho Inventory.
Self-billed invoices are raised in cases where the customers decide to raise a bill for themselves (self bill) on behalf of their vendors (suppliers). Let’s consider a scenario. You have a business. You get supplies from your vendor. In this case, you can raise a bill for yourself on behalf your the vendor. Since you are billing yourself the invoice which is supposed to come from the vendor, we call it a self-billed invoice. In this bill, you can mention the goods or services that had have ordered and the tax associated with it.
The tax generated in the self-billed invoices will be the output VAT of the supplier and the input VAT of the self biller.
How does it work?
For a customer to start raising self-billed invoices:
- The customer (self-biller) agrees to raise invoices for himself (self-billed invoices) on behalf of the vendor (supplier).
- An agreement is signed between the self-biller and the supplier based on the terms of supply and a time period (usually 12 months) for which the transactions can be carried out. After the time period ends, the agreement should be renewed.
- The self-billed invoice should account for the goods or services sold and the VAT applied on them.
- The supplier accounts for VAT even if the self-billed invoice is not raised for the same or the bill hasn’t been paid by the self-biller.
- A self-biller can raise self-billed invoices for multiple suppliers.
Criteria
Some of the criteria that needs to be fulfilled by the supplier and the self-biller include:
- The supplier should be VAT registered and should not raise invoices for the customer.
- The supplier should notify the customer if there are any changes in the VAT treatment of the supplier and the same must be reflected in the agreement.
- There should be an agreement between the supplier and self biller which contains the transaction period and terms of supply.
Benefits of self-billed invoices
- It helps in maintaining uniformity of purchase documentation for the self-biller.
- Value of purchase is determined by you (rather than supplier) after the goods or services have been delivered.
Creating a Self-Billed Invoice
To create a self-billed invoice:
- Click Bills on the sidebar.
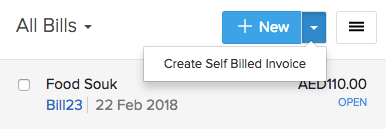
- Click the dropdown next to New button on the top right corner of the page.
- Click Create Self Billed Invoice.
- Fill in the appropriate details.
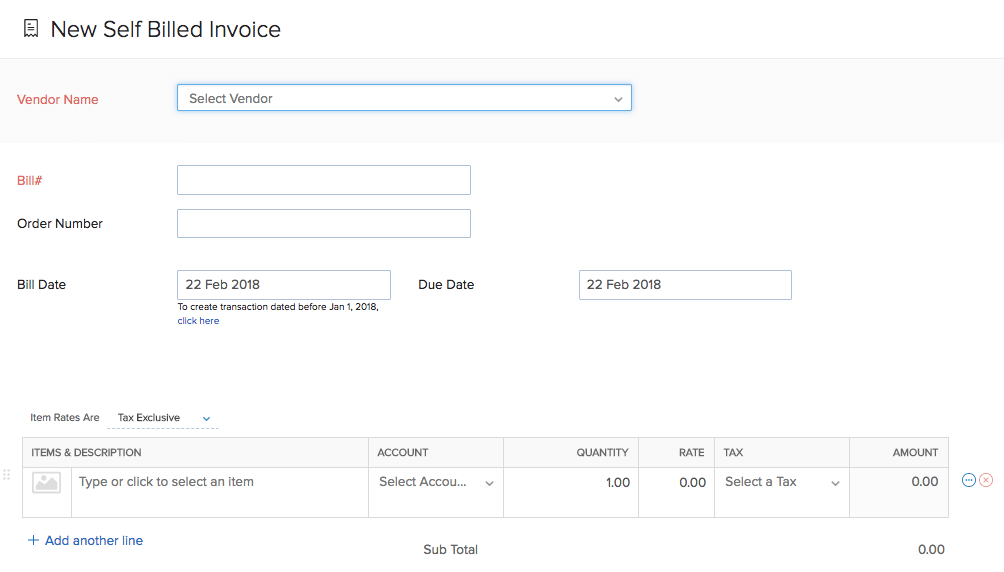
- Click Save as Open or Save as Draft.
The self-billed invoices will be displayed along with your other bills.
Recording Payments
You can record the payment for the self billed invoice by the following steps:
- Click Bills on the sidebar.
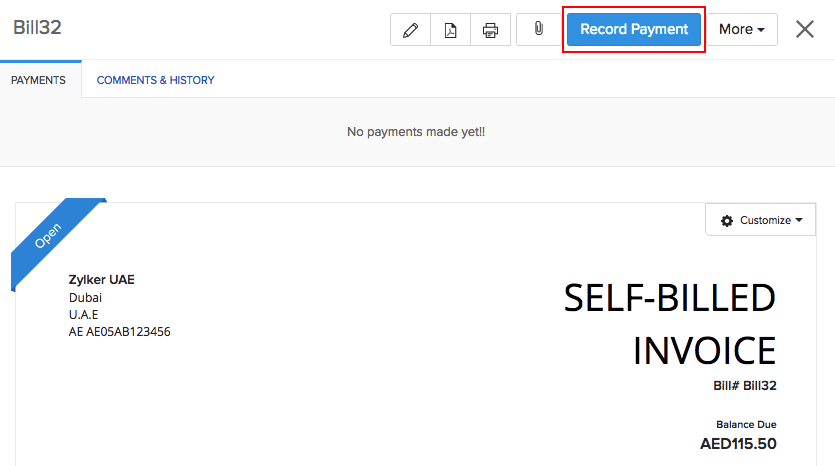
- Select any self invoiced bill for which you wish top record the payment.
- On the top right corner of the page click Record Payment.
- Enter the amount in Payment Made.
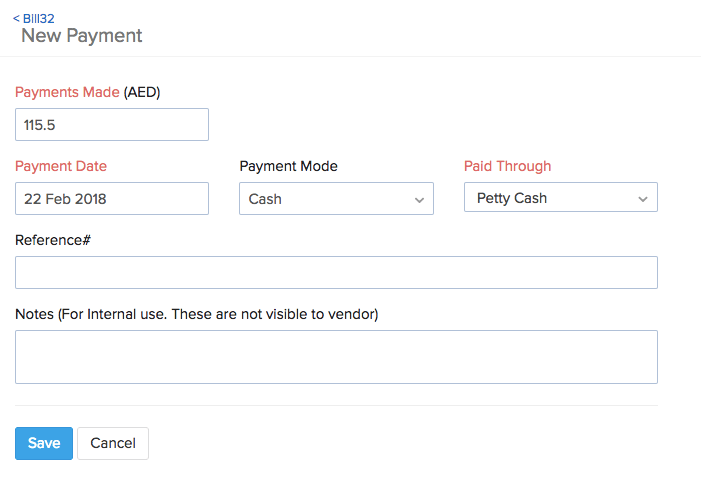
Note: If you wish to record only a part of the payment, you can enter the appropriate amount. The status of the bill will be Partially Paid.
Payments Received
After you have recorded the payment, you can either edit or delete the payments received for that bill.
- Go to the Bills module in the sidebar.
- Select any self-billed invoice.
- Click Payments on top of the page.

You can either:
- Click the Edit icon to change the payment details.
OR - Click the Delete icon to delete the payments received.
Other Actions
To perform any action on a self bill invoice:
- Click Bills on the sidebar.
- Select any self billed invoice.
After you have selected the self-billed invoice, you can see the following actions on the top right corner of the self-billed invoice:
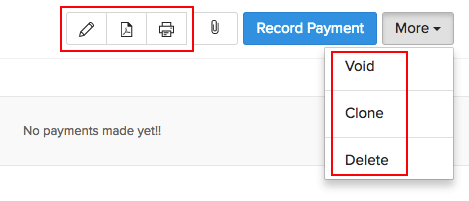
| Fields | Description |
|---|---|
| Edit | Click the edit icon to change details in the self billed invoice. |
| Click the PDF icon to download the self billed invoice in PDF format. | |
| Click the print icon to print the self billed invoice. | |
| Clone | If you want to create a new self billed invoice with similar details of the selected self billed invoice click More and then select Clone. |


