Reporting Tags
A reporting tag is a label with different values that can be associated with customers and products in Zoho Subscriptions. The reporting tags that you’ve associated can be used to generate reports, thereby giving you categorized insights into your subscription business. For example, you could create a reporting tag for your store locations and associate it with your customers–this lets you generate reports based on your customers’ attributes.
Scenario: Mark runs a gym with three branches, located in different parts of the city. All three branches maintain the same pricing scheme, and therefore he uses the same Plans in Zoho Subscriptions for all three branches. However, he’d like to track the number of sales per branch. To do this, he associates reporting tags to his customers based on the branch where they’ve bought a membership. At the end of the month, he generates sales reports based on these reporting tags.
Note: This feature is available only in the Professional and Standard plans of Zoho Subscriptions.
ON THIS PAGE
Create Reporting Tags
Prerequisite: Your organization must be integrated with Zoho Books.
Currently, you can create reporting tags only from Zoho Books. Any reporting tag that you create there will be available in Zoho Subscriptions instantly.
Note: You can create a maximum of 10 reporting tags.
Associate Reporting Tags
In Zoho Subscriptions, you can associate reporting tags with:
- Customers
- Plans
- Add-ons
Insight: You can also associate reporting tags for one-time add-ons and additional charges while creating transactions.
Associate Reporting Tags with Customers
- Go to the Customers module from the left sidebar.
- Edit an existing customer or click + New Customer to create a new customer.
Navigate to the Reporting Tags tab at the bottom of the screen.
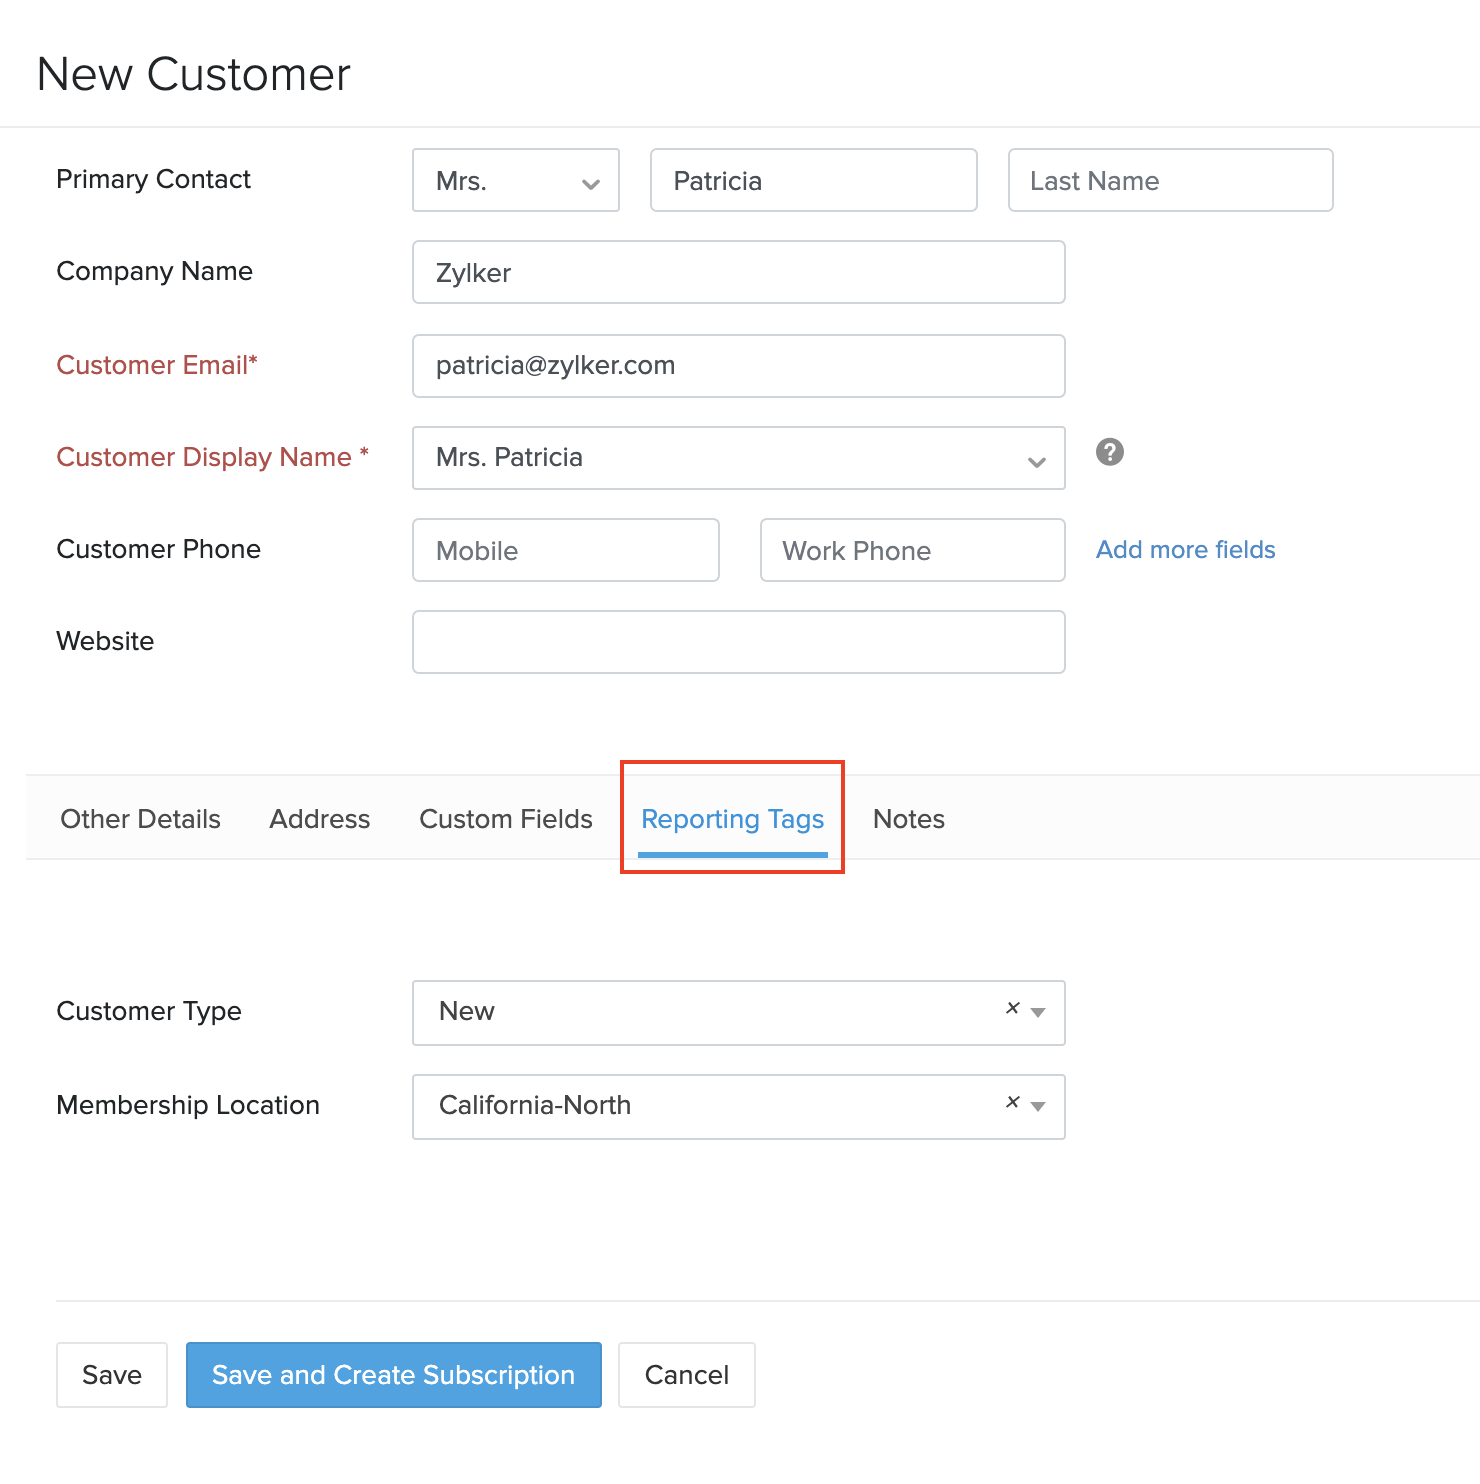
Select a value for the reporting tag by clicking the dropdown next to it.
Insights:
- Reporting tags will be associated only if you select a value for them.
- You can remove an associated reporting tag by clicking x in the dropdown.
- Click Save.
Now, the reporting tag will be associated with this customer and will be used for future transactions. If the customer is synced with Zoho Books, then the reporting tag will also be updated in Zoho Books and vice versa.
Important Notes:
- The reporting tags that you’ve associated with a customer will also be associated with plans, add-ons and additional charges whenever a transaction is created for that customer.
- If a plan or add-on has been associated with the same reporting tag as the customer, the value of the reporting tag for the plan/add-on will be associated, rather than the value of the customer’s reporting tag, while creating transactions.
Pro Tip: You can quickly associate or remove reporting tags for customers from the Overview tab in the Customer Details screen.
Associate Reporting Tags with Plans
- Go to the Products module from the left sidebar and select a product.
- Find the plan for which you want to associate the reporting tag and click Edit. You can also associate reporting tags while creating plans by clicking Add Plan.
Scroll down to the Reporting Tags section, where you can associate or remove reporting tags.
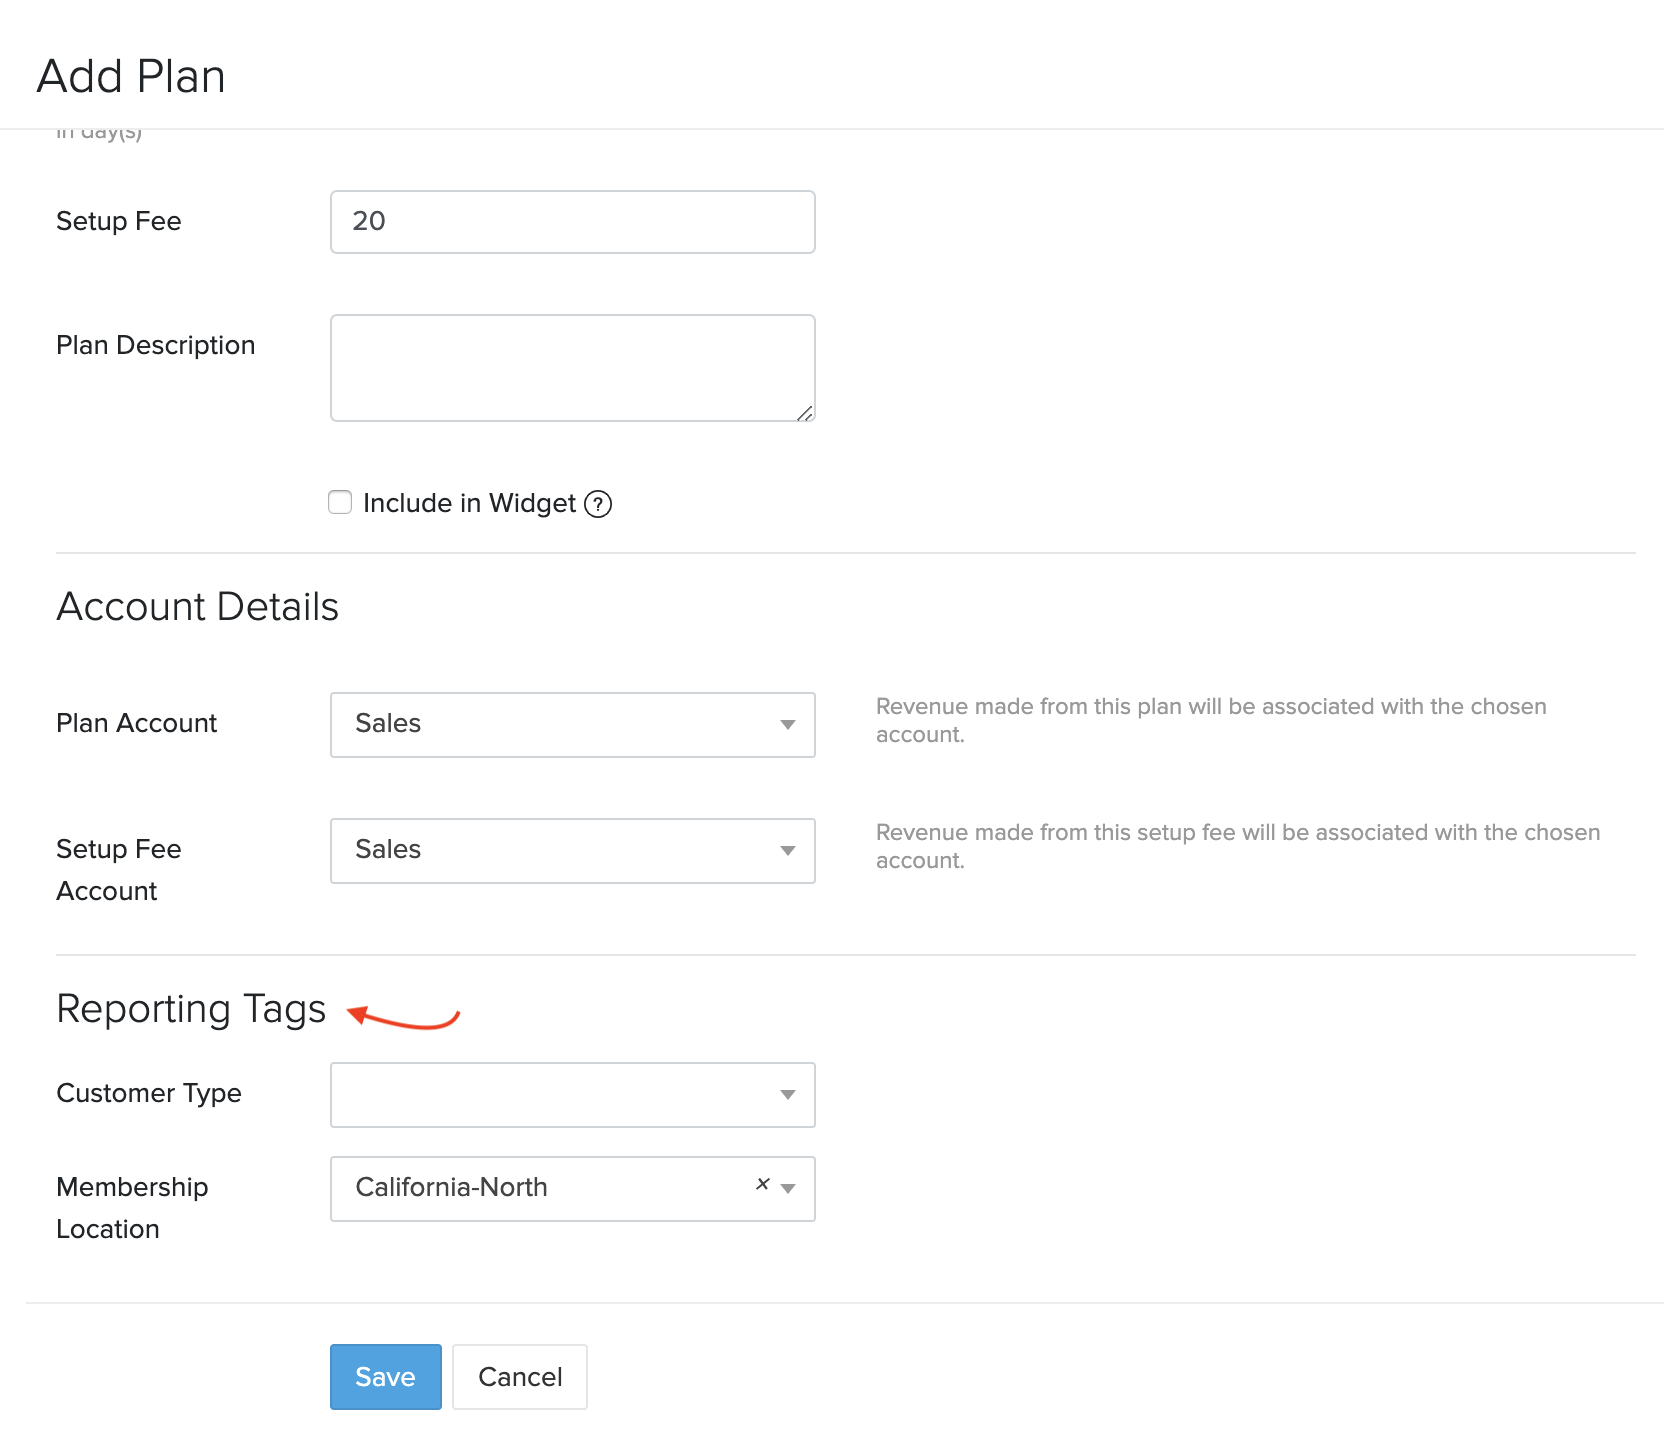
Click Save.
These reporting tags will be associated with this plan whenever a new subscription is created, including subscriptions that are created via the Hosted Payment Pages. However, you can also change the reporting tags for this plan while creating subscriptions.
Associate Reporting Tags with Add-ons
- Go to the Products module from the left sidebar and select a product.
- Find the add-on for which you want to associate the reporting tag and click Edit. You can also associate reporting tags while creating add-ons by clicking Add Addon.
Scroll down to the Reporting Tags section, where you can associate or remove reporting tags.
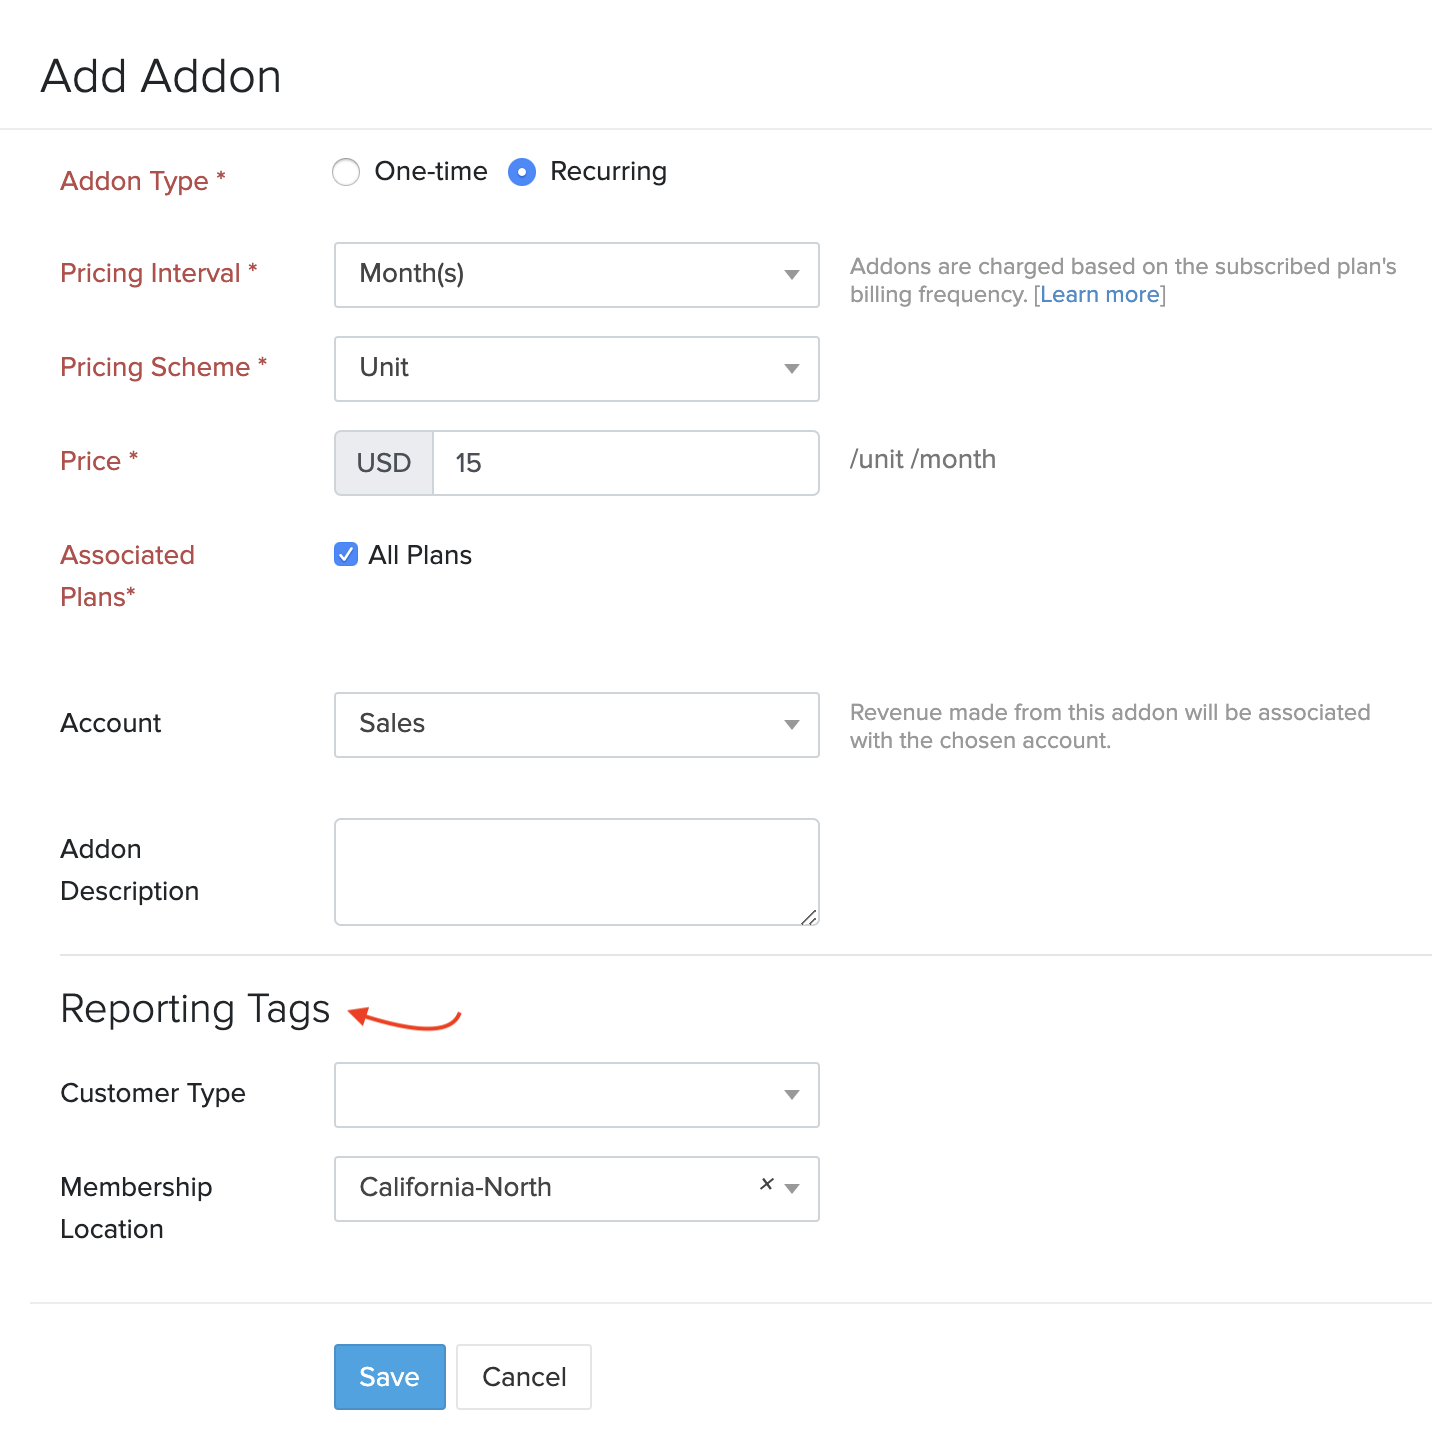
Click Save.
These reporting tags will be associated with this add-on whenever a new subscription is created, including subscriptions that are created via the Hosted Payment Pages. However, you can also change the reporting tags for this plan while creating subscriptions.
Associate Reporting Tags While Creating Subscriptions
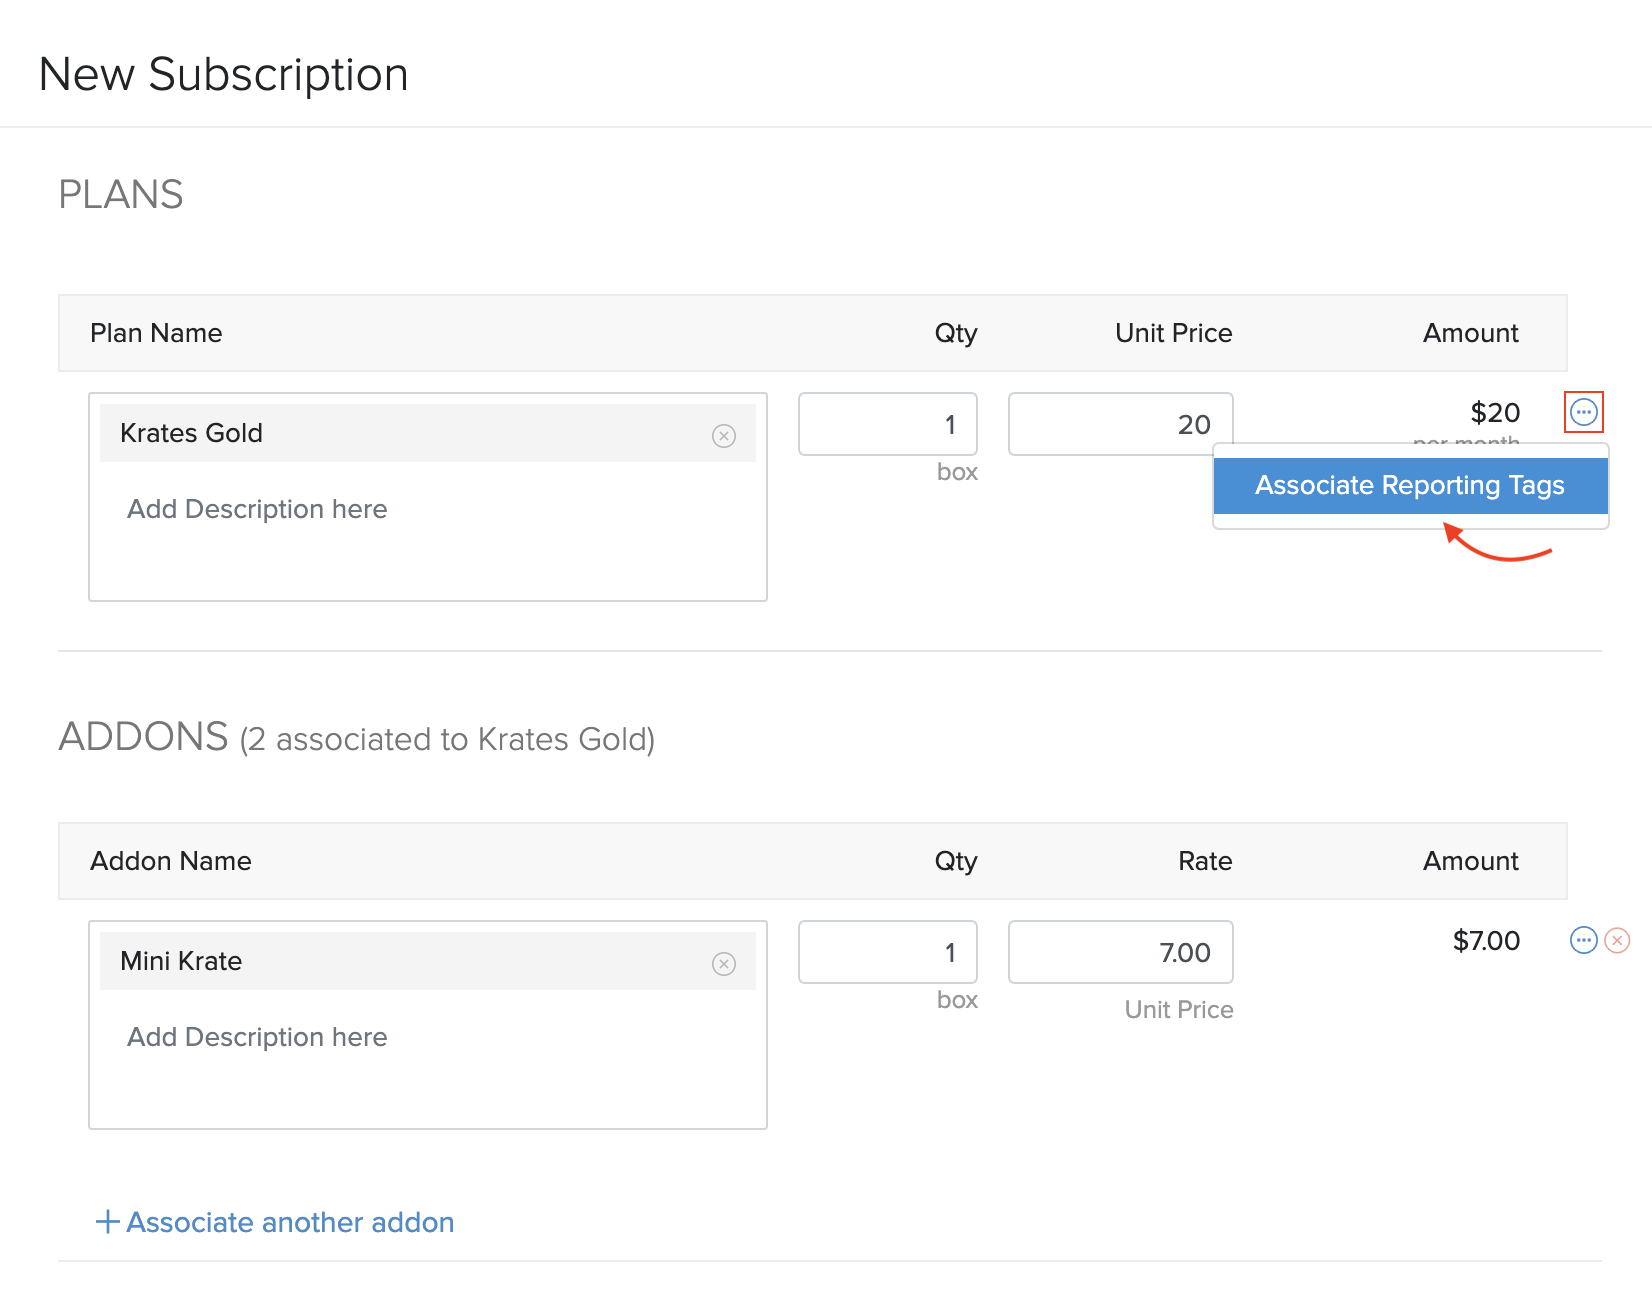
The reporting tags that you’ve associated with plans, add-ons and customers will be applied by default whenever new subscriptions are created. However, these tags may not be applicable for every business scenario. For such cases, you can customize reporting tags for plans and add-ons at the line-item level while creating a subscription. To do this:
- Go to the Subscriptions module from the left sidebar.
- Click + New Subscription or select an existing subscription and click Edit.
Click the More (ellipses) button next to the add-on or plan.
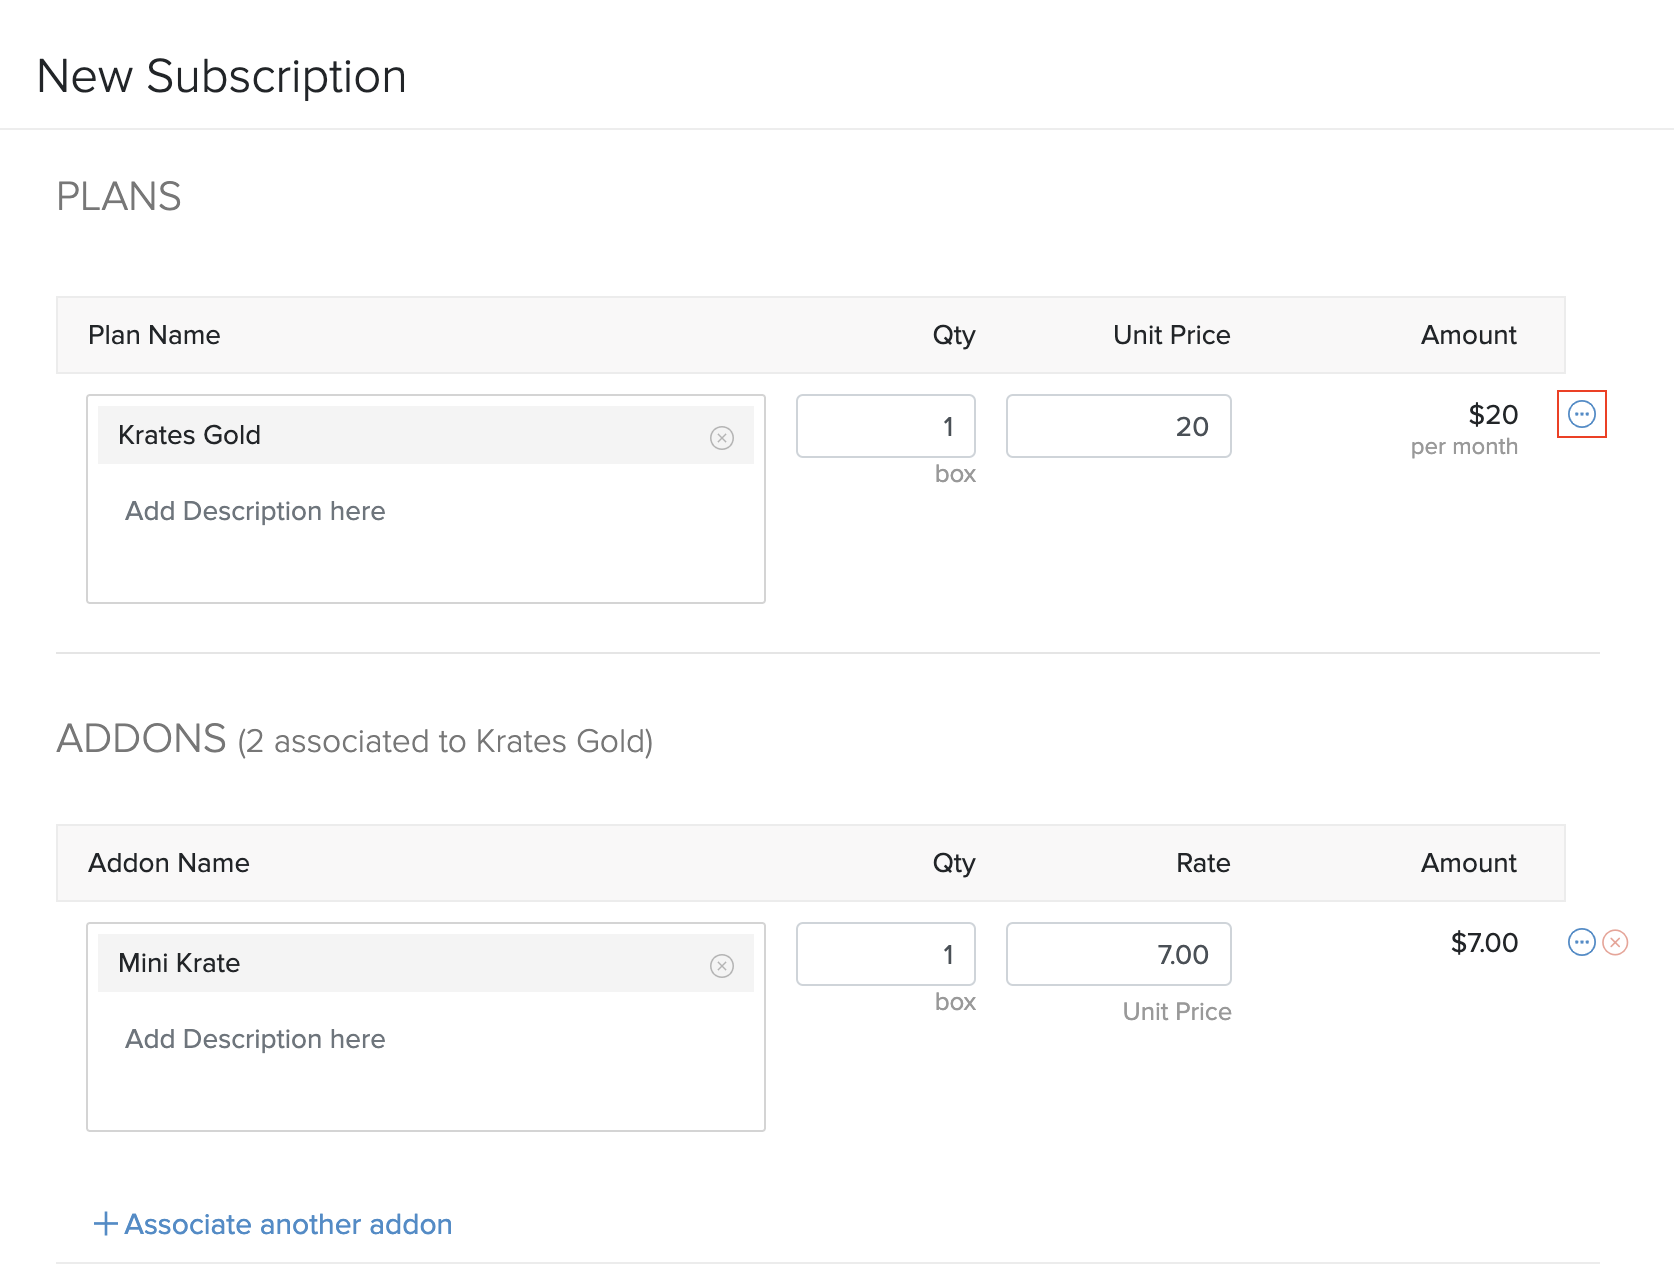
Click Associate Reporting Tags to associate or remove reporting tags.
Click Update.
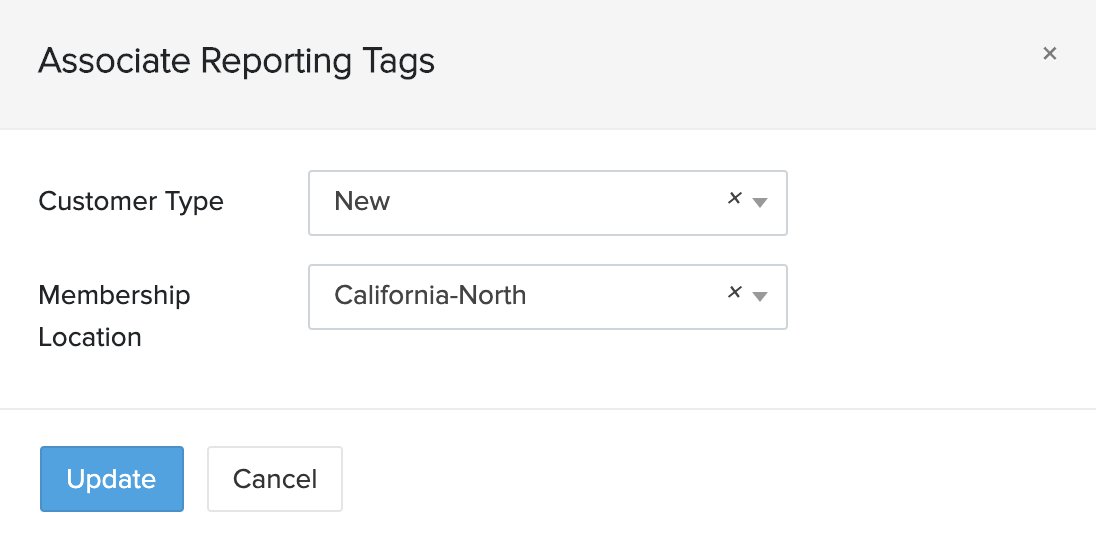
The reporting tags that you update at the line-item level while creating subscriptions will replace the default reporting tags (if any) and will be used for that subscription alone.
Associate Reporting Tags to Pending Invoices (Metered Billing)
If you’ve enabled Metered Billing for your organization, you can customize the reporting tags for line-items in pending invoices.
To do this:
- Go to the Invoices module from the left sidebar.
- Select a pending invoice and click Edit.
- Click the More (ellipses) button next to the line-item.
- Click Associate Reporting Tags to associate or remove reporting tags.
- Click Update.
Insight: You can only customize reporting tags for the additional line-items that were added to a pending invoice. i.e, you cannot customize the reporting tags for the original subscription related charges that were included when the pending invoice was first raised.
Associate Reporting Tags for One-time Add-ons and Additional Charges
You can associate reporting tags at the line-item level while creating transactions for one-time add-ons and additional charges.
To associate reporting tags with one-time add-ons:
- Go to the Subscriptions module from the left sidebar.
- Select a subscription and click the More dropdown in the top right.
- Click Add Onetime Addon.
Select an add-on and click the More (ellipses) button next to the Amount column.
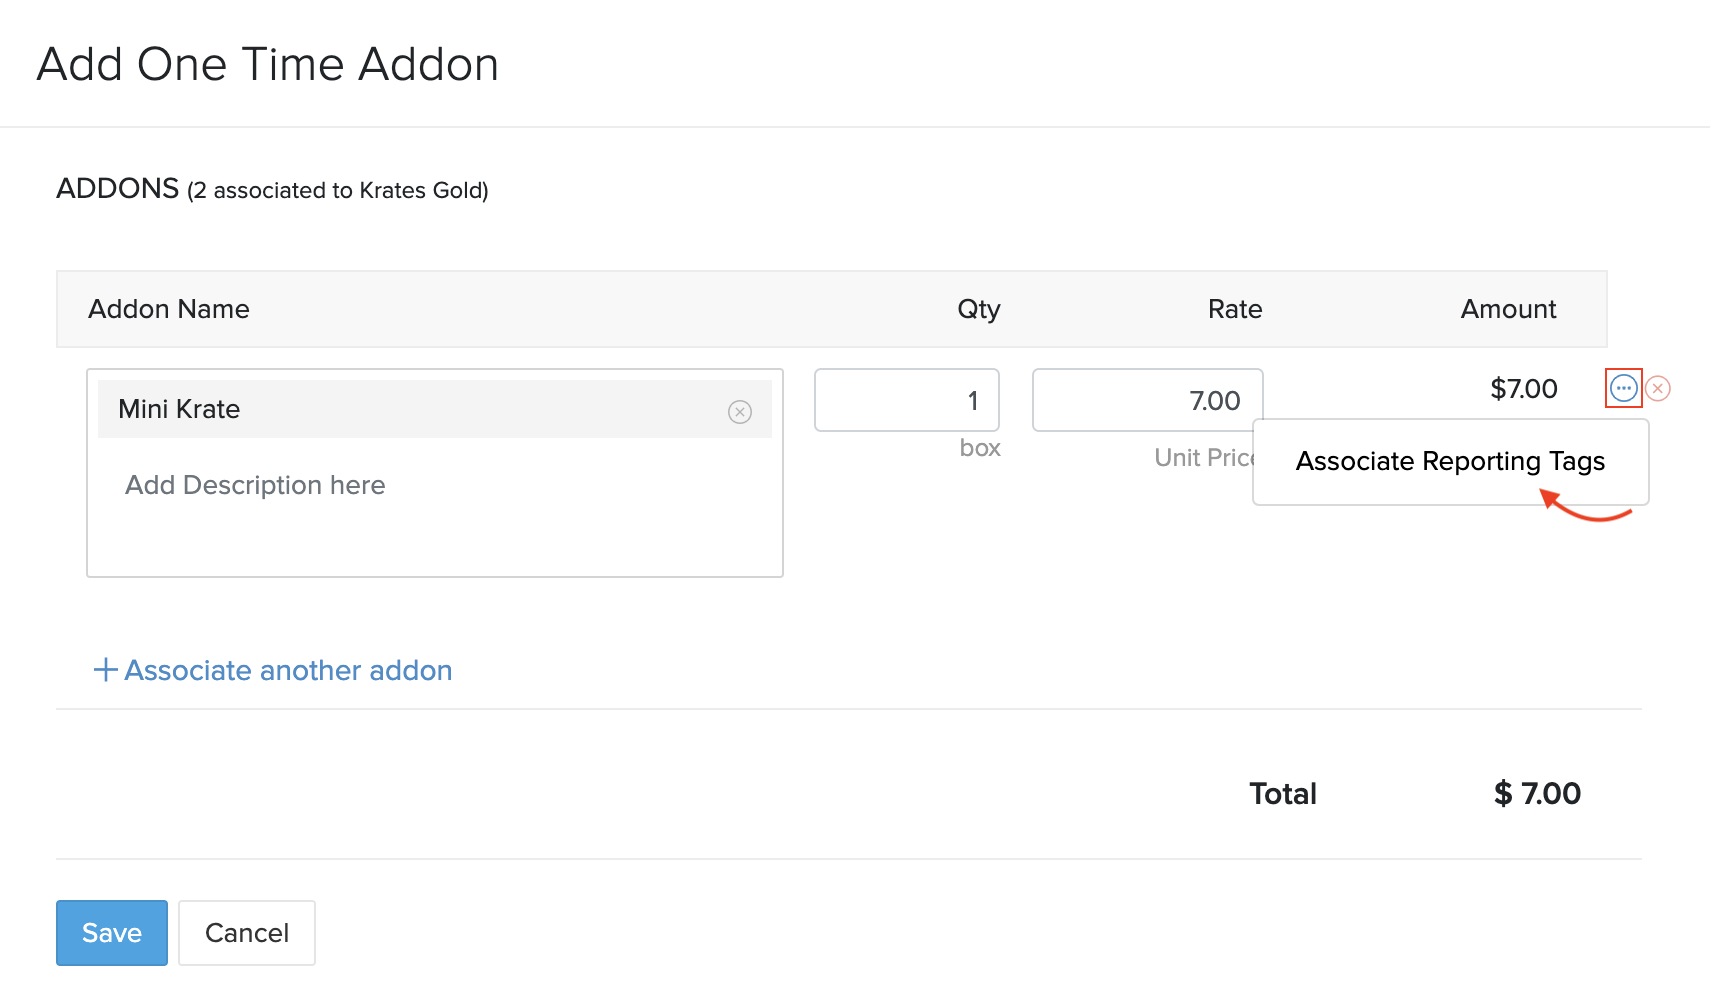
Click Associate Reporting Tags to associate or remove reporting tags.

Click Update.
To associate reporting tags with additional charges:
- Go to the Subscriptions module from the left sidebar.
- Select a subscription and click the More dropdown in the top right.
- Click Add Charge.
Associate or remove reporting tags under the Reporting Tags section.
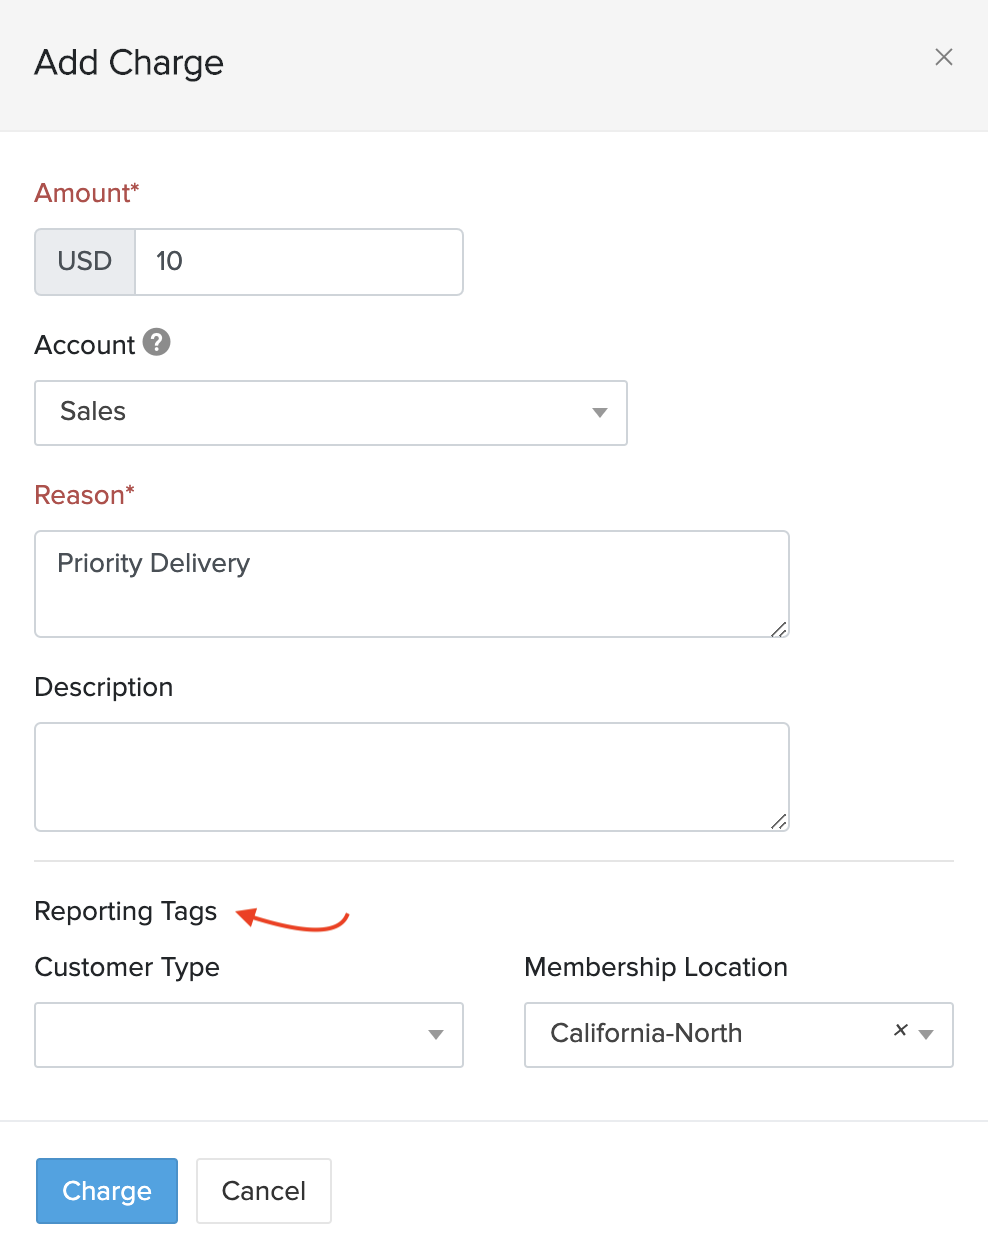
Click Charge.
Generating Reports with Reporting Tags
You can make use of the reporting tags that you associated with transactions by generating reports based on them. In Zoho Subscriptions, you can do this for the Sales by Plan and Sales by Add-on reports. Here’s how:
- Go to the Reports module from the left sidebar.
- Select the Sales by Plan or Sales by Addon reports under the Sales section.
Click Customize Report.

Select a value for the reporting tags that you want to use to customize the report. You can also select multiple values for a reporting tag, if required.
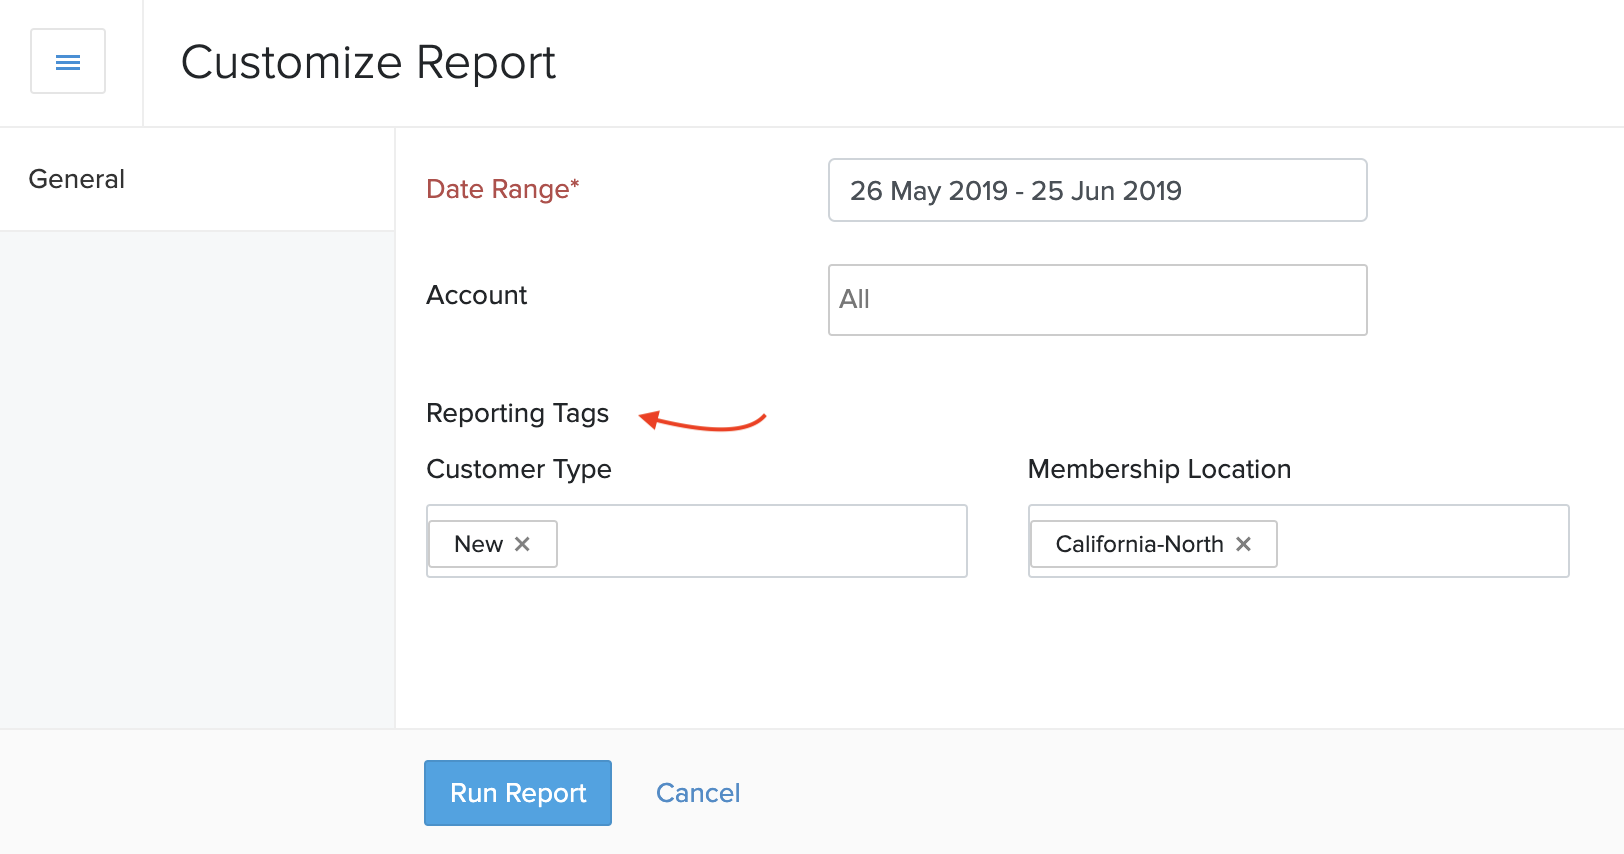
Click Run Report.
Now, the report will be generated based on transactions or customers that have been associated with the reporting tags that you selected.
Any transactions or customers that are associated with reporting tags in Zoho Subscriptions will turn up in applicable reports generated in Zoho Books as well.

 Yes
Yes Thank you for your feedback!
