This help page is for users in Creator 5. If you are in the newer version (Creator 6), click here. Know your Creator version.
Prerequisites for code signing iOS app for users
To enable your users install your Zoho Creator application as a native app on their iOS device, Apple mandates that you have to code sign your application using the certificates from the Apple Developer Enterprise Program. Code signing your app for iOS has prerequisites:
- Enrolling in the Apple Developer Enterprise Program
- Creating a p12 file
- Creating an App ID
- Creating an APNs p12 file
- Creating a Profile
1. Enroll in the Apple Developer Enterprise Program
- Visit the Apple Developer Program web page.
- Click the Enroll button at the top.
- Read through the What You Need to Enroll content then click the Start Your Enrollment button.
- Sign in using your Apple ID. Create an Apple ID if you do not have one, then follow steps 1-3 again.
- Agree to the legal agreement then click the Submit button.
- Select Entity Type, read the guidelines, then click Continue.
- Enter the required information then click Continue.
- Make a payment and get verified from Apple.
2. Create a p12 file
- Go to Keychain Access in your Mac.
- Click Keychain Access in the top menu bar.
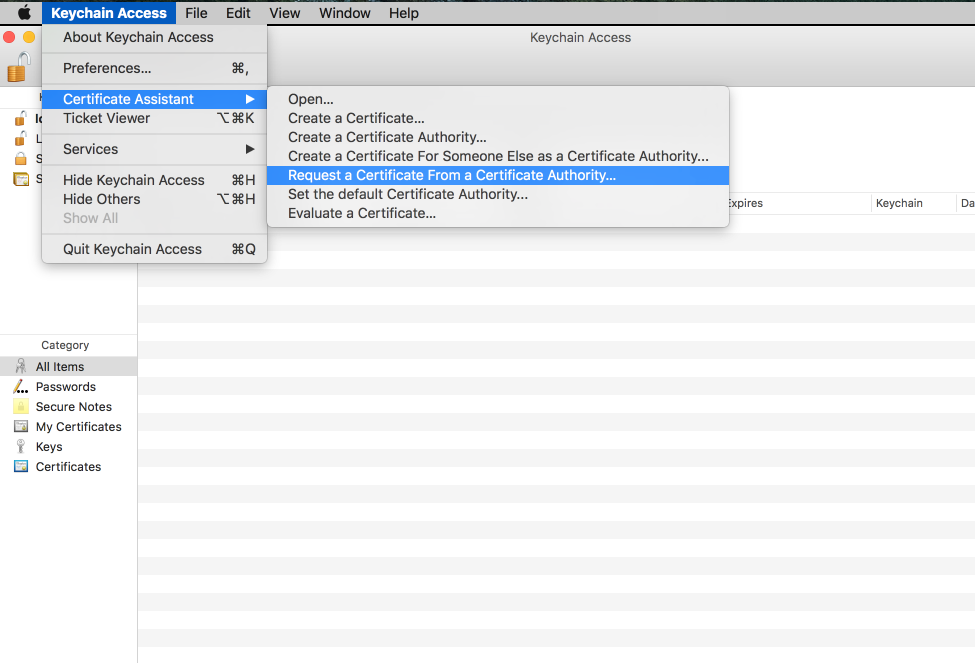
- Select Certificate Assistant, then select Request a Certificate from a Certificate Authority:
- Enter your email address in the User Email Address field.
- Create a name for your private key in the Common Name field.
Note: Leave the CA Email Address field empty.
- Select the Saved to disk option in the Request is group.
- Click Continue to complete the CSR generation process. The (. certSigningRequest) file will be saved on the desktop by default.
- Go to your Apple Developer's Account page.
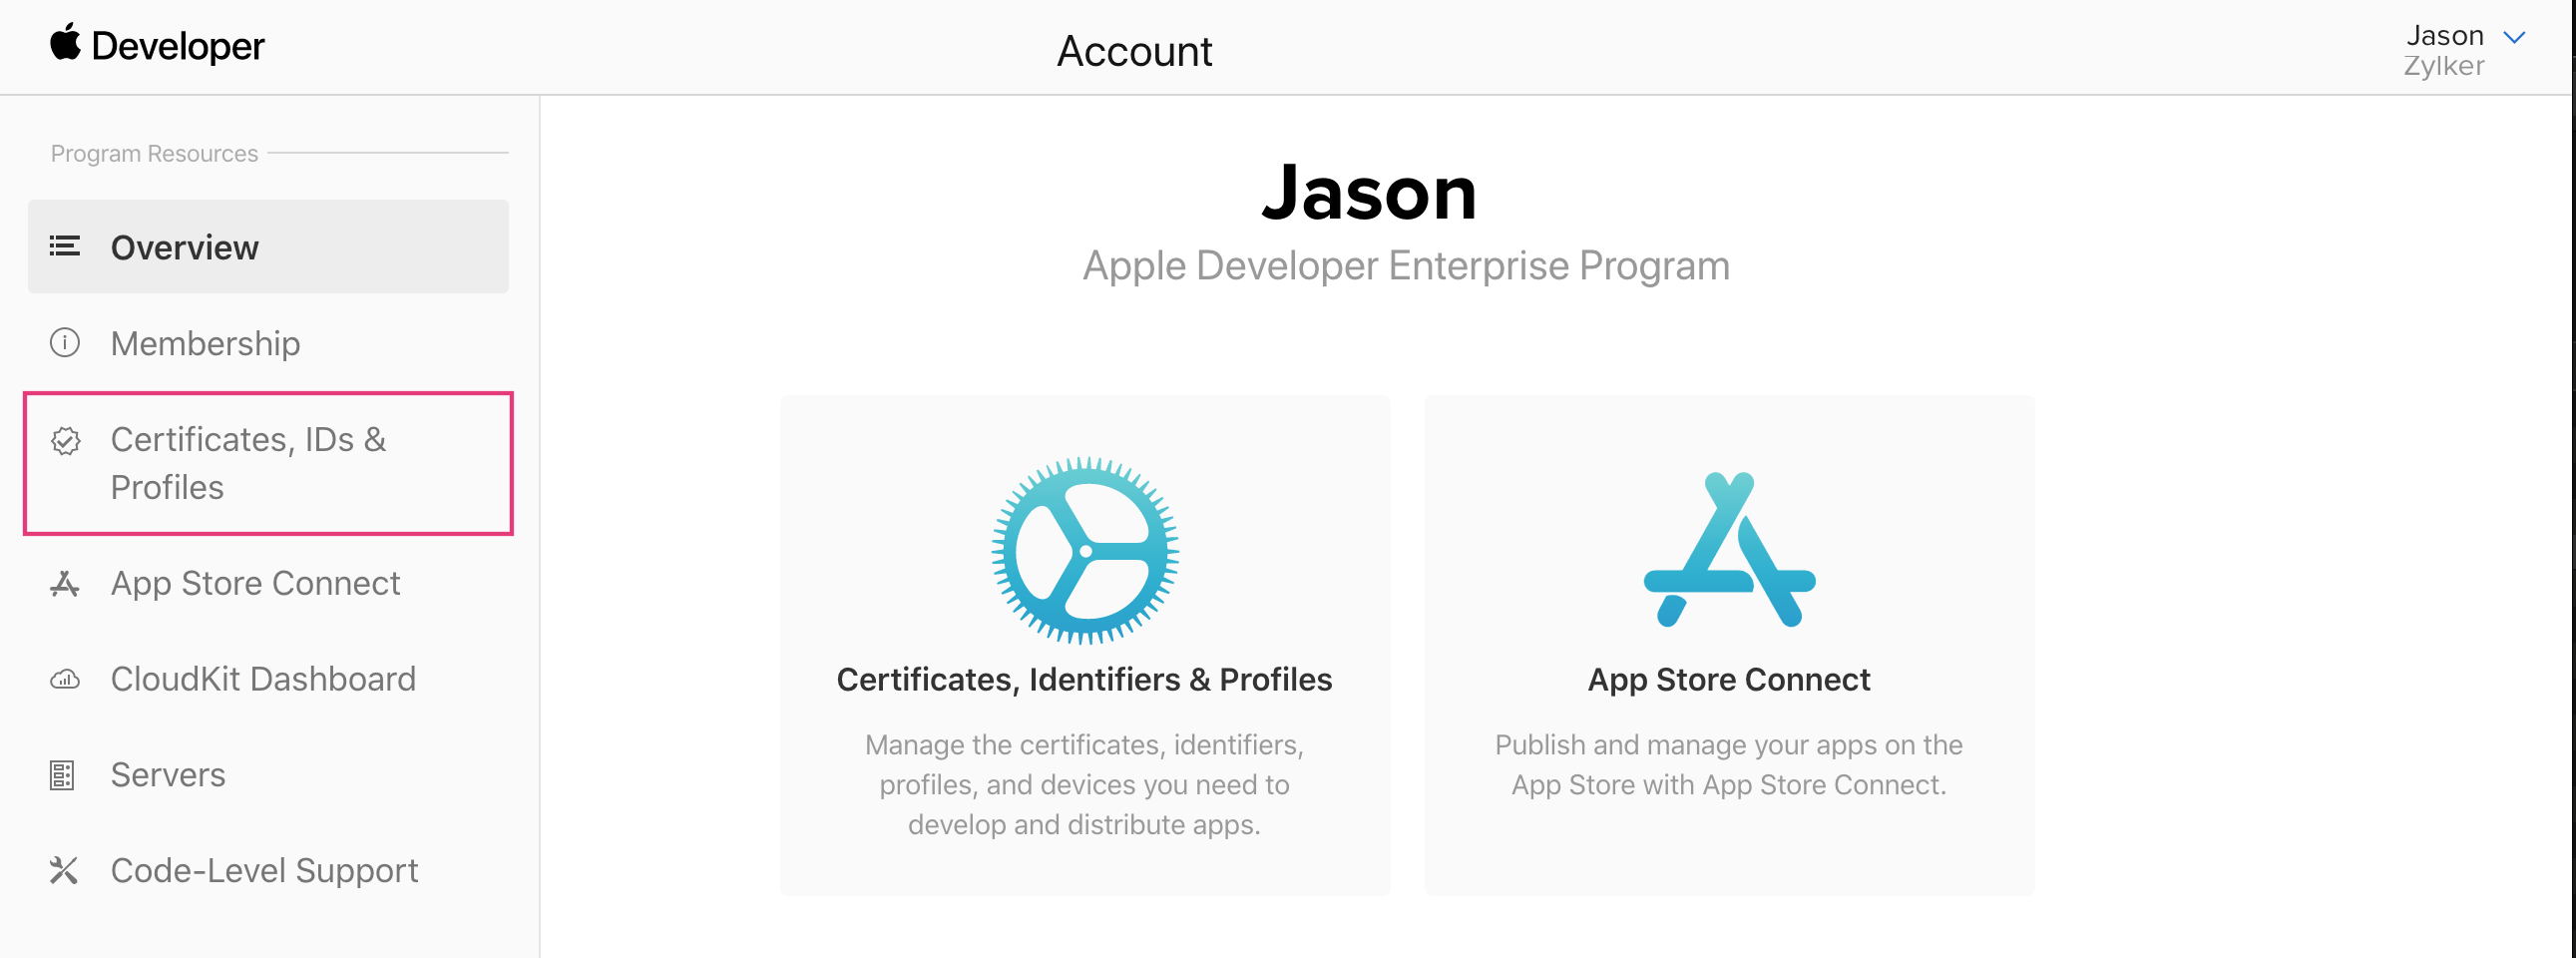
- Navigate to the Certificates, IDs & Profiles page:
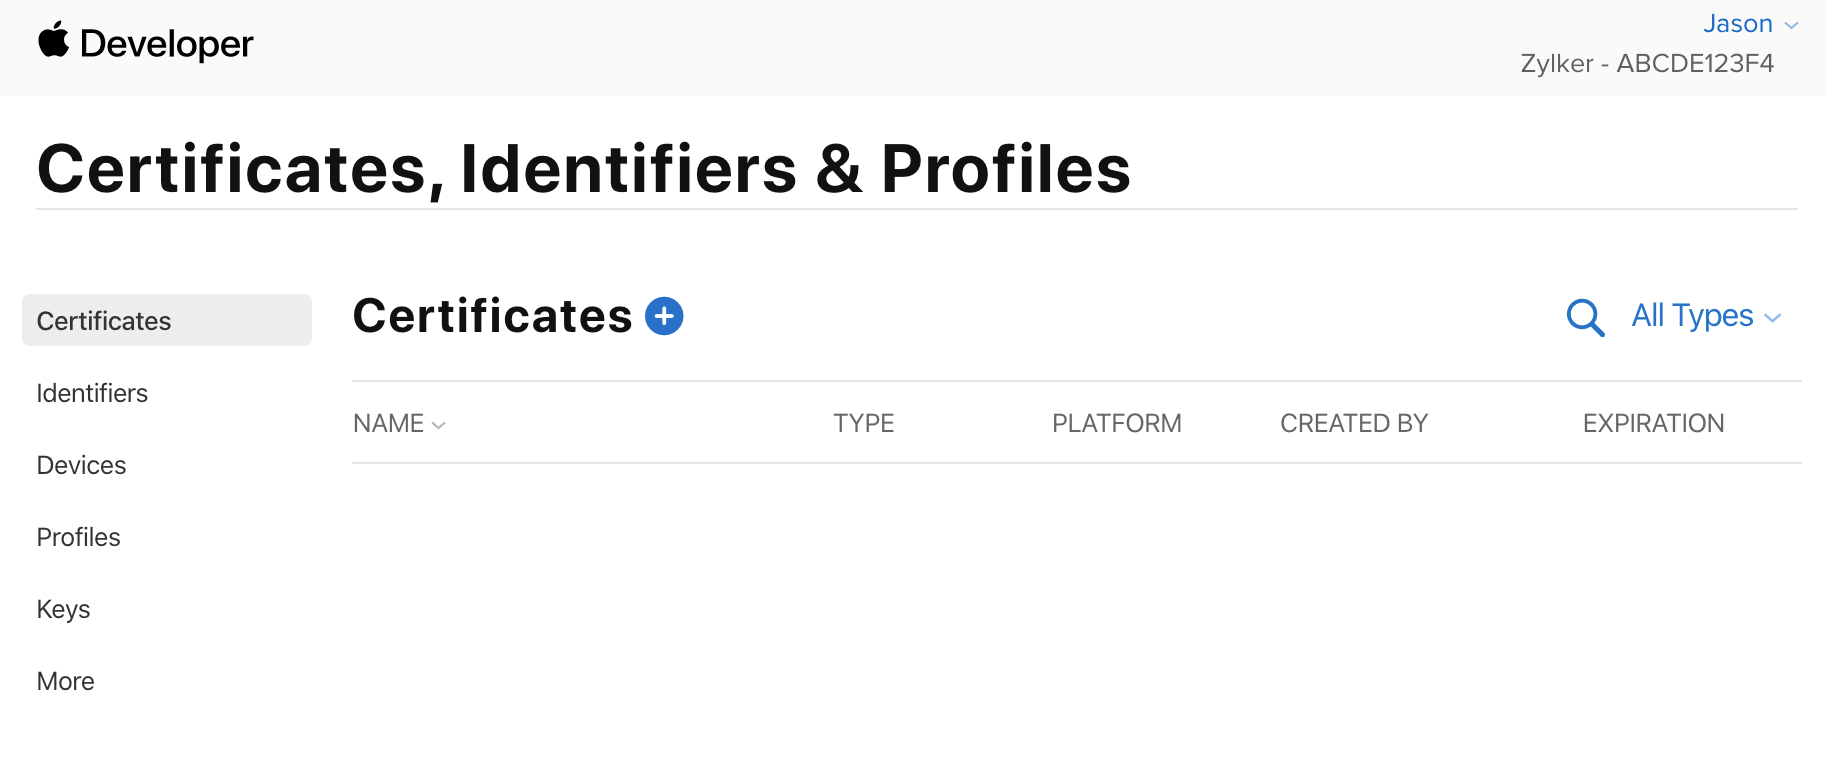
- Navigate to the Certificates page, then click the create button:
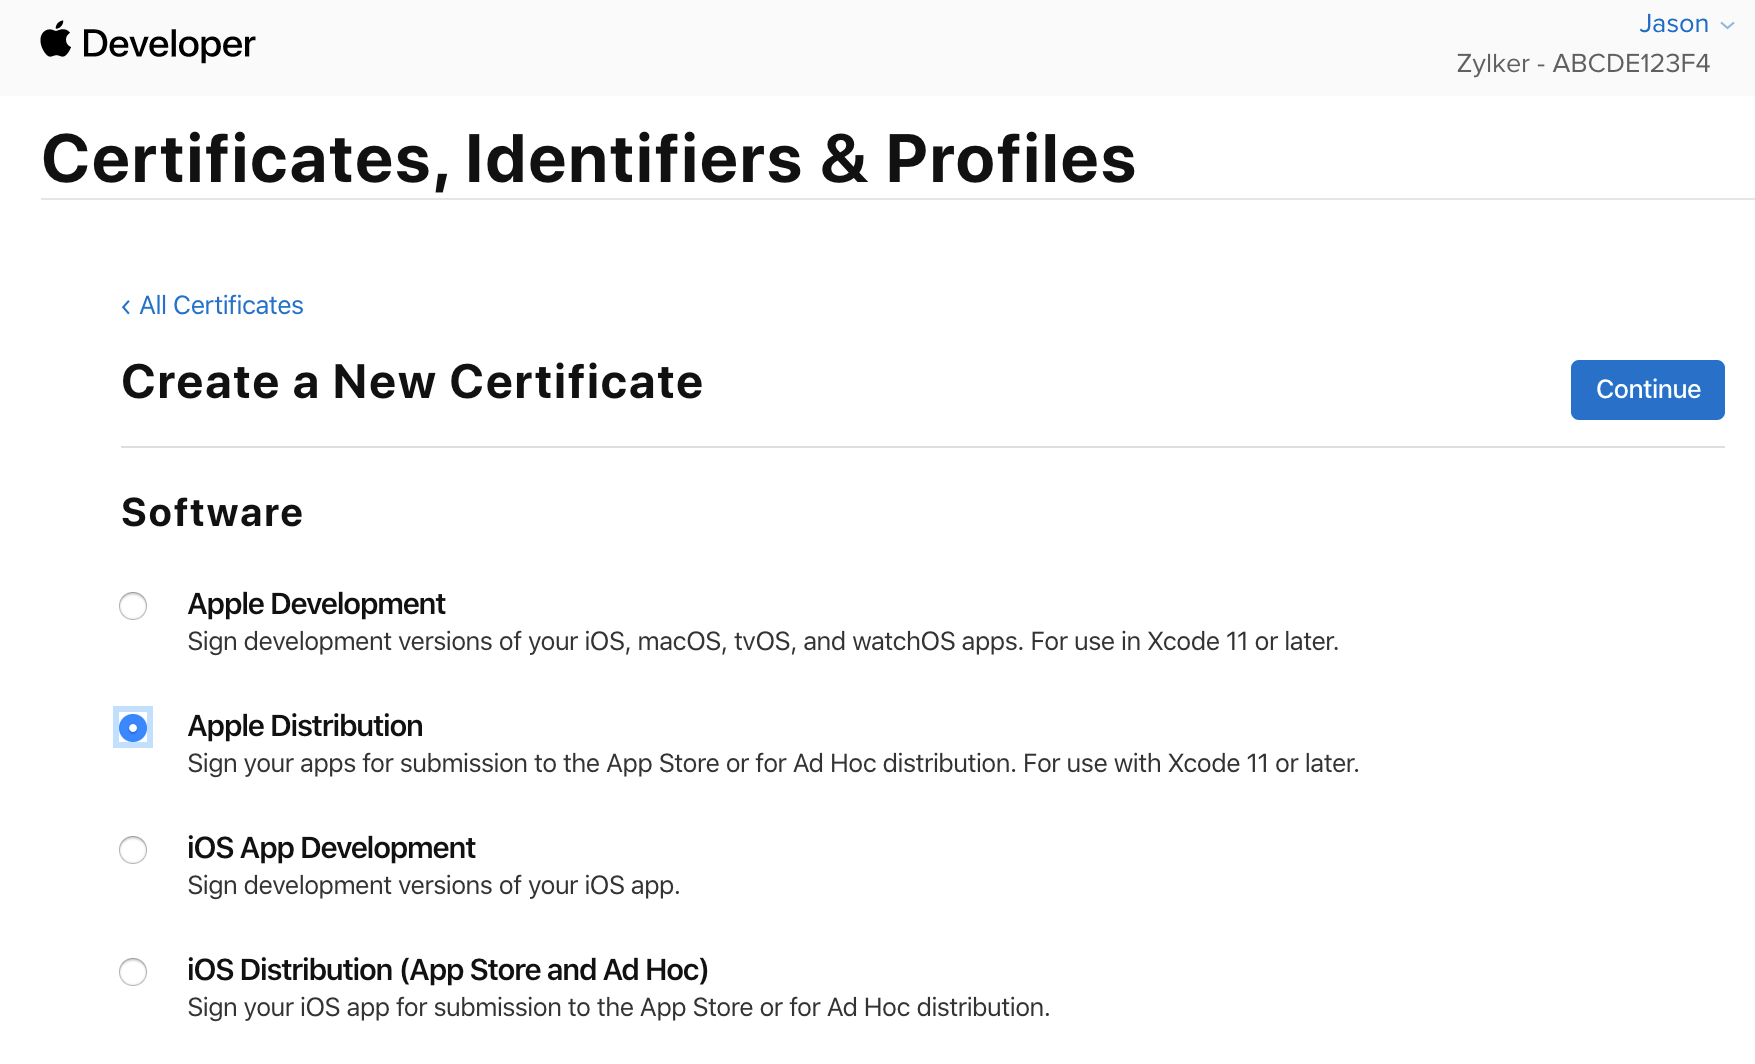
- Select Apple Distribution, then click Continue:
- Upload the .certSigningRequest file mentioned in step 7, then click Continue.
- Download the certificate and open it.
- Go to Keychain Access on your Mac.
- Select My certificates under Category in the bottom-left pane. The certificate you downloaded along with a private key will be available in the right pane.
- Control-click then select Export.
- Create a password for the file and remember the same for future use.
- Download the p12 file.
3. Create an App ID
- Go to your Apple Developer's Account page.
- Navigate to the Certificates, IDs & Profiles page.
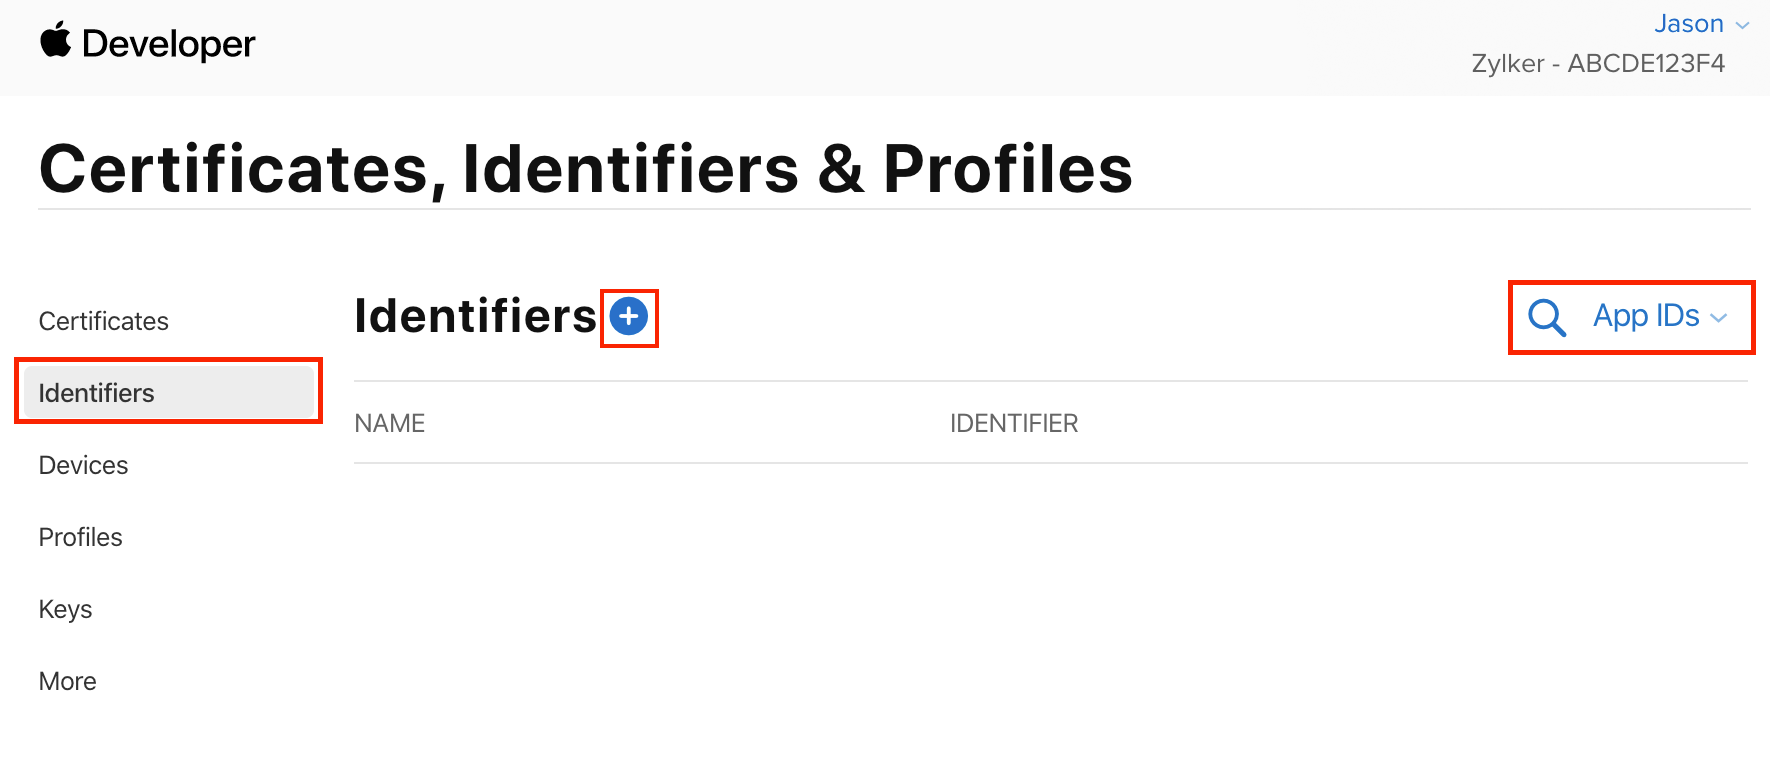
- Navigate to the Identifiers page, select App IDs in the dropdown near the top-right, then click the create button:
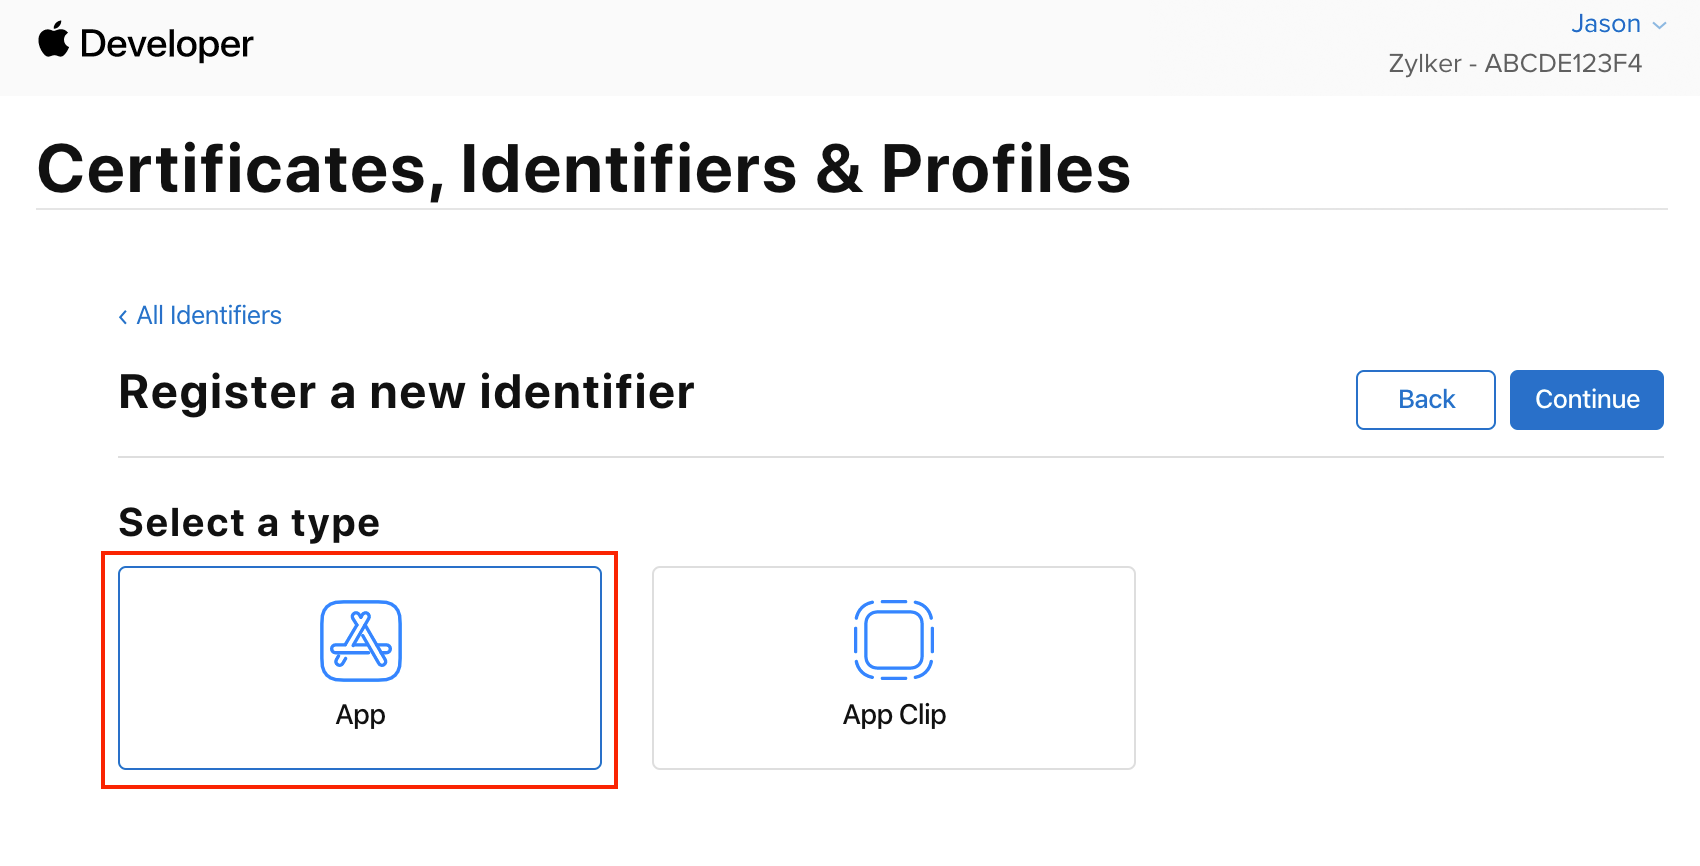
- Select App as the identifier type, then click Continue:
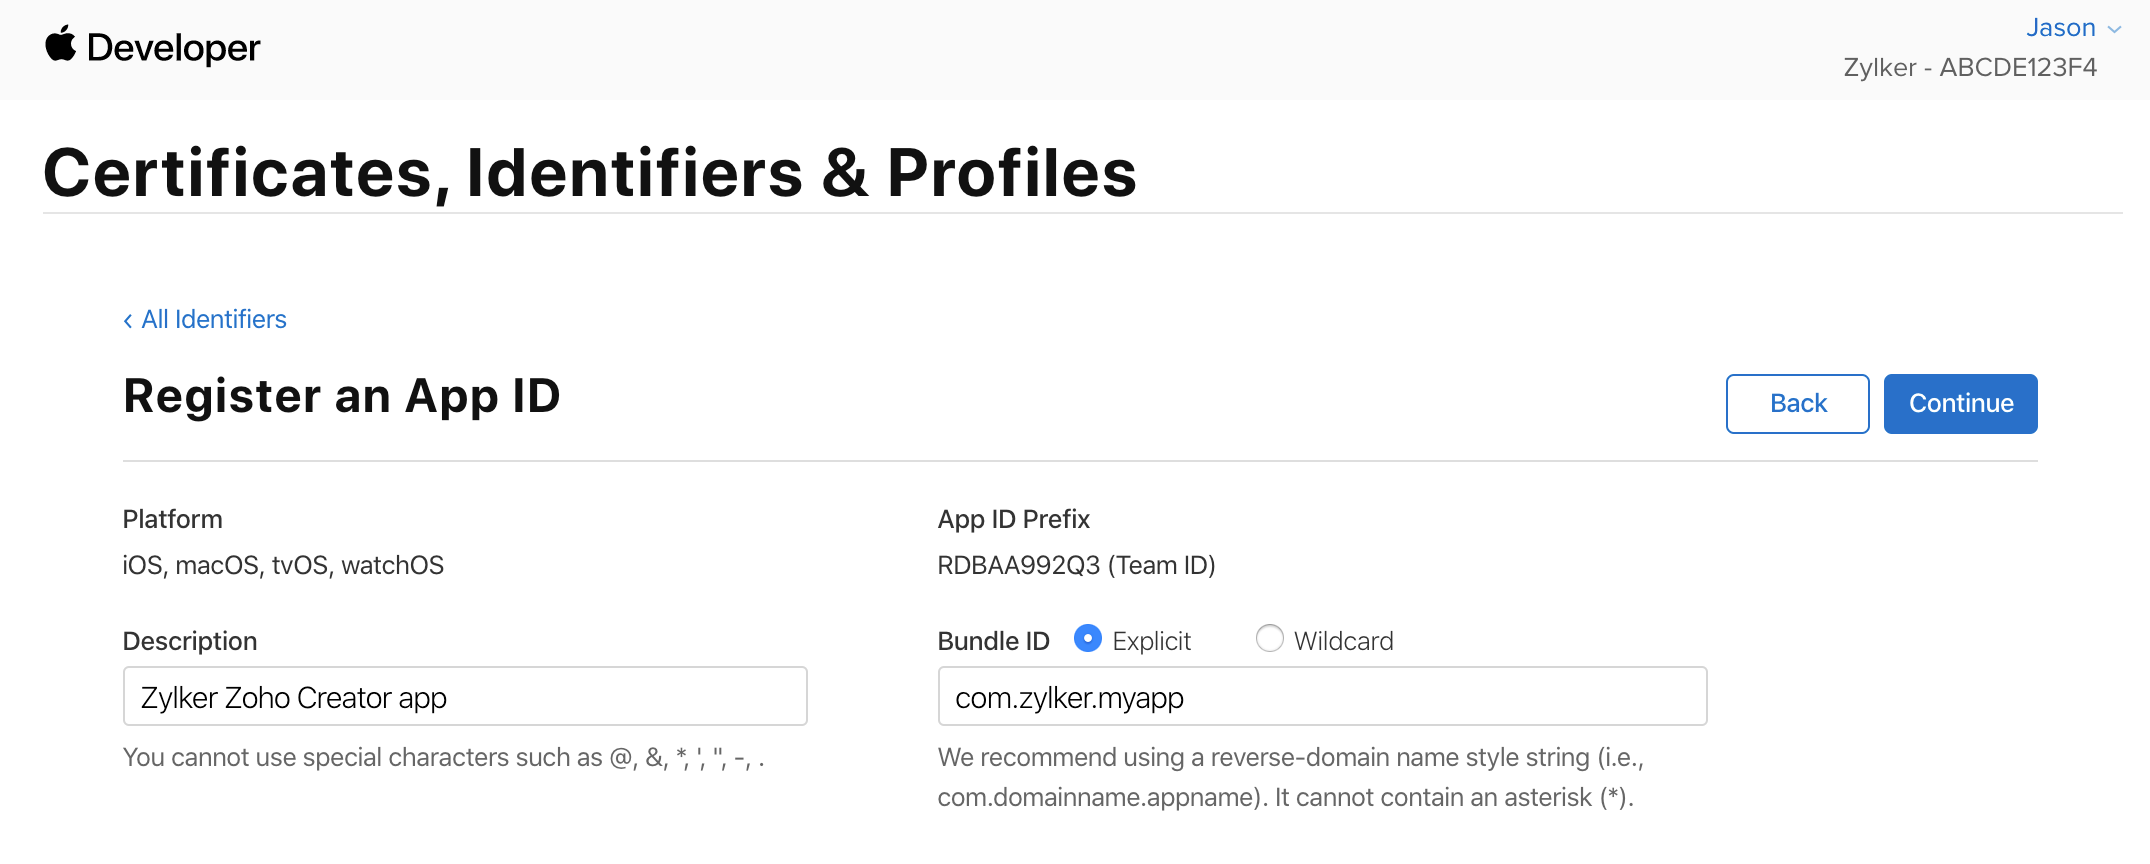
- Select Explicit, then enter the Bundle ID and Description (optional) for your iOS app, and then click Continue:
- Confirm your App ID details, then click Register.
4. Create an APNs p12 file
- Go to Keychain Access in your Mac.
- Click Keychain Access in the top menu bar.
- Select Certificate Assistant, then select Request a Certificate from a Certificate Authority:

- Enter your email address in the User Email Address field.
- Create a name for your private key in the Common Name field.
Note: Leave the CA Email Address field empty.
- Select the Saved to disk option in the Request is group.
- Click Continue to complete the CSR generating process. The (.certSigningRequest) file will be saved on the desktop by default.
- Go to your Apple Developer's Account page.
- Navigate to the Certificates, IDs & Profiles page:

- Go to the Identifiers page.
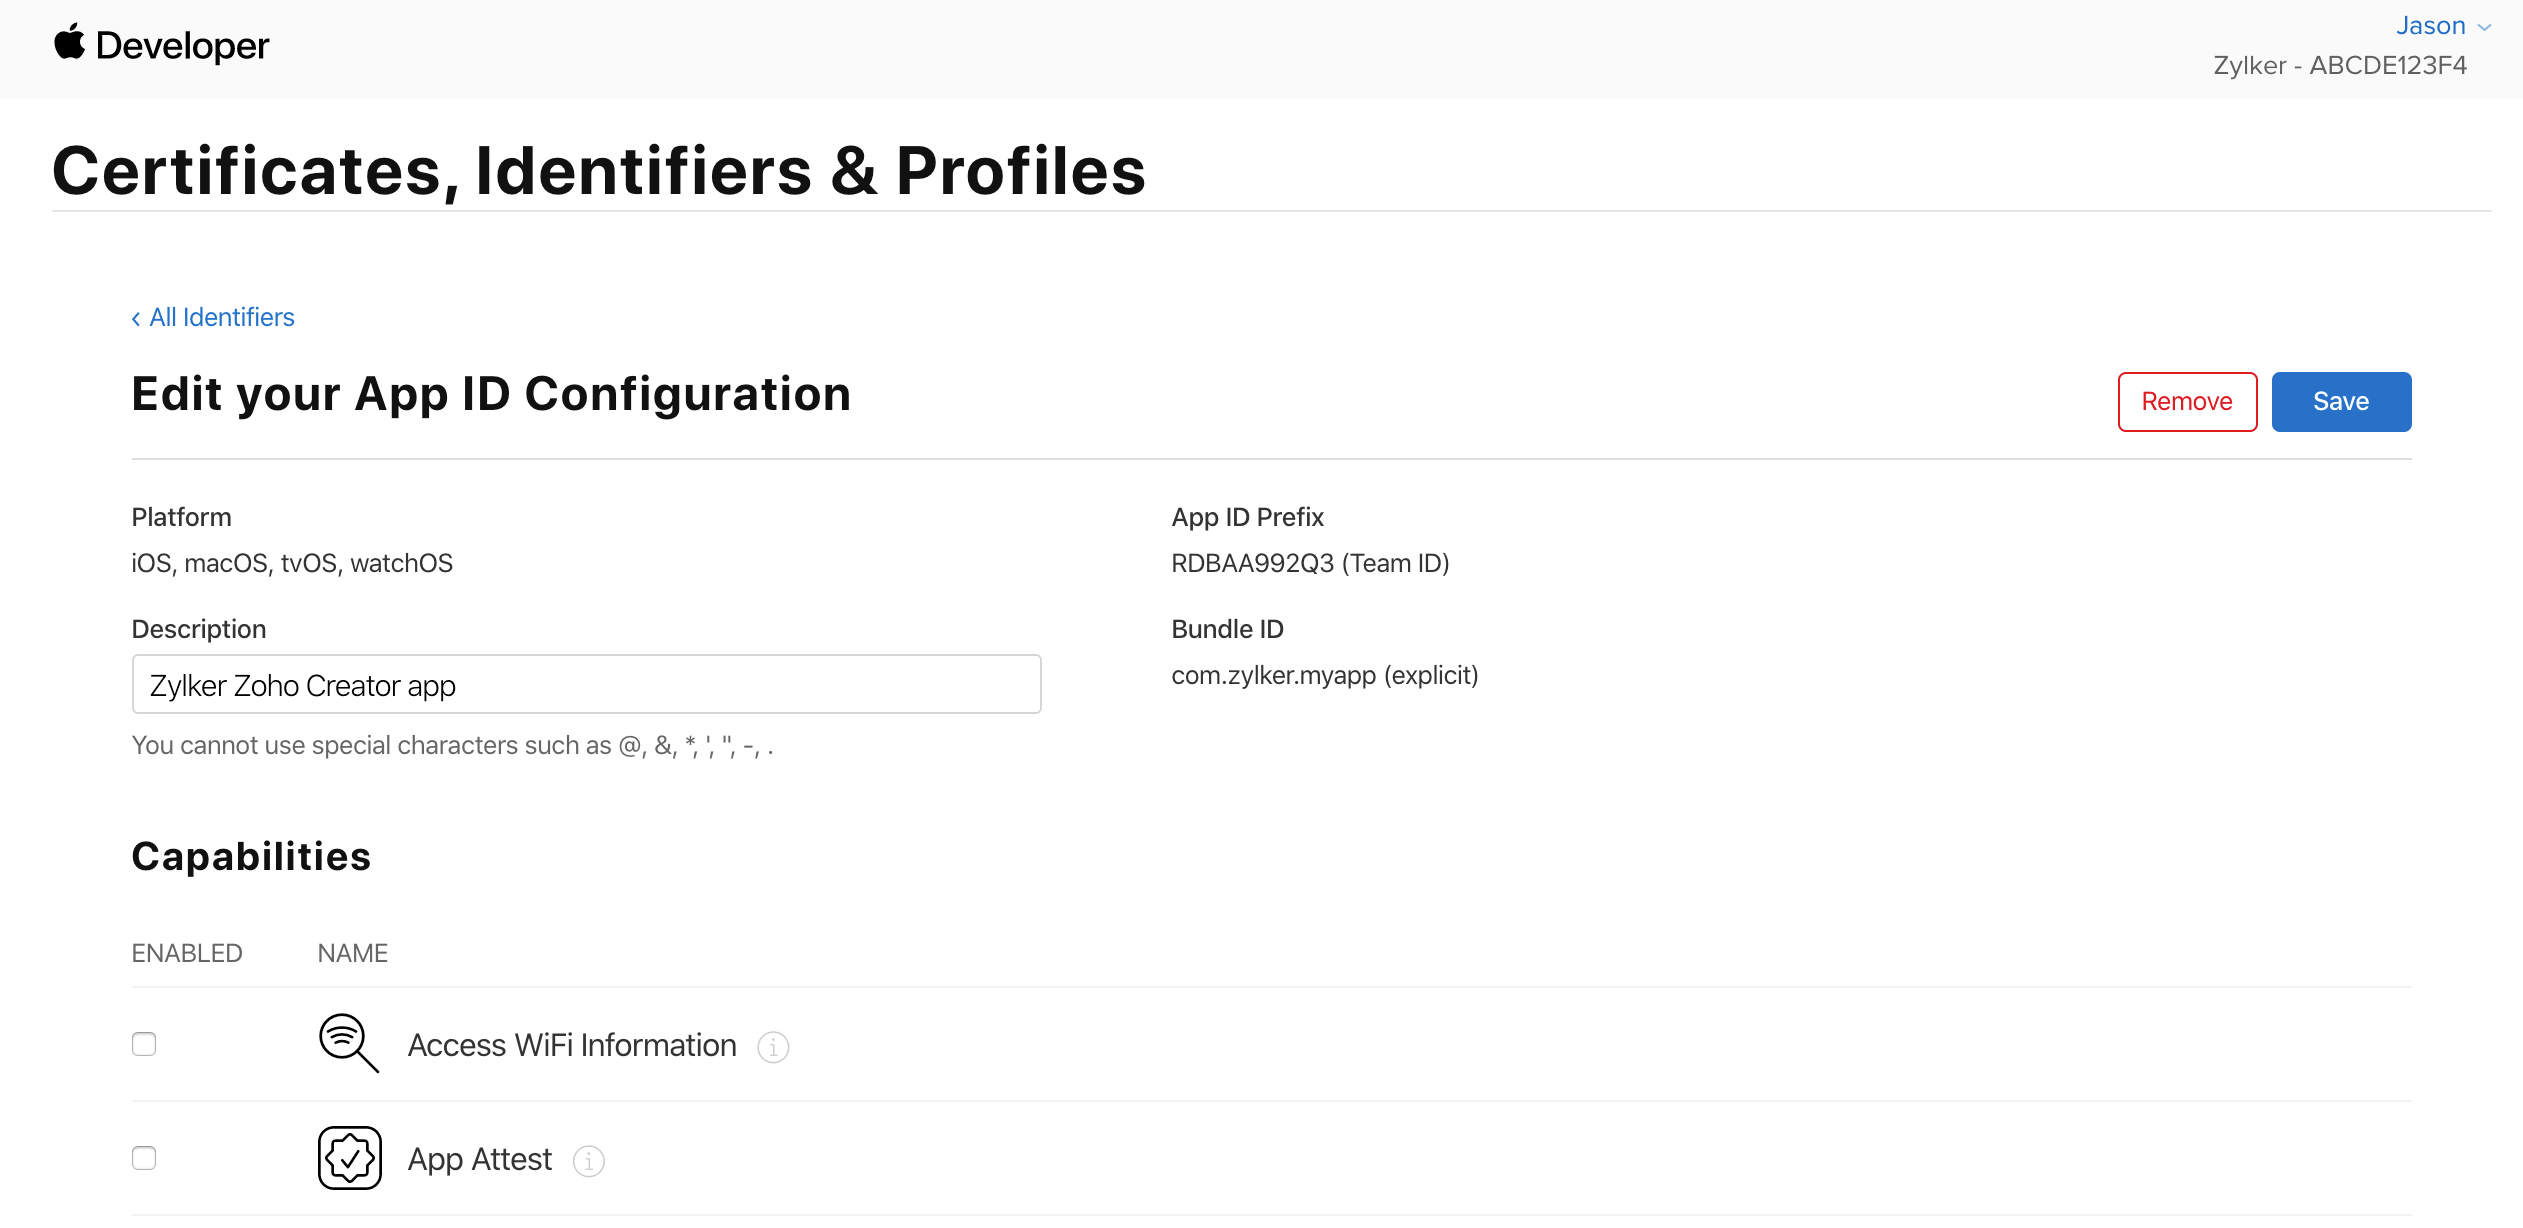
- Select the App ID that you created in the previous section. You'll then get to edit your app ID configuration.
- Check the Push Notifications checkbox under the Capabilities section, then click Save:
- Click Create Certificate under the Production SSL Certificate section, then click Done:
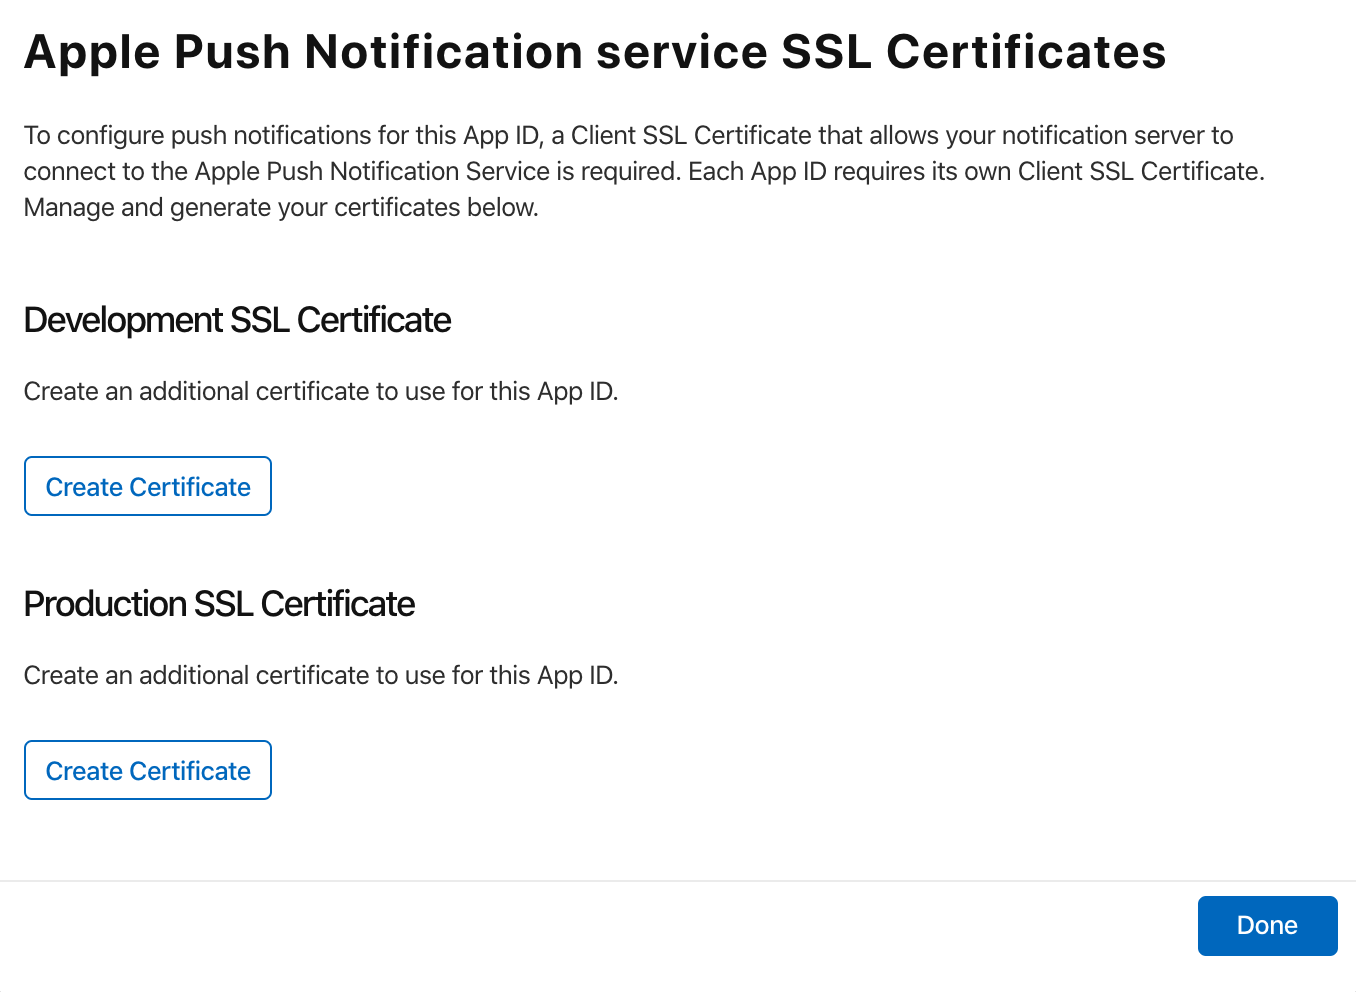
- Click Continue.
- Upload the .certSigningRequest that you downloaded in step 7 of this section, then click Continue.
- Download the certificate and open it.
- Go to Keychain Access in your Mac.
- Select My certificates under Category in the bottom-left pane. The certificate you downloaded along with a private key will be available in the right pane.
- Control-click and select Export.
- Create a password for the file and remember the same for future use.
- Download the p12 file. This will be your iOS app's APNs p12 file.
5. Create a Profile
- Go to your Apple Developer's Account page.
- Navigate to the Certificates, IDs & Profiles page.
- Navigate to the Profiles page, then click the Create button.
- Select Inhouse under the Distribution section, then click Continue.
- Select App ID that you created previously, then click Continue.
- Choose the certificate you set up in the first phase.
- Enter a name for the provisioning profile (for your reference).
- Download the file.


