Item Preferences
Let’s have a look at the various settings you can configure for the Items module in Zoho Invoice.
To go to Item Preferences:
- Click the Gear icon in the top-right corner of the window to open Settings.
- Select Preferences.
- Select Items in the left menu.

Alternatively, if you’re in the Items module, you can directly go to Item Preferences by clicking the Settings icon in the top-right corner.
![]()
IN THIS PAGE…
Set a Decimal Value for Item Quantity
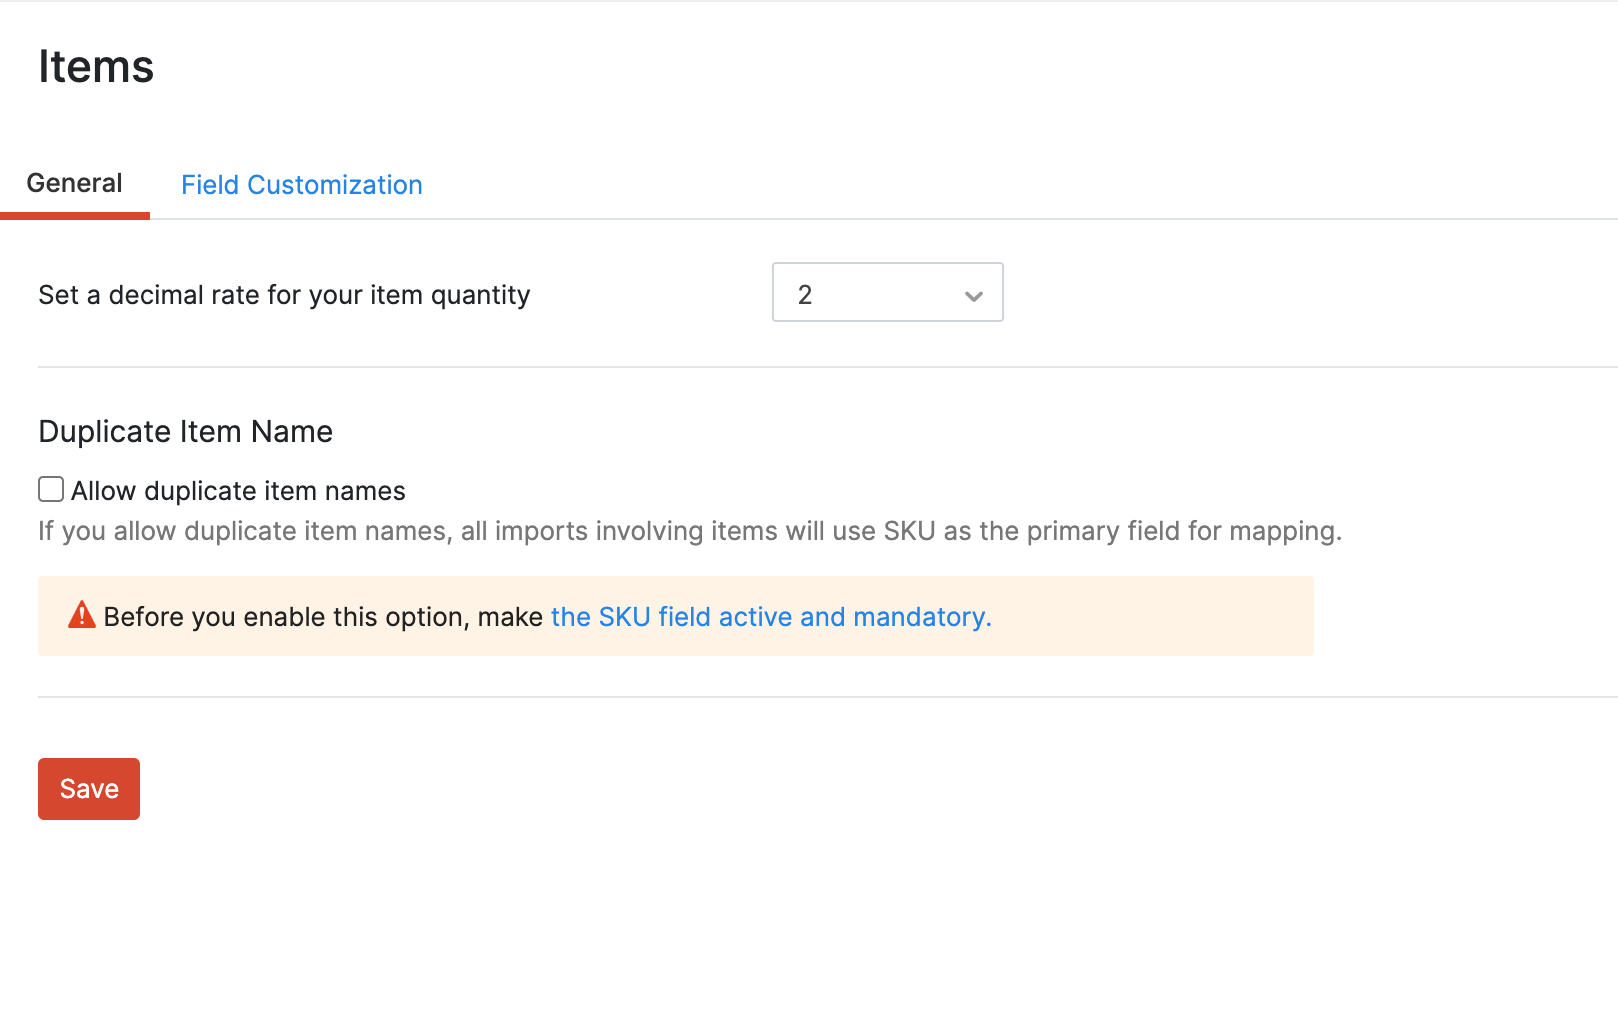
The decimal rate for item quantity comes into play when you are creating transactions (like invoices). By default, this rate is two. You can select any decimal rate of your choice.
Allow Duplicate Item Names
Enable this option if you want to create multiple items with the same name in Zoho Invoice. To enable this option, the SKU custom field should be made Active and Mandatory.
Once this option is enabled, the item’s SKU will be used to uniquely identify the item.
HSN Code
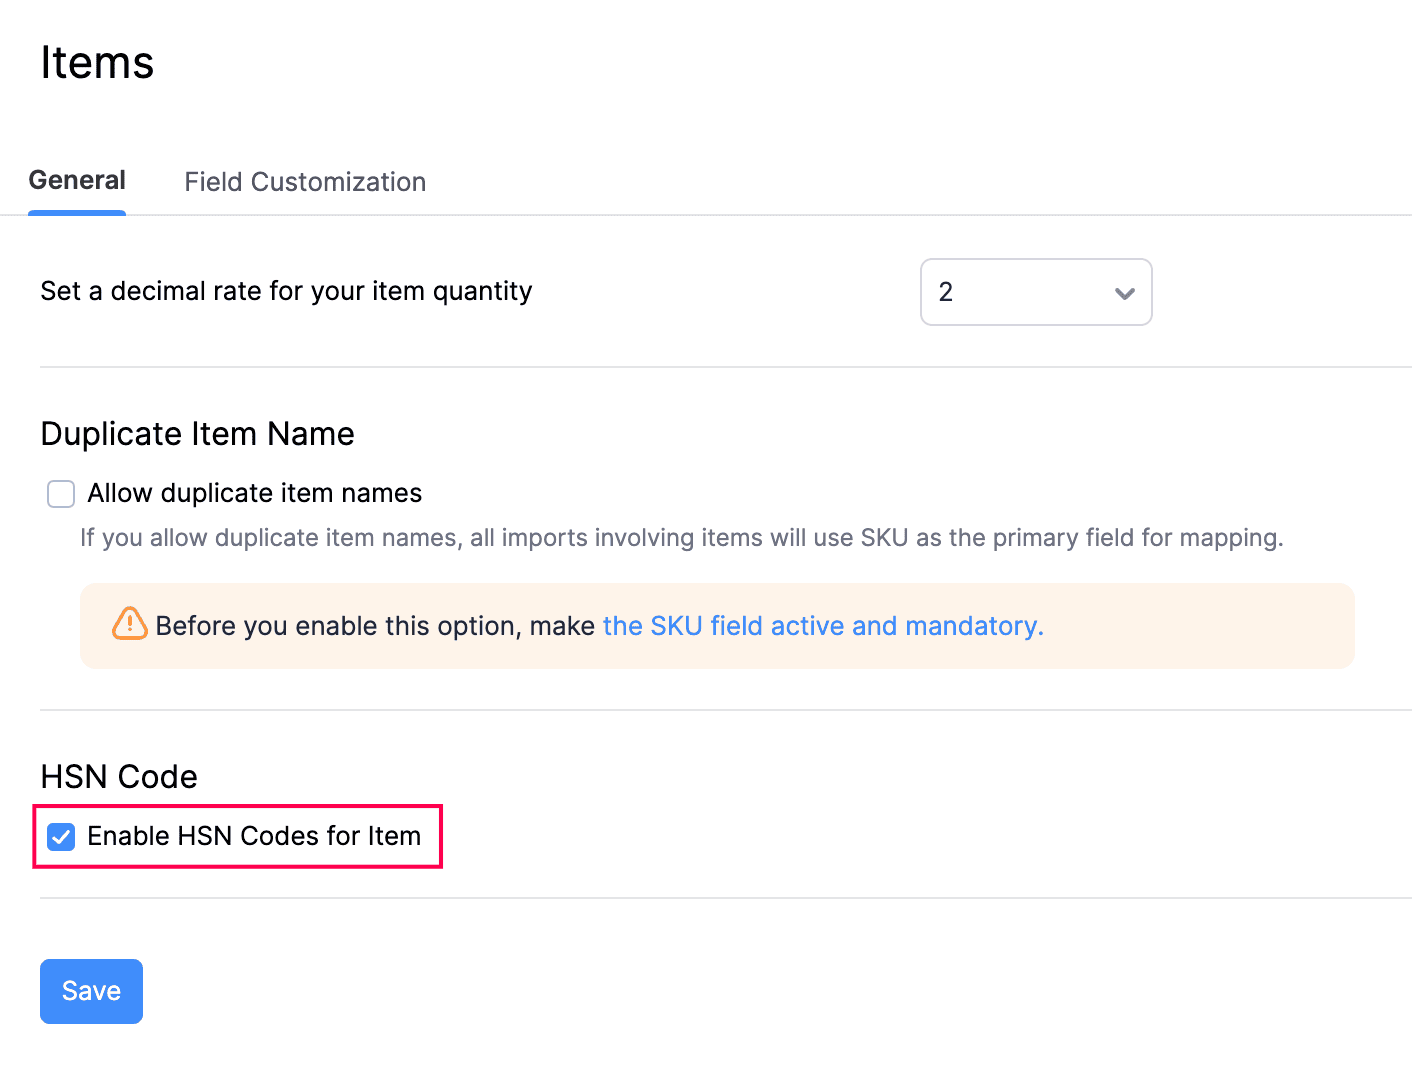
HSN Code (Harmonised System of Nomenclature) is a 6-digit code used to classify items based on well-established rules accepted worldwide. This code was developed by the World Customs Organisation (WCO) to enable efficient international trade between organizations.
You should enable HSN codes for your organization to assign them to your items. Here’s how:
-
Go to Settings from the top-right corner.
-
Click Items.
-
Mark the Enable HSN Codes for Item option under HSN Code.

Now, you can assign a HSN code for an item. Here’s how:
- Go to Items from the left sidebar.
- Click + New in the top-right corner.
- Enter the necessary details.
- You can enter the HSN Code or click the Search icon next to it.
- In the popup, enter the description of your item and the corresponding HSN code will be displayed.
- Select the relevant HSN code item and click Save.
You’ve now assigned a HSN code to the item.
Custom Fields
Custom Fields are fields that you can manually add to the item creation page to store additional information about the item.
Let’s take a look at how Custom Fields can be helpful with the help of an example.
Scenario: David sells beds which are of different sizes to his customers. He wants to store their specifications along with the item. So, David creates a Custom Field to enter the different sizes. The custom field is displayed in the item creation form where David enters the appropriate size and stores the relevant information.
Like David, you might want to create Custom Fields in different circumstances that are unique to your business. By default, there are a few Custom Fields available, like SKU and Item Image, which you can enable if needed.
To create a Custom Field:
- Go to Settings > Preferences > Items.
- Select the Field Customization tab.
- Click + New Custom Field in the top-right corner.
- Enter a Label Name for the custom field that you’re creating.
- Choose if the custom field should be a mandatory field or not.
- Click Save.
Learn more about Custom Fields.

 Thank you for your feedback!