Items
Items in Zoho Invoice are the goods and services you sell to your customers. You can add these goods and services as items to the Items module. Adding all the goods and services to the Items module allows you to quickly add the items to transactions. Let’s look at David’s business that sells furnitures to understand items.
Scenario: David has a furniture store. He sells goods like chairs, tables, sofas, beds etc to his customers. Also, he provides furniture repair services to his customers. Firstly, he creates each product and service he sells as an item in the Items module. After adding the items, he can easily use them to invoice his customers.
Adding Items
Adding all the products and services you sell as items in Zoho Invoice helps you to quickly add them to any transaction. Also, all the details pertaining to the item is auto populated in the transaction. Adding items is a one-time process and once you add all your items, you can effortlessly add items to an invoice and send them to your customers. There are two ways to add items in Zoho Invoice: creating new items and by importing items.
IN THIS PAGE…
Create New Items
To create a new item:
- Go to the Items module in the left sidebar.
- Click the + icon in the module name or the + New button in the top-right corner to create a new item.
- Select the Type as Product or Service depending on the item that you’re creating.
- Enter the item name. This name will be used when you add this item to any transaction.
- Enter the unit or select it from the Unit dropdown.
Insight: Unit is defined as a quantity which is chosen as a standard based on which other quantities can be expressed. Some examples of units are metre, kilogram, piece, device etc. These units are displayed along with quantity in a transaction.
- Enter the SKU (Stock Keeping Unit) for the item.
Insight: SKU is an identification code assigned to a product or a service to track the item. This code varies from business to business. Generally, you can enter the item’s bar code in this field and use a bar code scanner to scan the items.
Pro Tip: If you don’t find the SKU field in your item creation page, you can enable it in the Item Preferences and the field will be available every time you create an item. Learn more.
- Click the Upload Image box in the right side to upload an image of the item. This image will be displayed in a transaction whenever you add this item.
- After you upload the image, click Change Image to update the item image with a new image or click Remove Image to delete the image.
Pro Tip: If you don’t find the Upload Image field in your item creation page, you can enable this field in the Item Preferences to display it. Learn more.
- Choose if the item is Taxable or Non-Taxable under Tax Preference.
- Select a tax from the Tax dropdown if you’ve chosen the tax preference as Taxable.
- Select or enter a Tax Exemption Reason, if you’ve chosen the tax preference sa Non-Taxable.
Insight: When you sell products or provide services, some of them would be taxable while some of them are tax exempt. Choose if its taxable or non-taxable based on the item you are creating.
Pro Tip: Before you can select a tax while create an item, make sure that you’ve created a tax in the Taxes section under Settings. Learn more about adding a new tax.
- Enter the Rate at which you are selling the item. When you create a transaction and include this item, you can edit the item rate according to your need.
- Enter a Description about the product or service. This will be displayed along with the item name when you include this item in a transaction.
- Click Save.
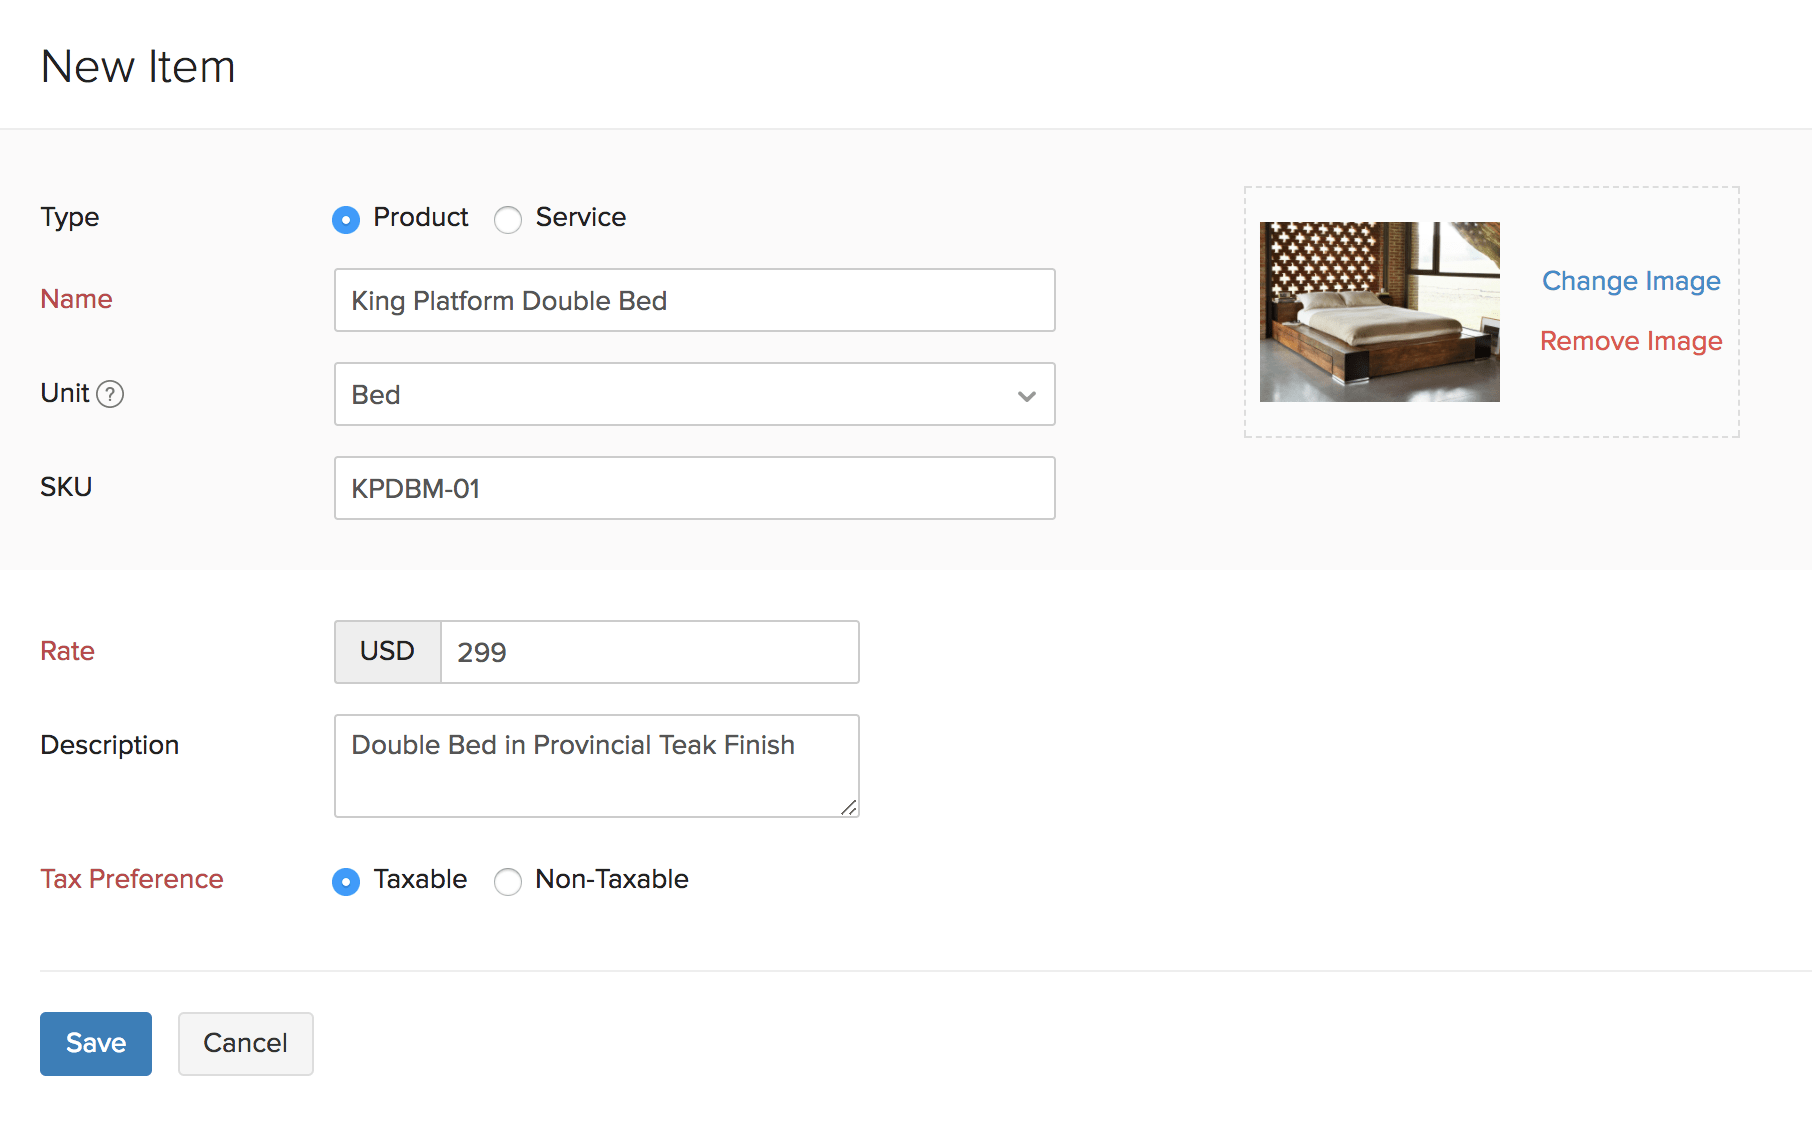
Now, you would have added a new item to the Items module and you can use this item when you create a new transaction.
Add Items As Capital Assets
Capital assets are long-term investments or resources used for business operations. They include real estate, stocks, bonds, business equipment, and intellectual property. They are used to generate income, increase value, or contribute to business productivity. Some examples of capital assets include buildings, machinery, furniture, and equipment.
To add an item as a capital asset in Zoho Invoice:
-
Go to Items from the left sidebar.
-
Click + New in the top-right corner.
-
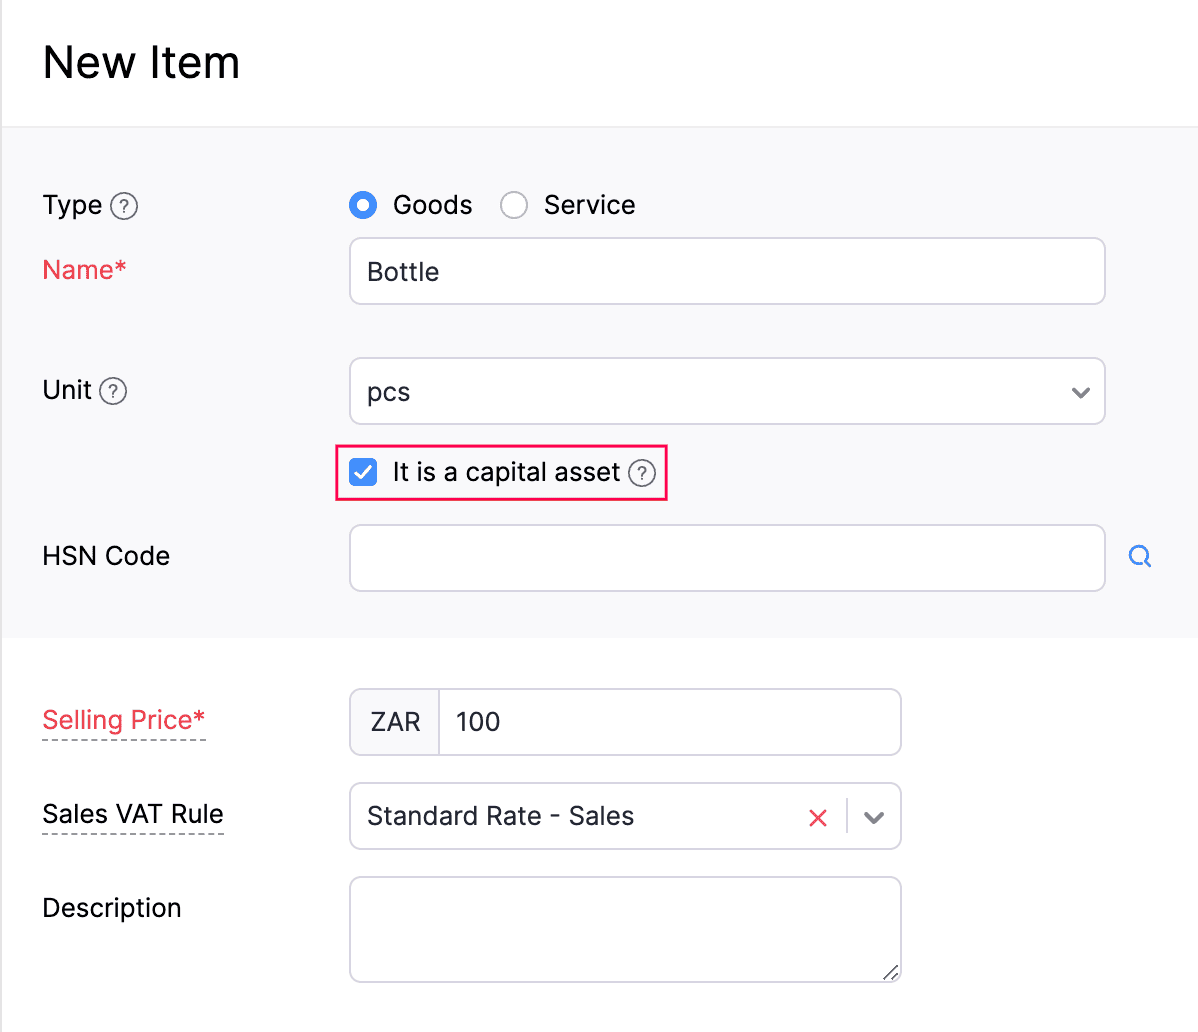
Enter the item details and mark the It is a capital asset option.
-
Click Save.
The item will now be considered a capital asset for your organisation. You can view the VAT Summary report to track the capital goods you’ve imported or supplied.
Import Items
You can import items from other invoicing platforms to Zoho Invoice. This allows you to quickly add the items without having to manually add them individually.
To import items:
- Go to the Items module in the left sidebar.
- Click the Hamburger icon and select Import Items.

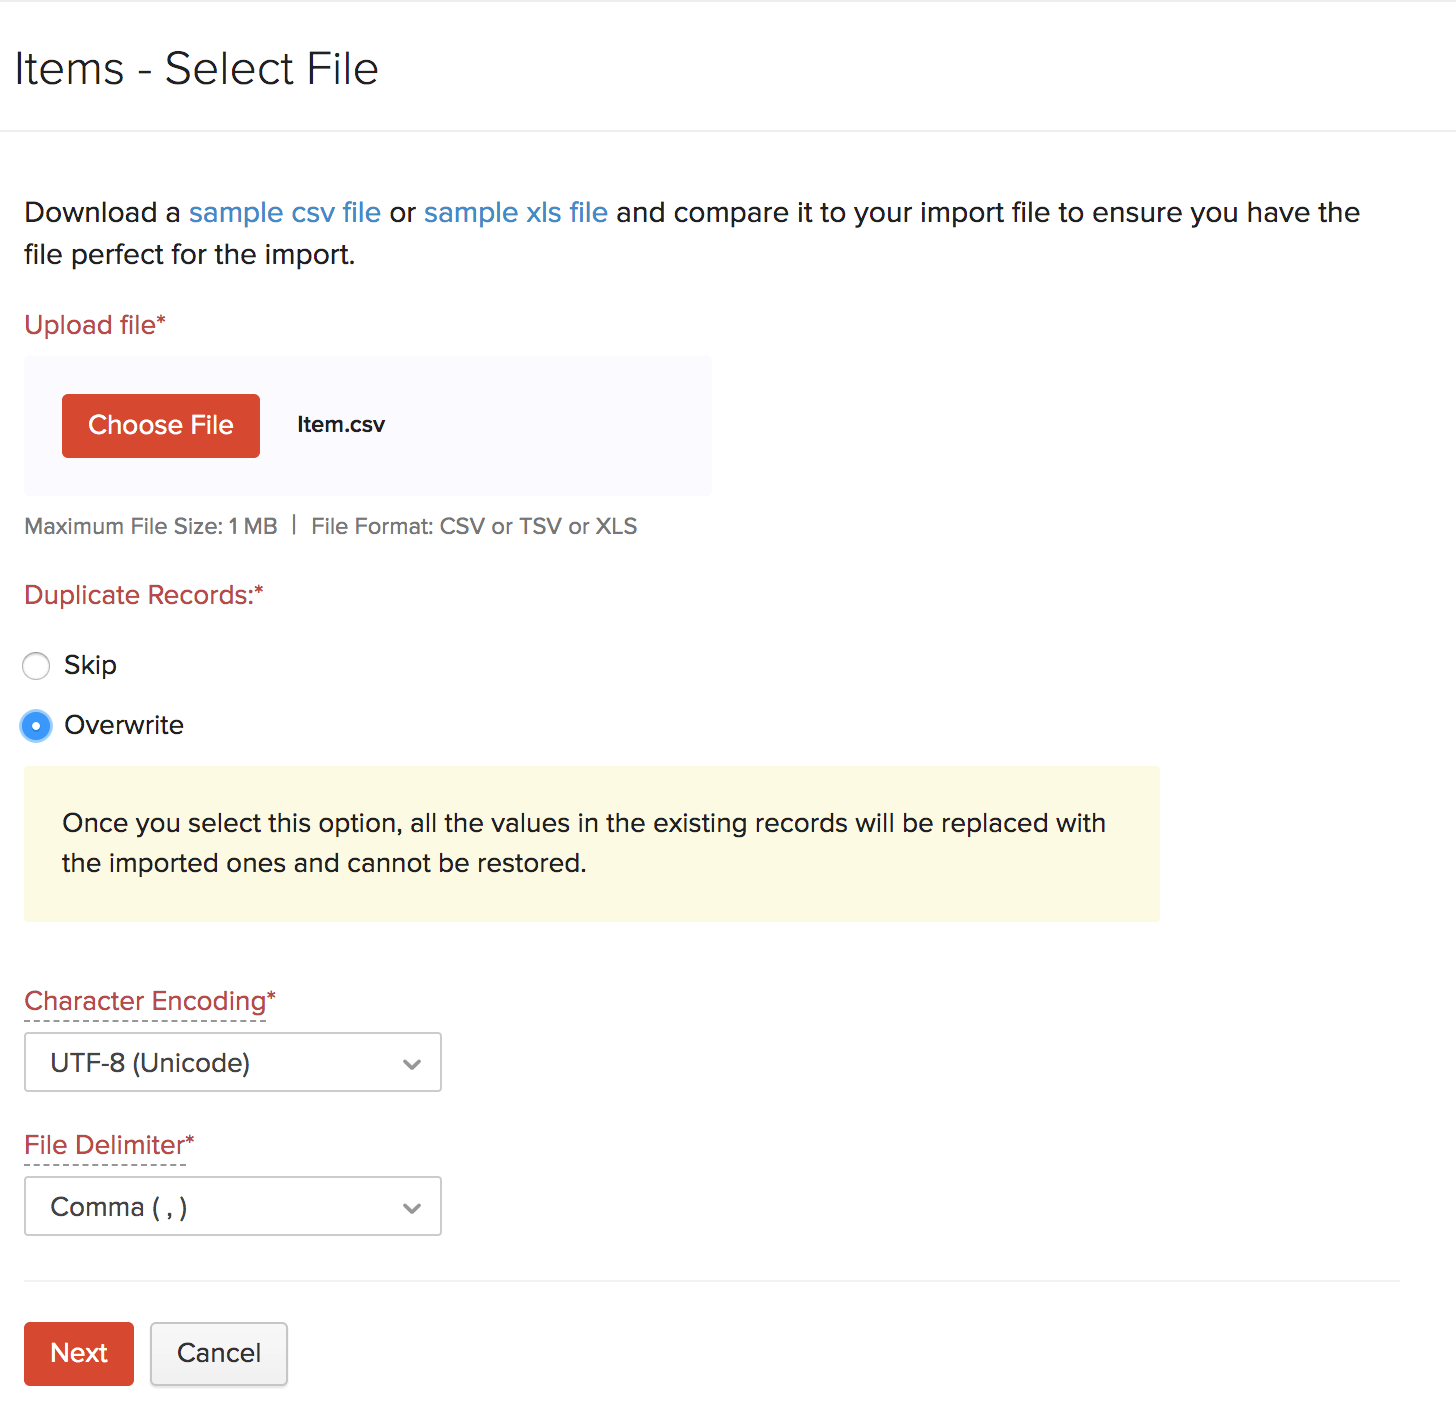
- Download the sample file and compare it with your file. Make sure that the format in your file is similar to the sample file.
- Click the Choose File button and select the import file from your device.
- In case you have matching records in the import file and Zoho Invoice, you can choose to overwrite these record(s). To do this, select Overwrite under Duplicate Records. You can also choose to Skip the duplicate records.
- Select the Character Encoding based on your import file. By default, UTF-8 (Unicode) is selected.
- Choose the appropriate File Delimiter.
Insight: File Delimiter refers to the character that is used to separate the values in the import file.
- Click Next.
- If you had opted to Overwrite the duplicate records, choose the field based on which the duplicates will be overwritten (Item Name or Item ID).
Note: This field is case-sensitive and the duplicate files will be overwritten only if this field’s value matches in both the import file and Zoho Invoice.
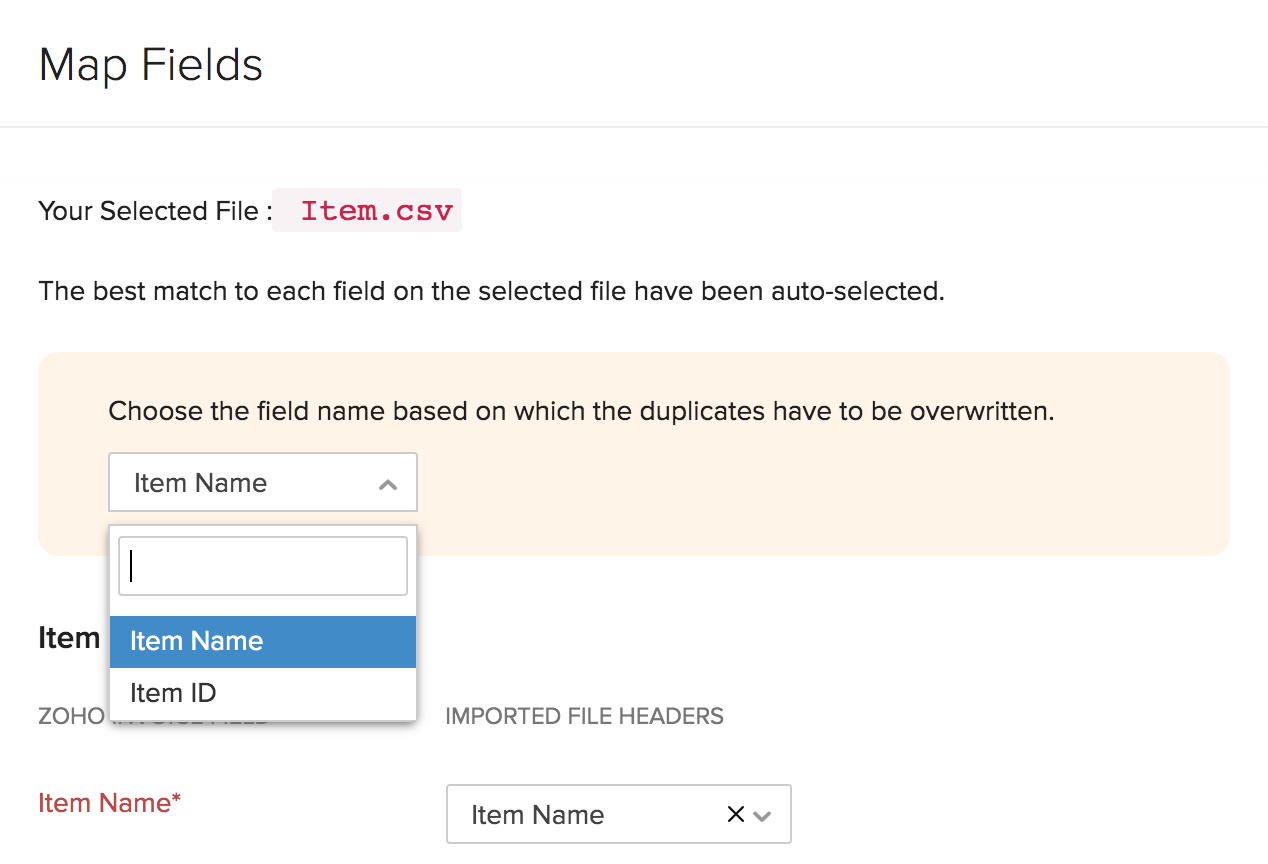
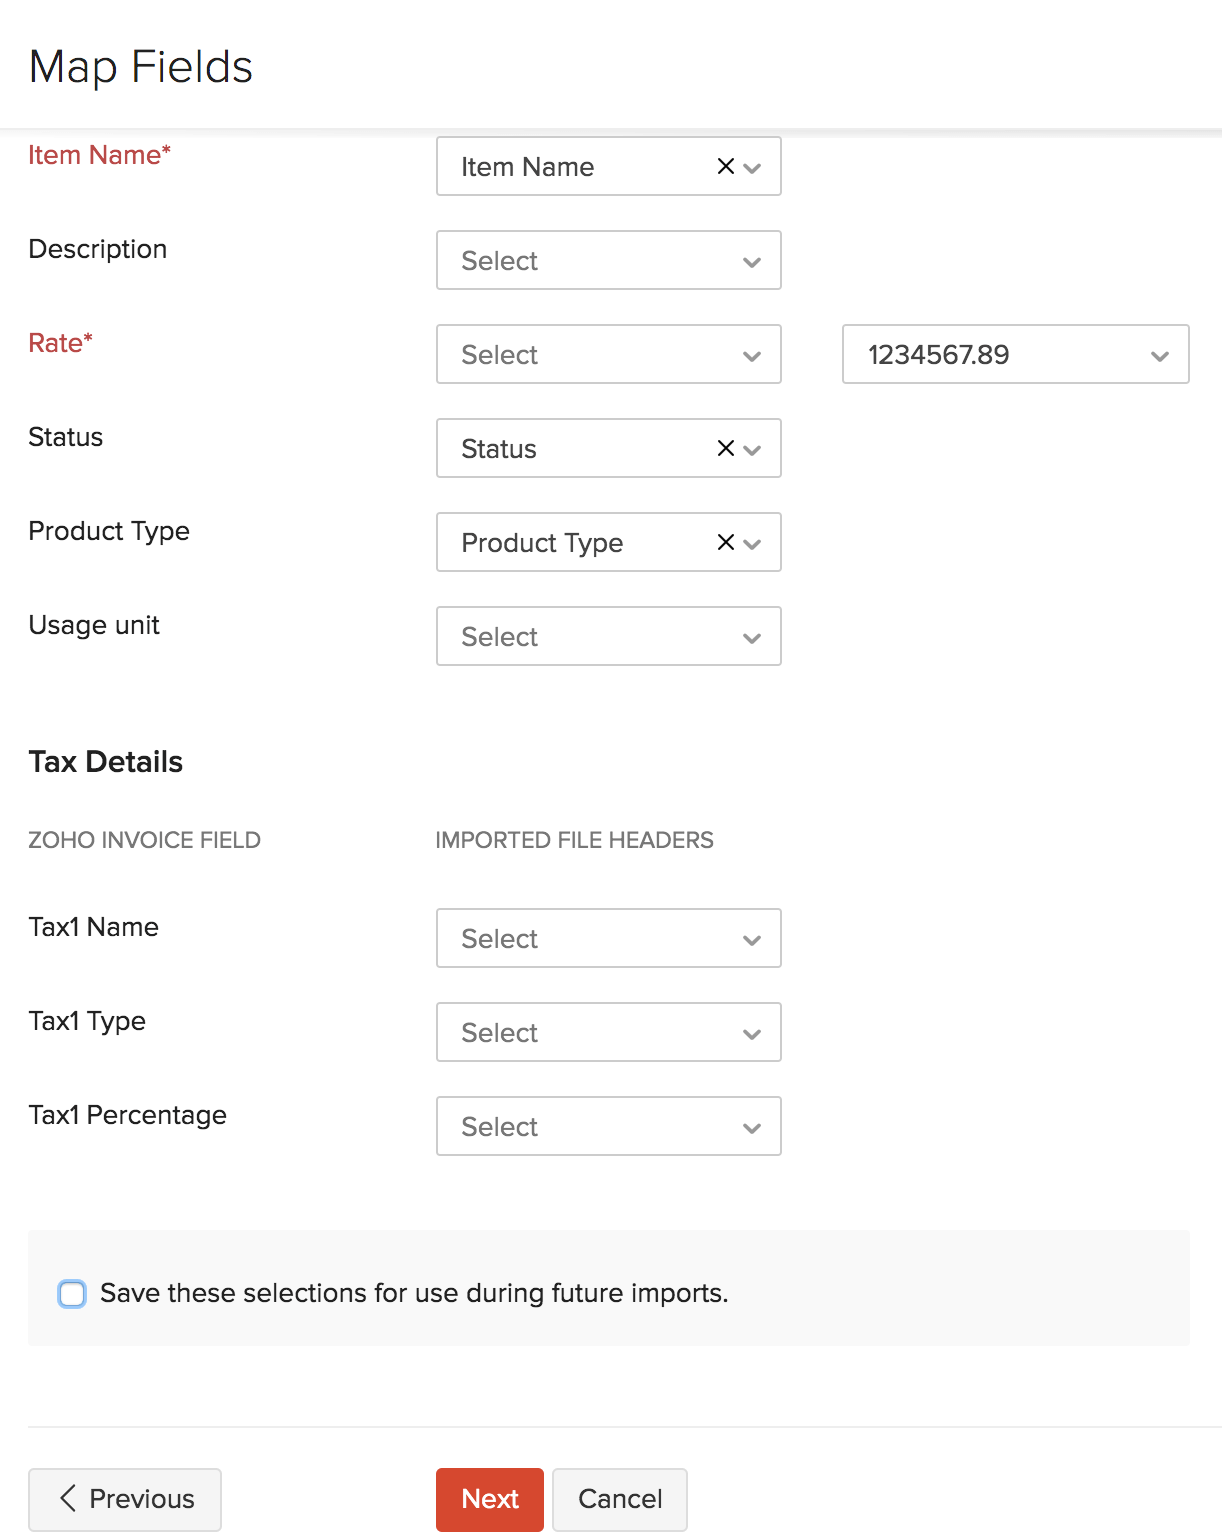
- In the Map Fields page, the field names of Zoho Invoice are listed on the left side and the field names in the import file are listed on the right side.
- Match the field names appropriately.
- Check the Save these selections for use during future imports. option if you wish to use the same mapping of fields in future imports.
- Click Next.
- You can see the status of all the items that are ready to be imported, skipped and the Unmapped Fields. If there are items that are being skipped, edit the import file and repeat the above steps.
- Click Import.
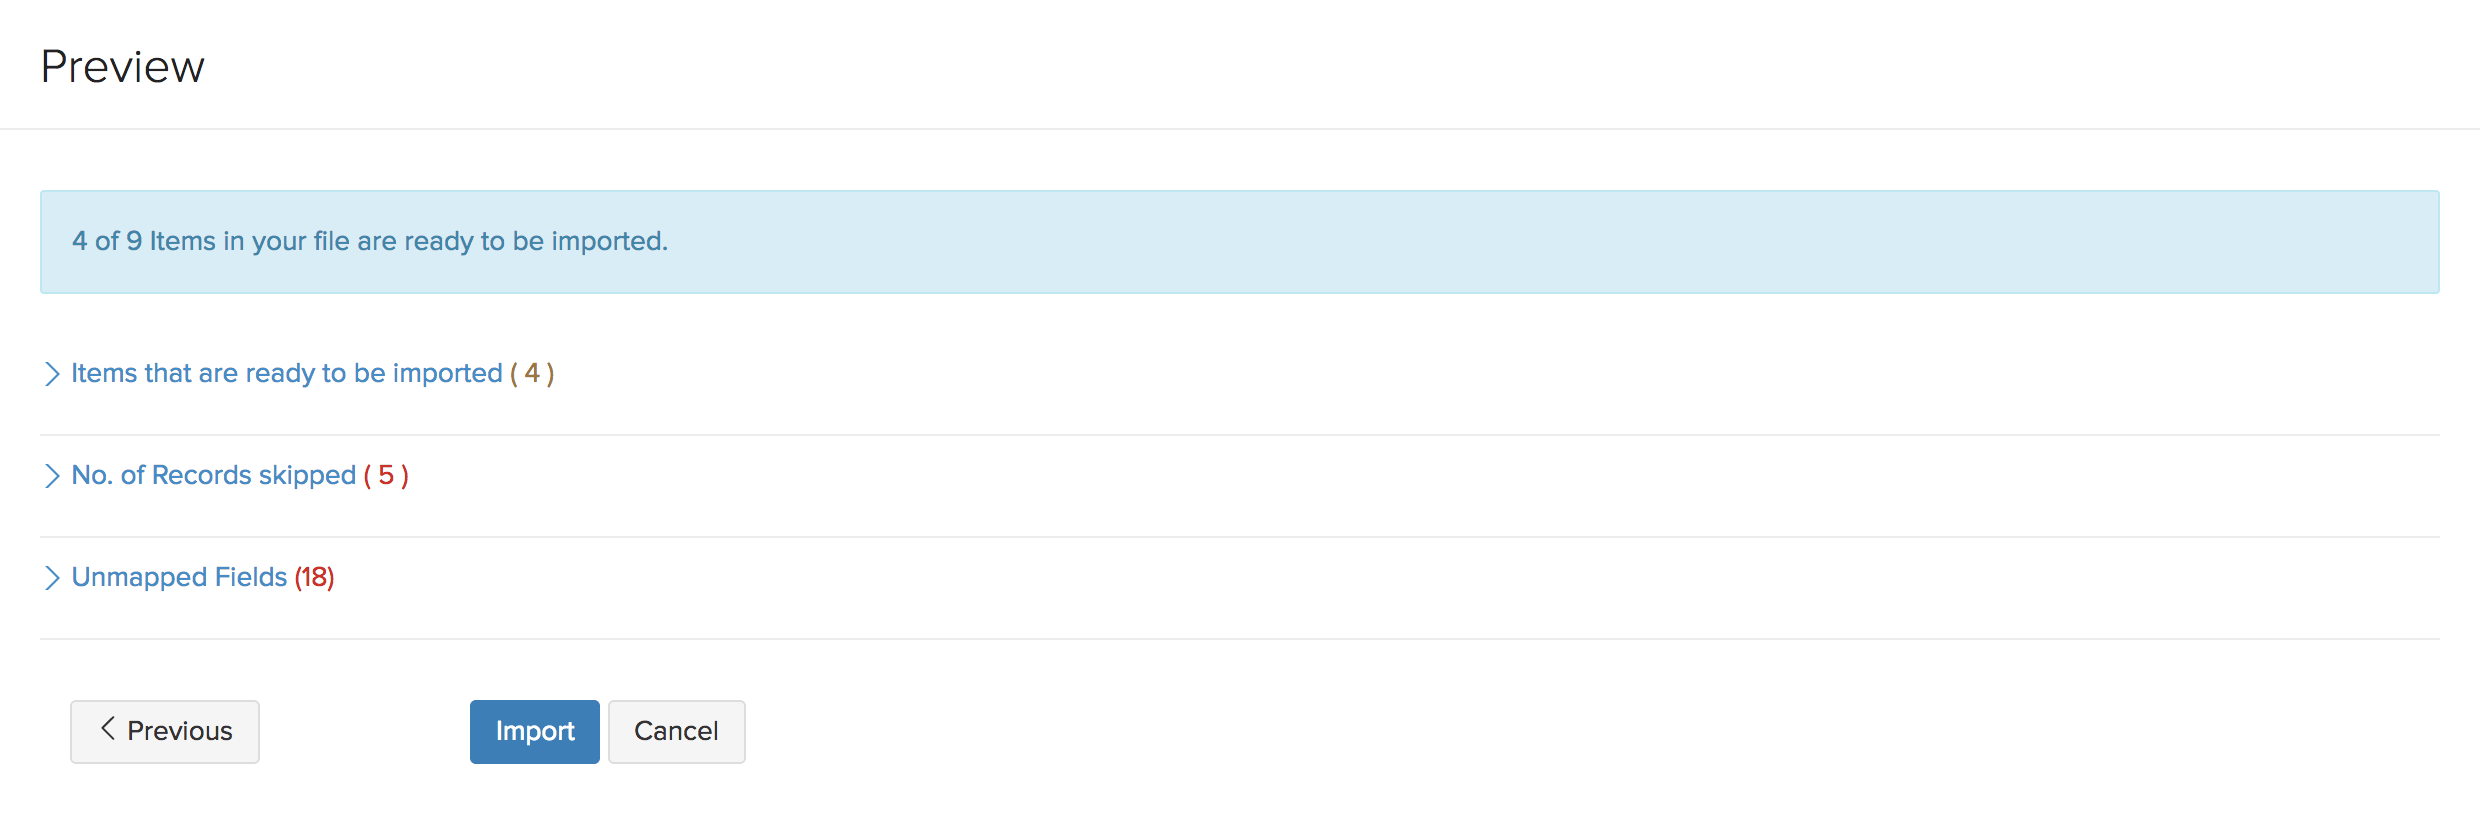
Now, the items in the import file will be imported into the Items module of Zoho Invoice.
Editing Items
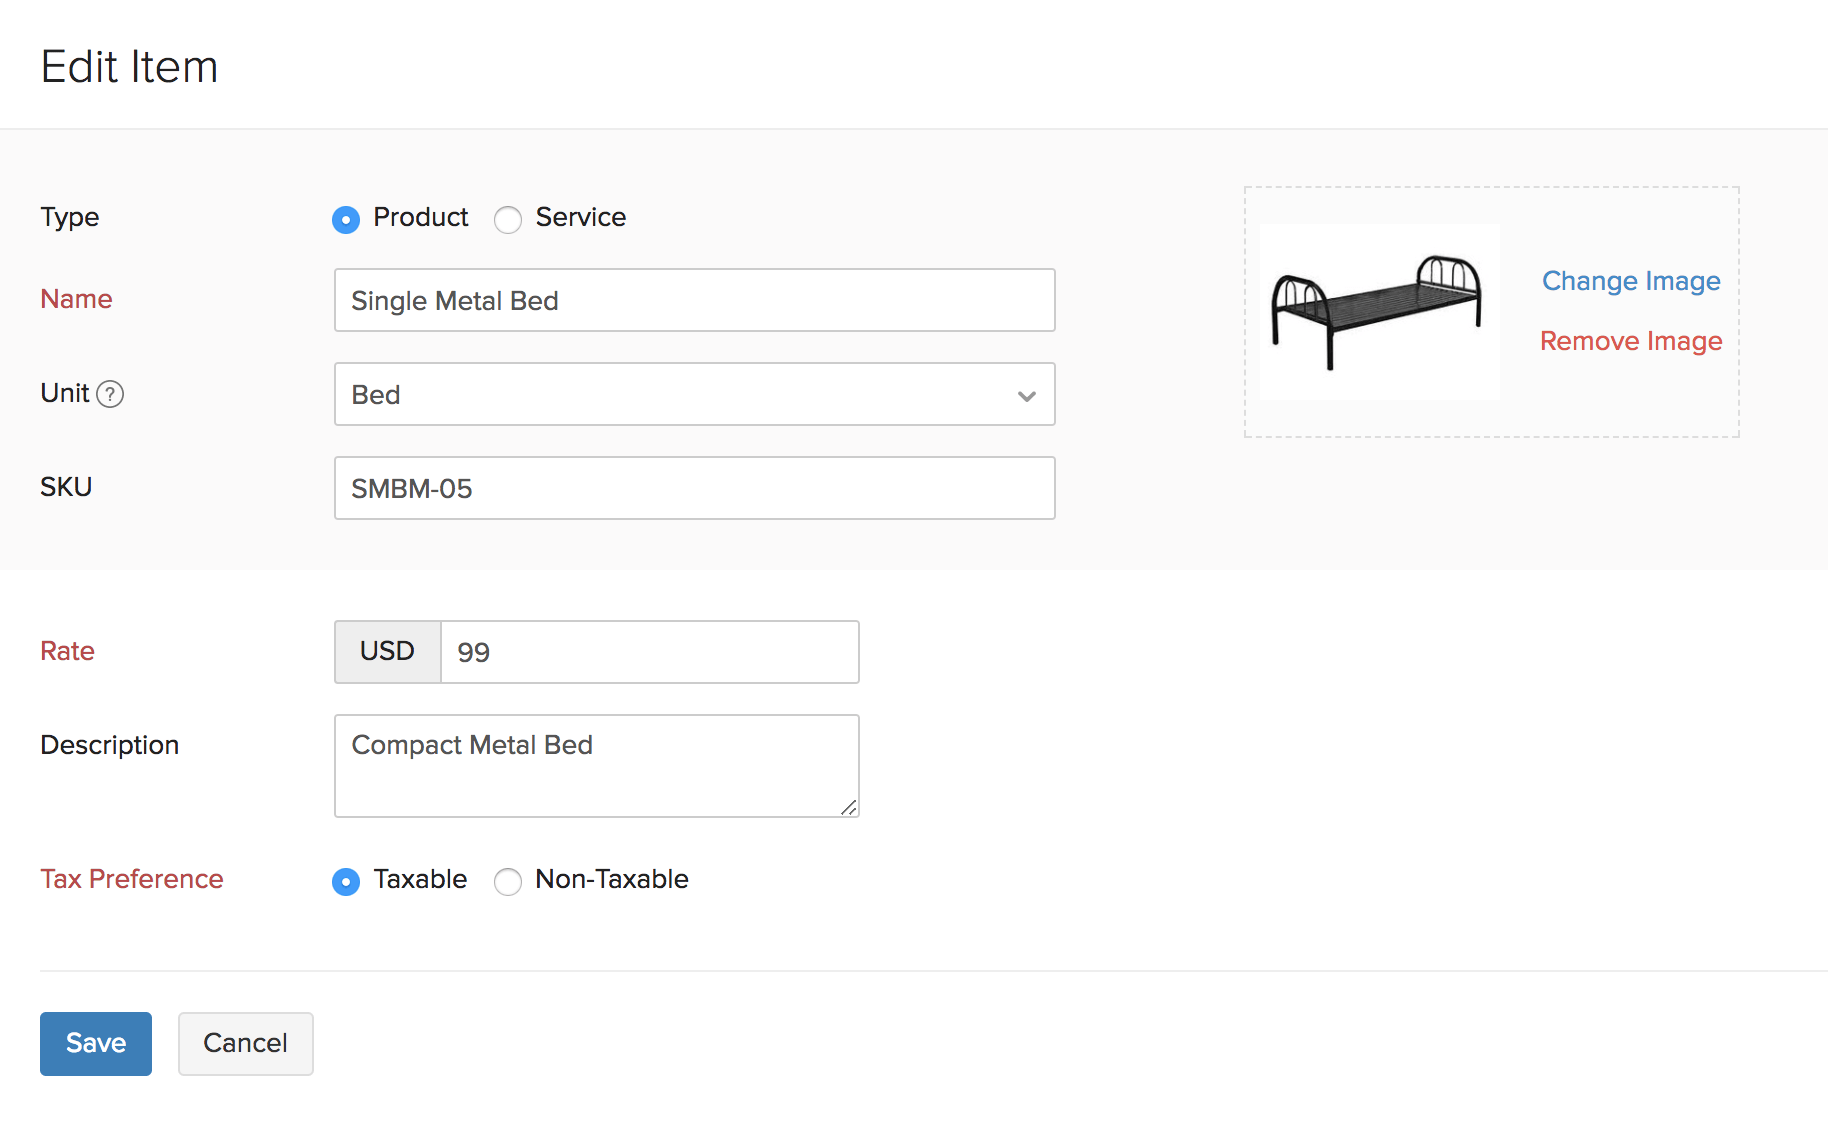
Scenario: David learns of new ways to modernise his furnitures and upgrades the furnitures he sells with new features. Due to this, he wants to re-evaluate and change the prices of the products he sells. In Zoho Invoice, he selects the item and edits its rate accordinly. Now, when an item is included in a transaction, its new rate will be displayed.
In similar scenarios, you would want to edit the items to change and update information. To edit an item:
- Go to the Items module in the left sidebar.
- Select the item you want to edit and it automatically redirects you to the edit window.
- Edit the fields as per your need and click Save.
Insight: The changes that you make to the items will not reflect the changes in the existing transactions but only when you create a new transaction and include the items in it.
