Zoho Workplace settings
The Settings section in Zoho Workplace helps you to manage all the personalization preferences for your account. You can change the display language, themes, appearance and notification preferences here. Apart from viewing the general settings, you can also navigate to individual application settings of Zoho Mail, Zoho Cliq, Zoho WorkDrive, Zoho Meeting and Zoho Vault from this section.
Steps to access Zoho Workplace settings
To access Zoho Workplace's settings:
- Log in to your Zoho Workplace account
- Access the Settings section from the top-right corner.
- The Settings section will open and you can configure the desired settings.
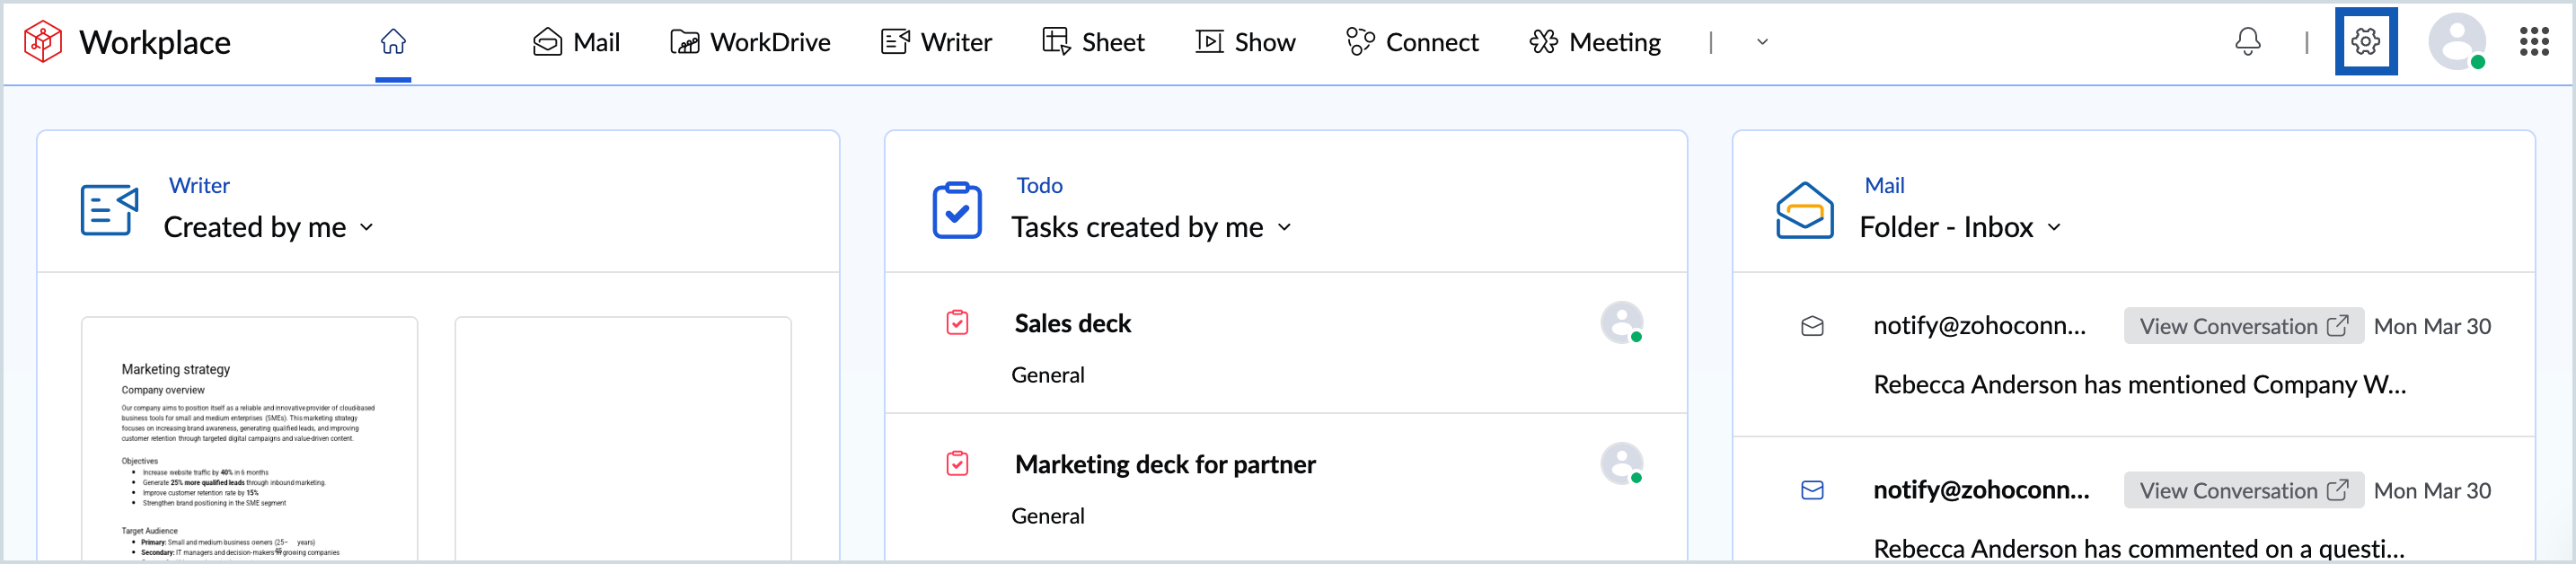
- Alternatively, you can also access the Settings section at any point from the top pane. If you are accessing the section from another application, you will be taken their respective setting section.
- You can click the Workplace tab to access the General settings.
You can set the following preferences in this section:
- Change Zoho Workplace's display language
- Modify display and appearance setting
- Enable or disable desktop and application notifications for individual Zoho Workplace application
- Enable keyboard shortcuts for quick action
- Enable or disable chat bar at the bottom
- Enable or disable dashboard widgets
- Enable or disable Zoho Workplace applications
- Navigate to account settings
Language setting in Zoho Workplace
The Zoho Workplace interface supports a total of 72 languages. You can select the language of your choice by navigating to Settings icon > Workplace tab > Language.
Choose the preferred language and refresh the browser to change your application language. You can learn more about the supported languages in this guide.

Display and appearance settings in Zoho Workplace
You can customize the way your Zoho Workplace interface looks like from the Display and Appearance section of the Workplace settings section. This includes — display font, themes and the appearance mode.
Steps to change the display font in your Zoho Workplace account
To change the display font for the Zoho Workplace interface:
- Log in to your Zoho Workplace account
- Access the Settings section from the top-right corner.
- Go to General > Display and Appearance > Display font options
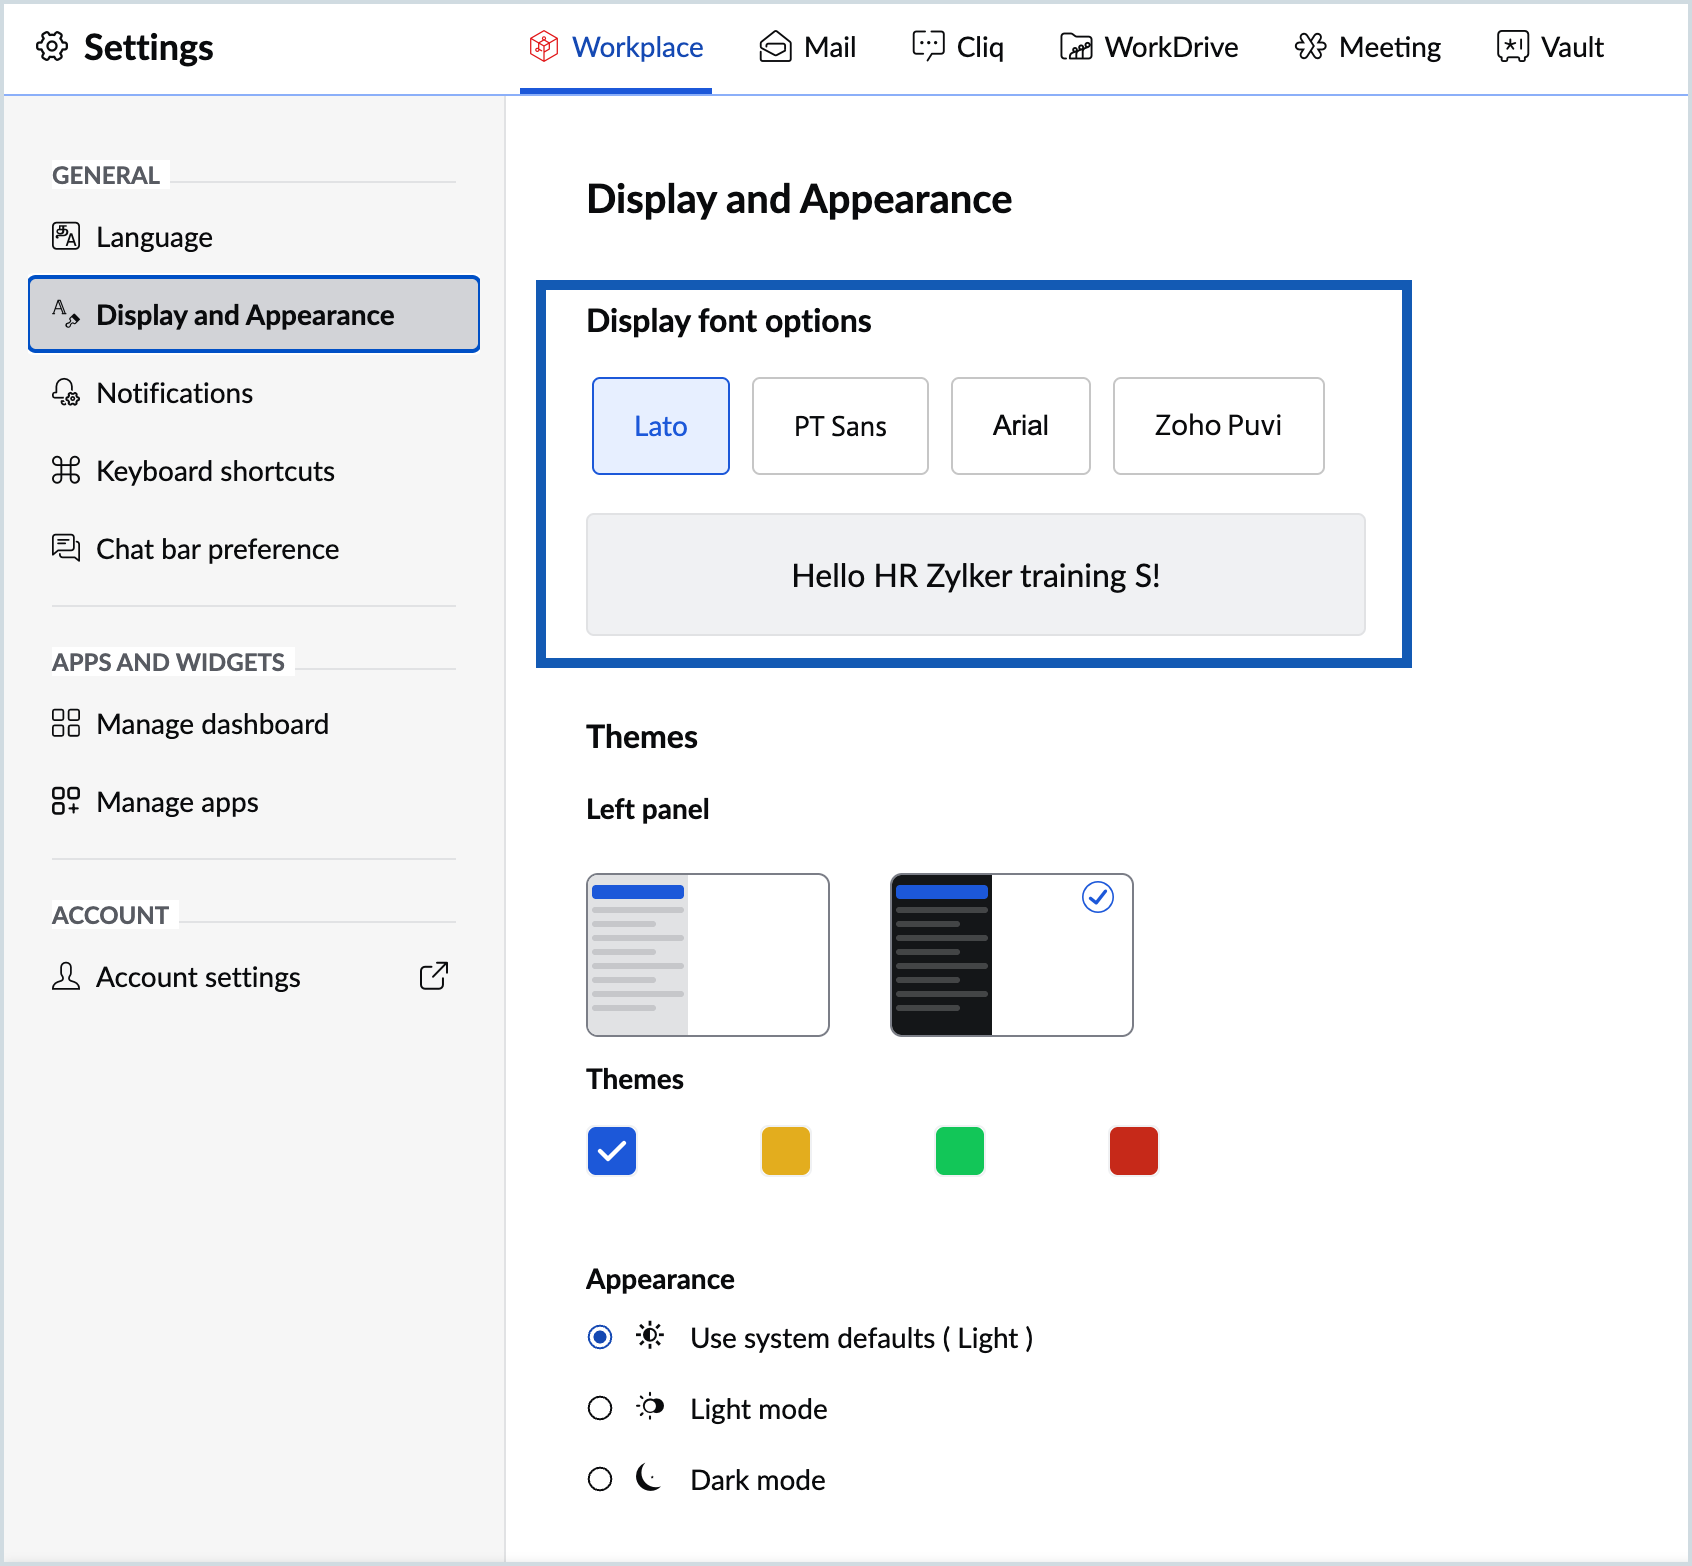
- Choose the preferred font from the options provided:
- Lato
- PT Sans
- Arial
- ZohoPuvi
- The changes will be applied automatically.
Steps to change the theme of your Zoho Workplace account
To change the theme of the Workplace interface:
- Log in to your Zoho Workplace account.
- Access the Settings section from the top-right corner.
- Go to General > Display and Appearance > Themes.
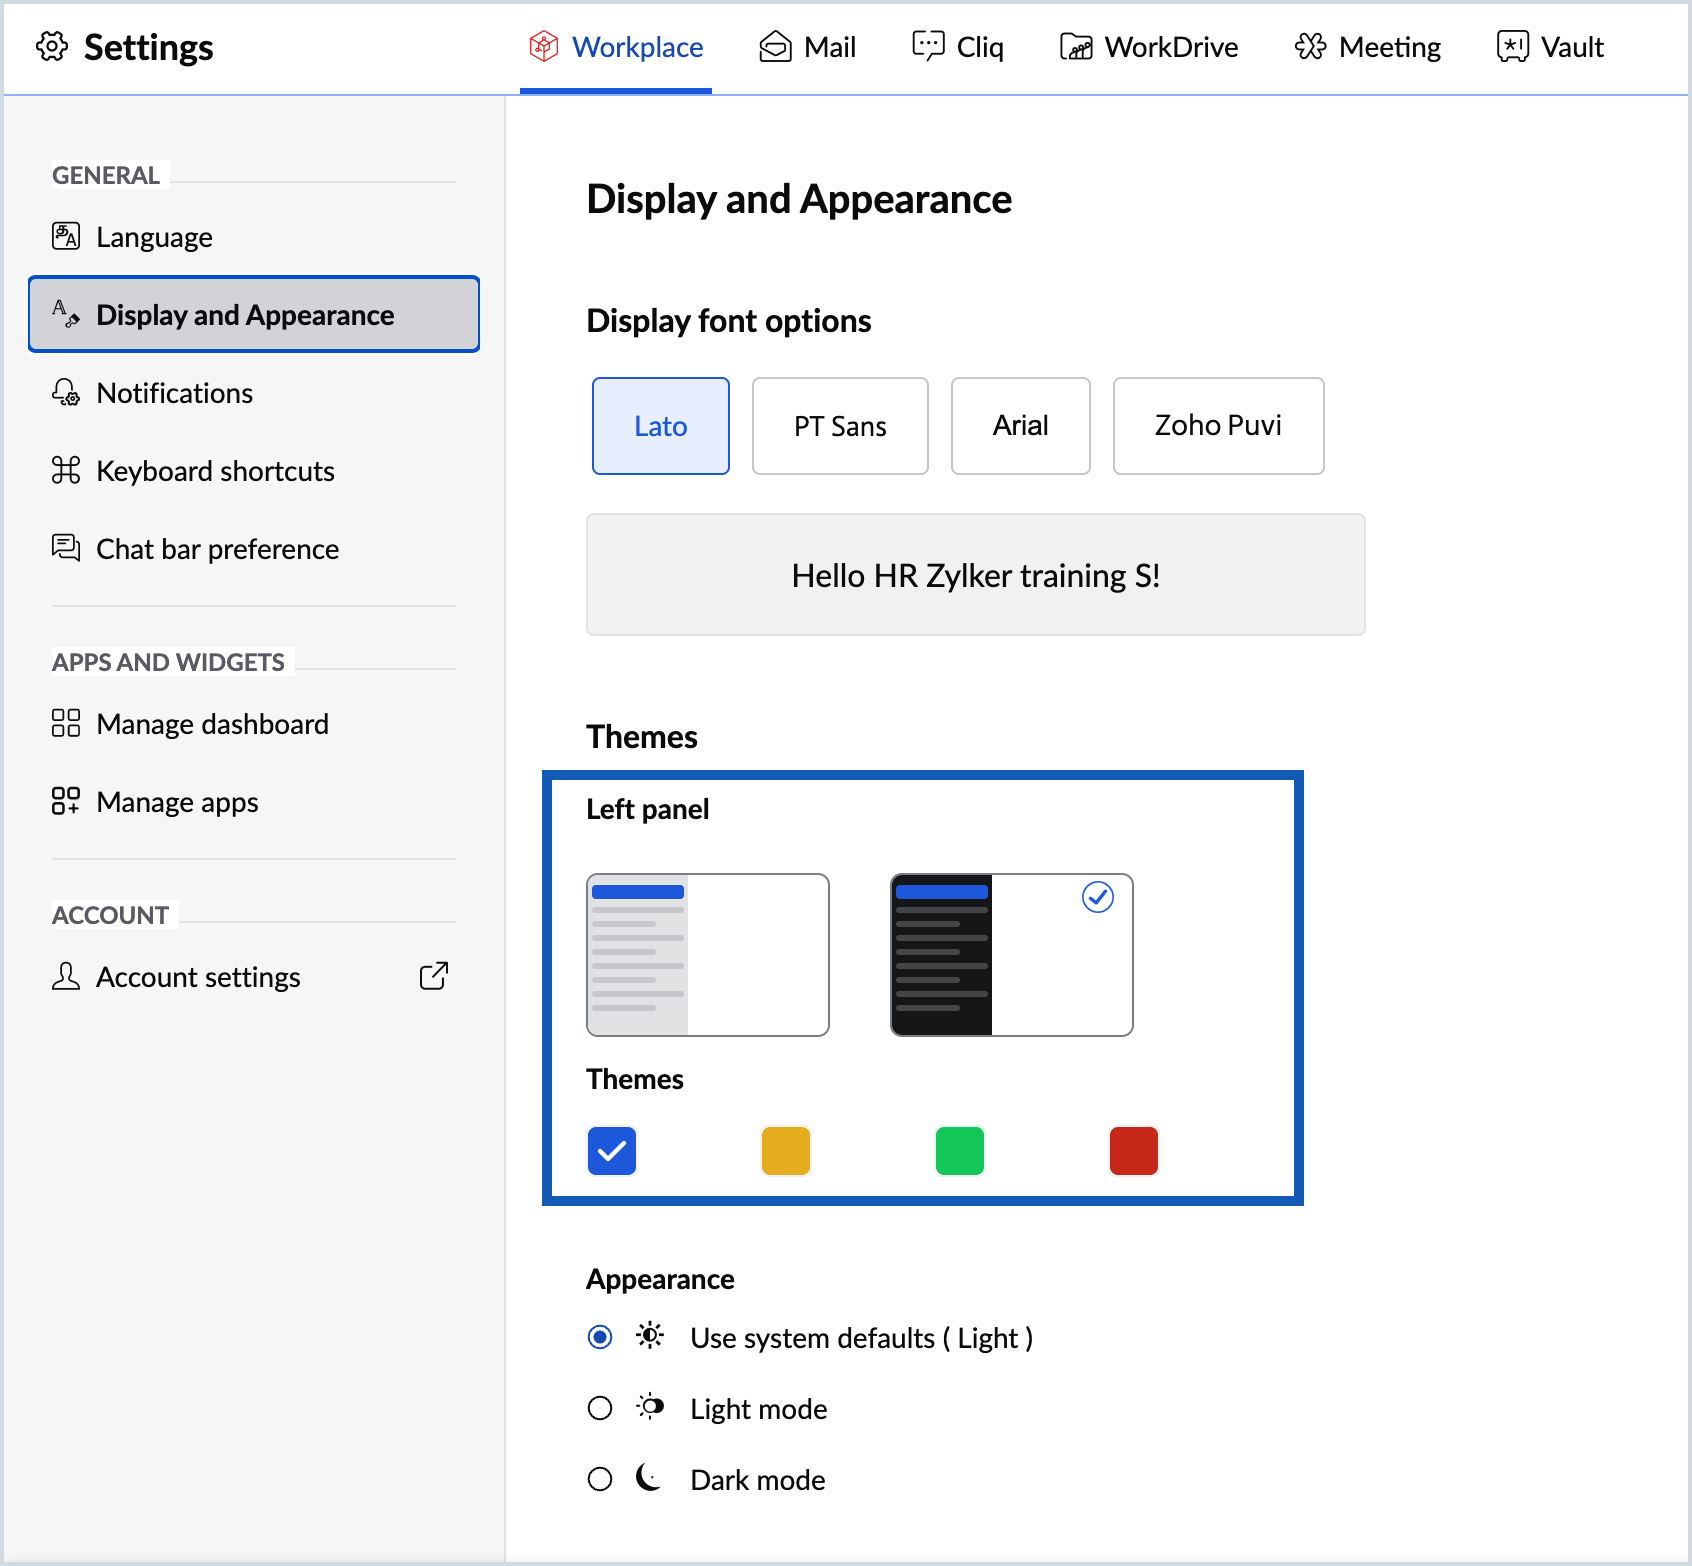
- Choose the desired theme: Dark/Light for the left panel.
- The changes will be applied automatically.
Steps to change the interface appearance of your Zoho Workplace account
To switch the appearance between Day and Night modes:
- Log in to your Zoho Workplace account
- Access the Settings section from the top-right corner.
- Go to General > Display and Appearance > Appearance
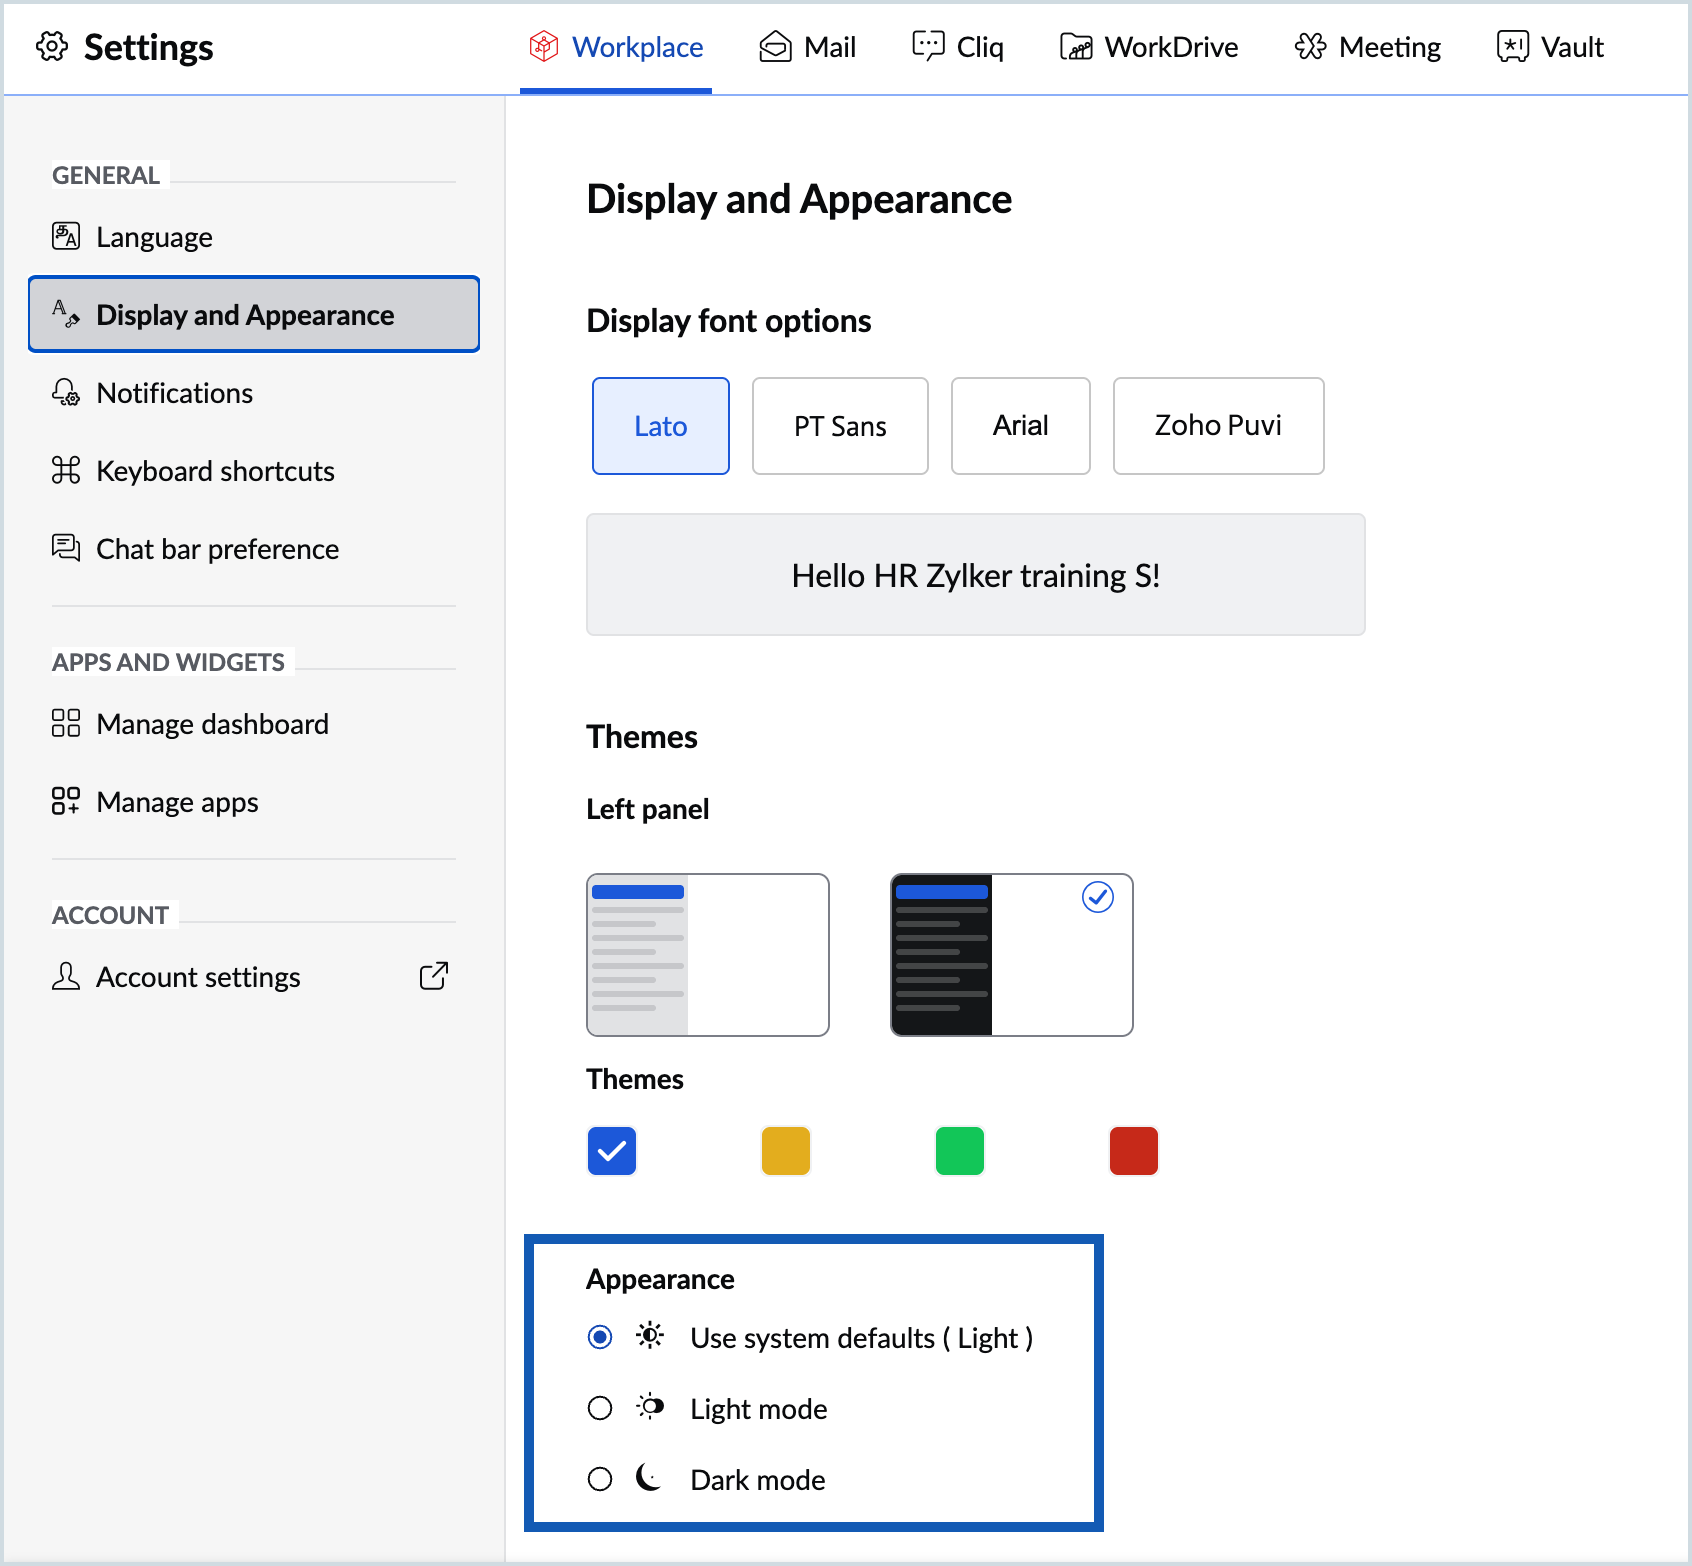
- Choose the preferred mode from the options provided:
- Use system default
- Light mode
- Dark mode
- The changes will be applied automatically.
Notification settings in Zoho Workplace
You can choose to customize the notification settings to enable or disable the desktop and application level notifications.
Note
Ensure that the browser-level permission is allowed for you to receive the desktop notifications from the applications.
Steps to modify notification settings
- Log in to your Zoho Workplace account
- Access the Settings section from the top-right corner.
- Go to General > Notifications
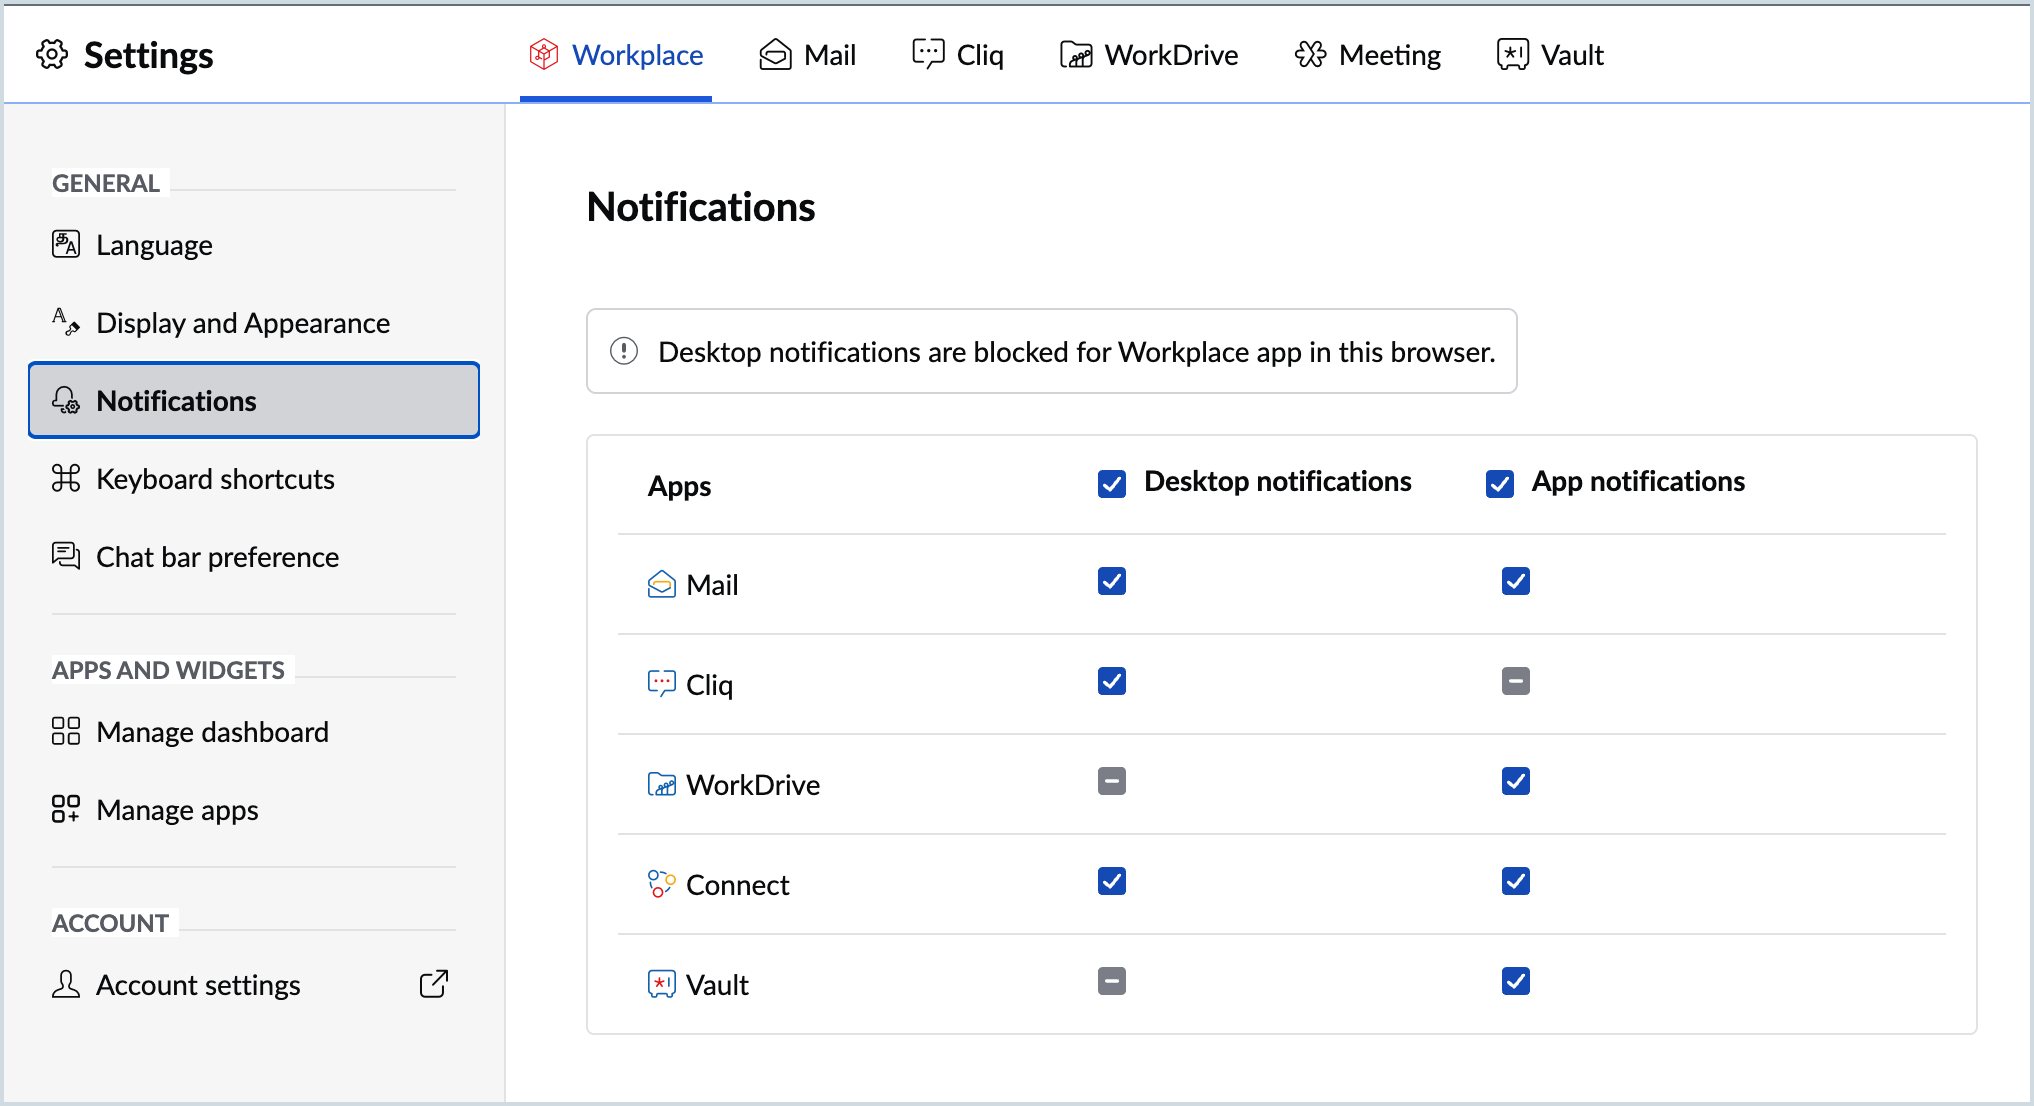
- Use the check-boxes provided against each application to enable the Desktop or Application level notifications.
- You can also choose to enable/disable all notifications using the check-box provided beside the Desktop notifications or Application notifications on the header.
Keyboard shortcuts in Zoho Workplace
The keyboard shortcuts in Zoho Workplace allow you to navigate easily within the Zoho Workplace interface using some key combinations on your keyboard.
Steps to enable or disable keyboard shortcuts
- Log in to your Zoho Workplace account
- Access the Settings section from the top-right corner.
- Go to General > Keyboard Shortcuts
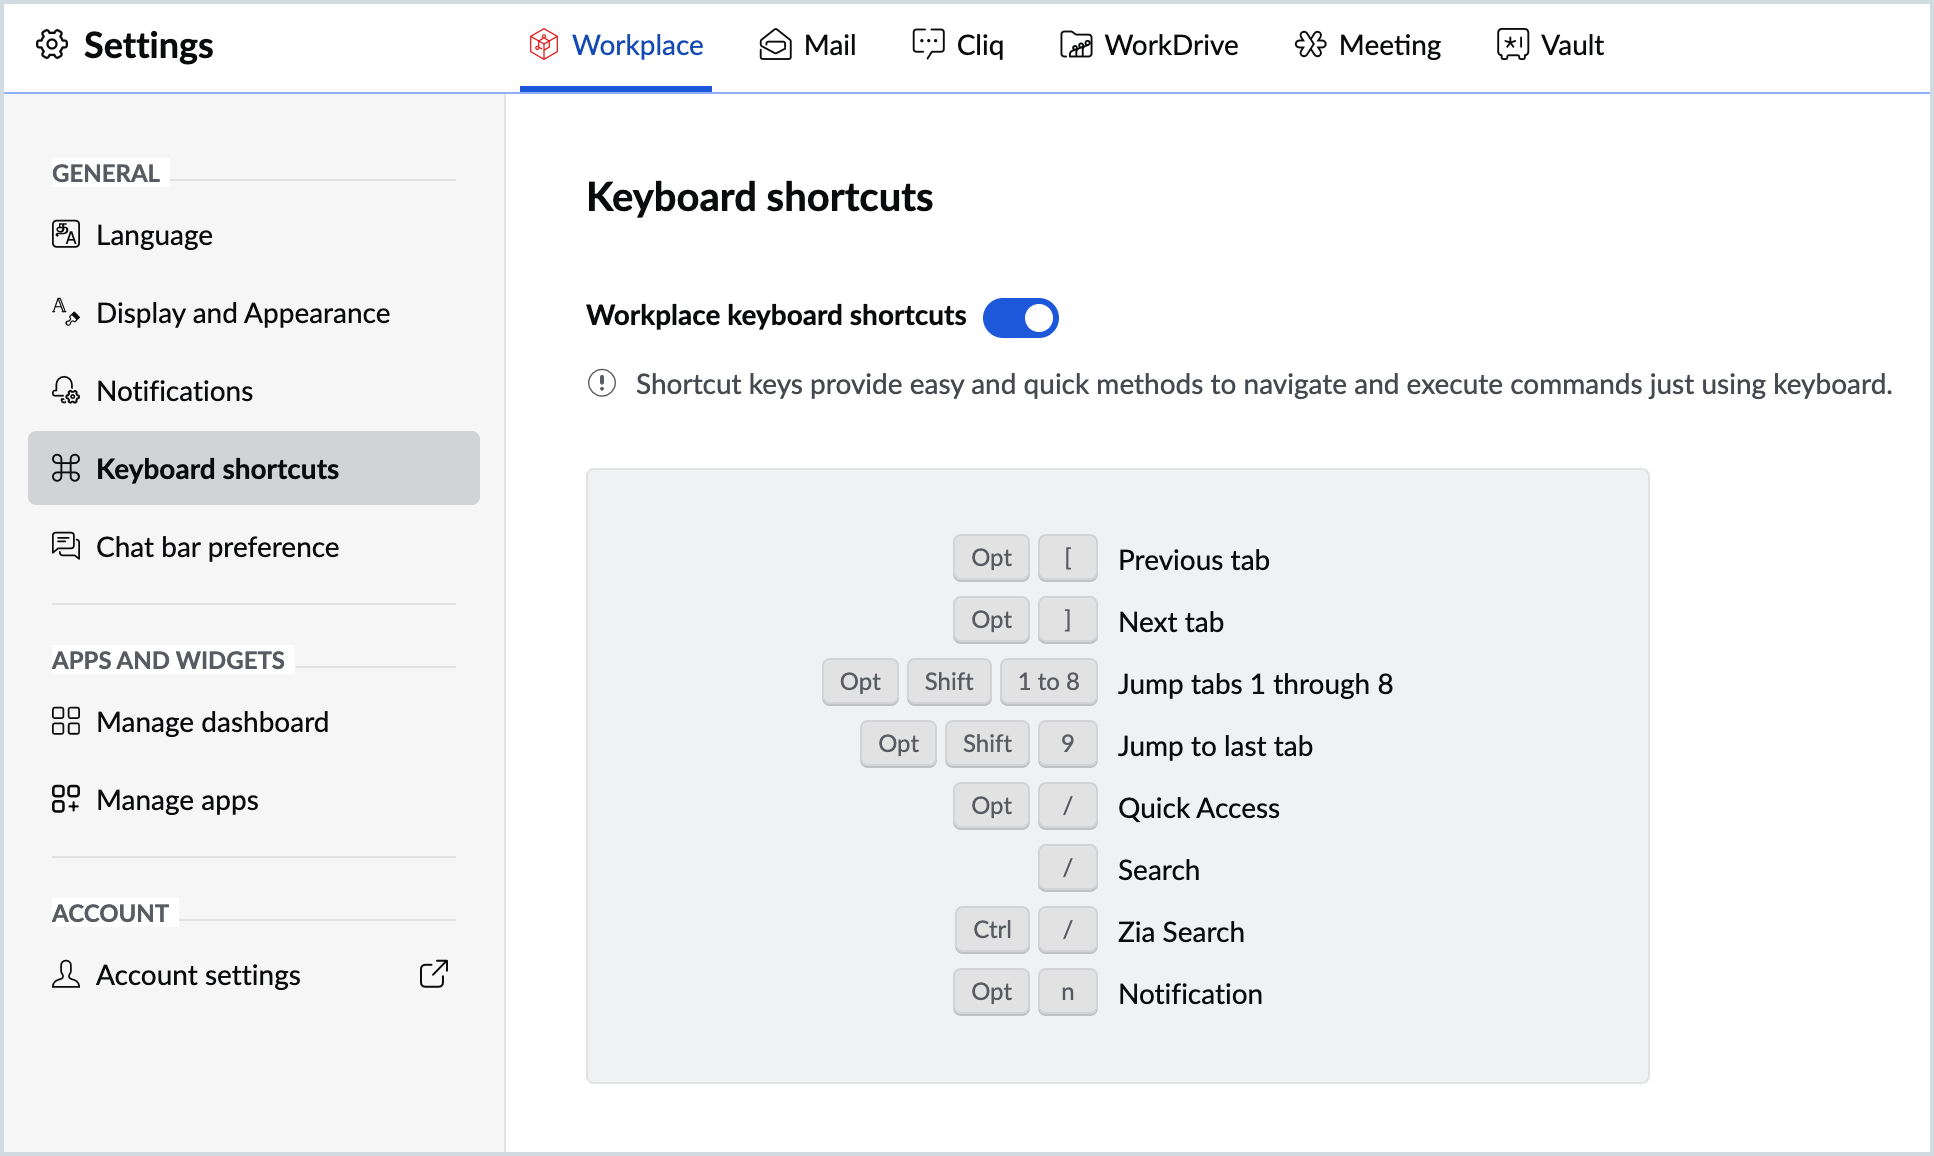
- Turn the toggle switch on/off to enable/disable the keyboard shortcuts.
Chat bar preference in Zoho Workplace
Zoho Cliq which is a part of the Zoho Workplace suite of applications is provided as an integration across all applications in the Zoho Workplace interface. This helps you stay connected with the users in your organization. The integration is available as a chat-bar at the bottom left corner of all the applications for you to easily access the chat window and stay connected despite working across multiple applications.
Steps to enable or disable the chat bar
- Log in to your Zoho Workplace account.
- Access the Settings section from the top-right corner.
- Go to General > Chat bar preference.
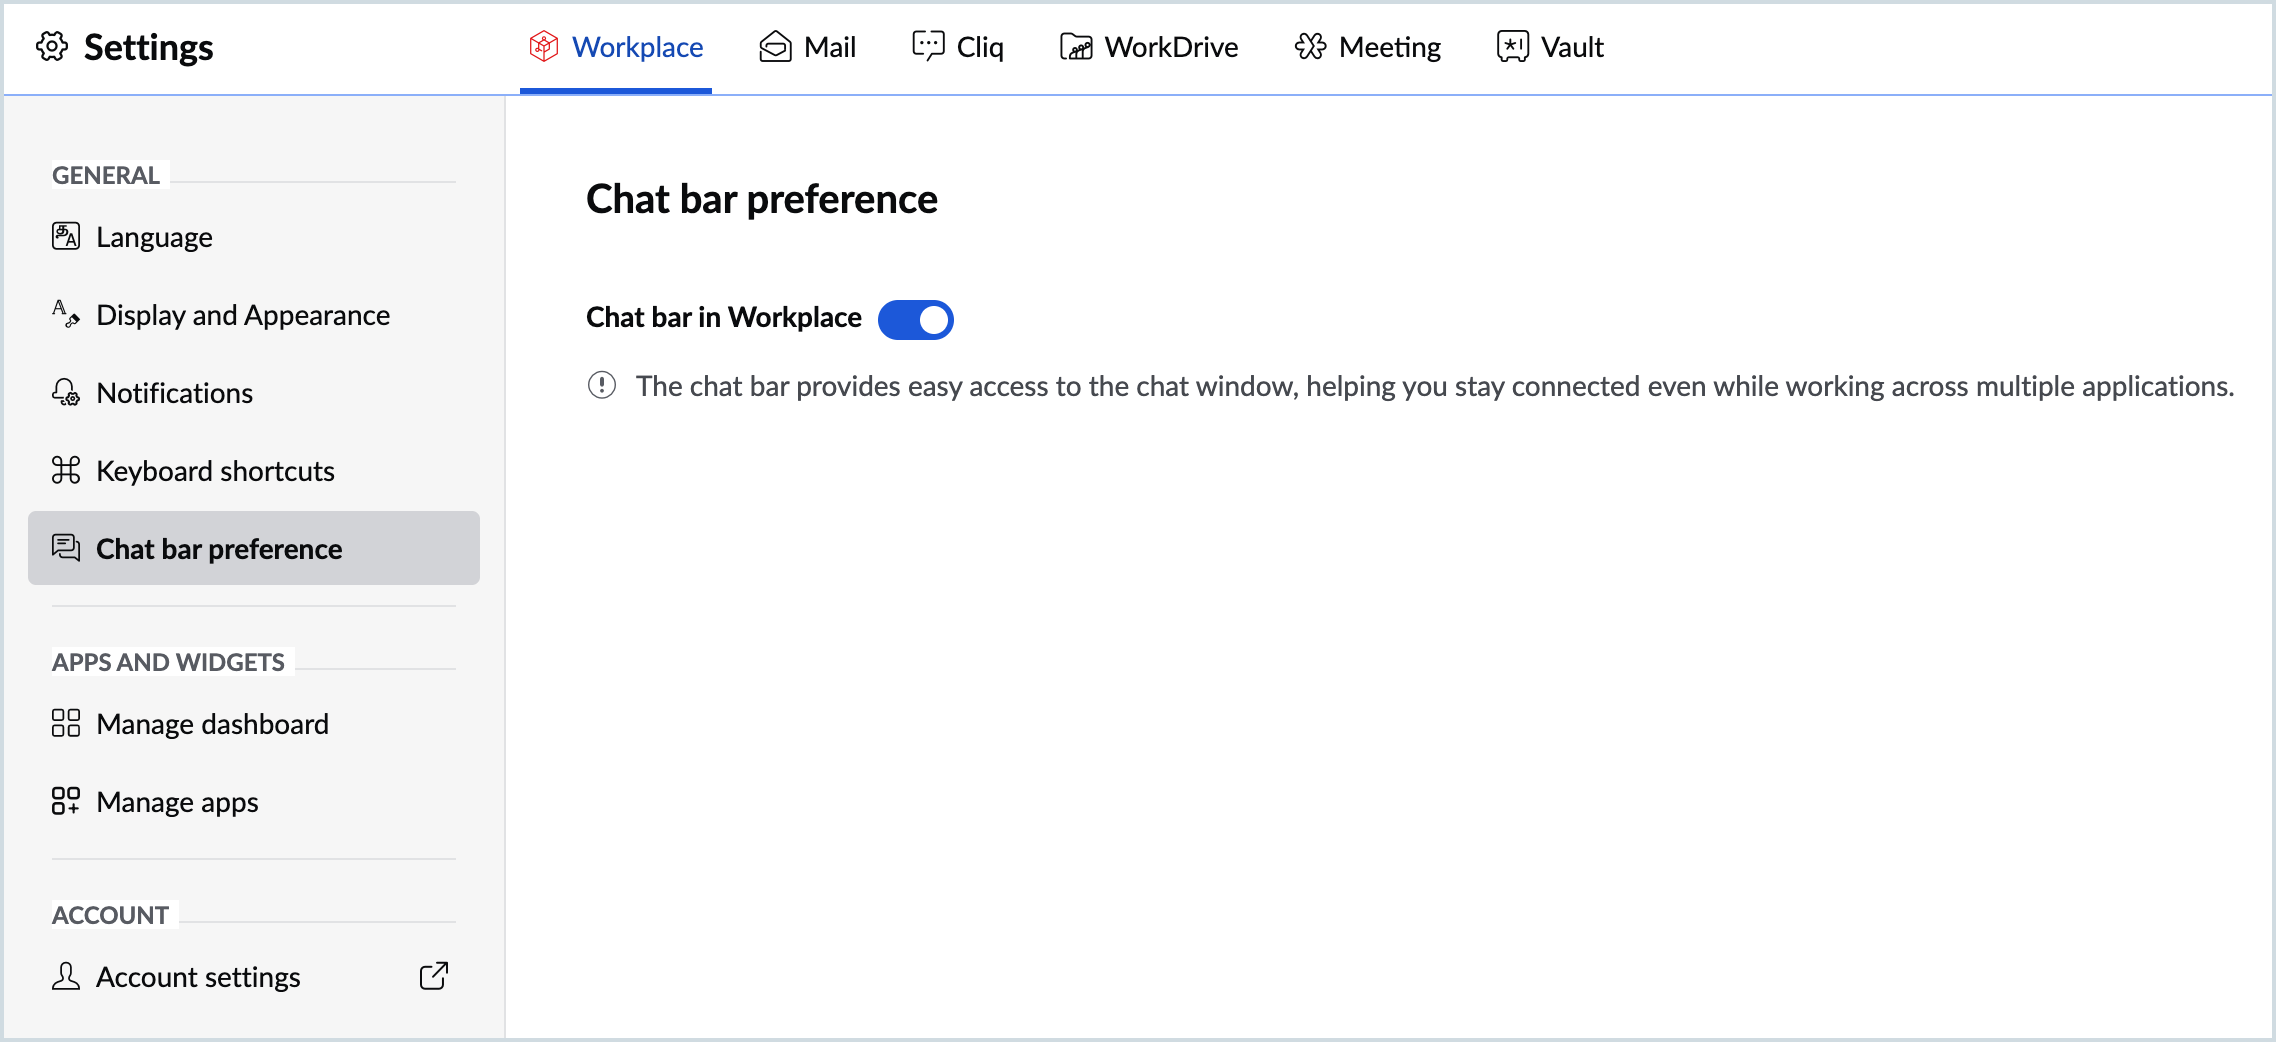
- Turn the toggle switch on/off to enable/disable the chat-bar.
Application and widget management in Zoho Workplace
Steps to add or remove applications from Zoho Workplace dashboard
If you are not using an application and want it to be removed from the Workplace interface, you can choose to disable it. To disable an app, navigate to Settings >General > Manage Apps > Turn OFF the toggle switch against the application. Click Disable on the confirmation dialog box. 
Once disabled, you can find these apps under the Disabled apps section. You can re-enable them by turning ON the toggle switch when needed.
Steps to add or remove widgets in Zoho Workplace
The widgets on the Zoho Workplace dashboard give you quick updates from each application. You can get a quick view of any pending tasks, events or notifications right from the dashboard. There are default widgets of each application and in addition to them you can also create custom widgets for them, based on specific requirement.
You can manage your Zoho Workplace widgets from the General Settings of your Zoho Workplace account. You can enable or disable a widget and create custom widgets for your applications.
To manage widgets:
- Log in to your Zoho Workplace account
- Access the Settings section from the top-right corner.
- Go to General > Manage dashboard.
- Drag and drop the desired widget in the desired position.
Alternatively, you can re-arrange the widgets by dragging and dropping them in the Zoho Workplace Dashboard too.
To enable/disable a widget:
- Log in to your Zoho Workplace account
- Access the Settings section from the top-right corner.
- Go to General > Manage dashboard.
- Turn off the toggle switch against the widget you want to disable.
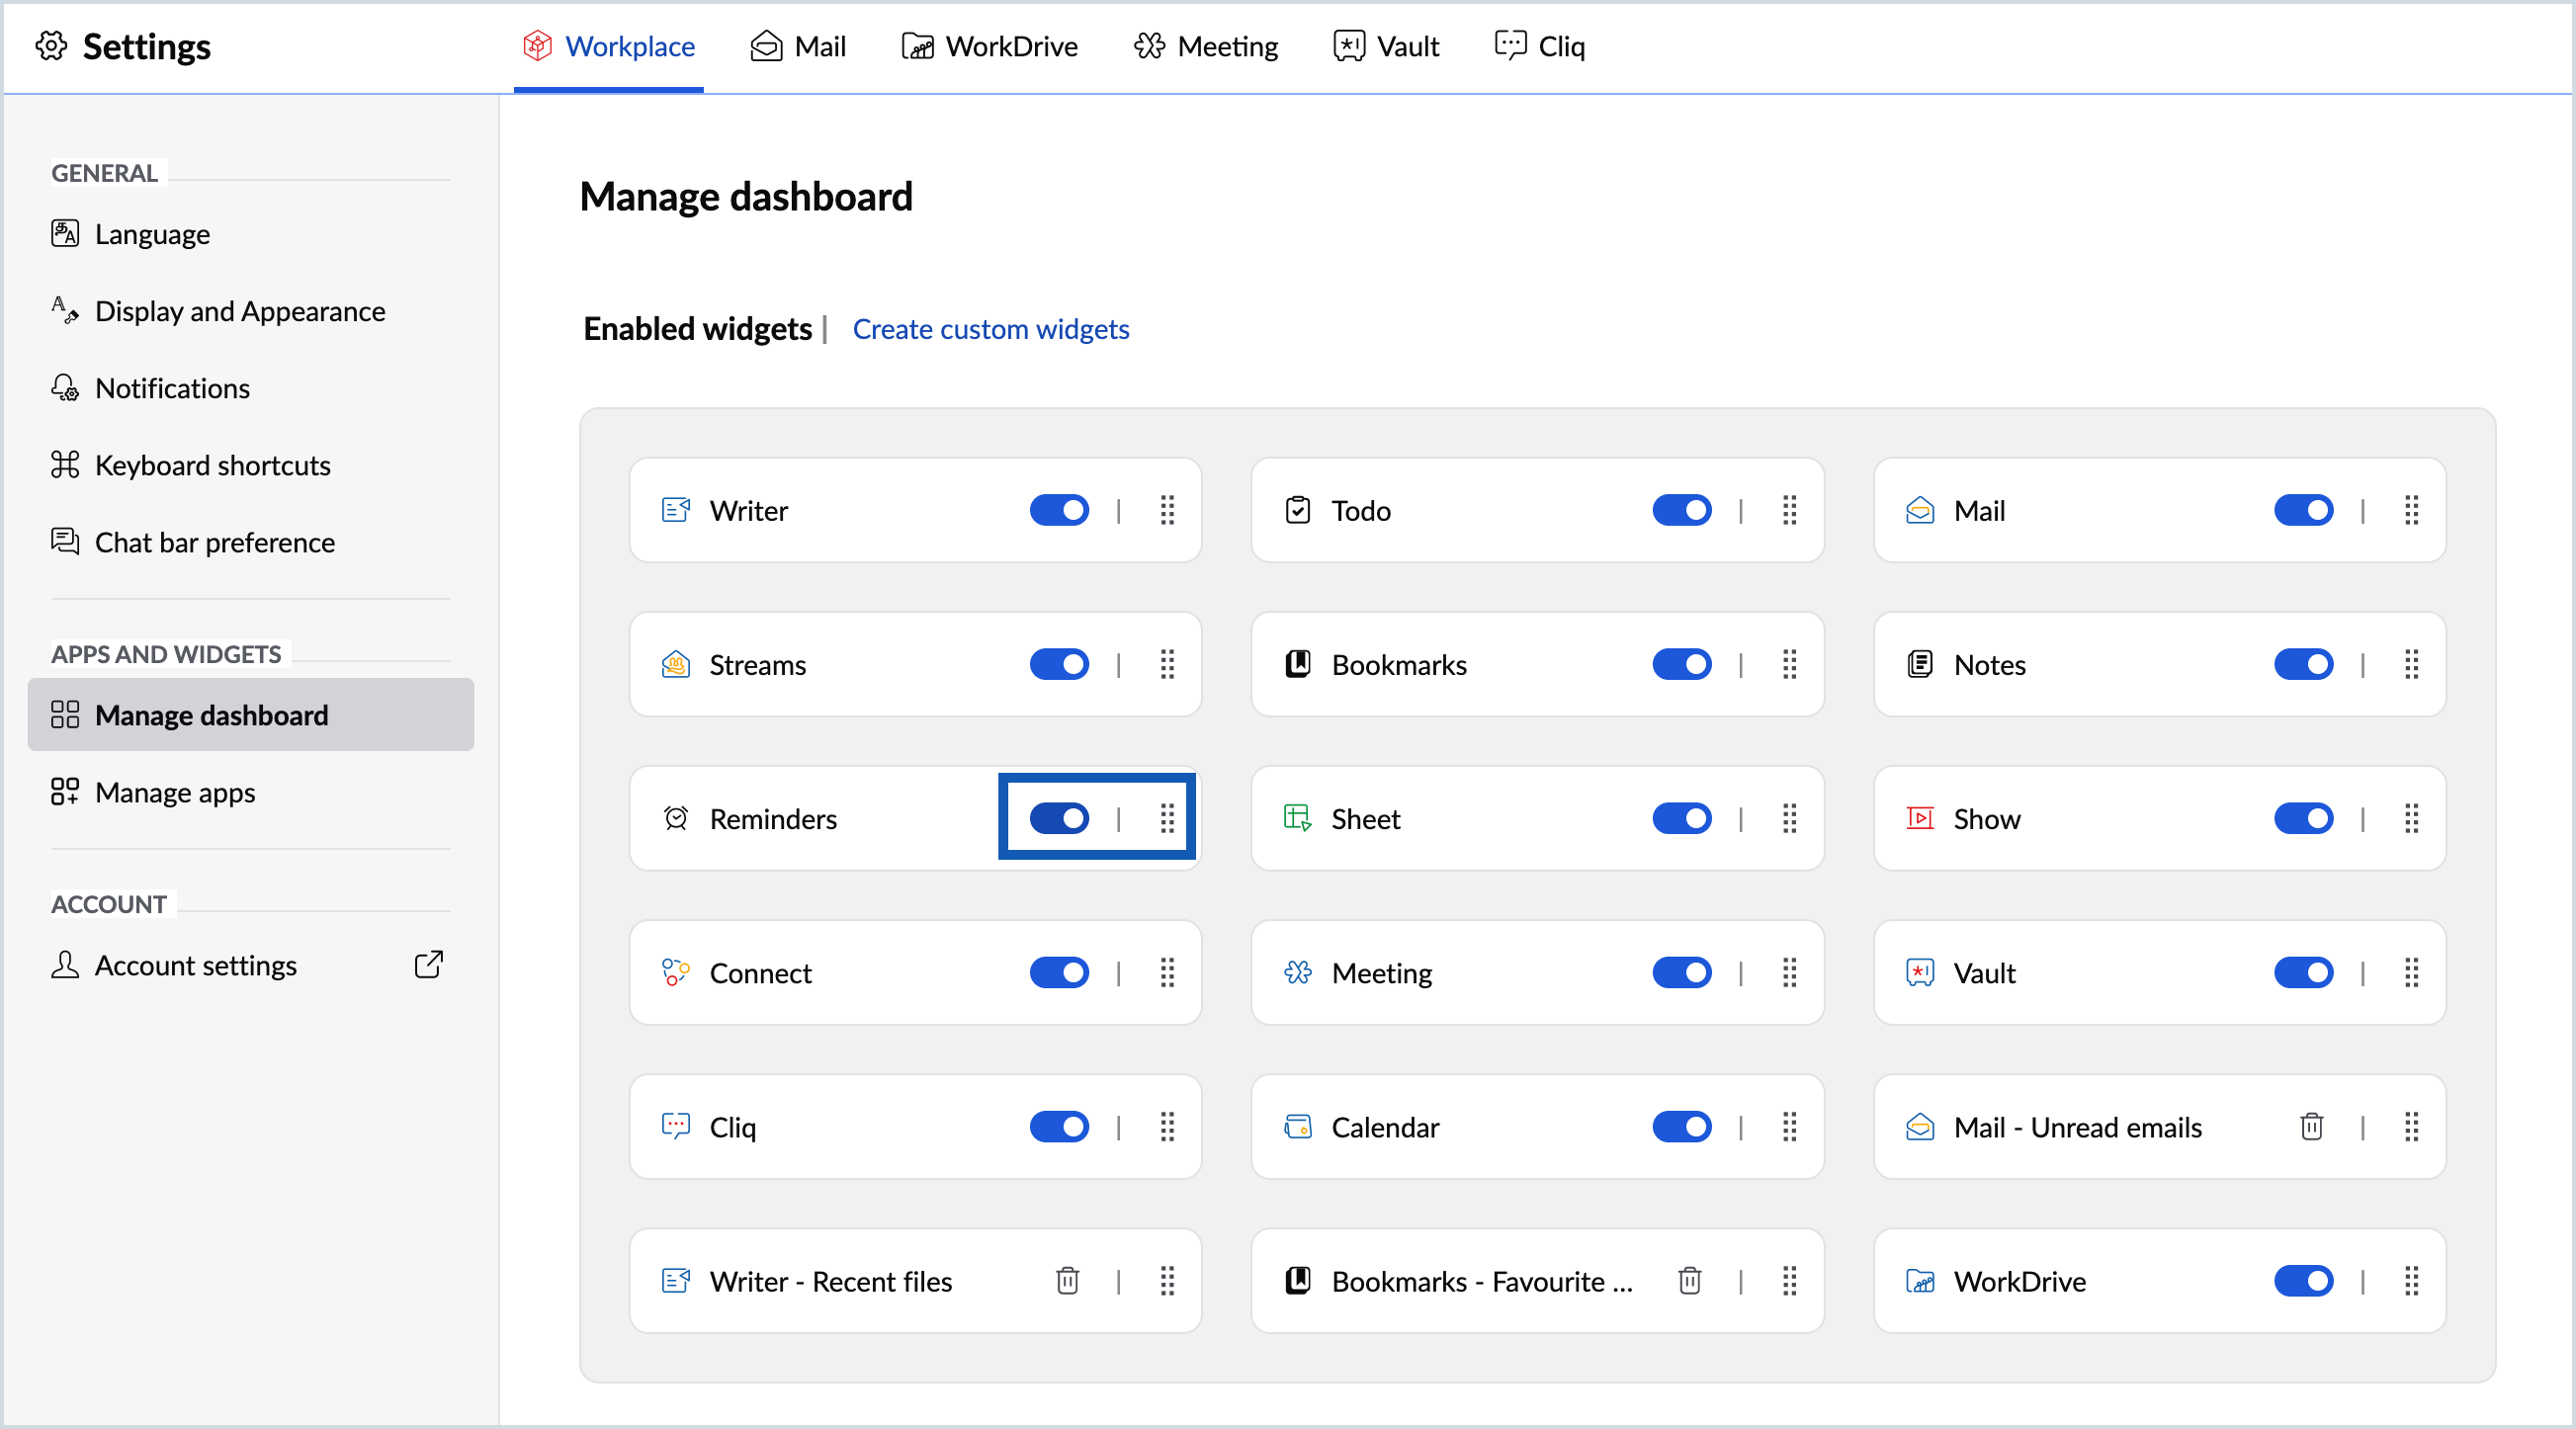
These widgets can be found in the Disabled widgets section and you can re-enable them any point if needed.
Steps to create custom widgets in Zoho Workplace
- Log in to your Zoho Workplace account
- Access the Settings section from the top-right corner.
- Go to General > Manage dashboard.
- Click on the Create Custom Widgets option.
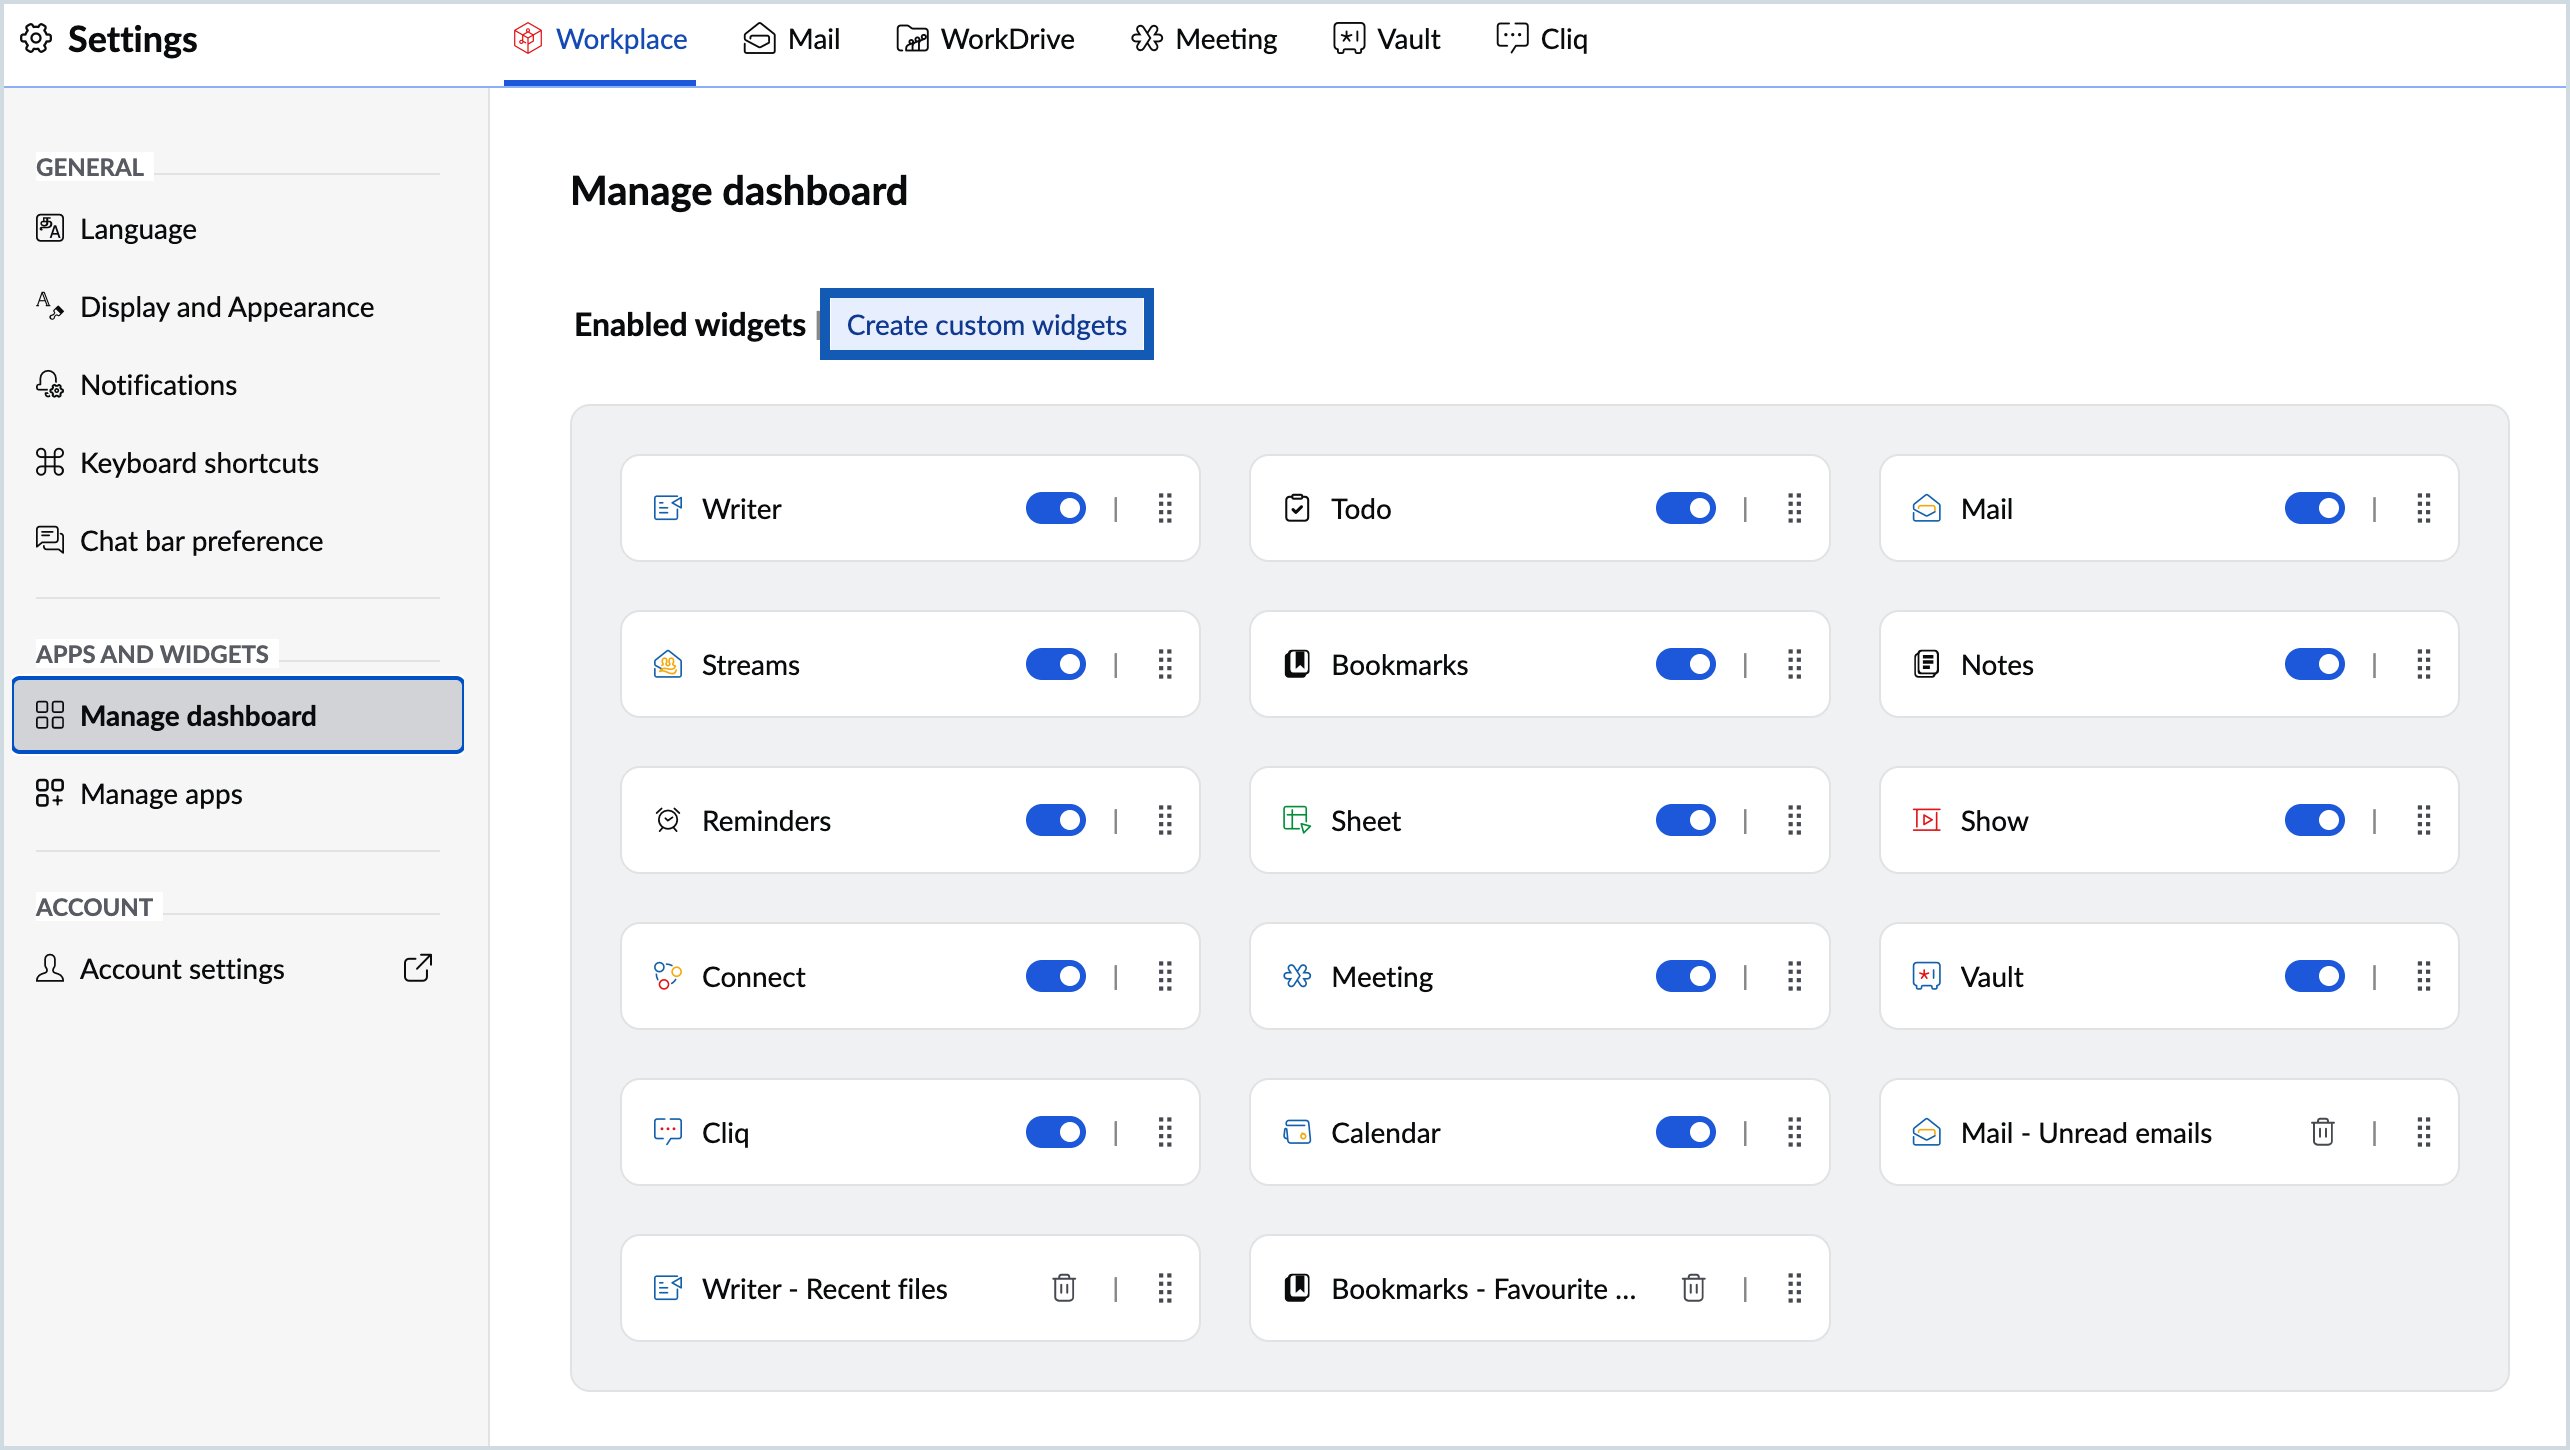
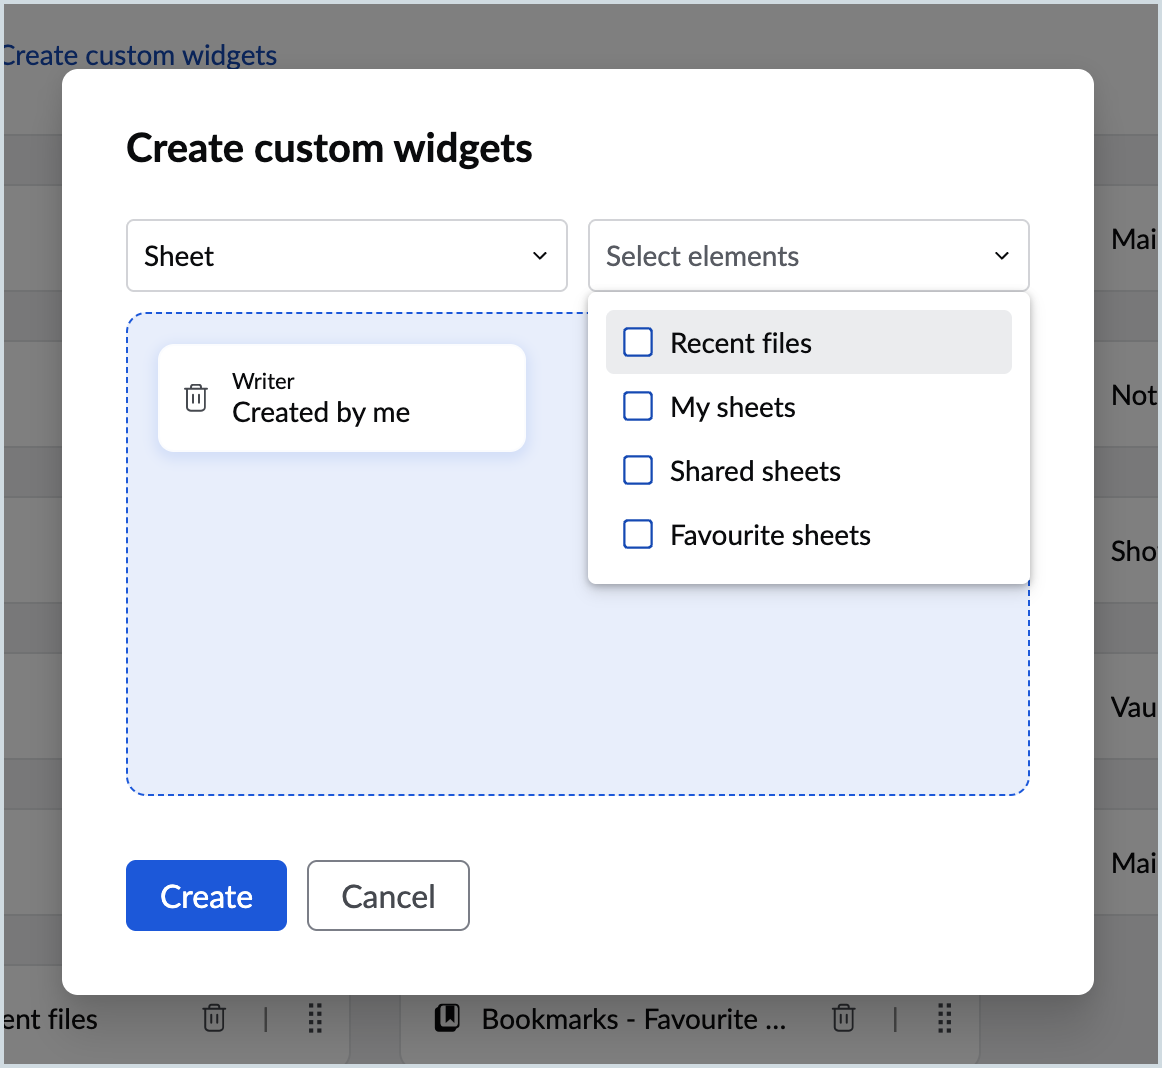
- Choose the application for which you wish to create a custom widget, from the drop-down.
- Choose the desired element from the application to be added as a widget.
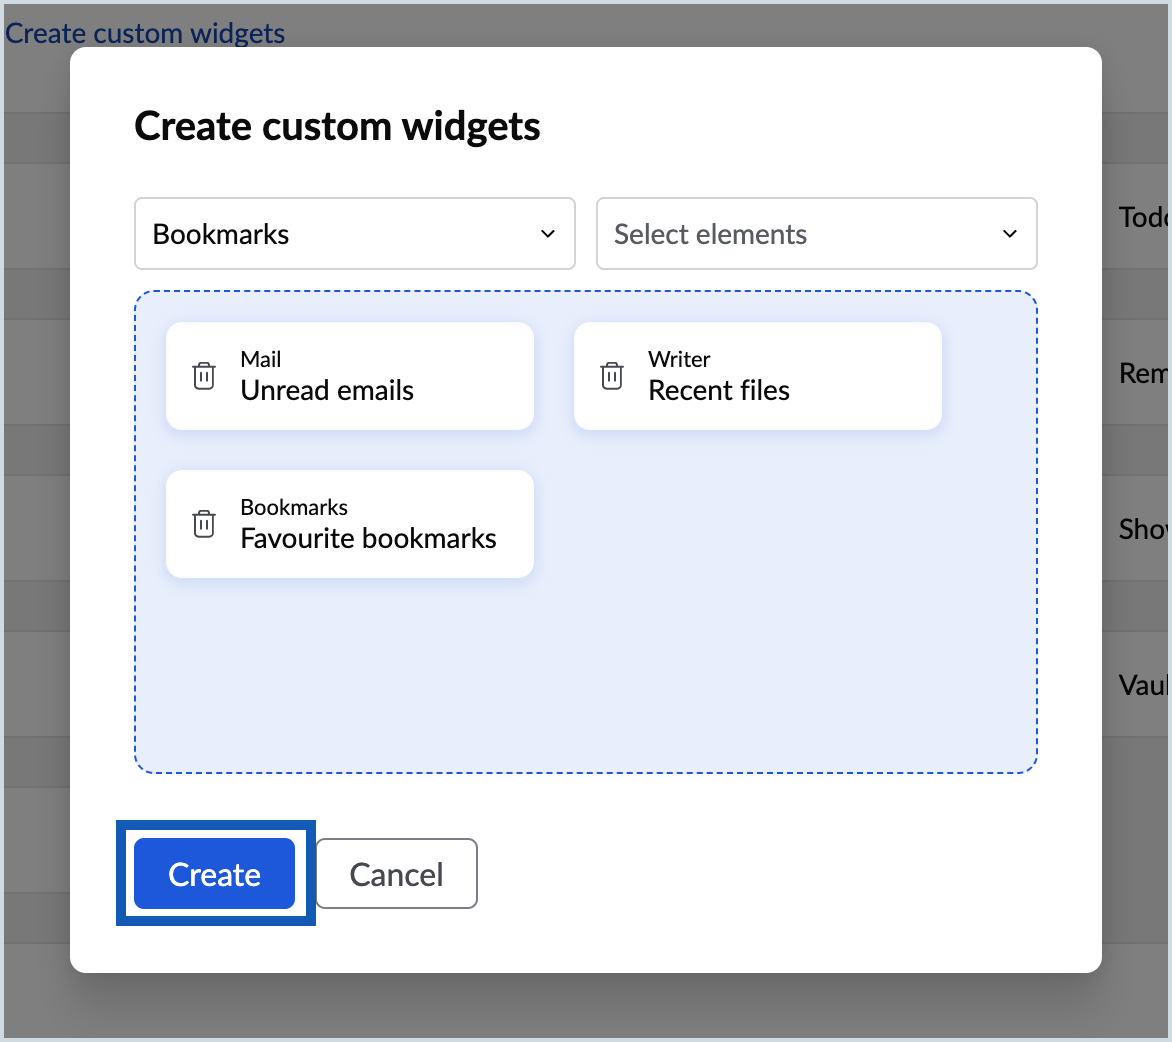
- You can create multiple custom widgets at once, and have them added to the Workplace Dashboard
- Once you choose them, click Create.
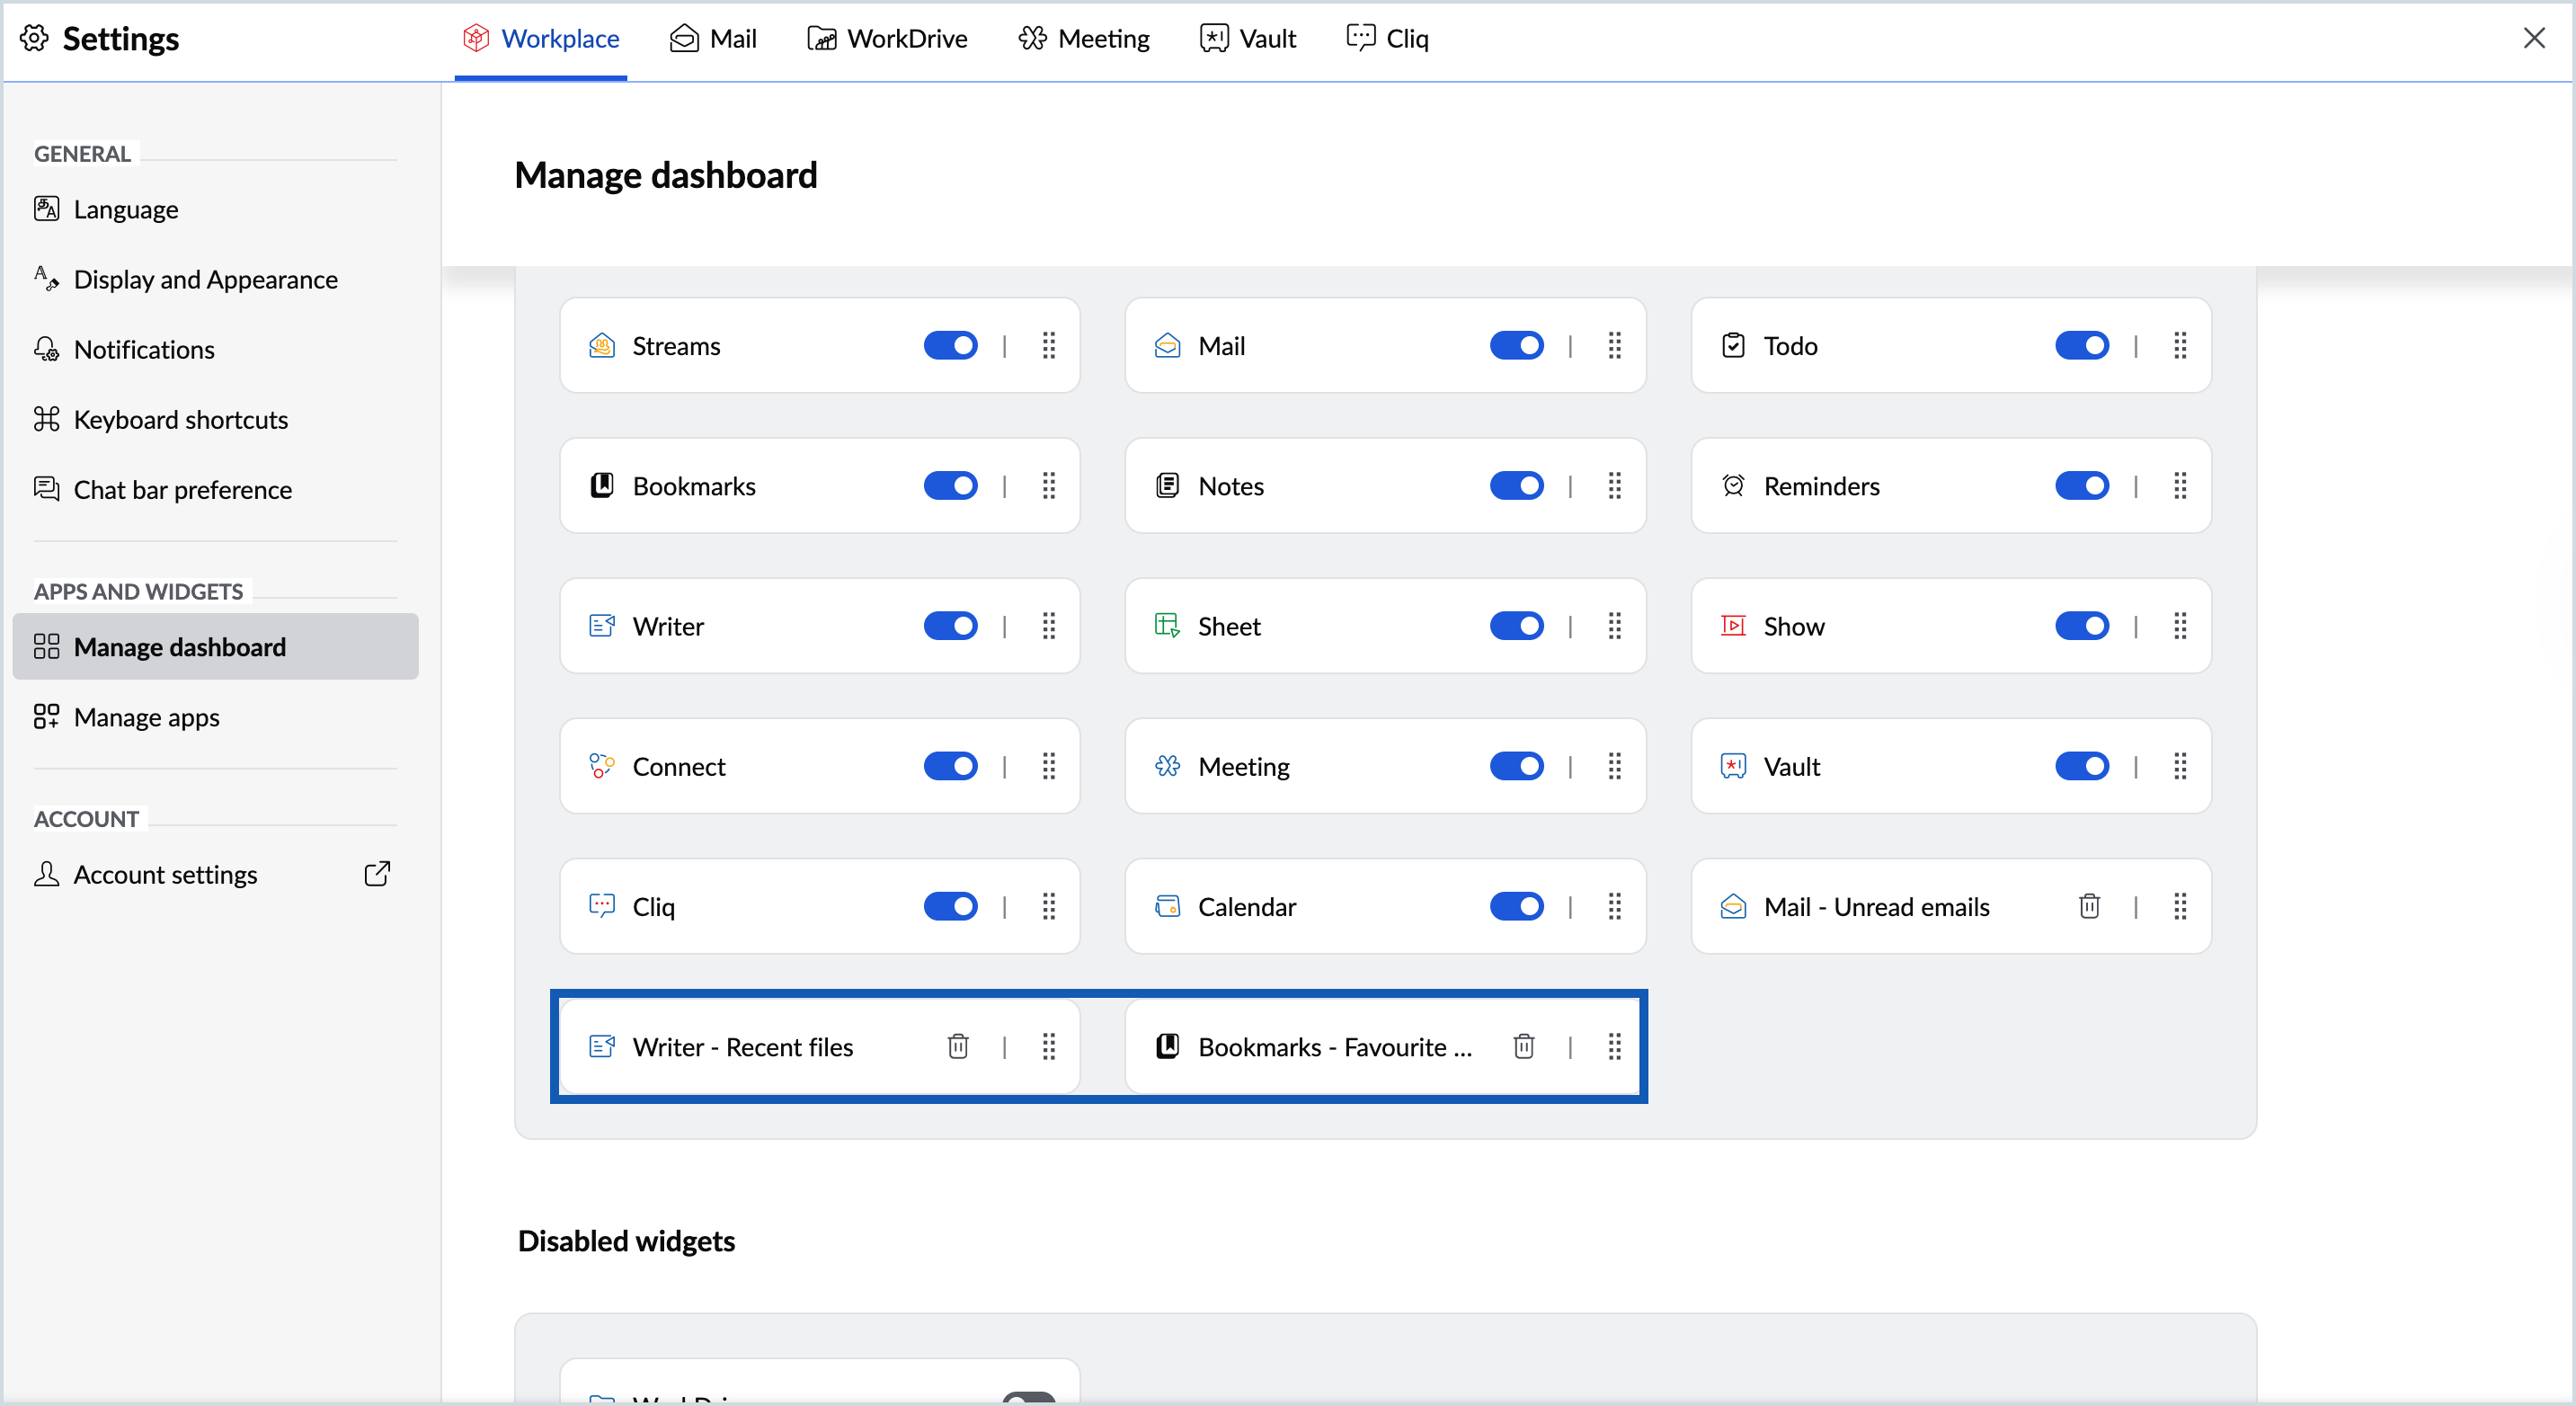
- You can delete the custom widgets by clicking the Delete icon next to the widget.
- You can also create a custom widget by clicking on the + icon at the bottom right corner of the Workplace Dashboard.
Zoho Workplace application settings
You can also access the settings of Zoho Workplace applications — Zoho Mail, Zoho Cliq, Zoho WorkDrive, Zoho Meeting and Zoho Vault from the top pane of your Workplace settings section.

Zoho account settings section
The Zoho Account settings can also be accessed by clicking on the Account Settings. You can edit your account details, manage your account security by configuring MFA, monitor your session history, etc. from your Zoho Accounts page.