Manage Employee Compensation Details
The Compensation tab in the Employees module helps you with the compensation details of an employee. This includes:
Salary and Wages
The Salary and Wages section displays the amount an employee earns as regular pay in a pay period.
INSIGHT Regular pay refers to the fixed portion of an employee’s income, typically set as an hourly rate or annual salary, excluding overtime or additional pay.
Edit an Employee’s Regular Pay
If you need to correct an error in the regular pay amount or update it due to a raise, you can easily make the changes in Zoho Payroll.
To edit the regular pay of an employee:
- Go to the Employees module.
- Click the employee’s name.
- Navigate to the Compensation tab.
- Click Edit next to Regular Pay.
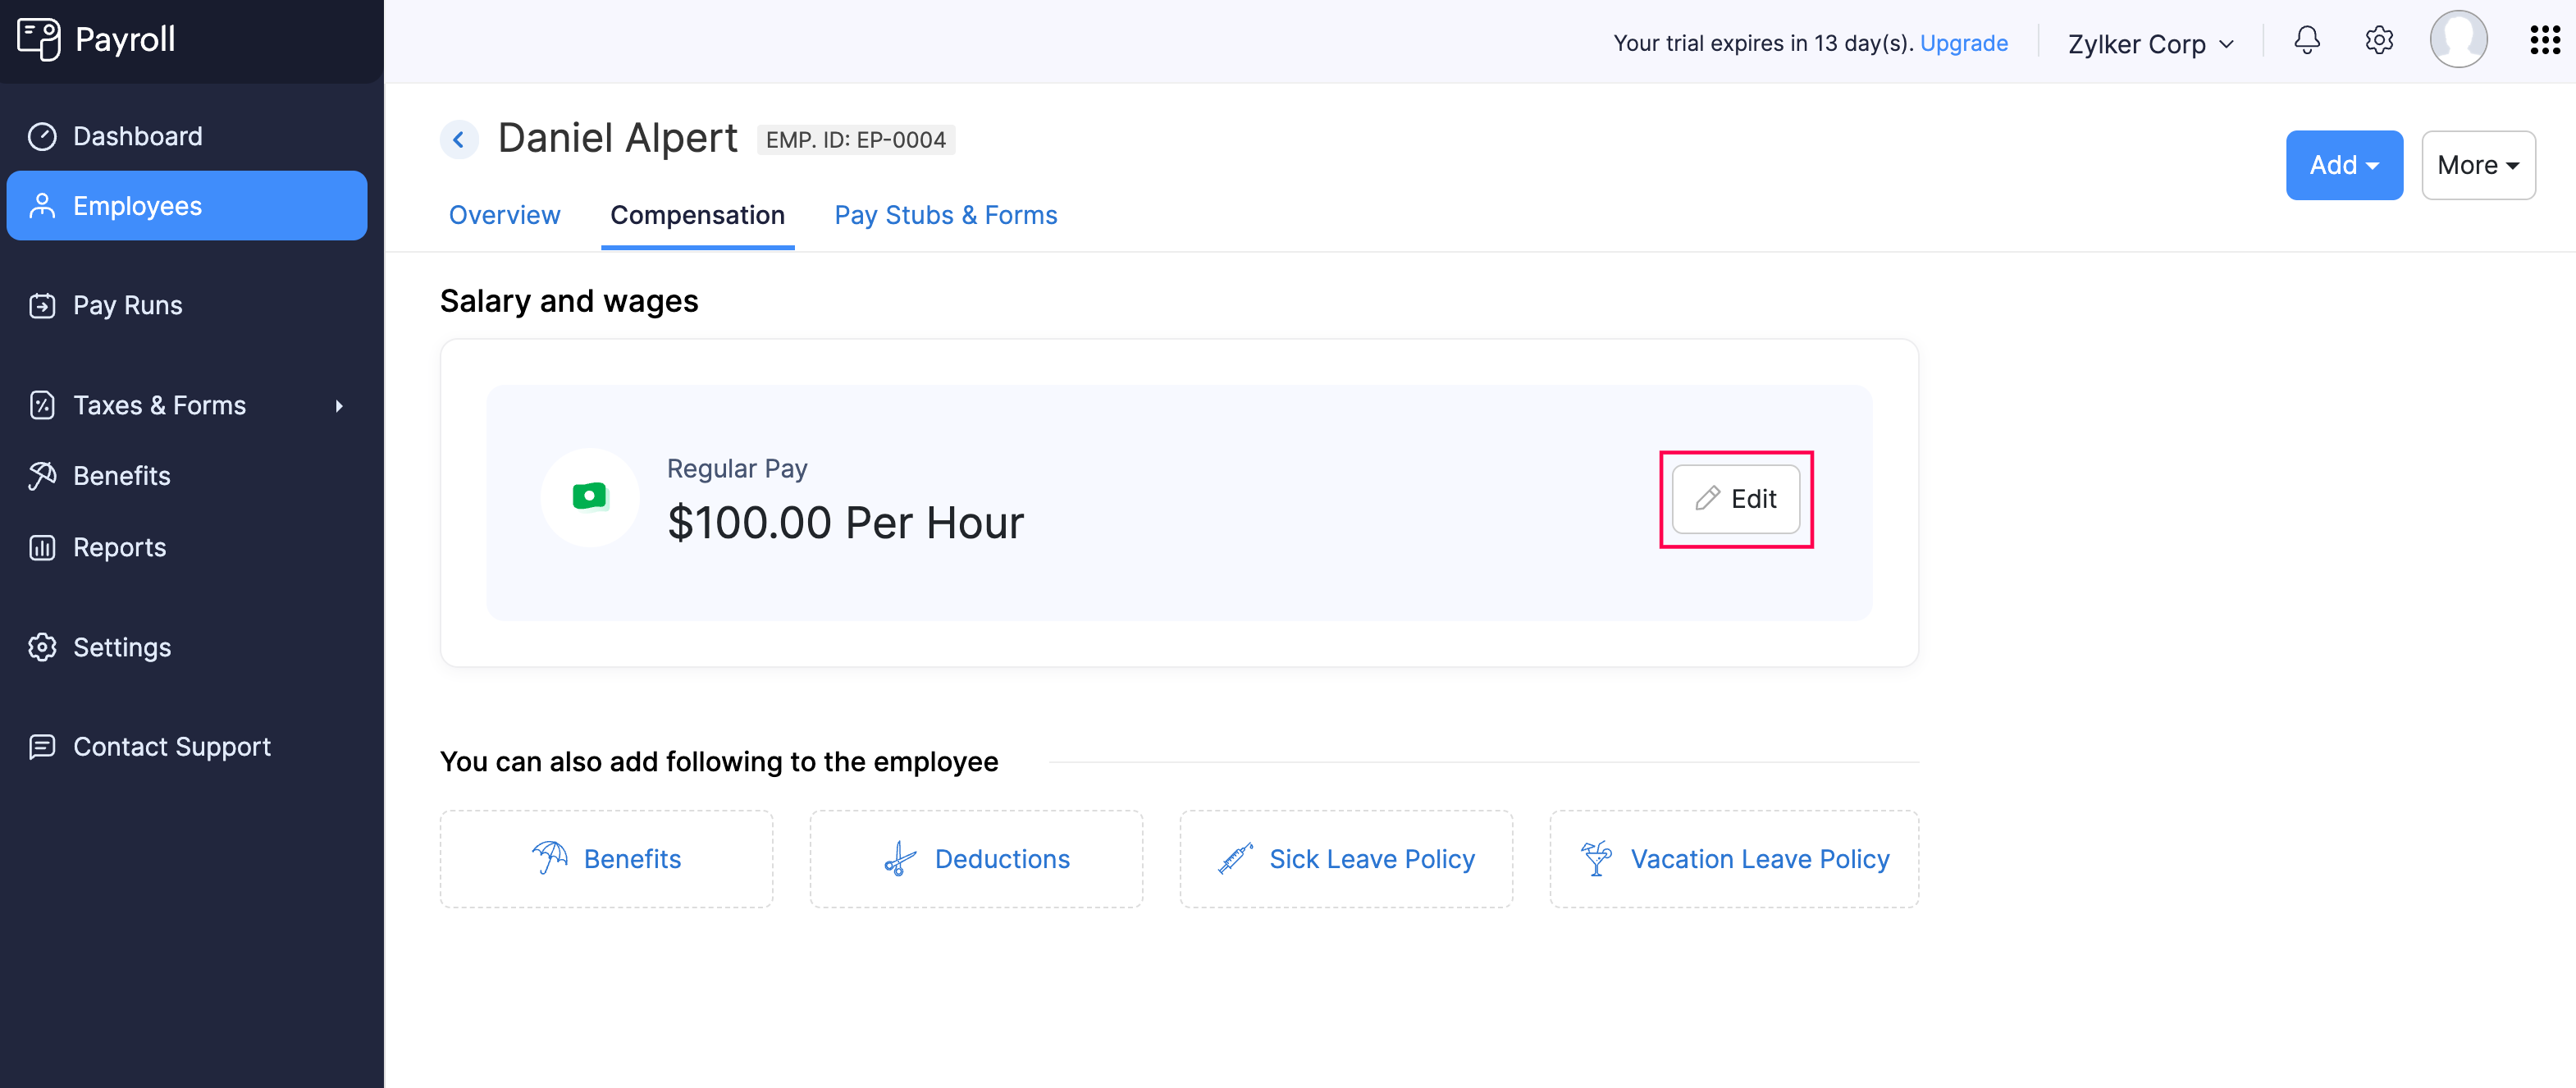
- Enter the updated Amount.
- Click Save.
Once saved, the updated regular pay will reflect in the upcoming payrolls.
Multiple Pay Rates for an Employee
NOTE This feature is available only for certain plans of Zoho Payroll. Visit our pricing page to check if it’s available in your current plan.
If an employee performs multiple roles in your organization, you may want to compensate them differently for each role. For example, a Subject Matter Expert (SME) in an ed-tech company may also take on an additional role as a Course Instructor.
Zoho Payroll allows you to manage this complexity by adding multiple pay rates for the same employee.
To add an additional pay rate for an employee:
- Go to the Employees module.
- Click the employee’s name.
- Navigate to the Compensation tab.
- Under Salary and wages, Click + Earning.
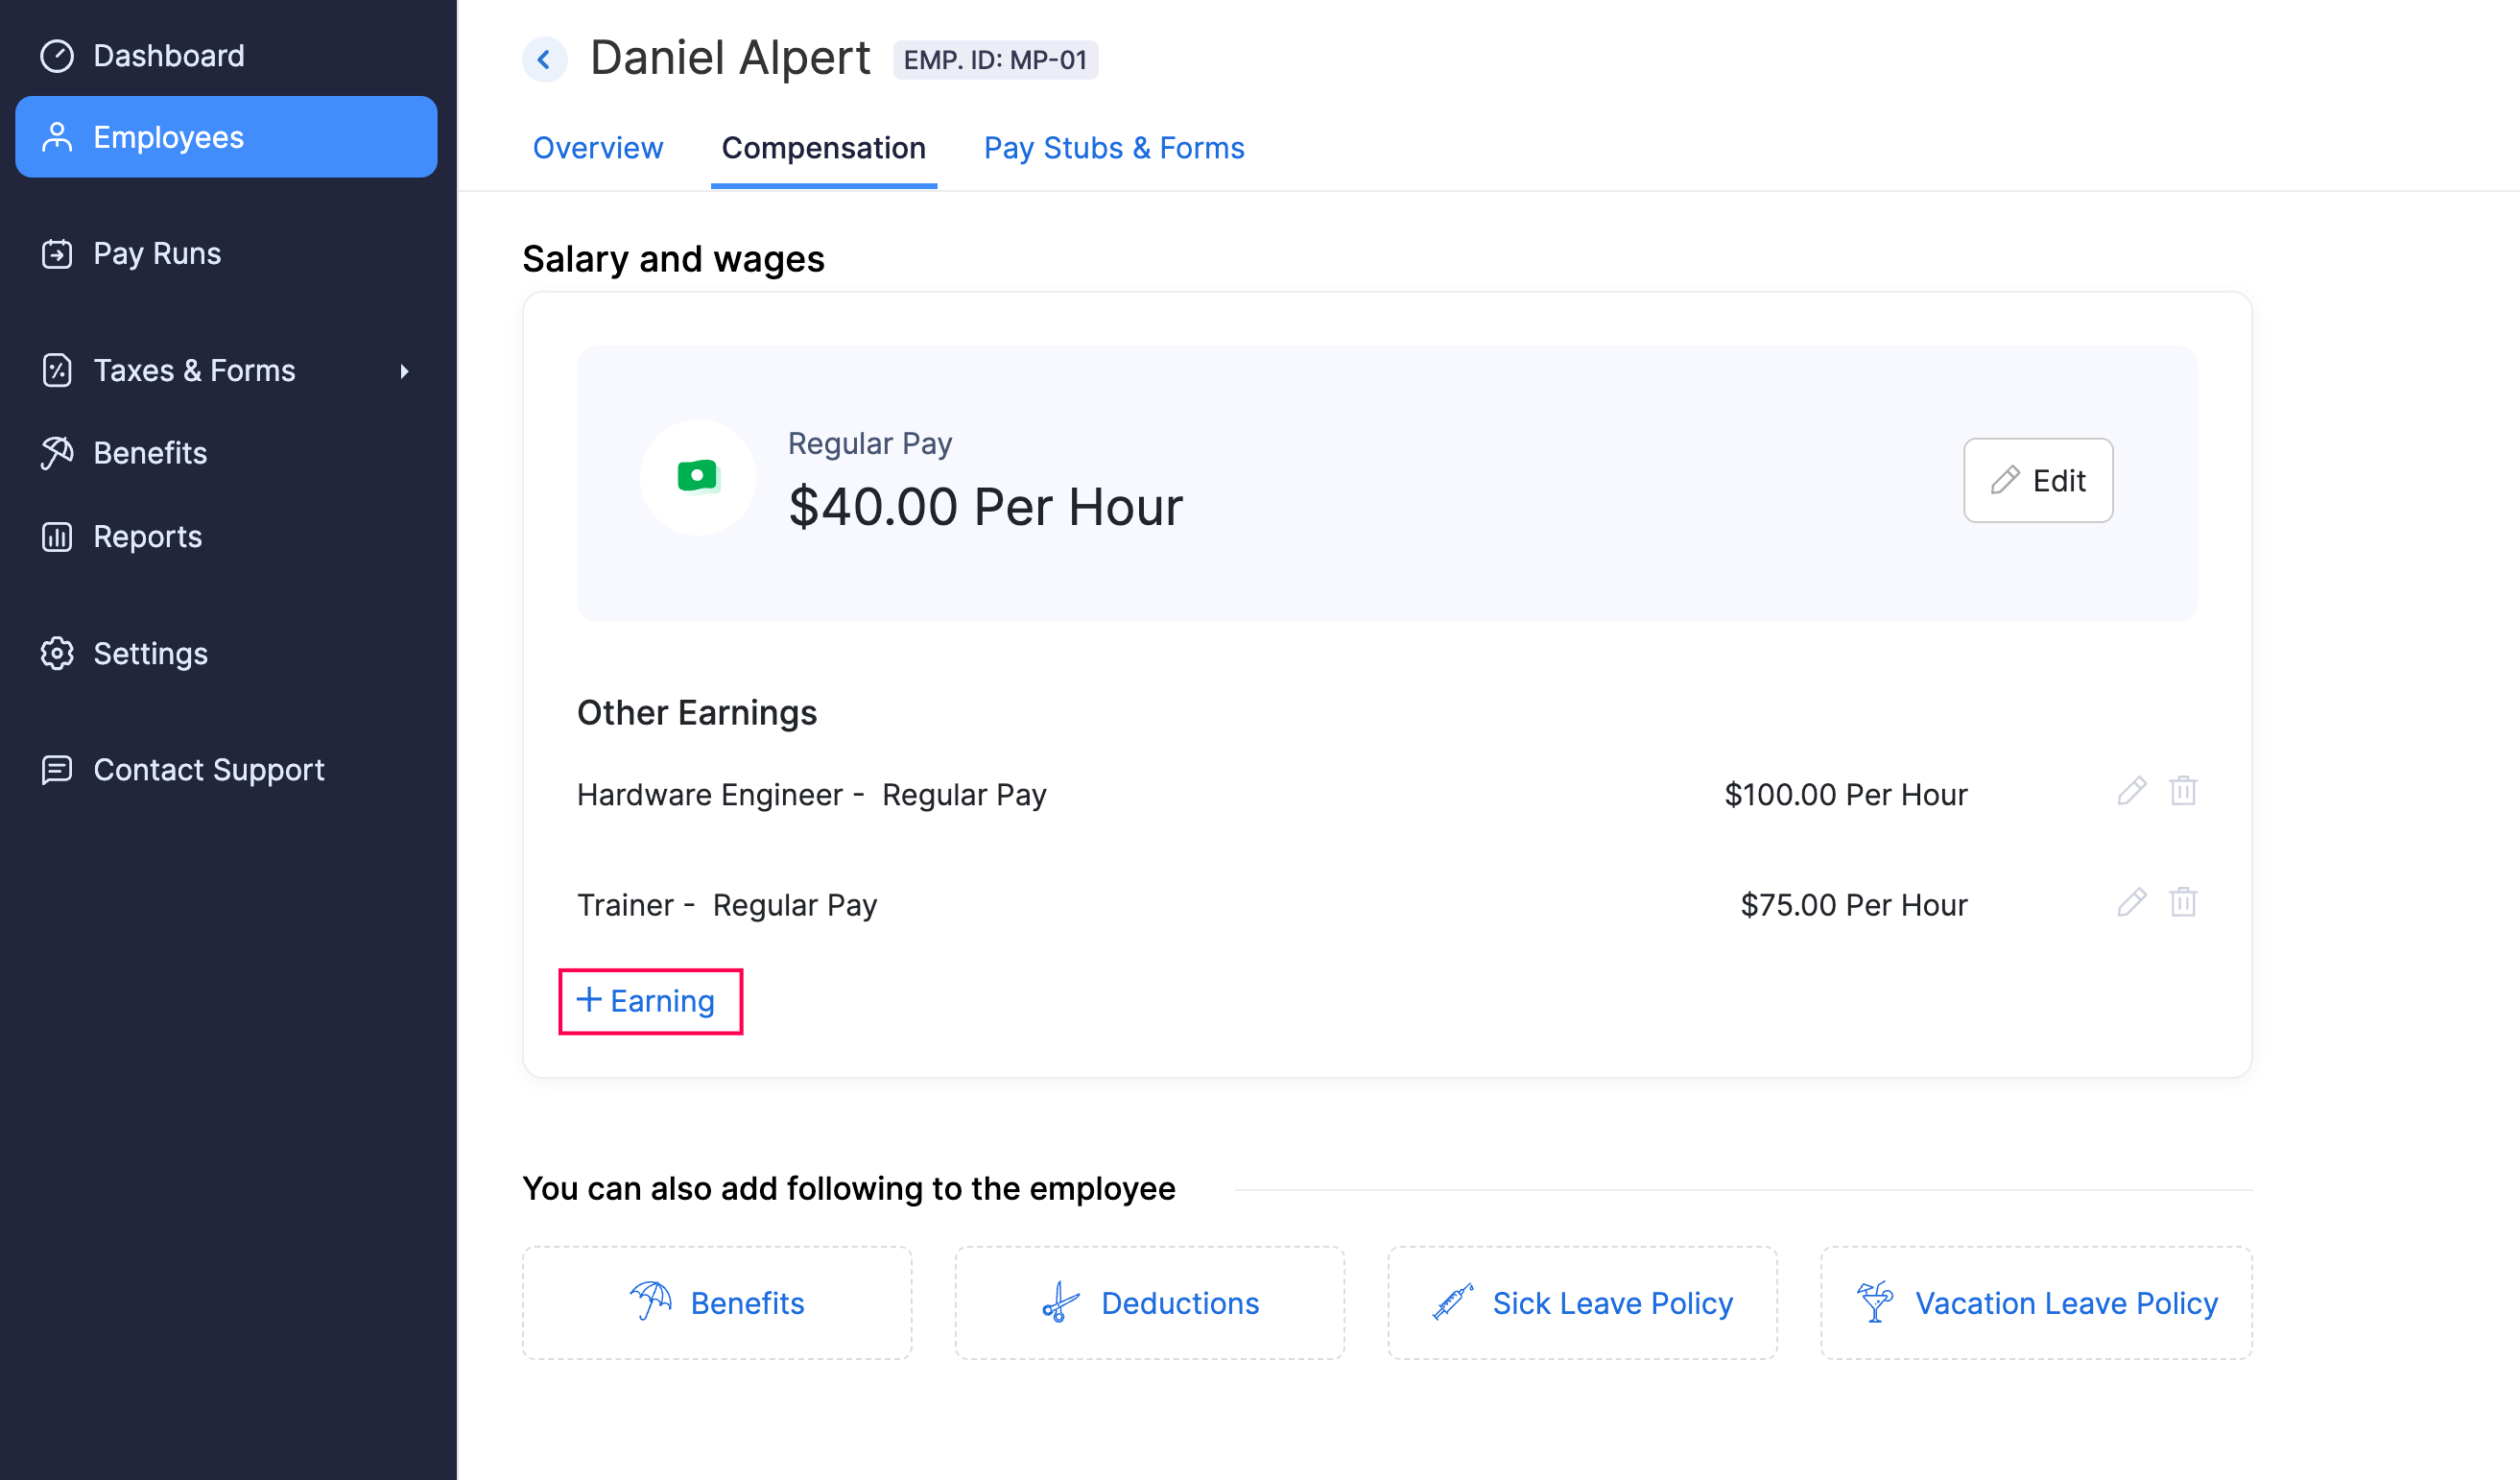
- In the pop-up that appears, select the Job Role, enter the corresponding Amount, and click Save.
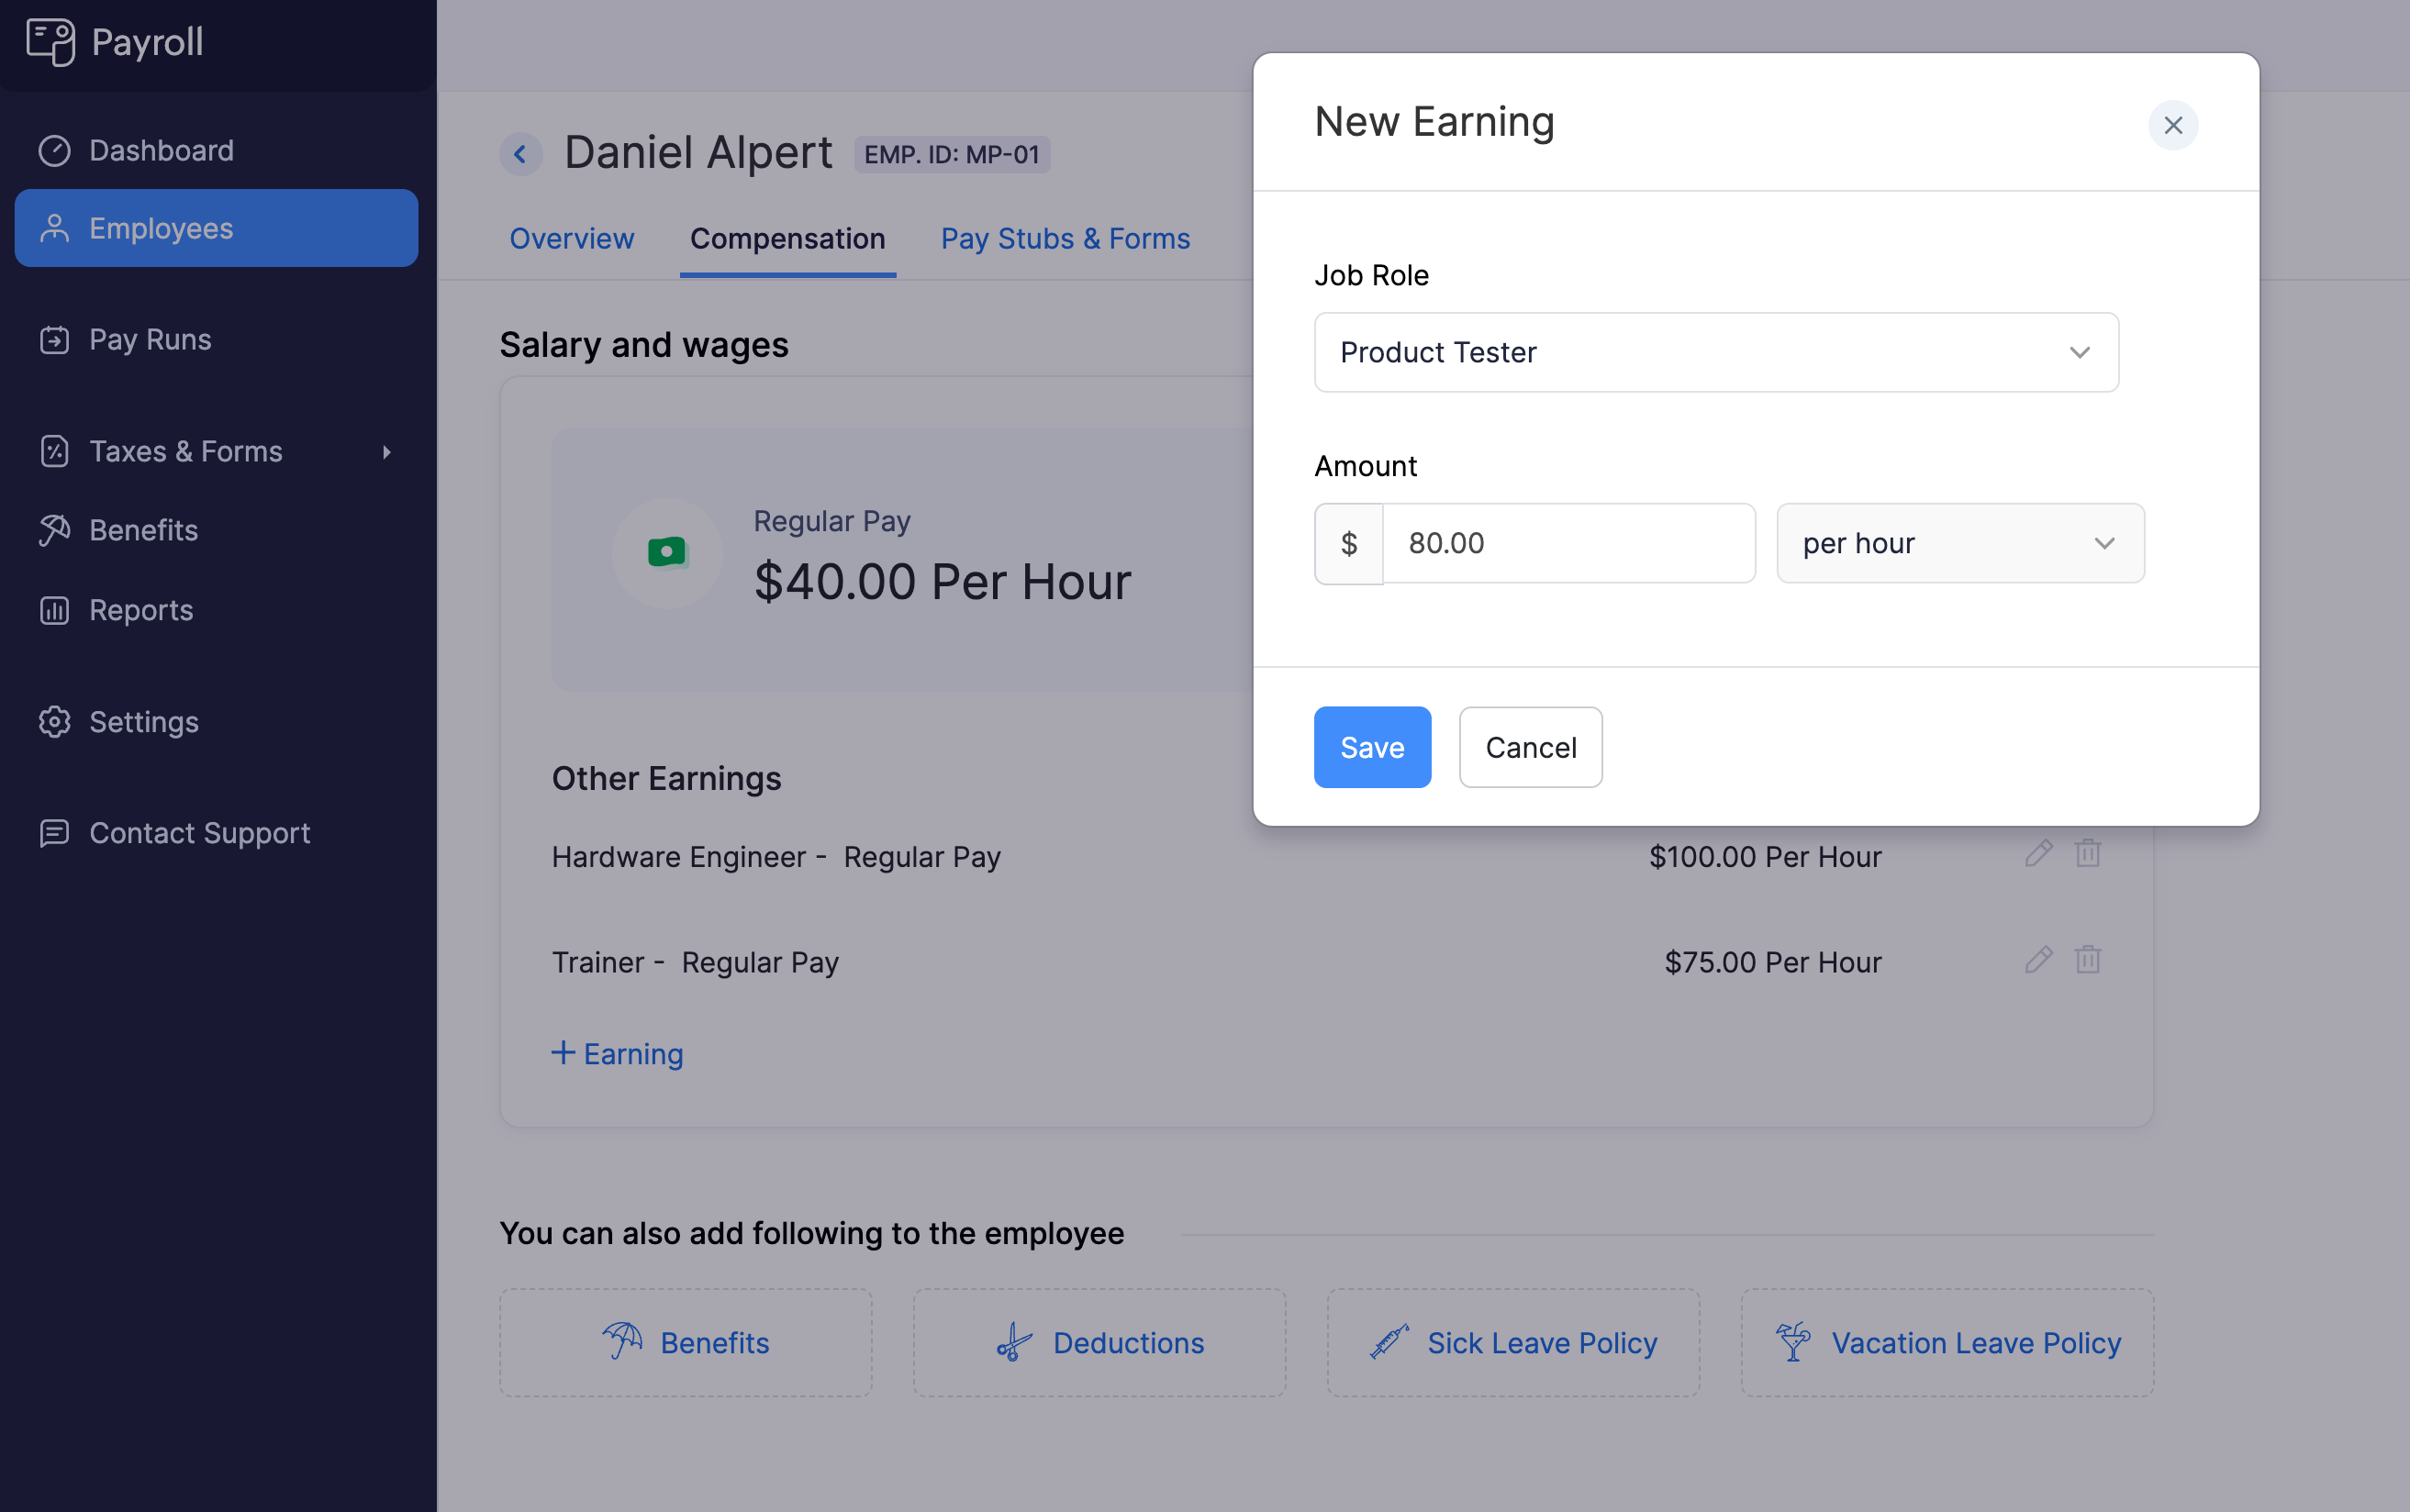
This way, you can add as many pay rates as needed for each role an employee performs. These additional pay rates can be included while processing a payroll.
Benefits
Benefits are additional compensation or perks provided to employees beyond their regular wages or salary. Certain benefits may have special taxability rules and, in some cases, need to be reported differently on tax returns and employee W-2s.
Zoho Payroll helps you manage and streamline the process of offering benefits to employees, ensuring that the correct tax treatment and reporting are applied automatically.
Assign Benefits to an Employee
PREREQUISITE You must have configured benefits at the organization level to be able to assign benefits to employees. If you haven’t configured it already, learn how.
To assign a benefit to an employee:
- Go to the Employees module.
- Click an employee.
- Navigate to the Compensation tab.
- Follow one of these steps:
- Click Add at the top right and select Benefit.
- If you have not assigned any benefits to the employee, click Benefits under You can also add following to the employee.
- If you’ve already assigned benefits to the employee, click Add New next to Benefits.
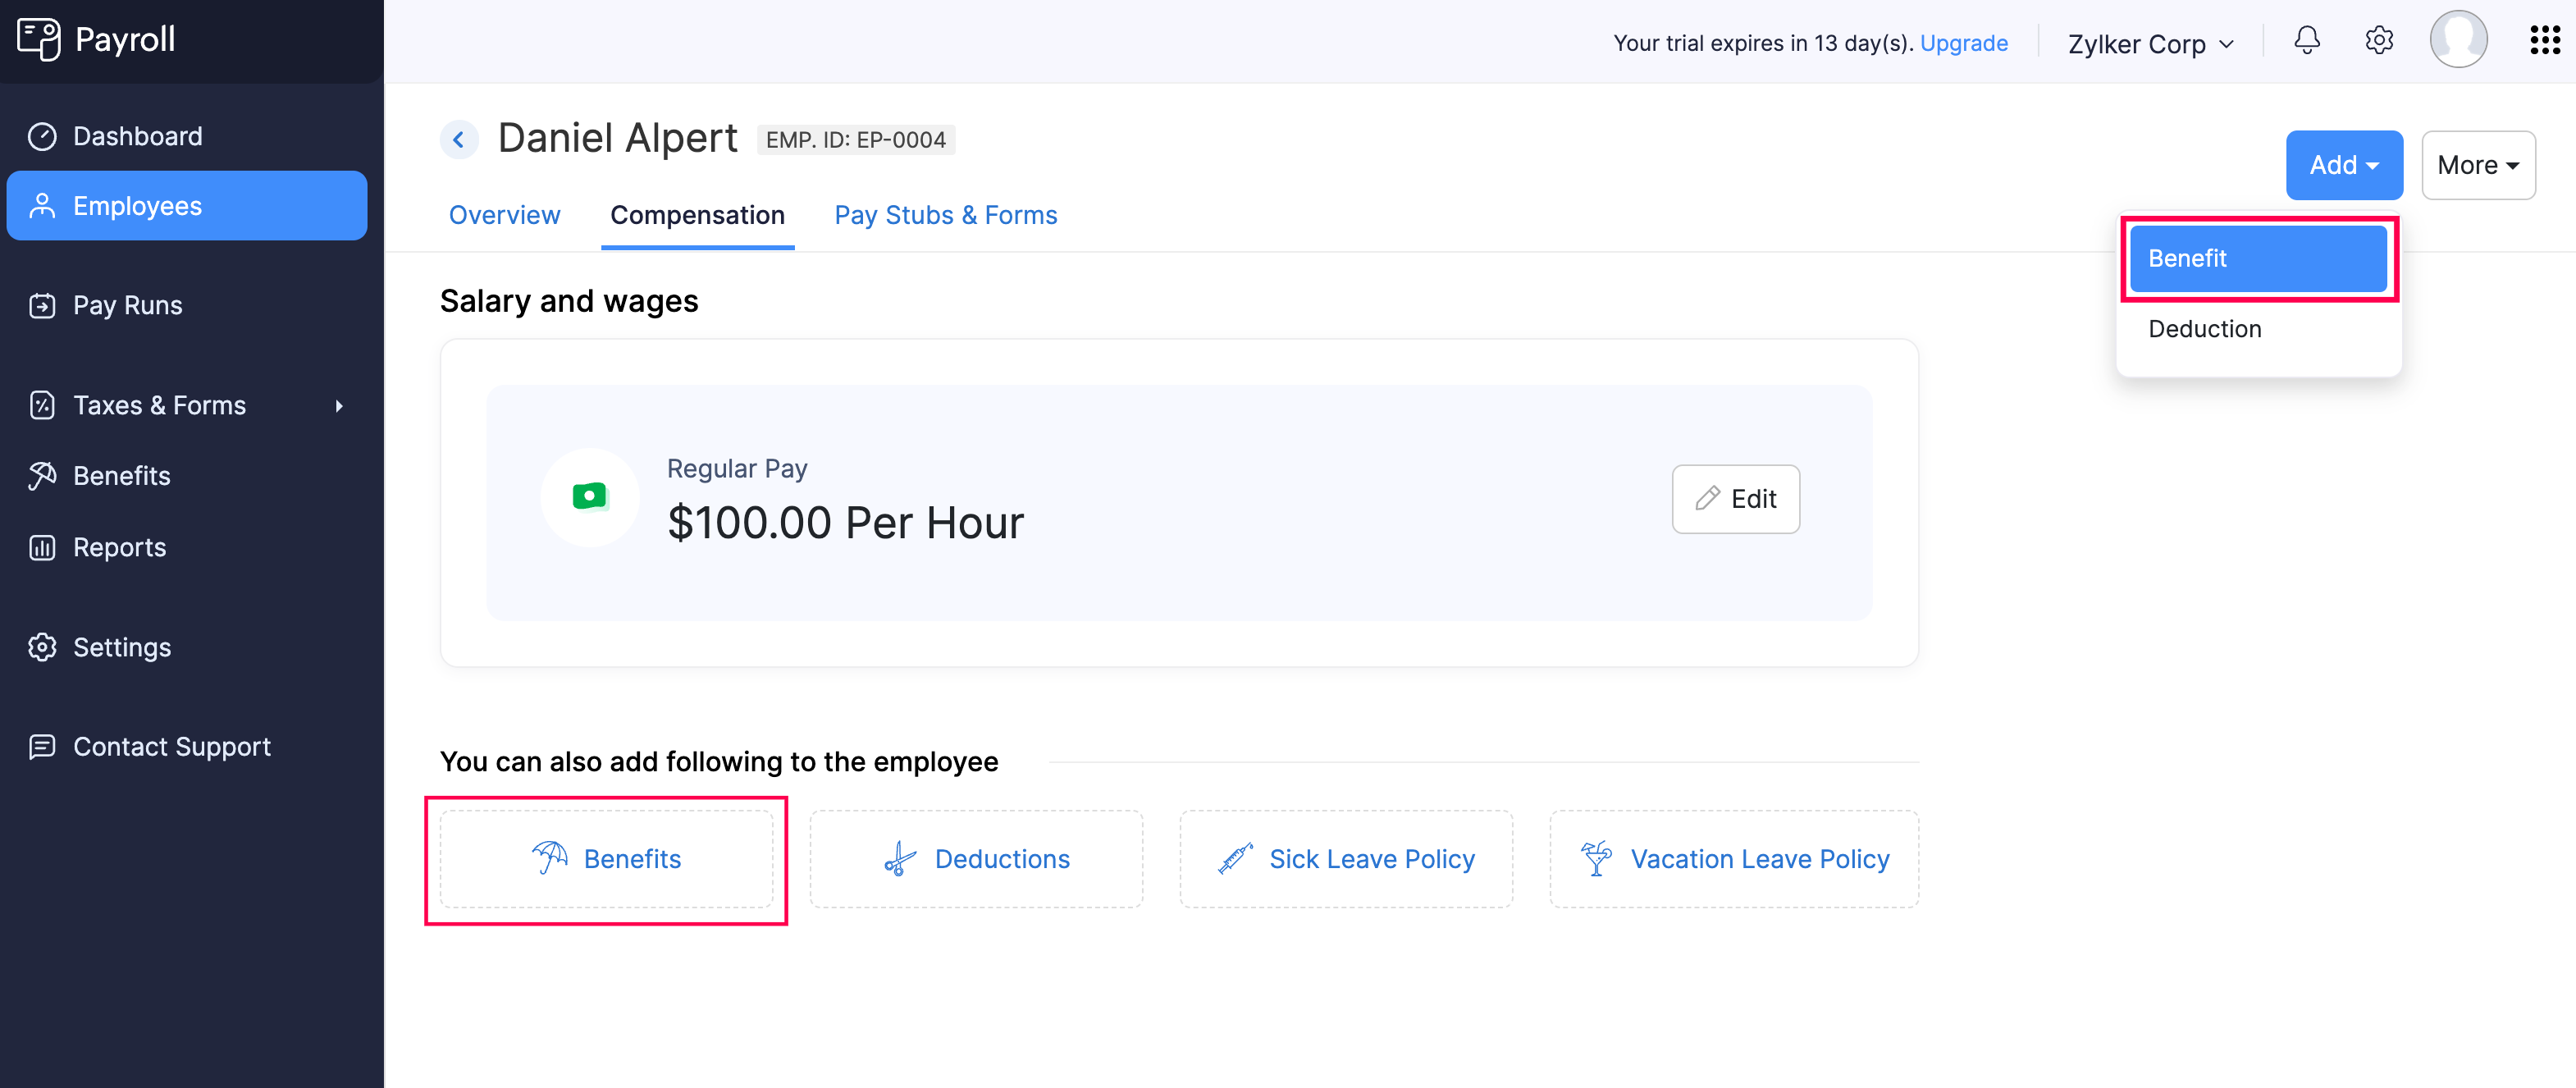
- In the popup that appears, select a benefit plan from the Benefit Name dropdown.
- Enter Employee’s Contribution and Employer’s Contribution. You can select either a fixed amount or a percentage of the employee’s gross pay.
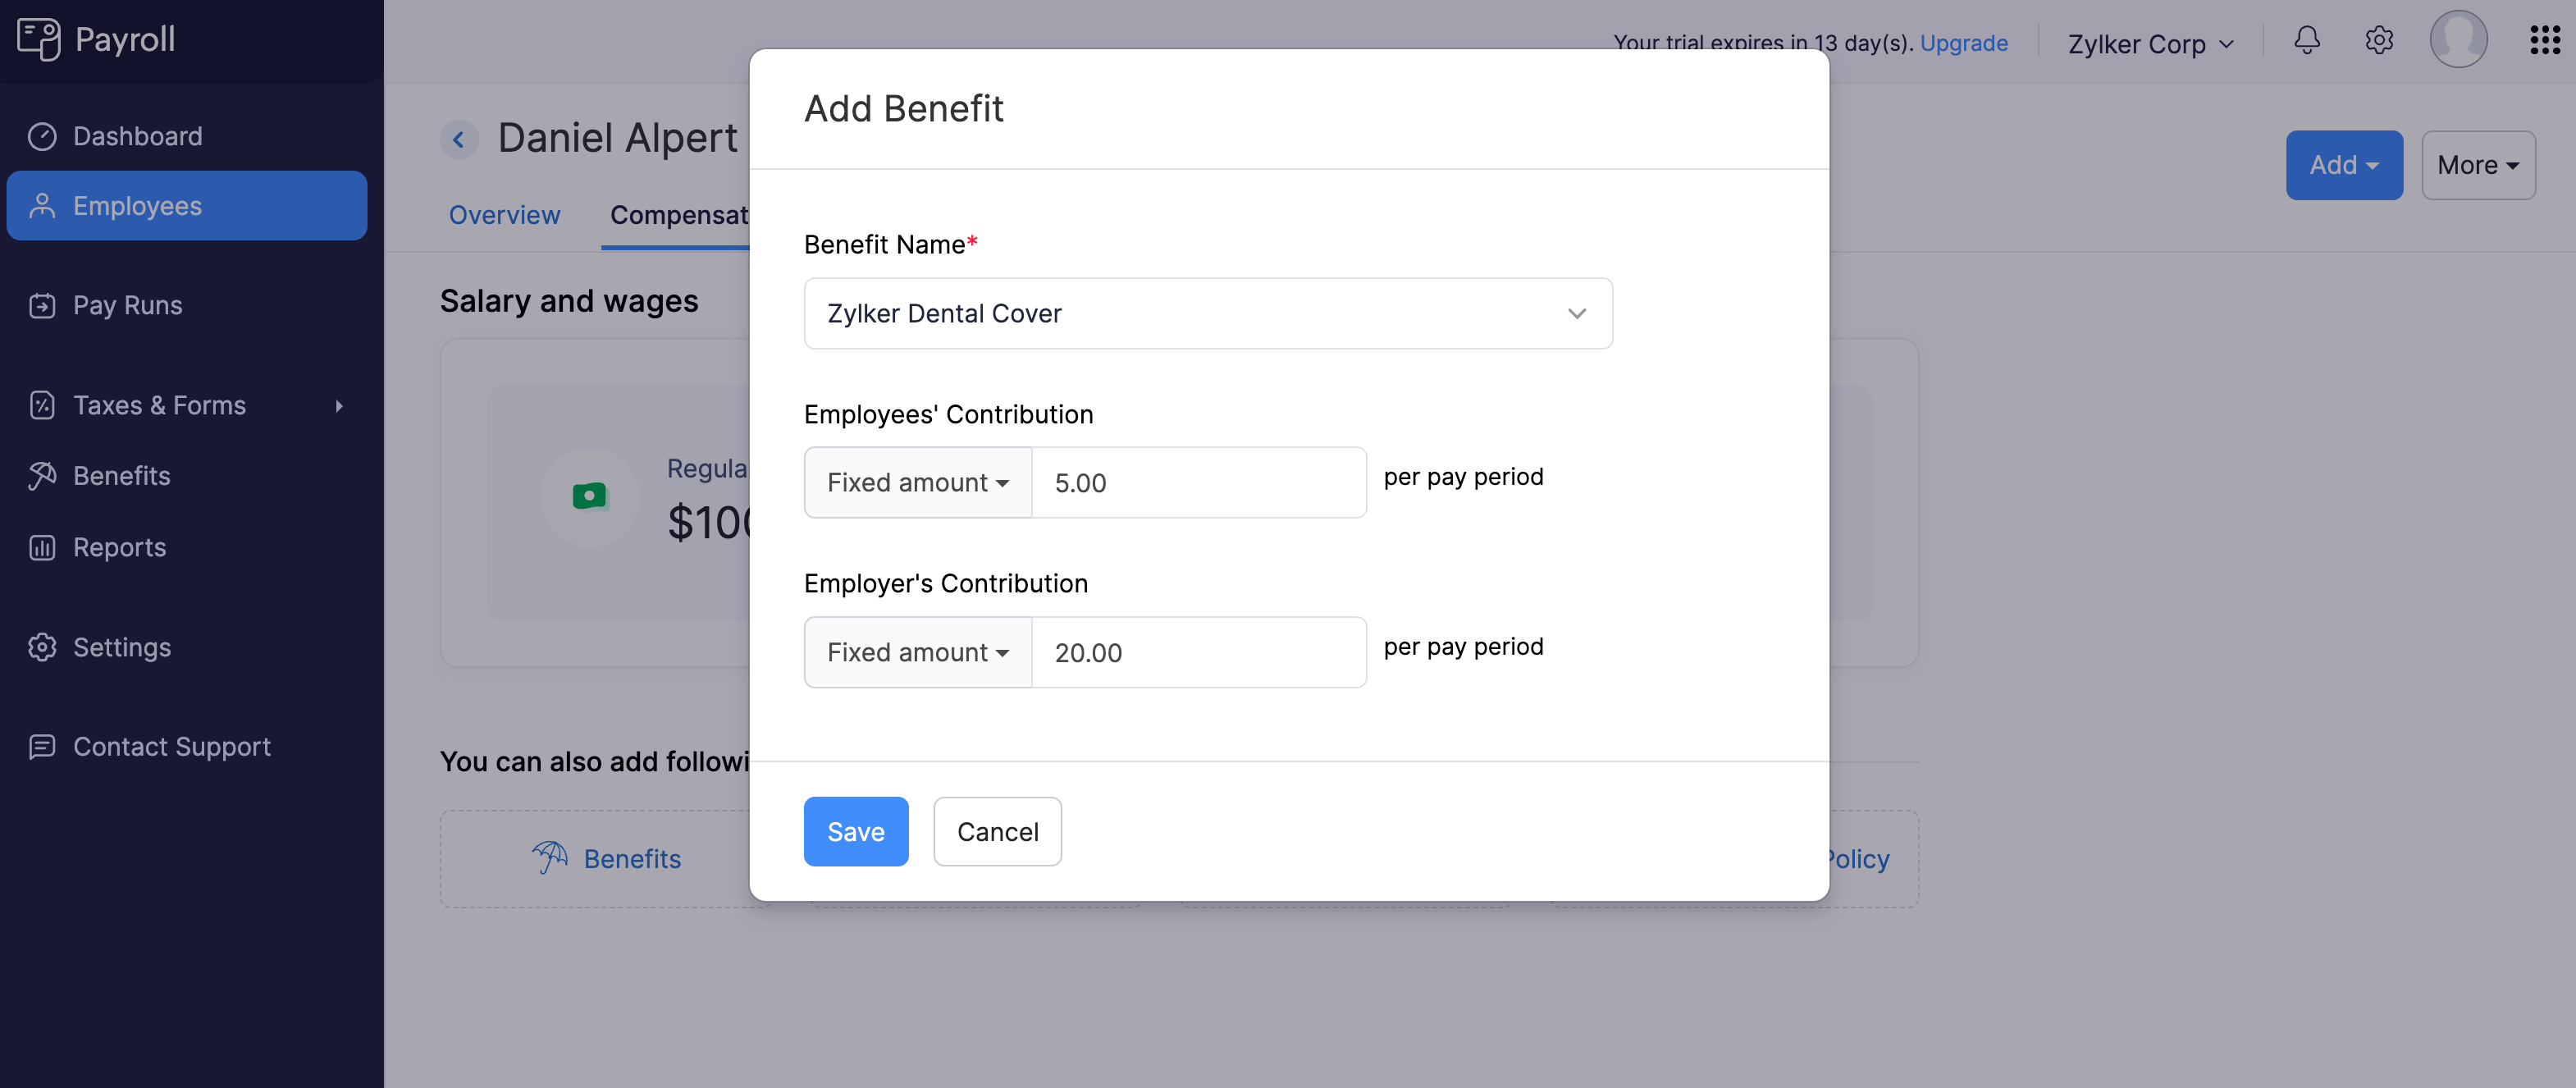
- Click Save.
The benefit will be assigned to the employee and will be included in their upcoming payrolls.
Edit Benefits Assigned to an Employee
PREREQUISITE You must have already assigned a benefit to the employee.
To edit a benefit assigned to an employee:
- Go to the Employees module.
- Click an employee.
- Navigate to the Compensation tab.
- Under Benefits, click the edit icon next to a benefit.
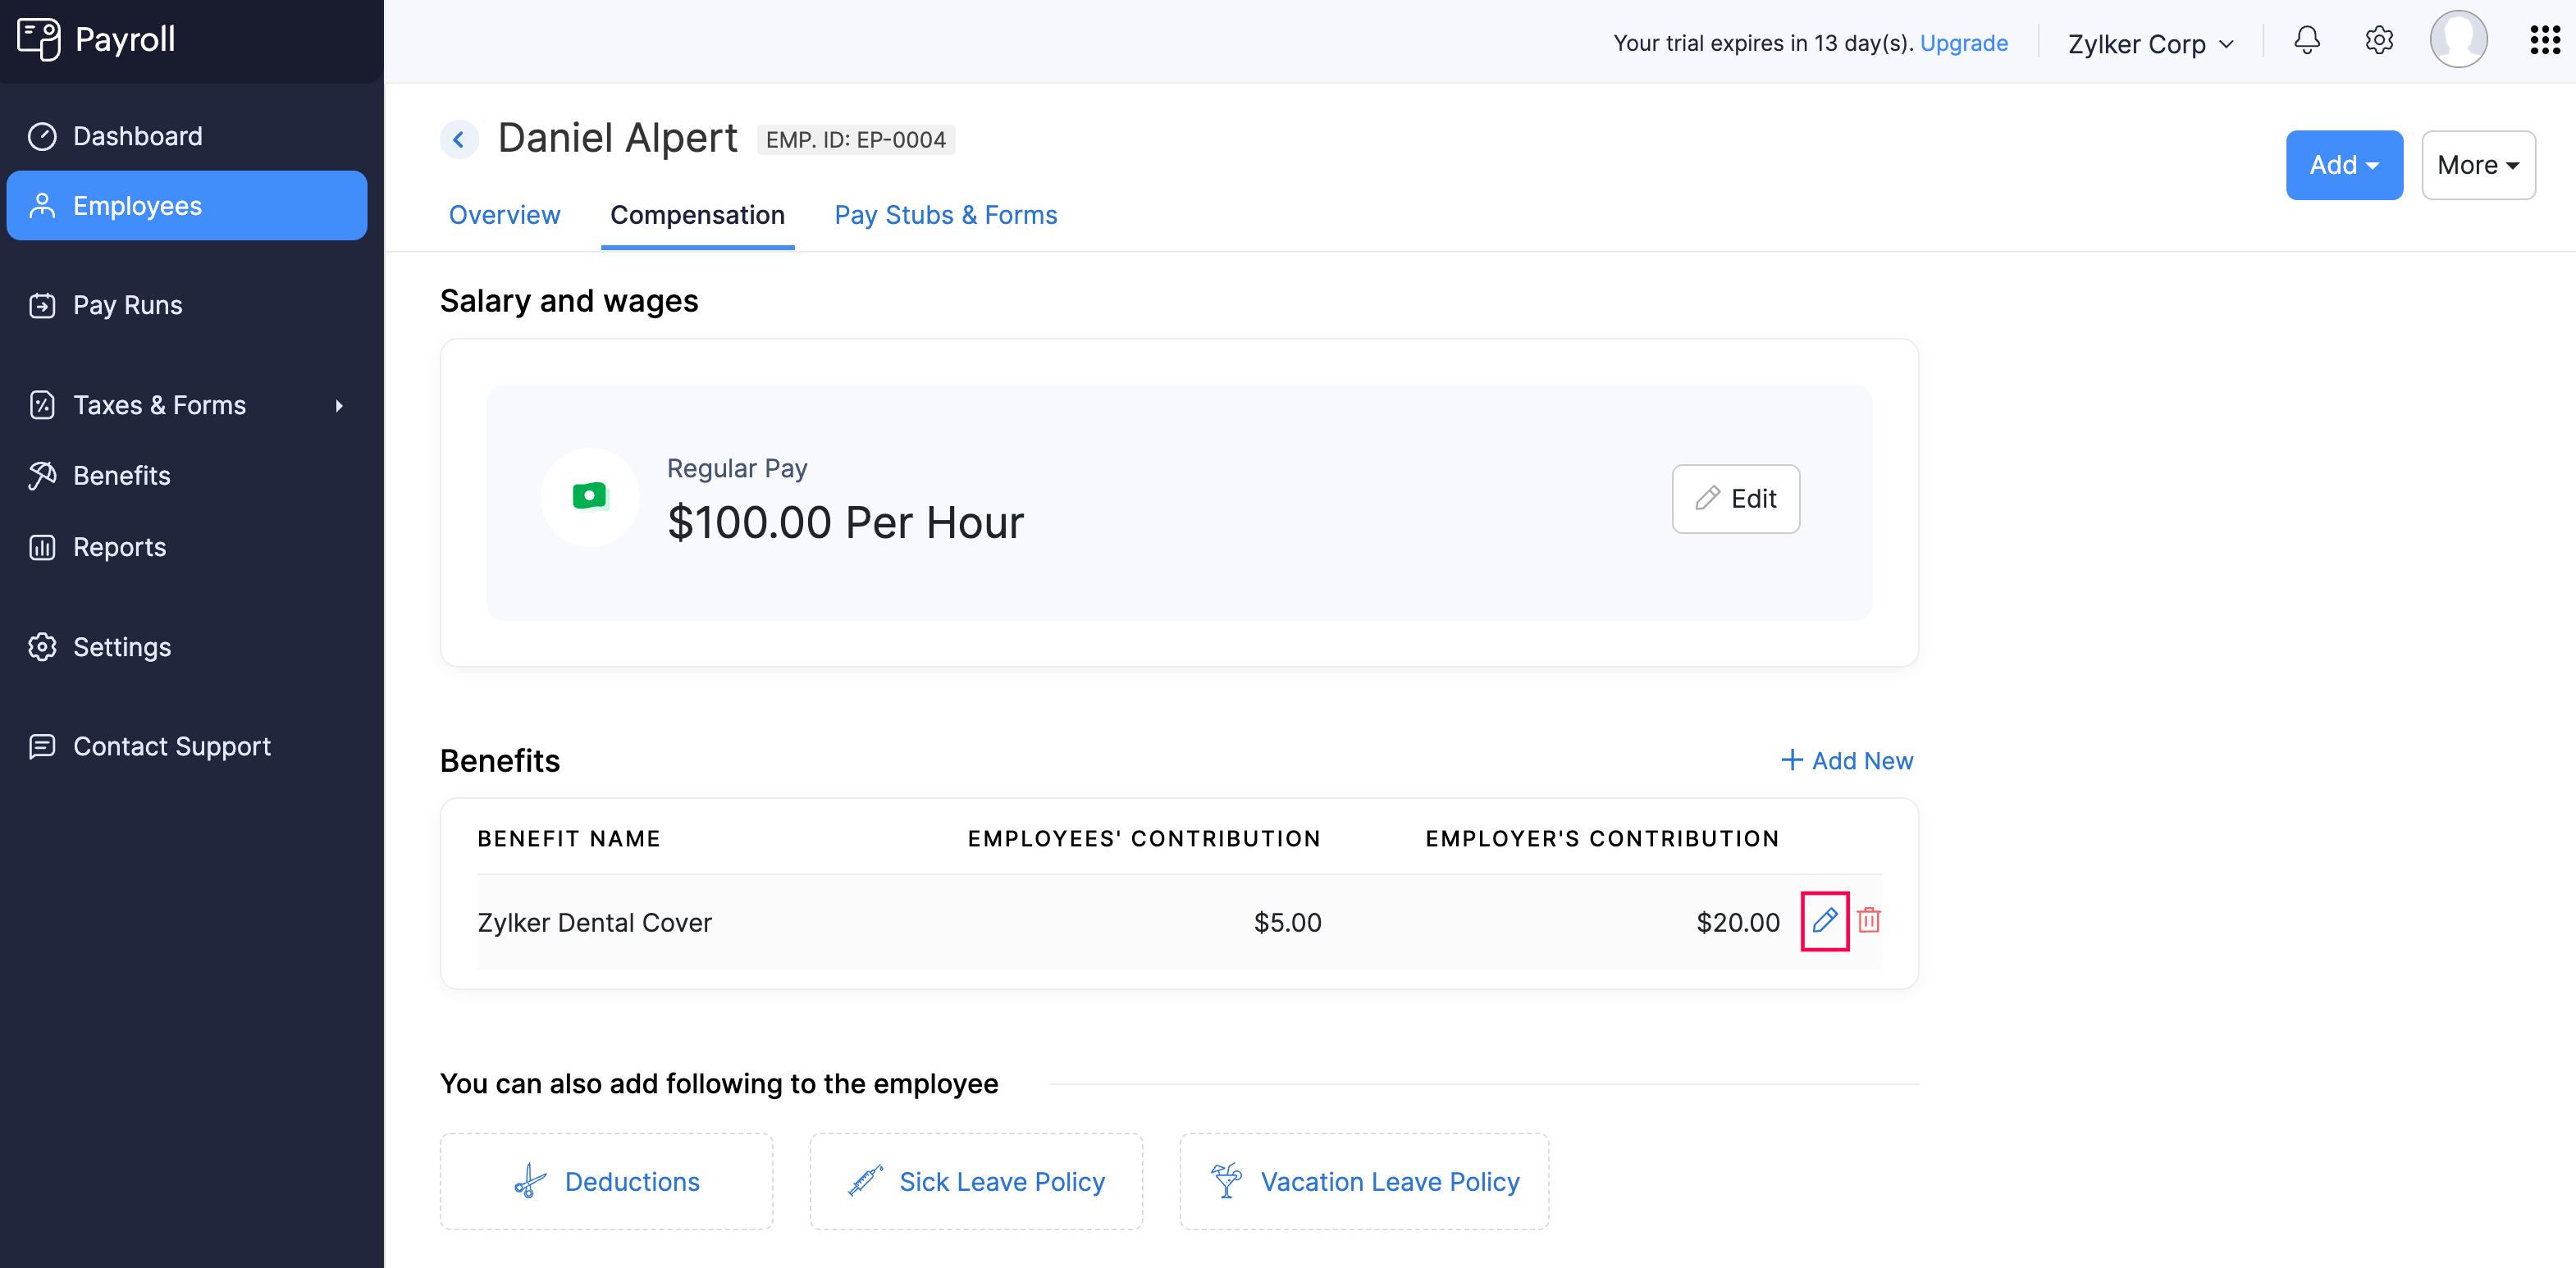
- In the popup that appears, update the Employee’s Contribution and Employer’s Contribution amounts. These contributions can be a fixed amount or a percentage of gross pay.
- Click Save.
The benefit assigned to the employee will be updated, and future payrolls will reflect the new contribution rates.
Delete Benefits Assigned to an Employee
PREREQUISITE You must have already assigned a benefit to the employee.
To delete a benefit assigned to an employee:
- Go to the Employees module.
- Click an employee.
- Navigate to the Compensation tab.
- Under Benefits, click the delete icon next to a benefit.
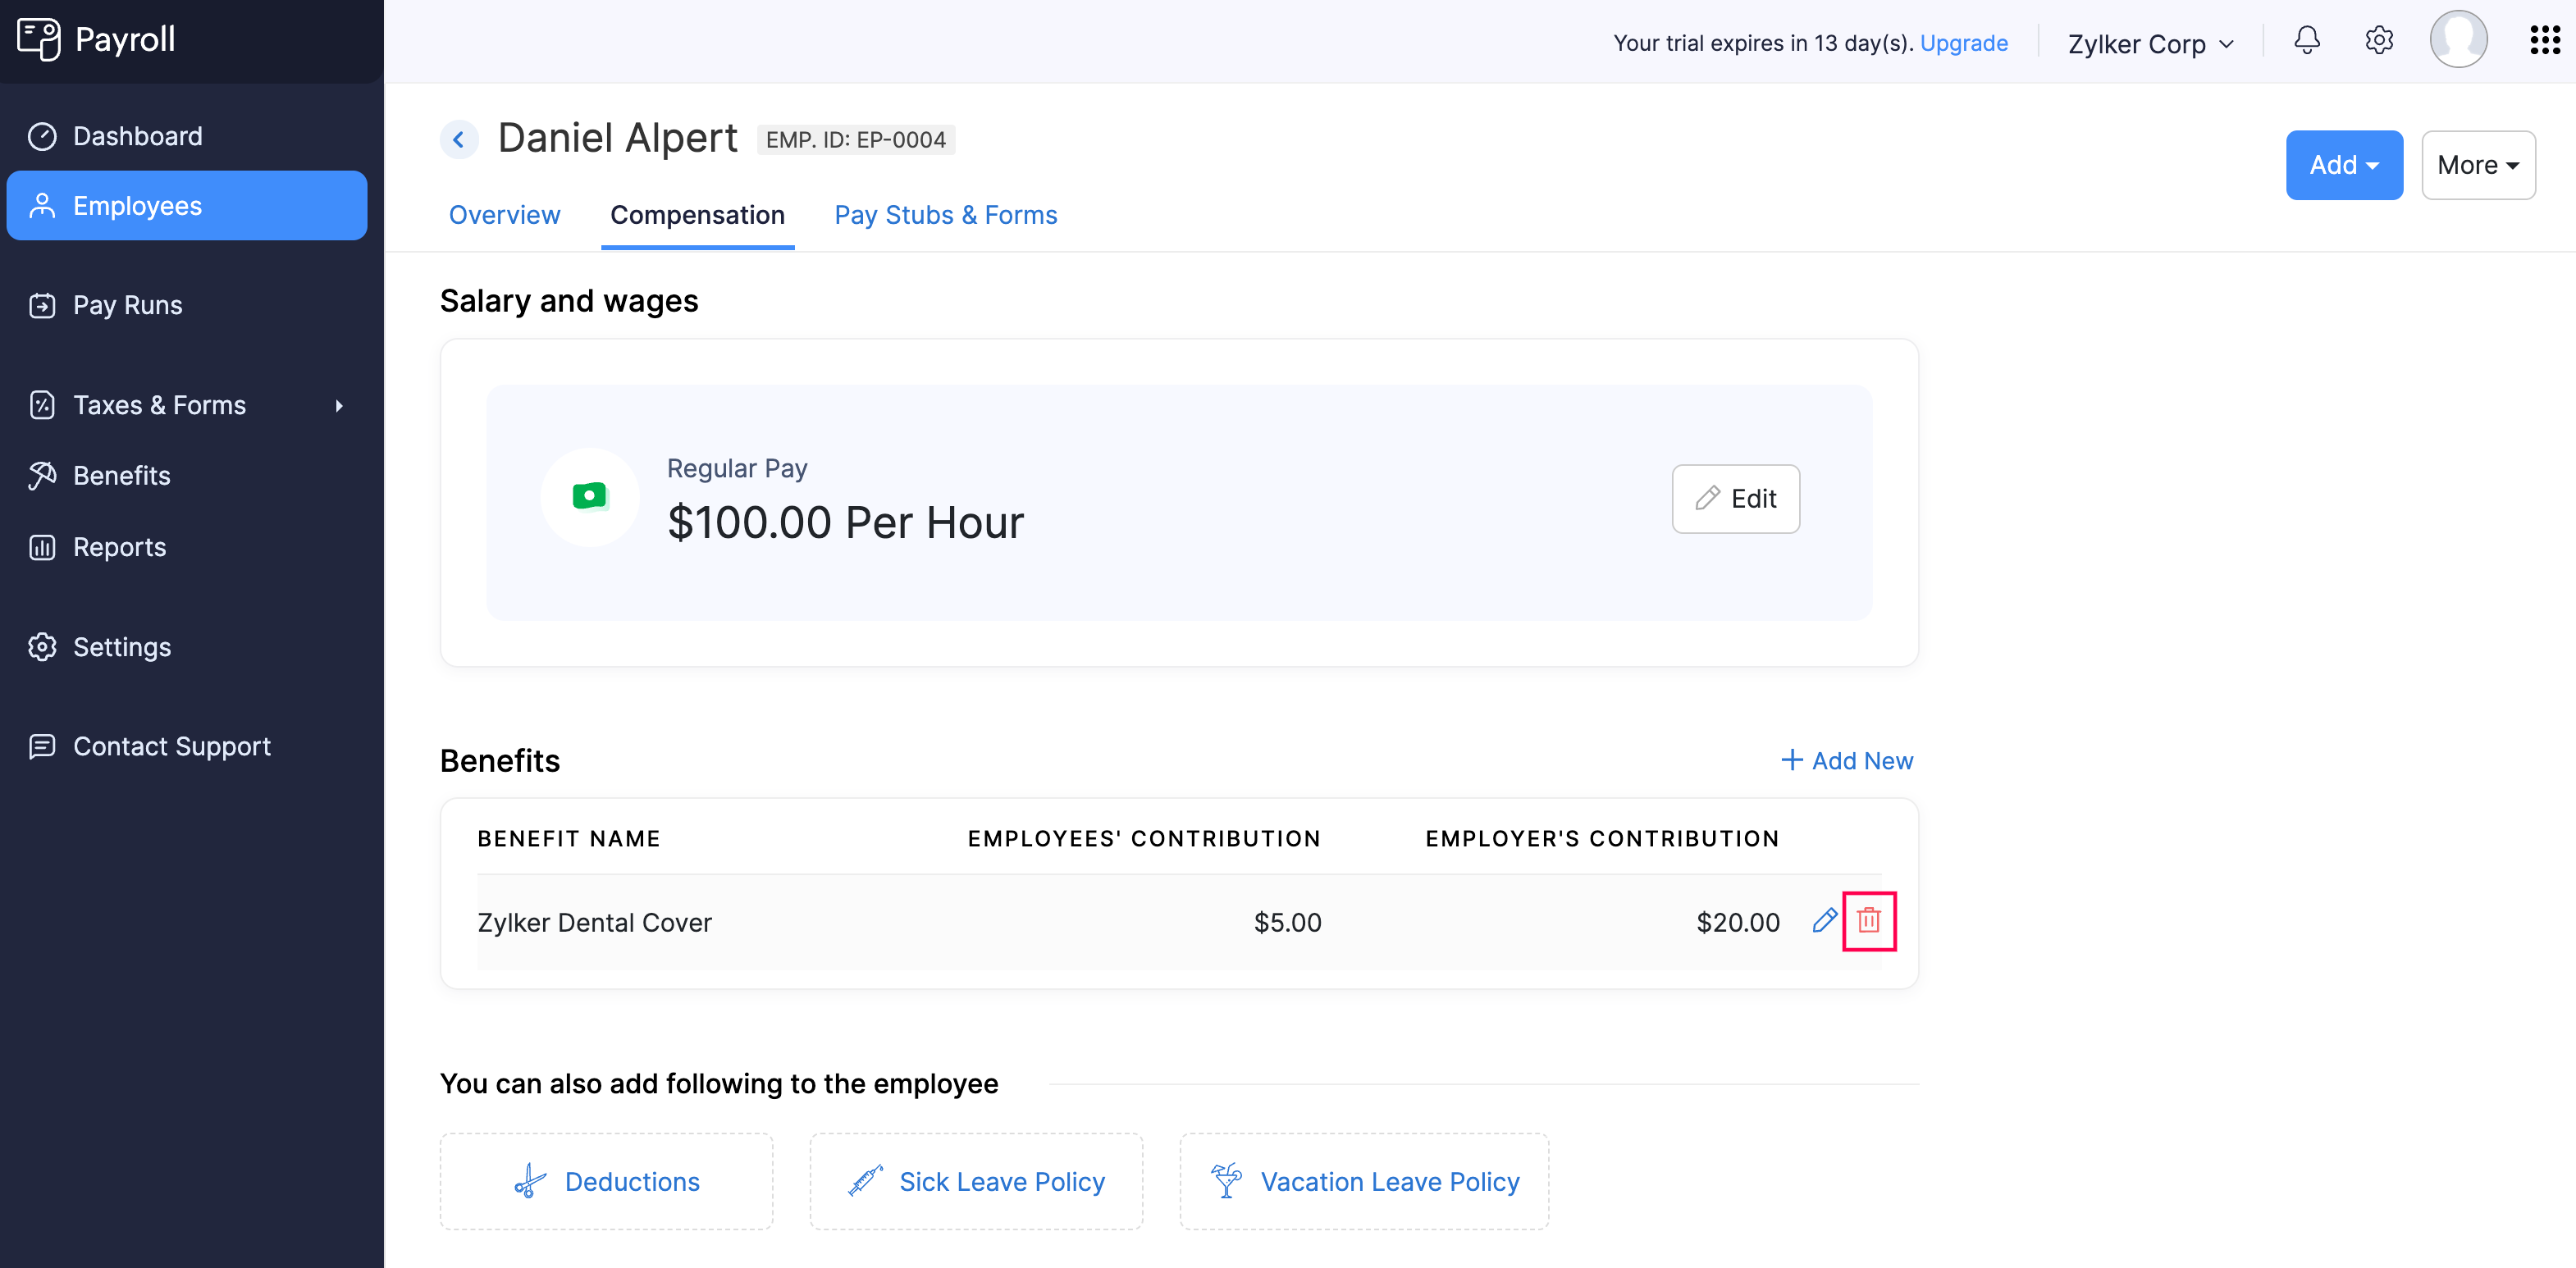
- In the popup that appears, click Yes.
The benefit will be removed from the employee’s profile.
Deductions
Deductions refer to amounts subtracted from an employee’s gross salary to arrive at the final take-home pay. These deductions can be for taxes, retirement contributions, garnishments, or other employee-related expenses.
For example, deductions may include voluntary contributions or court-ordered wage garnishments. These deductions must be applied in compliance with local and federal laws.
Assign Deductions to an Employee
PREREQUISITE You must have configured deductions at the organization level.
To assign a deduction to an employee:
- Go to the Employees module.
- Click an employee.
- Navigate to the Compensation tab.
- Follow one of these steps:
- Click Add at the top right and select Deduction.
- If you have not assigned any deductions to the employee, click Deductions under You can also add following to the employee.
- If you’ve already assigned deductions to the employee, click Add New next to Deductions.
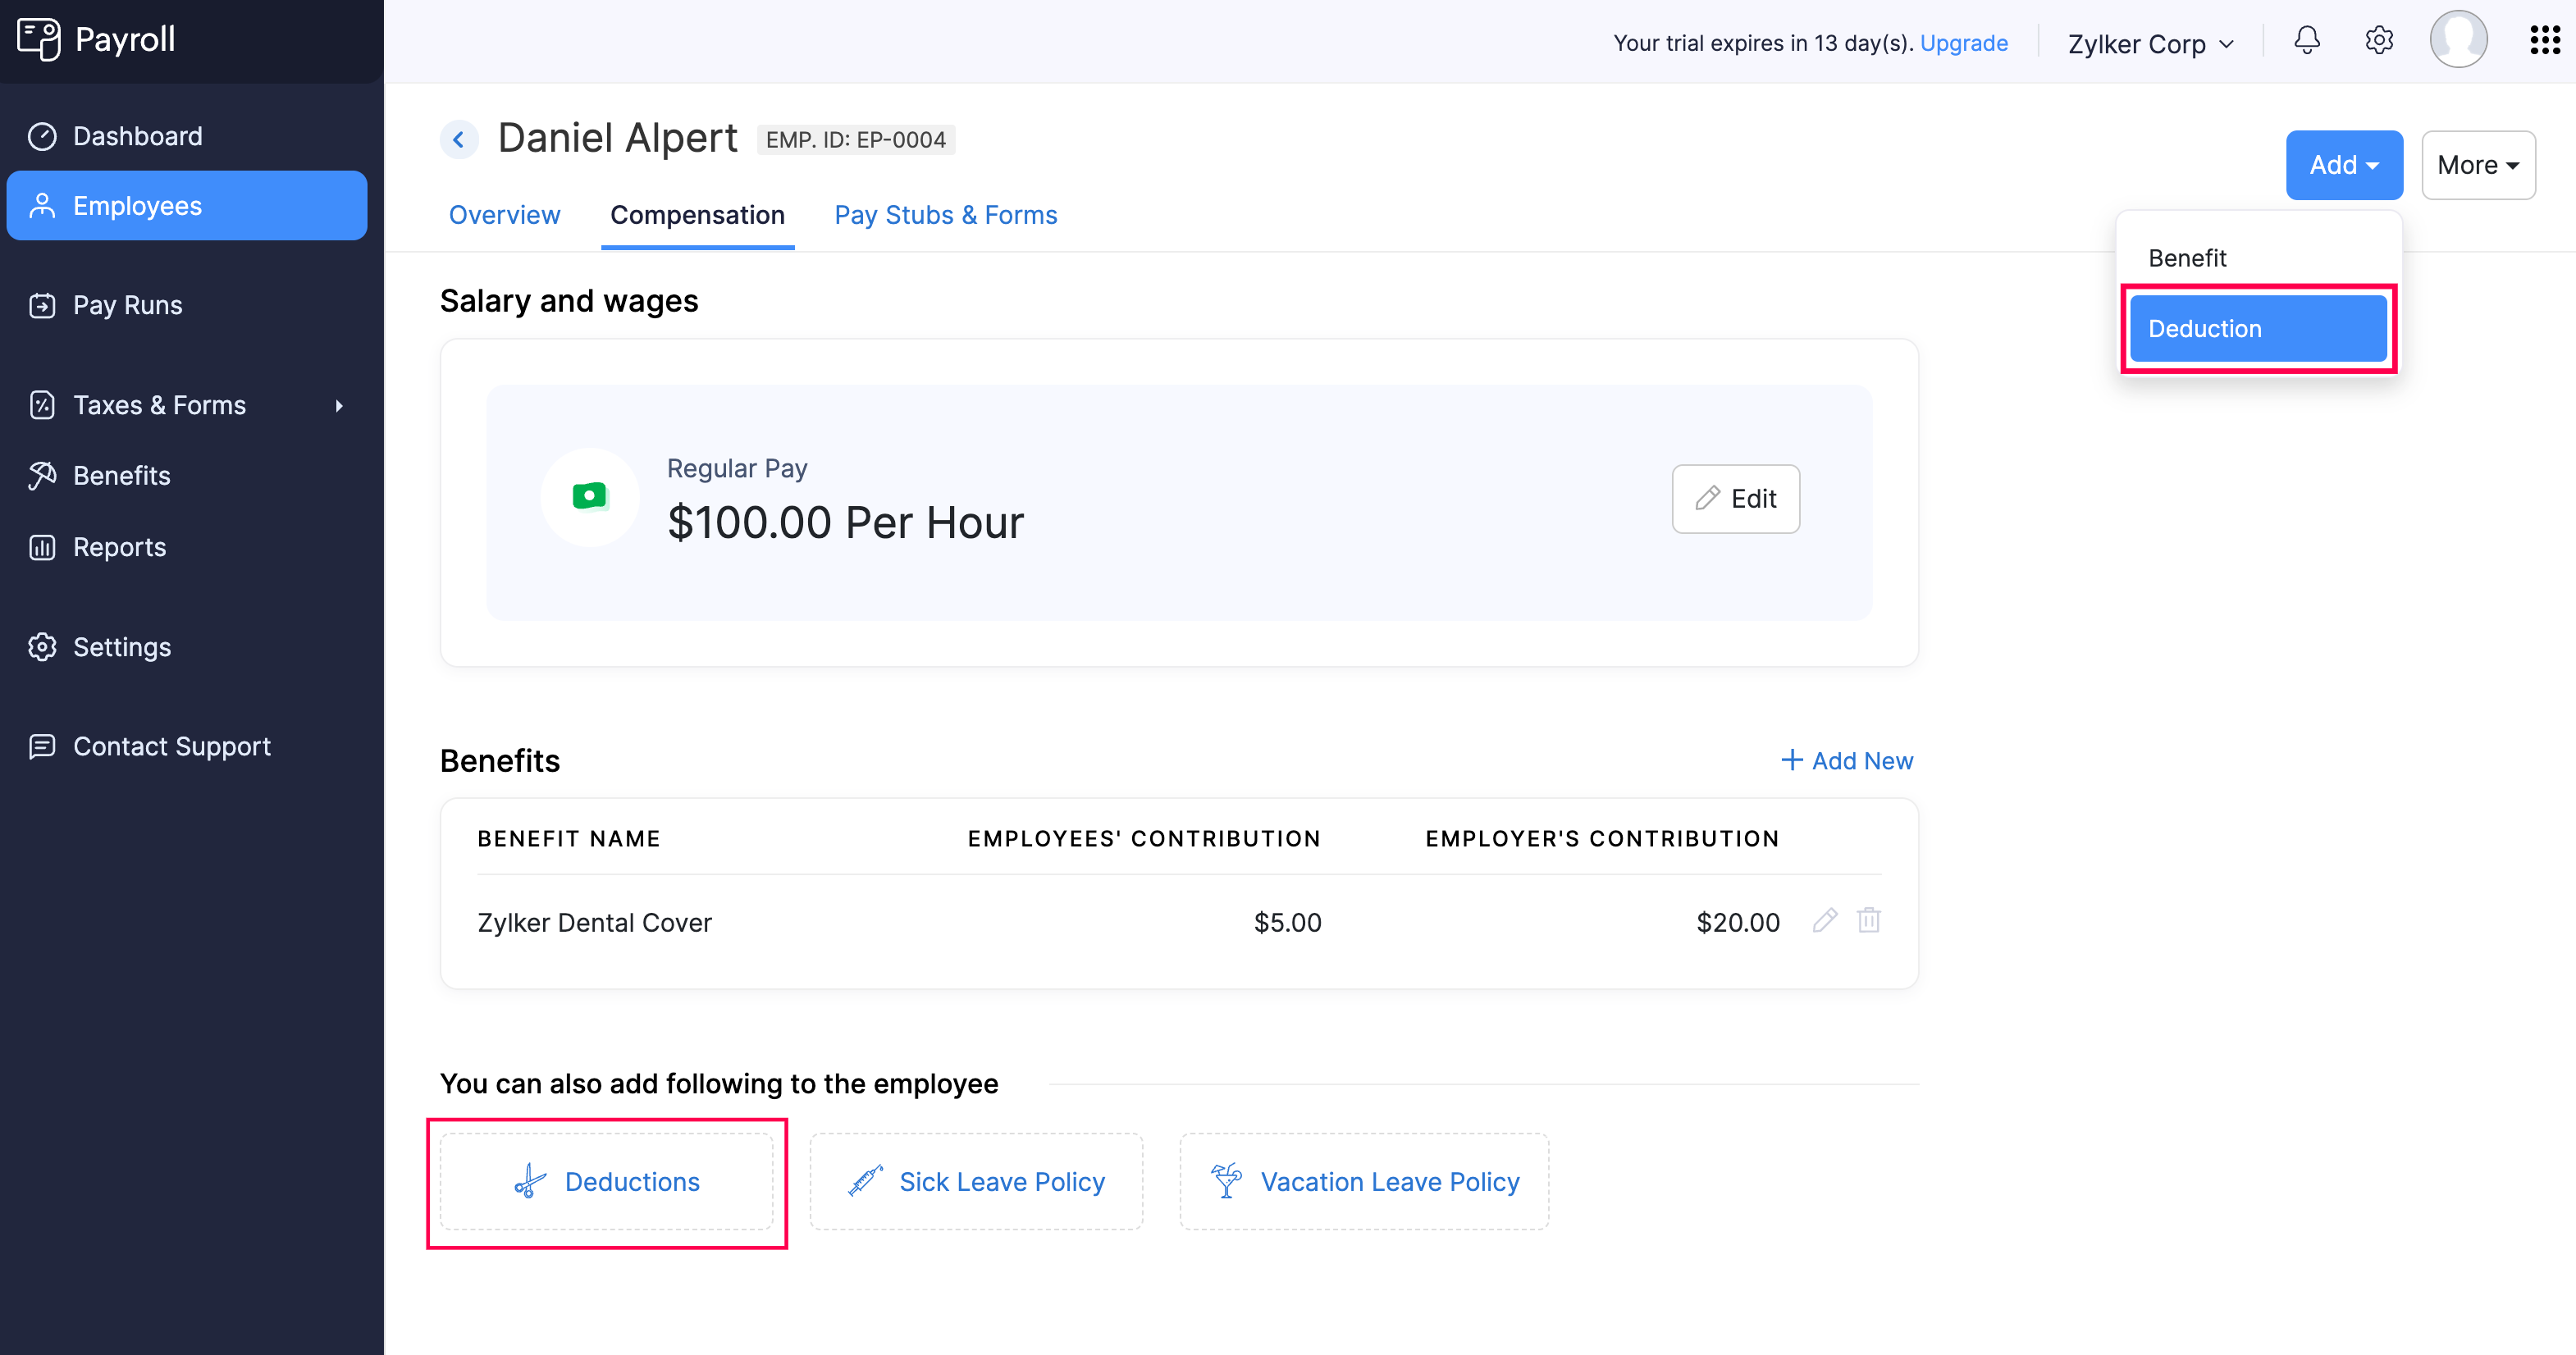
- In the popup that appears, select a deduction from the Select a Deduction dropdown.
- Enter the amount to be deducted from the employee’s salary. You can select either a fixed amount or a percentage of the employee’s gross pay.
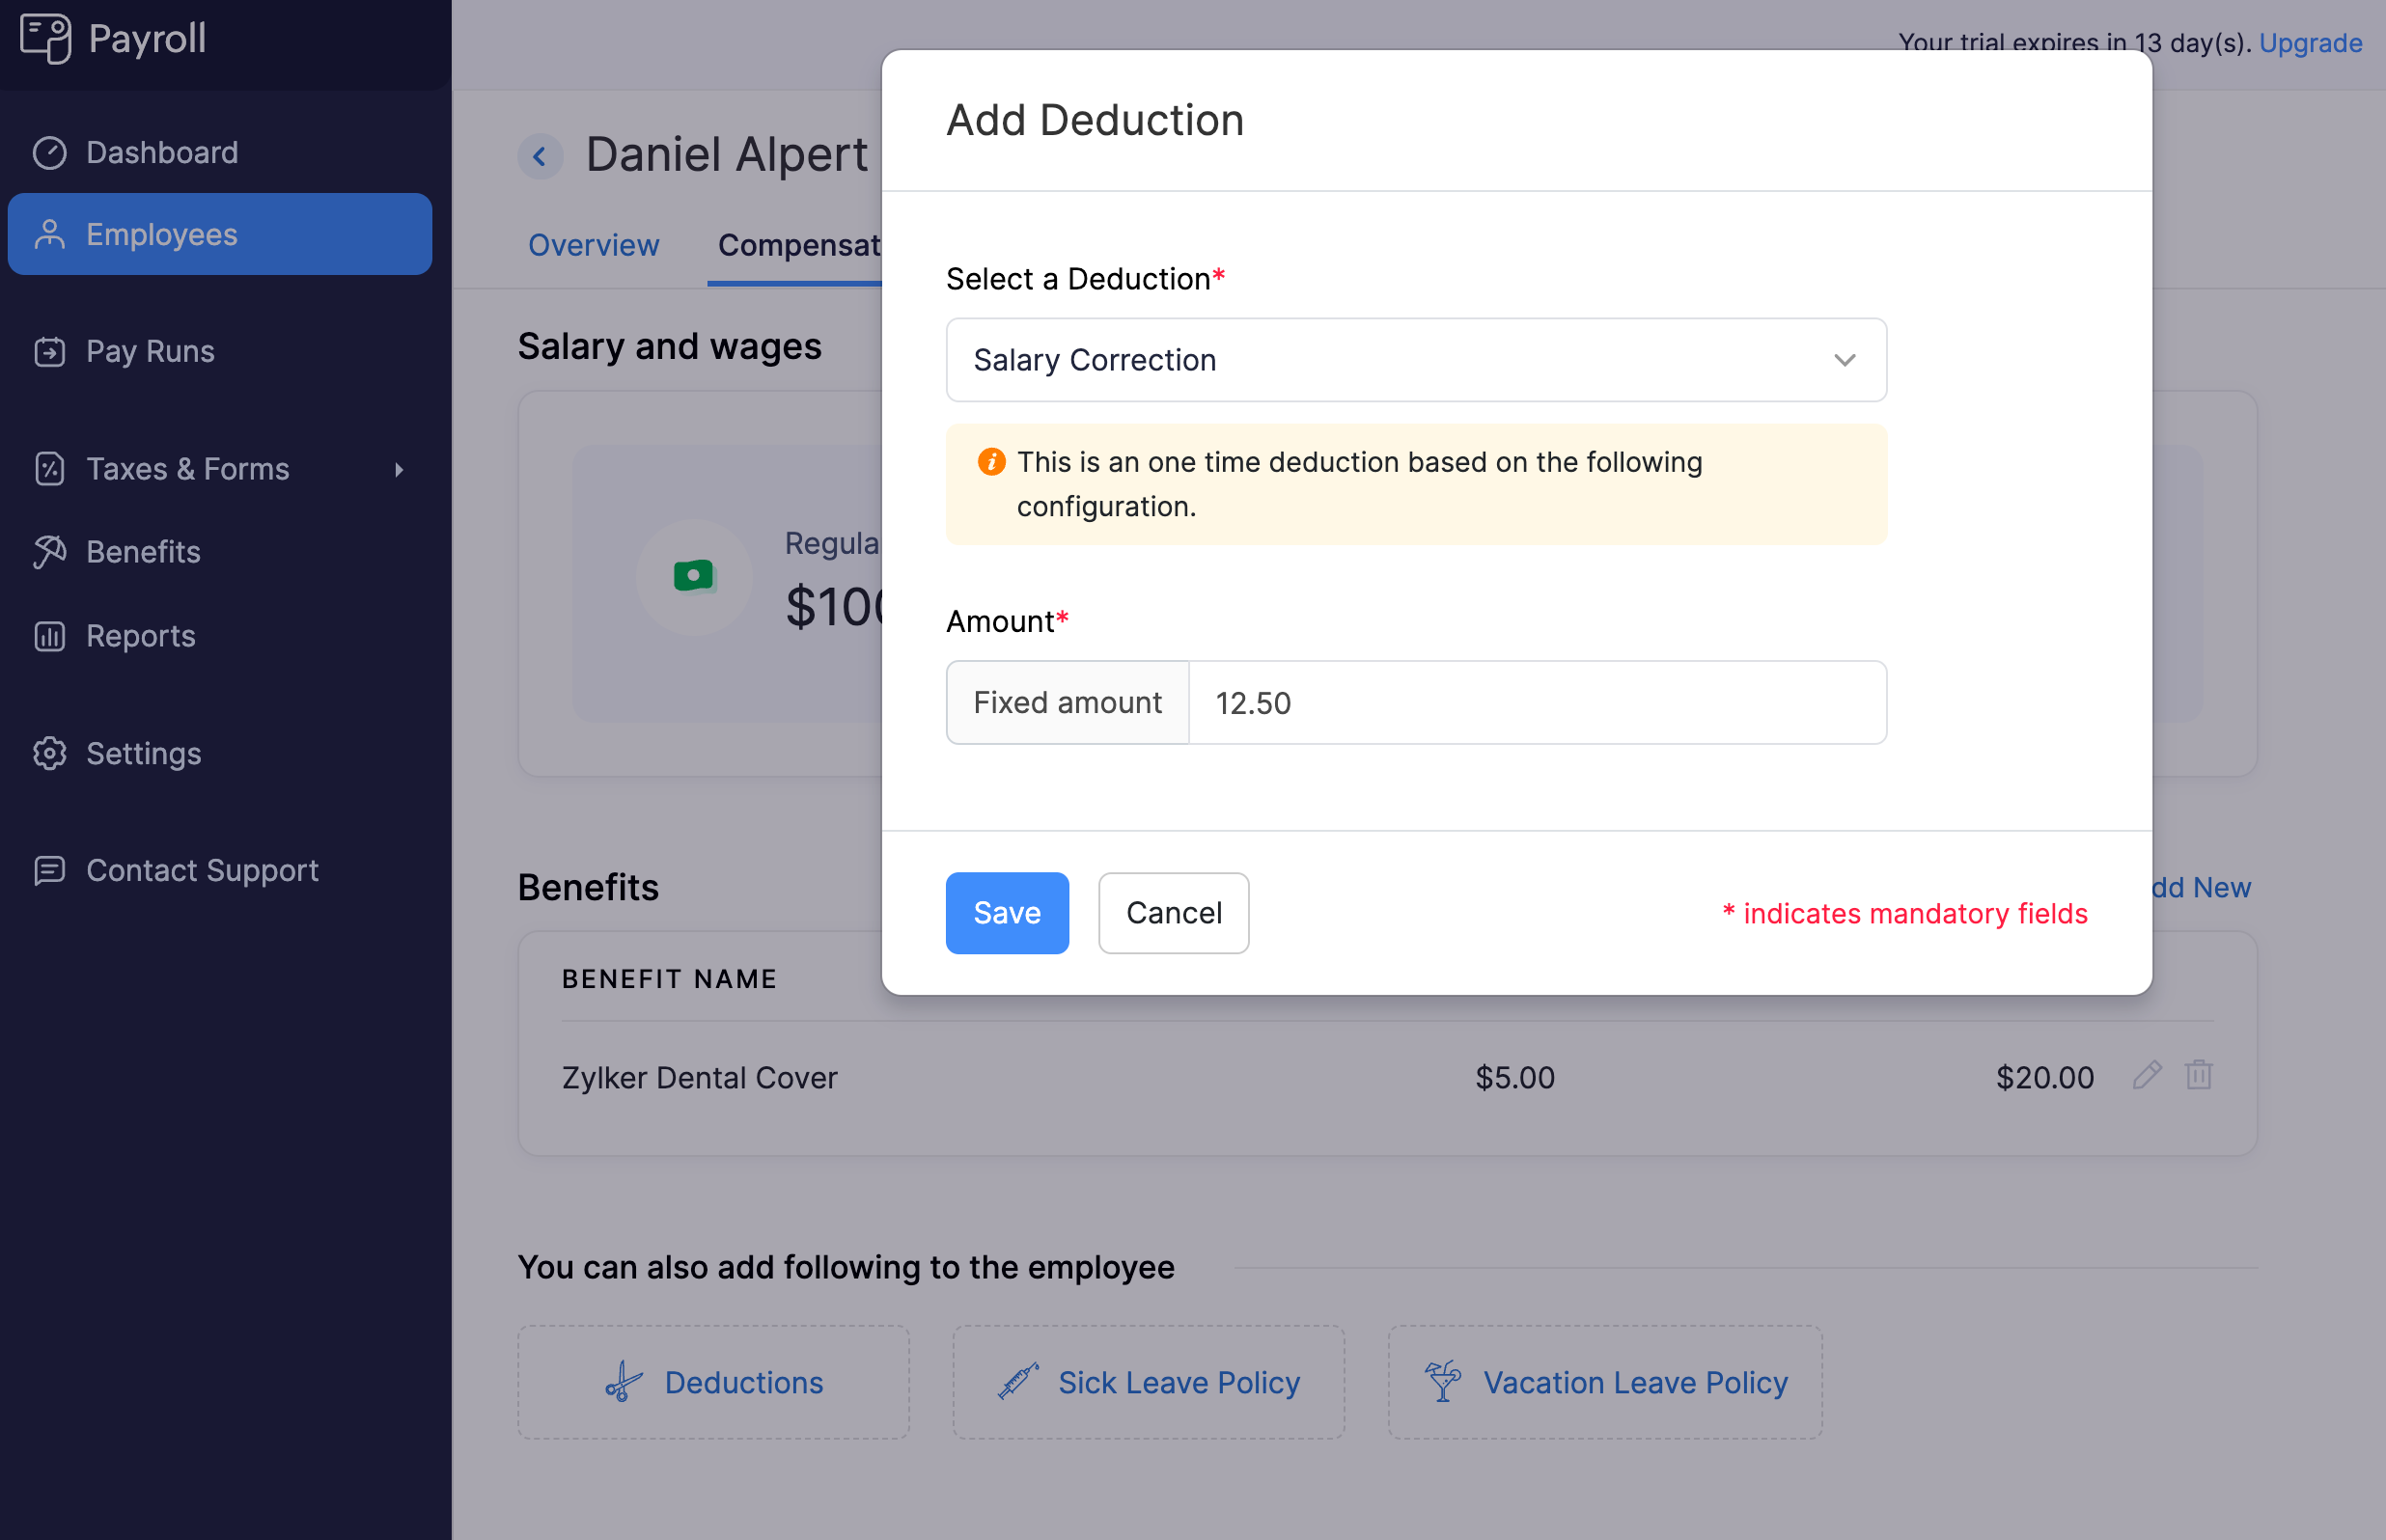
- Click Save.
The deduction will be assigned to the employee and included in their upcoming payrolls.
Edit Deductions Assigned to an Employee
PREREQUISITE You must have already assigned a deduction to the employee.
To edit a deduction assigned to an employee:
- Go to the Employees module.
- Click an employee.
- Navigate to the Compensation tab.
- Under Deductions, click the edit icon next to a deduction.
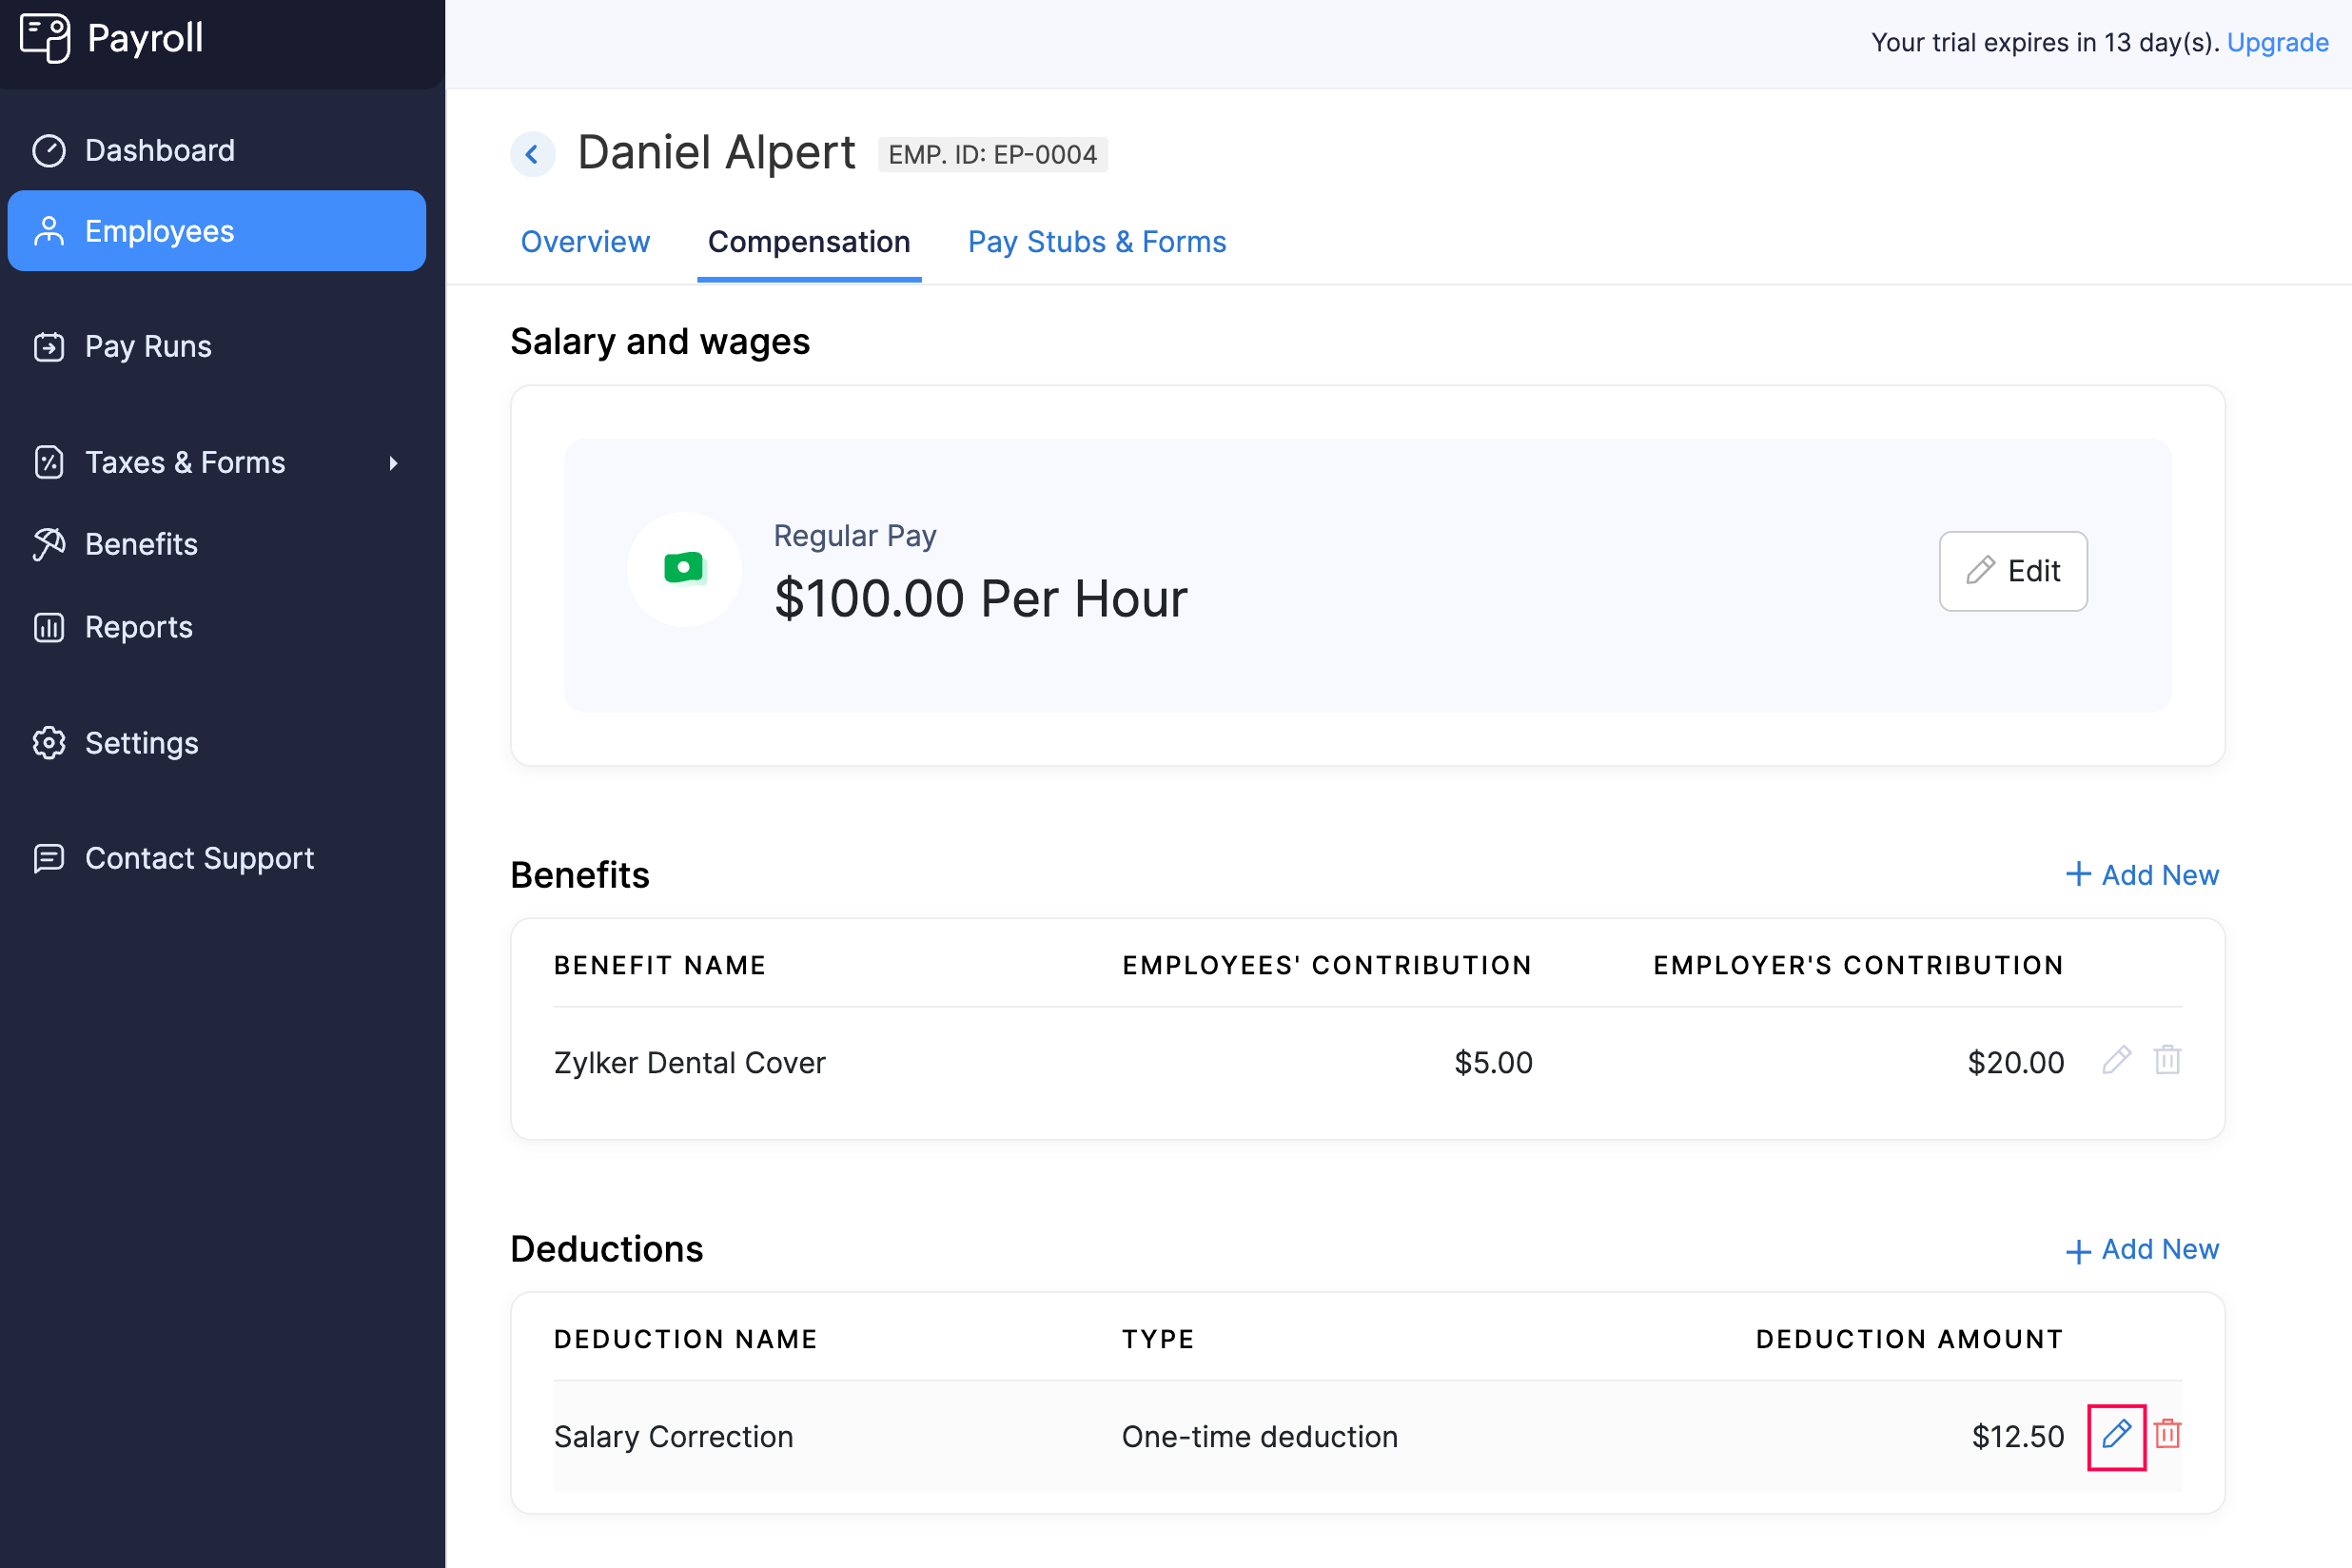
- In the popup that appears, update the deduction amount.
- Click Save.
The deduction assigned to the employee will be updated, and future payrolls will reflect the new deduction amount.
Delete Deductions Assigned to an Employee
PREREQUISITE You must have already assigned a deduction to the employee.
To delete a deduction assigned to an employee:
- Go to the Employees module.
- Click an employee.
- Navigate to the Compensation tab.
- Under Deductions, click the delete icon next to a deduction.
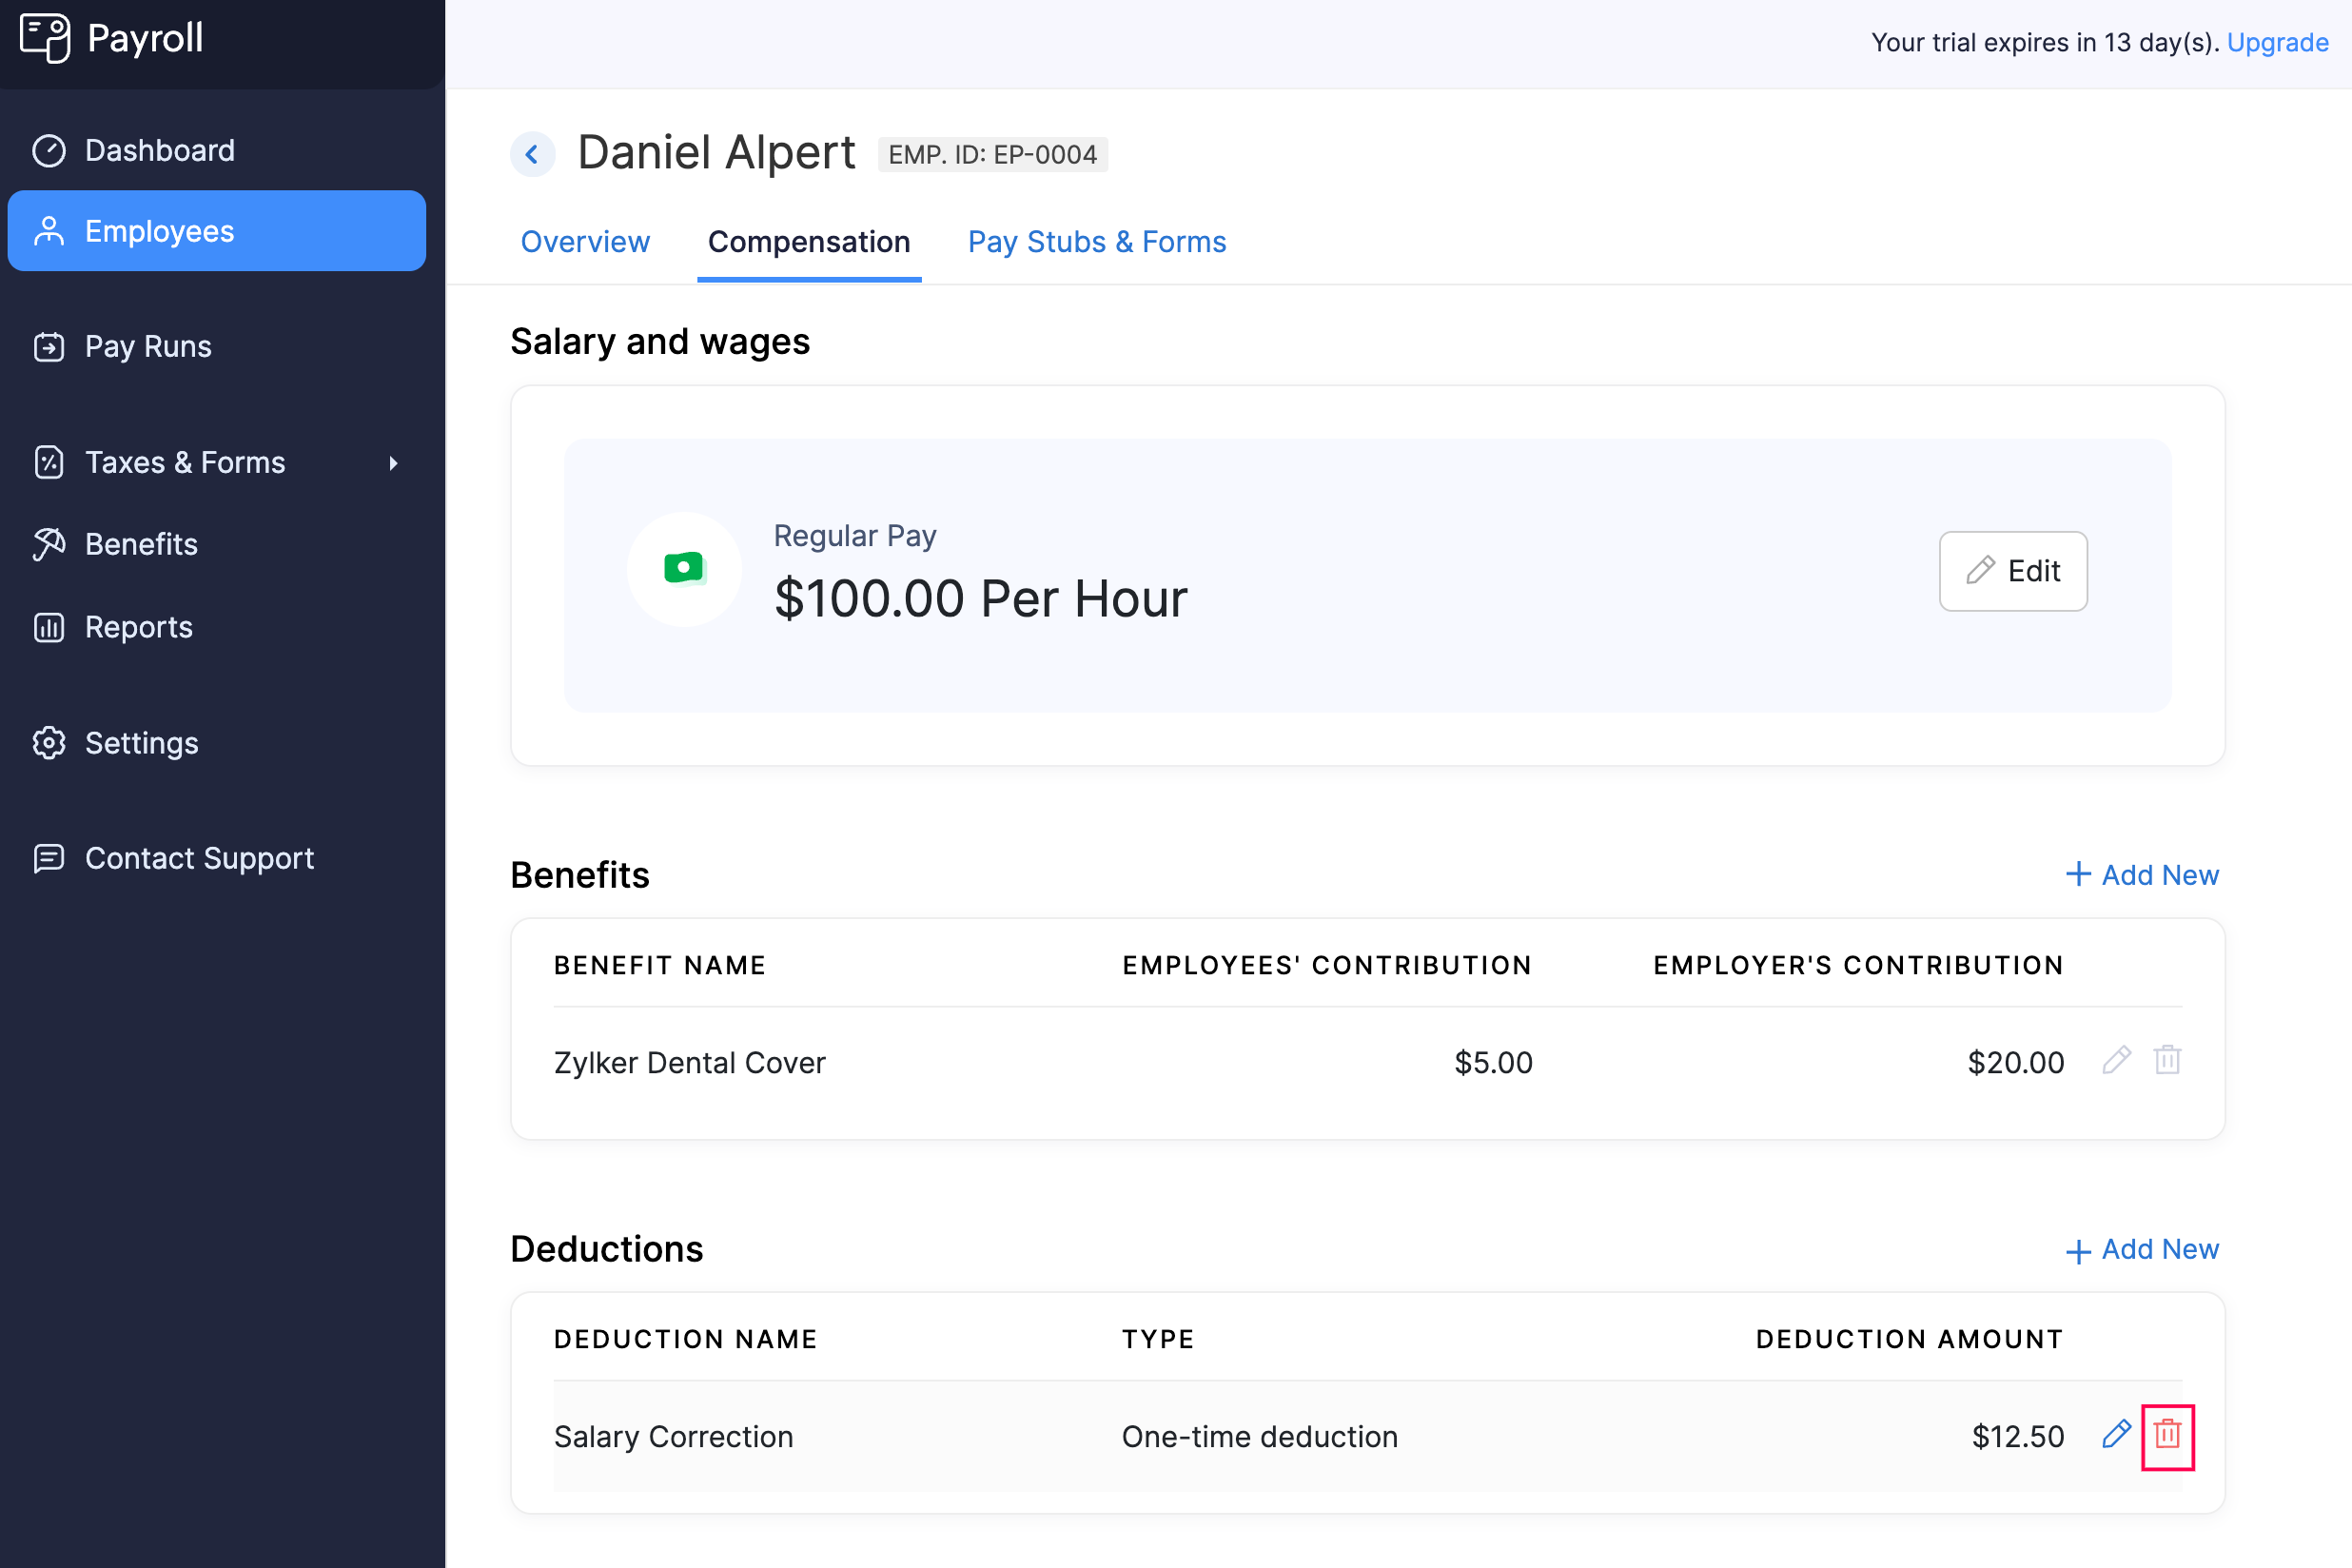
- In the popup that appears, click Yes.
The deduction will be removed from the employee’s profile.
Sick Leave Policy
A Sick Leave Policy allows employees to take paid time off for medical reasons, ensuring they can recover from illness or attend medical appointments without losing income.
Common reasons for sick leave include personal illness, medical treatments, and doctor visits. In some cases, it can also cover time off for caring for a sick family member, depending on your organization’s policy.
Assign Sick Leave Policy to an Employee
PREREQUISITE You must have set up a sick leave policy for your organization in Settings > Paid Time Off.
To assign a sick leave policy to an employee:
- Go to the Employees module.
- Click an employee.
- Navigate to the Compensation tab.
- Click Sick Leave Policy.
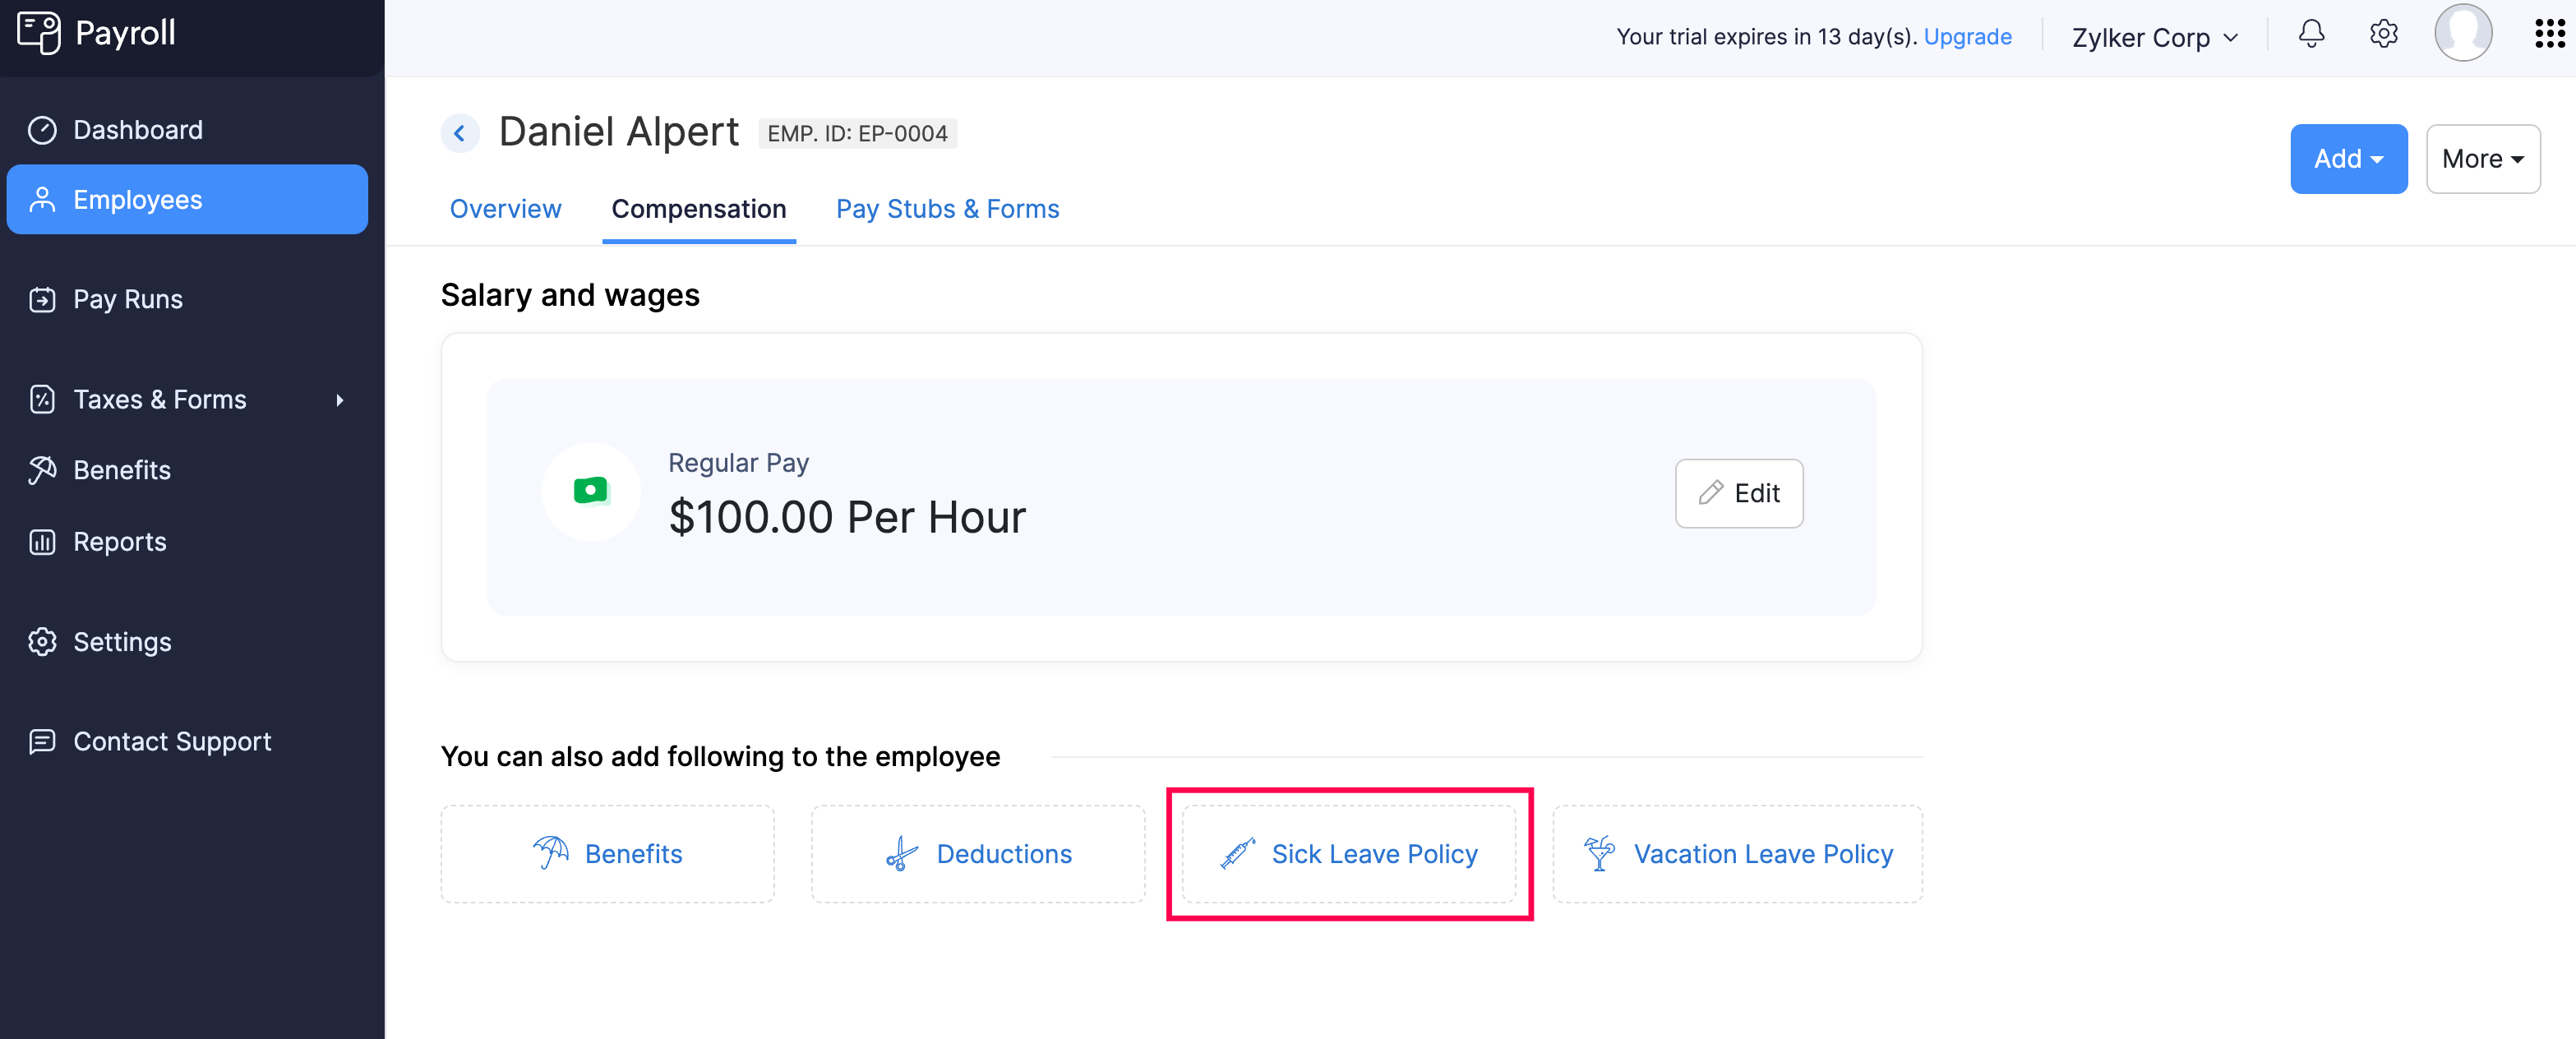
- Select the Earning Method.
- Enter the number of sick leave hours to Add.
- Enter the Maximum Balance that the employee can accrue for the year.
- Enter the Current Balance of sick leave hours the employee has.
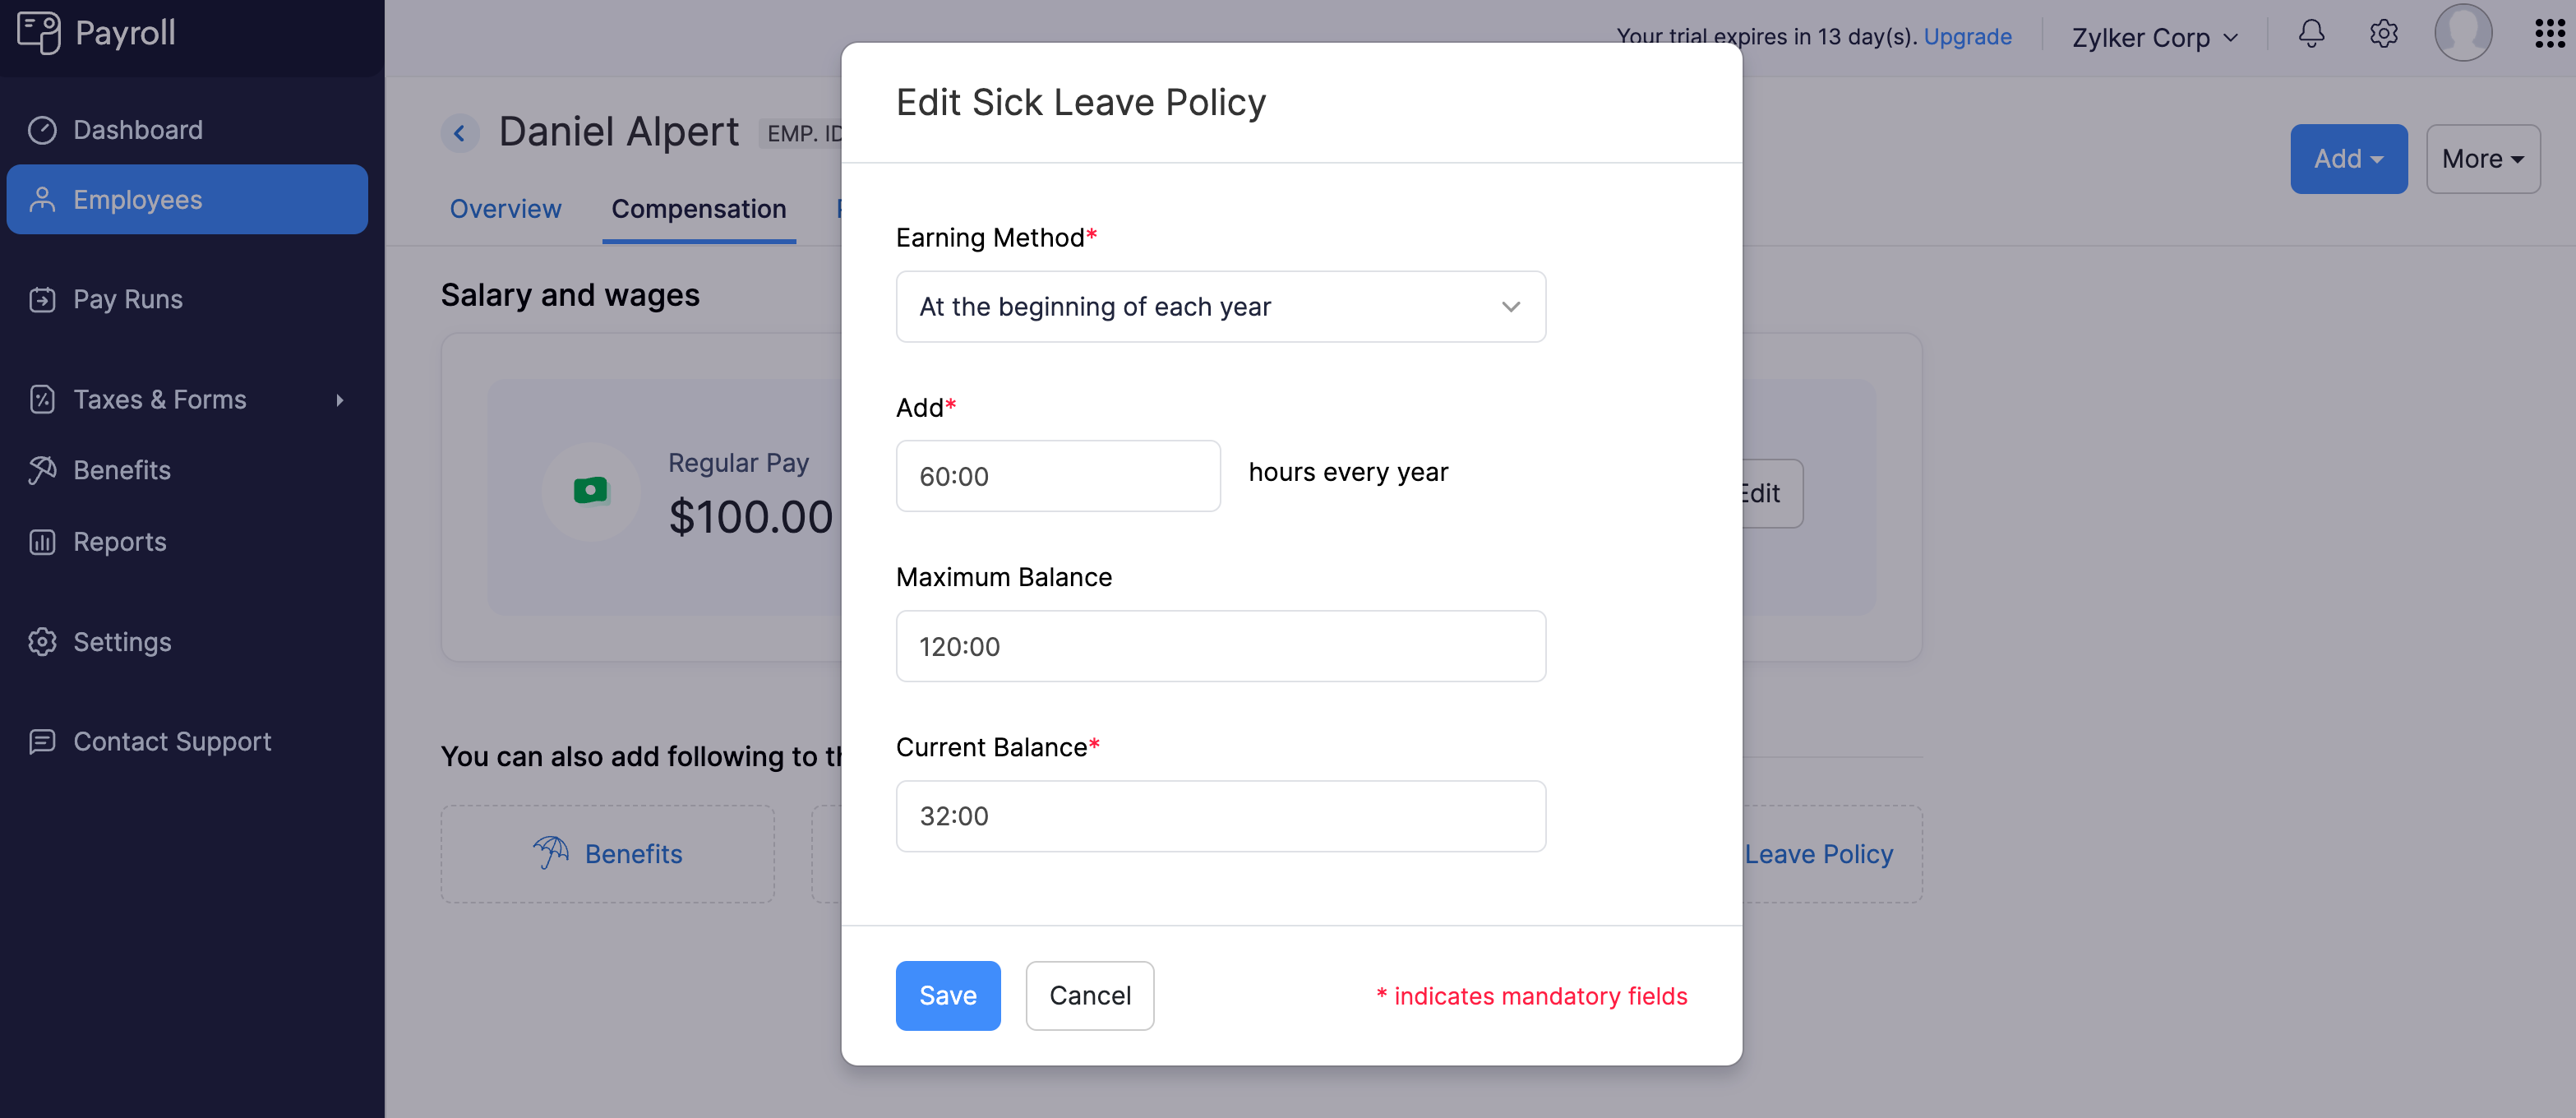
- Click Save.
The sick leave policy will be assigned to the employee, and you will be able to add sick leave hours in upcoming payrolls.
Edit Sick Leave Policy Assigned to an Employee
To edit the sick leave policy assigned to an employee:
- Go to the Employees module.
- Click an employee.
- Navigate to the Compensation tab.
- Under Paid Time Off, click the edit icon next to Sick Leave Policy.
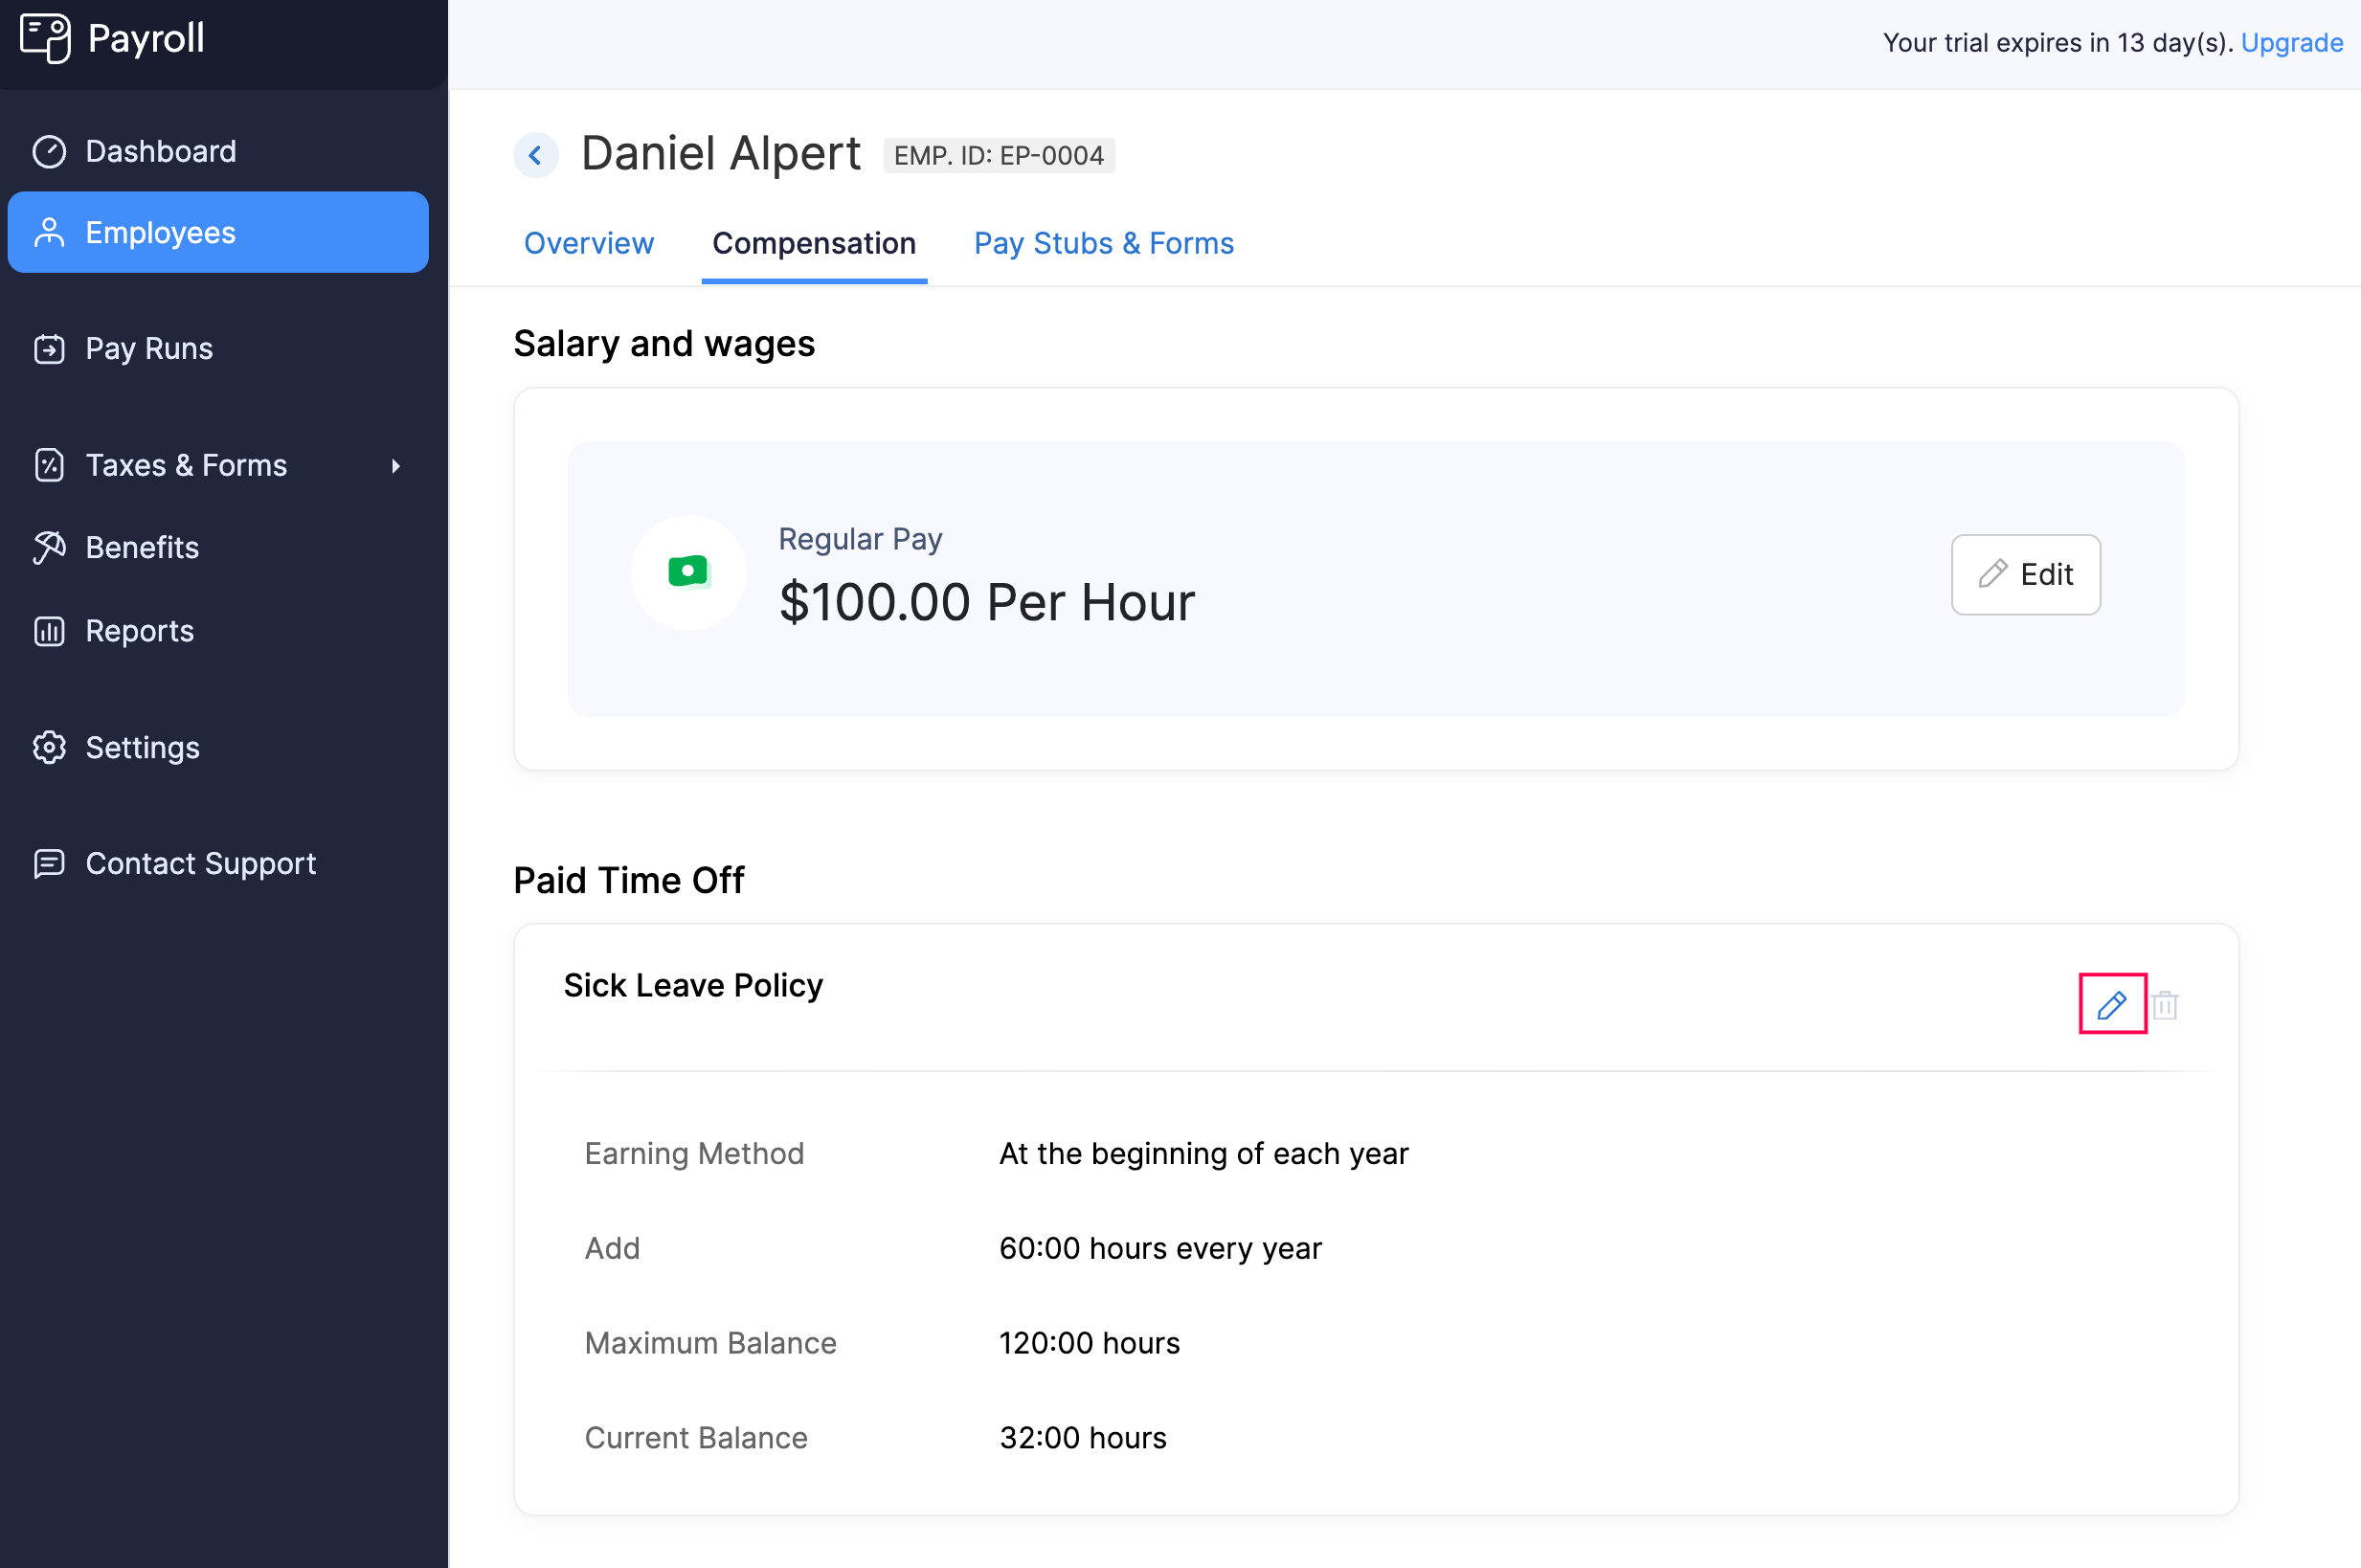
- Make the necessary changes.
- Click Save.
The employee’s sick leave policy will be updated.
Delete Sick Leave Policy Assigned to an Employee
To delete the sick leave policy assigned to an employee:
- Go to the Employees module.
- Click an employee.
- Navigate to the Compensation tab.
- Under Paid Time Off, click the delete icon next to Sick Leave Policy.
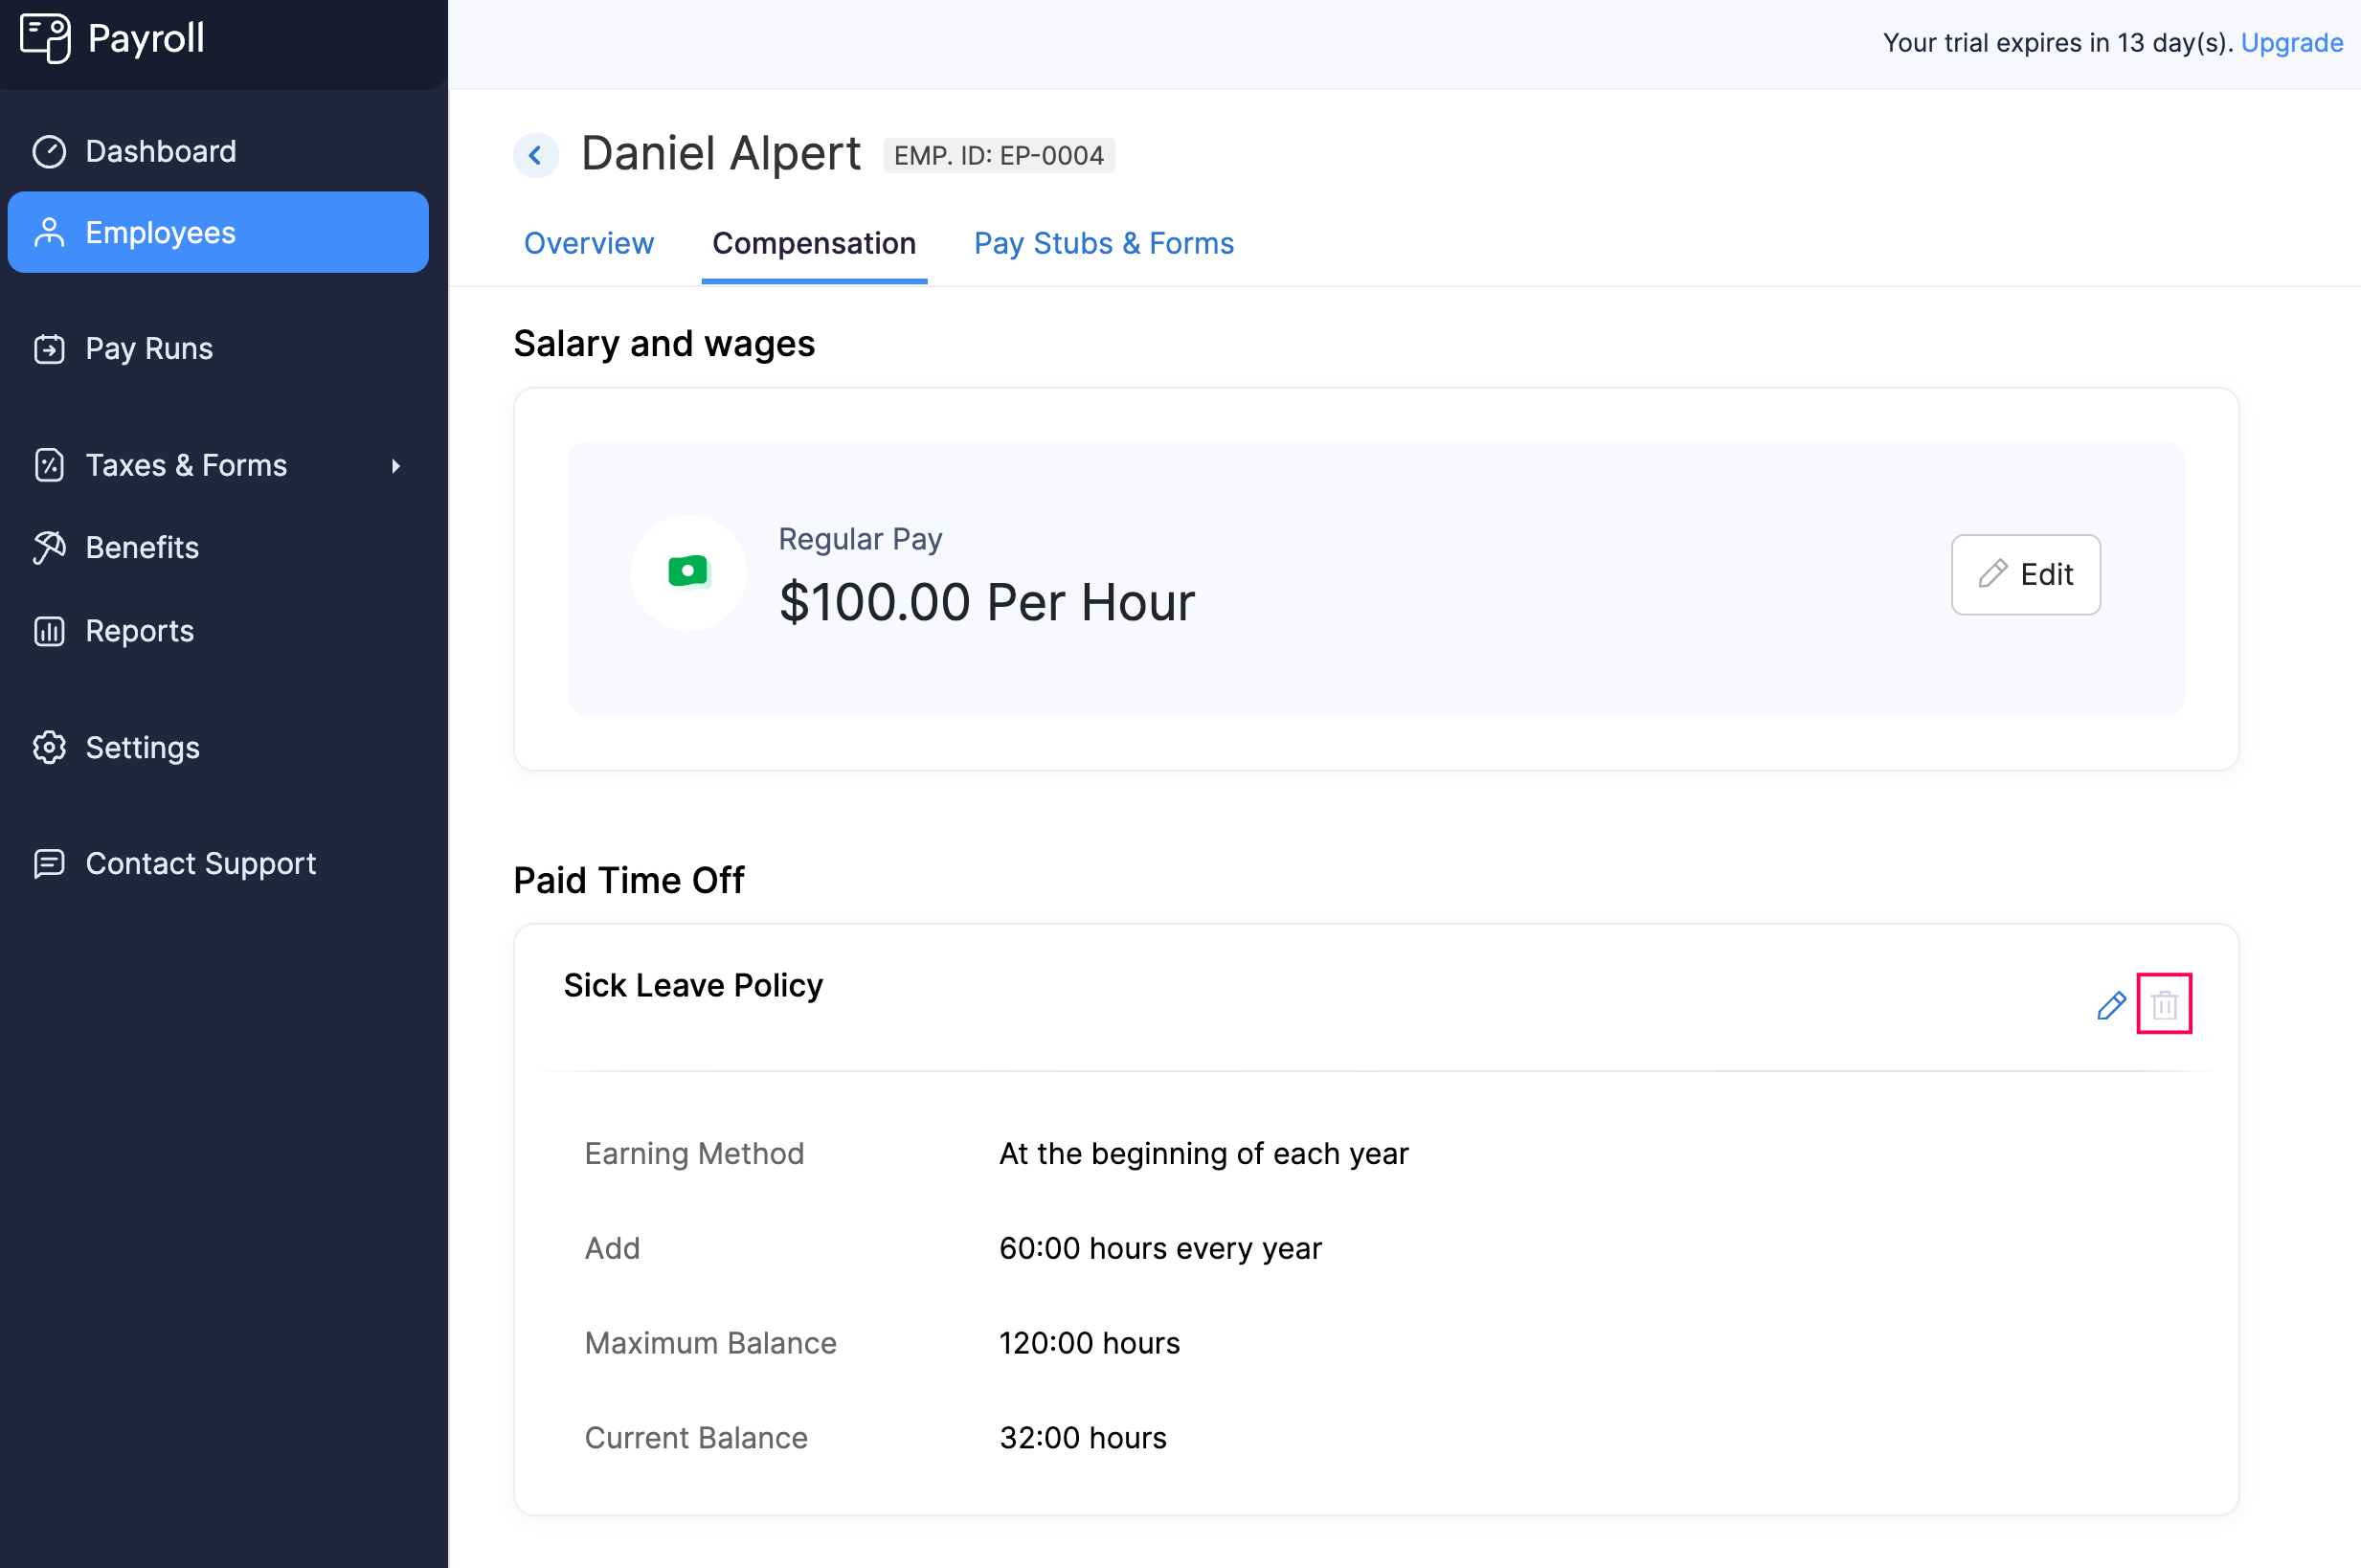
- In the popup that appears, click Yes.
The sick leave policy will be removed from the employee’s profile.
Vacation Leave Policy
A well-defined Vacation Leave Policy helps employees take time off for rest, travel, or personal activities without losing income, contributing to overall job satisfaction and productivity. Additionally, having a clear policy ensures compliance with regulations regarding the accrual and payout of vacation hours.
In Zoho Payroll, you can easily configure and manage vacation leave policies that suit your organization’s needs, while also adhering to legal requirements such as carrying over unused vacation hours or paying out accrued hours upon termination.
Assign Vacation Leave Policy to an Employee
PREREQUISITE You must have set up a vacation leave policy for your organization in Settings > Paid Time Off.
To assign a vacation leave policy to an employee:
- Go to the Employees module.
- Click an employee.
- Navigate to the Compensation tab.
- Click Vacation Leave Policy.
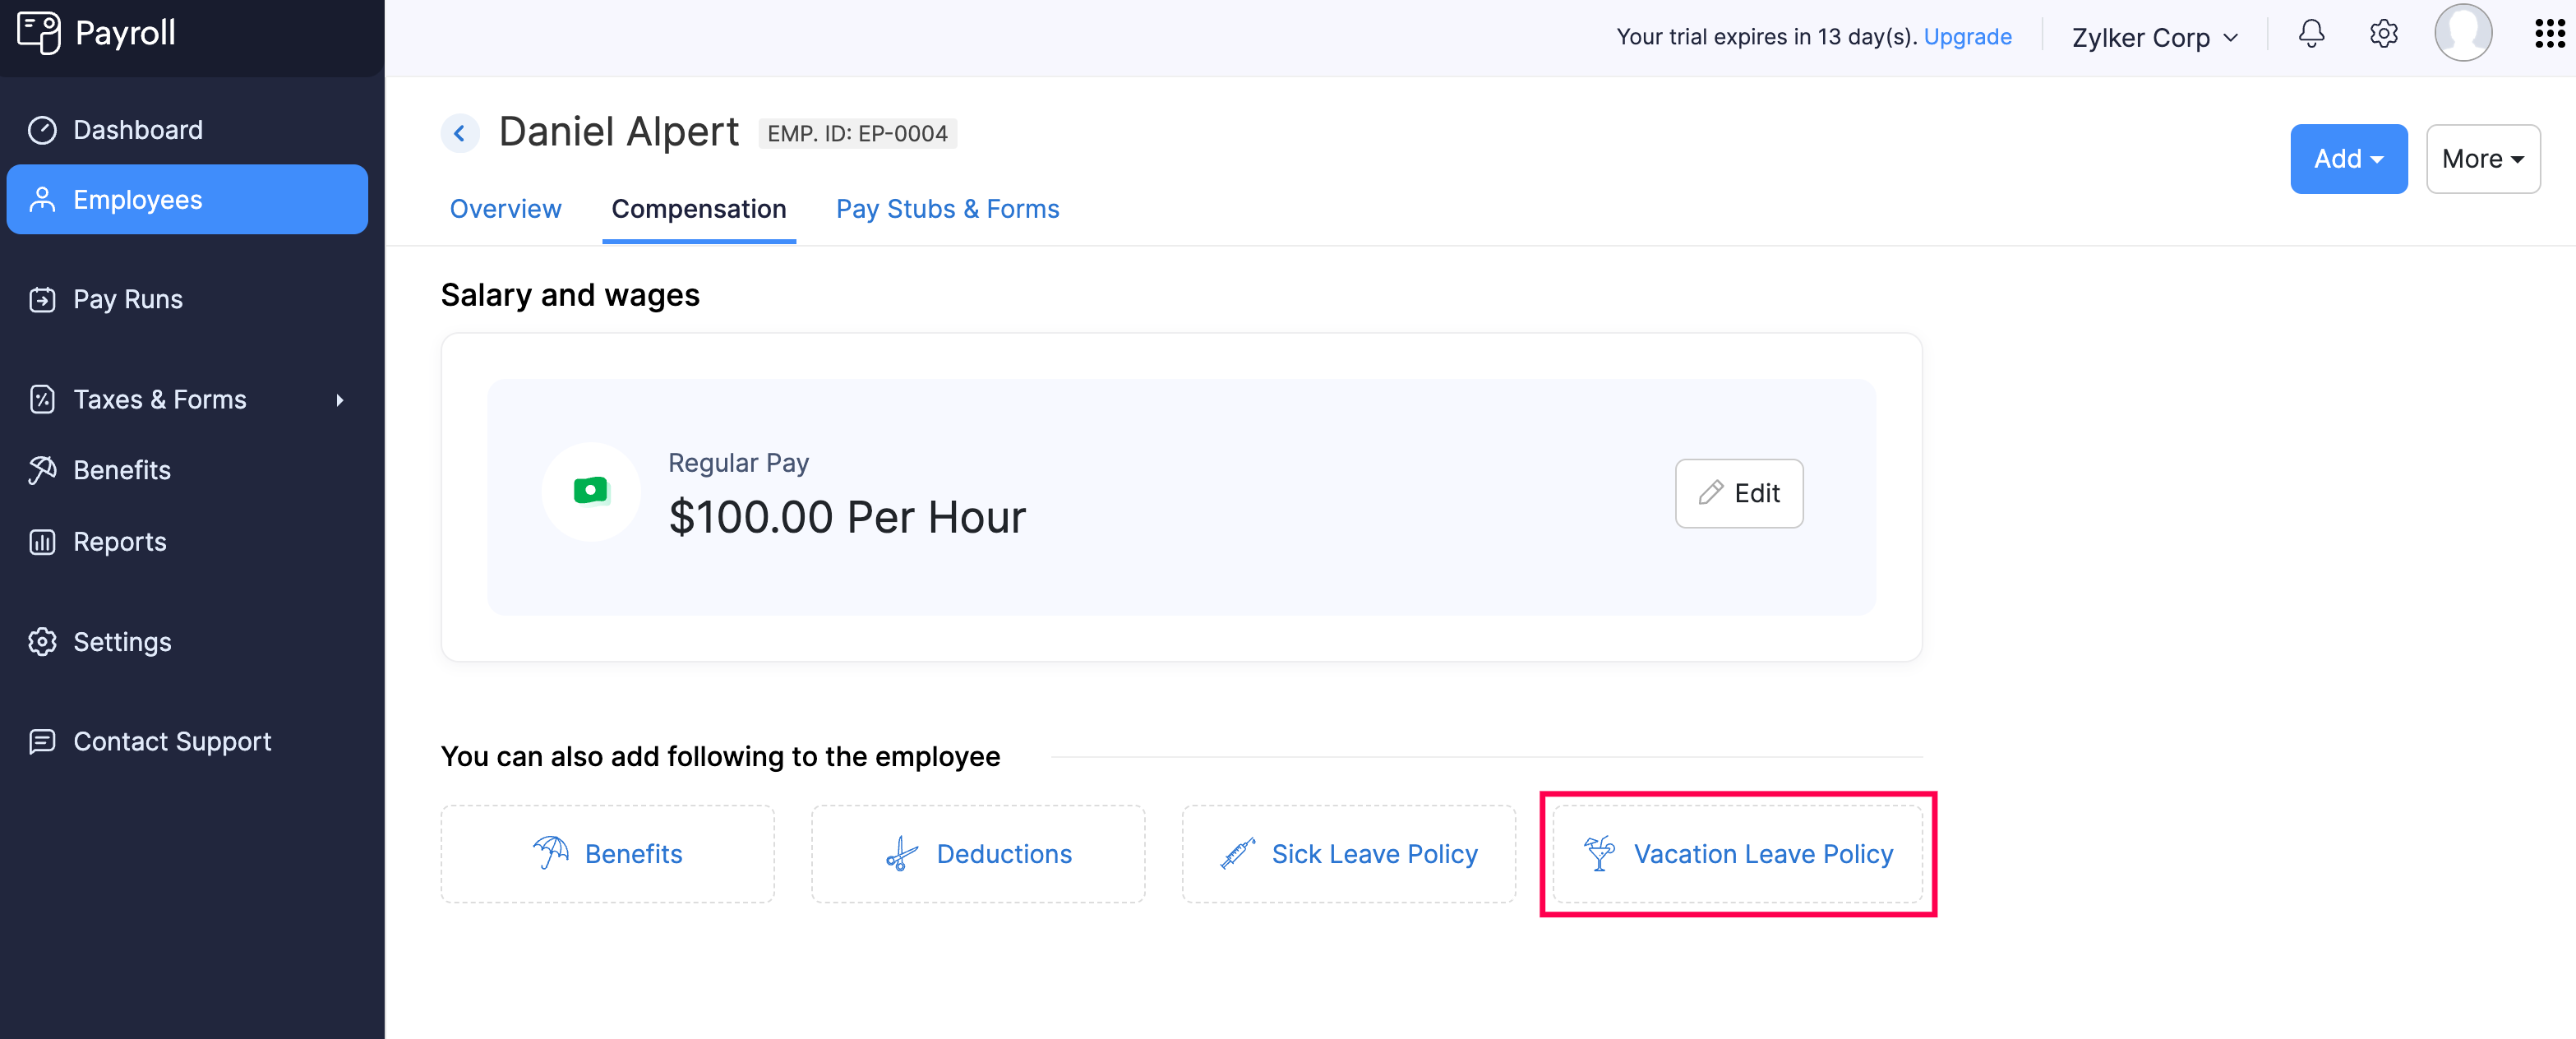
- Select the Earning Method.
- Enter the number of vacation leave hours to Add.
- Enter the Maximum Balance that the employee can accrue for the year.
- Enter the Current Balance of vacation leave hours the employee has.
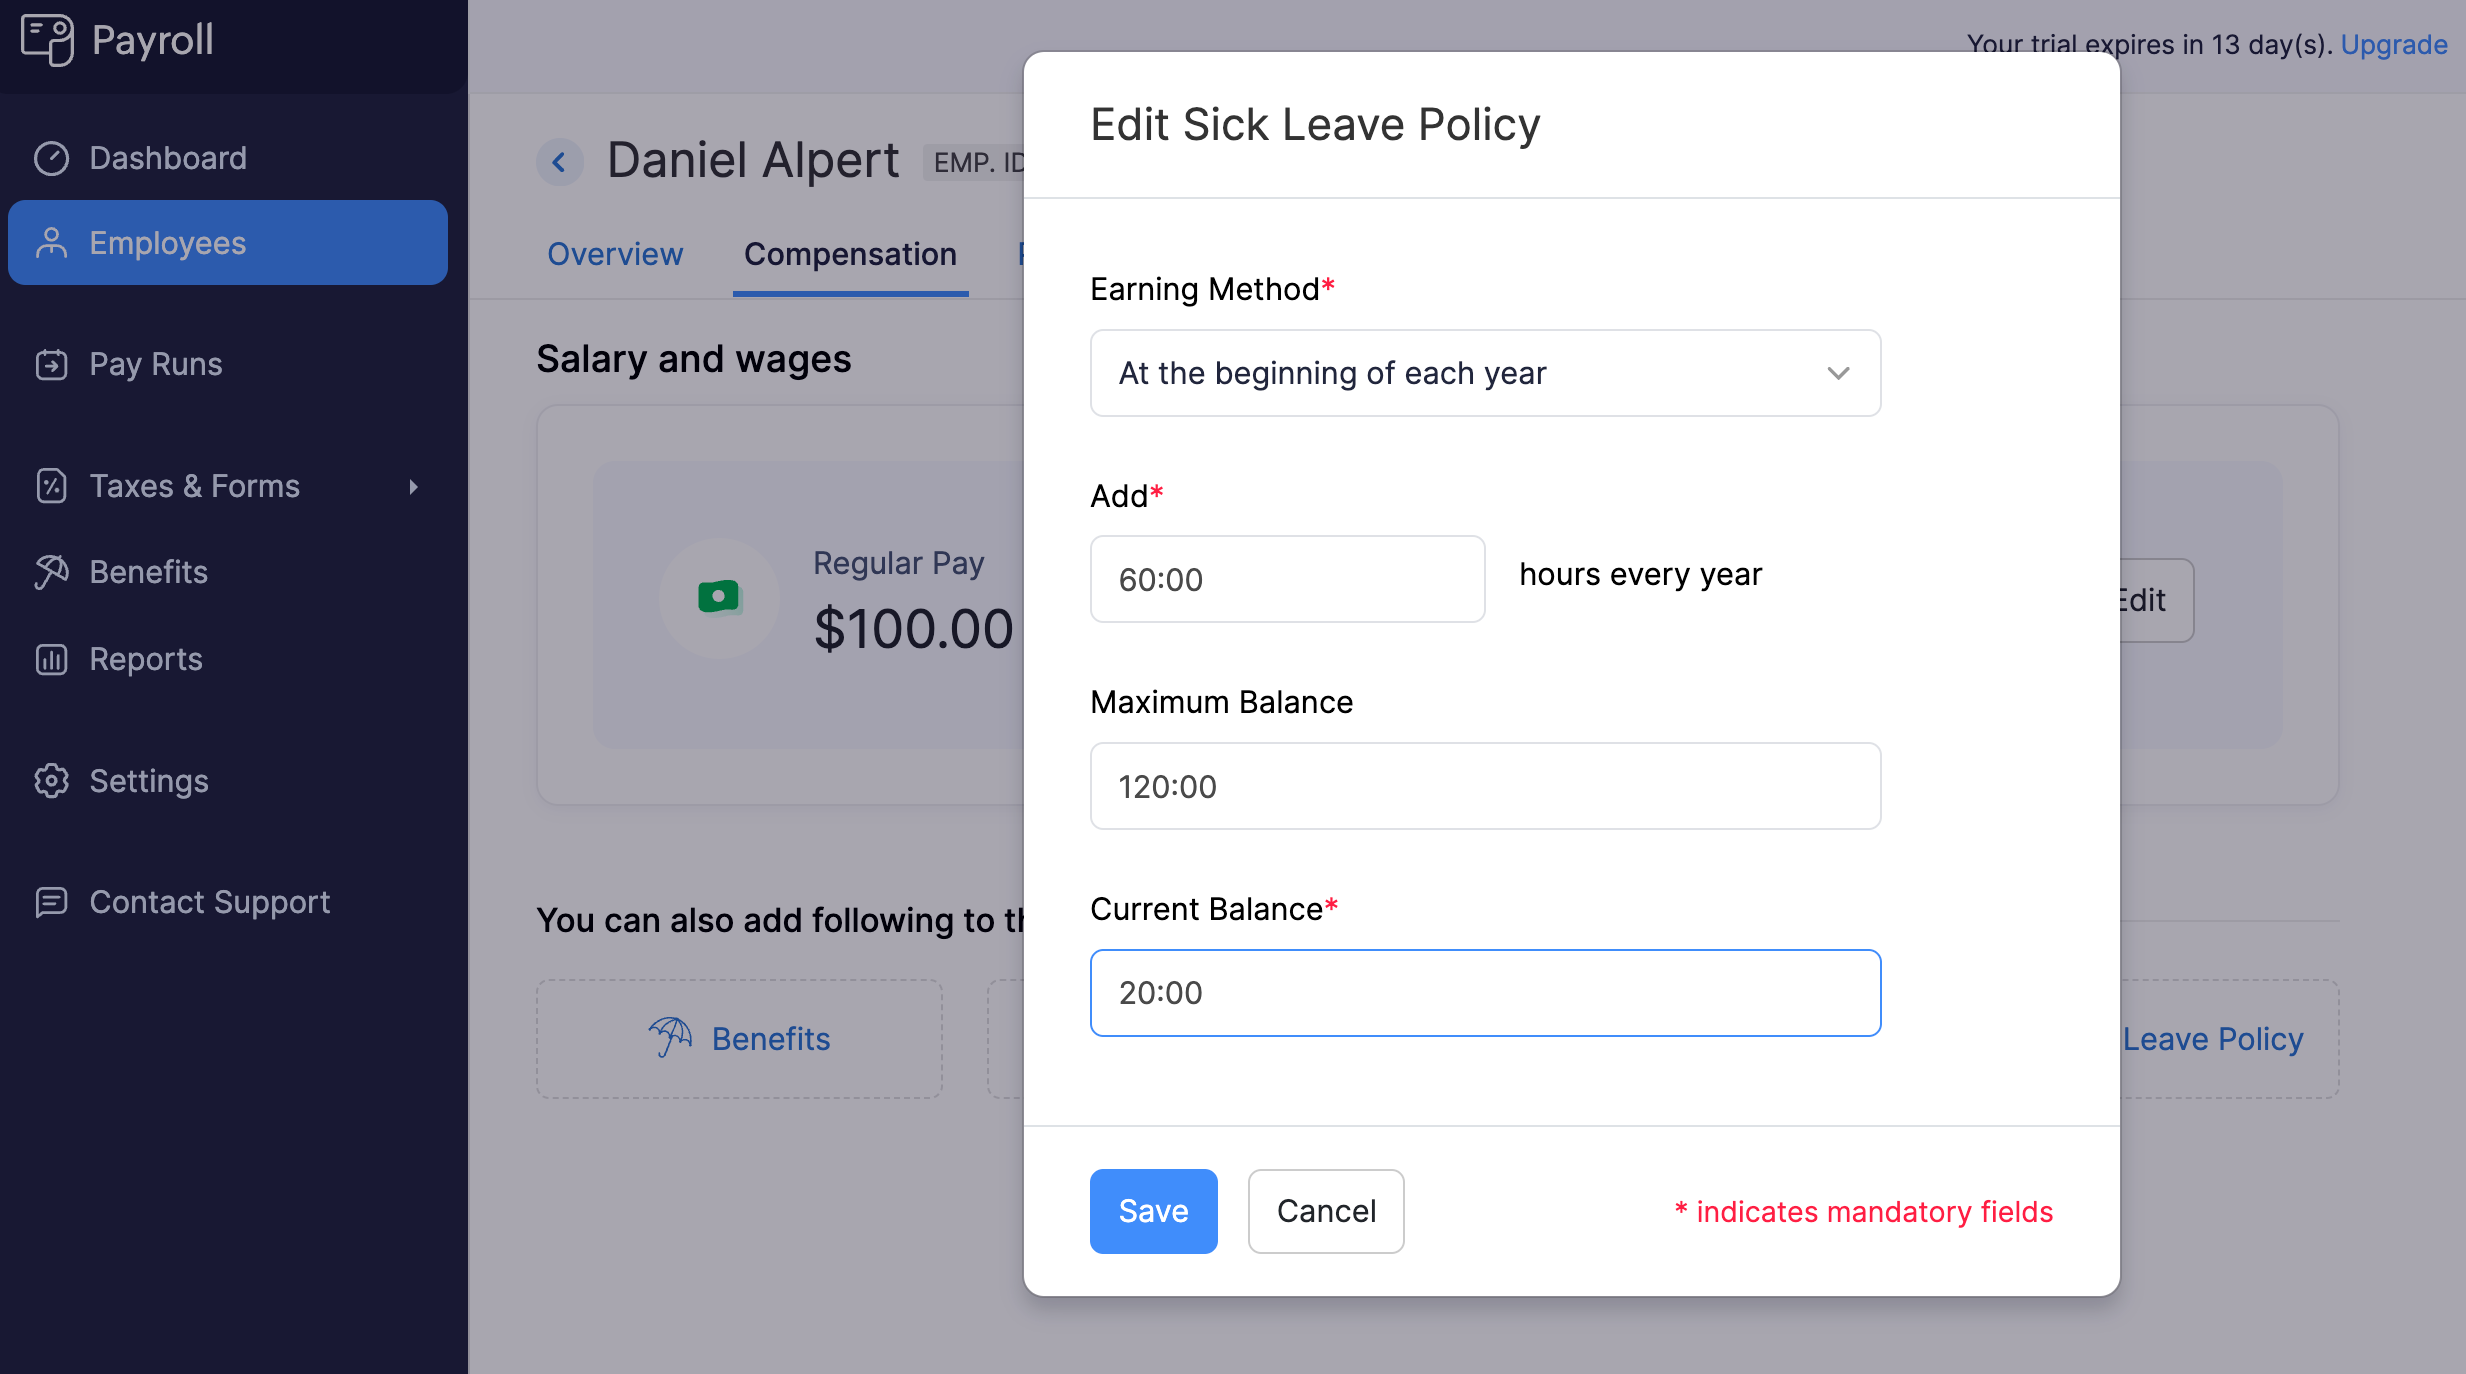
- Click Save.
The vacation leave policy will be assigned to the employee, and you will be able to add vacation leave hours in upcoming payrolls.
Edit Vacation Leave Policy Assigned to an Employee
To edit the vacation leave policy assigned to an employee:
- Go to the Employees module.
- Click an employee.
- Navigate to the Compensation tab.
- Under Paid Time Off, click the edit icon next to Vacation Leave Policy.
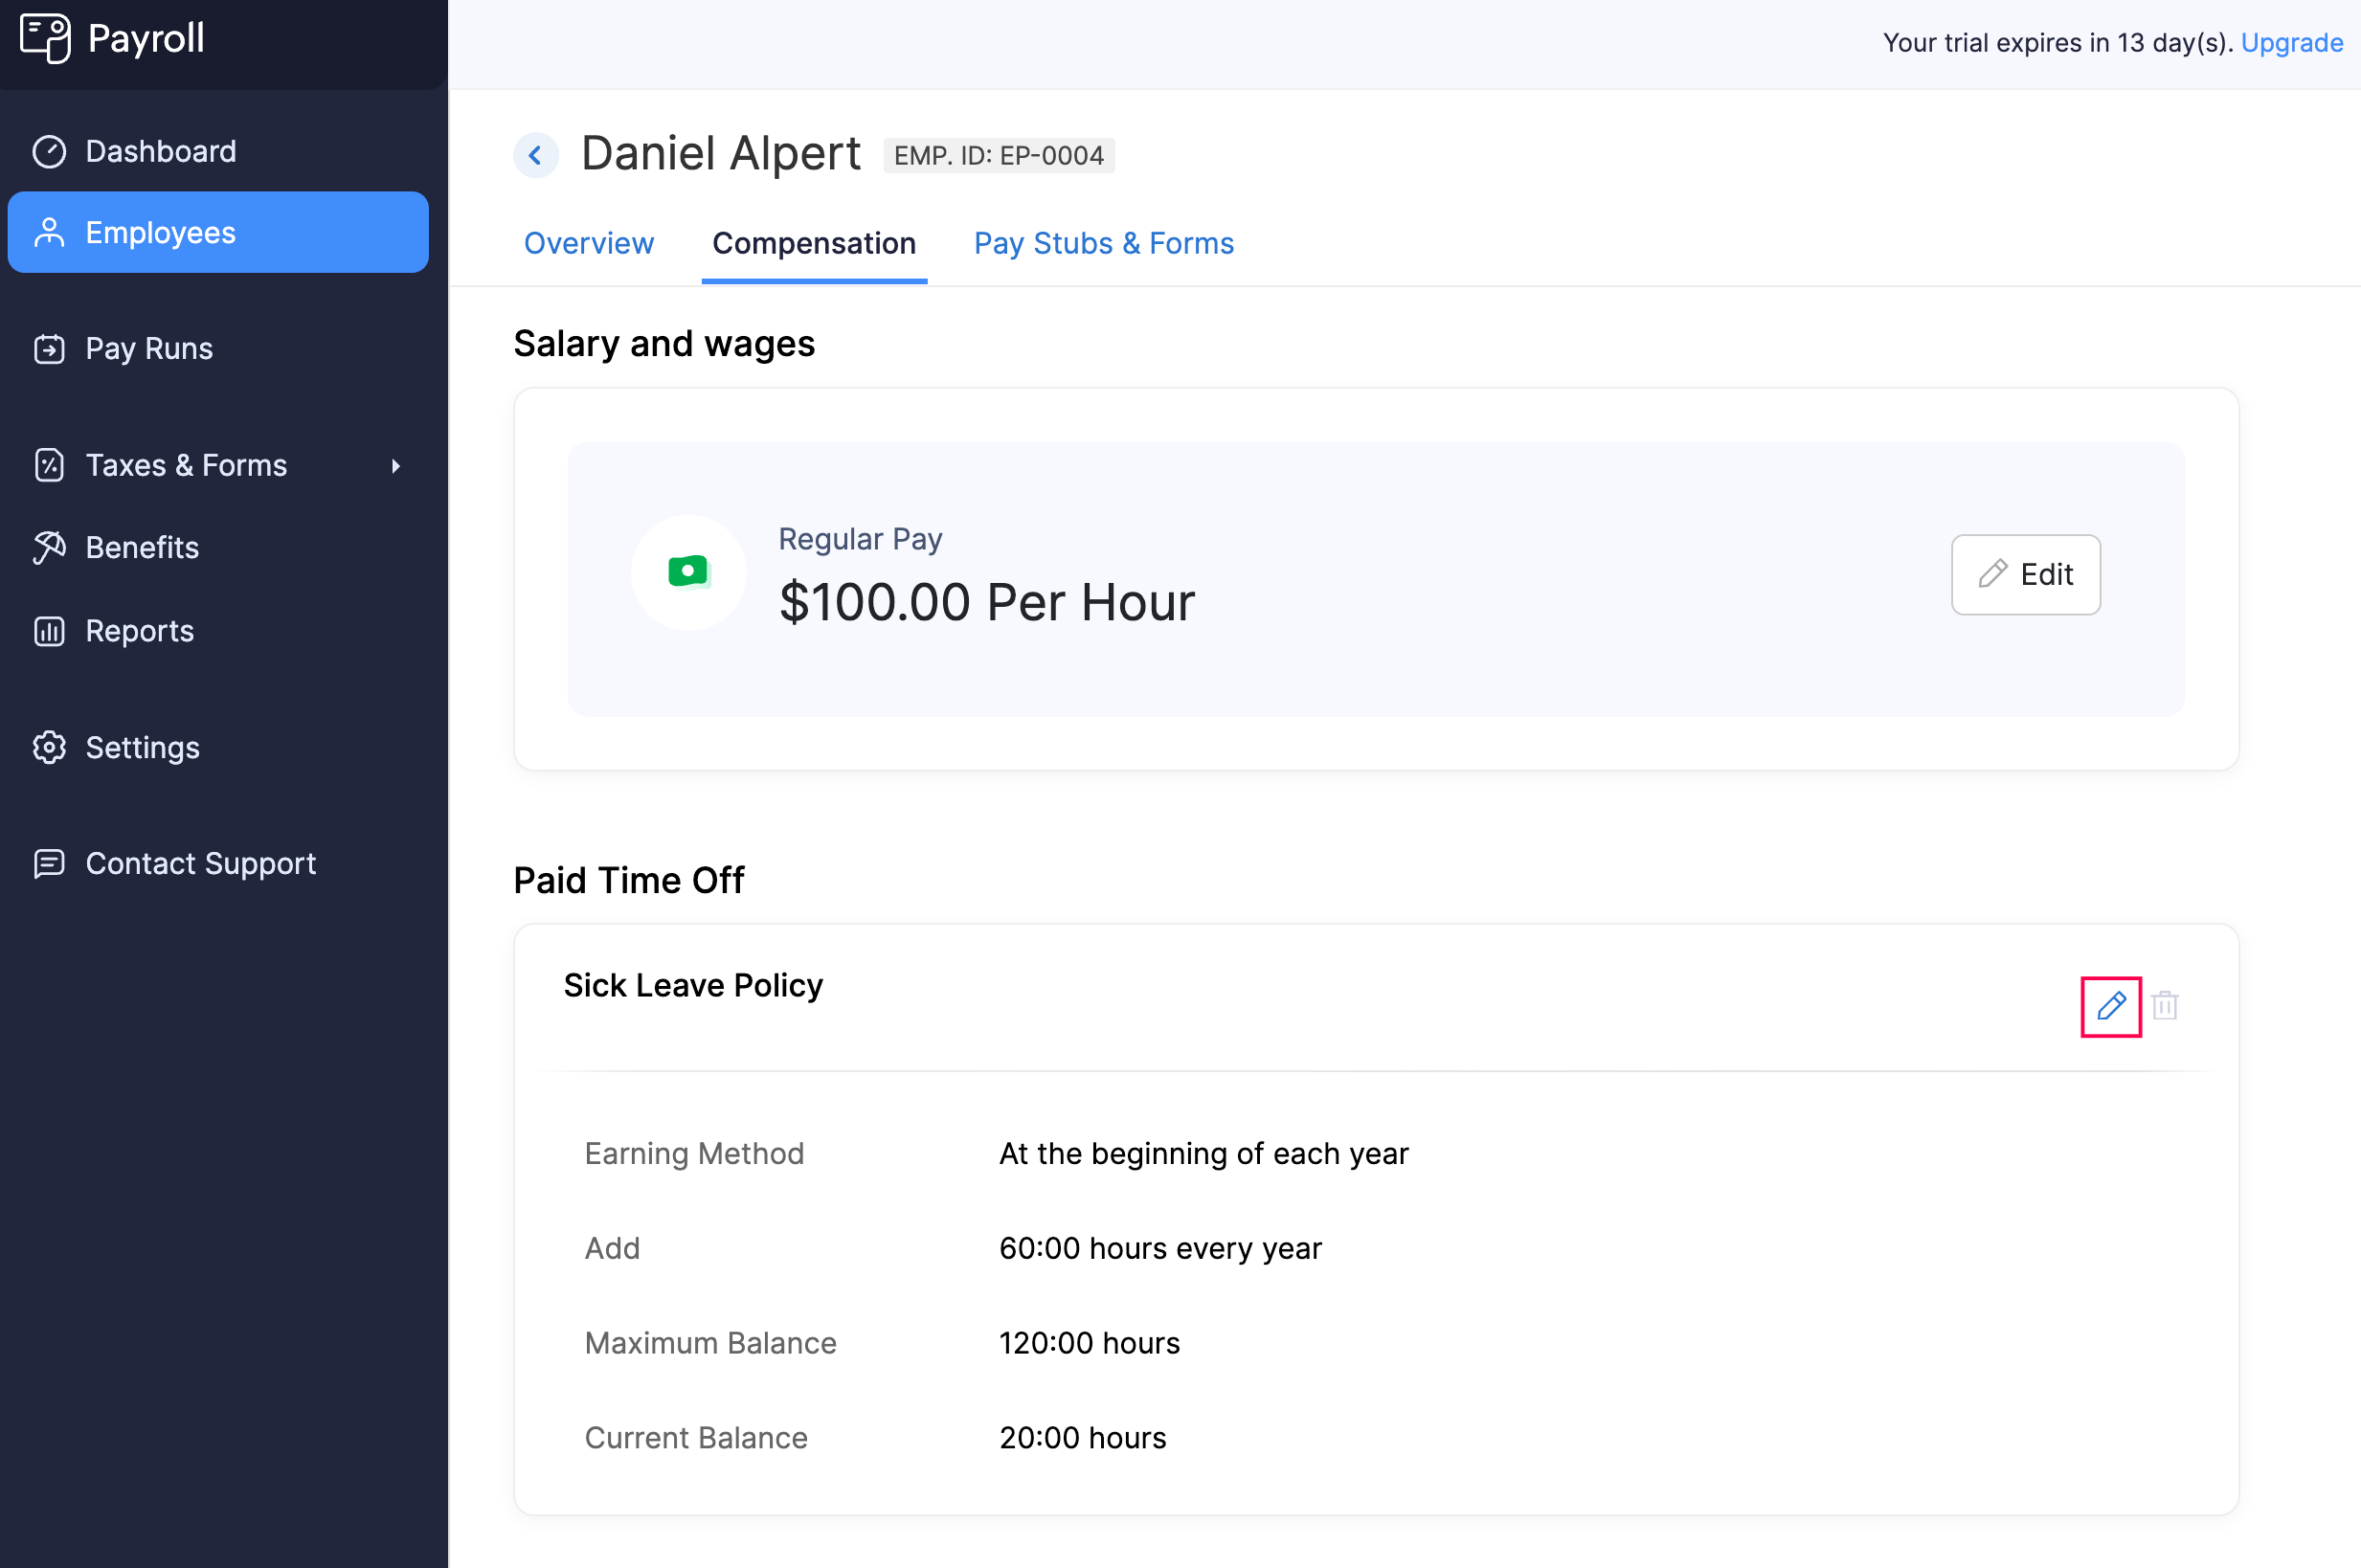
- Make the necessary changes.
- Click Save.
The employee’s vacation leave policy will be updated.
Delete Vacation Leave Policy Assigned to an Employee
To delete the vacation leave policy assigned to an employee:
- Go to the Employees module.
- Click an employee.
- Navigate to the Compensation tab.
- Under Paid Time Off, click the delete icon next to Vacation Leave Policy.
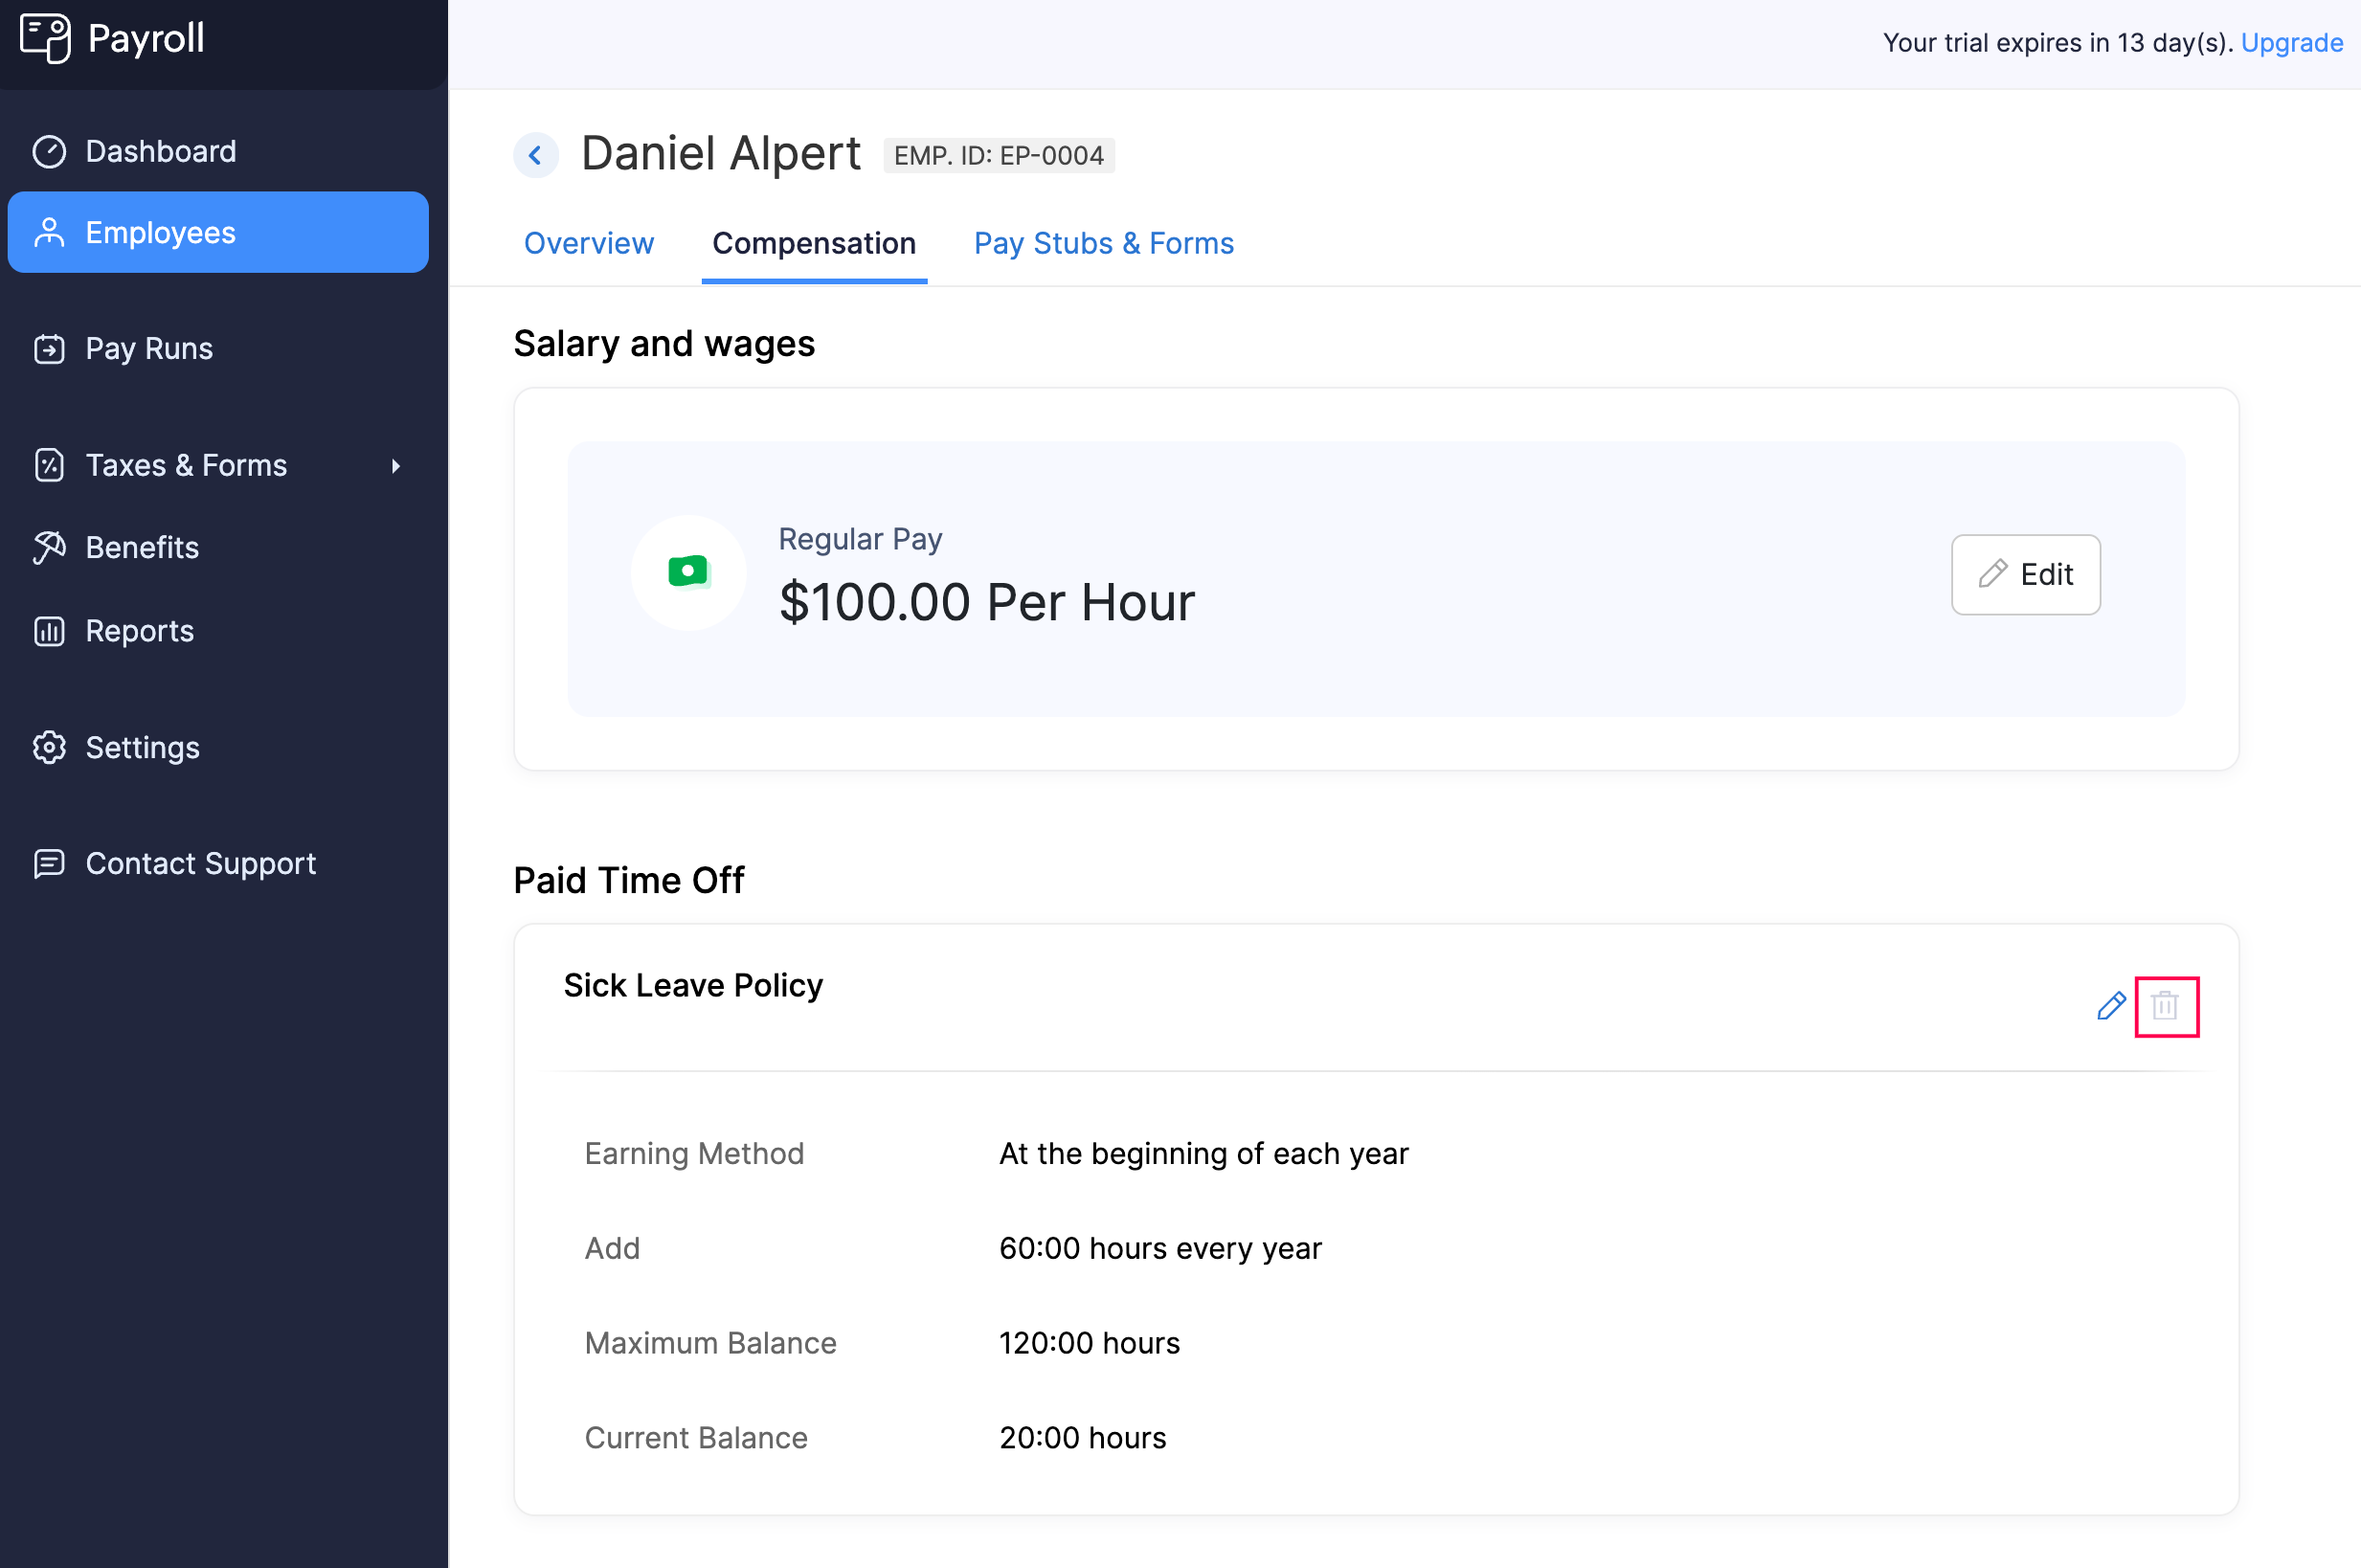
- In the popup that appears, click Yes.
The vacation leave policy will be removed from the employee’s profile.
