
Item Preferences
Let’s have a look at the various settings you can configure for the Items module in Zoho Billing.
To go to Item Preferences:
- Click the Gear icon in the top-right corner of the window to open Settings.
- Select Products under General.
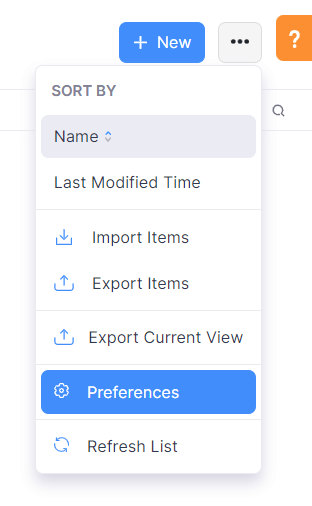
Alternatively, if you’re in the Items module, you can directly go to Item Preferences by clicking the Settings icon in the top-right corner.
Set a Decimal Value for Item Quantity
The decimal rate for item quantity comes into play when you are creating transactions (like invoices). By default, this rate is two. You can select any decimal rate of your choice.
Allow Duplicate Item Names
Enable this option if you want to create multiple items with the same name in Zoho Billing. To enable this option, the SKU custom field should be made Active and Mandatory.
Once this option is enabled, the item’s SKU will be used to uniquely identify the item.
Enhanced Item Search
Enable this option if you want to find items using keywords of its name when creating transactions.
To enable Enhanced Item Search:
- Go to Settings > Module Settings > General > Products.
- Check Enable Enhanced Item Search.
- Click Save.
Once enabled, you can search for items by entering keywords in any sequence, and the search will return matching results.
Price Lists
Price Lists allow you to configure lists with custom prices and currency for your items, plans, and addons. With price lists, you can provide seasonal discounts or special offers for different customers, regions, or product categories with ease.
To enable Price Lists:
- Go to Settings > Module Settings > General > Products.
- Check Enable Price Lists.
- Click Save.
Once enabled, you can create a new price list and associate it with a customer or transaction. Learn more about price lists.
Redirection URL
The Redirection URL directs your customers to the configured URL after they complete a purchase through the hosted payment pages.
If no Redirection URL is configured, customers will be redirected to the default Thank You page after completing a payment.
To configure the Redirection URL:
- Go to Settings > Module Settings > General > Products.
- Enter the URL in the Redirection URL field.
- Click Save.
Once configured, customers who complete a payment through a hosted payment page will be automatically redirected to the specified URL instead of the default Thank You page.
Custom Fields
Custom Fields are fields that you can manually add to the item creation page to store additional information about the item.
Let’s take a look at how Custom Fields can be helpful through an example.
Like David, you might want to create Custom Fields in different circumstances that are unique to your business. By default, there are a few Custom Fields available, like SKU and Item Image, which you can enable if needed.
To create a Custom Field:
- Go to Settings > Preferences > Items.
- Select the Field Customization tab.
- Click + New Custom Field in the top-right corner.
- Enter a Label Name for the custom field that you’re creating.
- Choose if the custom field should be a mandatory field or not.
- Click Save.
Learn more about Custom Fields.
Related Lists
You can fetch data from both the Zoho Billing application and third-party services with Related Lists, and view them in the Items module, making it easy to cross-reference information from different sources.
Custom Buttons And Links
You can create new buttons in the Items module to perform specific actions for your transactions or to open external links. You can create them using Deluge script and execute actions based on the functions you add.
 Yes
No
Yes
No
Thank you for your feedback!