Introduction - Credit Note
A Credit Note is a document issued by a vendor to a customer when goods are returned to the vendor after a sale. This can happen due to reasons like the goods being damaged or not satisfactory. The credit note is created for the value of the goods returned.
Create Credit Note
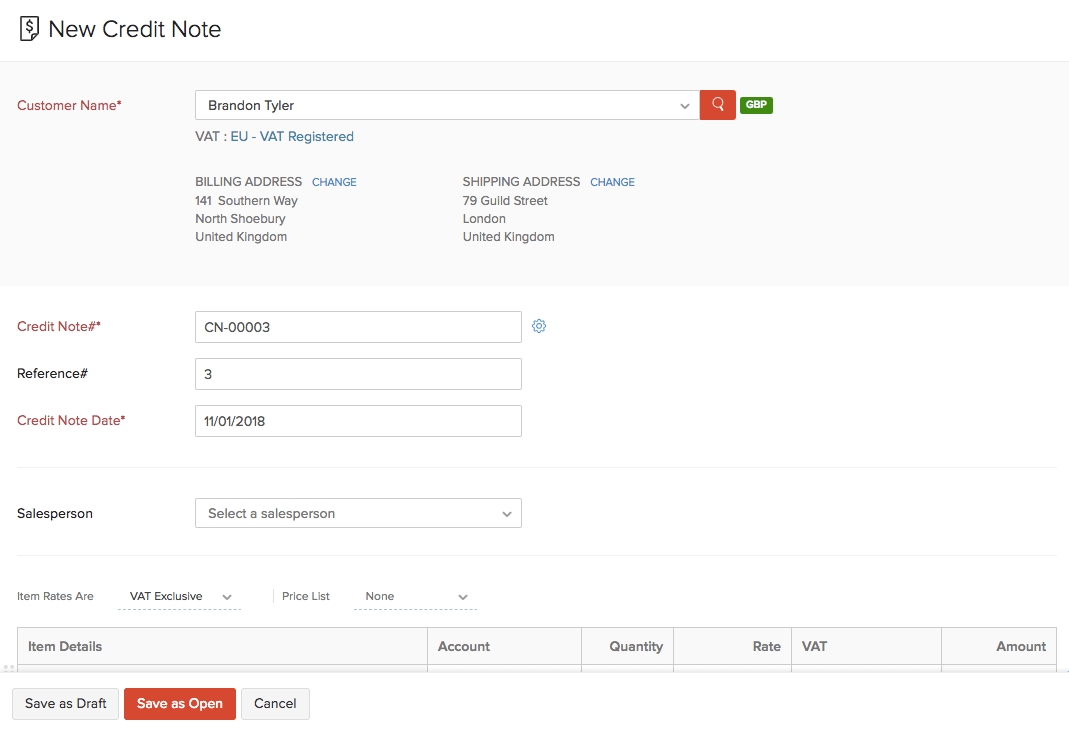
You can directly create a credit note from the Credit Notes module. Here’s how:
- Go to Sales > Credit Notes.
- Click the + New button in the top right corner of the page (or use c + n).
- Enter the customer and item details for which you want to create a credit note.
- Click Save as Draft or Save as Open.
Convert to Open
If you have saved your credit note as a Draft, you can convert it to the Open status to ensure that the credit note is active and shows up in your sales reports.
To mark a credit note as open:
- Go to Sales > Credit Notes.
- Select the credit note in the Draft status which you want to convert to open.
- Click the Convert to Open button in the top right side of the page.

From Invoice
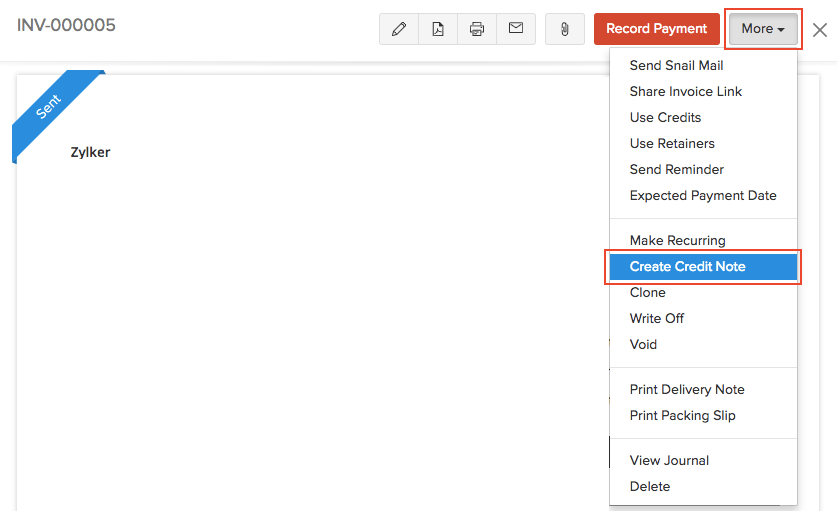
You can directly create a credit note from an invoice. Here’s how:
- Go to Sales > Invoices.
- Select the invoice that you want to convert into a credit note.
- Click More > Create Credit Note.
- The New Invoice page will be auto-populated. You can save the invoice details from here.
Import Credit Notes
Another way of adding credit notes in Zoho Books is to import them. You can import the credit notes you have in your system in CSV, TSV or XLS format.
To import credit notes:
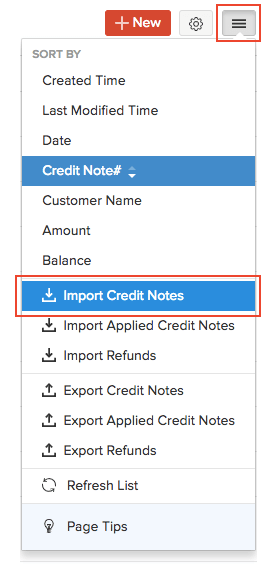
- Go to Sales > Credit Notes.
- Click the More icon in the top right corner of the page.
- Select Import Credit Notes.
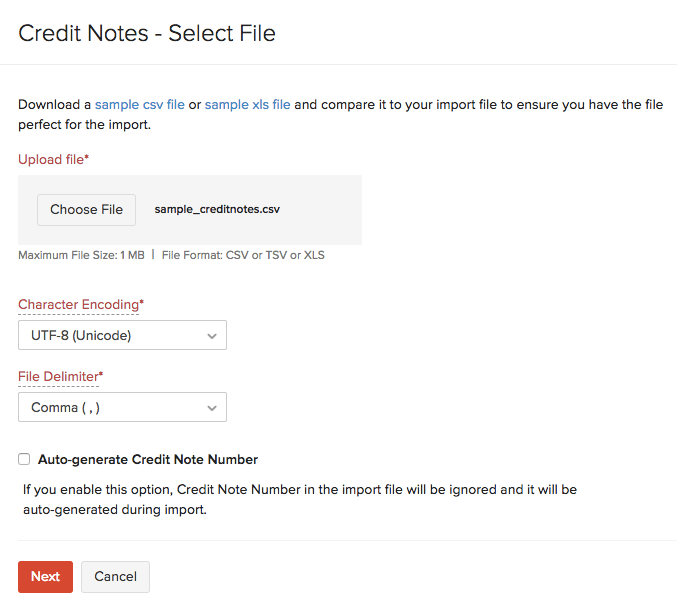
- Click the Choose File button under Upload file. You can download a sample CSV or XLS file for your reference by clicking sample csv file or sample xls file.
- If you want your credit note number in the imported file to be auto-generated, mark the box Auto-generate Credit Note Number.
- Click Next.
- Ensure that all the fields are mapped correctly in the Map Fields page.
- To import using the same format next time, mark the box Save these selections for use during future imports.
- Click Next.
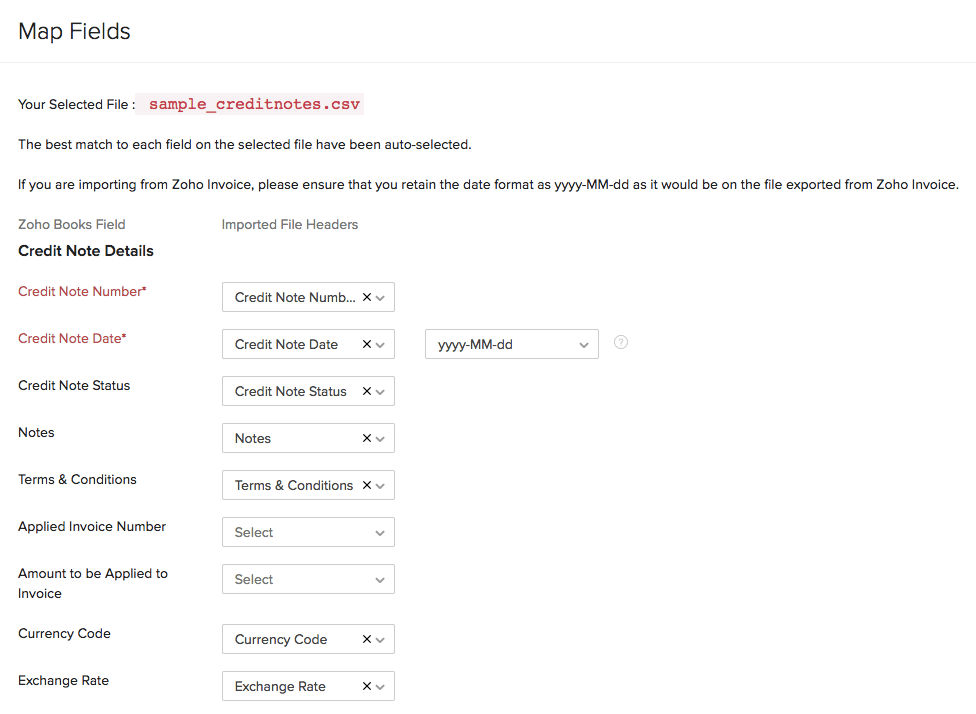
- Click Import.
Next >
Apply Credits to Invoice
Related >


 Yes
Yes