
Preferences
Email Receipt Forwarding
Email receipt forwarding in Zoho Spend helps you forward expense receipts from your emails through the system generated email address to your Zoho Spend organization.
- If autoscan has been enabled for your organization, receipts will be autoscanned once forwarded.
- If autoscan has not been enabled for your organization, you can manually record the expense.
You can also rename the customizable part of the generated email address.
Here’s how you can enable email receipt forwarding in Zoho Spend:
- Click My Settings on the left sidebar.
- Go to the Preferences tab.
- Click Enable Now under Email Receipt Forwarding.
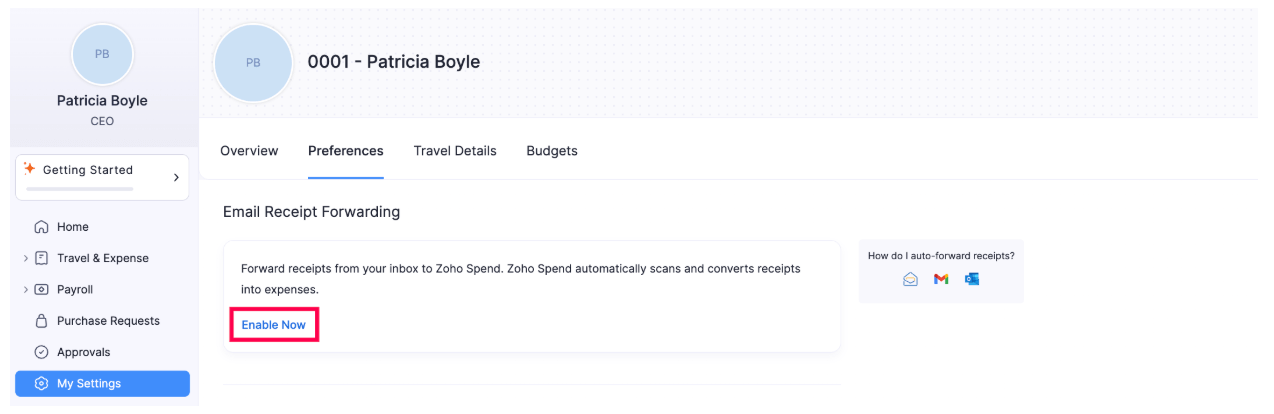
- Enter the email prefix in the box and click Save.
Edit Receipt Forwarding Email Address
Here’s how you can rename the customizable part of your receipt forwarding email address:
- Click My Settings on the left sidebar.
- Go to the Preferences tab.
- Click Update under the Email Receipt Forwarding.
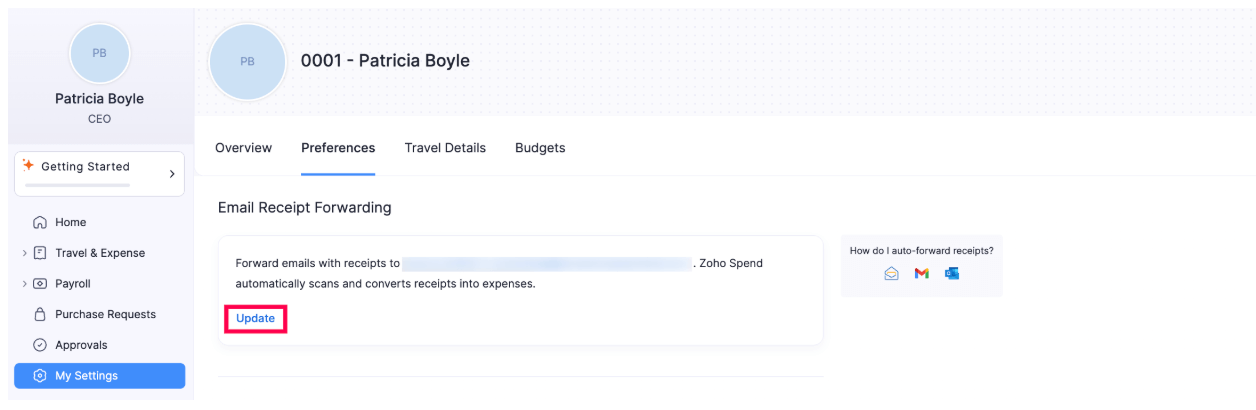
- Enter the preferred email prefix and click Save.
Auto-forward Receipts From Your Email
Zoho Mail
- Open Zoho Mail.
- Click the Gear icon in the top right corner.
- Click Create a new incoming filter under Filters to filter the emails from your merchant that have receipts. Fill in the details.
- Choose Forward email to under the Actions section.
- Paste the generated email address and click Save. Now, your expense receipts will be forwarded to Zoho Spend.
Gmail
- Open Gmail and navigate to Settings.
- Go to the Forwarding and POP/IMAP tab and click Add a forwarding address.
- Paste the generated email address in the popup and click Next.
- Click Proceed in the new tab that opens. Gmail will send a verification code to Zoho Spend.
- Go to the Expenses module on the left sidebar and click View next to the scan failed receipts band at the top of the page. In the slider that opens, click the PDF file. Copy the Confirmation Code from the file.
- Paste the code under Forwarding and POP/IMAP in Settings in Gmail to verify the email address.
- As soon as the email is verified, it will be added as a forwarding address.
- Click the PDF file from Gmail and copy the confirmation code.
- Next, go to the Filters and Blocked Addresses tab.
- Click Create a new filter and fill in the details.
- Enter your merchant’s email address from which you receive the expense receipts.
- Click Create filter.
- Mark the Forward it to option and select the forwarding address from the dropdown.
- Click Create filter. Now, your expense receipts will be forwarded to Zoho Spend.
Outlook
- Open Outlook.
- Click the Gear icon in the top right corner and click Settings.
- Click View all Outlook settings.
- Select the Rules tab under the Mail section.
- Click + Add new rule and enter the details with proper conditions.
- Select Forward to under the Add an action section and paste the generated email address.
- Click Save. Now, your expense receipts will be forwarded to Zoho Spend.
Set Default Values
When creating a transaction, there may be certain fields for which you might fill in the same value each time. You can set default values for these fields. These values will automatically be pre-filled whenever you create a new transaction.
For example, if your meal preference during trips or your paid through account for expenses rarely changes, selecting them manually each time can become redundant. By setting a default value for these fields, they’ll be auto-populated when creating transactions, ensuring efficiency and convenience.
Note: You can set default values for both default and custom fields in the Expenses, Trips, Reports, and Purchase Requests modules.
Set Default Values for Trips
Here’s how you can set default values for trips:
- Click My Settings on the left sidebar.
- Go to the Preferences tab.
- Click Configure under Trips.
- Select the fields for which you want to set a default value and their value.
- You can add more fields by clicking + New Field or remove existing fields by clicking x next to the default value.
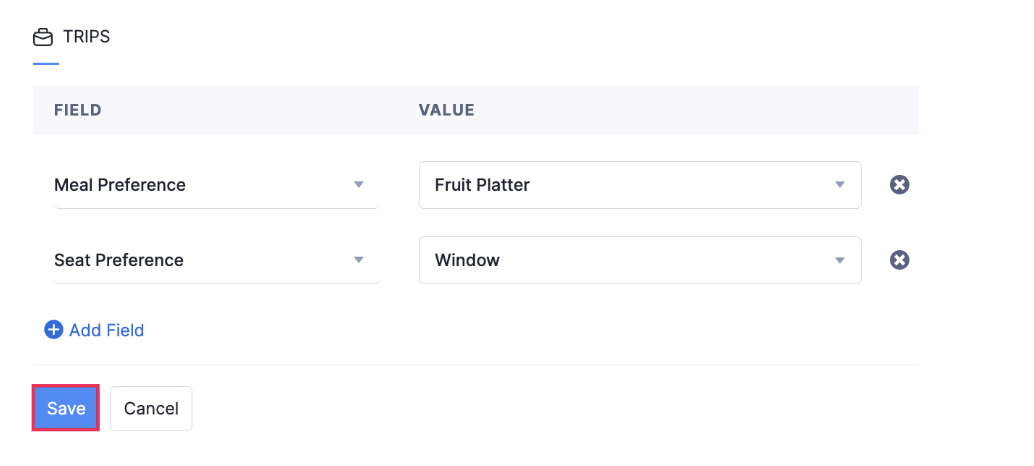
- Click Save.
Set Default Values for Expenses
Here’s how you can set default values for expenses:
- Click My Settings on the left sidebar.
- Go to the Preferences tab.
- Click Configure under Expenses.
- Select the fields for which you want to set a default value and their value.
- You can add more fields by clicking + New Field or remove existing fields by clicking x next to the default value.
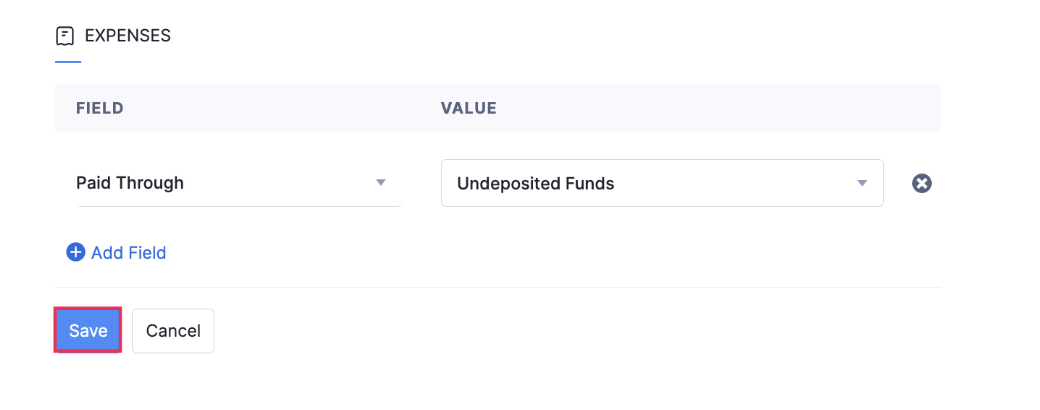
- Click Save.
Set Default Values for Reports
Here’s how you can set default values for reports:
- Click My Settings on the left sidebar.
- Go to the Preferences tab.
- Click Configure under Reports.
- Select the fields for which you want to set a default value and their value.
- You can add more fields by clicking + New Field or remove existing fields by clicking x next to the default value.

- Click Save.
Set Default Values for Purchase Requests
Here’s how you can set default values for purchase requests:
- Click My Settings on the left sidebar.
- Go to the Preferences tab.
- Click Configure under Purchase Requests.
- Select the fields for which you want to set a default value and their value.
- You can add more fields by clicking + New Field or remove existing fields by clicking x next to the default value.
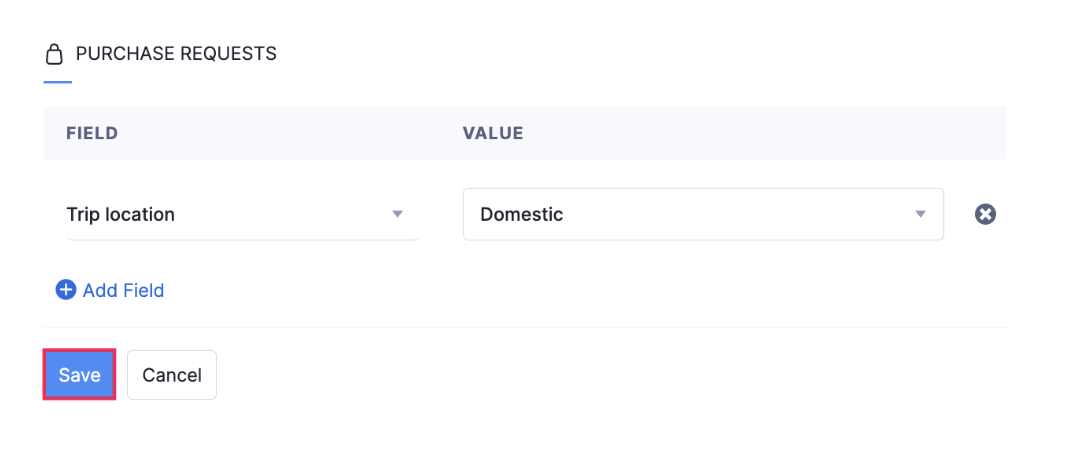
- Click Save.
Budgets
View the employee budget allocated to you by your organization. Compare the budget with your actual spending for better tracking.
To view your budget:
- Click My Settings on the left sidebar.
- Go to the Budgets tab.
- Select the Budget Period for which you want to view the employee budget from the dropdown.
