
Travel Details
In this section, you can add and manage your travel-related details such as Name as in Passport/ID Proof, Nationality, Gender, Personal Email Address, D.O.B as in Passport/ID Proof, etc., which will be used at the time of booking tickets or making reservations. You can also add the details of your emergency contacts, who can be reached on your behalf in case of an emergency during your travels.
Travel Profile
You can add and edit your travel profile which will be pre-filled at the time of booking.
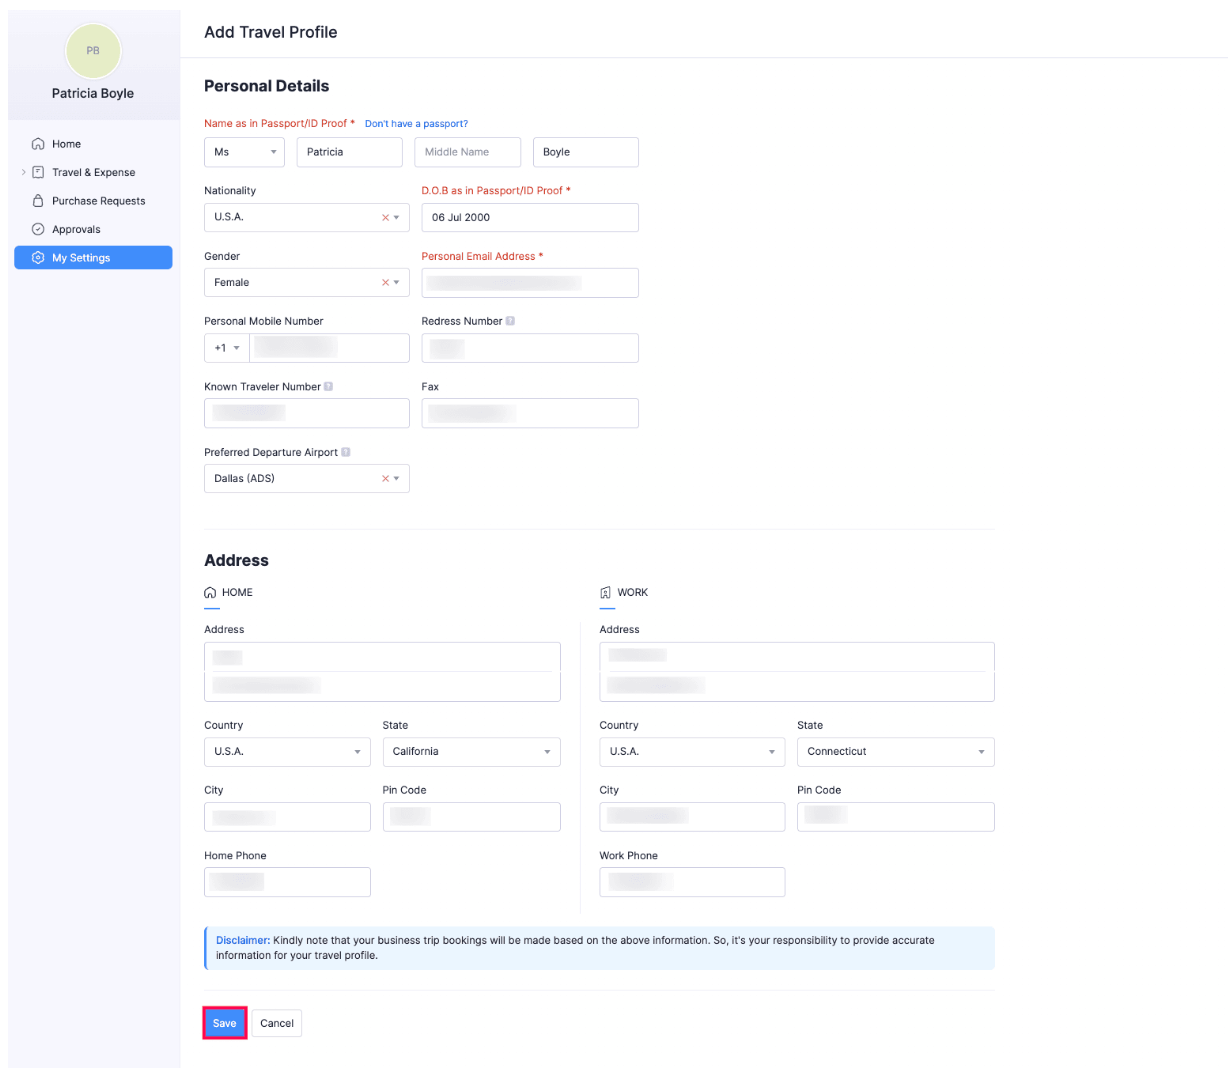
Add Travel Profile
To add a travel profile:
- Go to My Settings and switch to the Travel Details tab.
- Click Add Travel Profile.

- Enter the required details in the Travel Profile section.
- Name as in Passport/ID Proof: Enter your name as in the passport or an ID proof if you do not have a passport.
- Nationality: Select your nationality.
- D.O.B as in Passport/ID Proof: Select your D.O.B as in passport or any ID proof.
- Gender: Select your gender identity.
- Personal Email Address: Enter your personal email address.
- Personal Mobile Number: Enter your personal mobile number.
- Redress Number: Enter the redress number which is a unique ID issued by the TSA to help avoid mistaken identity and speed up identity verification.
- Known Traveler Number: Enter the Known Traveler Number received from a Trusted Traveler Program that lets you use TSA PreCheck and Global Entry lanes.
- Fax: Enter your fax number.
- Preferred Departure Airport: Enter your Preferred Departure Airport, which is used to fetch local airports and cities for your domestic trips. This airport will be pre-filled in the first Depart From field for all your trips.
- Enter your home and work addresses, if required.
- Click Save.
Edit Travel Profile
You can edit the details of your travel profile you’ve added. To do this:
- Go to My Settings and switch to the Travel Details tab.
- In the Travel Profile section, click the Edit icon.
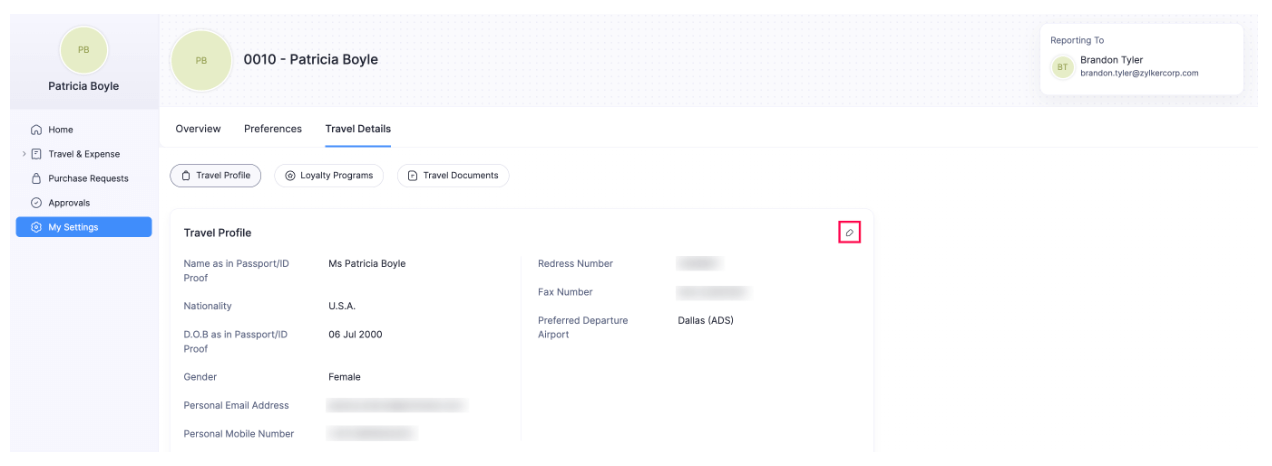
- Make the required changes and click Save.
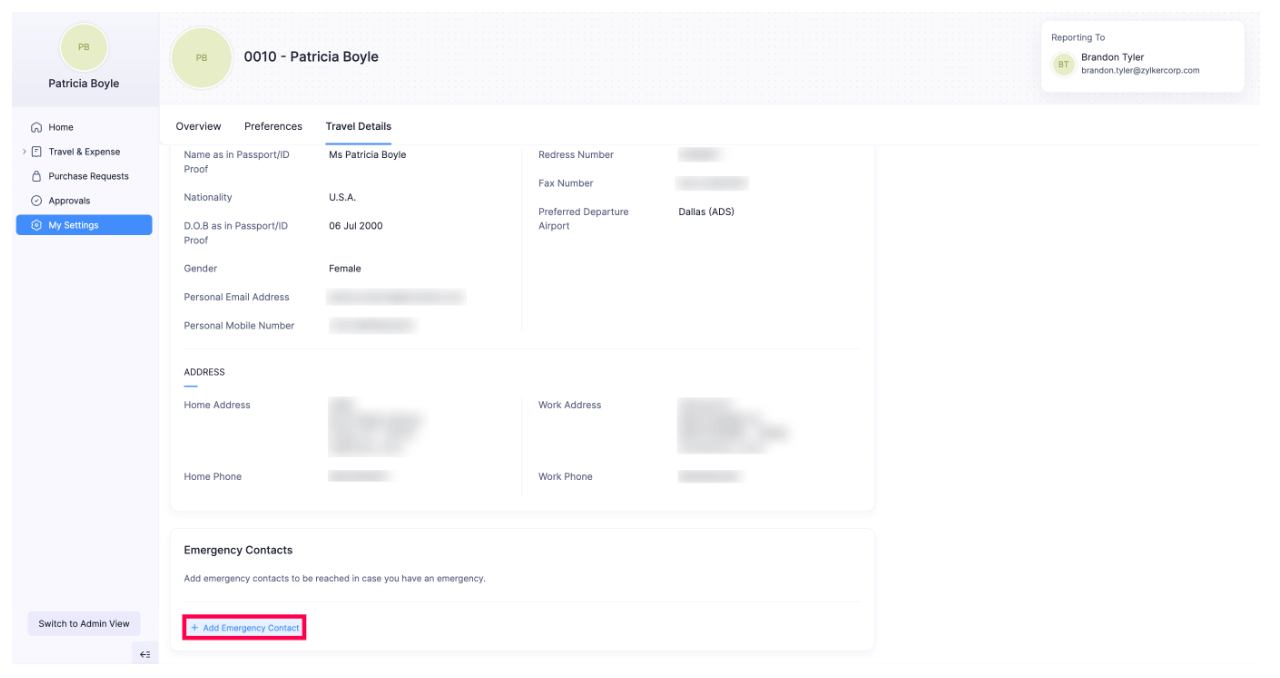
Emergency Contacts
You can add, edit, delete, and mark an emergency contact as primary. Emergency contact details are used to ensure that someone can be reached in case of unexpected events during your travel.
Note: The emergency contact section will be displayed in the travel profile section only after you add your travel profile. You can add a maximum of two emergency contacts.
Add Emergency Contact
To add an emergency contact:
- Go to My Settings and switch to the Travel Details tab.
- Click Add Emergency Contact below Travel Profile.
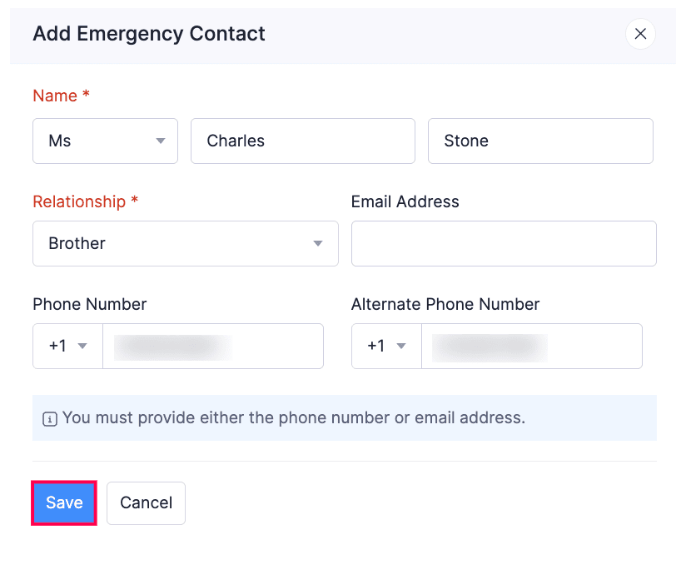
- In the pop-up, enter the full name of your emergency contact.
- Select your relationship with the emergency contact.
- you can either enter their phone number or email address as one of them is mandatory.
- Click Save.
Primary Contact: The primary contact will be the first person contacted in case of emergencies. If the primary contact is unavailable, the secondary person will be contacted. By default, the first contact you add is marked as primary, but you can change the primary contact at any time.
To change the primary contact: In the Emergency Contacts section, click the More icon next to the contact you want to mark as primary and select Mark as Primary.
Edit Emergency Contact
You can edit an emergency contact. Here’s how:
- Go to My Settings and switch to the Travel Details tab.
- In the Emergency Contacts section below Travel Profile, click the More icon next to the contact you want to edit and select Edit.

- Make the required changes and click Save.
Delete Emergency Contact
If you want to remove an emergency contact, you can delete it.
To delete an emergency contact:
- Go to My Settings and switch to the Travel Details tab
- In the Emergency Contacts section below Travel Profile, click the More icon next to the contact you want to delete and select Delete.

- In the pop-up, click Delete.
Loyalty Programs
A loyalty program is a reward system offered by airlines, hotels, car rental, and other services, where customers earn points, discounts, or benefits based on how frequently they use their services.
For example, let’s assume you’re a frequent flyer of a particular airline and you’re enrolled in one of their loyalty programs. You’ll earn loyalty points for each flight with the airline. Additionally, as a loyalty member, you can enjoy other benefits and exclusive services including priority check-in, lounge access, and fast-track security clearance, special offers while booking tickets, and so on. The loyalty points you’ve earned will be applied to your future bookings.
Note: You can only add the loyalty program details of your flights, hotels, and car rentals.
Add Loyalty Program
You can add a loyalty program details of your flights, hotels, and car rentals.
To add a loyalty program:
- Go to My Settings and switch to the Travel Details tab.
- Click Loyalty Programs.
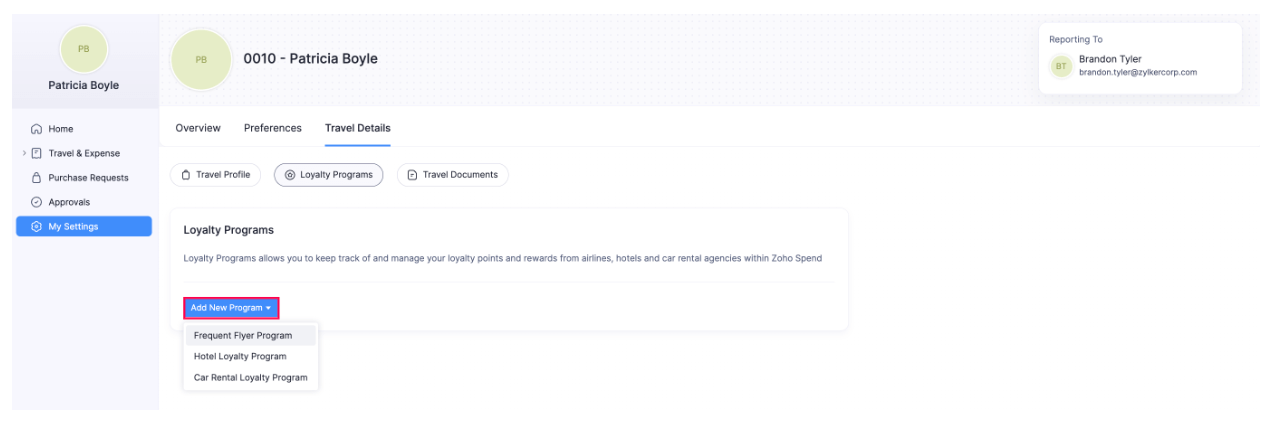
- Click the Add New Program dropdown and select the program you want to add.
- In the pop-up, select the airline, hotel, or car rental provider based on the program.
- Enter the Program Number.
- Click Save.
Edit Loyalty Program
You can edit the details of your loyalty program you’ve added, if required.
To edit a loyalty program:
- Go to My Settings and switch to the Travel Details tab.
- Click Loyalty Programs.
- Click the More icon next to the loyalty program you want to edit, and select Edit.
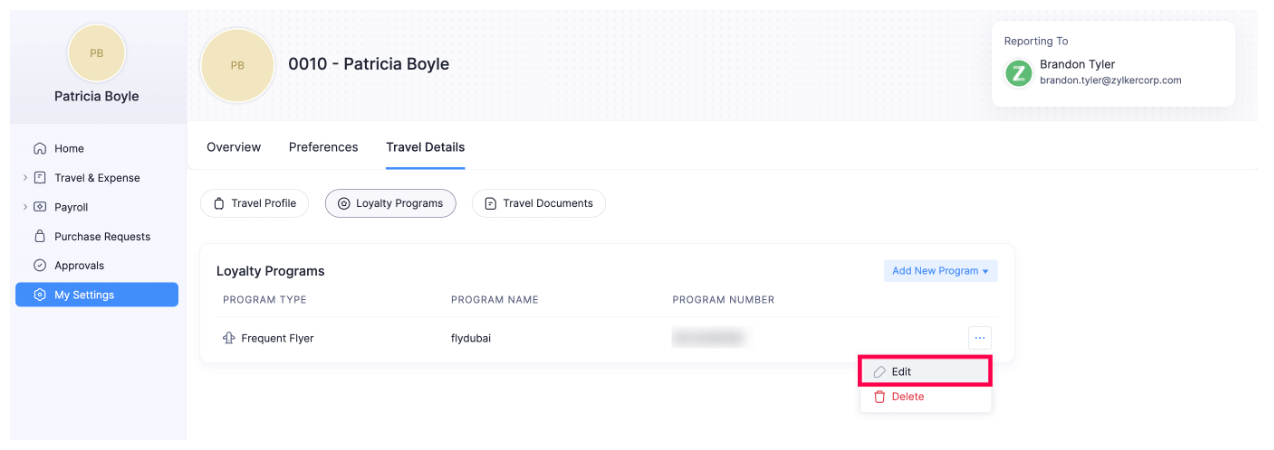
- Make the required changes and click Save.
Delete Loyalty Program
You can delete the details of your loyalty program if it’s not required anymore.
To delete a loyalty program:
- Go to My Settings and switch to the Travel Details tab.
- Click Loyalty Programs.
- Click the More icon next to the loyalty program you want to delete and select Delete.
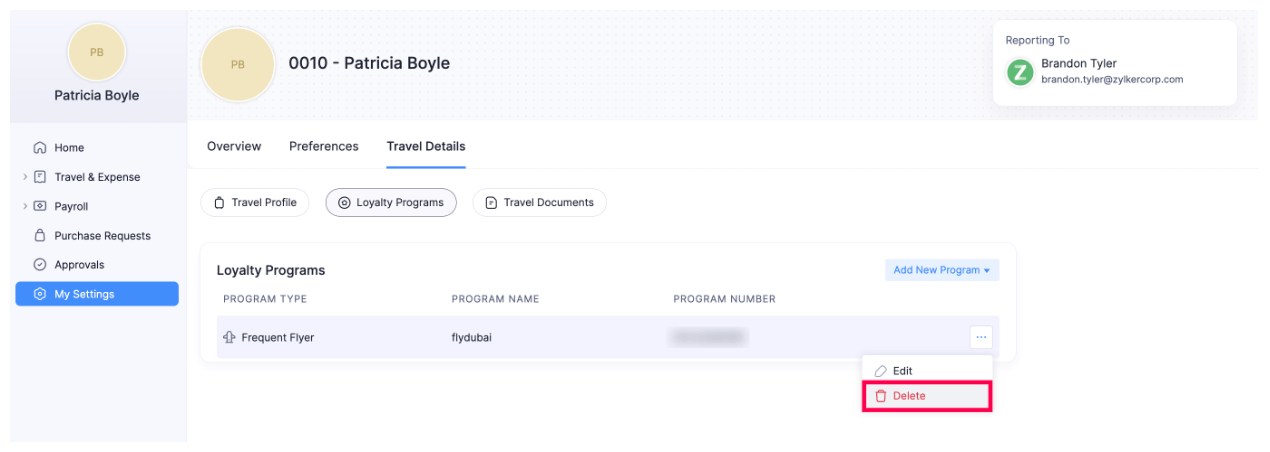
- In the pop-up, click Delete to confirm your action.
Travel Documents
Your travel documents such as your passport, visa, ESTA, and other travel-related information are needed to book your tickets. You can upload your travel documents to Zoho Spend and make booking tickets a seamless process.
Add Travel Documents
You can upload the files you have as travel documents in Zoho Spend.
Note: You can upload a maximum of two files as a travel document from your desktop or cloud.
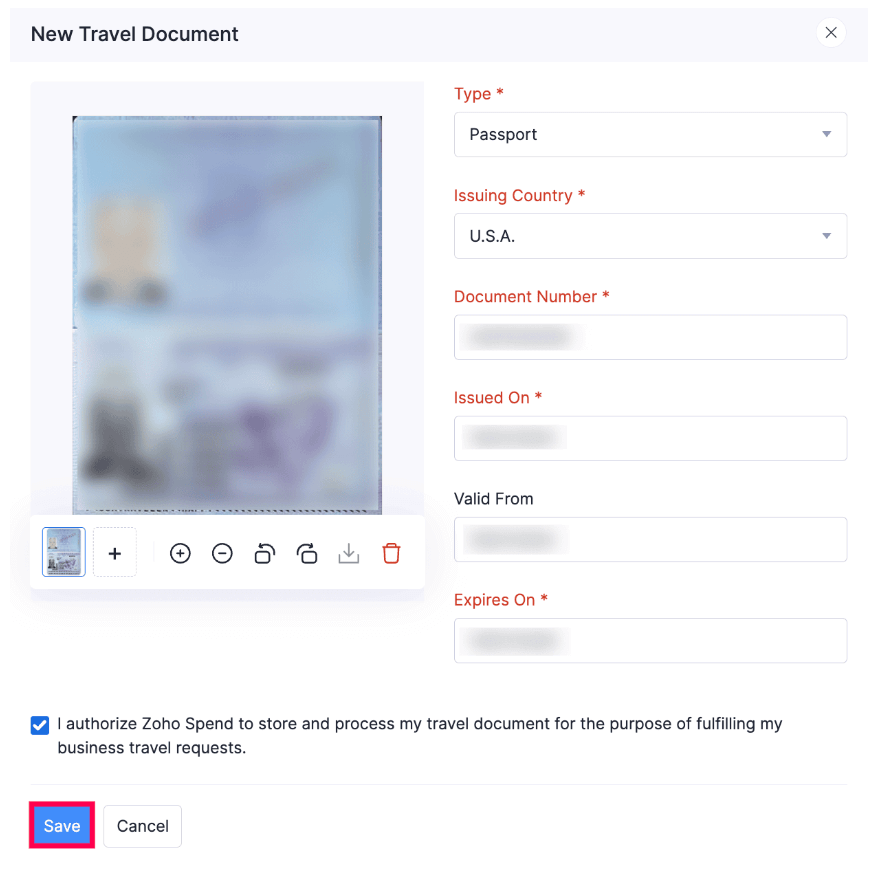
To add travel documents:
- Go to My Settings and switch to the Travel Details tab.
- Click + Add Travel Document.
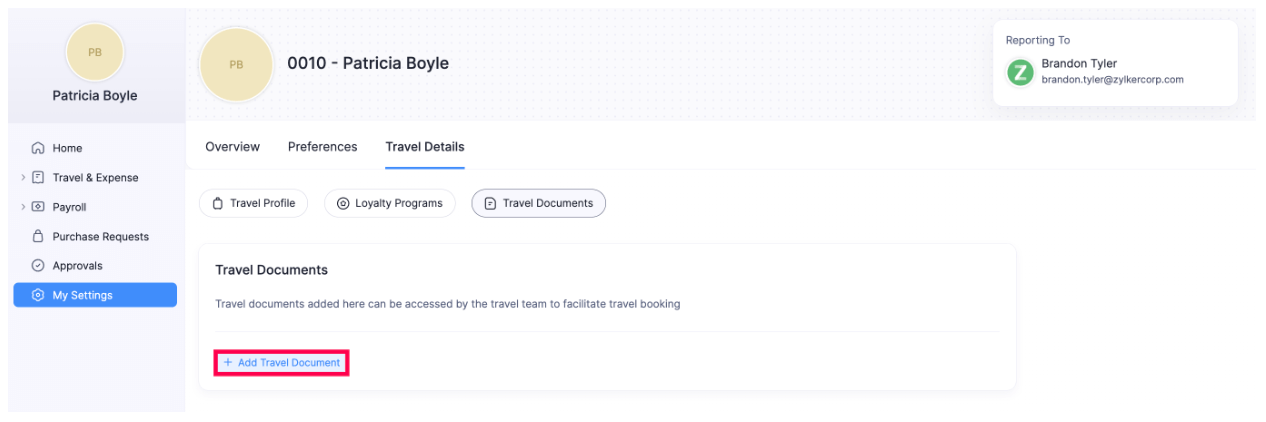
- Select the document type and country.
- Enter the document number.
- Select the issue, valid from, and expiry dates.
- Mark the I authorize Zoho Spend to store and process my travel document for the purpose of fulfilling my business travel requests checkbox.
- Click Save.
Insight: If you wish to check the details of your files, you can click + to zoom in and - to zoom out. Click the Delete icon to delete the file.
Edit Uploaded Travel Documents
You can edit the details of the travel documents you’ve uploaded. Here’s how:
- Go to My Settings and switch to the Travel Documents tab.
- Click the More icon next to the travel document you want to edit.
- Select Edit.
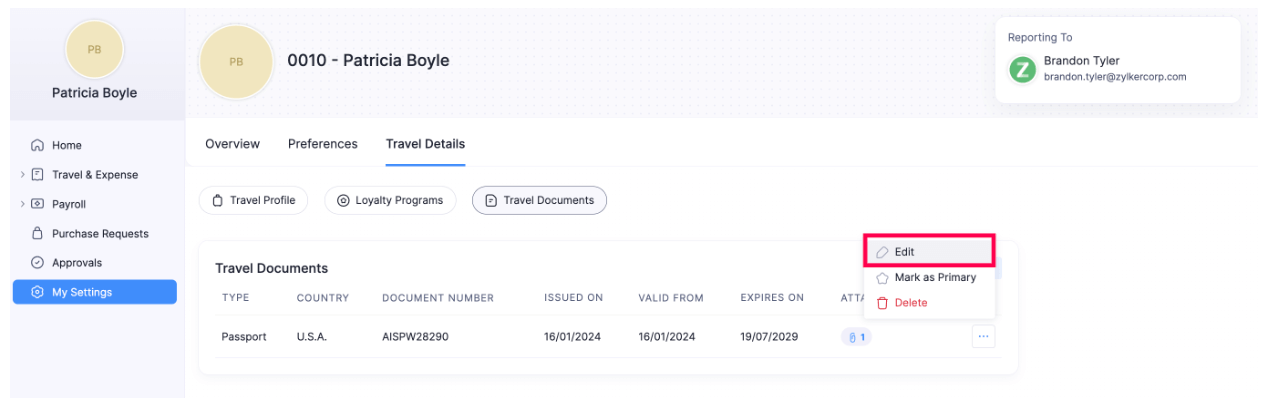
- Make the required changes and click Save.
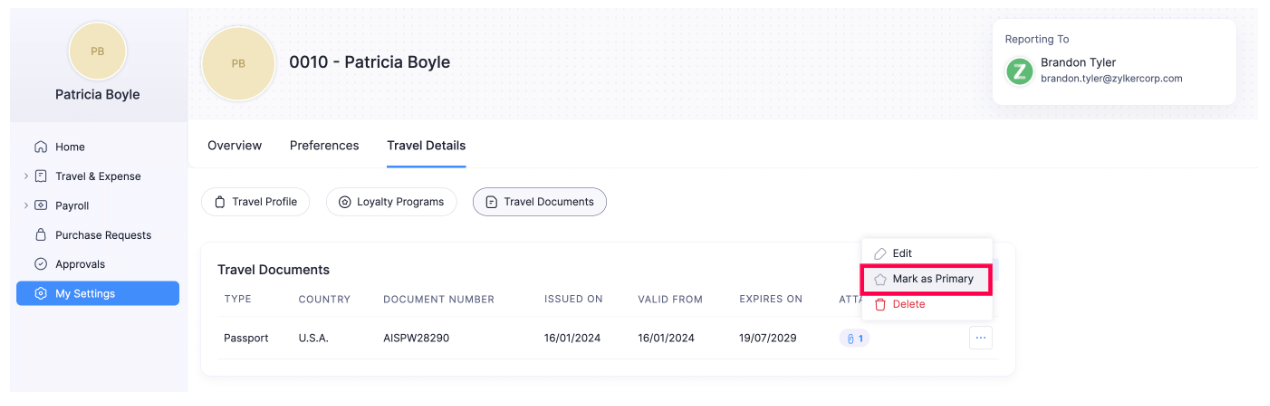
Mark Passport as Primary in Travel Documents
You can set any of your passports as primary, ensuring that the person booking the tickets knows which one to use.
To mark a passport as primary:
- Go to My Settings and switch to the Travel Documents tab.
- Click the More icon of the passport you want to mark as primary.
- Select Mark as Primary.
Download Travel Documents
You can download the files you’ve uploaded as travel documents. Here’s how:
- Go to My Settings and switch to the Travel Documents tab.
- Click the Attachment icon next to the travel document you want to download.
- On the page that opens, click the Download icon. The attachment will be downloaded. Alternatively, you can also download the uploaded file to your desktop or cloud from the travel document Edit page.
Delete Travel Documents
If your travel document has expired or is not required anymore, you can delete them. Here’s how:
- Go to My Settings and switch to the Travel Documents tab.
- Click the More icon next to the travel document you want to delete.
- Select Delete.
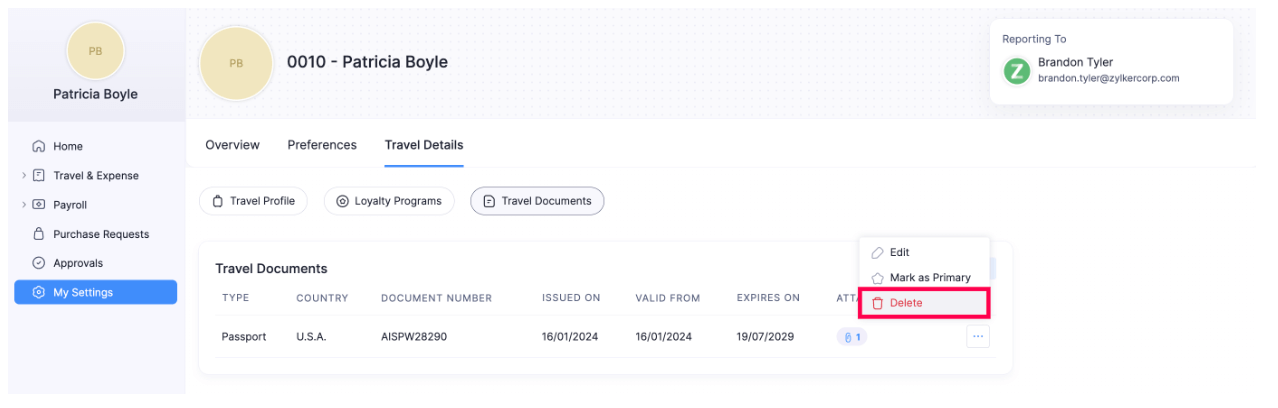
- Click Delete again to confirm your action.