
Locations
Your organization might have multiple locations spread across the country. In Zoho Spend, you can create multiple locations and associate those locations with users and transactions in Zoho Spend. This way, you can all manage your business expenditures incurred across multiple locations within Zoho Spend.
Note: You can create a maximum of 200 locations in Zoho Spend.
Enable Locations
To get started with Locations in Zoho Spend, you will have to enable it. Here’s how:
Warning: Once you enable Locations, you will not be able to disable it in Zoho Spend. However, you can delete a location or mark it as inactive.
- Go to Settings on the left sidebar.
(OR)
Click Settings in the top right corner. - Click Locations under Organization.
- Click Enable.
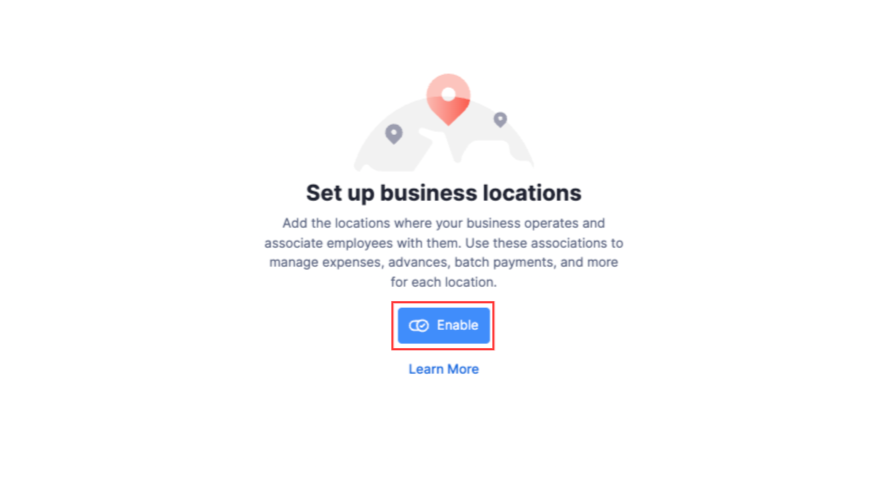
You will receive an in-app notification when the Locations feature has been enabled. Your current organization address will be considered as the Head Office.
Add a Location
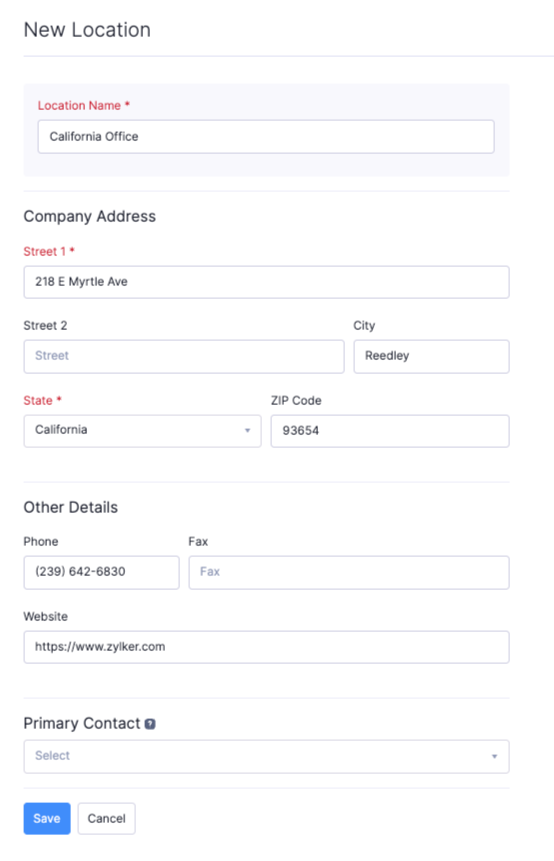
Once you’ve enabled Locations, here’s how you can create a new location:
Note: You can create a maximum of 200 locations in Zoho Spend.
- Go to Settings on the left sidebar.
(OR)
Click Settings in the top right corner. - Click Locations under Organization.
- Click New Location in the top-right corner.
- Enter the Location Name.
- Fill in the Company Address and Other Details.
- Select a Primary Contact for the location.
- Click Save.
Edit Location
To edit your existing locations:
- Go to Settings on the left sidebar.
(OR)
Click Settings in the top right corner. - Click Locations under Organization.
- Hover over the location you want to edit.
- Click the More icon next to the location and select Edit.
- Click Edit and make the necessary changes.
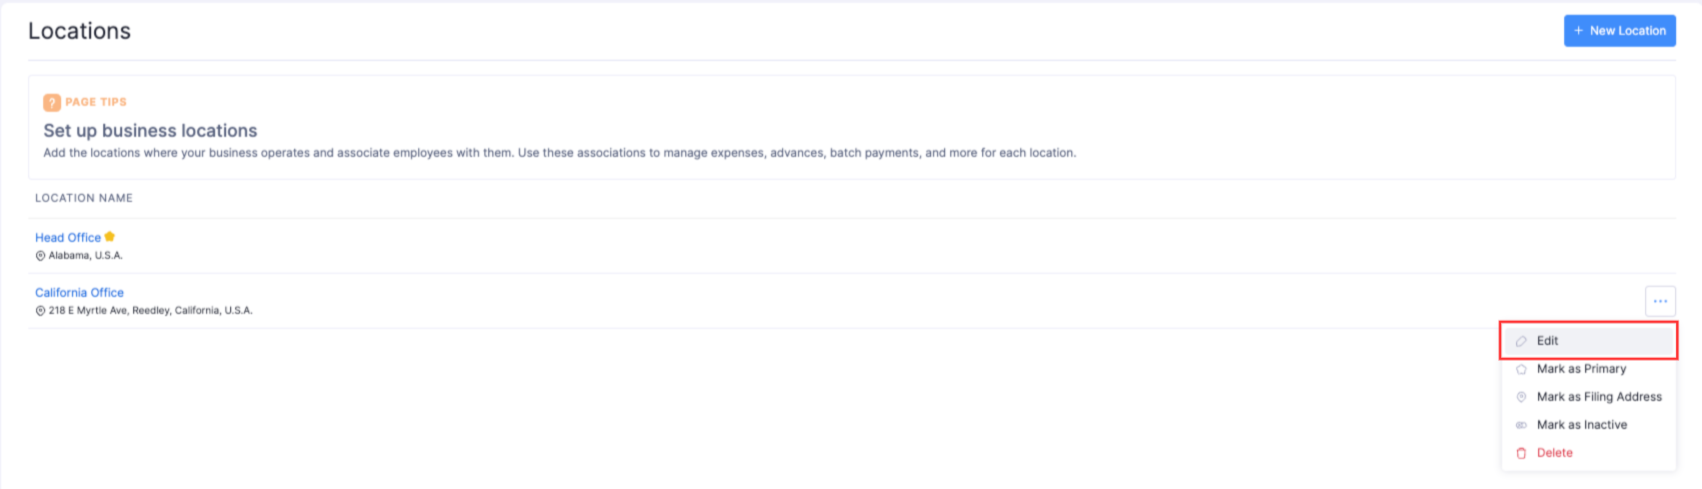
- Click Save.
Mark Location as Primary
The organization address will be considered as the Head Office. The Head Office is the centre for administration for your organization and will be considered as the primary location in Zoho Spend. You can however, mark other locations as primary as well. To do so:
- Go to Settings on the left sidebar.
(OR)
Click Settings in the top right corner. - Click Locations under Organization.
- Hover over the location you want to mark as primary.
- Click the More icon next to the location and select Mark as Primary.
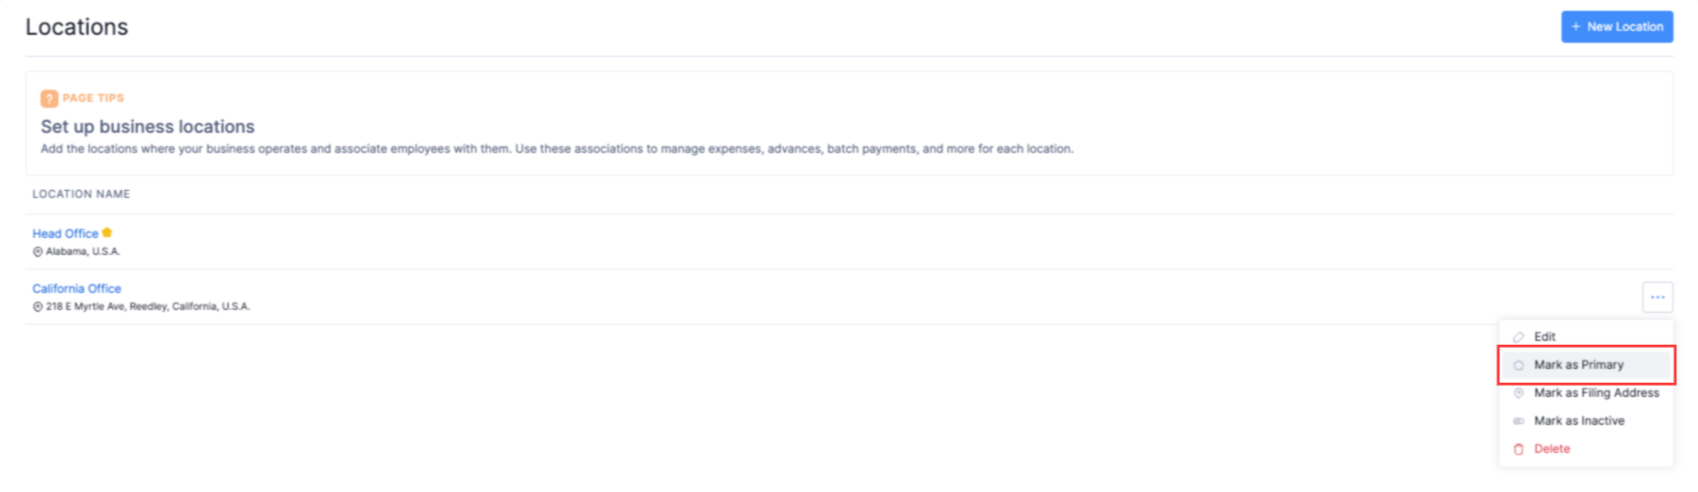
This location will be marked as primary and will be considered as the Head Office.
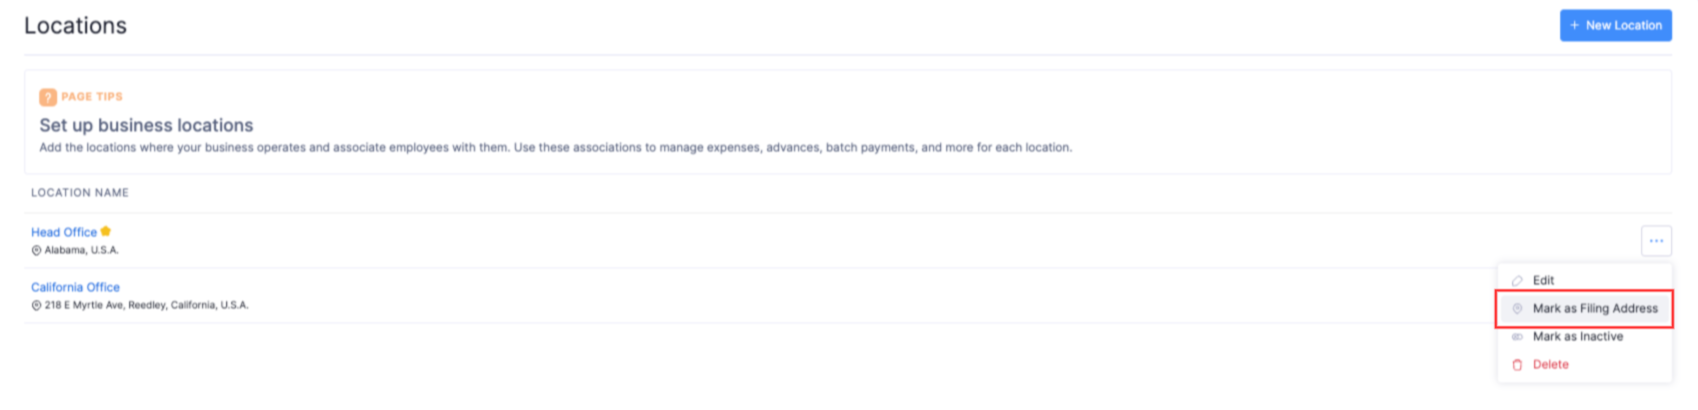
Mark a Location as Filing Address
The filing address is your registered business address, and appears on all employee pay stubs and tax forms.
Note: You can mark a location as the filing address only if the Payroll domain is enabled for your organzation.
To mark a location as the filing address:
- Go to Settings on the left sidebar.
(OR)
Click Settings in the top right corner. - Click Locations under Organization.
- Hover over the location you want to mark as the filing address.
- Click the More icon next to the location and select Mark as Filing Address.
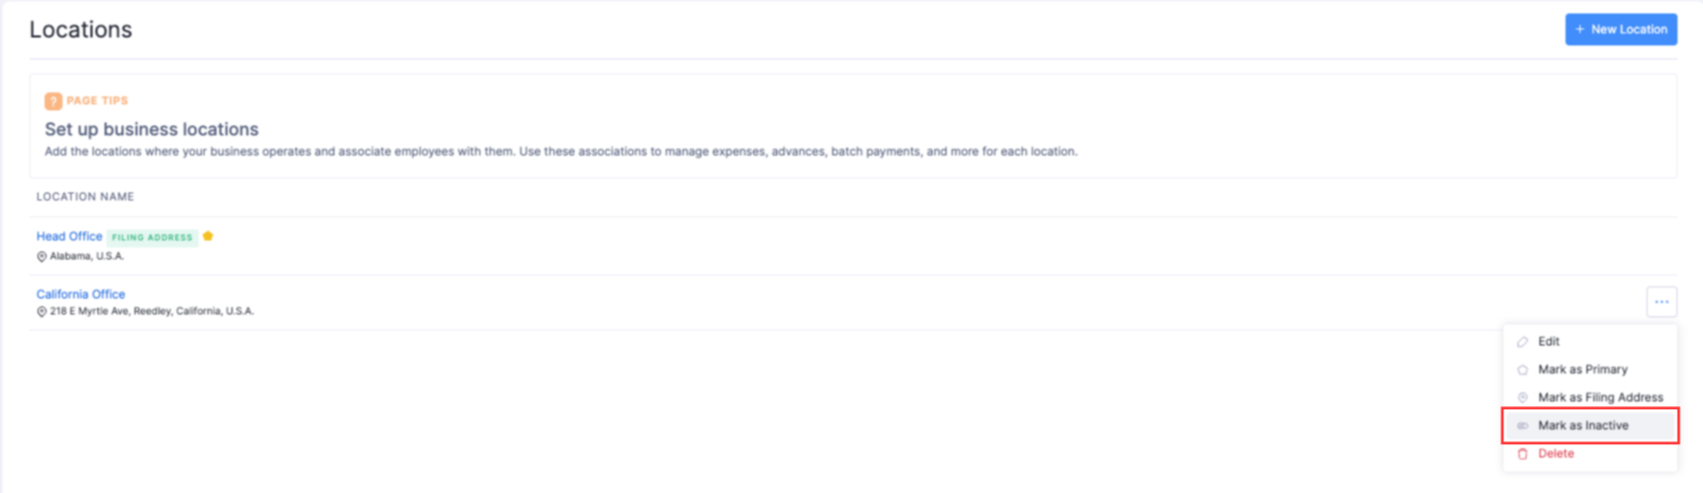
Mark a Location as Inactive
If you’ve closed your location temporarily, you can mark the location as inactive.
- Go to Settings on the left sidebar.
(OR)
Click Settings in the top right corner. - Click Locations under Organization.
- Hover over the location you want to mark as inactive.
- Click the More icon next to the location and select Mark as Inactive.
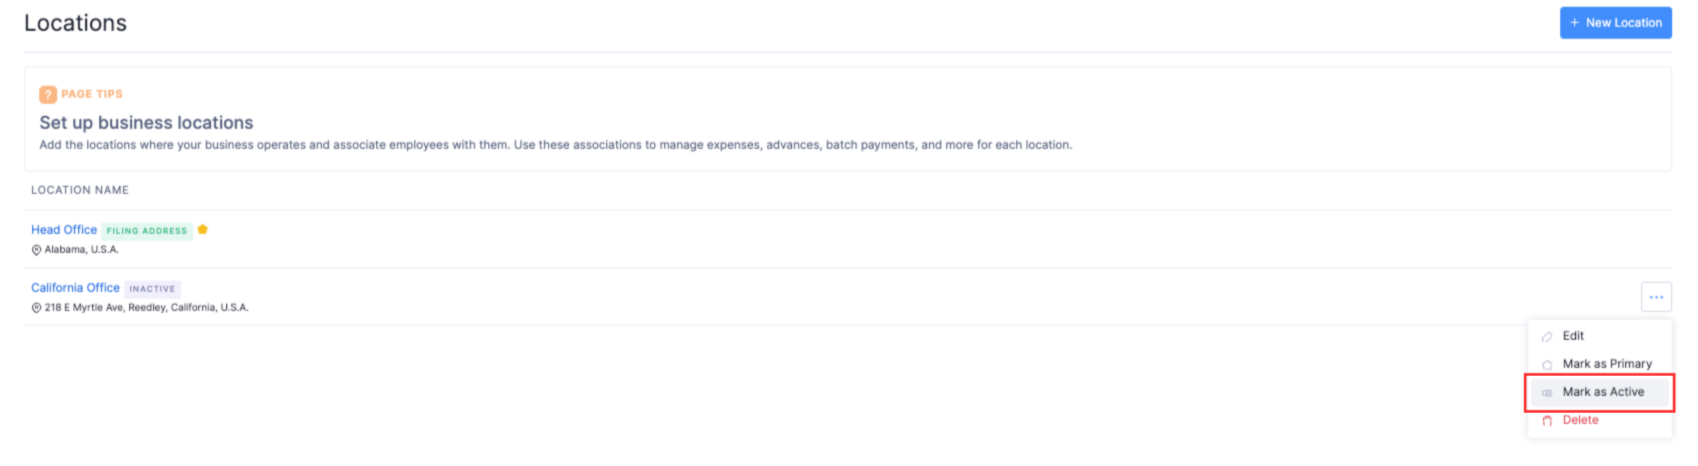
Mark a Location as Active
You can enable an inactive location by marking it as active. Here’s how:
- Go to Settings on the left sidebar.
(OR)
Click Settings in the top right corner. - Click Locations under Organization.
- Hover over the location you want to mark as inactive.
- Click the More icon next to the location and select Mark as Inactive.
Delete Location
If you have shut down your location permanently, you can delete them.
Warning: Once you delete a location, you will not be able to retrieve it in the future.
- Go to Settings on the left sidebar.
(OR)
Click Settings in the top right corner. - Click Locations under Organization.
- Hover over the location you want to delete.
- Click the More icon next to the location and select Delete.

- Click Delete in the pop-up to confirm your action.