
Manage Users
In this help document, you’ll learn the actions you can perform to manage the Users in your Zoho Spend organization.
Edit Users
Here’s how you can edit the details of a user:
- Go to People on the left sidebar.
- Click Users.
- Hover over the user and click the More icon.
- Select Edit.
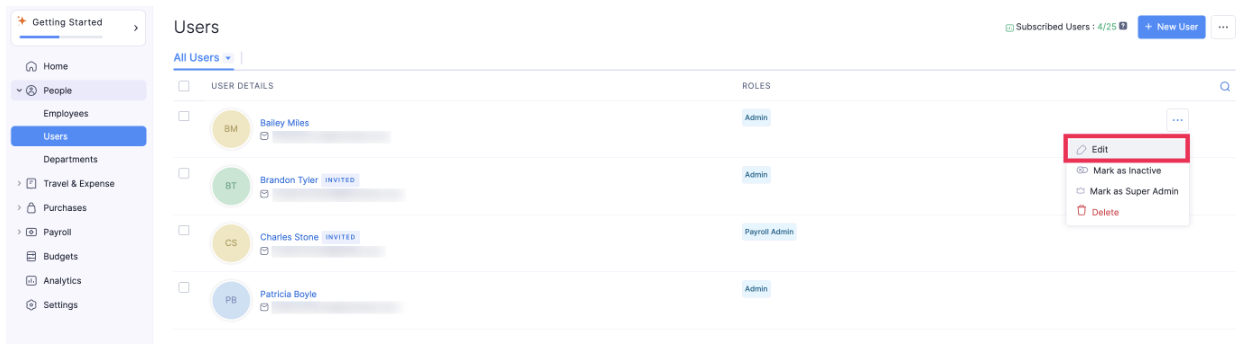
- Make the necessary changes and click Save.
Mark User as Super Admin
Super Admin is a privilege that is automatically assigned to the admin who creates an organization. In addition to the standard admin permissions, the Super Admin has authority over other admins within the organization.
Note: There can be only one Super Admin in an organization, and they’re same across all the Zoho Finance applications, including Zoho Invoice, Zoho Books, Zoho Billing, Zoho Expense, Zoho Inventory, Zoho Payroll, Zoho Commerce, Zoho Checkout, Zoho POS, Zoho Practice, and Vikra.
If you no longer want to be the Super Admin of your organization, you must assign another active admin to be the new Super Admin. Here’s how:
- Go to People on the left sidebar.
- Click Users.
- Hover over the user and click the More icon.
- Select Mark as Super Admin.
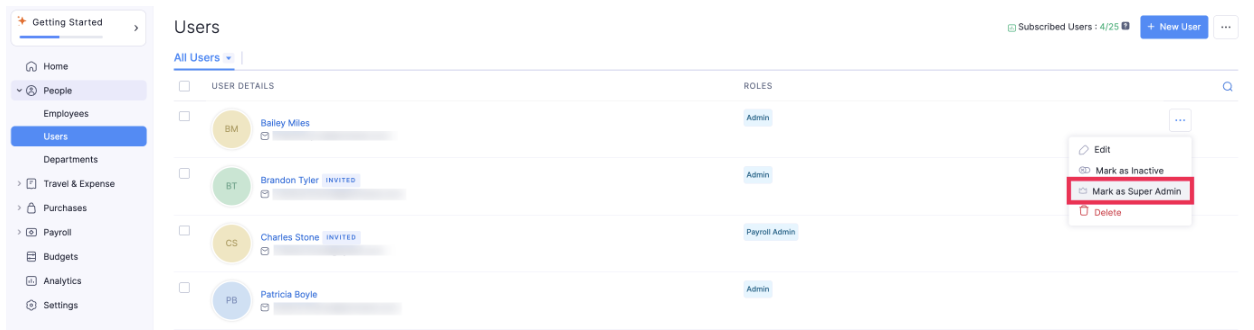
- Confirm your action by clicking Mark as Super Admin in the pop-up.
The selected admin will become the Super Admin for your organization, and you’ll be automatically assigned the Admin role.
Unique Privileges of a Super Admin
Only the Super Admin can set up their organization in other Zoho Finance applications. For example, if you’re a Super Admin in Zoho Spend, only you can set up that organization in Zoho Expense, Zoho Billing, and so on.
- If any other admin wants to set up the organization, they must send a request, and the Super Admin must approve it.
- Once an admin requests access, the Super Admin will receive an email with the request link. The link will show the list of admins who have requested access. The Super Admin can either choose to accept or reject the request.
- Only the Super Admin can delete the organization.
Note: Once the request is approved, the admin can join the organization in the respective Zoho Finance application, and will continue to have the Admin role in that organization.
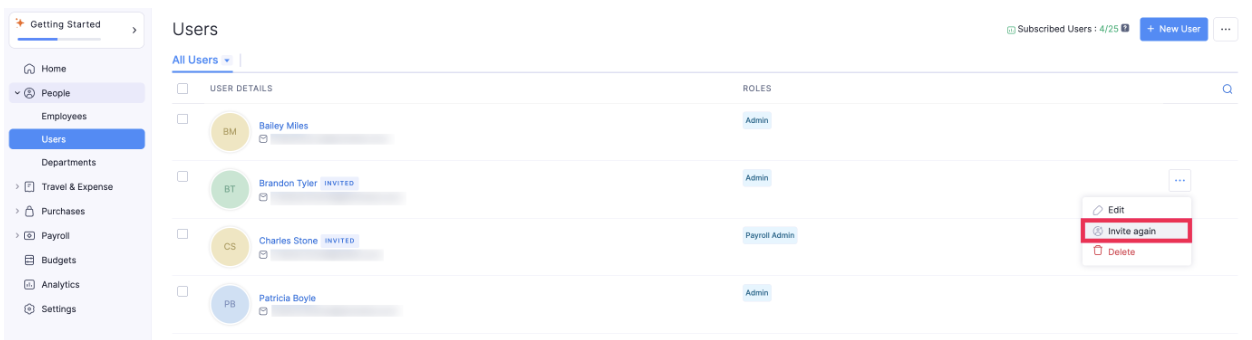
Re-invite User
If the user you’ve invited misses their invitation in the email inbox or if their invite email expires, you can choose to send an invite again. Here’s how:
- Go to People on the left sidebar.
- Click Users.
- Hover over the user and click the More icon.
- Select Invite Again.
Mark User as Inactive
You can temporarily disable a user from accessing your Zoho Spend organization by marking them as inactive. The user won’t be able to access the organization unless the admin marks the user as active again. Here’s how:
- Go to People on the left sidebar.
- Click Users.
- Hover over the user and click the More icon.
- Select Mark as Inactive.
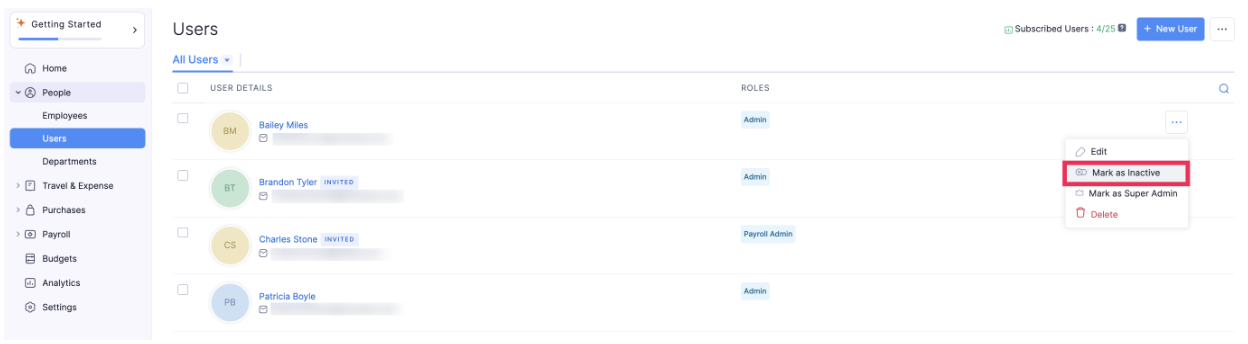
The user will no longer be able to access the organization.
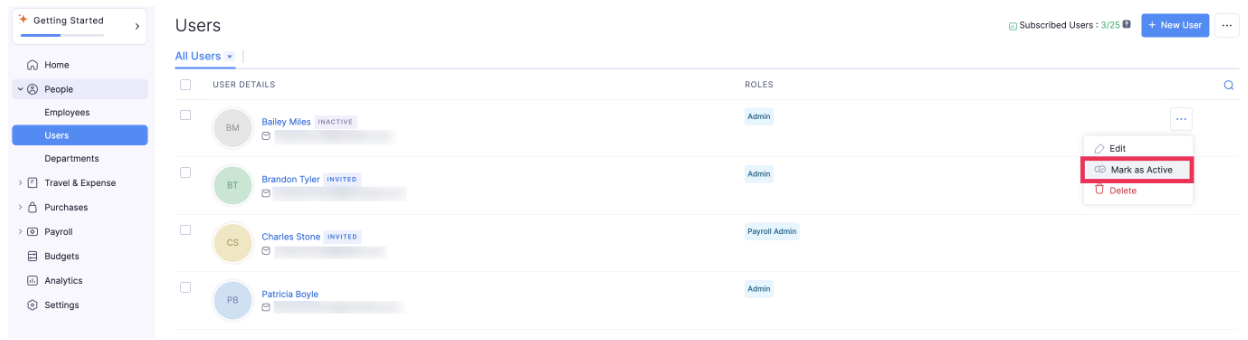
Mark an Inactive User as Active
Here’s how you can mark an inactive user as active:
- Go to People on the left sidebar.
- Click Users.
- Hover over the user and click the More icon.
- Select Mark as Active.
Delete Users
If an employee quits or leaves your organization due to any reason, you can delete that user from your Zoho Spend organization.
Note:
- The records that belong to the deleted user will remain in Zoho Spend.
- If you invite a deleted user to your organization again, they will be added as a new user in Zoho Spend. The user will not have access to their previous data.
- A user deleted from Zoho Spend will still be able to access other Zoho services using the same email address.
- Deleting a user does not cancel the user’s license. To cancel a license, you must manage your subscriptions.
Here’s how you can delete a user:
- Go to People on the left sidebar.
- Click Users.
- Hover over the user and click the More icon.
- Select Delete.
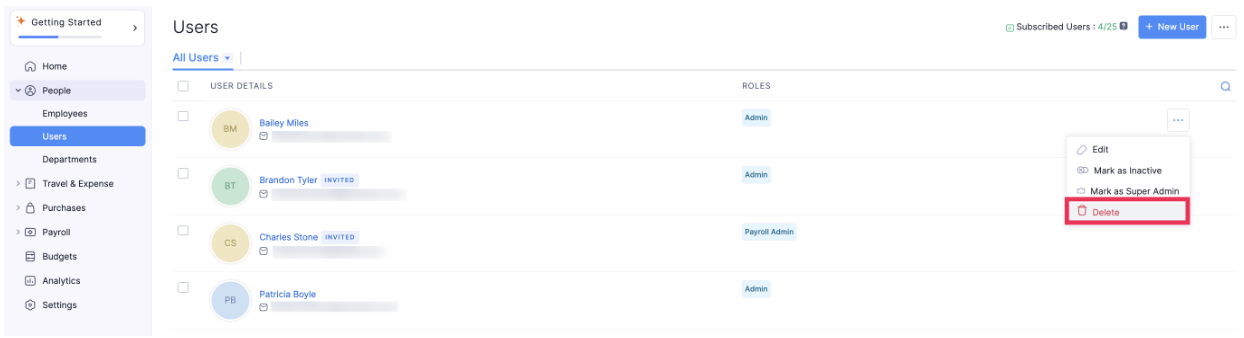
- Confirm your action by clicking Delete again in the pop-up.