
Manage Custom Modules
Learn how to manage the records of custom modules created in Zoho Spend.
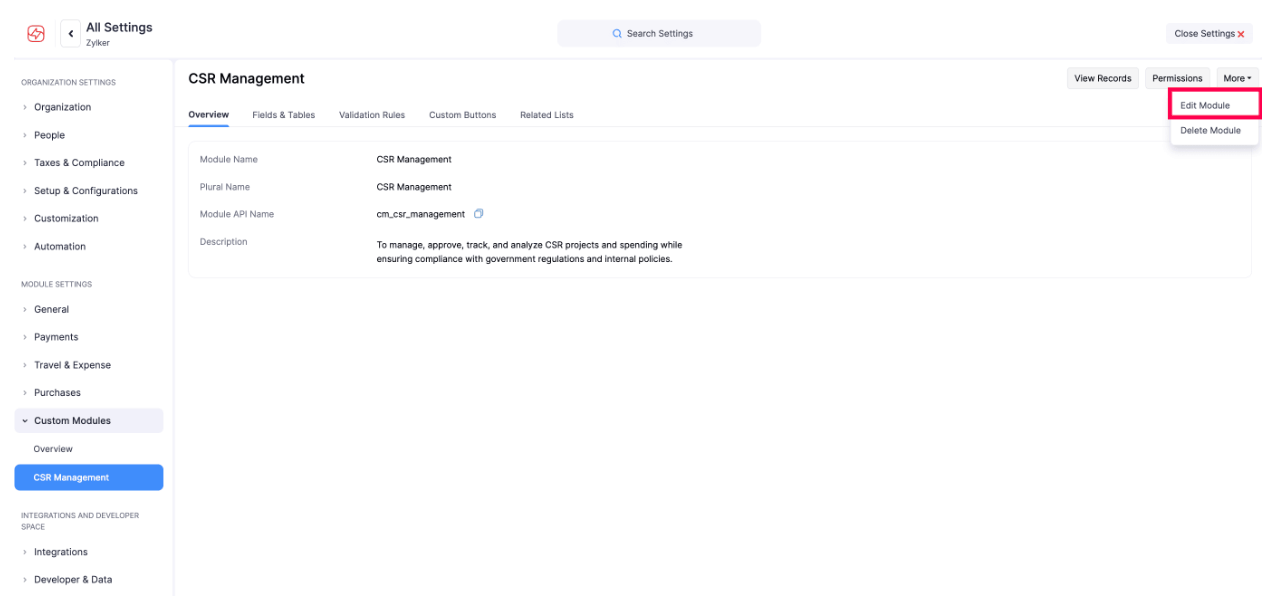
Edit Custom Module
You can make changes to a custom module you have created. Here’s how:
- Go to Settings on the left sidebar.
(OR)
Click Settings in the top right corner of the page. - Click Custom Modules.
- Open the custom module you want to edit.
- Click the More dropdown at the top right corner.
- Click Edit Module.
- Make the necessary changes and click Save.
Customize Field Layout
Once you create the fields, they will be listed in the chronological order of creation. You can change them based on your requirements. Here’s how:
- Go to Settings on the left sidebar.
(OR)
Click Settings in the top right corner of the page. - Click Custom Modules.
- Select the custom module for which you want to change the order of the custom fields.
- Go to the Fields & Tables tab.
- Click Change Order in the top right corner.
- Drag and reorder the fields based on your requirements.
- Click Save Reorder.
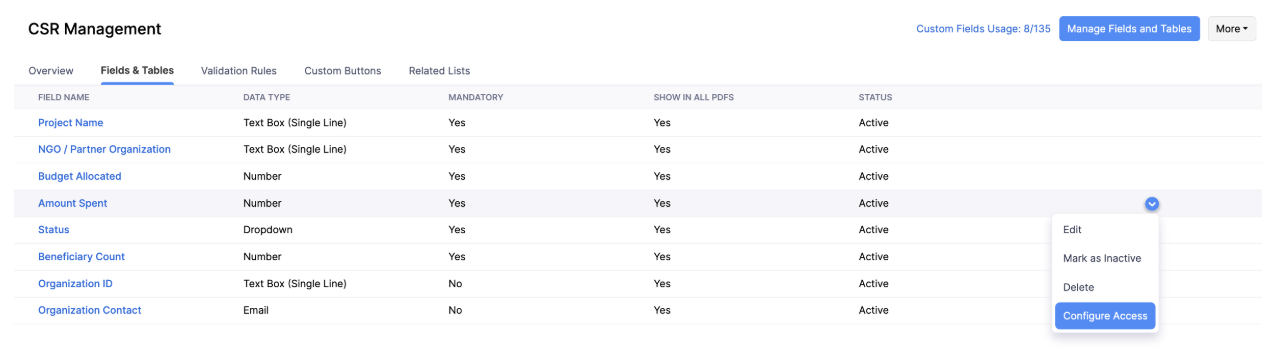
Configure Field Access
There may be cases where you would want to hide or give limited access for a field to certain users. Here’s how you can do this:
- Go to Settings on the left sidebar.
(OR)
Click Settings in the top right corner of the page. - Click Custom Modules.
- Select the custom module for which you want to configure field access.
- Go to the Fields & Tables tab.
- Hover over the field for which you want to configure access.
- Click the down arrow and select Configure Access from the dropdown.
- Select the access type against the role you want the give the specific access for.
Access Type Description Read and Write The user with this access can view and fill or edit the field. Read Only The user with this access can only view the field. Hide Field The user with this access type will not be able to view this field.
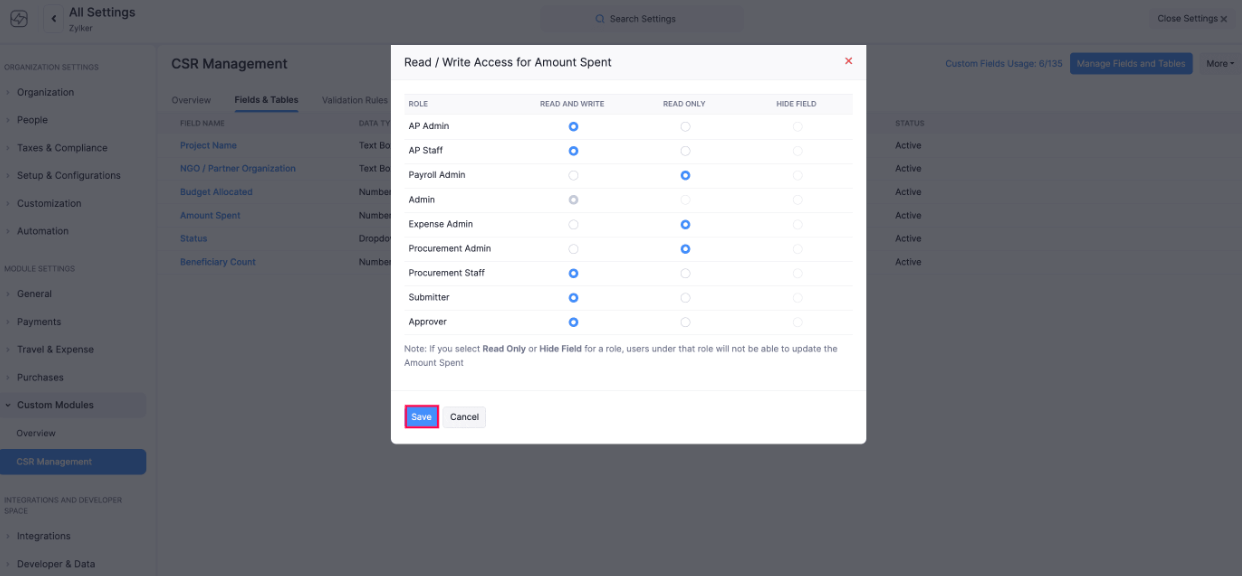
- Click Save.
Edit Fields
Here’s how you can edit the fields in a custom module:
- Go to Settings on the left sidebar.
(OR)
Click Settings in the top right corner of the page. - Click Custom Modules.
- Select the custom module.
- Go to the Fields & Tables tab.
- Hover over the field for which you want to edit.
- Click Edit from the dropdown.
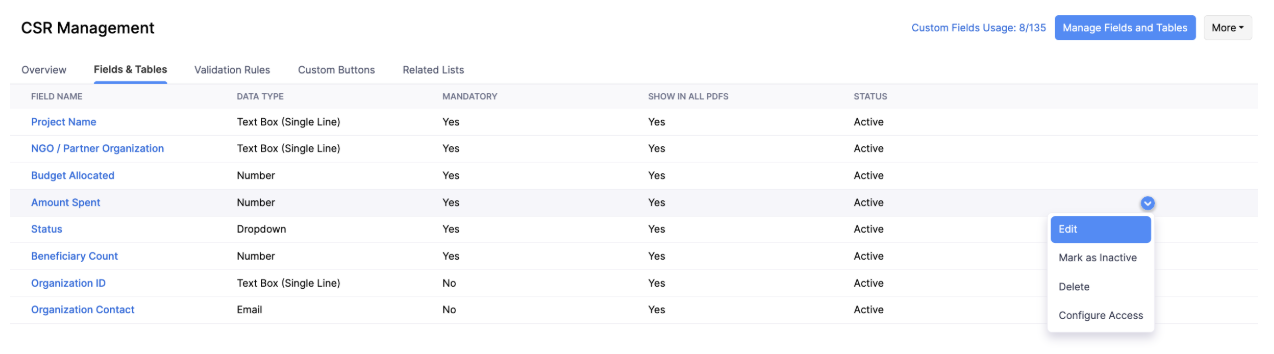
- Make the necessary changes and click Save.
Mark Field as Inactive
Here’s how you can mark a custom field as inactive:
- Go to Settings on the left sidebar.
(OR)
Click Settings in the top right corner of the page. - Click Custom Modules.
- Select the custom module.
- Go to the Fields & Tables tab.
- Hover over the field for which you want to mark as inactive.
- Click Mark as Inactive from the dropdown.
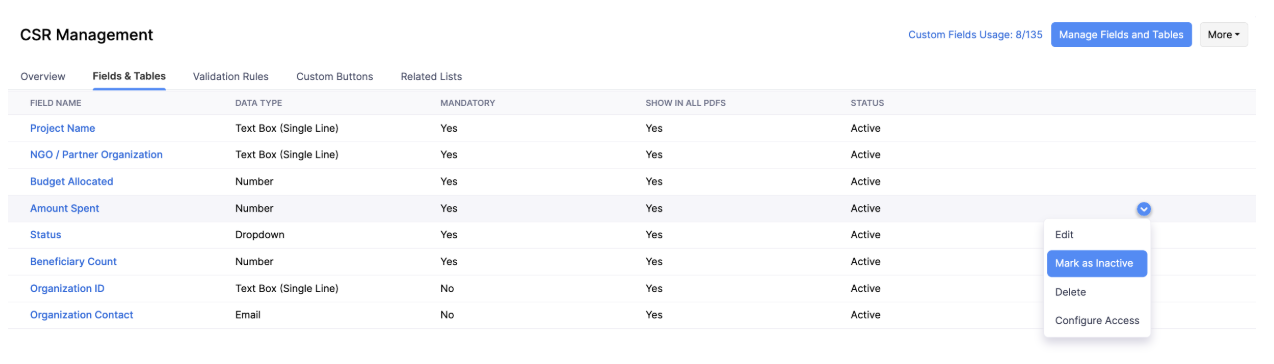
The field will now be marked as inactive and this field will not be shown while creating records in this custom module.
Mark an Inactive Field as Active
Here’s how you can mark an inactive custom field as active:
- Go to Settings on the left sidebar.
(OR)
Click Settings in the top right corner of the page. - Click Custom Modules.
- Select the custom module.
- Go to the Fields & Tables tab.
- Hover over the inactive field that you want to mark as active.
- Click Mark as Active from the dropdown.
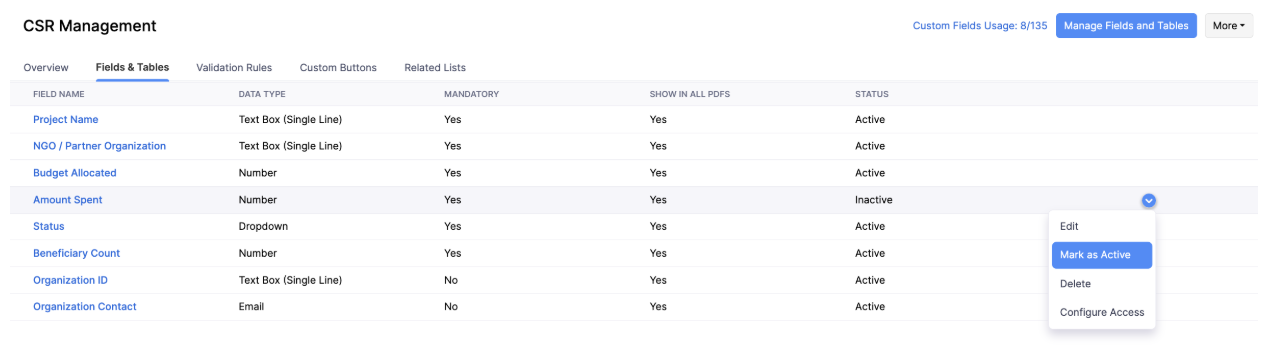
The field will now be marked as active and users can record information in this field.
Delete Fields
Here’s how you can edit the fields in a custom module:
- Go to Settings on the left sidebar.
(OR)
Click Settings in the top right corner of the page. - Click Custom Modules.
- Select the custom module.
- Go to the Fields & Tables tab.
- Hover over the field for which you want to delete.
- Click Delete from the dropdown.
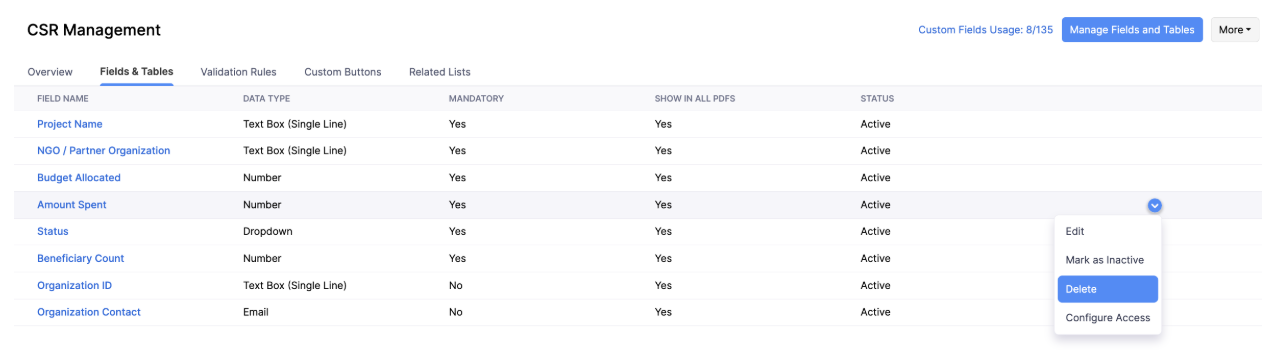
- Confirm your action by clicking Yes in the pop-up.
Module Permissions
You can assign different permissions to the users in your organization. However, only the admin can create a new custom module.
To extend permissions to other users of your organization:
- Go to Settings on the left sidebar.
- Click Roles & Permissions under People.
- Hover over the role you want to edit and click the More icon.
- Scroll down to Custom Modules.
- Mark the checkboxes under the permission you would like to provide or mark the All Access checkbox to provide full access to a custom module.

- Click Save.
Create Custom Views
Custom views can be used to filter the records in your custom modules based on the criteria you’ve set. Here’s how you can create a custom view for the custom module:
- Go to Custom Modules on the left sidebar.
- Select the custom module.
- Click the All {Custom Module Name} dropdown on top of the page.
- Click + New Custom View.
- Fill in the following fields:
| Fields | Description |
|---|---|
| Name | Enter a name for your custom view. You can check the Mark as Favourite box to mark the custom view as favourite. |
| Define the Criteria | Add criteria for the custom view based on the fields in the purchase request module. You can add multiple criteria by clicking + Add Criteria. |
| Columns Preference | Choose the fields that have to be displayed in the custom view that you’re creating. You can move fields from the Available list to the Selected list by hovering over the column name clicking the + icon next to them. |
| Visibility Preference | Choose who gets access to this custom view. You can choose to share the custom view with Only me, Only selected users & roles, or with Everyone. |
- Click Save.
Export Custom Module
You can export all your custom module records that are in Zoho Spend to your system in the CSV, XLS or XLSX format. Here’s how:
- Go to Custom Modules on the left sidebar.
- Open the custom module you want to export.
- Click the More icon in the top right corner.
- Click Export.
- You can either choose to export the custom module or the current view, that is, only the visible columns will be exported from Zoho Spend in CSV or XLS format.

- If you choose to Export Current View:
- Choose the Export File Format. You can choose from CSV, XLS, and XLSV.
- If there is any personally identifiable information in the records you are exporting, mark the Include Sensitive Personally Identifiable Information (PII) checkbox.
- Enter the File Protection Password if you want to protect the export file.
- Click Export.
- If you choose to Export {Custom Module Name}:
- Select the custom module from the Module dropdown.
- Select if you want to export All {Custom Module Name} or a Specific Period.
- If you select a specific period, enter the period for which you want to export the records.
- Select the Filter Criteria.
- Select an Export Template from the dropdown.
- Select the Export File Format. You can choose from CSV, XLS, and XLSV.
- If there is any personally identifiable information in the records you are exporting, mark the Include Sensitive Personally Identifiable Information (PII) checkbox.
- Enter the File Protection Password if you want to protect the export file.
- Click Export.
Delete Custom Module
Warning: Once a custom module is deleted, it cannot be retrieved. Make sure to export the custom module before deleting it to avoid any data loss.
You can delete a custom module you had created. Here’s how:
- Go to Settings on the left sidebar.
(OR)
Click Settings in the top right corner of the page. - Click Custom Modules.
- Open the custom module you want to delete.
- Click the More dropdown at the top right corner.
- Click Delete Module.

- Confirm your action by clicking Delete again in the pop-up.