
Multi-Level Approval
Note: You can set Multi-Level Approval only for the Purchase Orders, Bills, Vendor Credits, and Payments Made modules.
Multi-Level Approval in Zoho Spend allows organizations to set up a structured, hierarchical approval process for their business transactions. When a transaction is submitted for approval, it is first sent to the first-level approver. Once approved, it automatically moves to the next-level approver, and this continues until the final approver reviews and approves the transaction.
Create Multi-Level Approval
Here’s how you can set multi-level approval:
- Go to Settings on the left sidebar.
- Click the module for which you want to set multi-level approval.
- Go to the Approvals tab.
- Click Multi-Level Approval.
- Select the Level 1 Approver from the Approver Name dropdown.
- If you want to add more approvers, click Add New Level and select the Level 2 Approver.
Note: You can add upto 10 approvers in the Multi-Level Approval flow.
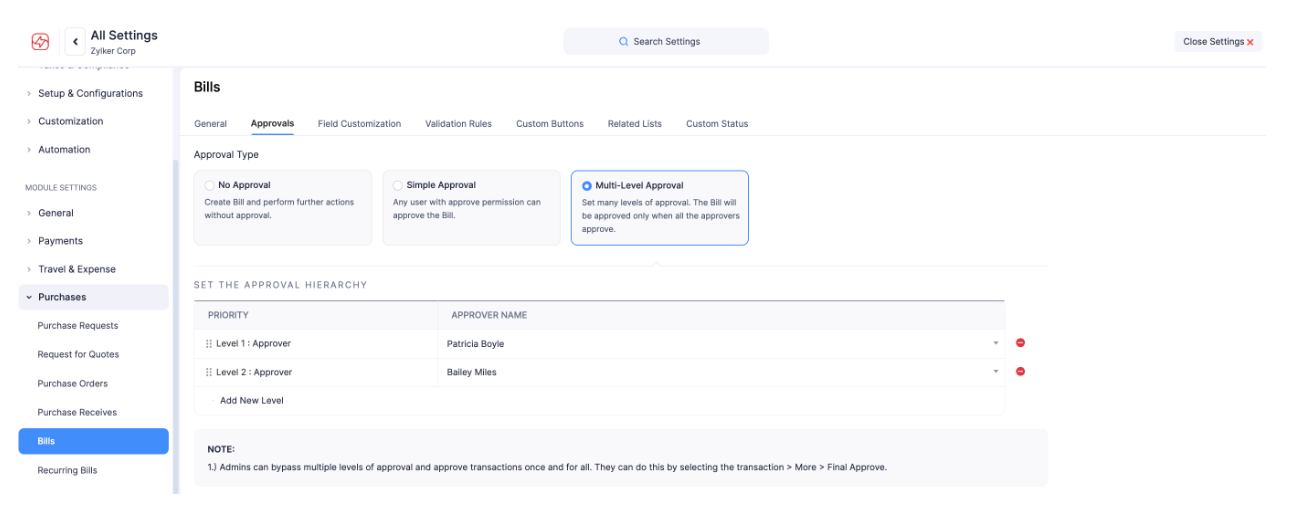
- You can remove any approval level by clicking the (-) icon in the right corner of the flow.
- Click Save.
Note: Admins can bypass multiple levels of approval and approve transactions once and for all. They can do so by selecting the transaction > More > Final Approve.
Set Approval Preferences
You can set approval preferences to allow approvers to approve the transactions they create. Here’s how:
- Go to Settings on the left sidebar.
- Click the module for which you want to set approval preferences in multi-level approval.
- Go to the Approvals tab.
- Click Multi-Level Approvals.
- Mark the Allow approvers to approve the transactions they create checkbox if you want an approver to approve the transactions they create.

- Click Save.
Set Notification Preferences
You can set notification preferences to keep the submitters and approvers notified when a transaction is submitted, approved or rejected. Here’s how:
- Go to Settings on the left sidebar.
- Click the module for which you want to set notification preferences in multi-level approval.
- Go to the Approvals tab.
- Click Multi-Level Approval.
- Mark the Send email and in-app notifications when transactions are submitted for approval checkbox so that approvers get notified when they have to approve transactions.
- Mark the Notify the submitter when a transaction is approved or rejected checkbox so that the submitter is notified when their transaction is approved or rejected.

- Click Save.