Configure Zoho MCP server
Table of Contents
Configure Zoho MCP server
To begin with, you need to configure your Zoho MCP server. Follow the steps given below:
- Log in to Zoho MCP console.
- You can create a new server using either of the two options - Create MCP Server and Pre-configured servers.
- Create MCP Server allows you create a new server by selecting the tools you require.
- Pre-configured servers are ready-to-use configuration templates that include predefined tools for specific operations.
- Select Create MCP server to manually configure a server with your preferred tools.
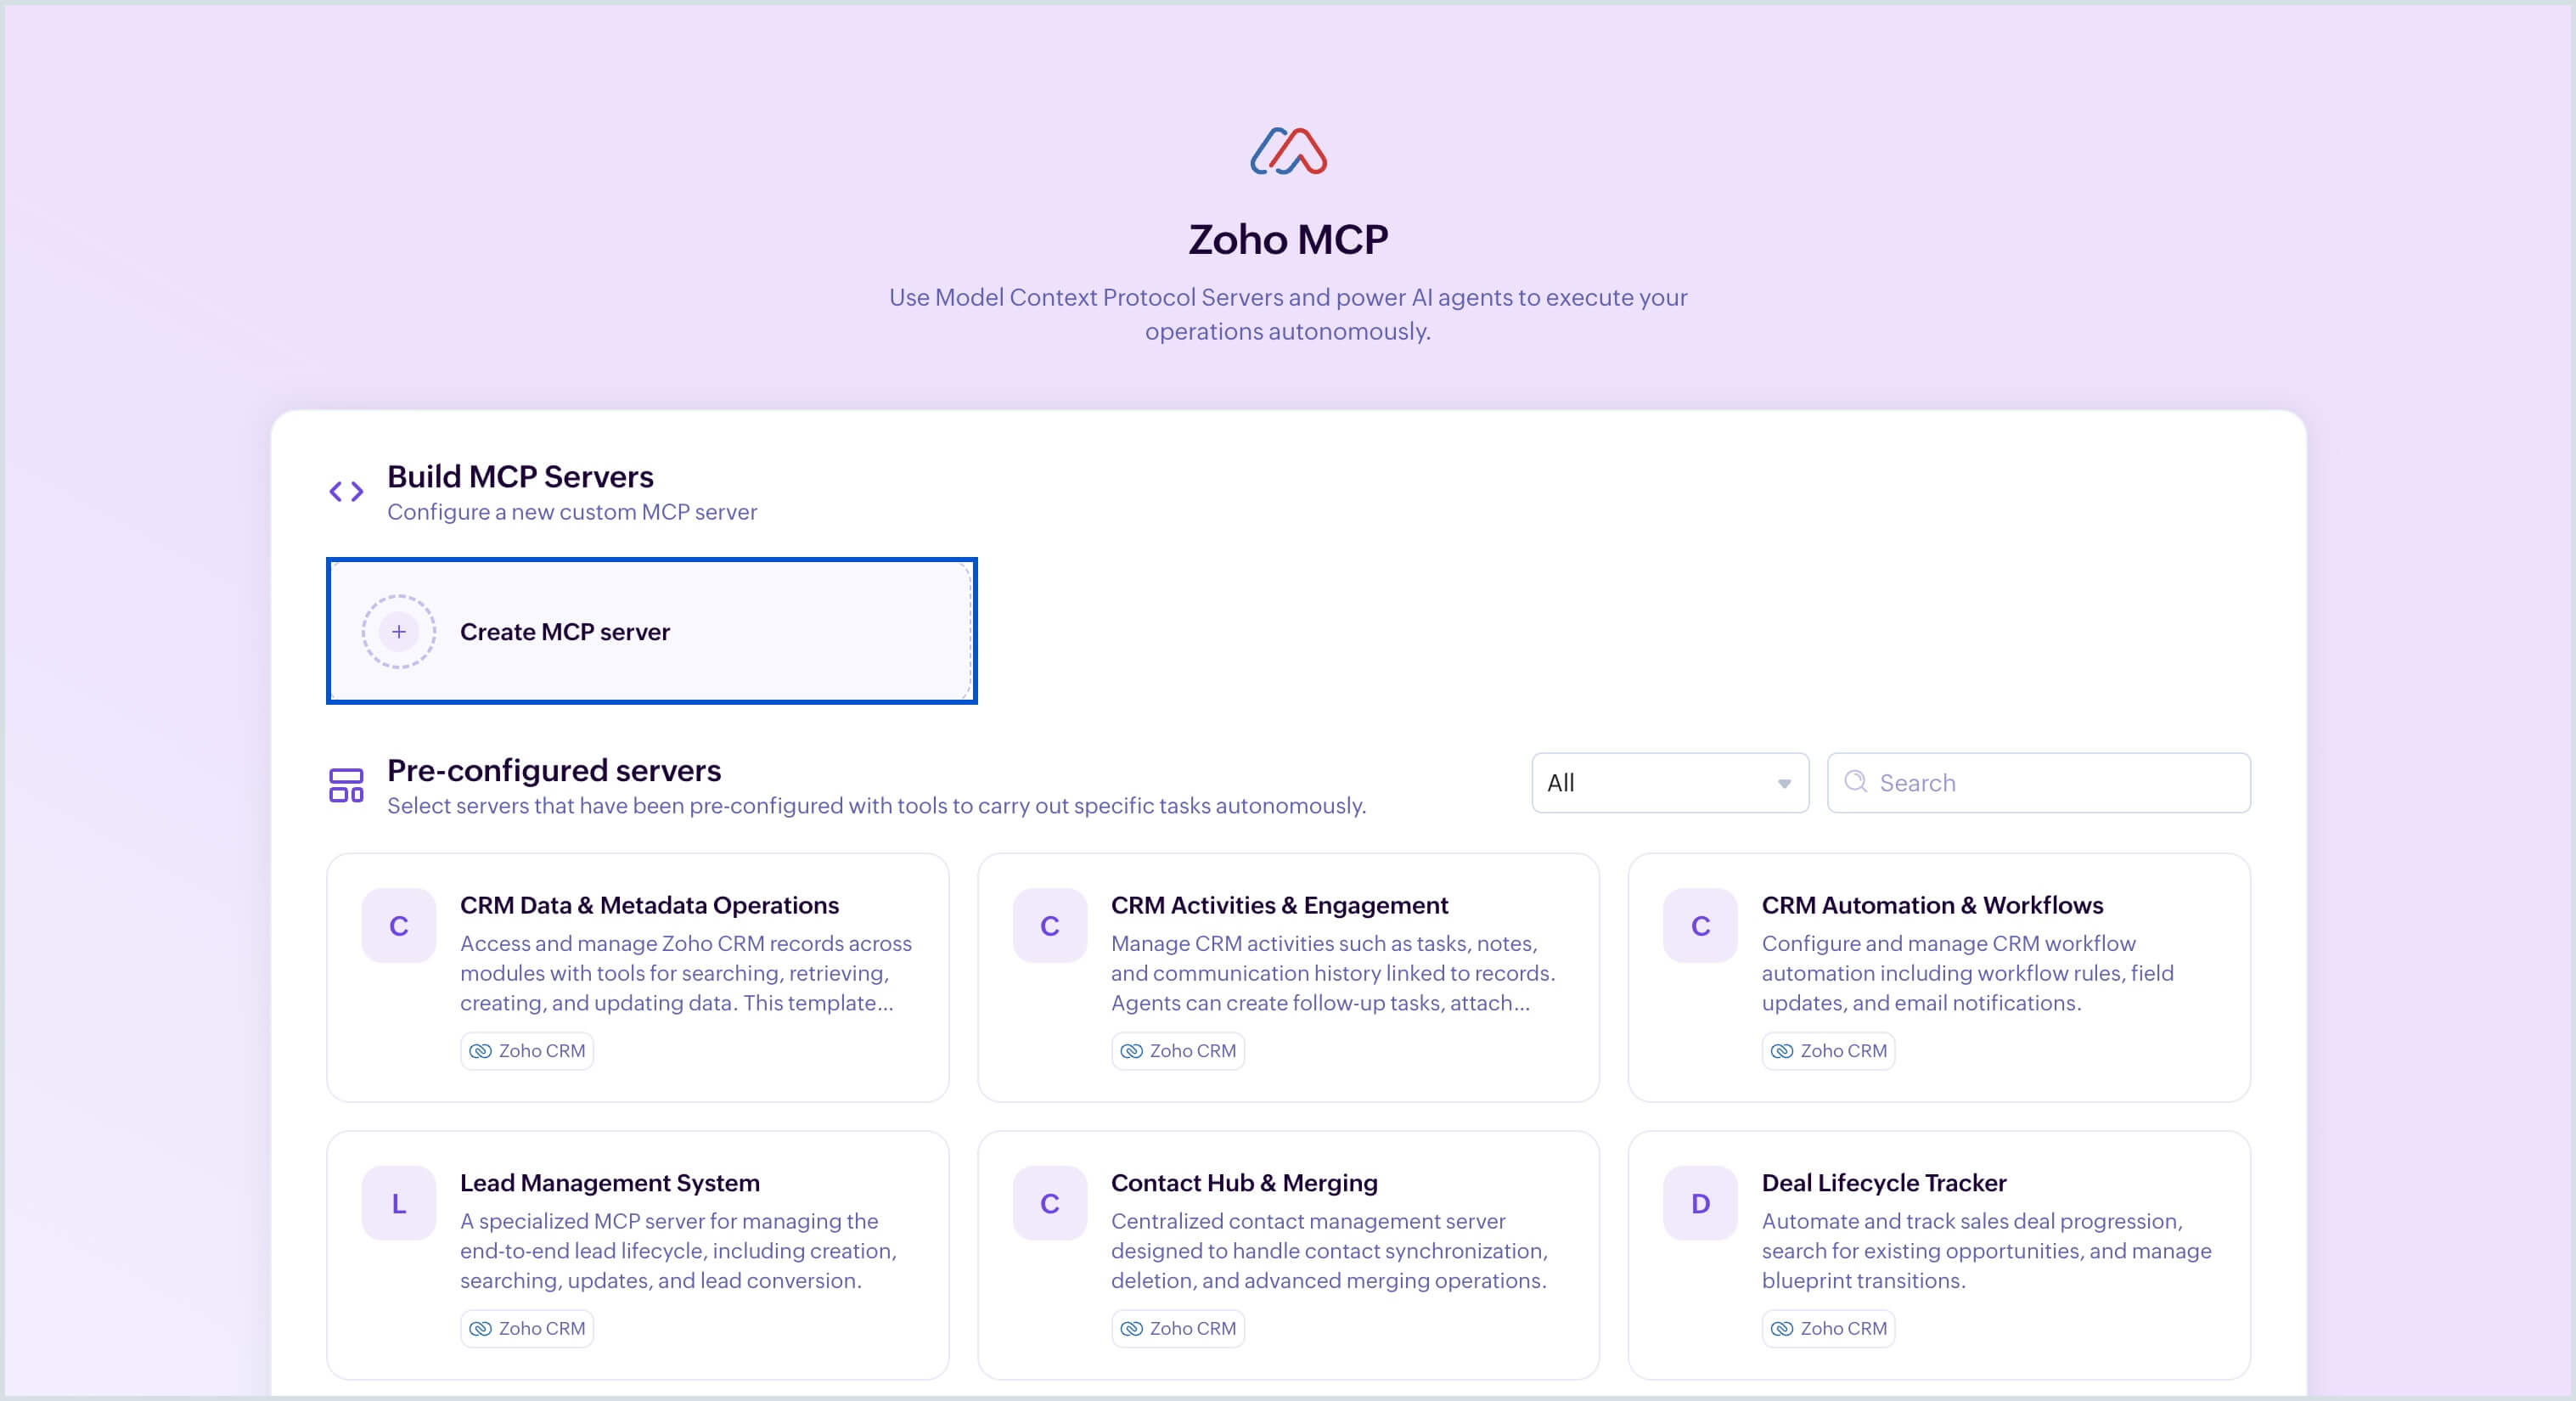
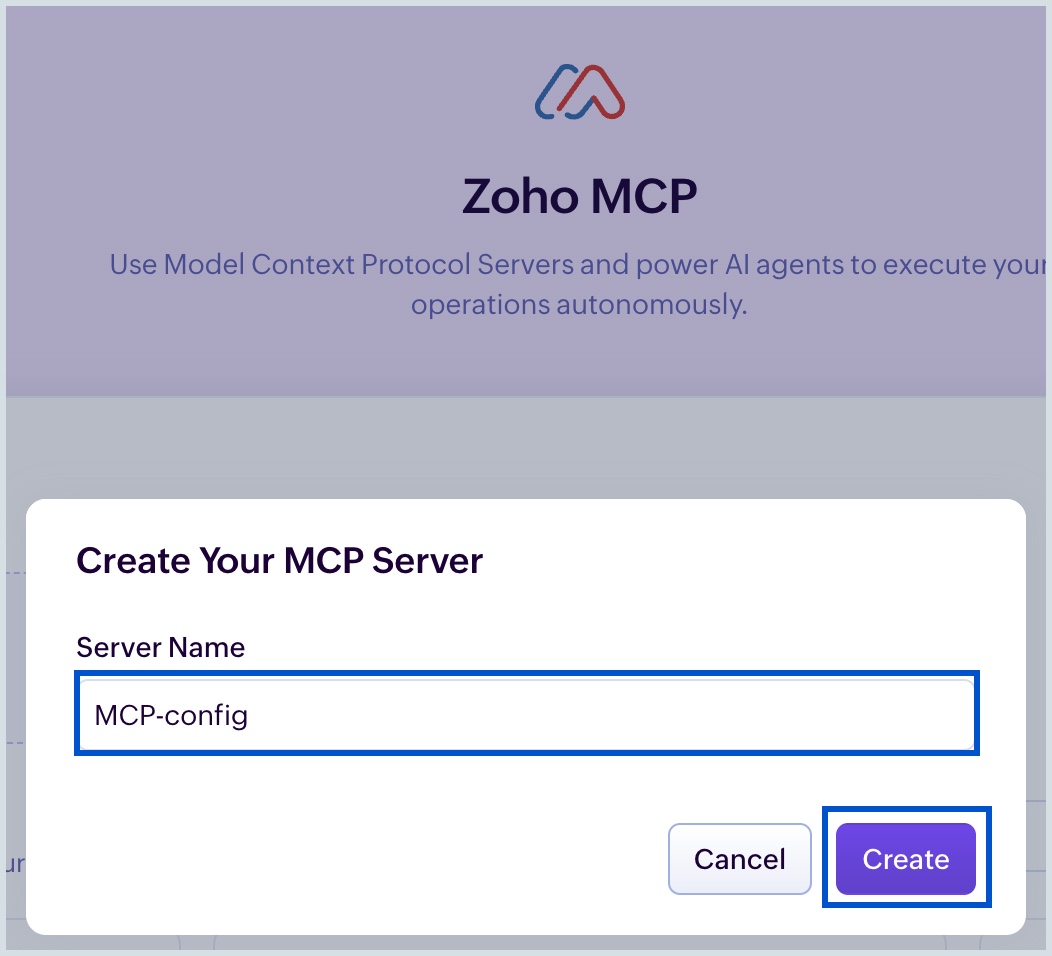
- Provide the desired server name and click Create.
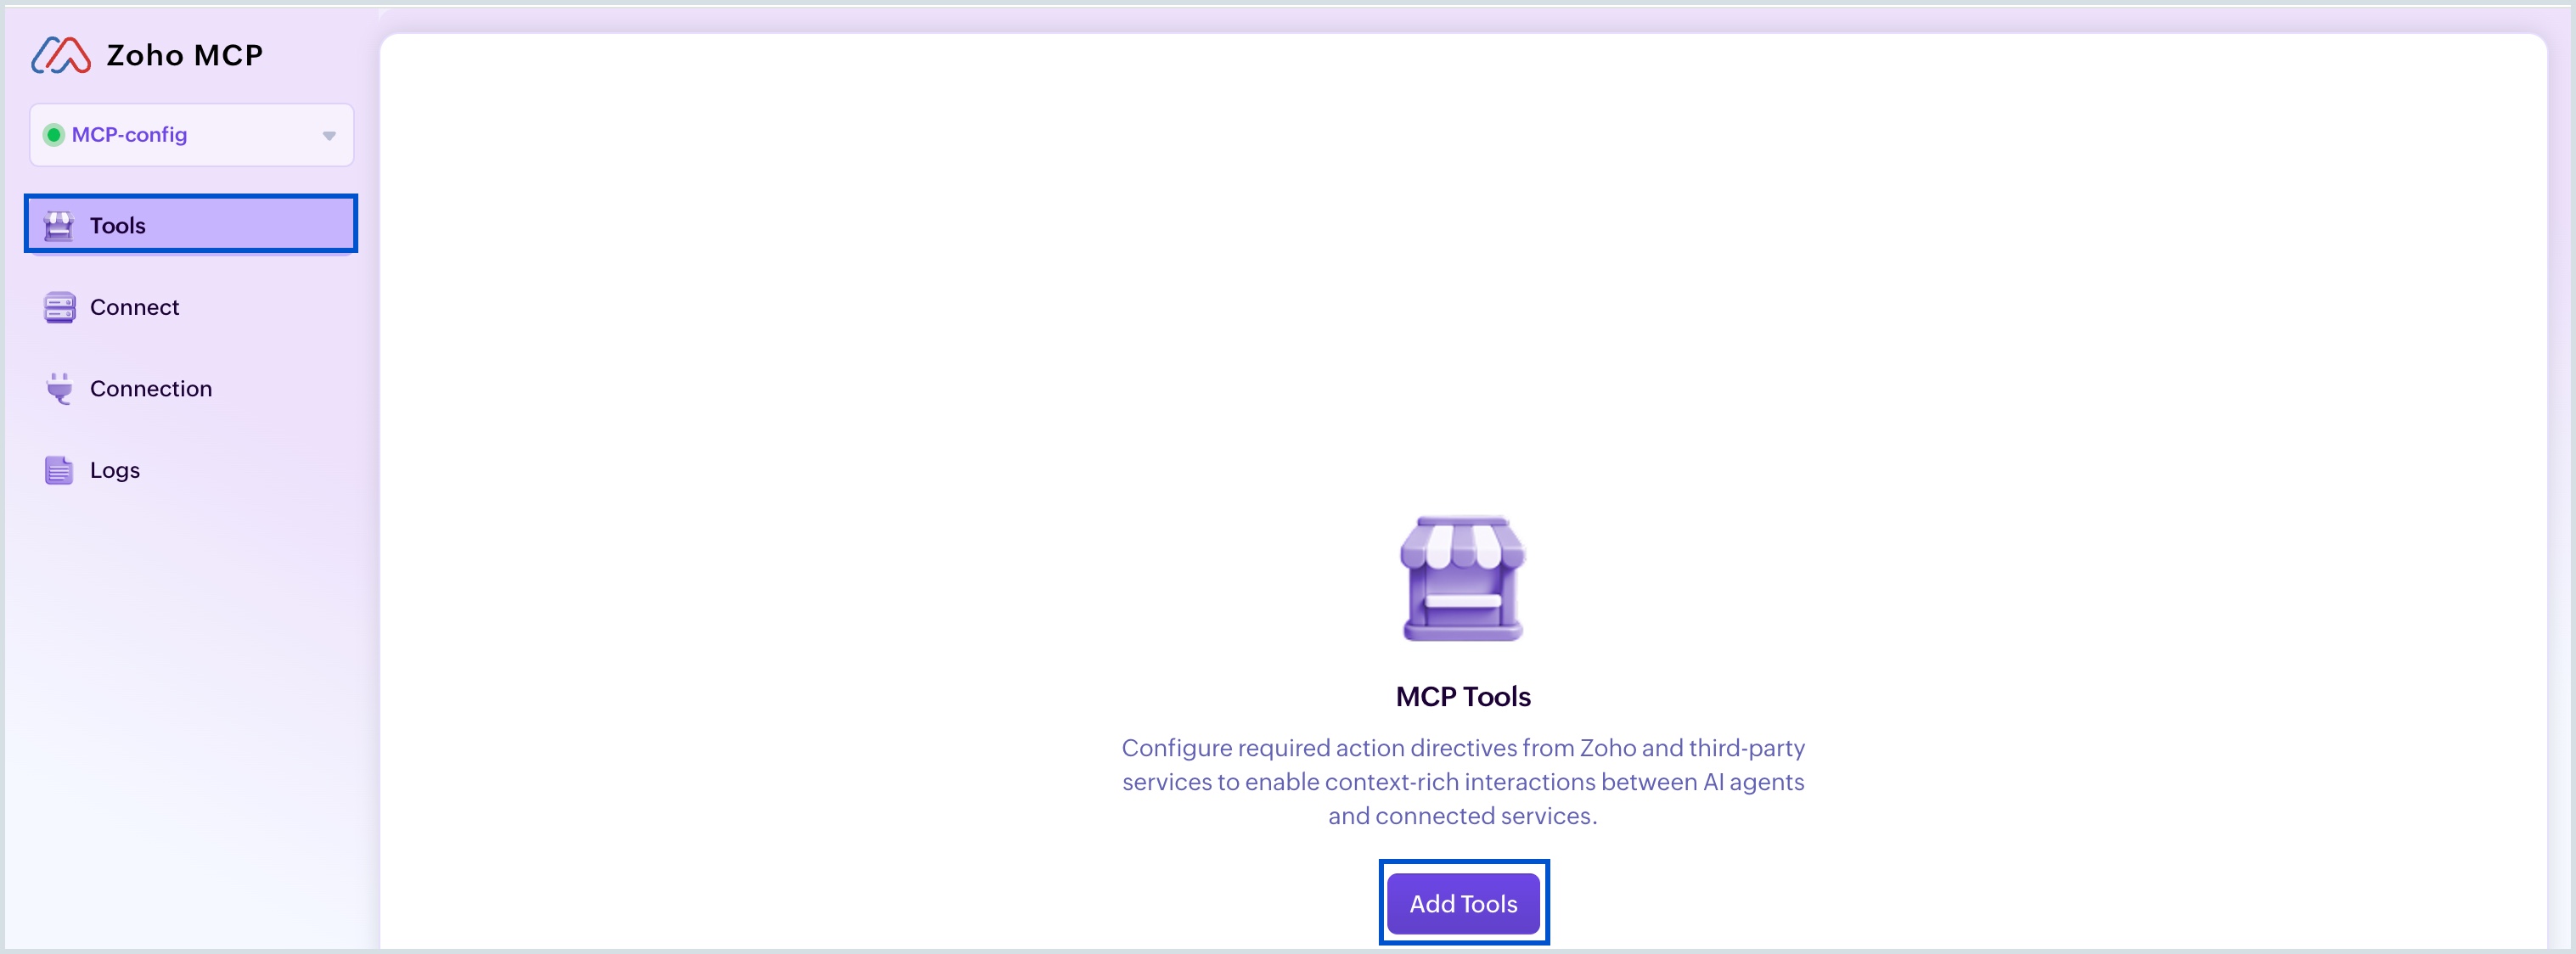
- Select Add Tools to add the required tools to the created MCP server.
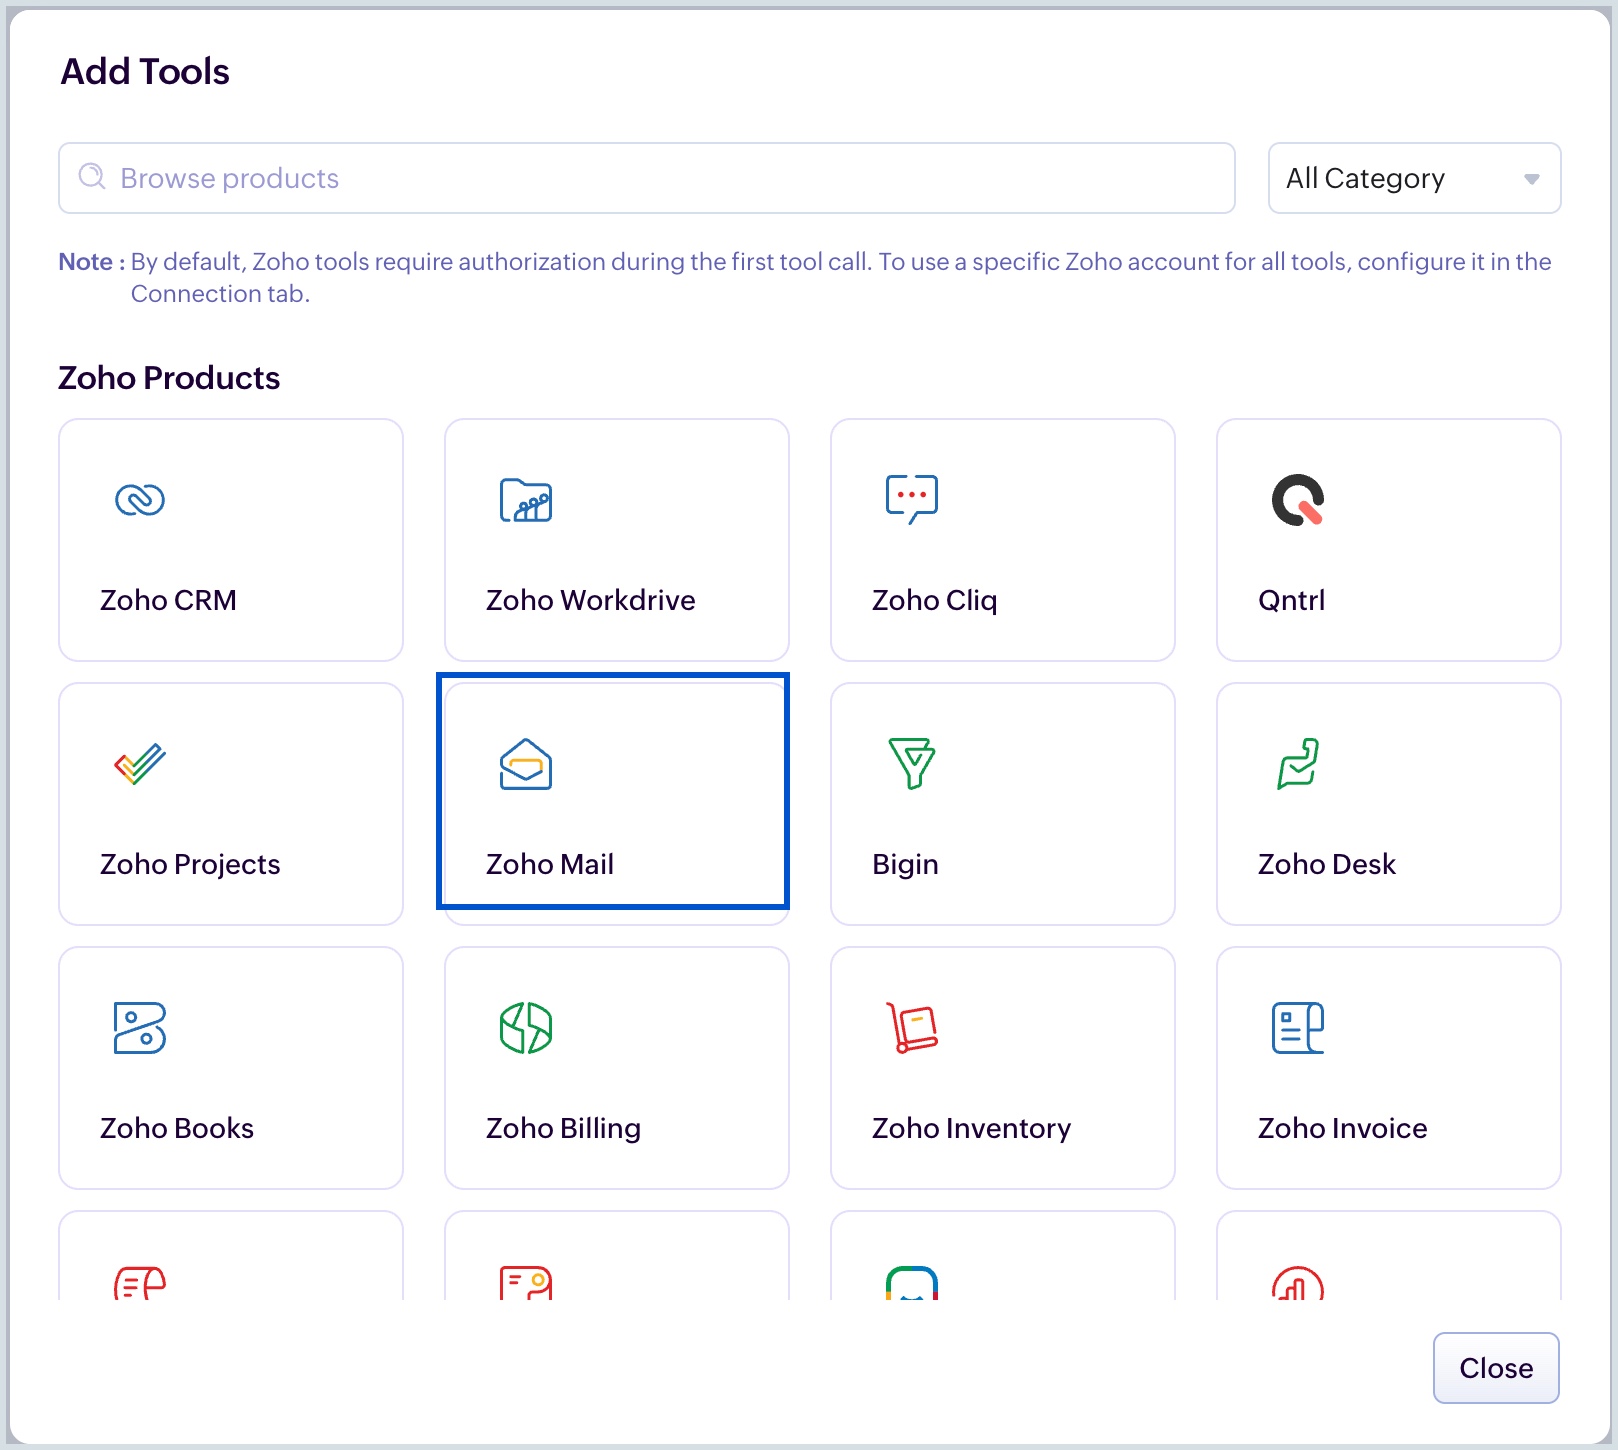
- Select Zoho Mail from the list of products displayed.
The tools in Zoho Mail are listed under two views - Group view and All Tools.
- Group view displays the categories under which the tools are organized.
- The All Tools view lists all the tools and lets you search for and select the required ones.
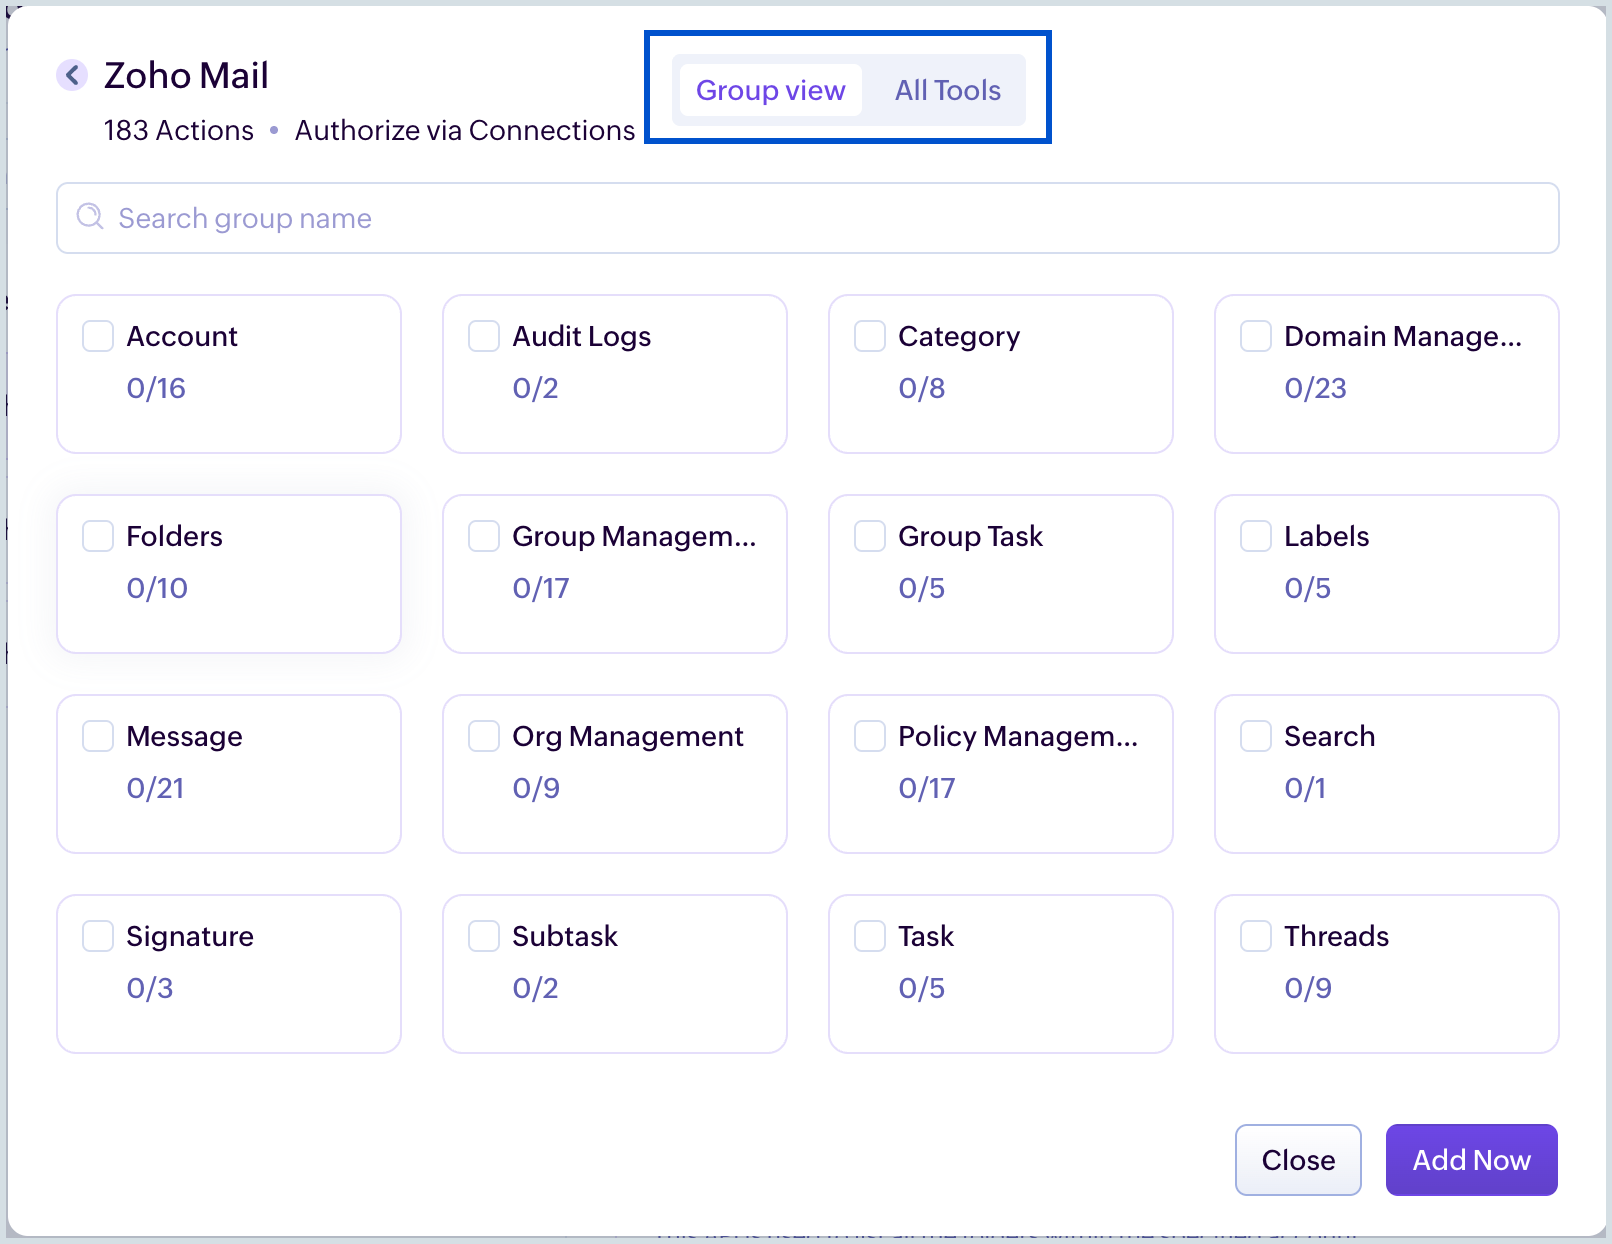
Select a category checkbox and all tools under it is automatically selected.
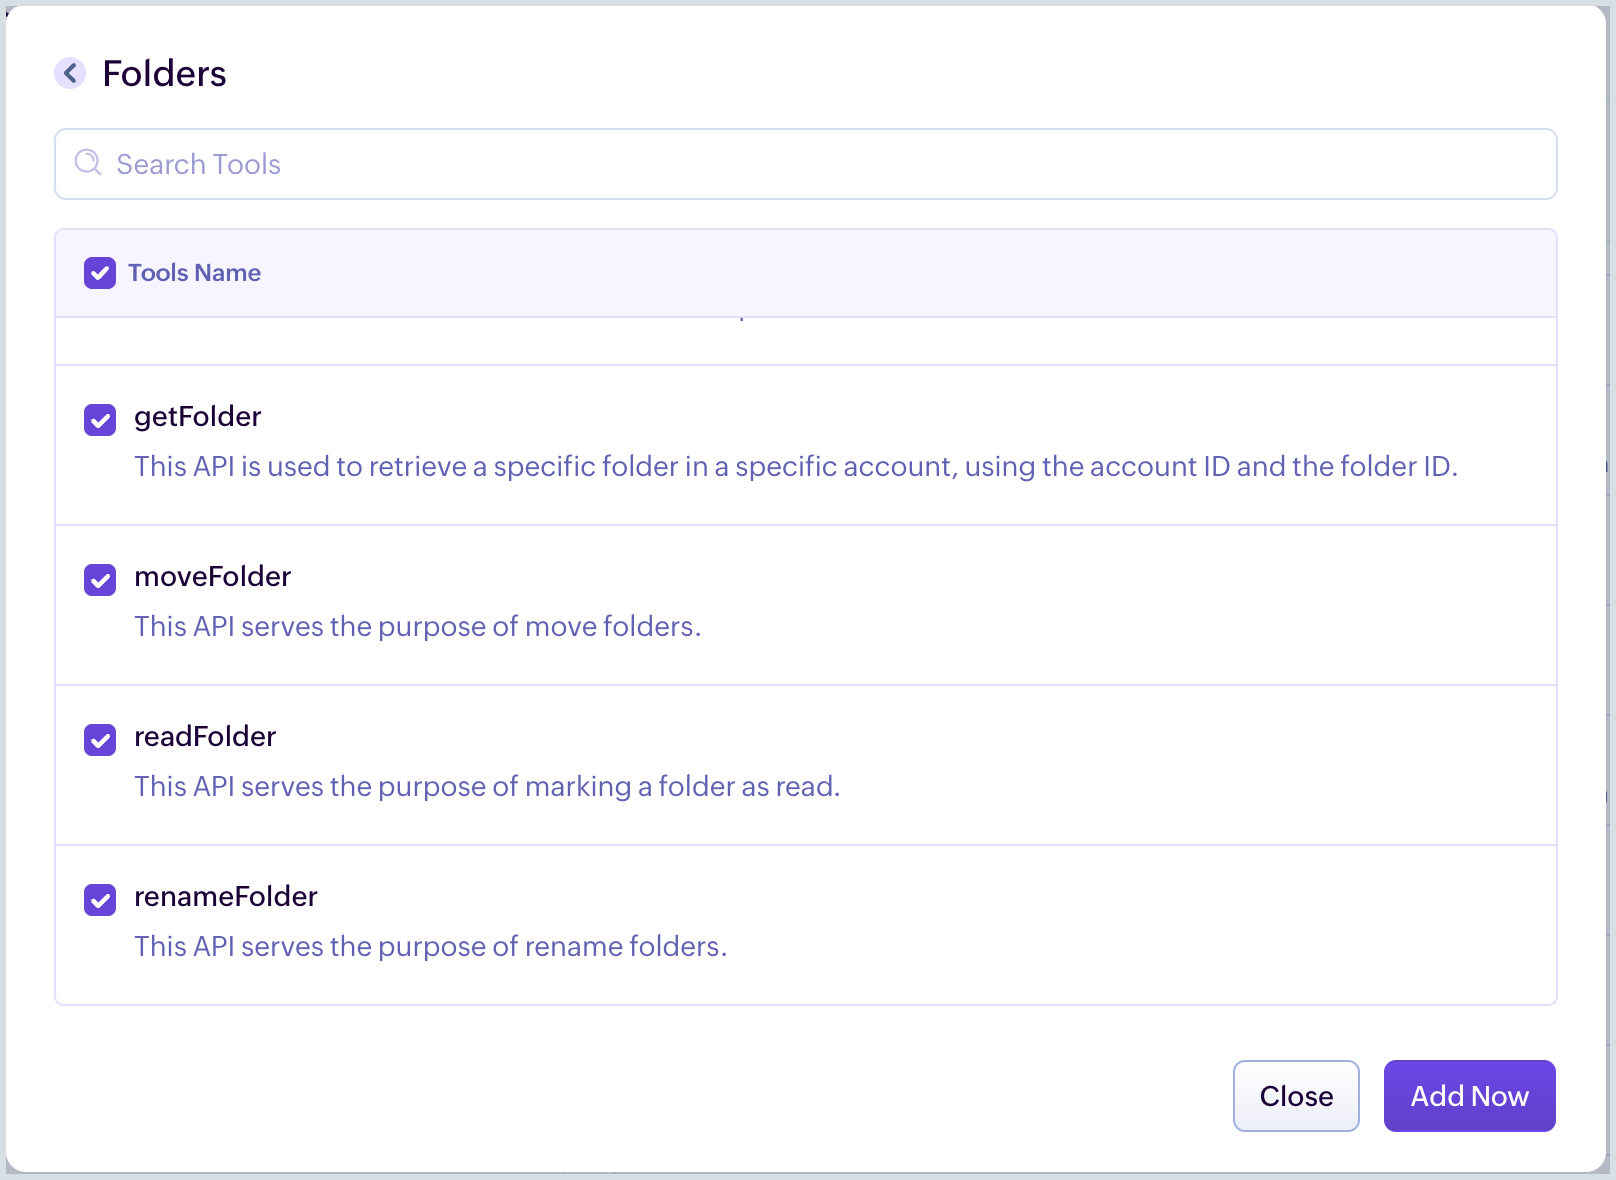
- Select the list of actions you wish to add and click Add Now. These tools provide the appropriate context and access to perform the required actions instructed in the prompt. You can also search for your required tools using the search-bar.
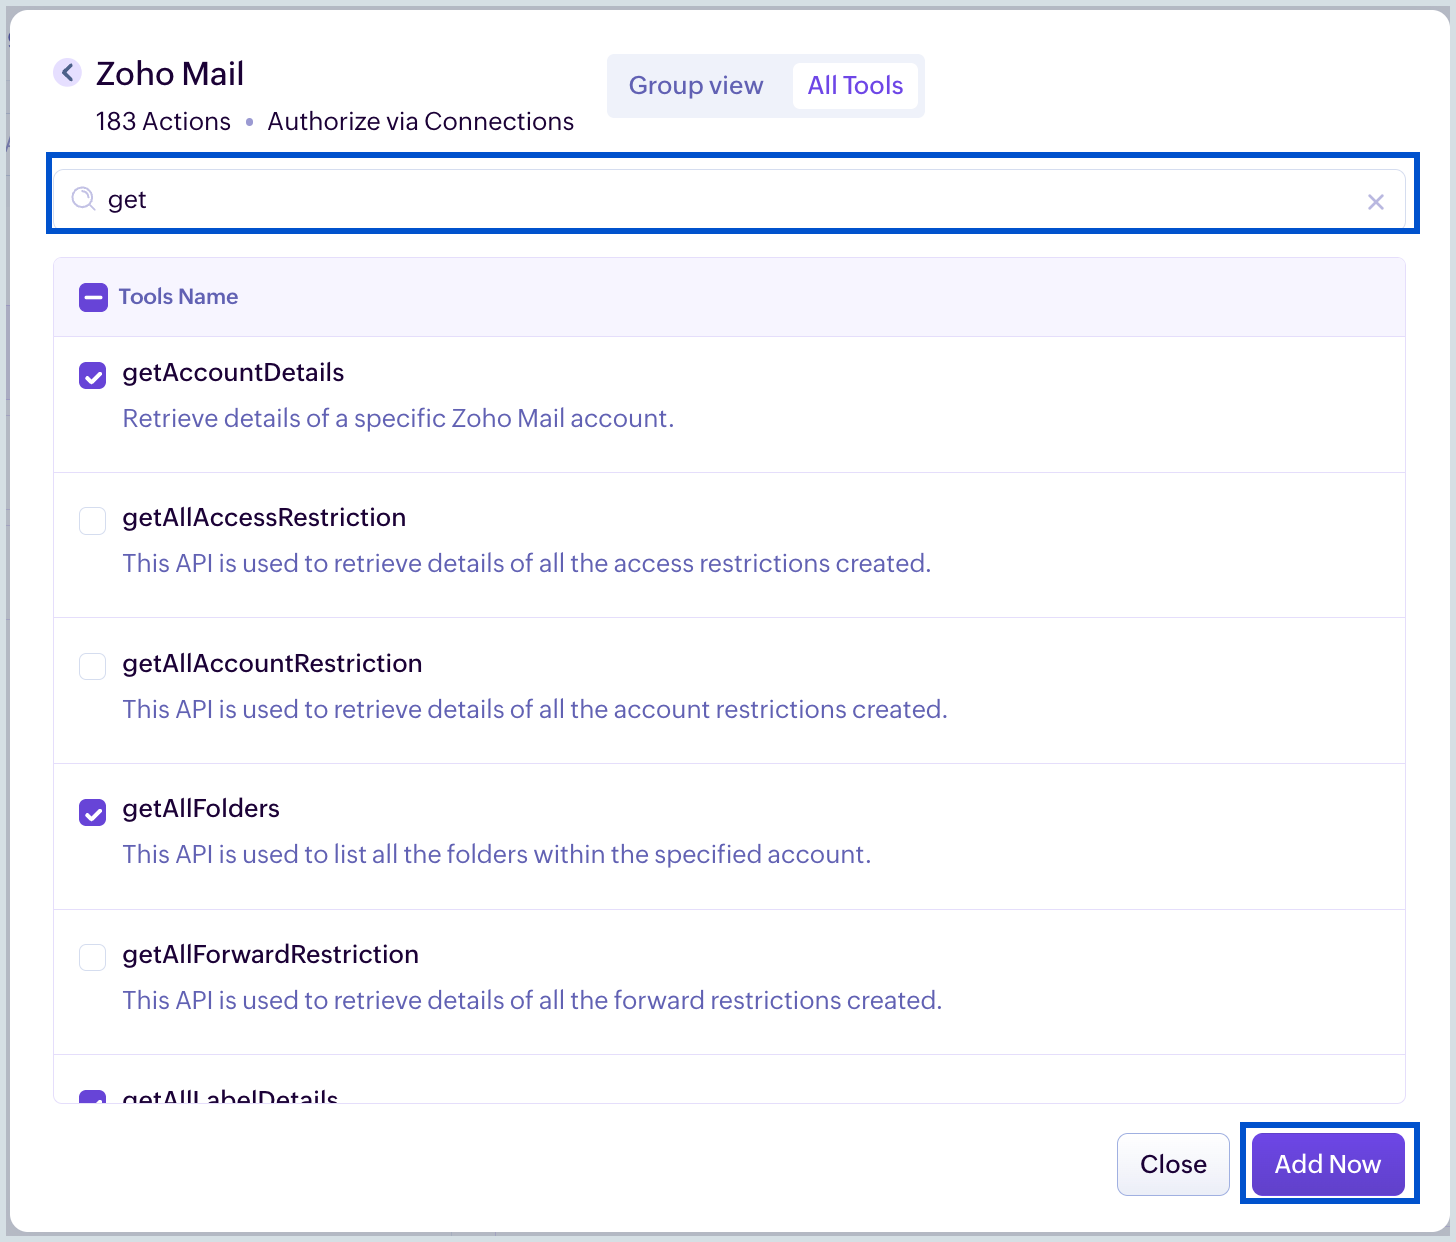
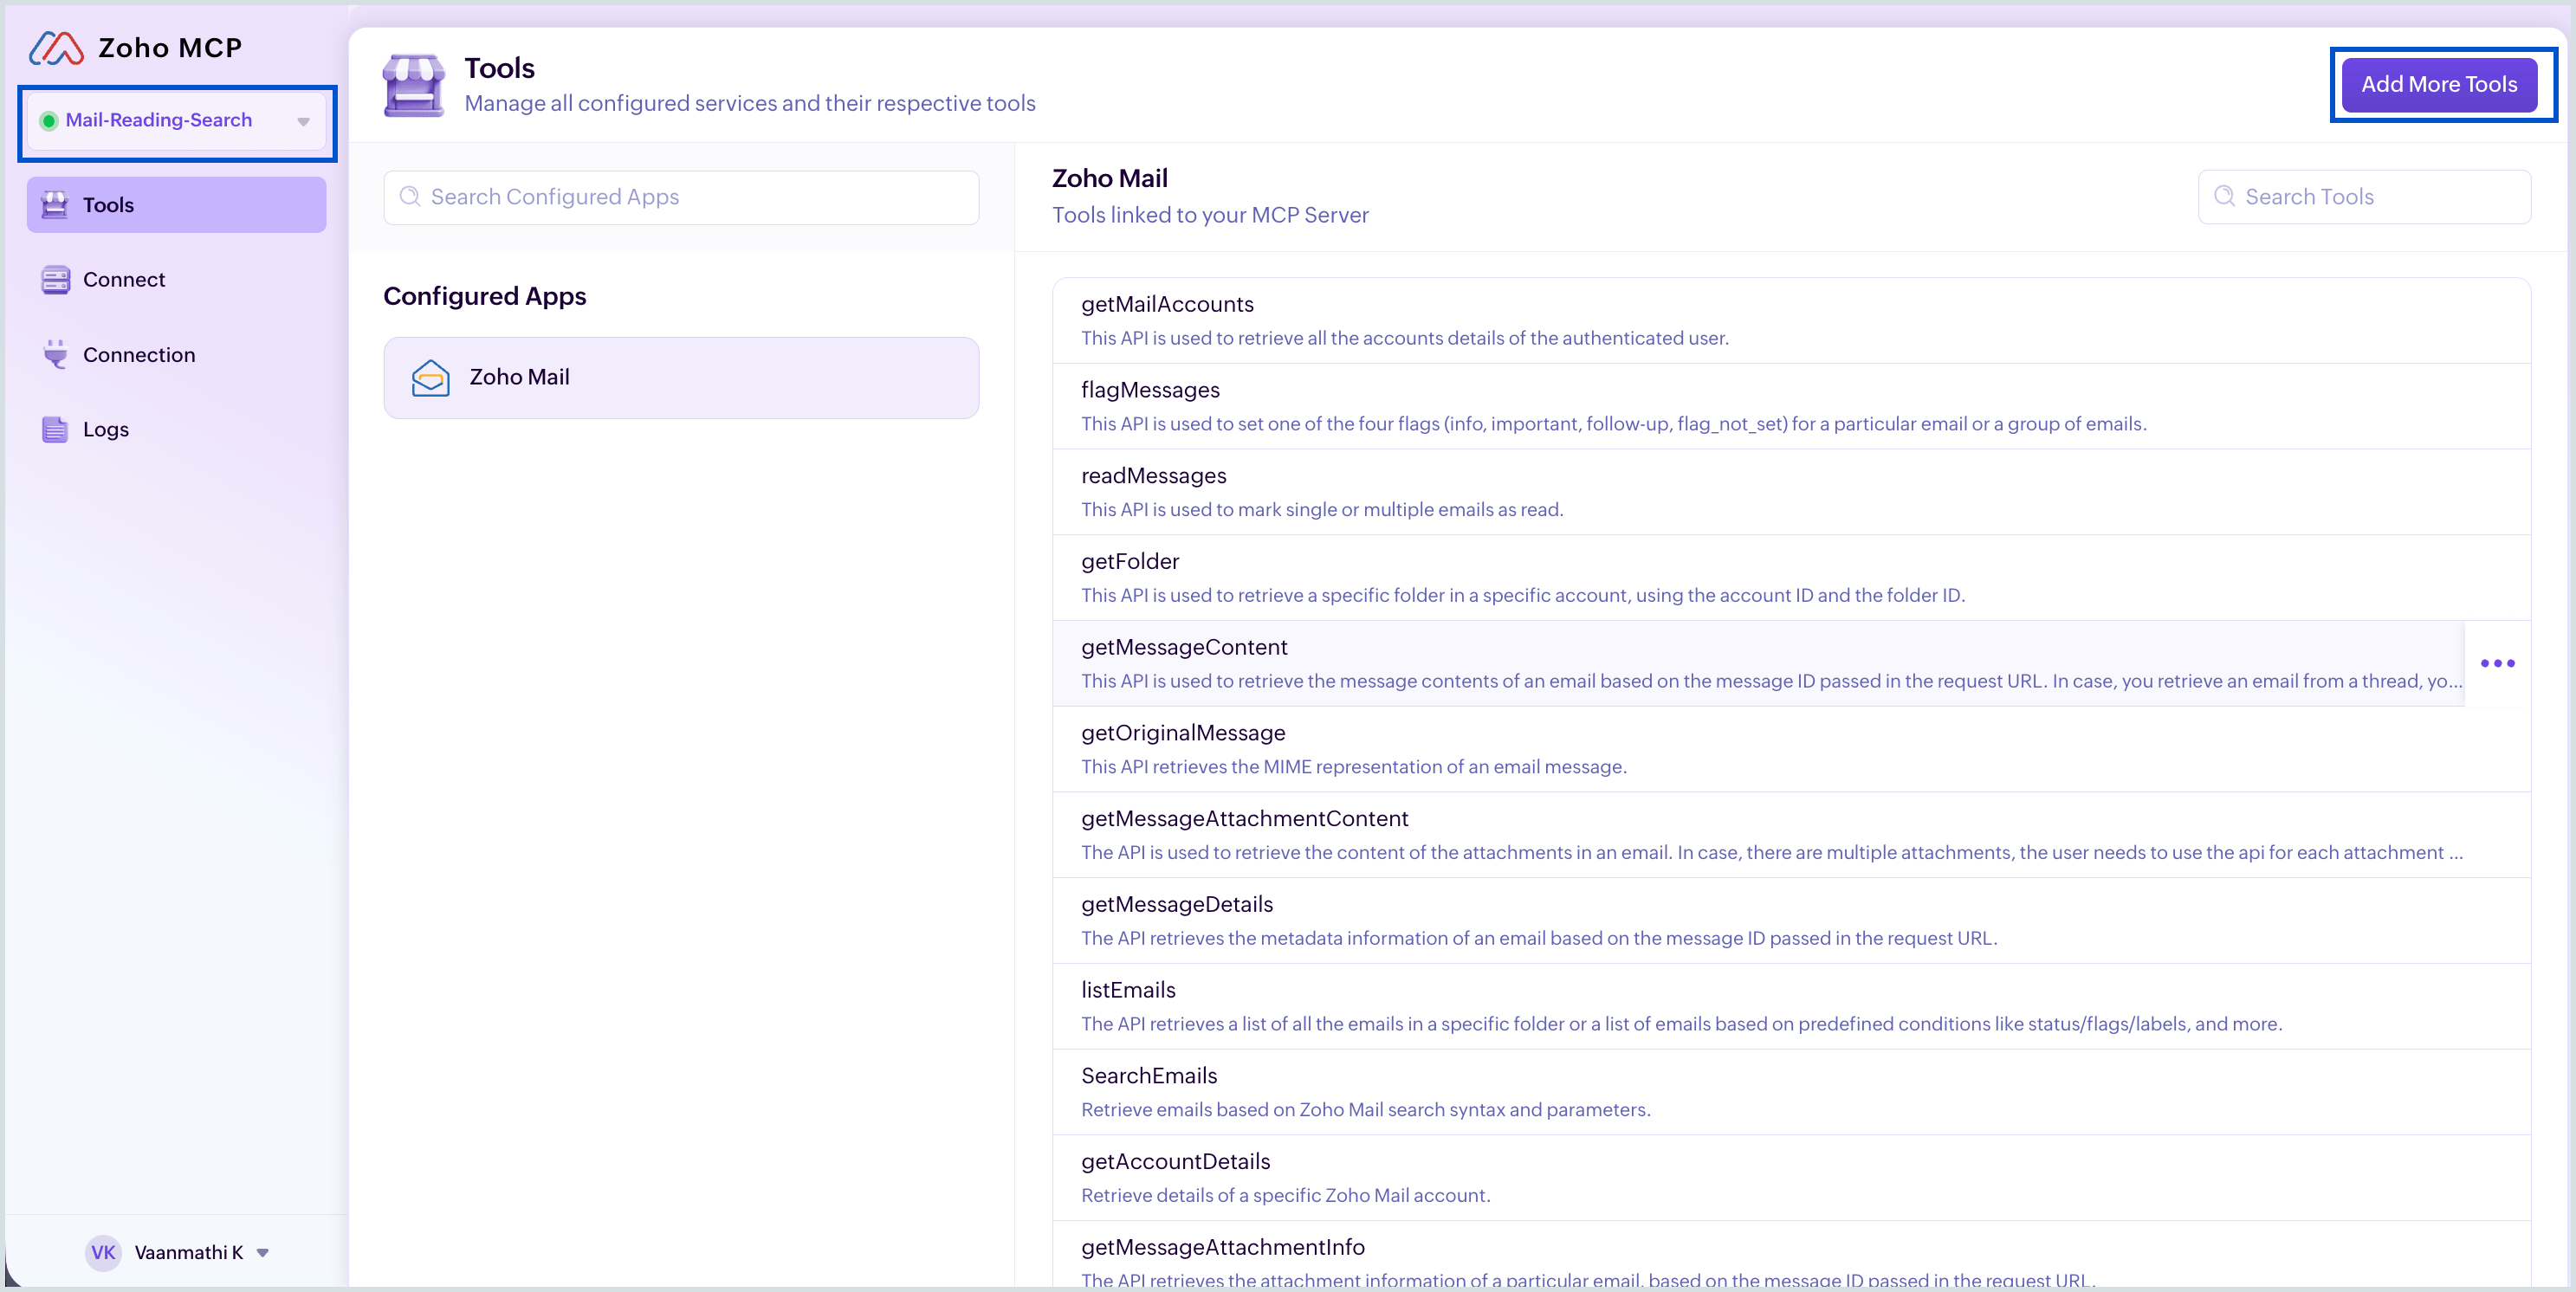
Select Add More Tools in the top right corner to add the desired tools to your Zoho MCP server as and when required.
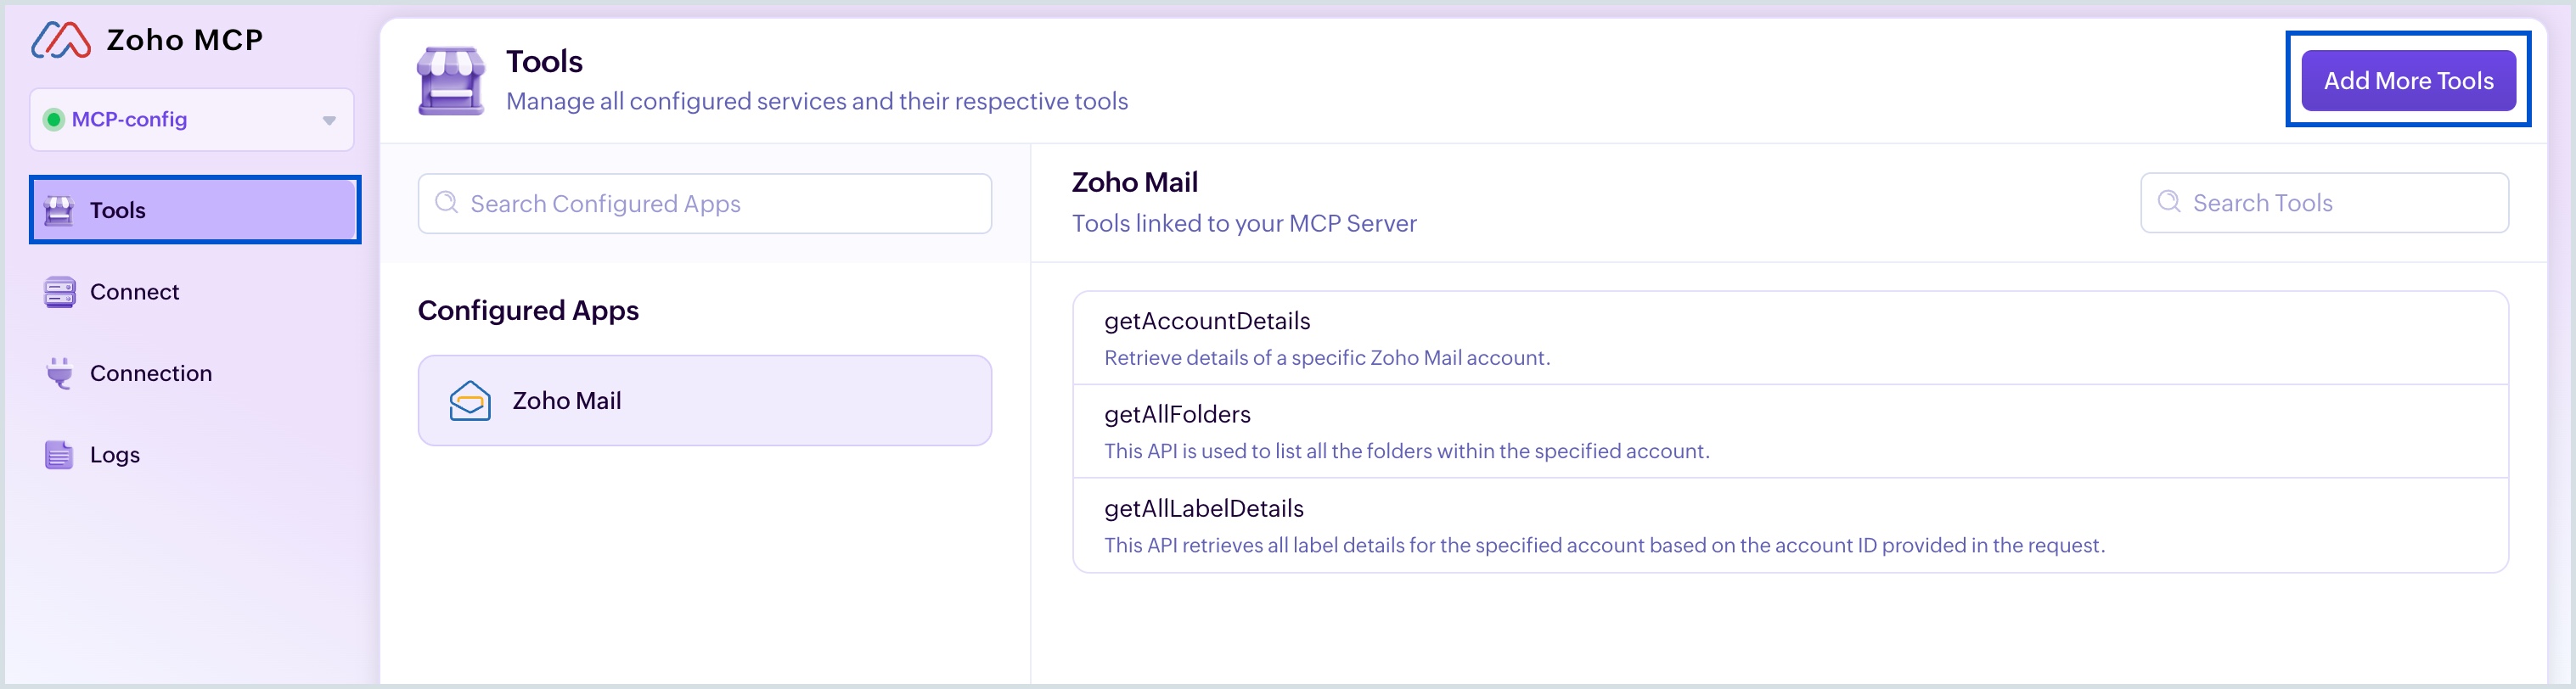
All the added tools will be displayed under your configured Zoho MCP server.
- To create a new server using Pre-configured servers, select Zoho Mail option from the filter dropdown. The list of available predefined servers is displayed.
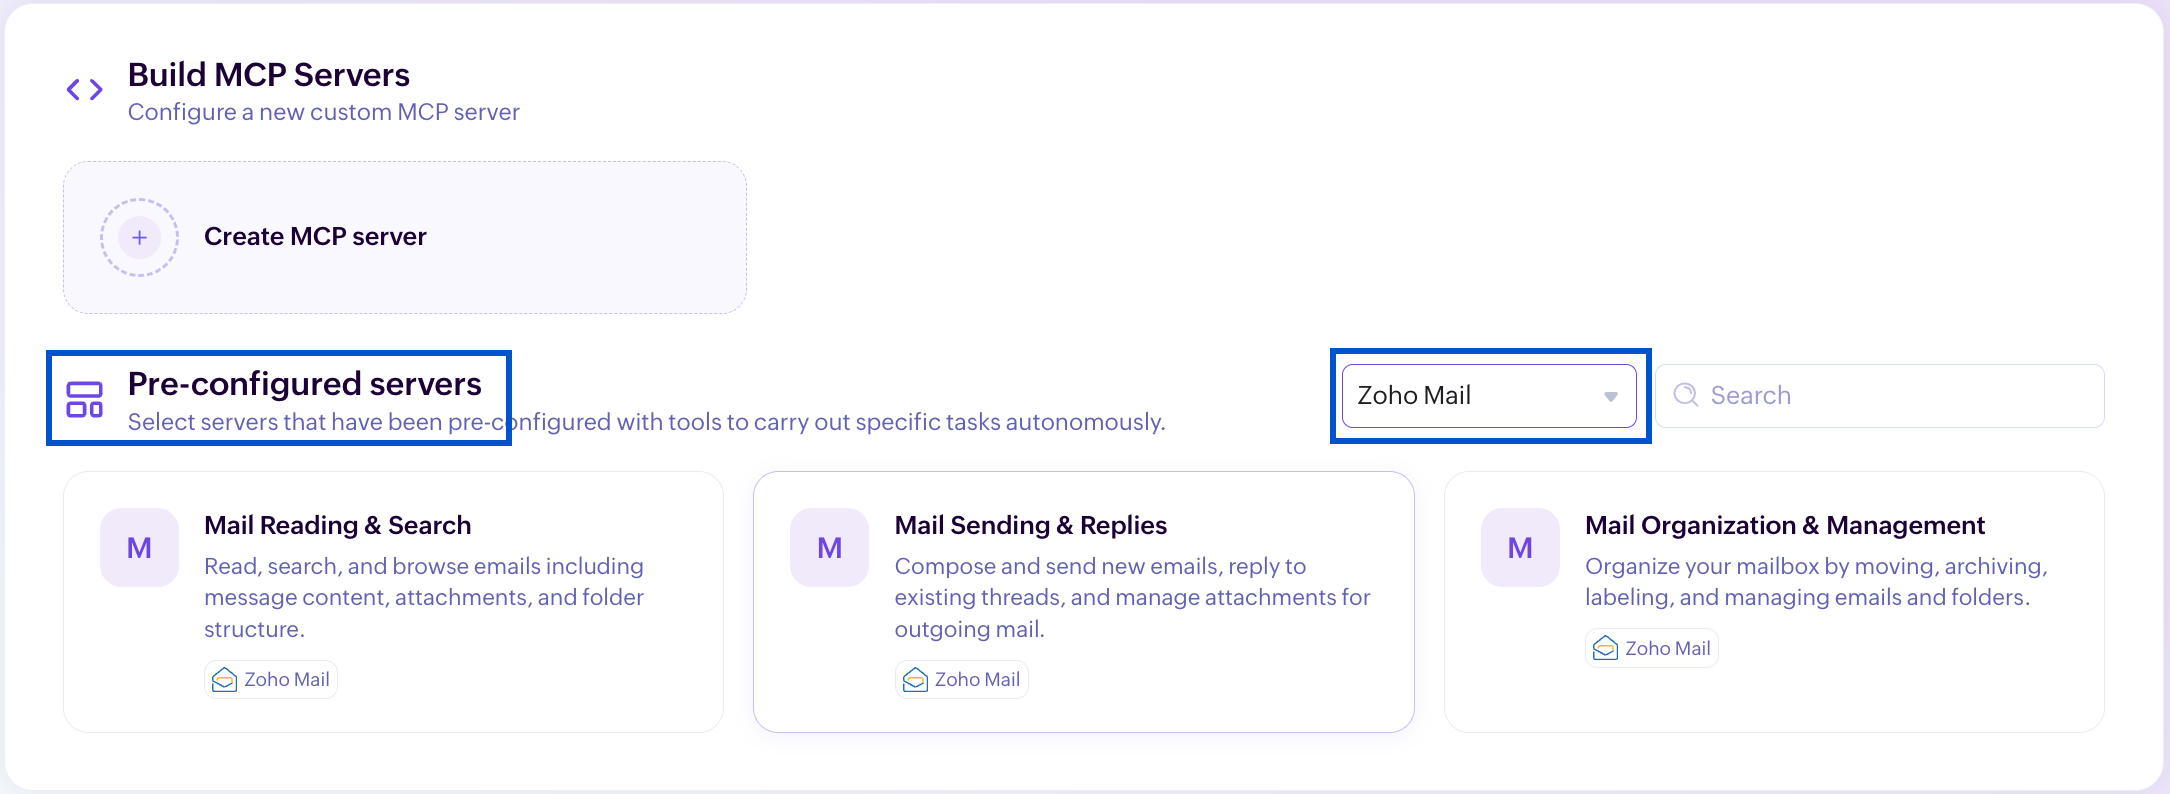
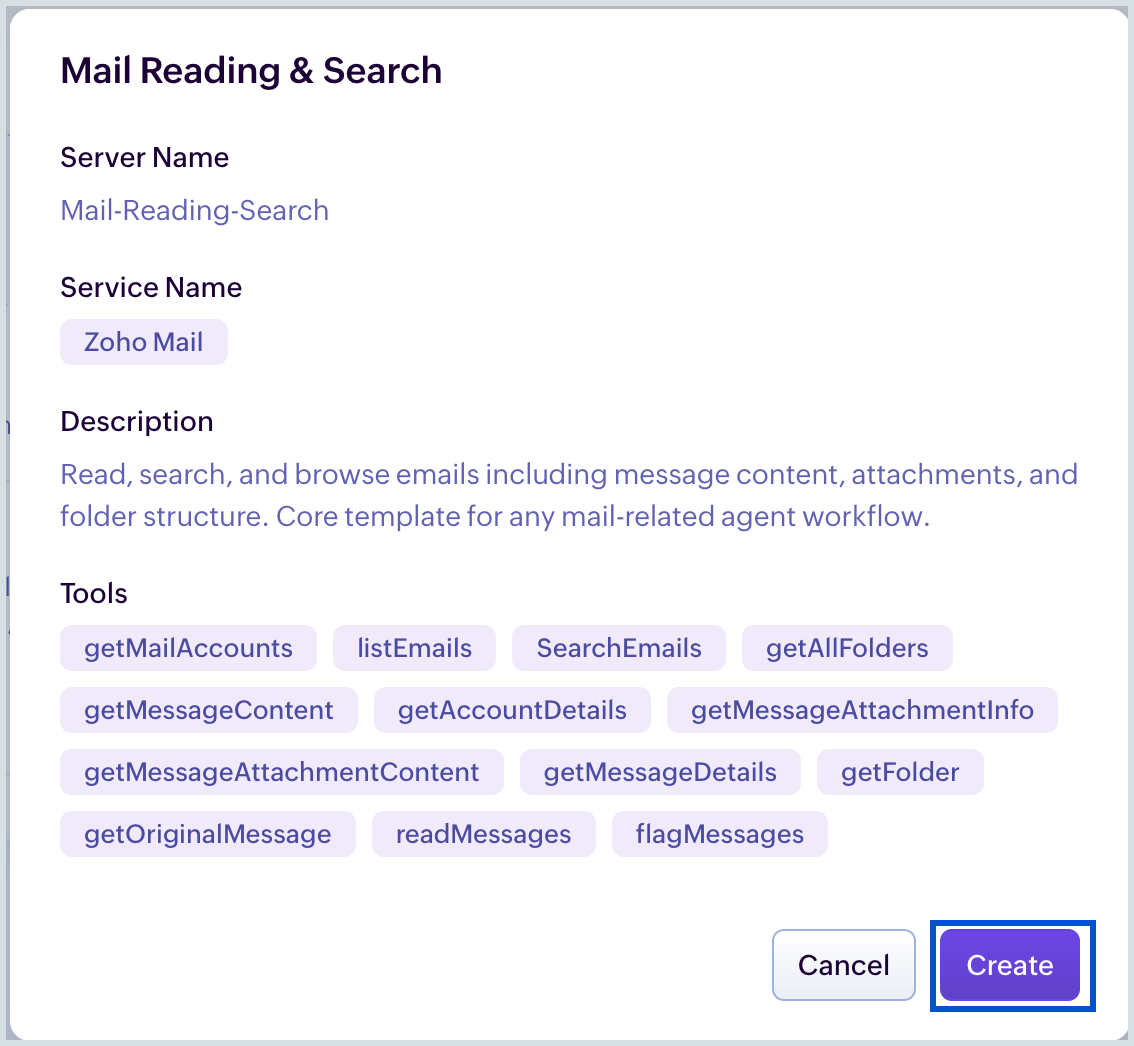
Click to select a server from the list. The predefined server name, description, and the tool list are displayed in the popup. Click on Create to create the server.
The new Zoho Mail MCP server is created with the predefined tools. To add more desired tools, click on Add More Tools in the top right corner.
MCP URL
A unique and secure URL will be generated by the Zoho MCP service each time you create a Zoho MCP server. This MCP URL will serve as the endpoint invoked when a prompt is executed from your MCP Client.
To view the MCP URL:
- Navigate to Connect section from the left pane of your Zoho MCP server.
- Your MCP URL is displayed.
- Select Regenerate API Key to generate a new MCP URL endpoint to invoke your Zoho MCP server.

Now you can use this URL to integrate your Zoho MCP server with your MCP Client.
Authorization Types
How is authorization managed in Zoho Mail MCP?
When you add Zoho Mail MCP tools to your Zoho MCP server, authorization is handled using the OAuth 2.1 protocol. The Zoho MCP supports this authorization in two ways:
Authorization on Demand
This is the default authorization type. It is account-dependent, where each user has to authenticate the added MCP tools using their Zoho account credentials.
Authorization via Connection
This is an organization-level authorization type. The user who creates an account in Zoho MCP becomes the Super Admin. Once the tools are added, the Super Admin will be prompted to authorize the connection. On successful authorization, the MCP server URL can be shared with the team members.
With this method, trusted members can authenticate the MCP tools using Super Admin’s shared OAuth and Refresh tokens, instead of individual authentication.
Under Connection tab, click Edit, and select your Authorization type.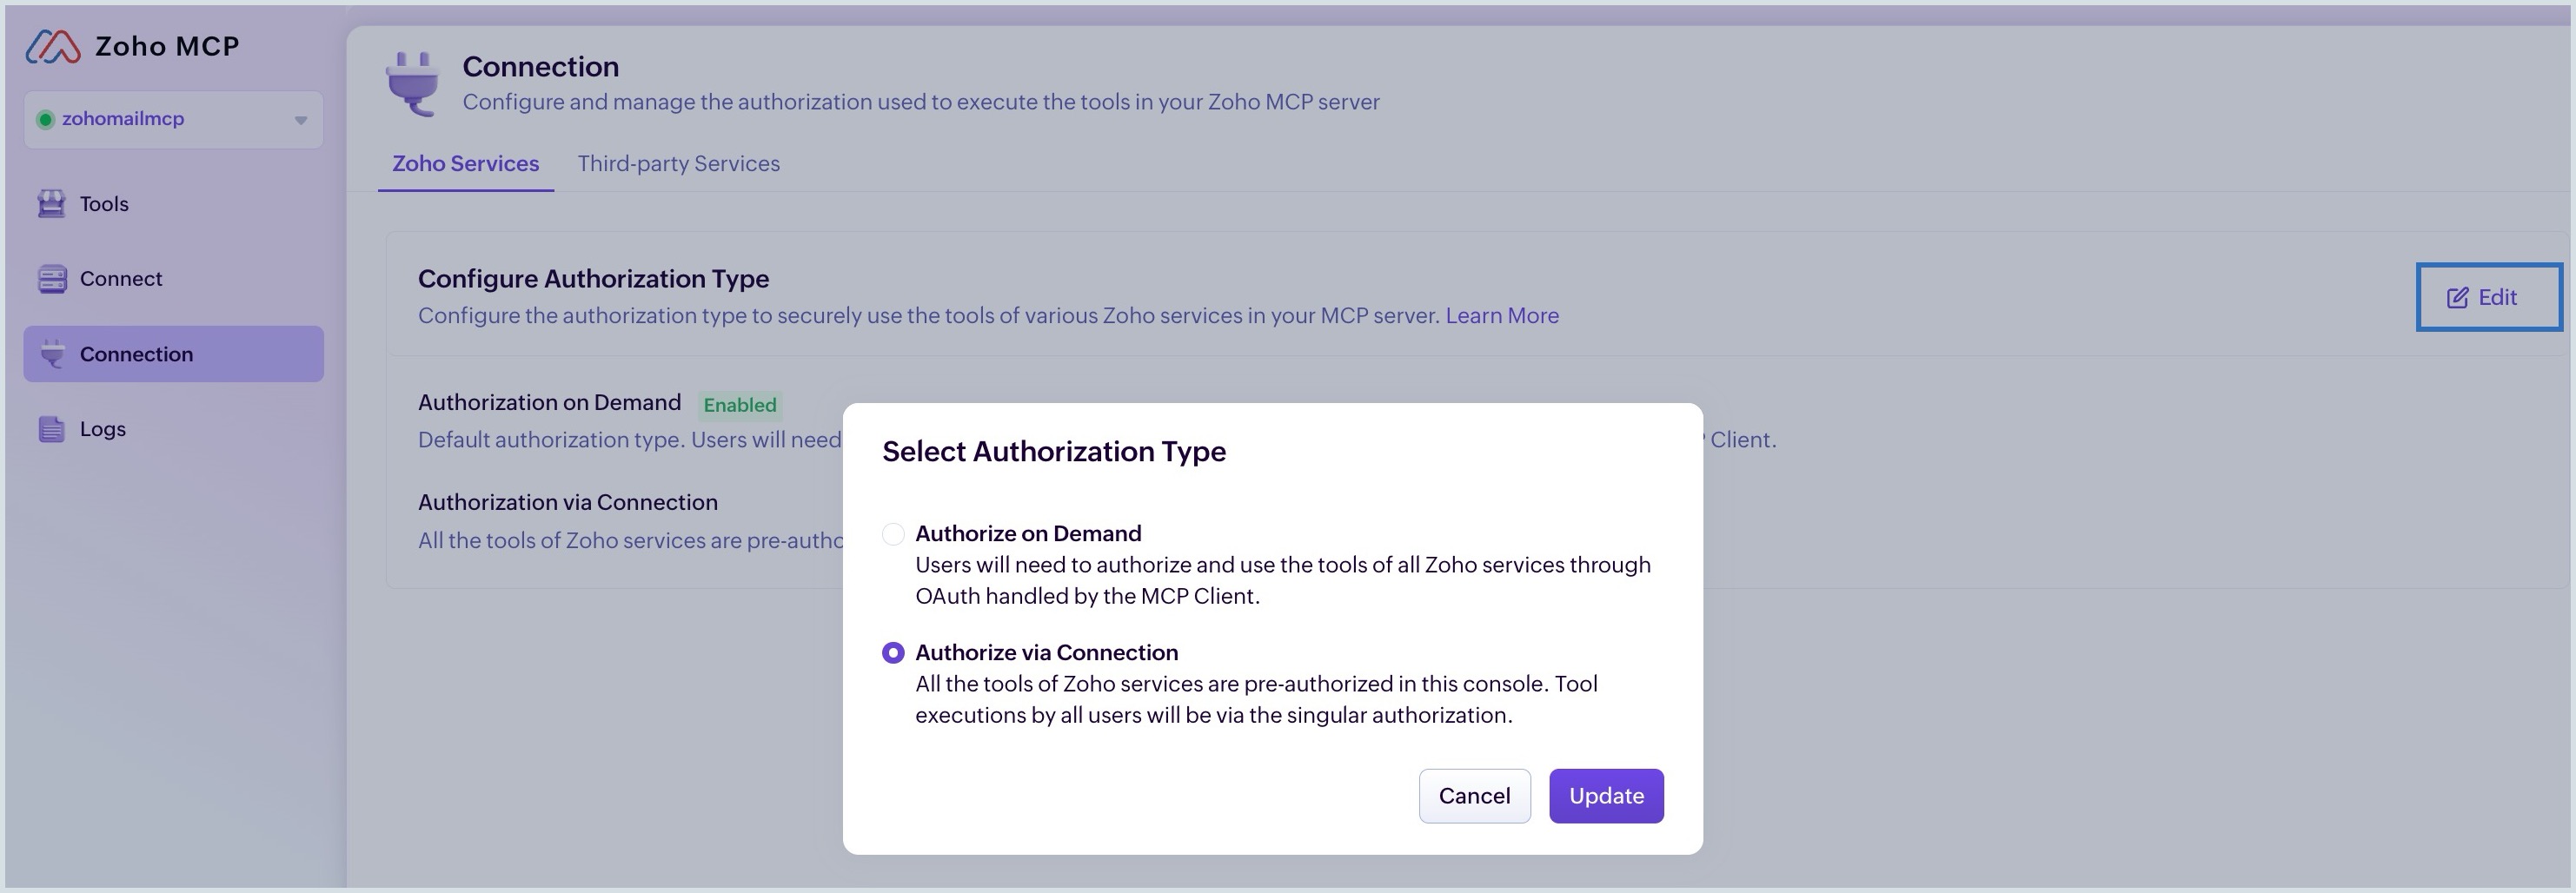
For detailed information and steps to change the authorization type, refer to Zoho MCP Authorization page.
Collaborators
Who can access your Zoho Mail MCP server?
Collaborators feature in Zoho MCP allows users to invite their team members to access the shared MCP servers, eliminating individual server creation. The user who creates the Zoho MCP account becomes the Super Admin.
- Under Settings - Collaborators, you can Invite users and assign role permissions to them.
- Enter the trusted member’s email address and select the Role as Admin or User.
- Admin – Access all features and manage other collaborators
- User – Access all features
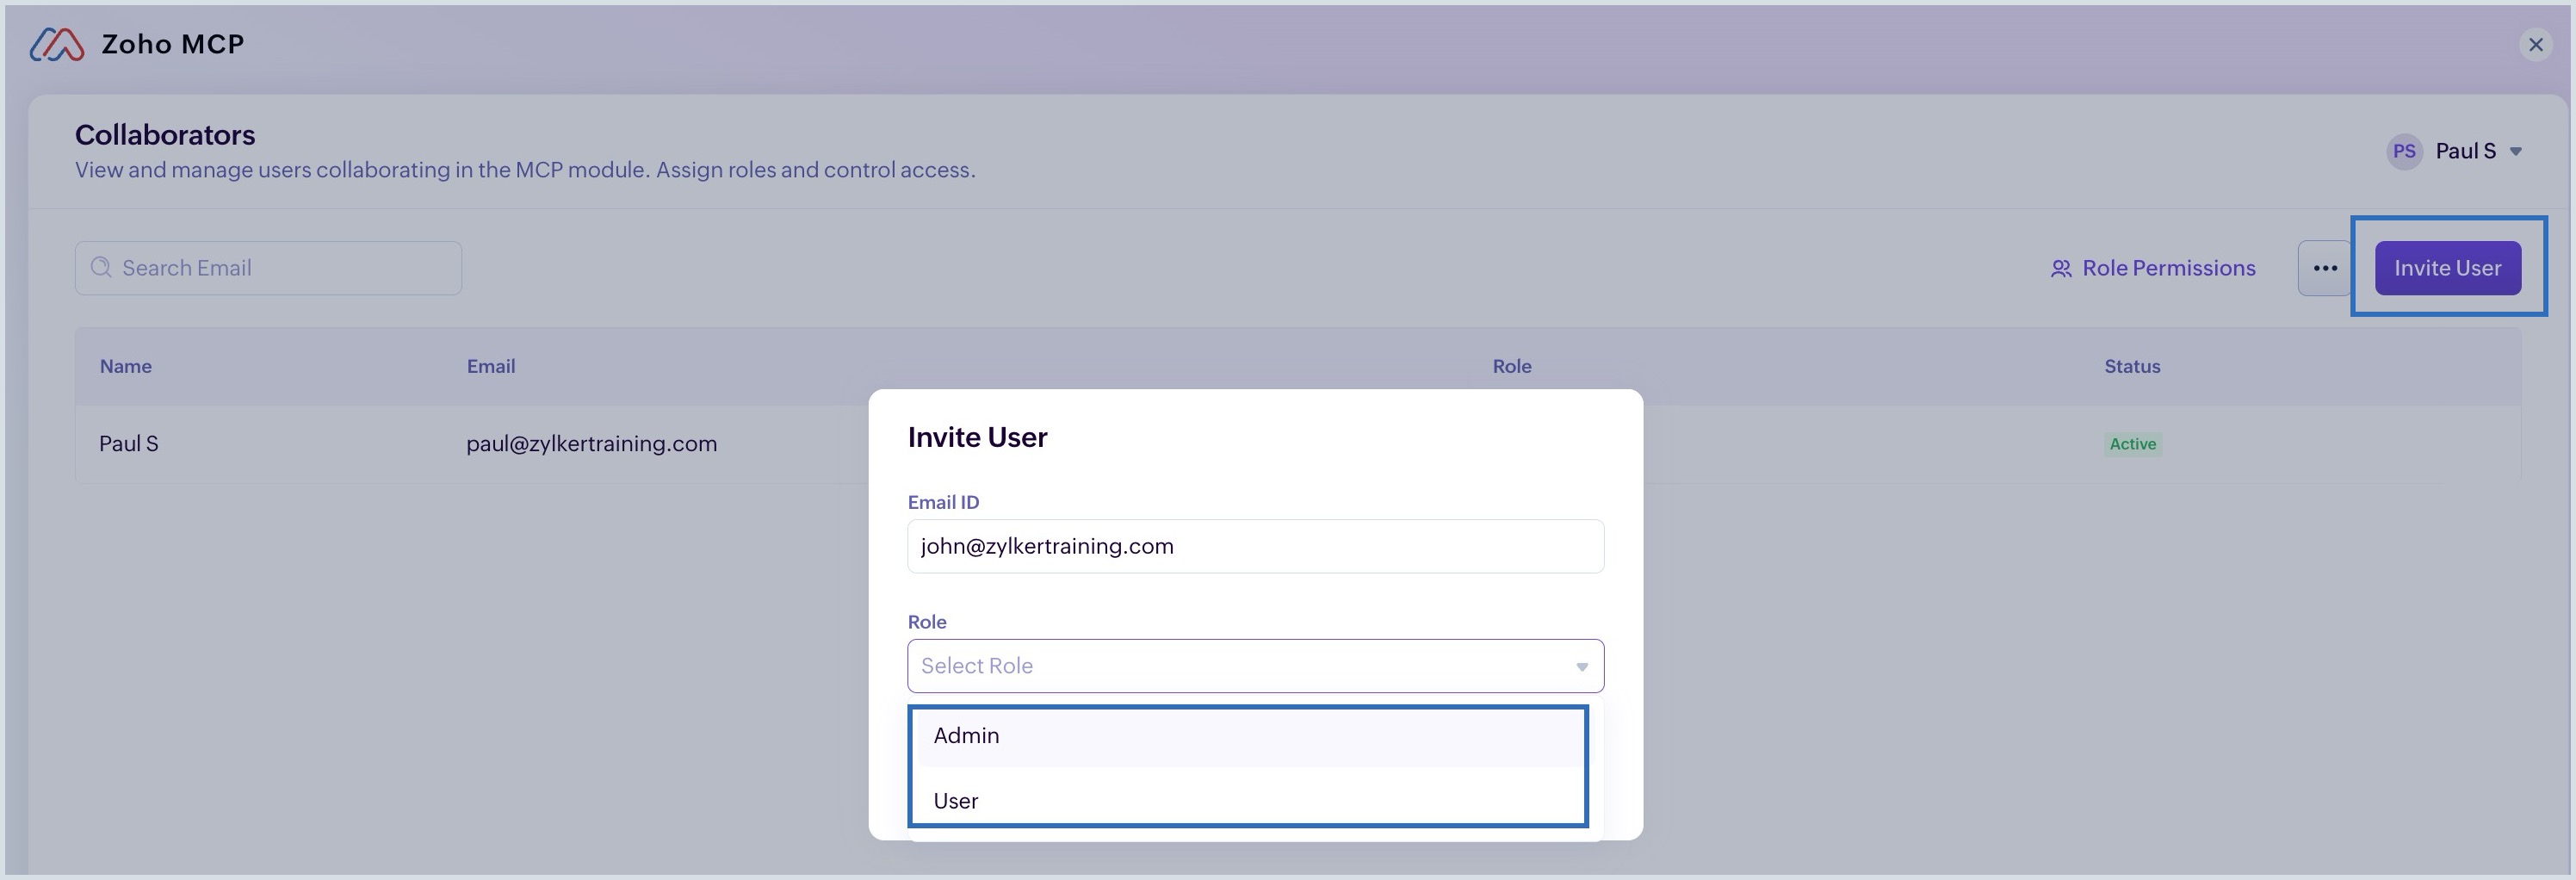
Using collaborators, your team can share MCP servers and perform operations without sharing account credentials.
For more information and steps to add and manage collaborators, refer to Zoho MCP Collaborators document.
Note:
- Collaborator feature is more helpful when you want the members to build, configure, and manage the Zoho MCP server.
- Authorization via Connection is suitable for the users who want to perform actions using the tools, without managing the server.