Basic Functions in Bills
Create Bill
To create a new bill in Zoho Books:
To create a bill in Zoho Books:
- Go to Purchases on the left sidebar and select Bills (or press shift + b).
- Click + New in the top right corner of the page (or press c + b).
- Enter all the necessary details.
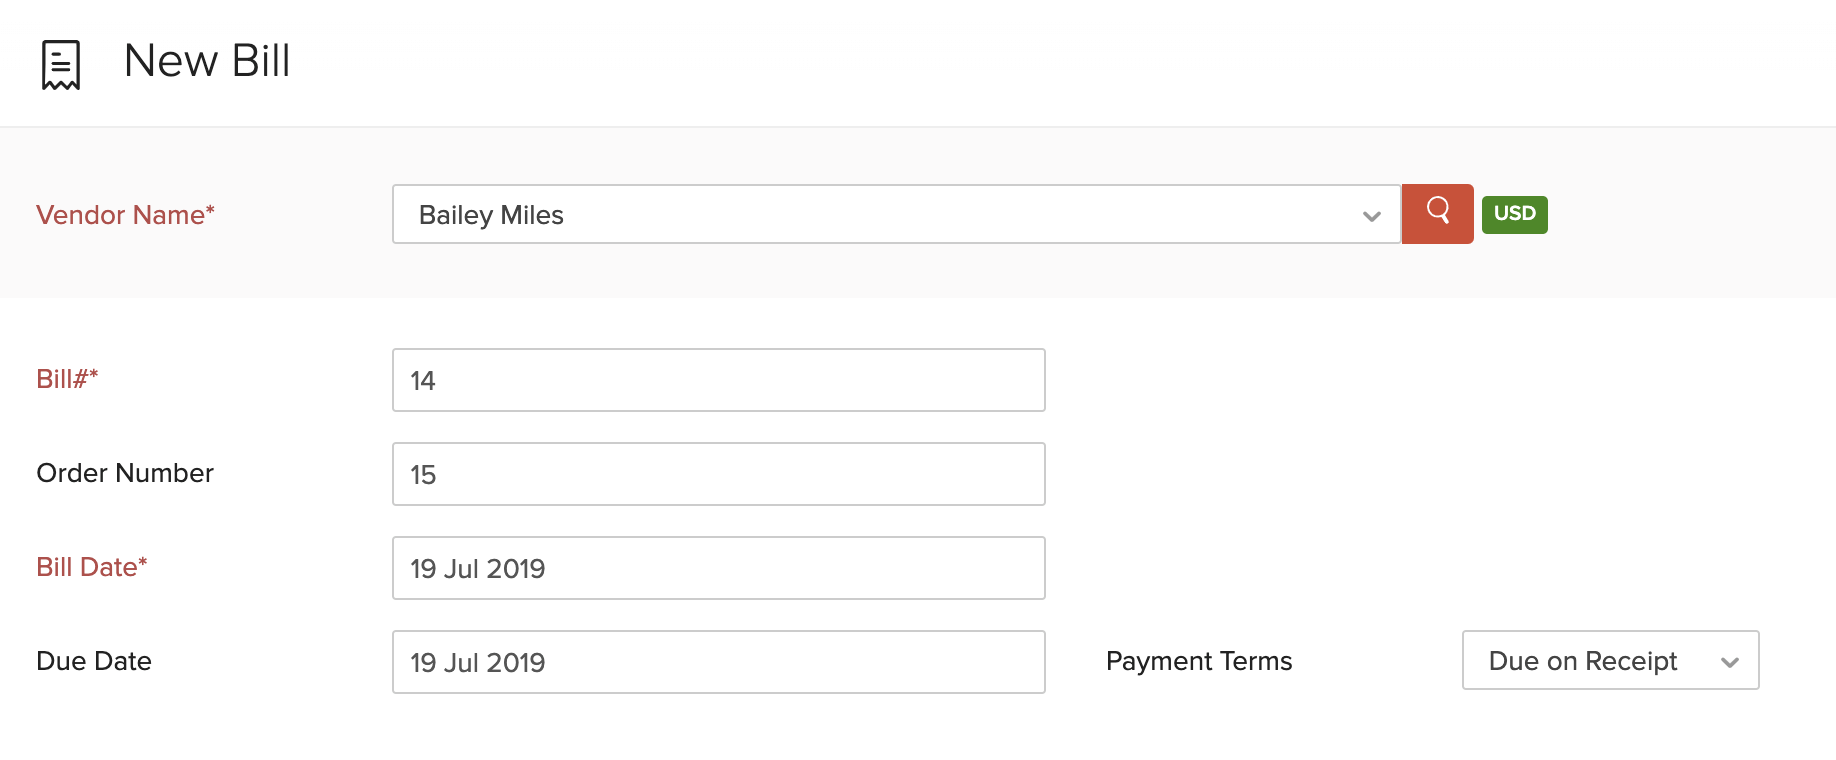
| Fields | Description |
|---|---|
| Vendor Name | Select the vendor whose bill you’re recording. |
| Bill# | Enter the unique bill number. |
| Order Number | Enter an order number for your bill. |
| Bill Date | Enter the date on which you create the bill. |
| Due Date | Enter the due date for bill payment. |
| Payment Terms | Select the time frame within which you need to pay your vendor. For example, Net 15 would mean you’ll have to pay the vendor within 15 days from the date when the bill is created. When you select a payment term, the due date will be adjusted accordingly. |
Note: With Transaction Posting Date, you can select the date on which you want the journal posted for your bill. This feature is available only in the India, Canada and Global editions. Learn more about Transaction Posting Date.
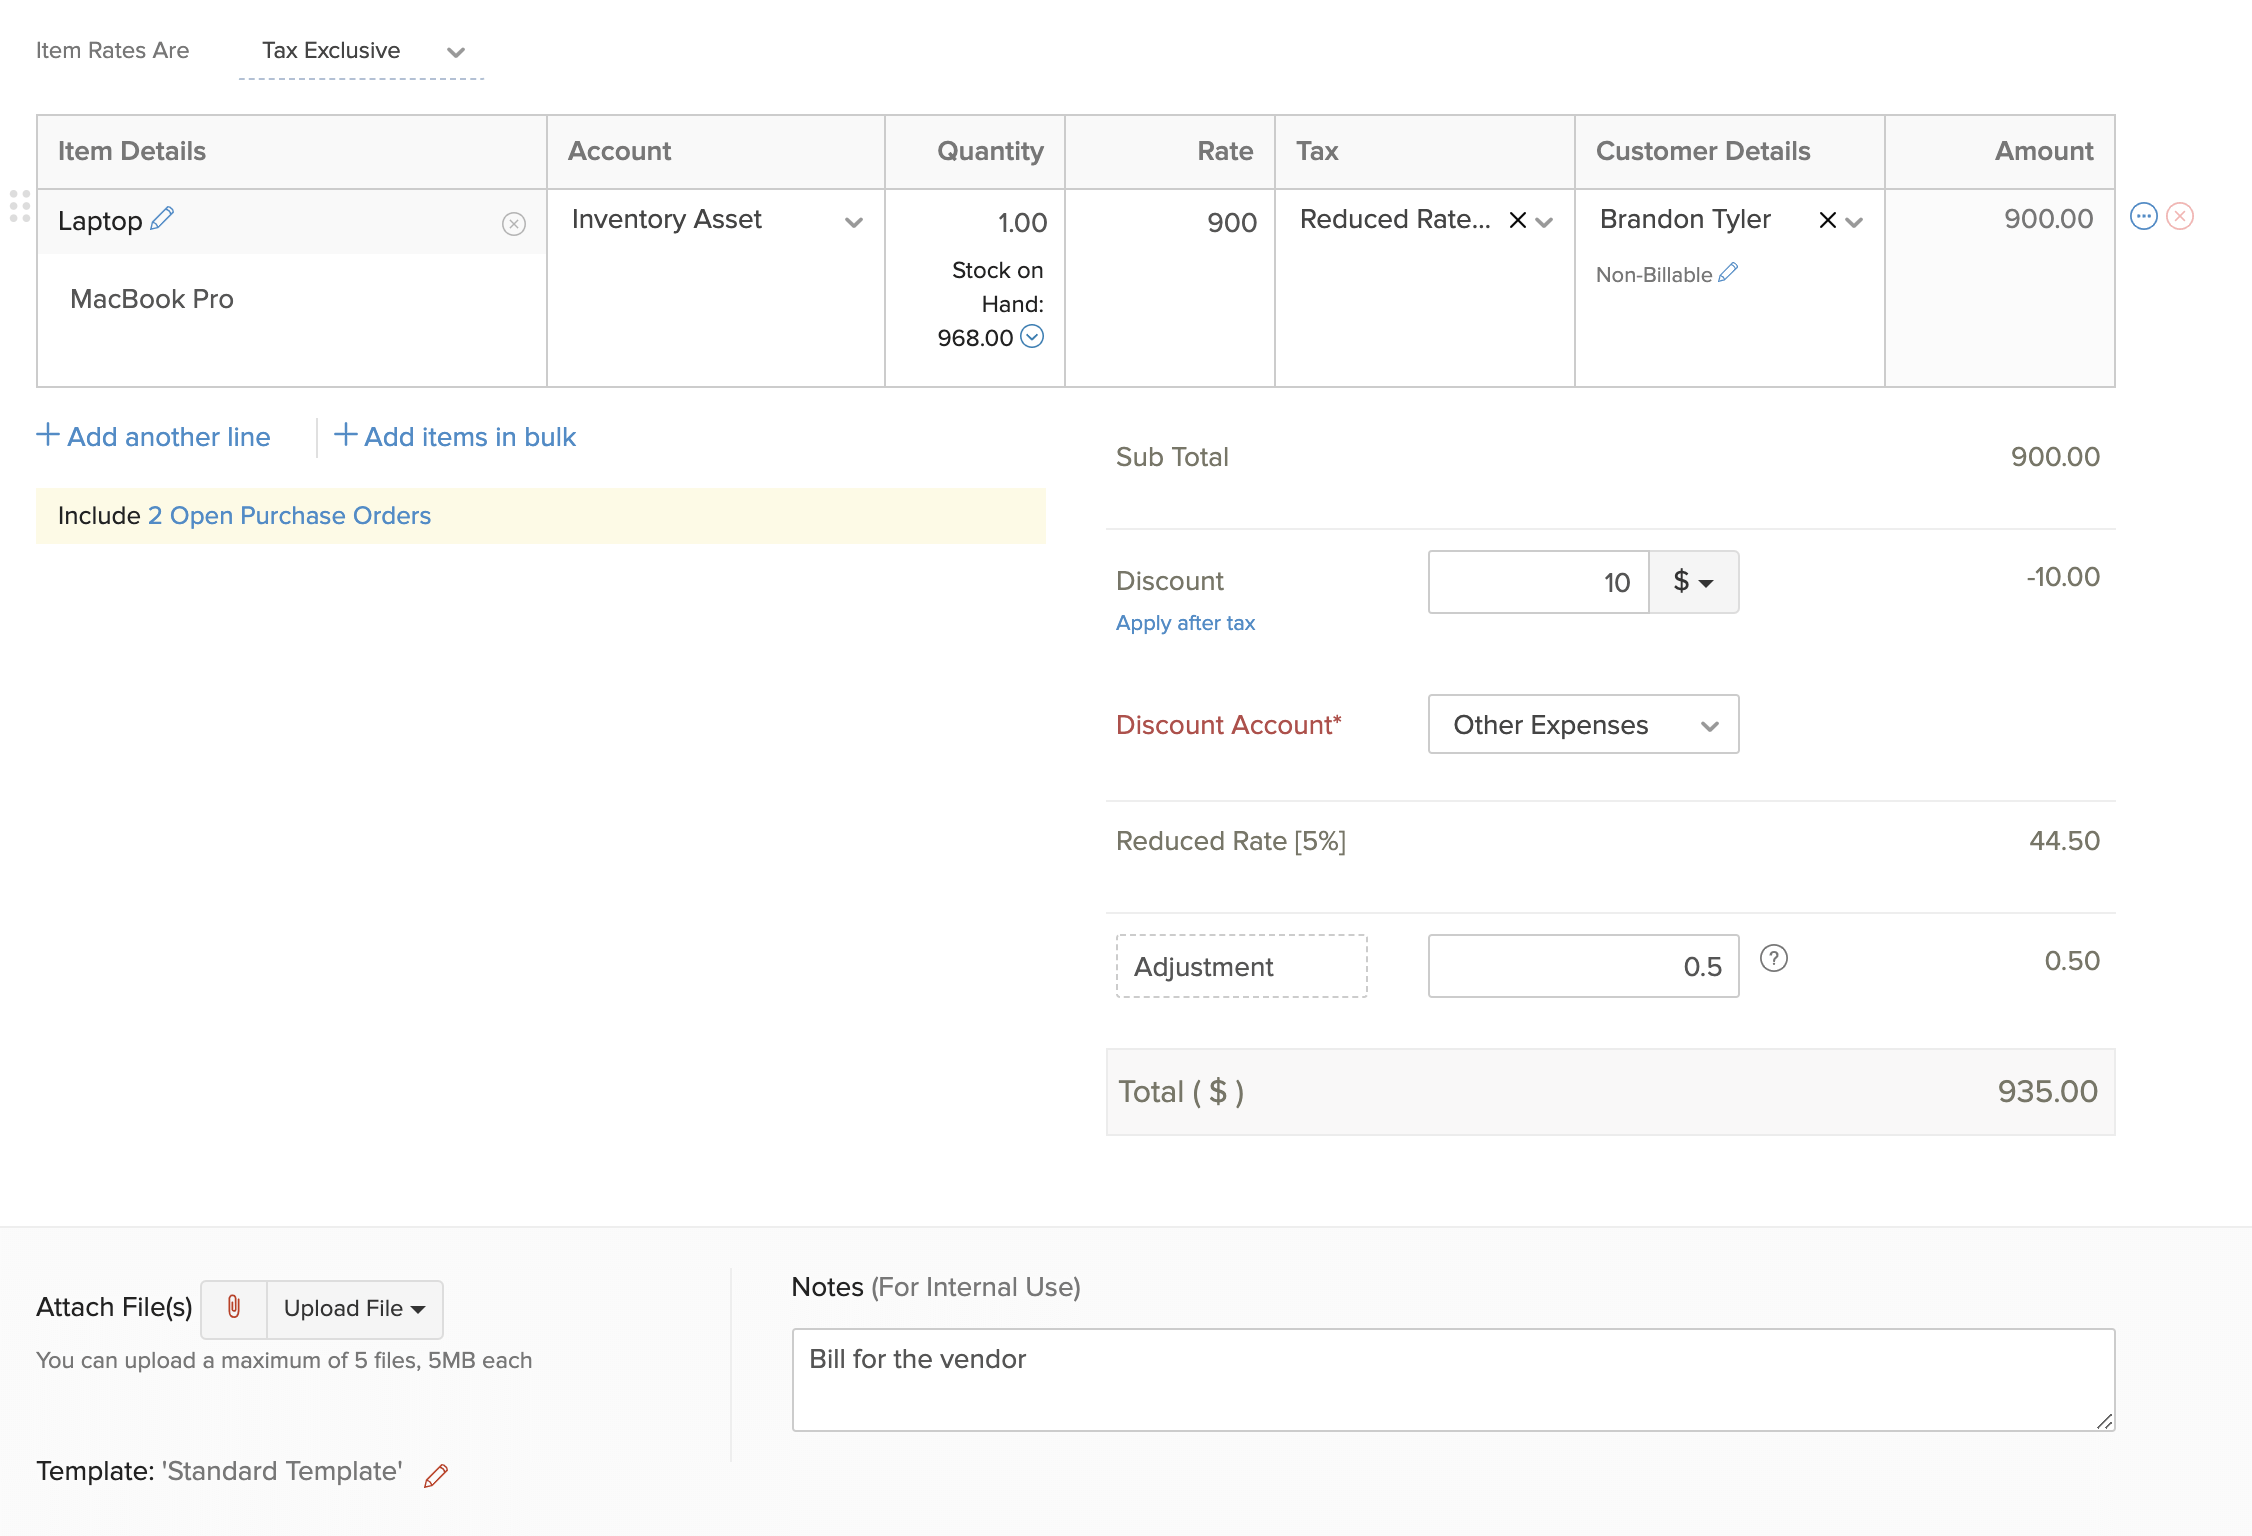
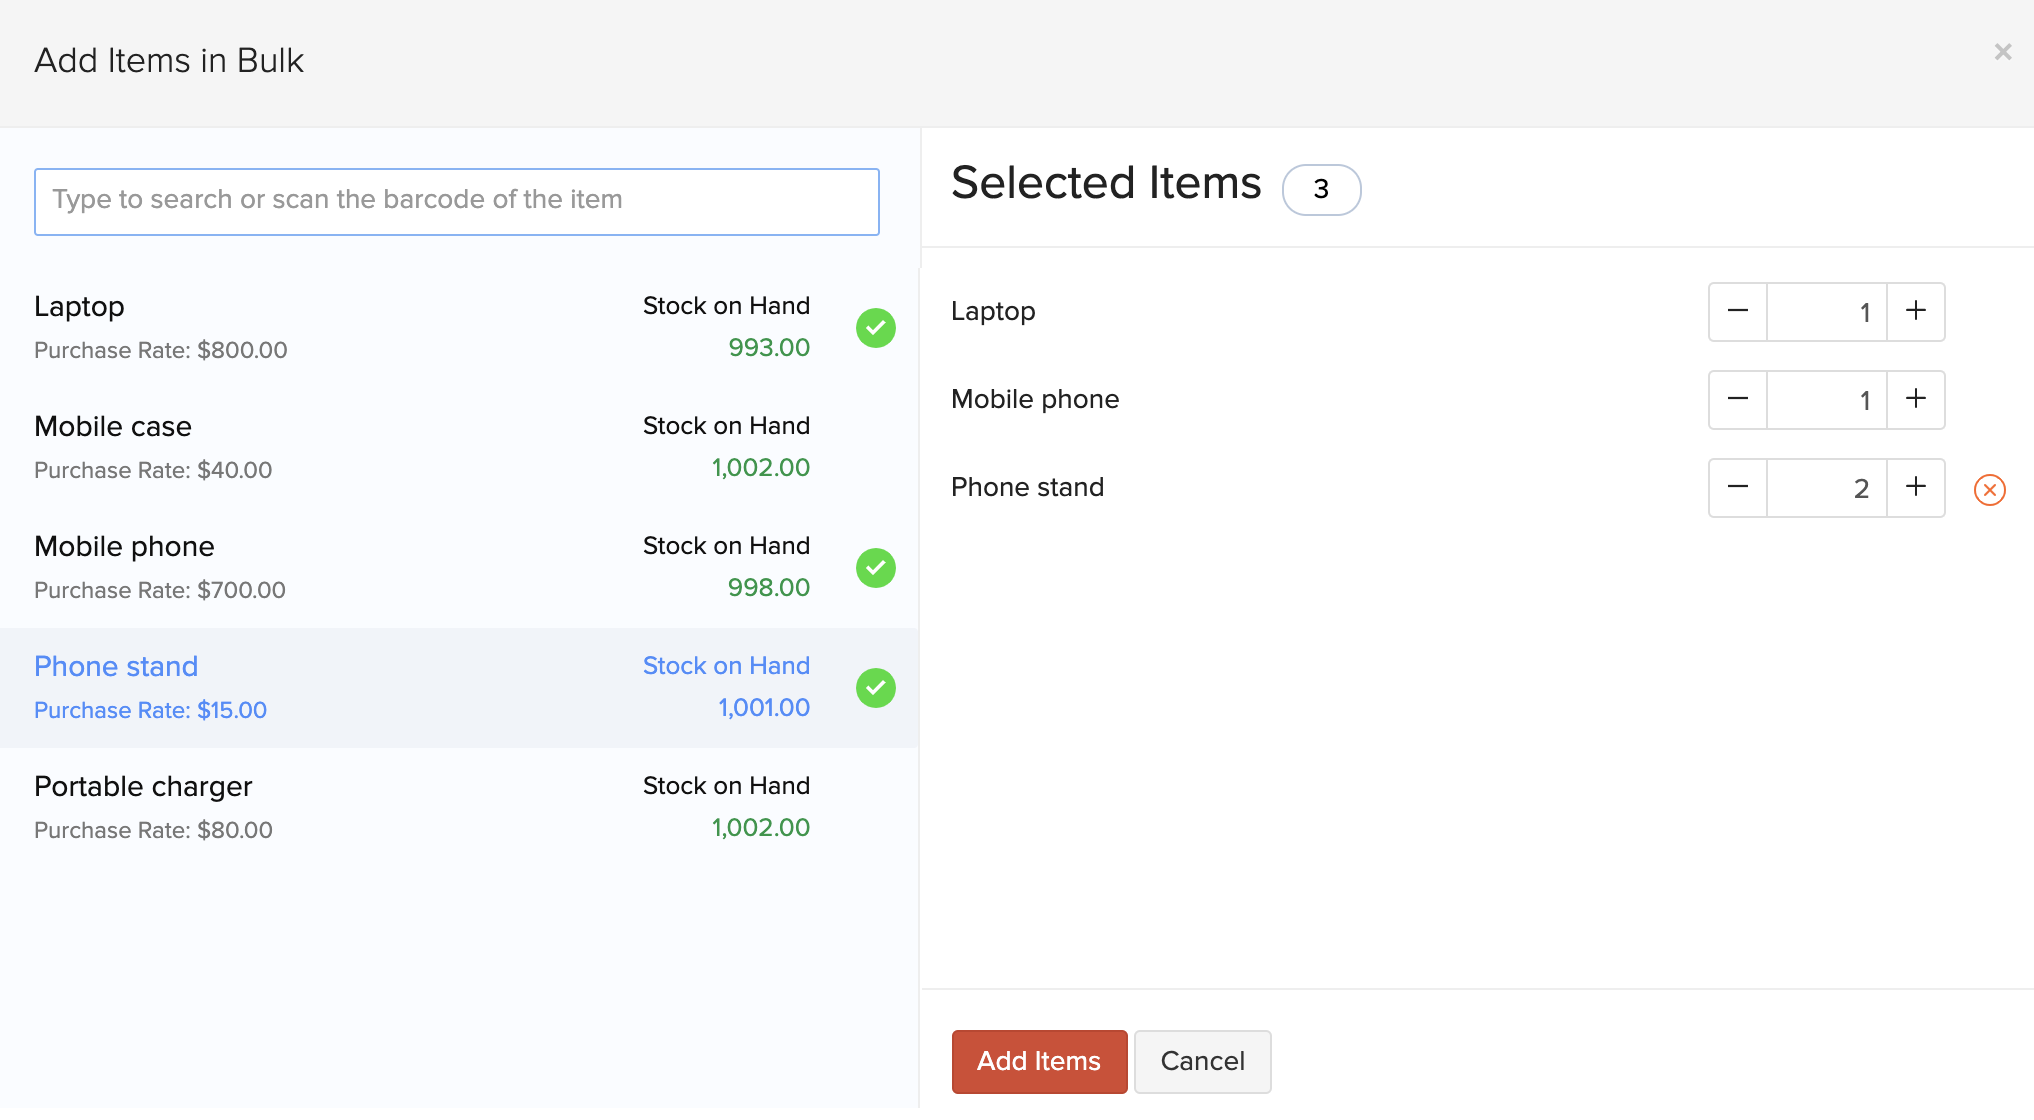
- Select the items for which you were billed. You can also add items in bulk by clicking the dropdown next to + Add another line and selecting + Add items in bulk.
- In this page, you can come across the following cases:
Customer Details
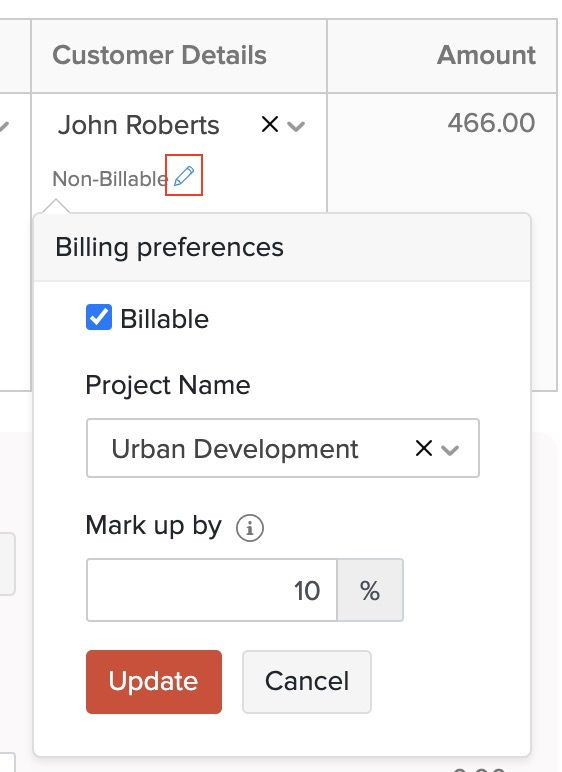
- Select the customer you want to associate to the line items in your bill. By default, the item will be Non-Billable to customer. If you make it Billable, then you can invoice the items and collect payments from them.
To make the item billable:
- Click the Edit icon, mark the Billable option.
- Select a Project to associate with the customer.
- If you had configured a default markup percentage for billable bills and expenses in Settings, the default percentage will be pre-filled. You can edit and change the markup percentage, if needed.
- Click Update
Open Purchase Orders
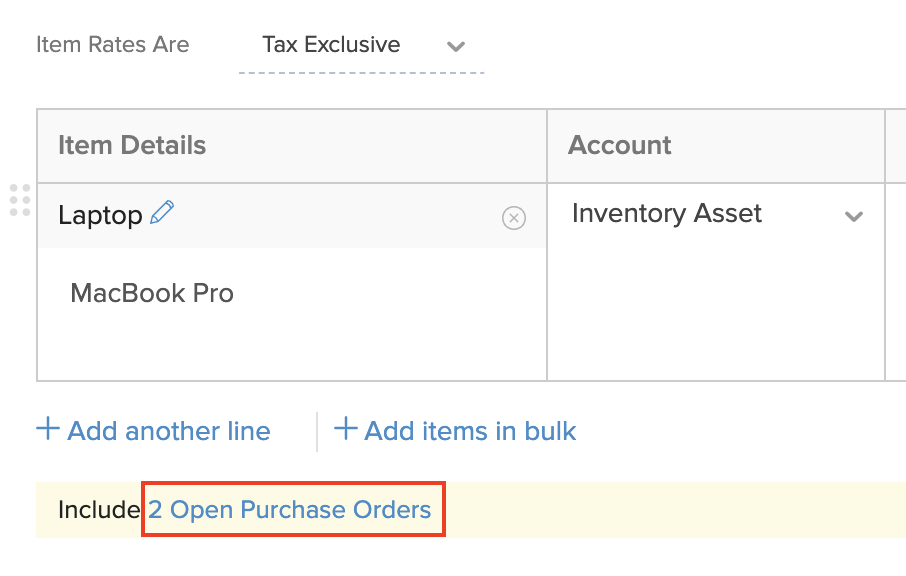
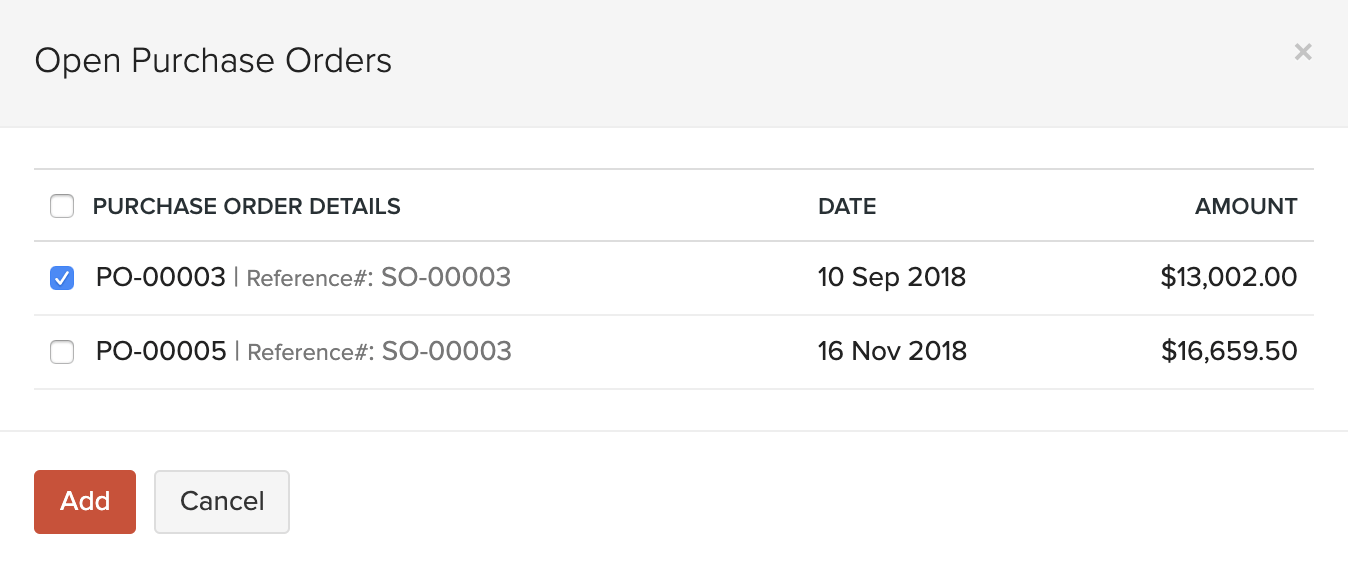
If you have any open purchase orders for a particular vendor, you can choose to include them in the bill. Click the purchase order option below the Item Details, select the purchase order(s) to be included, and click Add.
- Add notes and attach files to the bill.
- Select a template for your bill.
- After entering the required details, click Save as Draft or Save as Open.
View Journal
After you have recorded a bill, a corresponding journal will be created for it.
To view the journal:
- Go to the Purchases module in the left sidebar and select Bills.
- Select the desired bill.
- In the overview page, scroll down and click Display Journal (or) click More > View Journal.

Record Payments
There are 4 ways in which you can record payments made to your vendors.

Record Individual Payment
You can manually record payment for a bill. Here’s how:
- Go to the Purchases module in the left sidebar and select Bills.
- Select the bill for which you wish to record payment.
- Click the Record Payment button in the top right corner of the page.

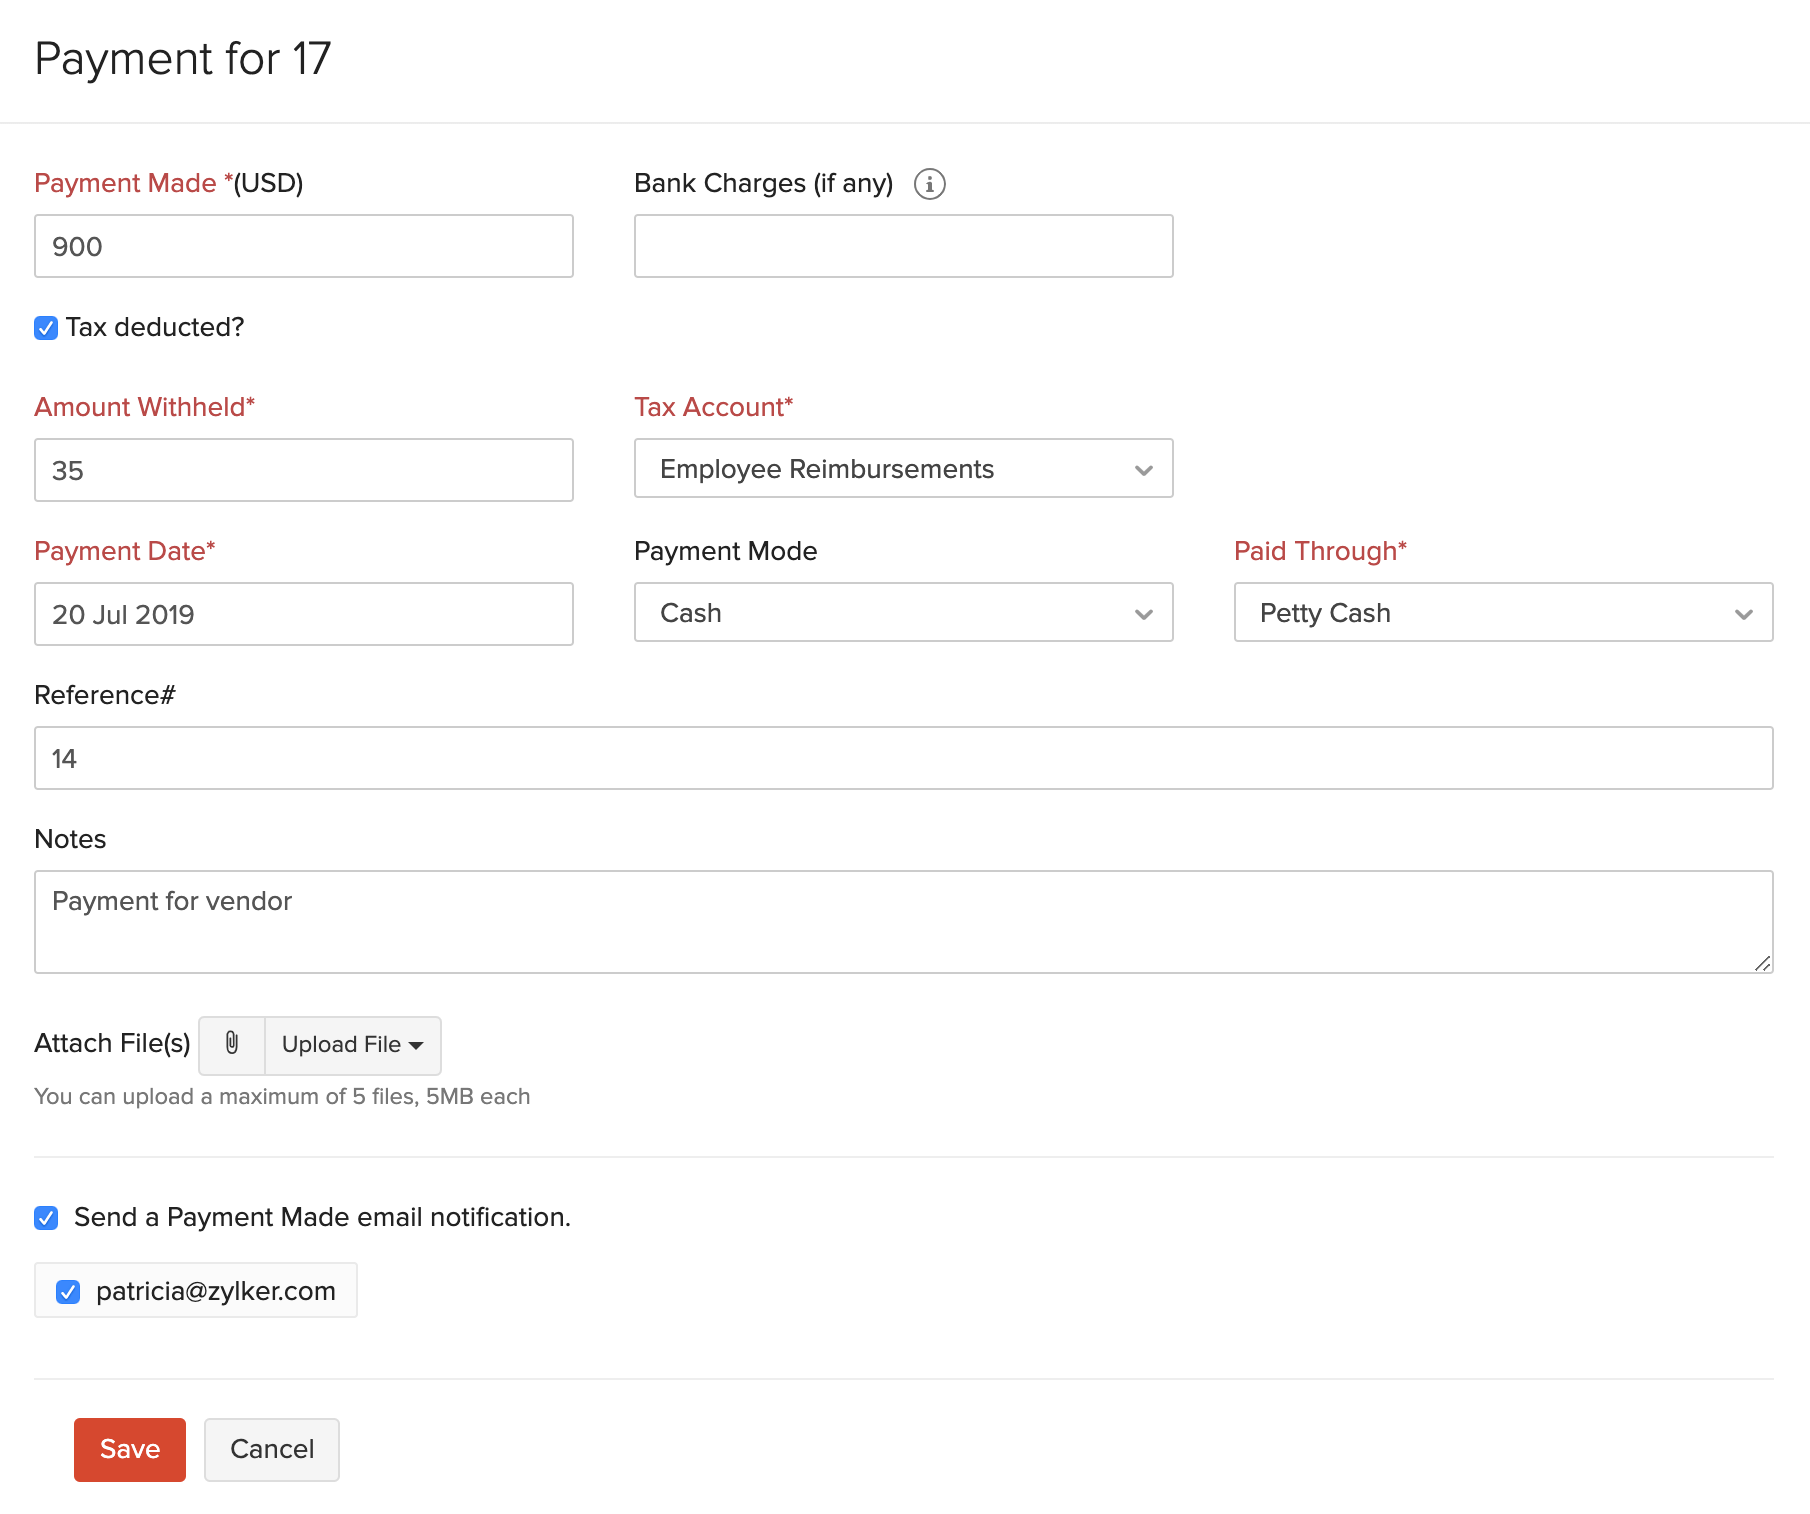
- Fill in the required details.
| Fields | Description |
|---|---|
| Payments Made | Enter the amount to pay the vendor. By default, the total amount is auto-populated. You can also choose to pay a part of the payment. |
| Tax Deducted | Mark this box if there is any tax deducted while making payment to the vendor. Enter the Amount Withheld and the Tax Account which tracks this tax. |
| Payment Date | Enter the date you make the bill payment. |
| Payment Mode | Choose from the different payment modes or configure one of your own. |
| Paid Through | Choose the account which tracks this payment. |
- Add Notes and Attach Files to the payment.
- If you wish to send an email notification about the payment to your vendor, mark the box Send a Payment Made email notification and select the vendor’s email address.
- Click Save.
Record Bulk Payments
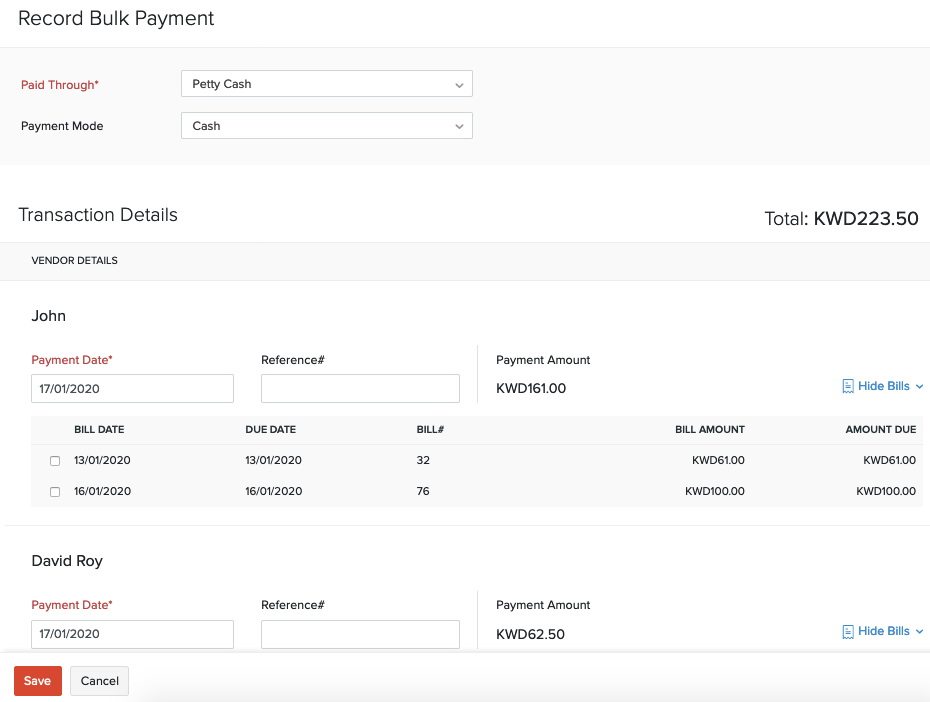
Filter and record payments you’ve made towards various bills at once using bulk payments. You can record payments made to the same vendor or multiple vendors. Here’s how you can:
- Go to the Purchases module in the left sidebar and select Bills.
- Filter your bills by their status. You can choose either Open, Overdue, Unpaid or Partially Paid filter by clicking the All Bills filter.

- Select the bills for which you would like to record the payment.
- Click the More dropdown and select Record Bulk Payment.

- Select the Paid Through account and Payment Mode.
- Enter the dates on which you made the payment to various vendors.
- Enter the Reference Number, if any. The Transaction ID can be used as a reference number if you’ve made the payment online.
- Verify and select the bills for which you’ve made the payment by marking the checkbox.
- Click Save.
Payments Through Checks
You can record payment for a bill through a check.
To record payment:
- Go to the Purchases module in the left sidebar and select Bills.
- Select a bill for which you want to record payment via check.
- Click the dropdown next to Record Payment.
- Select Pay via Check.
- Fill in the required details.
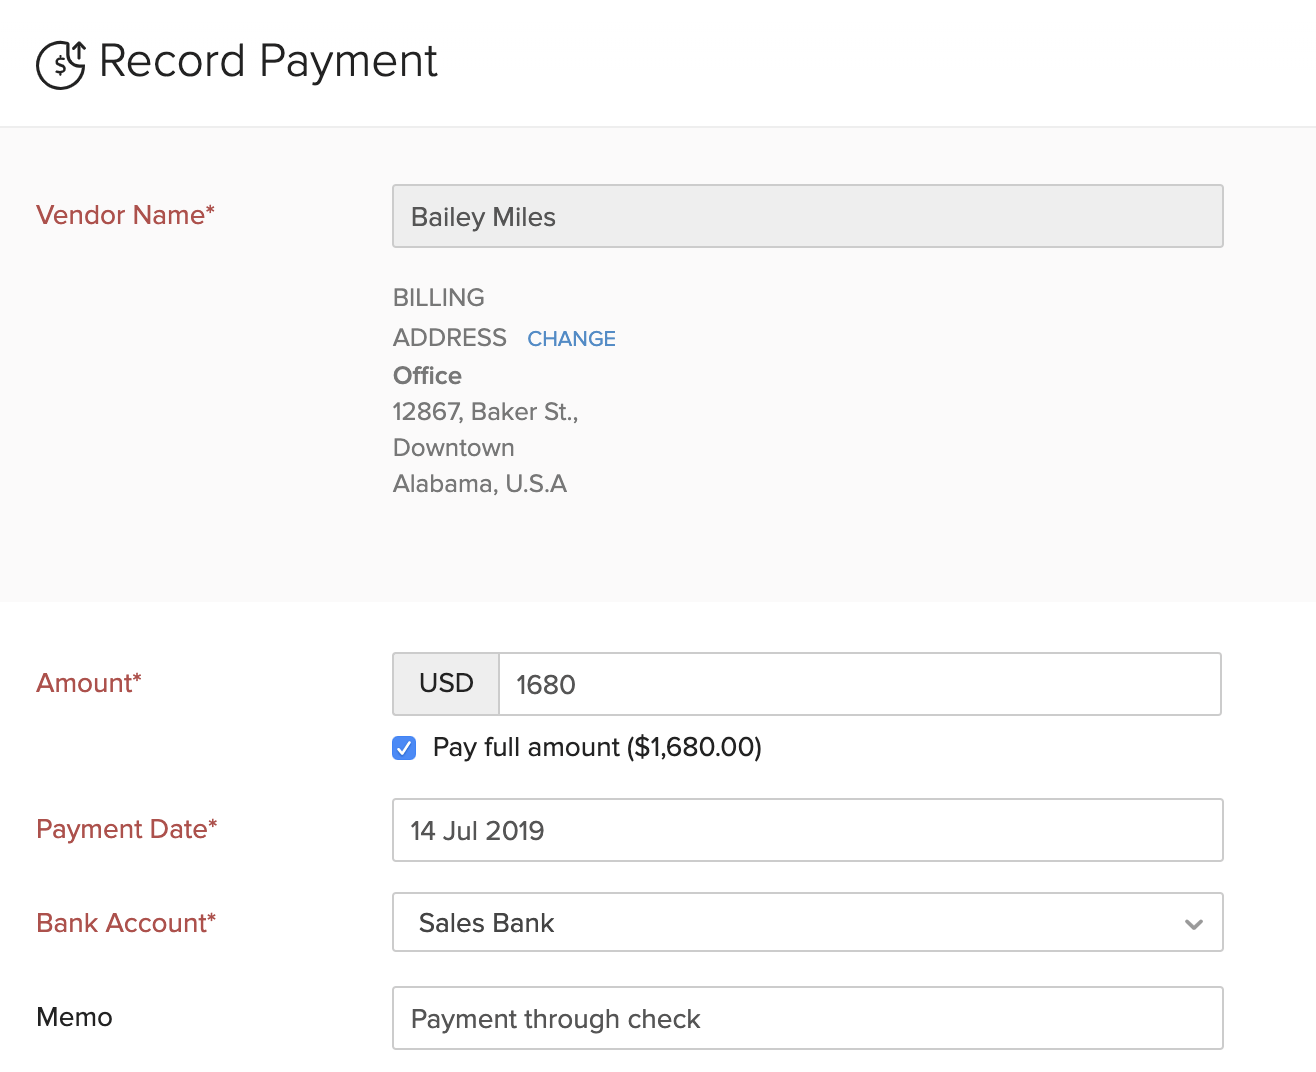
| Fields | Description |
|---|---|
| Vendor Name | The vendor to whom you’re making the payment. |
| Amount | Enter the total amount to be paid to the vendor. Check the box Pay full amount to record the full outstanding payment for the vendor. |
| Bank Account | Select the bank account which tracks the payment through the check. |
| Memo | Enter a brief description about the check. |
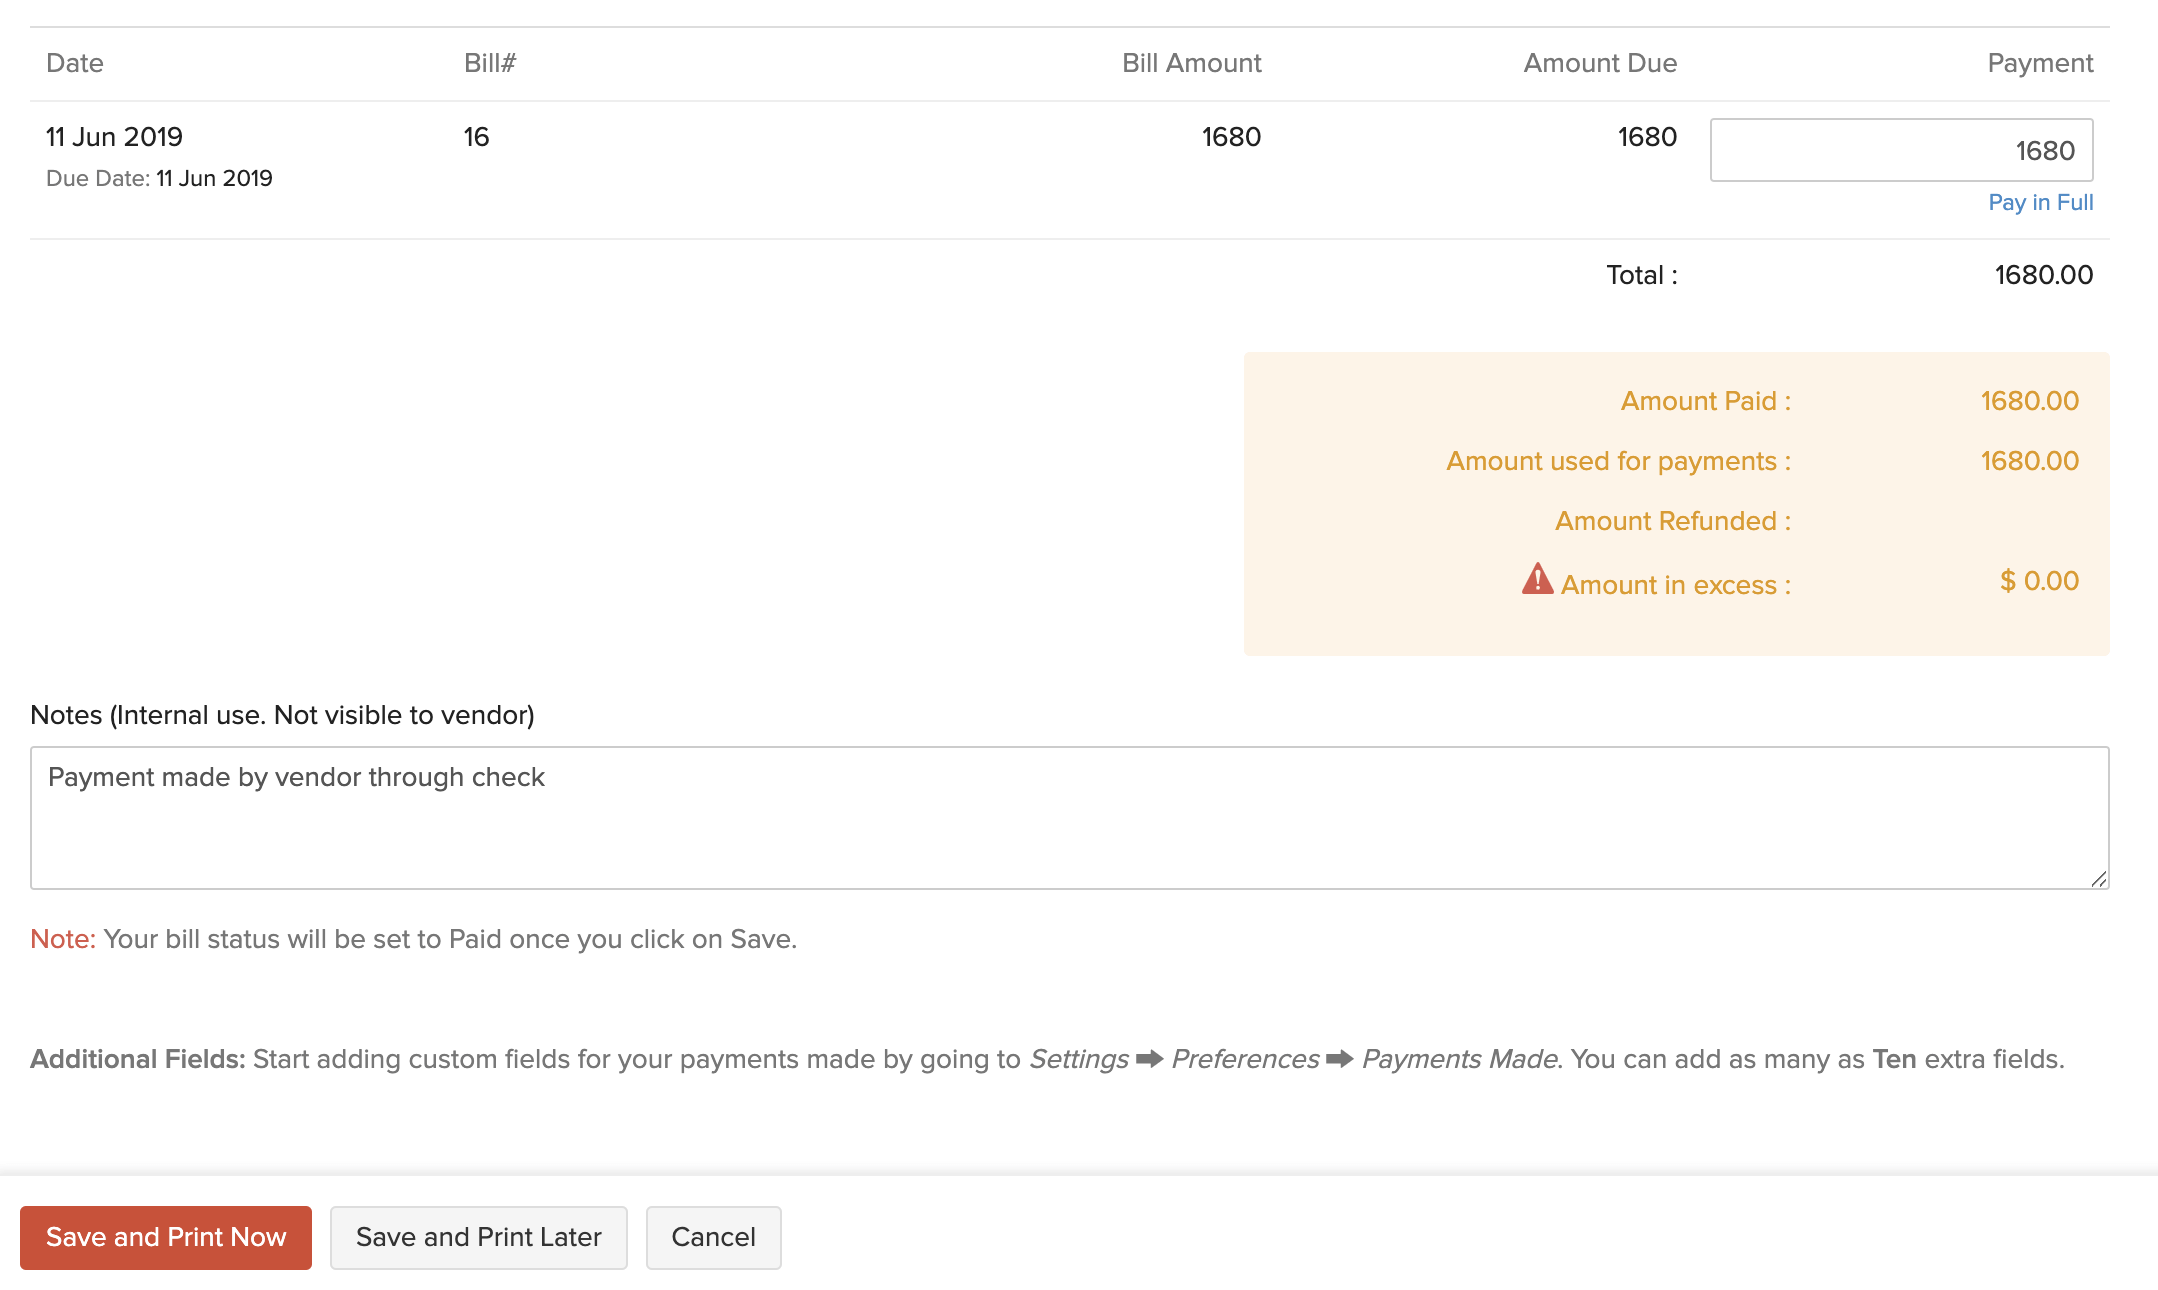
- Enter the amount you wish to record in the Payment section.
- Enter any Notes about the payment.
- Click Save and Print Now or Save and Print Later.
If you decide to print the check later, it will be in the To Be Printed status.
Payment Through ACH
You can record payment for any bill through Automated Clearing House (ACH) payments. For this, you need to set up Forte by going to Settings > Intergrations > Vendor Payments and clicking Set up Now next to Forte.
To record payment:
- Go to Purchases on the left sidebar and select Bills.
- Select a bill for which you want to record payment through ACH.
- Click the dropdown next to Record Payment.
- Select Pay via ACH.
- Enter the required details.
- Click Proceed.

View Recorded Payments
You can view all the payments that you have recorded for a bill. Here’s how:
- Go to the Purchases module in the left sidebar and select Bills.
- Select the bill for which you have recorded a payment.
- Click the Payments Made tab on top of the page.

From here, you can hover over the payment and click the Edit or Delete icon to perform the desired action.
Import Bills
If you already have a list of all the bill of your vendors, you can import them into Zoho Books in the CSV, TSV or XLS format.
To know the format of the import, i.e. the columns and data to be included in the import file, you can download the sample import file which we’ll be looking at in the steps below.
- Go to the Purchases module in the left sidebar and select Bills.
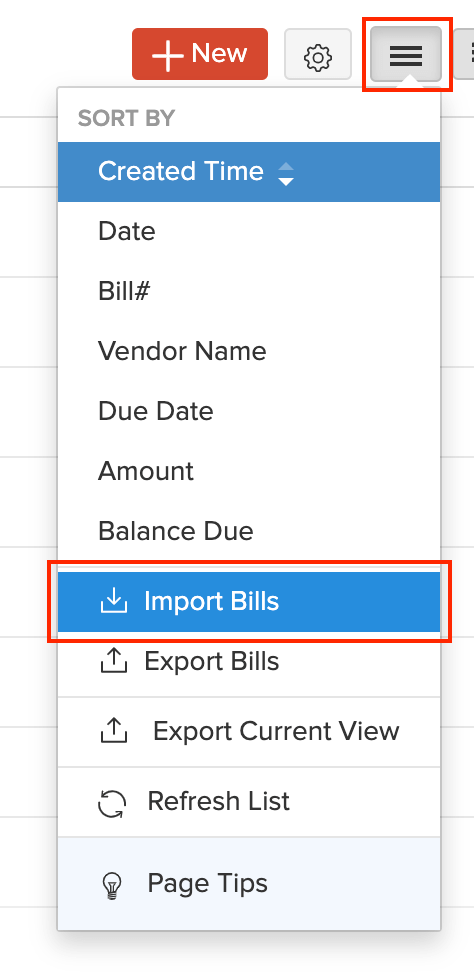
- Click the More icon in the top right corner of the page.
- Select Import Bills.
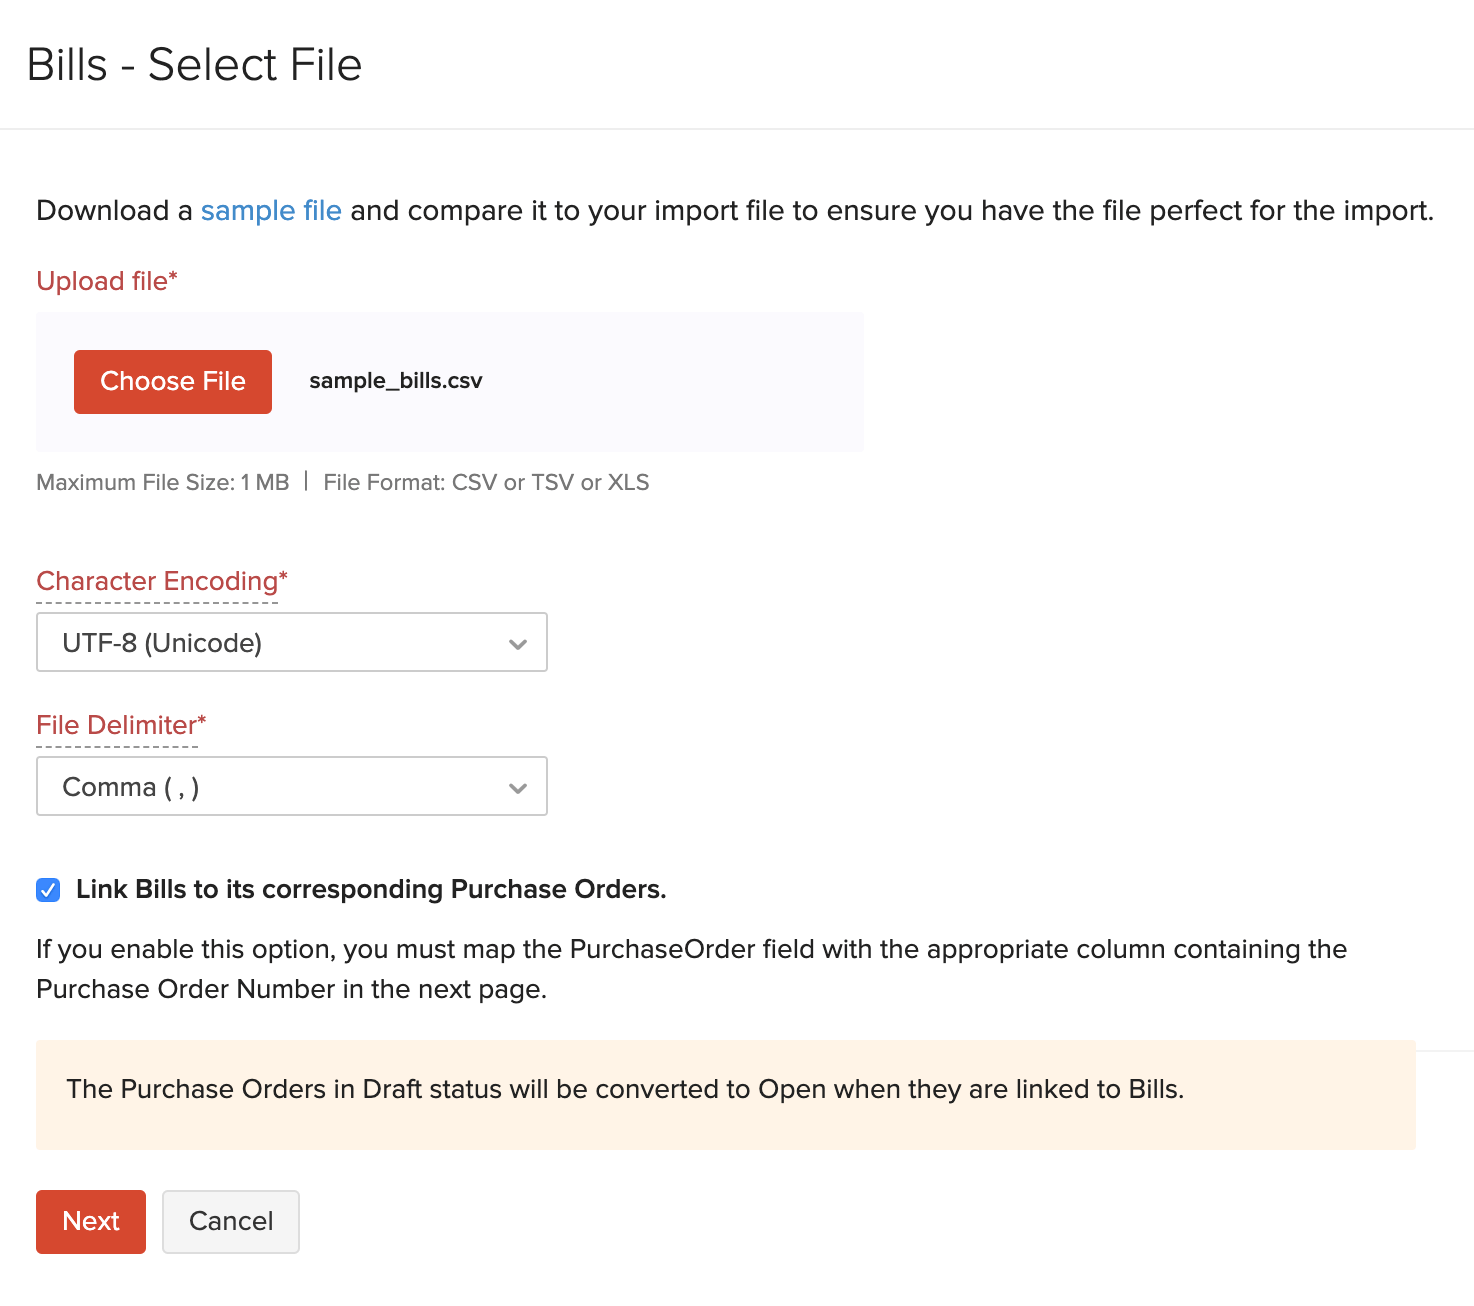
- Click the Choose File button under Upload file. You can download the sample file for your reference by clicking sample file.
- You can Link bills to its corresponding Purchase Orders by marking this box.
Insight: The file size cannot be more than 1 MB.
- Choose the Character Encoding and File Delimiter for your file.
Insight: Character Encoding is used to pair numbers with characters. By default, the Unicode Transformation Format (UTF-8) encoding is used which supports a wide range of characters that go beyond 8 bits.
Insight: The Field Delimiter is used to separate two values in a row. While importing bills, the default file delimiter is comma (,) .
- Click Next.
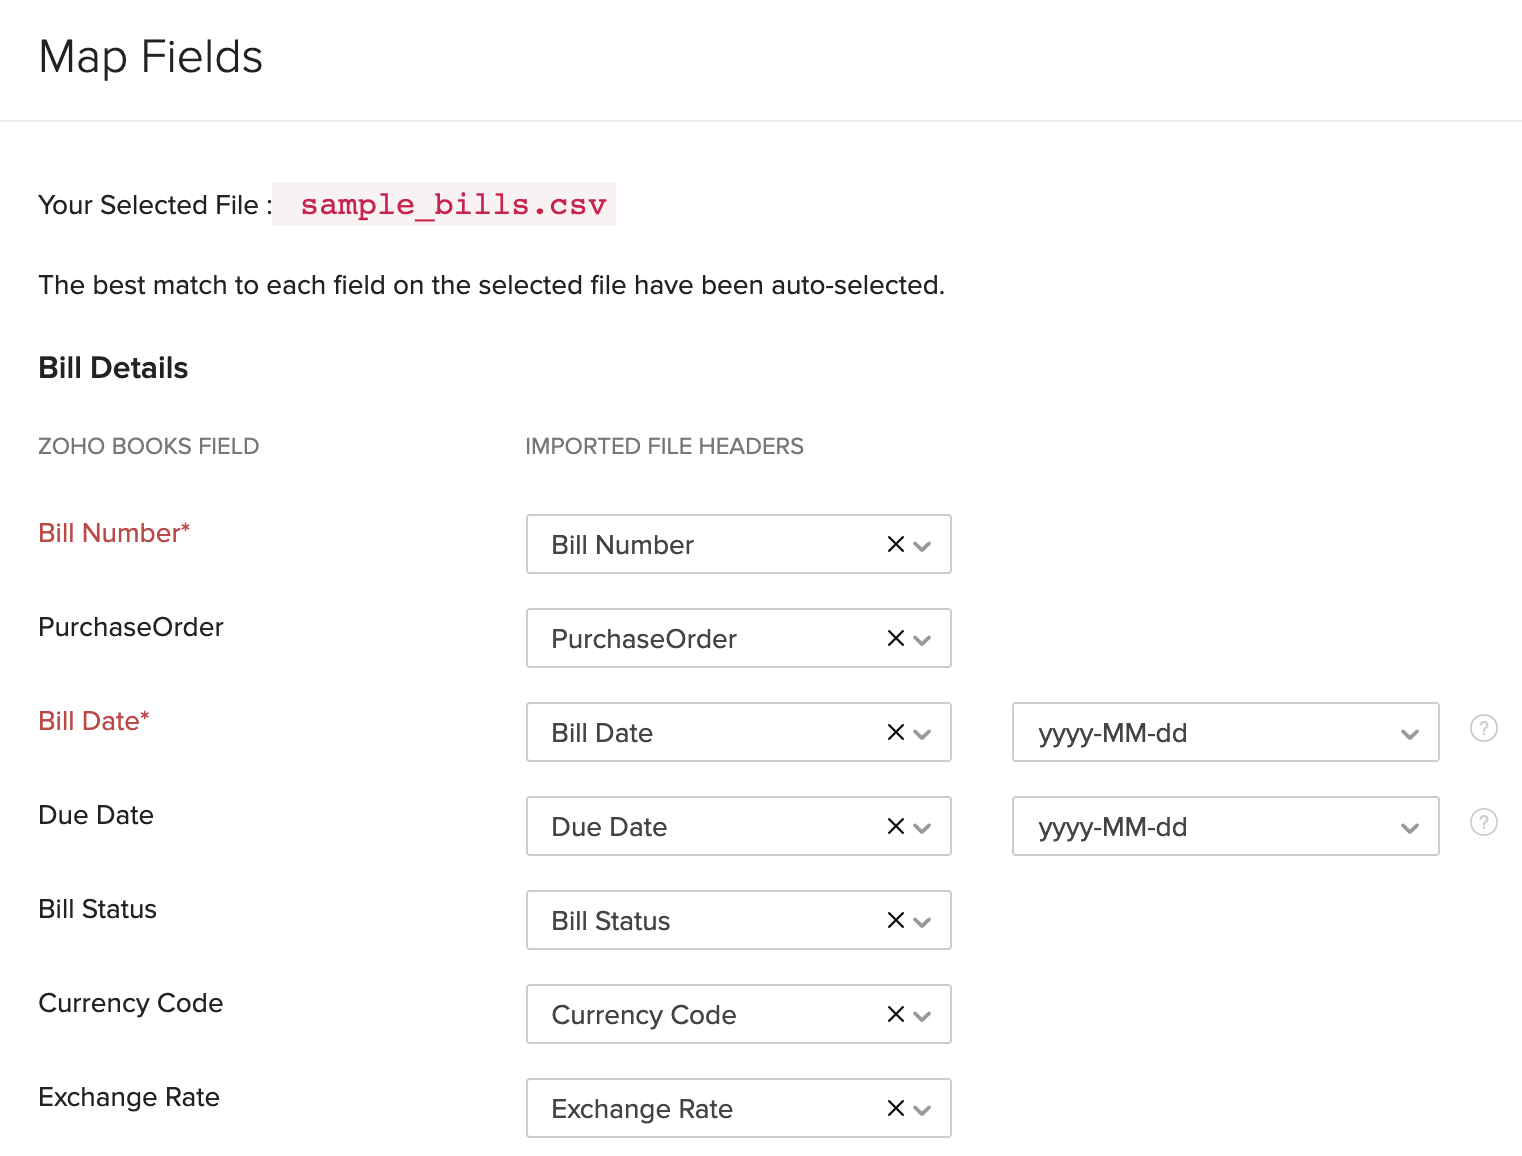
- Ensure that all the fields are mapped correctly in the Map Fields page.
- Mark the box Save these selections for use during future imports if you want to use the similar import format next time.
- Click Next.
- In the Preview window, click Import.
Next >
Functions in Bills
Related


 Yes
Yes