Online Reimbursements via HSBC
If you’re an organisation that wants to reimburse your employees’ business expenses at regular intervals, then this integration will ease your reimbursement process. With the HSBC integration, you can directly reimburse your employees from within Zoho Expense and help them receive timely repayments for the business expenses they’ve incurred.
Note: Reimbursements via HSBC can be done only in the India edition of Zoho Expense.
How Do Online Reimbursements via HSBC Work
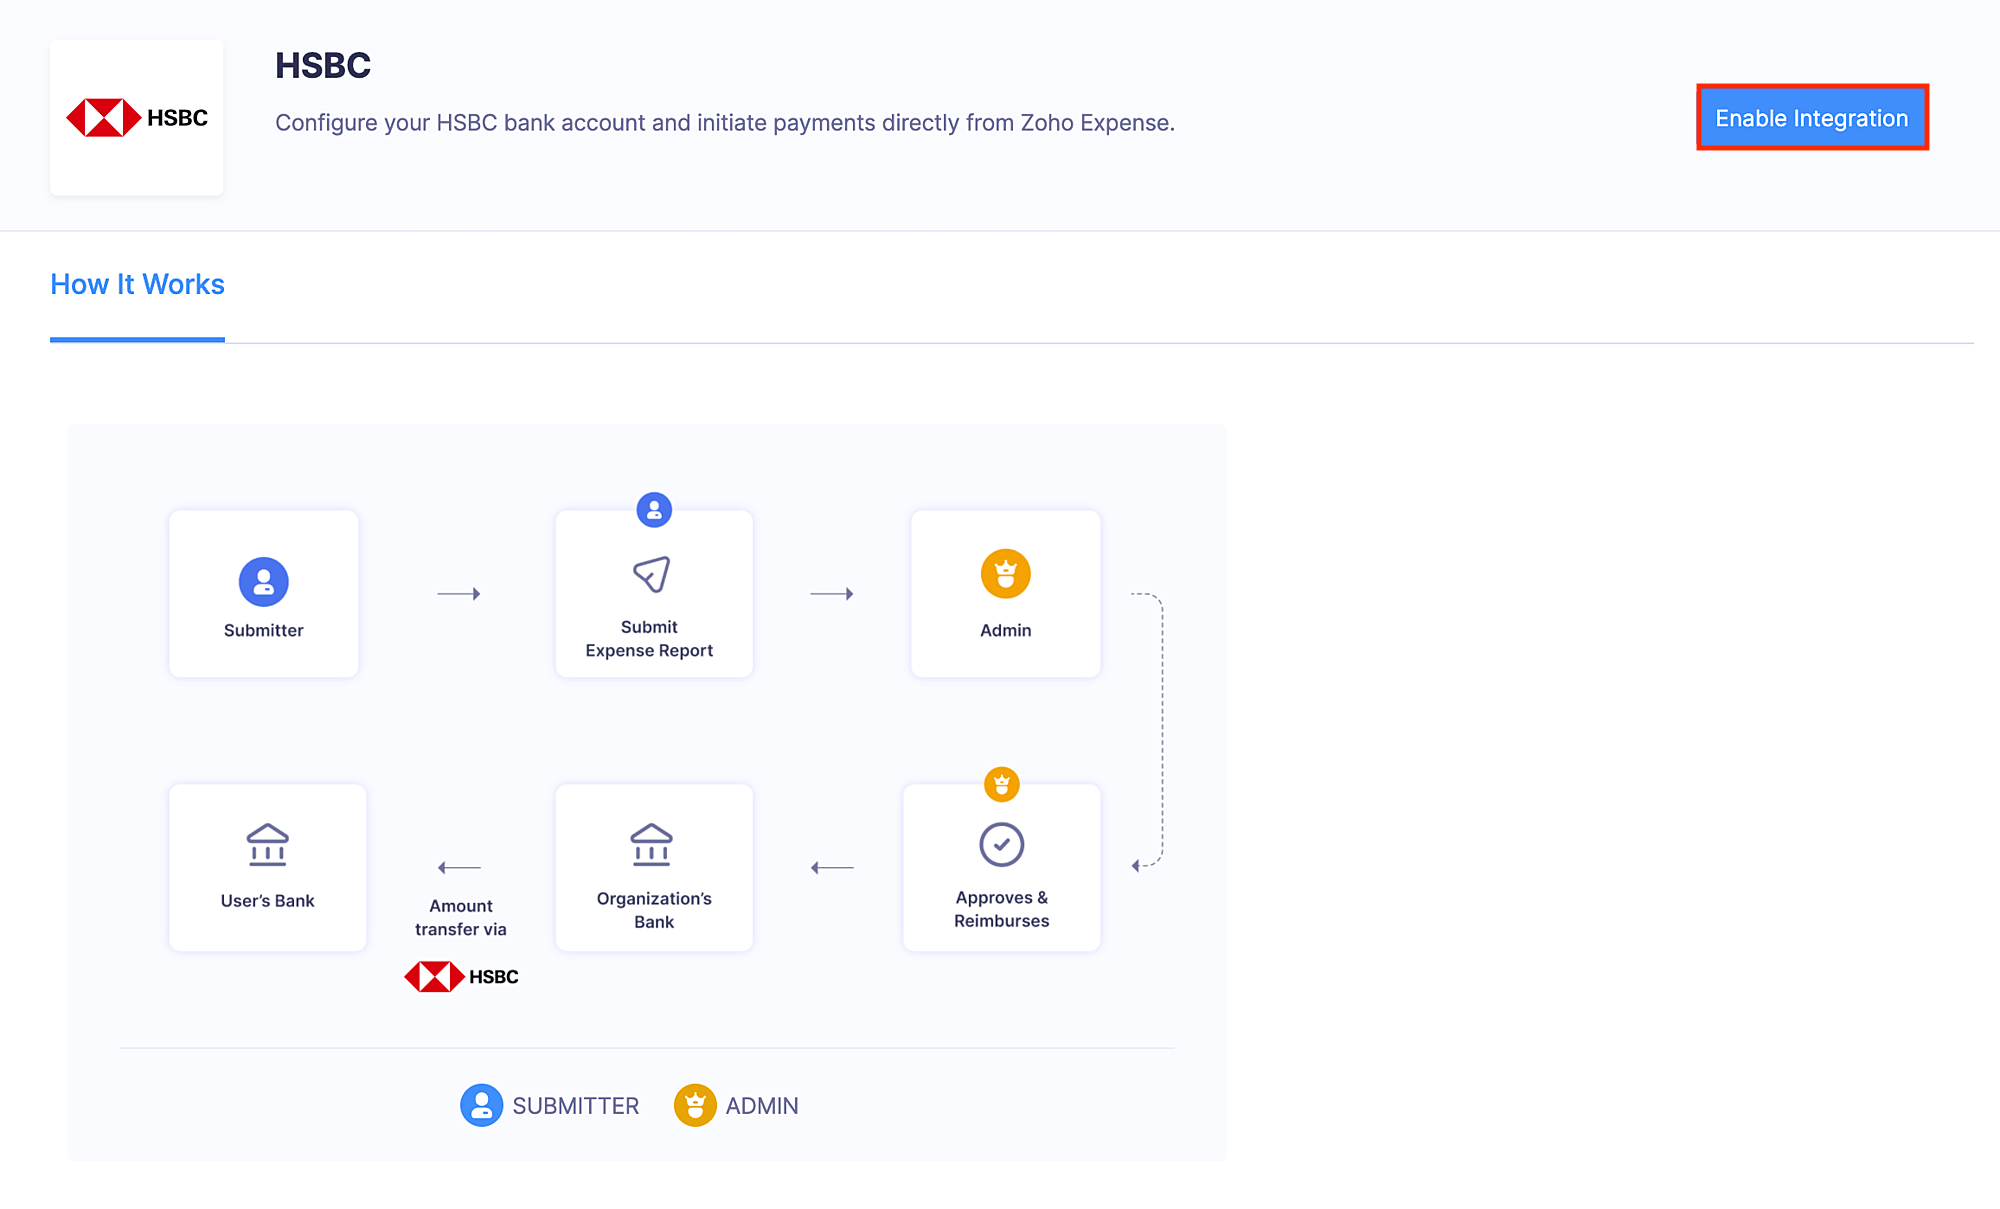
To reimburse your employees via HSBC, set up your HSBC account in Zoho Expense by entering the credentials received from HSBC. Once you save these credentials in Zoho Expense, employees can add their bank accounts to which they want to receive their reimbursements.
Now, you are all set to make reimbursements via HSBC. You can go to the Admin View and reimburse the employees from the Reports section. The time taken for employees to receive their reimbursements depends on the type of transaction chosen.
Enable the Integration
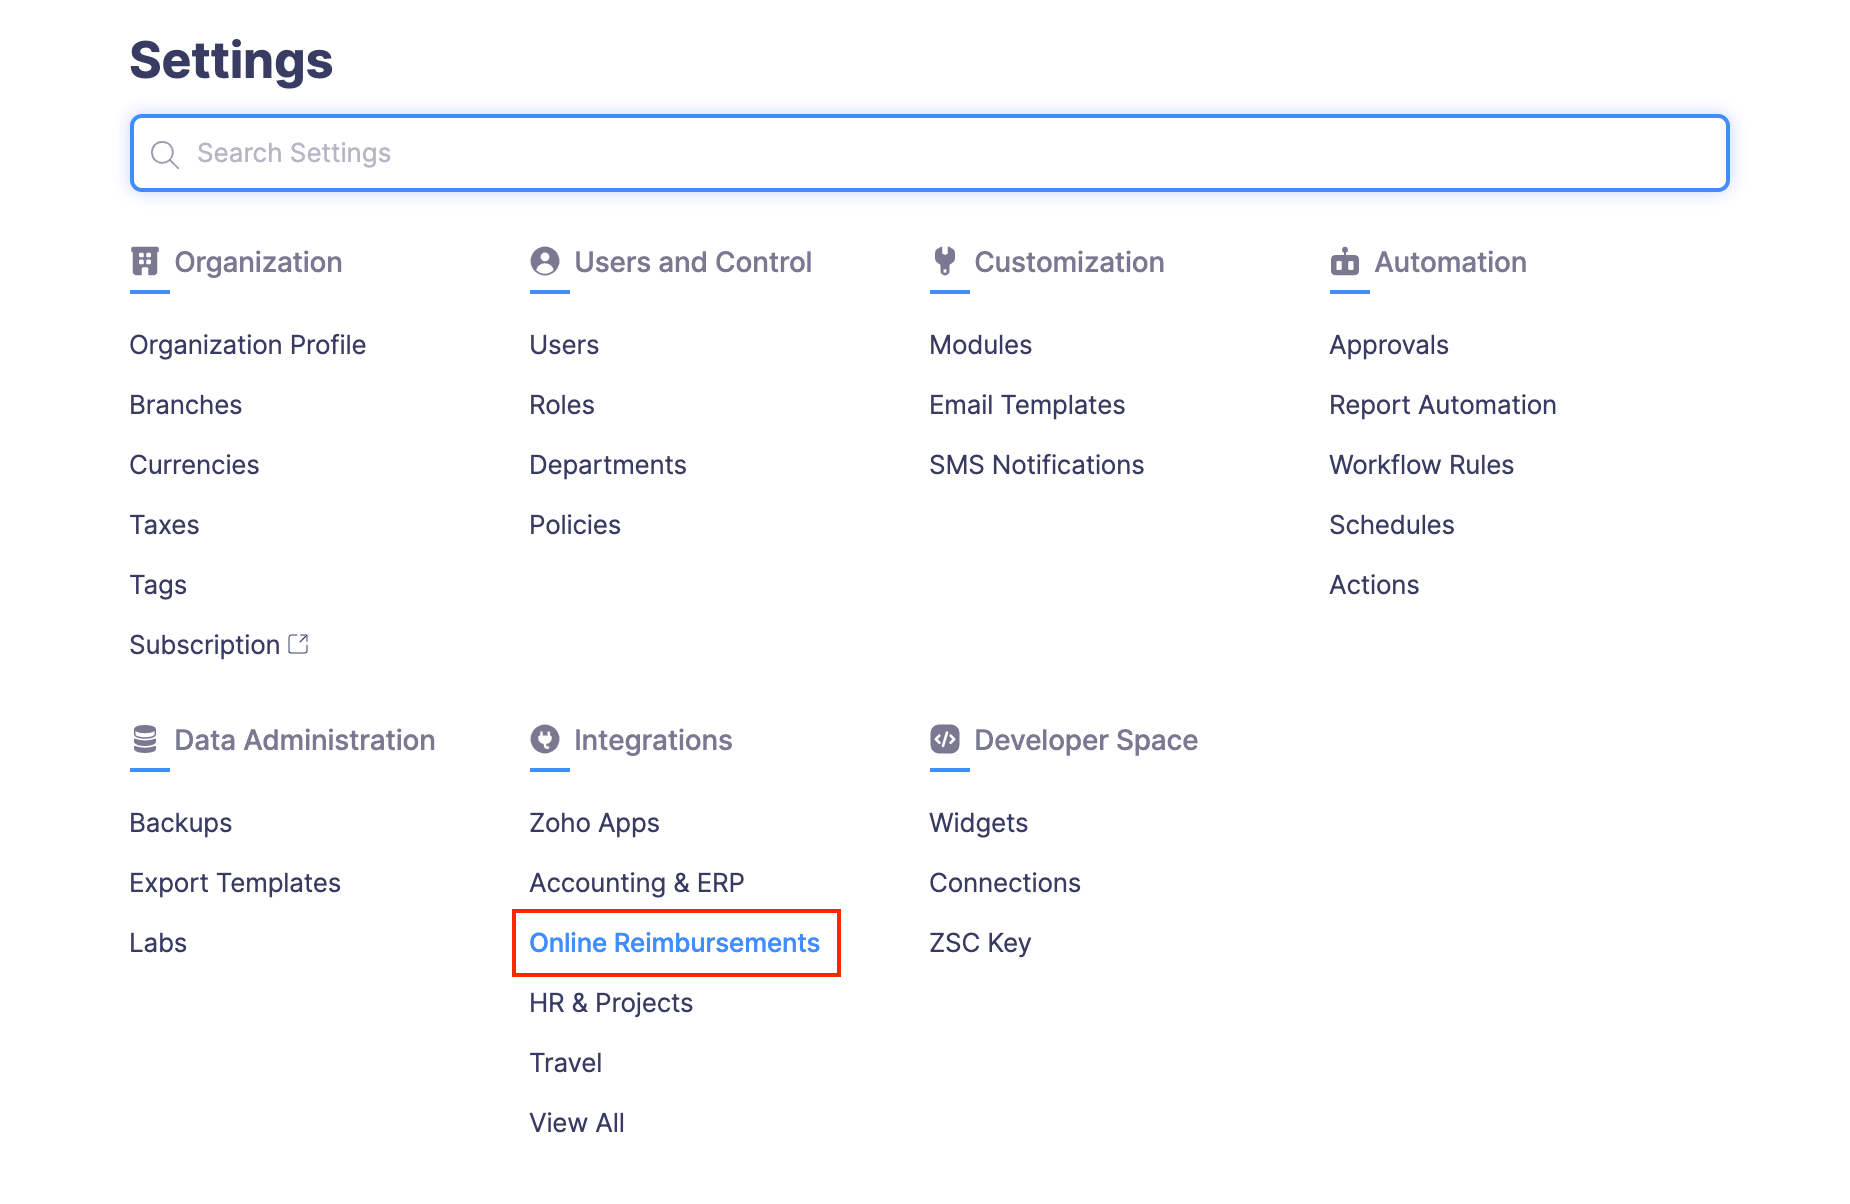
- Click Admin View.
- Go to Settings on the left sidebar.
(OR)
Click the Gear icon in the top right corner. - Click Online Reimbursements under Integrations.
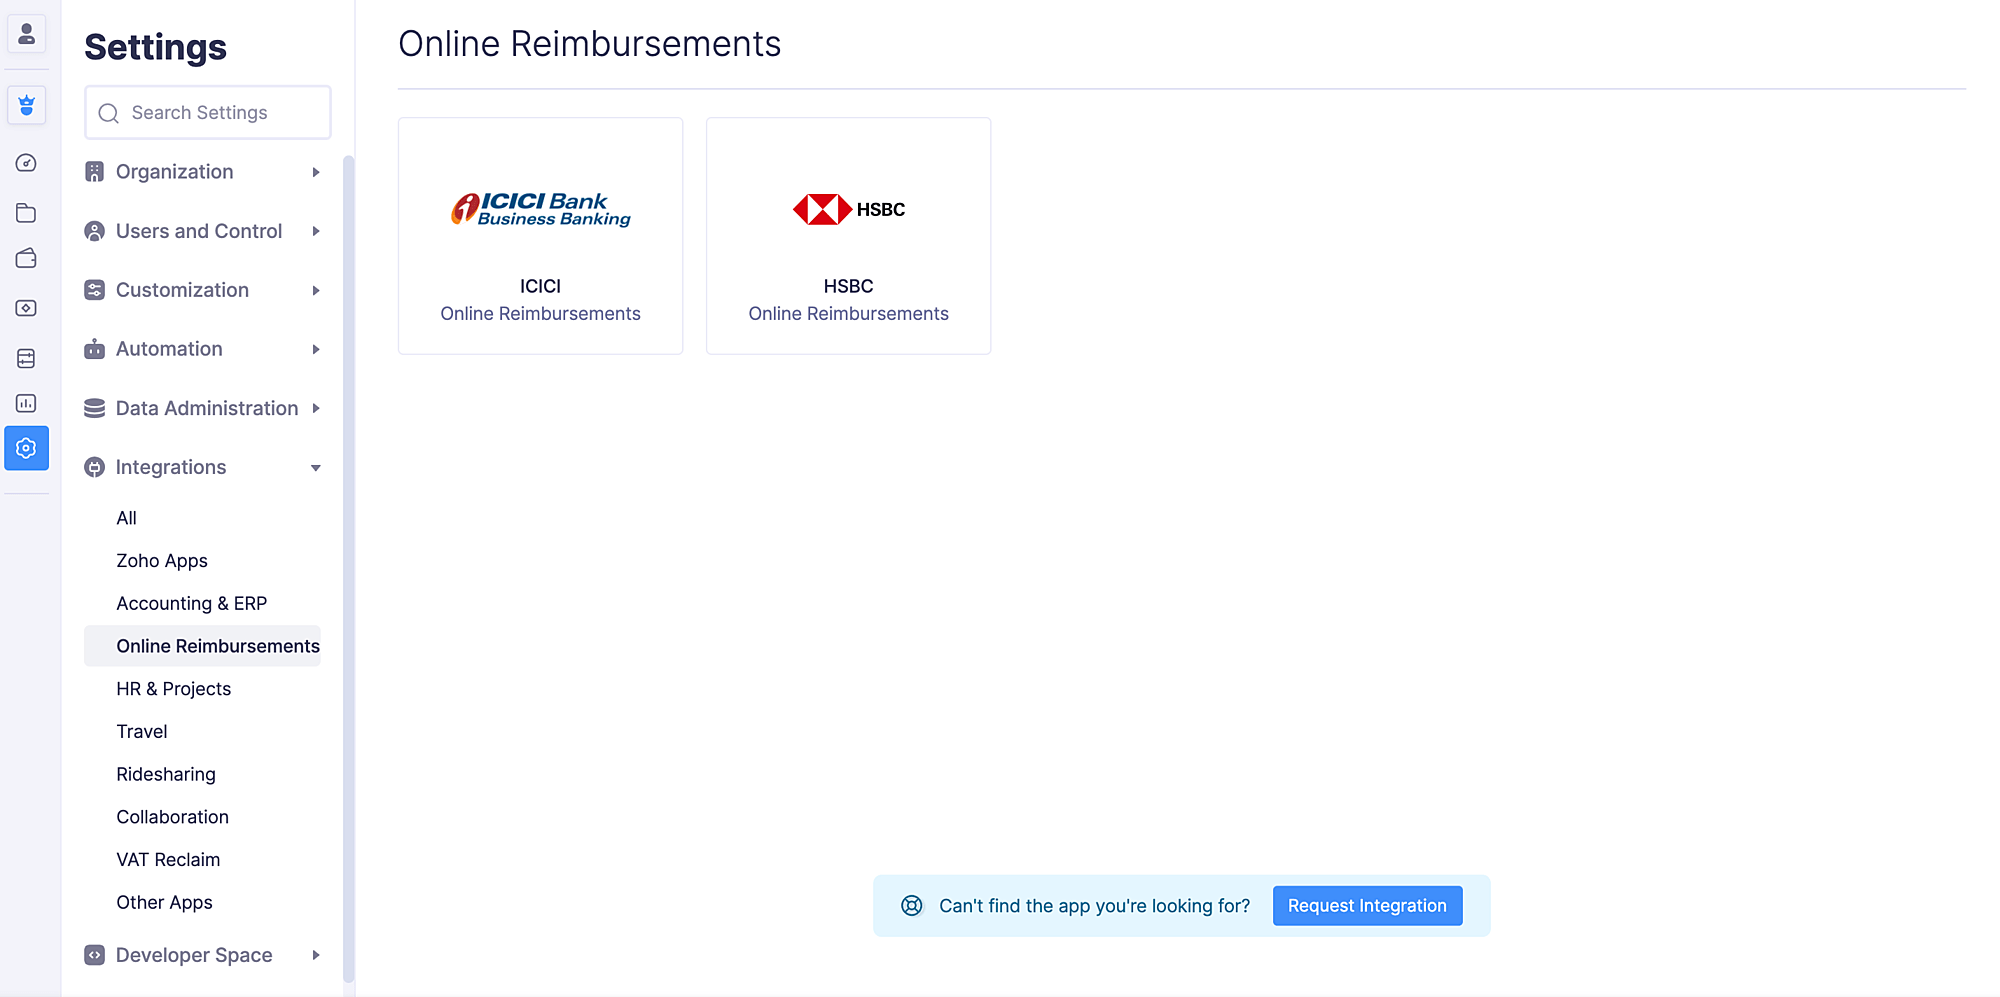
- Click the HSBC card.
- Click Enable Integration.
- If you had already received the credentials for the integration from HSBC, click Yes.
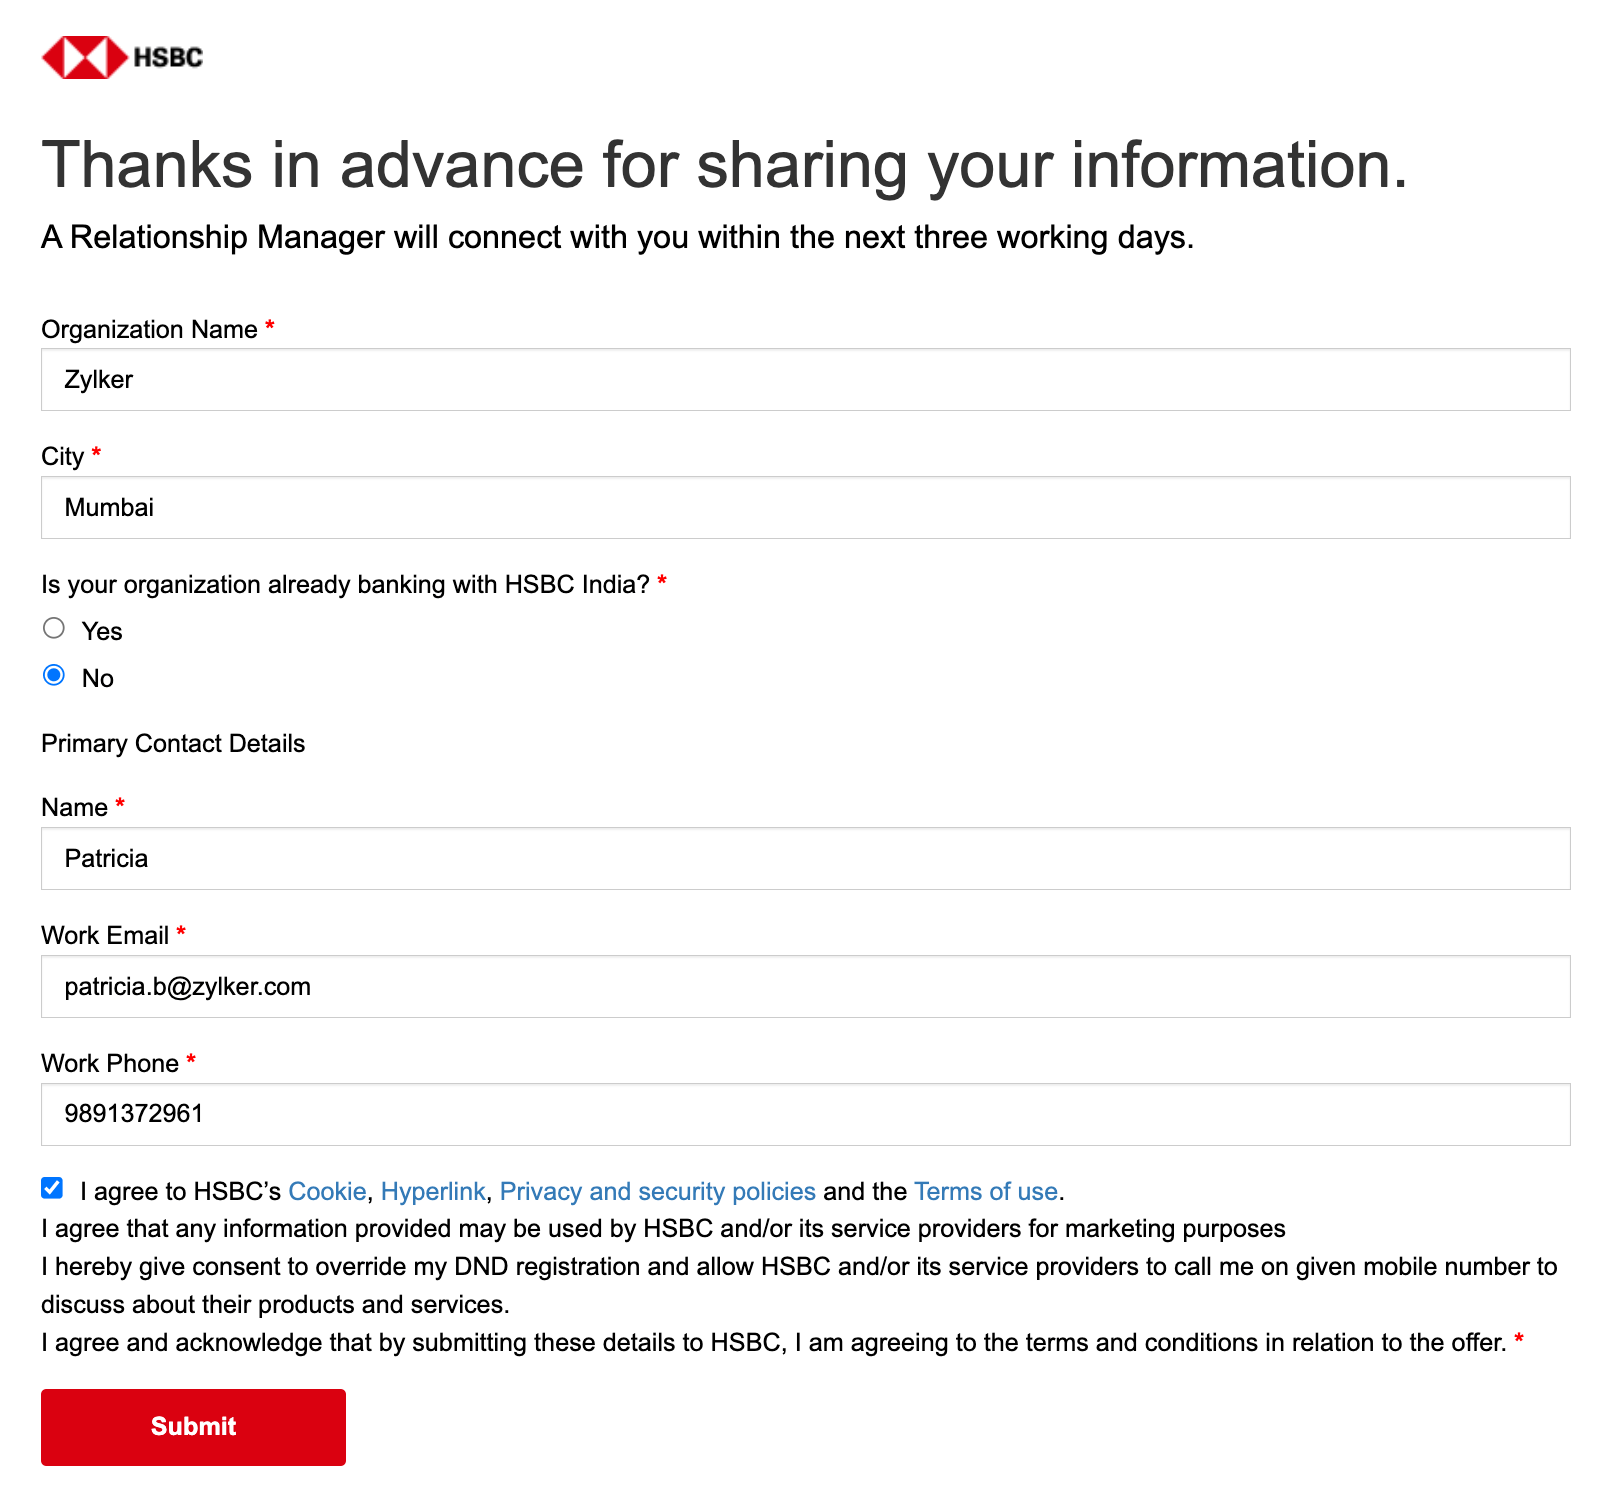
- If you don’t have the necessary credentials to integrate Zoho Expense with HSBC, click No and select Open HSBC Contact Form.
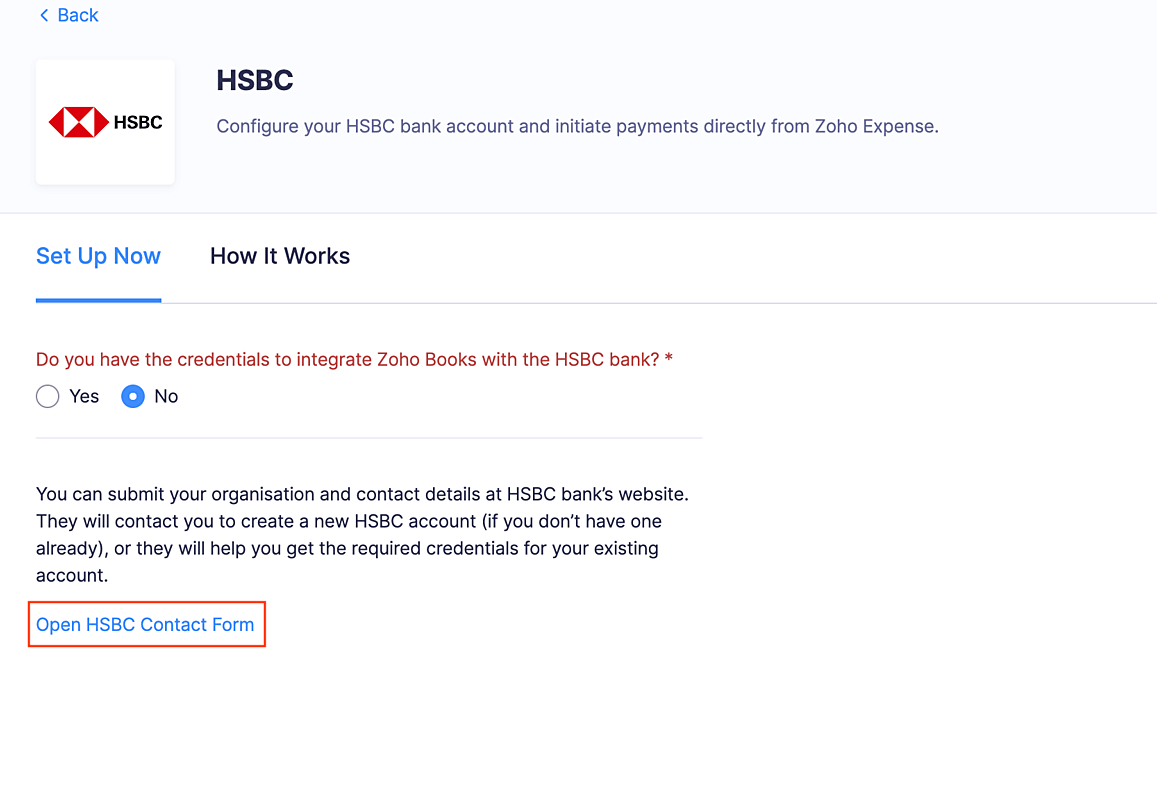
- In the form that opens, you can provide your organisation and contact details. A relationship manager will get in touch with you to help you create a new HSBC corporate account and provide the credentials required for the integration. If you already have a HSBC account, they will help you receive the credentials required for the integration.
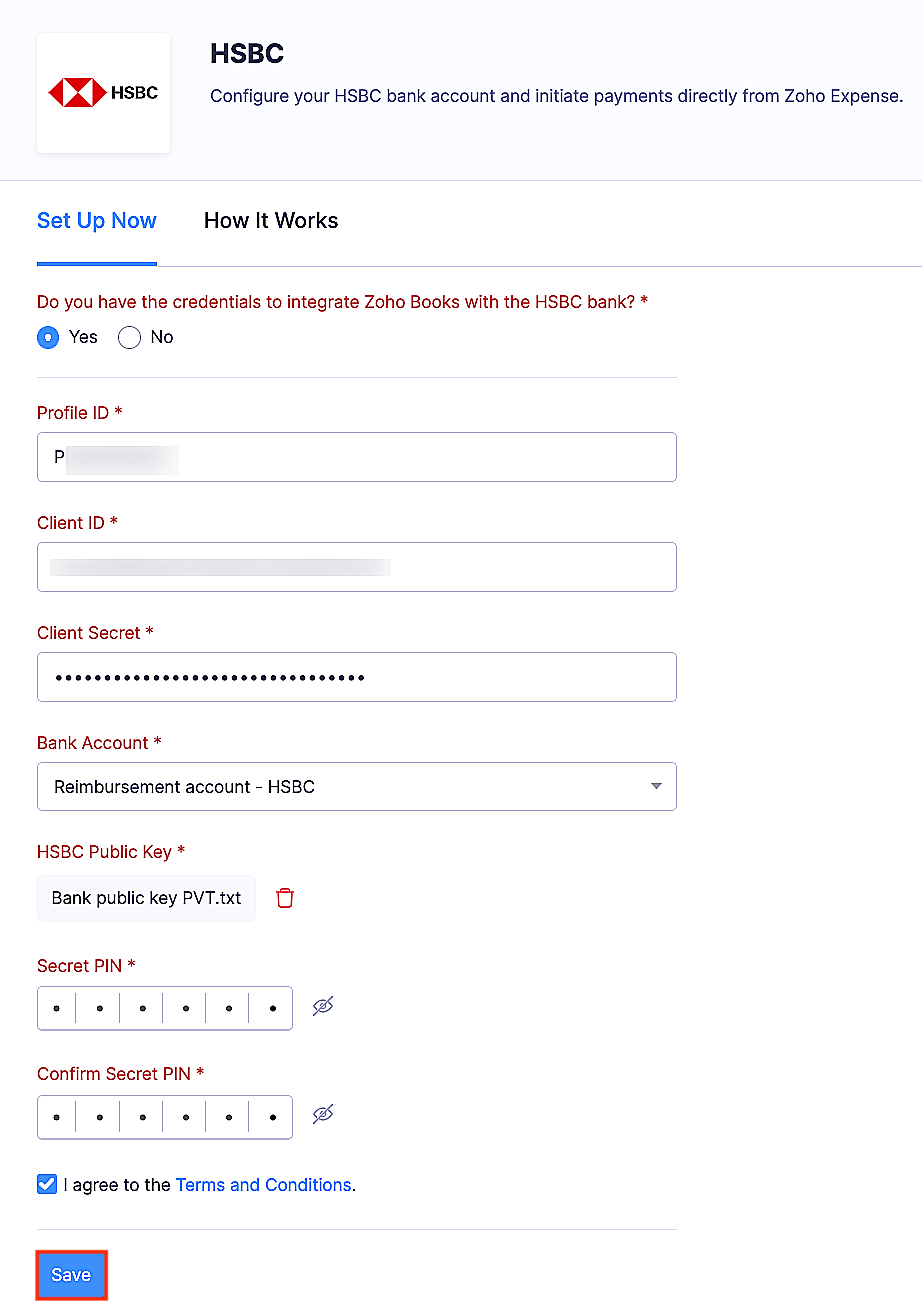
- Once you receive the credentials to integrate with HSBC, you can fill them in the HSBC integration details page after clicking Yes.
- Enter the Profile ID, Client ID, Client Secret, the HSBC bank account from which the reimbursements must be initiated, HSBC Public Key, which would be shared as a file with you to your email address, and a Secret PIN which will help you initiate reimbursements from Zoho Expense.
- Click Save.
Note: Reimbursers who aren’t admins can also set up the HSBC corporate account.
Add Employees’ Bank Accounts
Once the admin has set up the HSBC integration, the employees can add their bank accounts to receive reimbursements. Once the bank account is added, the employee will receive reimbursements to that account.
Reimburse Your Employees From Zoho Expense
After enabling the integration and adding the bank accounts, admins will be able to reimburse the reports of the employees.
Prerequisites:
- The bank accounts to which you’re initiating reimbursements must be within India.
- The reimbursement amount must be less than ₹2,00,000 if you’re reimbursing through NEFT. However, if you’re reimbursing through RTGS, the reimbursement amount should be more than ₹2,00,000.
Warning:
Once you reimburse online via HSBC, it cannot be undone.
To reimburse your employees:
- Click Admin View.
- Go to Reports.
- Navigate to the Awaiting Reimbursement tab.
- Click the report that you want to reimburse.

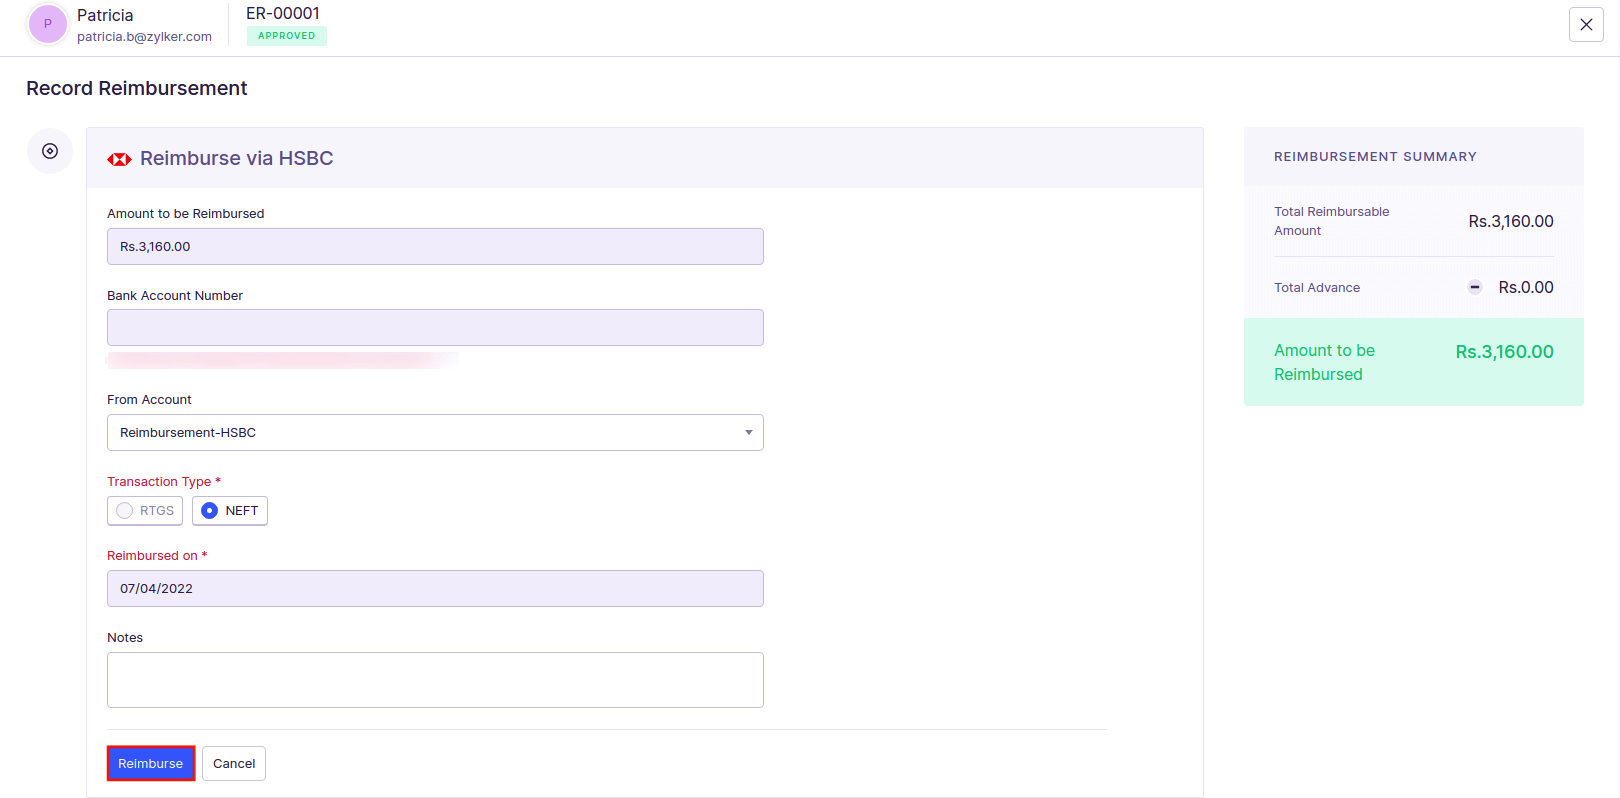
- Click the Reimburse dropdown and select via HSBC.

- Under the From Account dropdown, select the account from which you are reimbursing.
- Choose the Transaction Type (NEFT or RTGS), and enter a note regarding the reimbursement, if required. However, NEFT & RTGS have some limitations during bank holidays and the reimbursements initiated on the non-working hours of the bank. Additionally, only domestic transactions are supported for NEFT and RTGS.
- Click Reimburse.
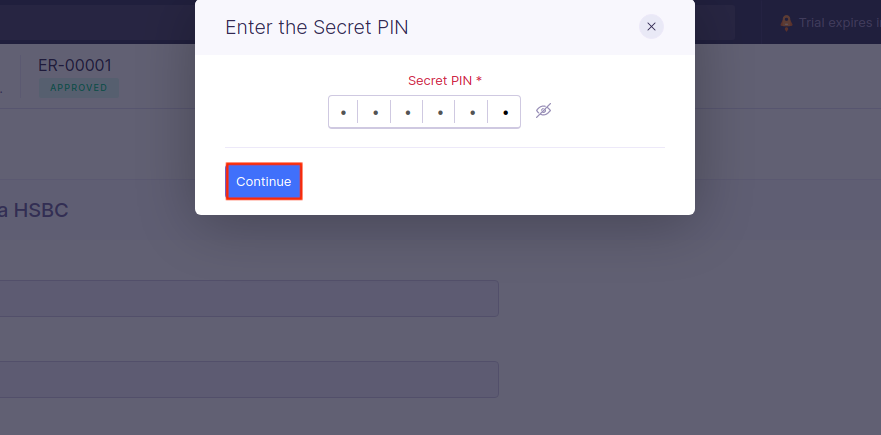
- Enter the Secret PIN that you had configured while setting up the integration. You have only 5 attempts to enter the right PIN. If you fail to do so, the integration will be marked as inactive and you will have to delete the integration and set it up again.
The payment will be initiated once you authorise the payment in HSBCnet.
Authorise Payment in HSBCnet
If you had initiated a NEFT or RTGS payment from within Zoho Expense, you will have to authorise that payment using File Level Authorisation. To do this:
- Log in to HSBCnet.
- Go to the Menu, and select Payments and transfers.
- Click File authorisation, and you can view the files of the NEFT payments that you had initiated from Zoho Expense.
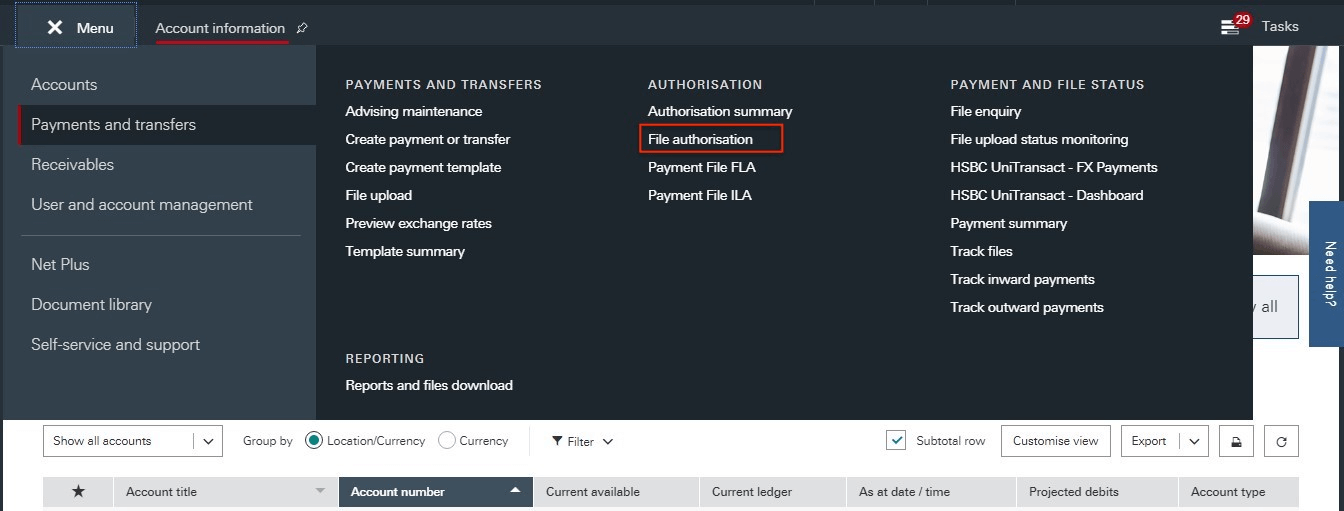
- Select the file, and click Review files.
- Click Authorise file to authorise the payment. Or, you can click Reject file to reject the payment.
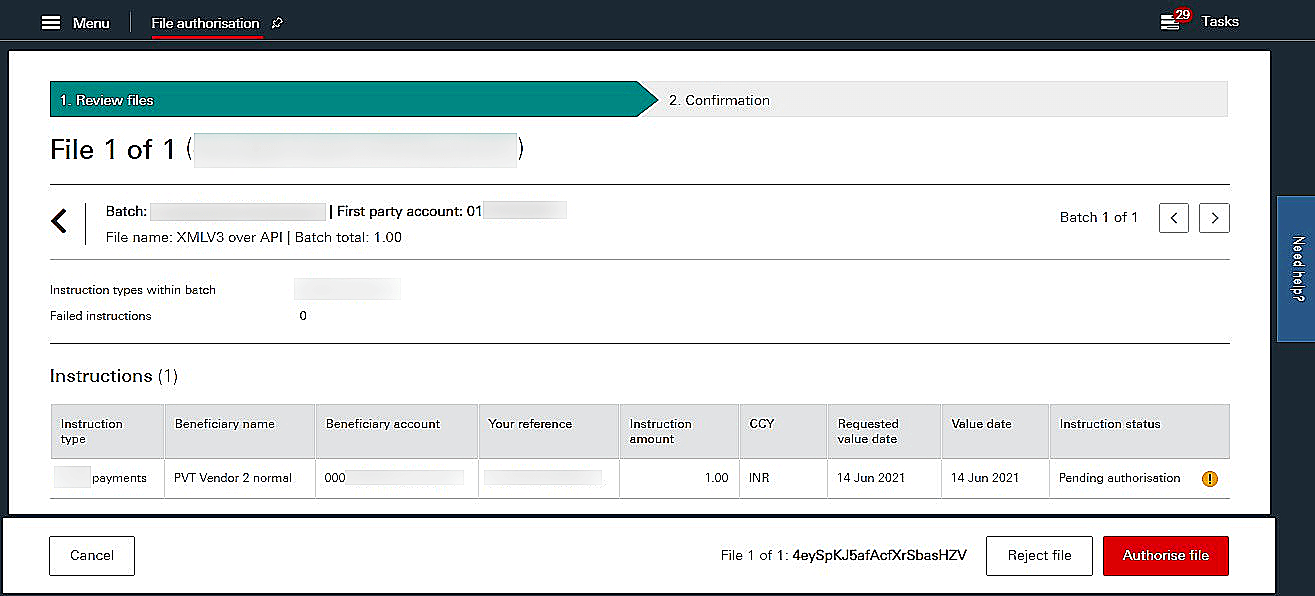
Once you authorise the payment, this payment may be sent for further authorisations based on the authorisation structure that is configured at HSBCnet for the account. Once authorised, the reimbursement will be reflected in the employee’s account depending upon the type of transaction you’ve chosen and the corresponding report’s status in Zoho Expense will be updated to Reimbursed automatically. If the payment fails, you can contact support@zohoexpense.com.
Disable the Integration
If you want to stop making payments through your HSBC corporate account or you want to change your account details, you can disable the integration. Here’s how:
- Click Admin View.
- Go to Settings on the left sidebar.
(OR)
Click the Gear icon in the top right corner. - Click Online Reimbursements under Integrations.
- Click the HSBC card.
- Click Disable.
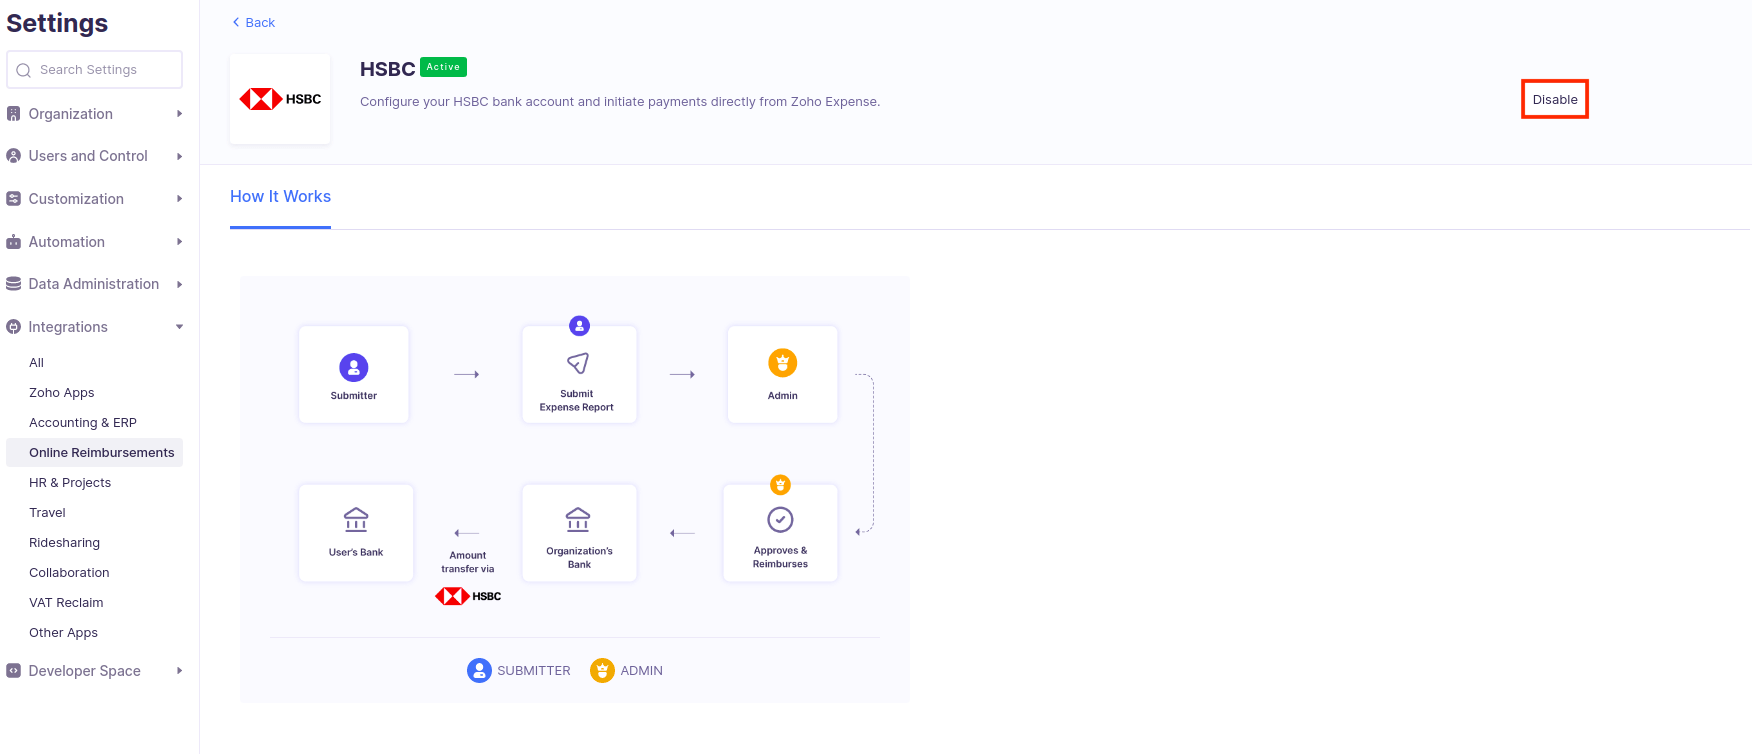
- In the popup that opens, click Disable again to confirm the action.
The integration will be disabled, and you can choose to set it up again, if required.


 Yes
Yes