Integrate Zoho Expense With Uber
If you often travel on behalf of your organisation, reporting your cab rides could be difficult. That’s why we have integrated with Uber to make it as easy as possible. Using Zoho Expense, you can manage your business rides with Uber effortlessly. Now, let’s look at some of the benefits of integrating Zoho Expense with Uber.
Key Benefits
- Automated expense creation: The receipt for the ride will be instantly forwarded to Zoho Expense account, based on which an expense will be created automatically.
- Gain insights about rides: Employers can access detailed summaries about the business rides in Zoho Expense application. Admins can easily monitor employee’s corporate rides and look out for policy violations.
- Consolidated expense reports: Employees can add their ride expenses from a business trip to an expense report and submit it for approval.
Prerequisites
- Zoho Expense account and an Uber for Business profile.
- Email address used for setting up Uber for Business profile should be same as the email address used to create Zoho Expense account.
Setting up Uber for Business Profile
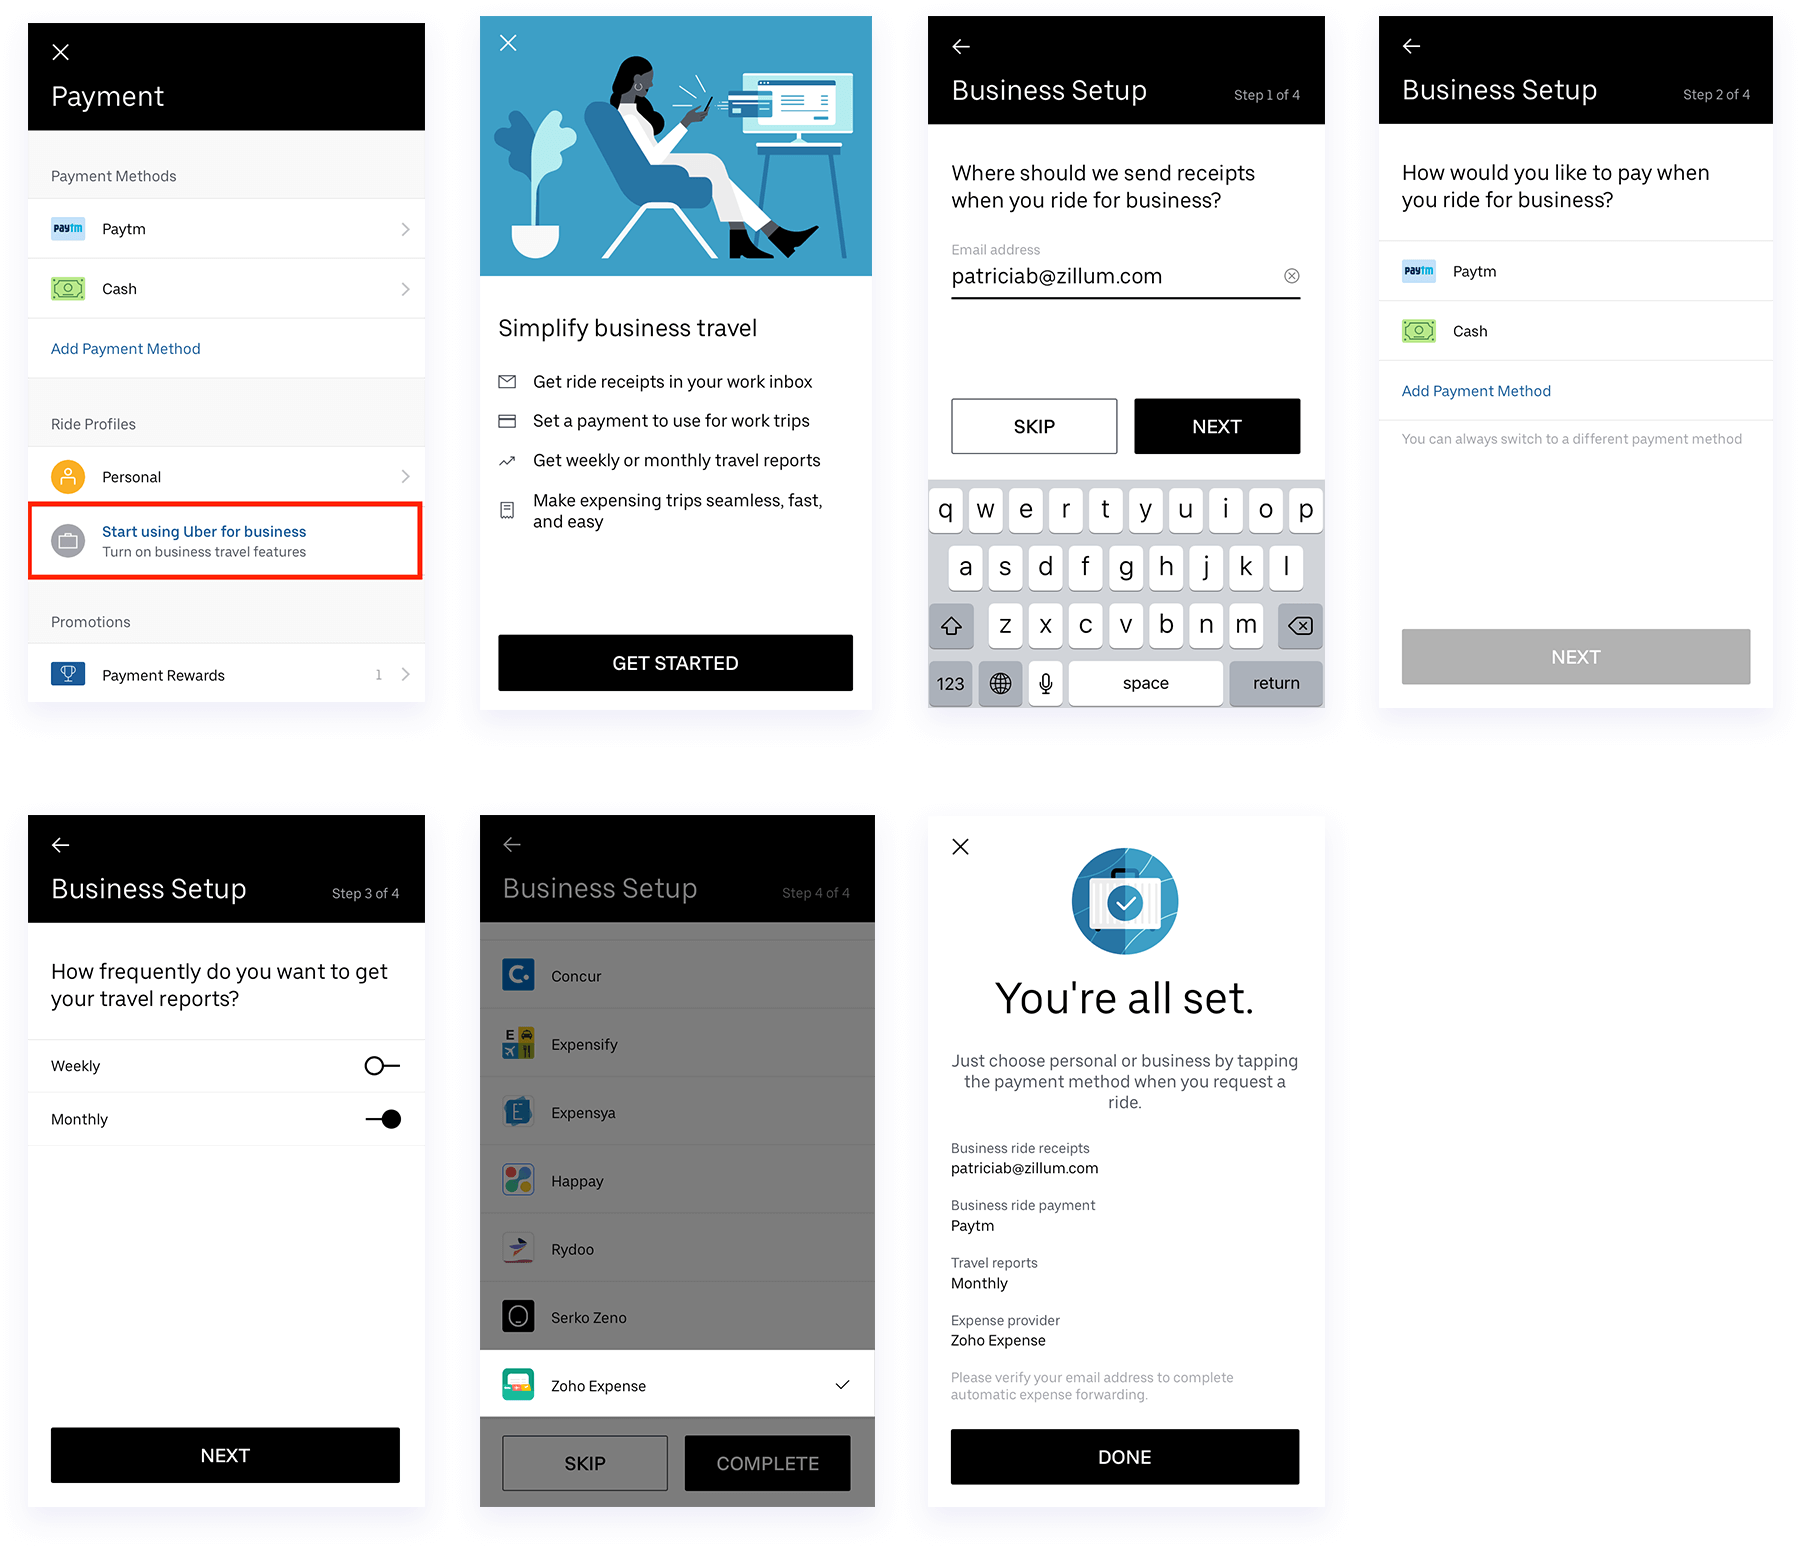
Employees can set up their Uber for Business profile if they don’t have one, by performing the following steps:
- Open the Uber app and go to Menu.
- Select Payment.
- Select Start using Uber for Business under ride profiles and click Get Started.
- Enter your email address. Ensure that the email address is the same as the email address you had used to create your Zoho Expense account.
- Set up your payment method.
- Configure how frequently you want to get your travel reports, whether weekly and/or monthly.
- Select Zoho Expense as your expense provider.
- Select Complete to finish the Business Setup.
Employees will now be able to take Uber for Business rides.

Enabling Uber for Business Integration in Zoho Expense
Admins can enable the integration for their organisation by performing the following steps:
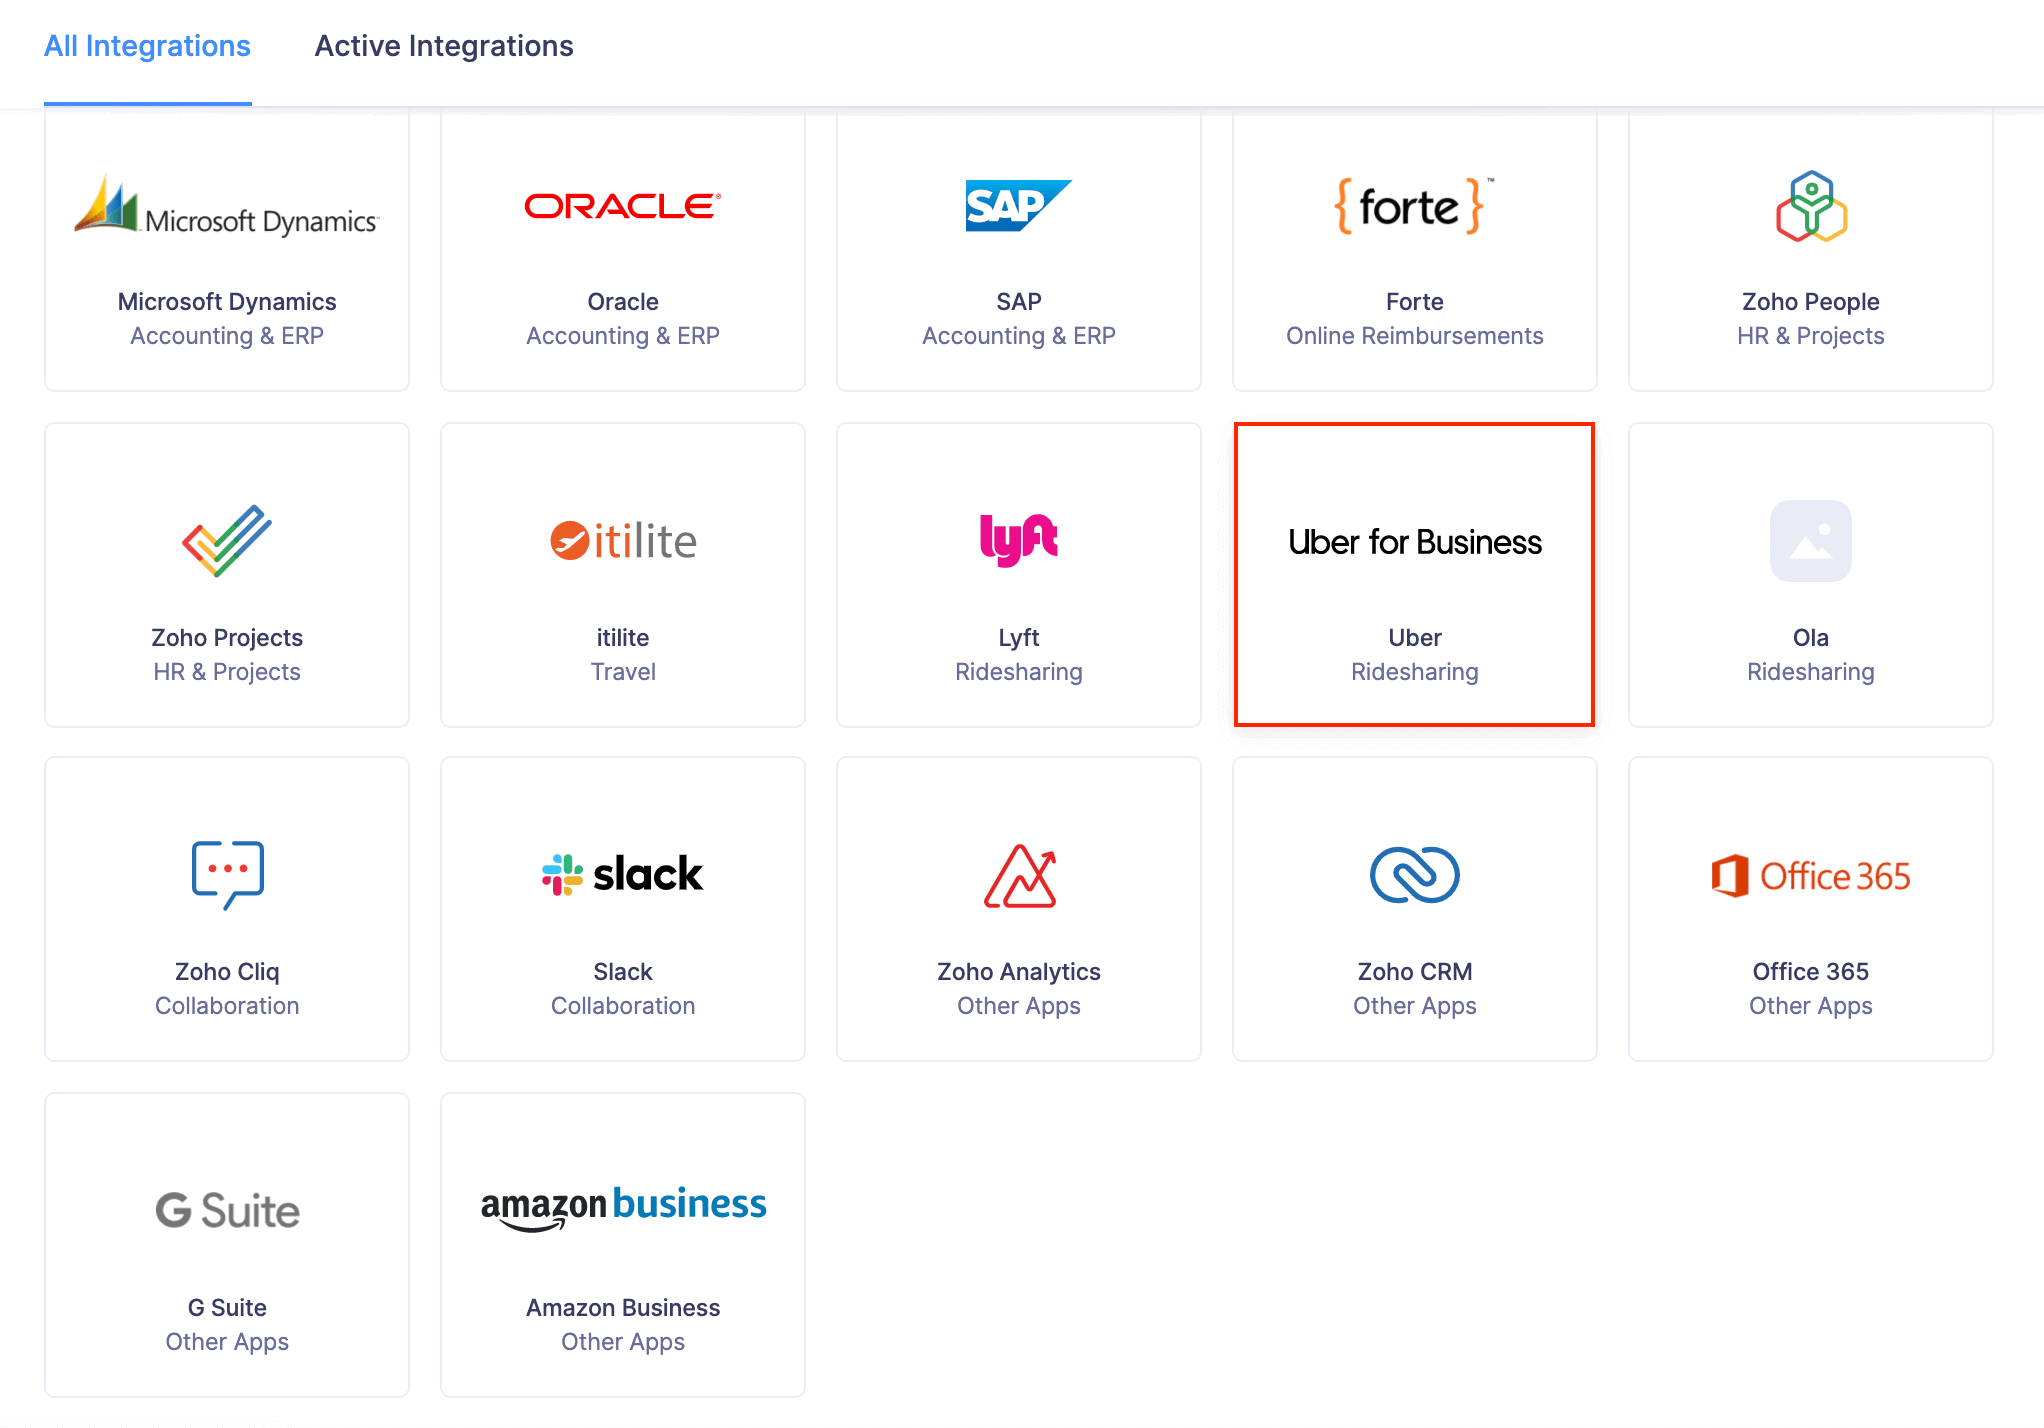
- Open your Zoho Expense account and click Admin View.
- Click the Gear icon at the top right side.
(OR)
Go to Settings on the left sidebar. - Go to View All under Integrations.
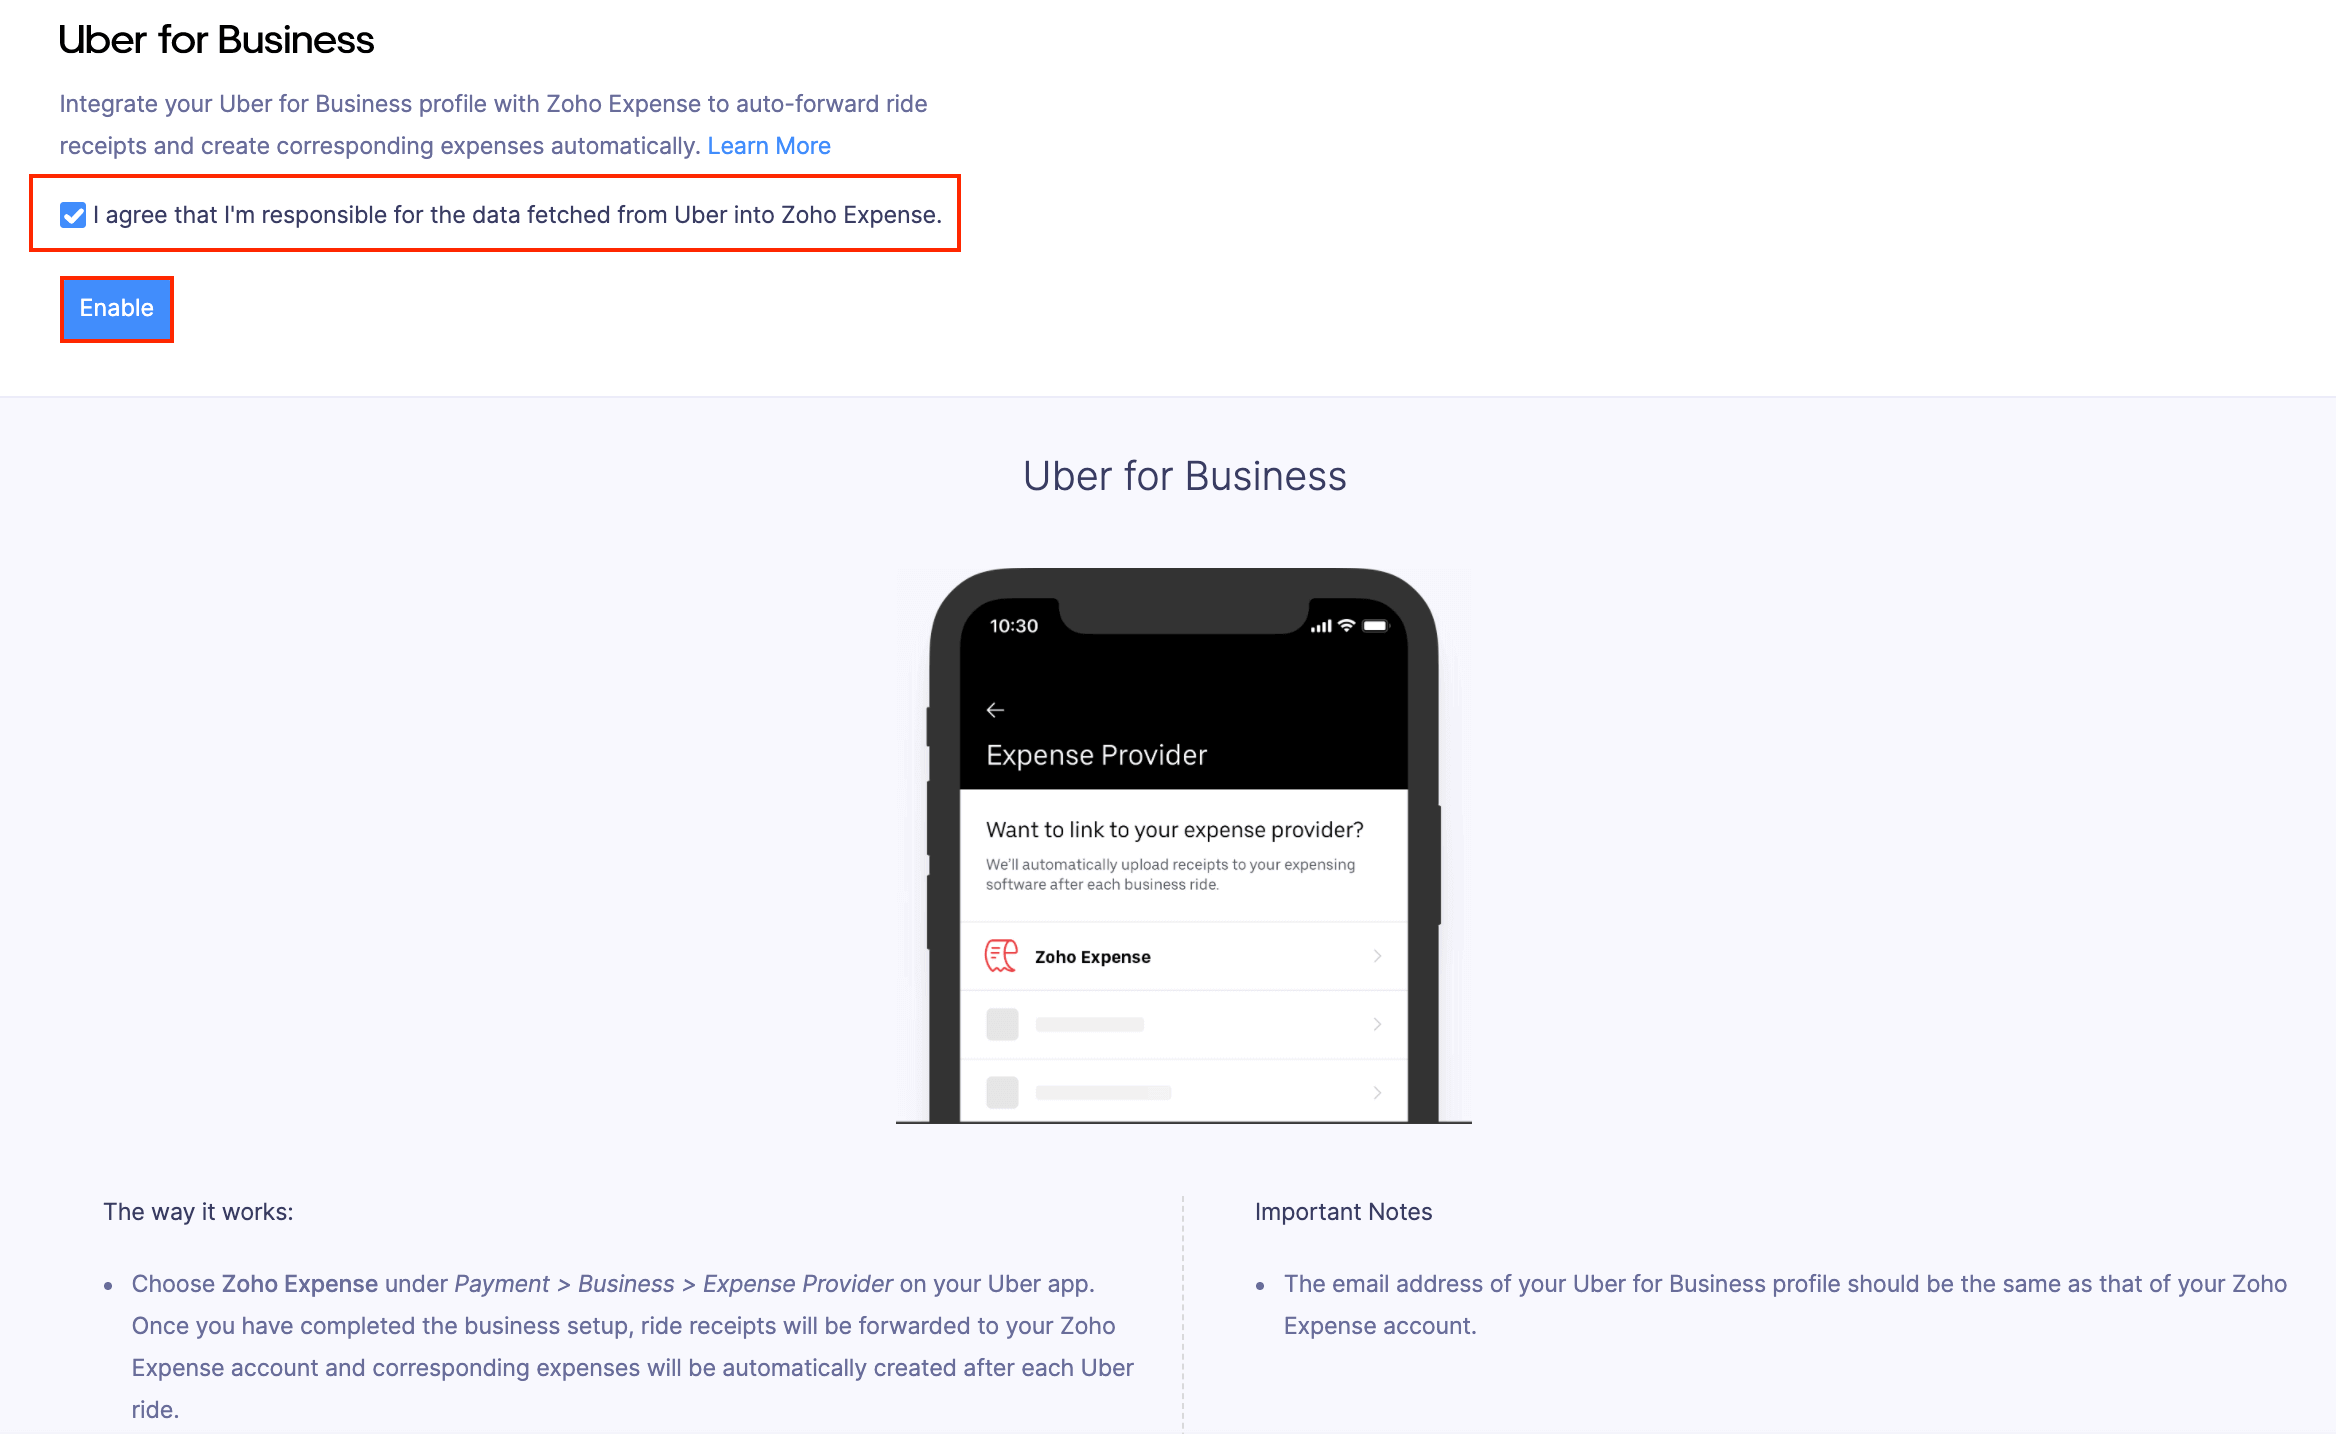
- Click Uber for Business.

- Mark the option to agree you are responsible for the data fetched from Uber into Zoho Expense.
- Click Enable to complete the integration with Uber.

Note: Employees can submit their expense reports to approvers only if admins have enabled the integration for their organisation in Zoho Expense.
Requesting Uber for Business Rides
Employees can request a ride by performing the following steps:
- Open the Uber app.
- Enter your destination address in the “Where to?” field.
- Choose one of the vehicle options available to you.
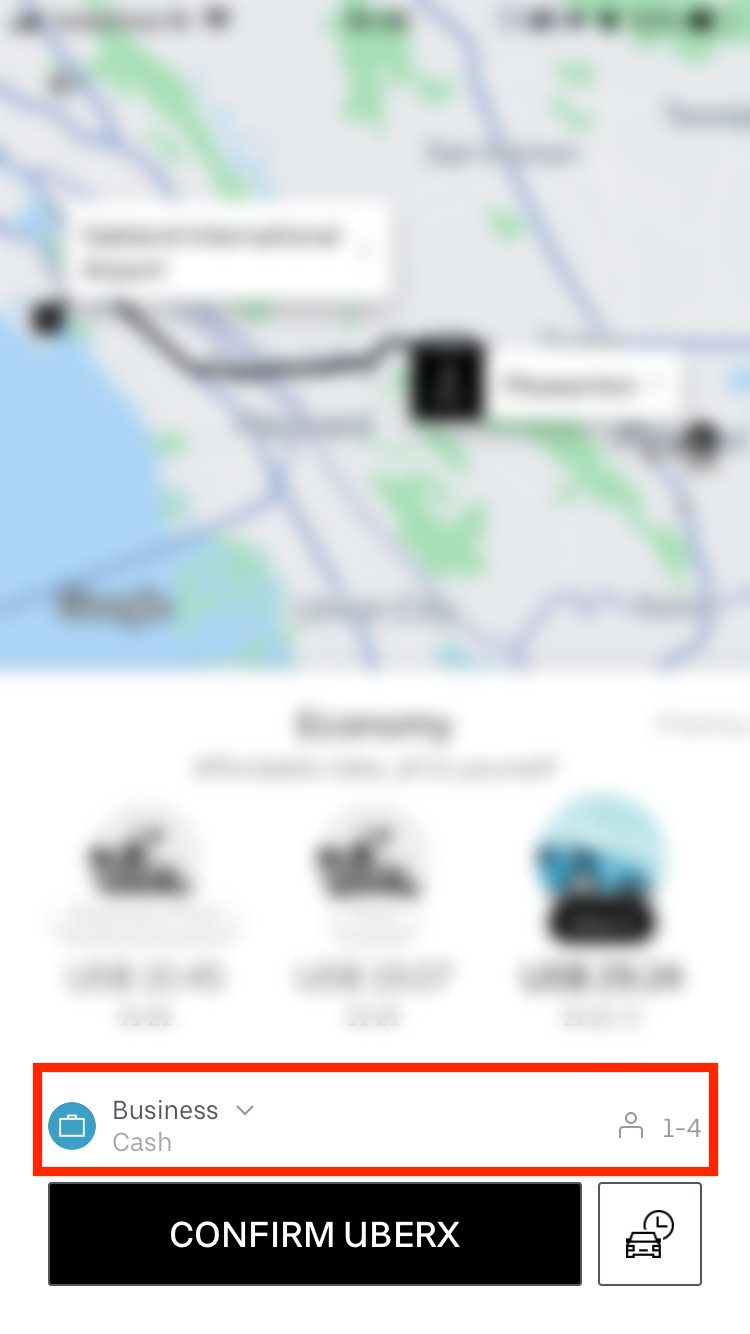
- Select Business in the field below the set of the vehicle options.
- Click Confirm.
Note: Expenses will be auto-created along with the receipts in Zoho Expense only if employees pay for their rides. If the organisation pays for their employees’ rides, expenses will not be created in Zoho Expense.


 Yes
Yes