How Zoho Expense Works
Zoho Expense is an online expense reporting application that you can use to record and report all your business expenses.
Whenever you incur a business expense, you can upload the receipt or record it in Zoho Expense. If you upload an expense receipt, it will be autoscanned and converted into an expense automatically. Once you’ve recorded the expenses, you can consolidate them into an expense report and submit it to your manager for approval. Your manager will review the expense report and choose to approve or reject it. If your manager approves the report, you can claim reimbursement for your expenses. On the other hand, if your manager rejects the report, you can make the changes suggested in the comments section of your expense report and re-submit it for approval.

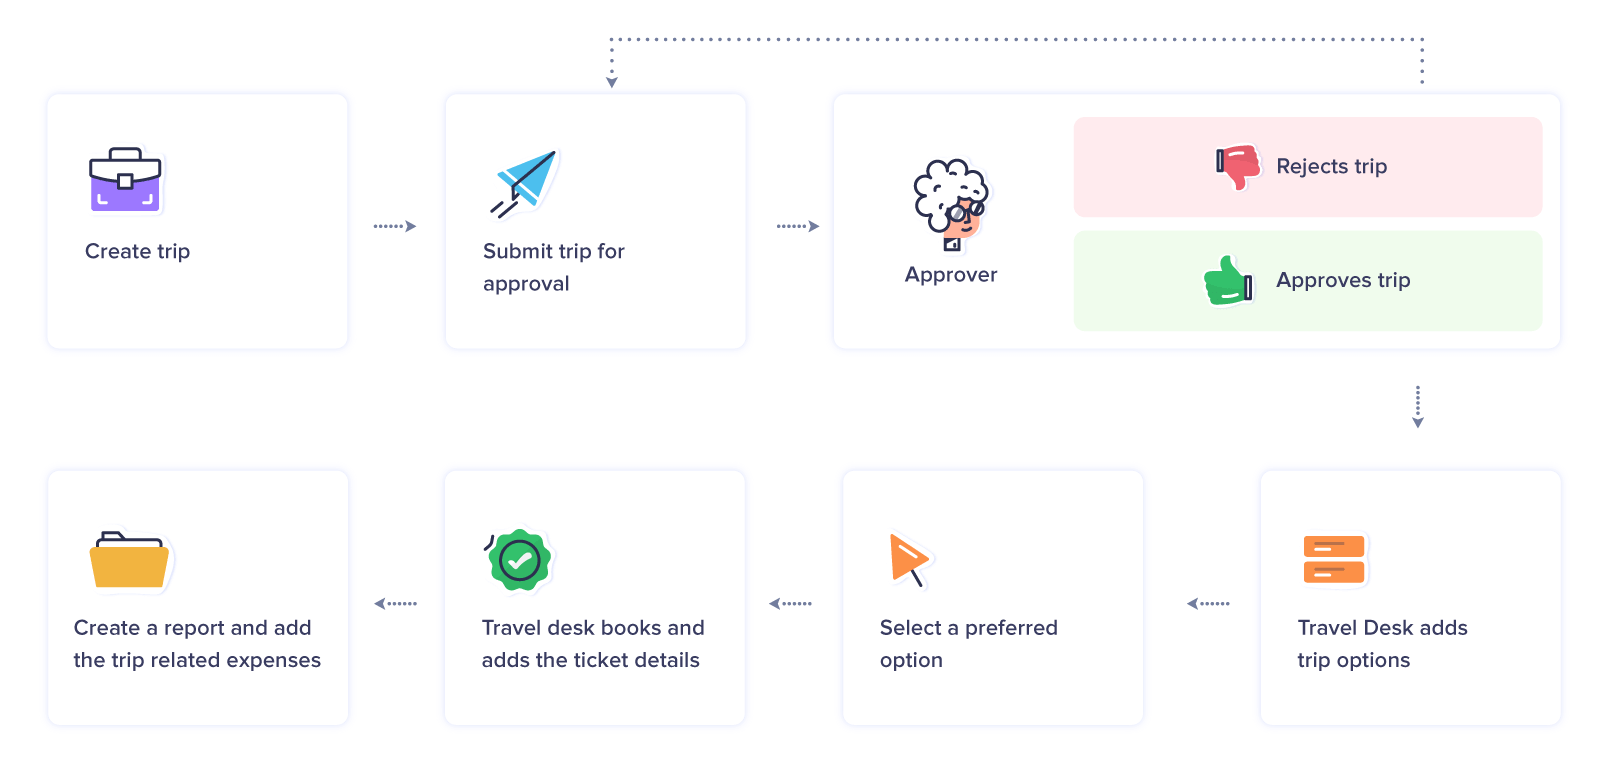
You can also raise trip requests before going on business trips, and you can submit it to your managers to get approval. Once you return from the trip, record the trip-related expenses and submit it to your approvers to claim reimbursement.

You can navigate through the various modules in our help documentation to learn how you can manage your expenses efficiently. Before taking a deeper look into the modules of Zoho Expense, let’s take a look at some of the common aspects of the product that will make using Zoho Expense easy for you.
User Roles
Zoho Expense has three default user roles, namely, Submitter, Approver, and Admin. However, the admins can create new user roles and configure permissions.
Here are the functions that each user role can perform:
- Submitter: Can upload receipts, create expenses, create and submit expense reports for approval. Submitters are usually the employees of the organisation.
- Approver: Can perform all the actions of a submitter, and also has permission to approve submitted reports (including their own reports). Approvers are usually the team leaders and managers.
- Admin: Can access all the modules of the product, configure the product preferences, assign user roles, and perform any action. Admins are usually the managers, the finance team, and the travel desk.
Access Zoho Expense
To access Zoho Expense, you’ll have to receive an invitation from your admin. Once you receive the invite email to your email address, click the Invite email and set up your account to access your Zoho Expense organisation.
Home
As soon as you log in to Zoho Expense, you will see an insightful dashboard which will give you an overview of all your expenses and reports.
Expenses
Record all the expenditures incurred on behalf of your business. With the auto-scan feature, you can simply drag and drop the receipts to create expenses automatically. There are various ways to record your expenses.
Reports
Reports module allows you to create a report and add all the expenses that you’ve recorded. Also, you can add relevant receipts along with the expenses and submit the report to claim reimbursement. You can also automate report generation.
Trips
If you’re going on a business trip, you can create a trip and submit the trip for approval. While you’re on your trip, you can record the trip related expenses such as food, transportation, accommodation, etc. Post the business trip, you can create a report, add these expenses and submit it to claim your reimbursement. You can also track the booking process of your trips.
Advances
If you require funds in advance for your upcoming expenses or trips, request advance from your employer. Once you receive the advances, you can apply them to reports or trips.
Cards
You can add your personal or corporate cards and fetch the card statements. The card transactions thus fetched will be created as expenses automatically or you can convert them into expenses manually.
My Settings
In My Settings, you can configure default values, and assign delegates to submit and approve expenses on your behalf. Connect your cards and create expenses from card statements. You can also add your travel documents from here.