

Other Actions for Bills

Edit Bill
You can edit the details of any bill. Here’s how:
- Go to Purchases on the left sidebar and select Bills.
- Select the bill you want to edit.
- Click the Pencil icon on top of the page.
- Make the changes.
- Click Save.

Insert Headers as Line Items
You can insert headers to group related line items in your bill. When you have many line items, headers break the list into clear sections so the bill is easier to read. For example, you can add a header such as Hardware Items, Office Supplies, or a project name and group the related line items under it. You can also insert multiple headers to your bill.
To insert a header row in your bill:
- Go to Purchases on the left sidebar and select Bills.
- Click + New in the top right corner to create a bill, or select an existing bill and click Edit to modify an existing one.
- In the Item Table, click the More icon next to the required line item, and select Insert New Header. Alternatively, you can click the dropdown next to + New Row below the Item Table and select New Header.
- Type the title for the header.
- Fill in the required fields and click Save.
The header will be added as a row and the line items below it will remain unchanged. To remove a header, click the Remove icon to the right of it.
Insight: Removing a header does not remove the line items below it.
Download as PDF
You can download any bill as a PDF. Here’s how:
- Go to Purchases on the left sidebar and select Bills.
- Select the bill you want to download.
- Click the PDF icon on top of the page.

Print Bill
You can print the details of any bill. Here’s how:
- Go to Purchases on the left sidebar and select Bills.
- Select the bill you want to print.
- Click the Print icon on top of the page.
- Check the Preview and click Print.

Attach Files to Bill
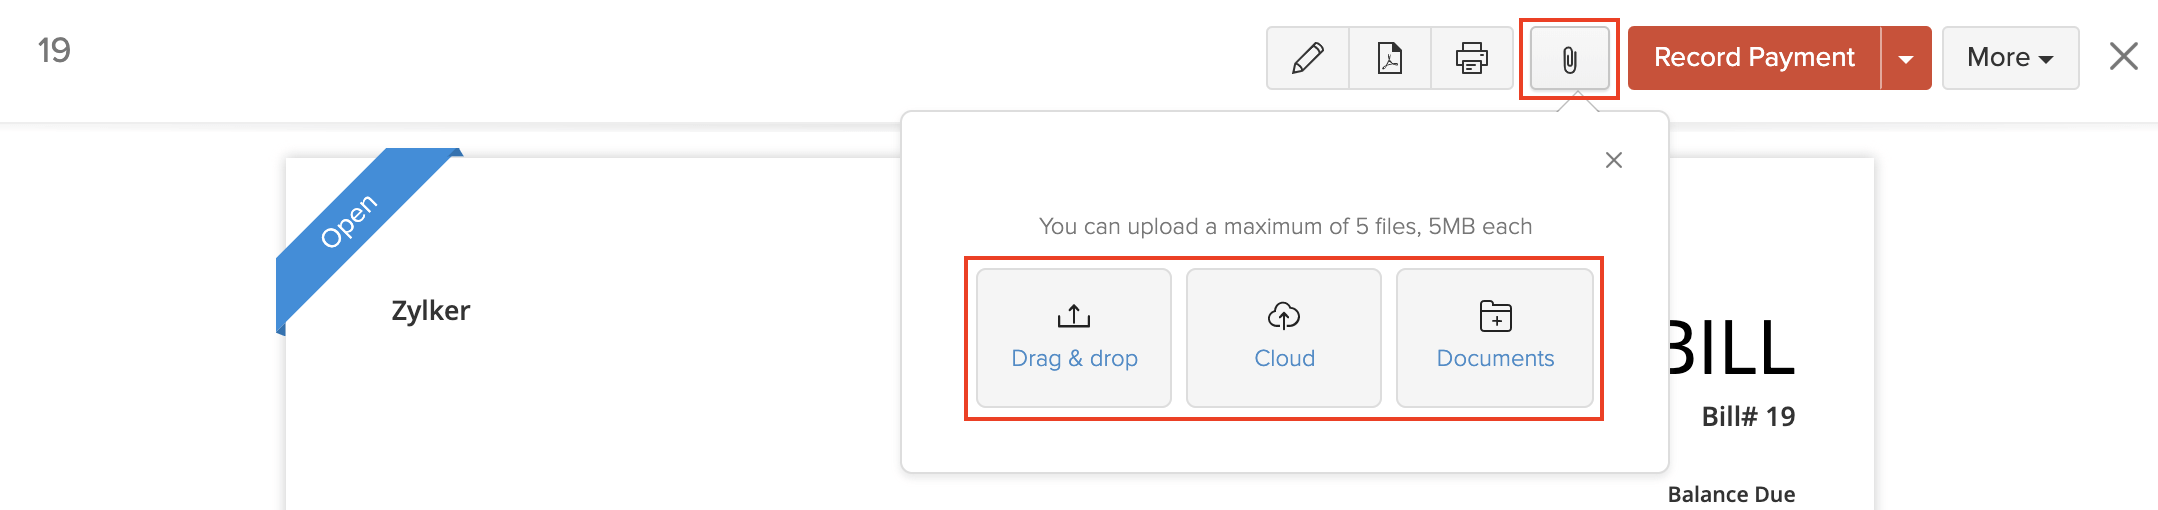
You can attach files to your bill. This can be done through:
- Drag & Drop: Upload files from your system (a maximum of 5 files, each of 5 MB).
- Cloud: Upload from cloud resources like Zoho Docs, Google Drive, Dropbox, One Drive, etc.
- Documents: Upload from the Documents folder in Zoho Books.
To attach files to your bill:
- Go to Purchases on the left sidebar and select Bills.
- Select the required bill.
- Click the Attach icon on top of the page.
- Select the desired option and attach your file(s).
Clone Bill
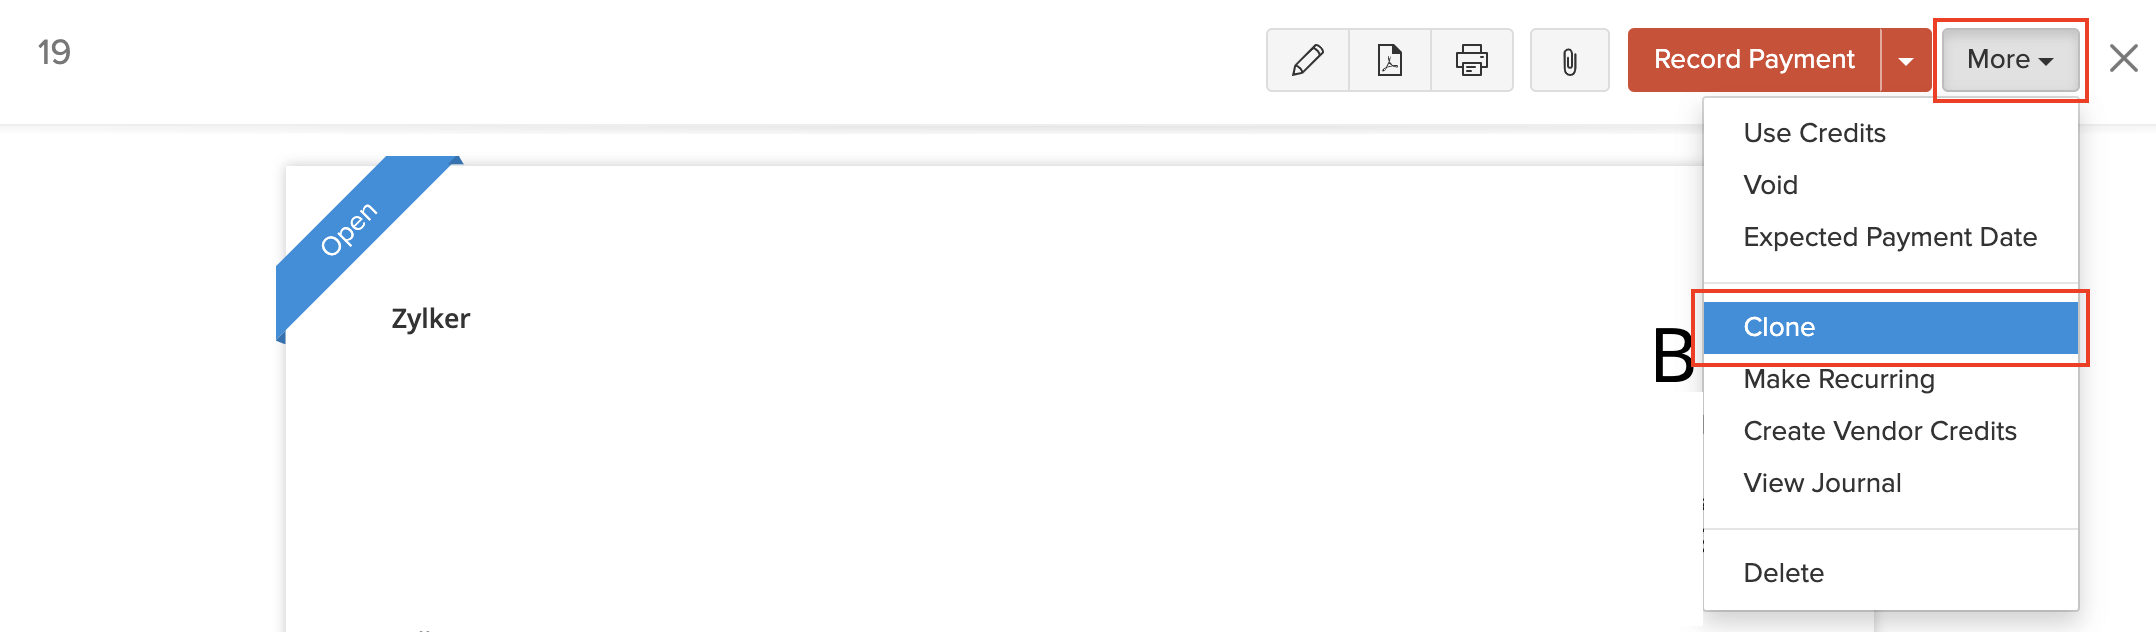
You can create a bill in Zoho Books with details similar to an existing bill by cloning the bill.
To clone a bill:
- Go to Purchases on the left sidebar and select Bills.
- Click More > Clone.
- Review the new bill and save it.
Make Bill Recurring
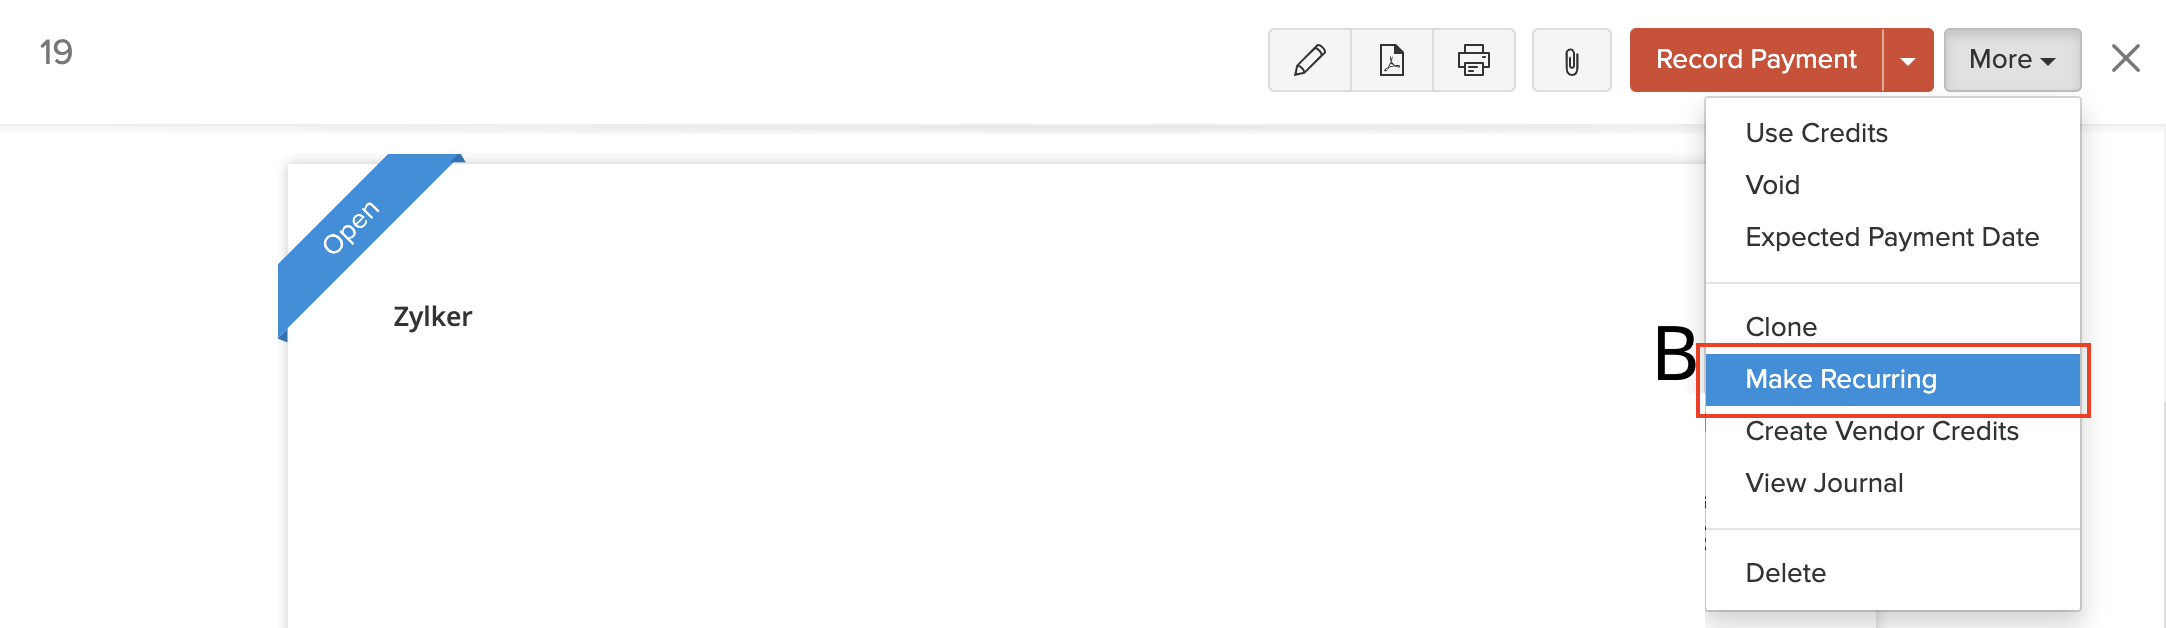
You can make any bill that you’ve recorded in Zoho Books as recurring. Here’s how:
- Go to Purchases on the left sidebar and select Bills.
- Click More > Make Recurring.
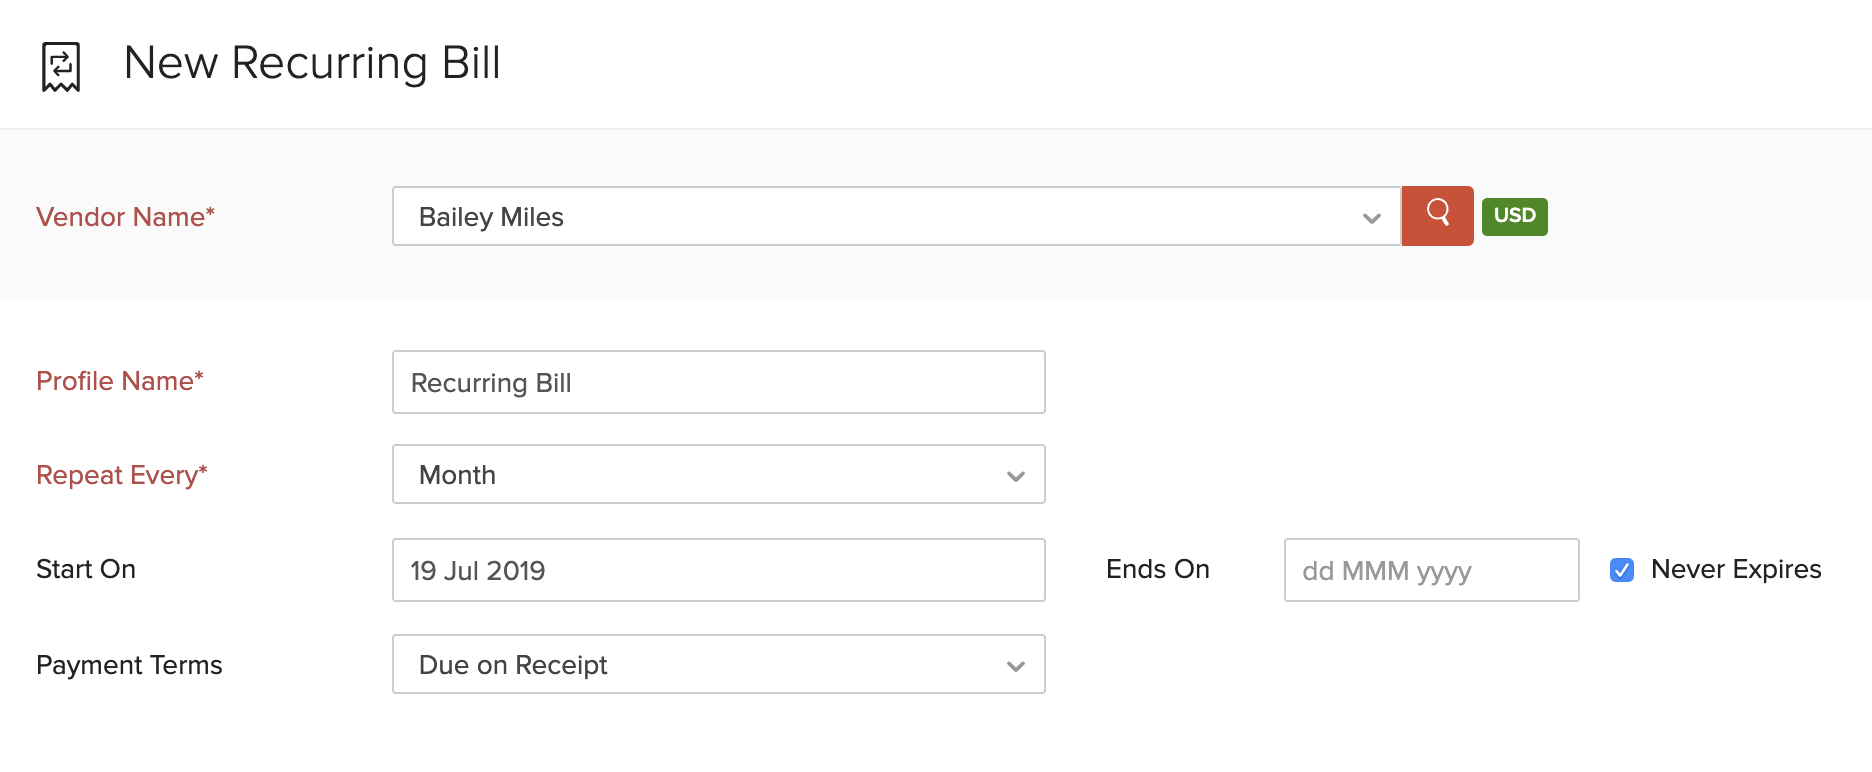
- Review the new recurring bill and save it.
Void Bill
If you void a bill, it will no longer be valid and will not reflect in any of your transactions or reports. You can, however, make it active at a later point of time. This is a better alternative to deleting the bill altogether.
To void a bill:
- Go to Purchases on the left sidebar and select Bills.
- Click More > Void.
- Enter the reason to void.
- Click Void it.
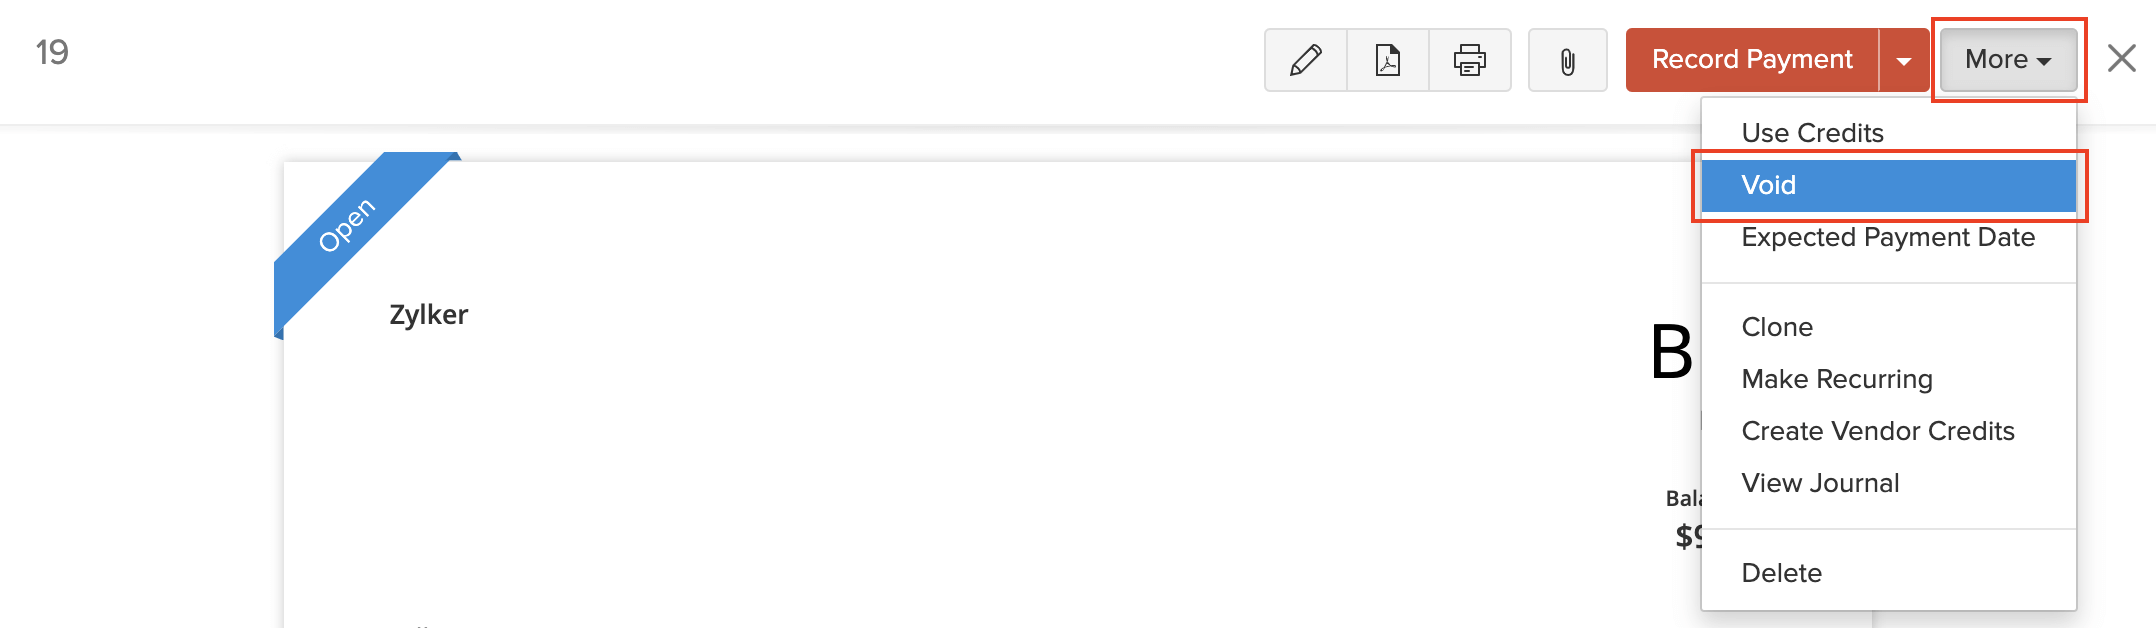
If you applied credits or recorded payment for a bill, you would need to delete them before voiding the bill.
Make the Bill Active
If you have voided a bill, you can make it active again. Here’s how:
- Go to Purchases on the left sidebar and select Bills.
- Select the bill to be made active.
- Click the Convert to Draft button on top of the page.
- Enter the reason for making the bill active again.
- Click Convert to Draft.

Delete Bill
You can delete any bill that you’ve recorded in Zoho Books. Here’s how:
- Go to Purchases on the left sidebar and select Bills.
- Select the bill to delete.
- Click More > Delete.
- Click Delete to confirm.
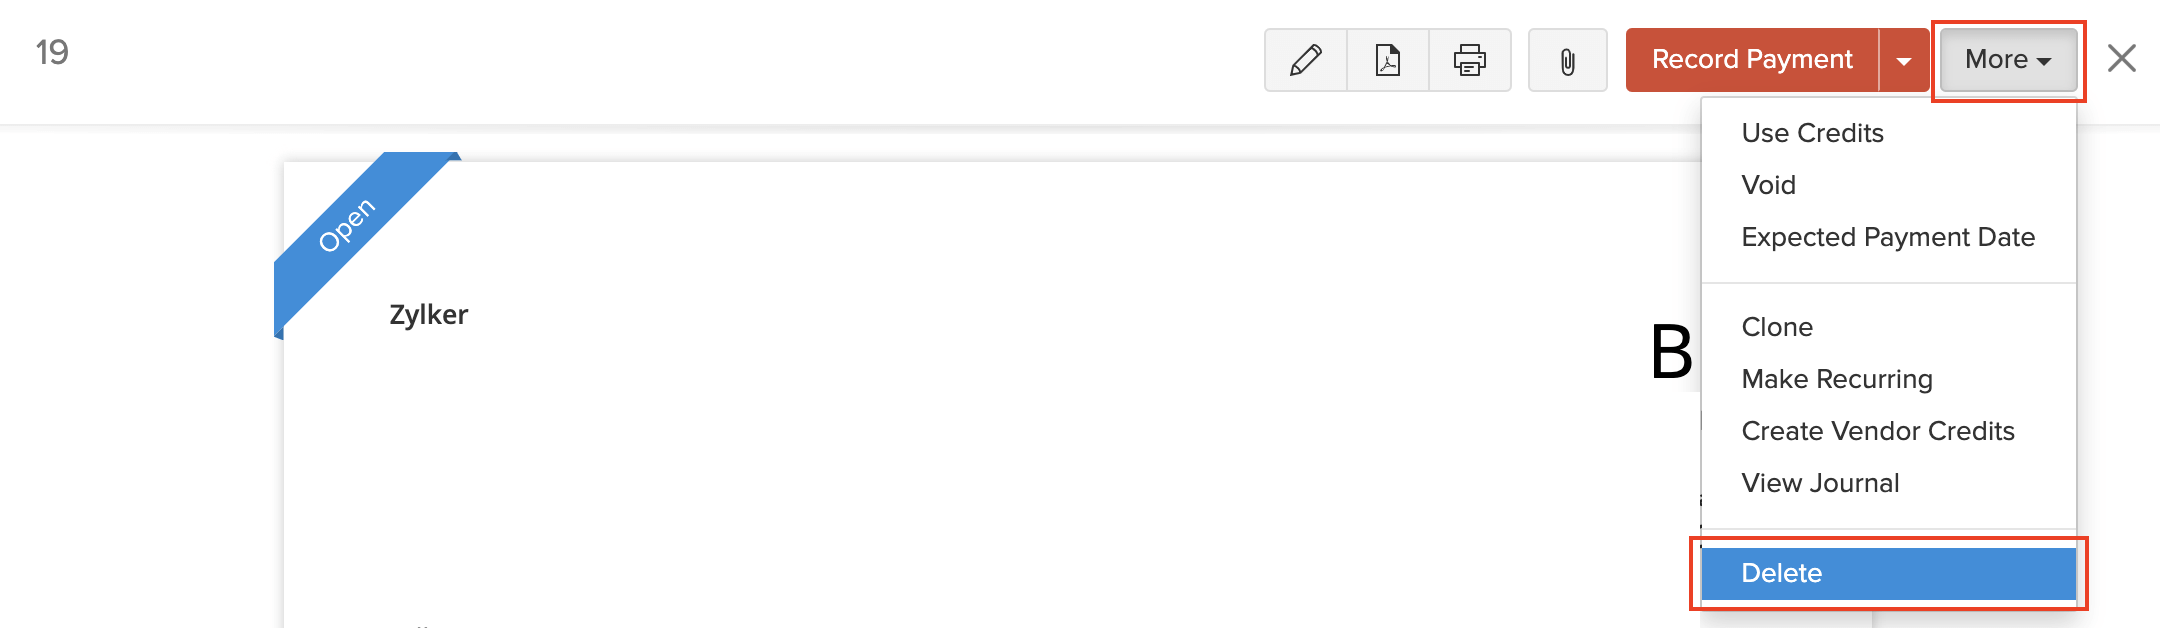
If you have applied credits or recorded payment for a bill, you would need to delete them before deleting the bill.
Export Bills
You can export all the bills in Zoho Books to your system in the CSV, XLS or XLSX format. Here’s how:
- Go to Purchases on the left sidebar and select Bills.
- Click the More icon in the top right corner of the page.
- Select Export Bills.
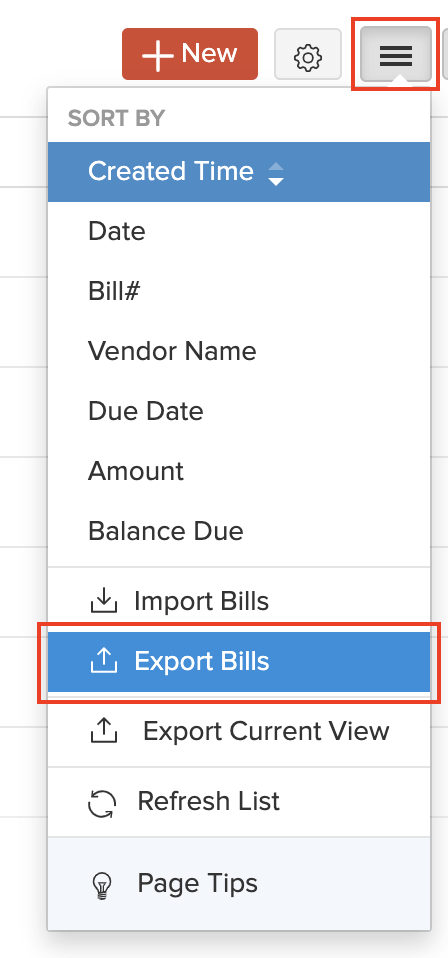
- Fill in the following fields.
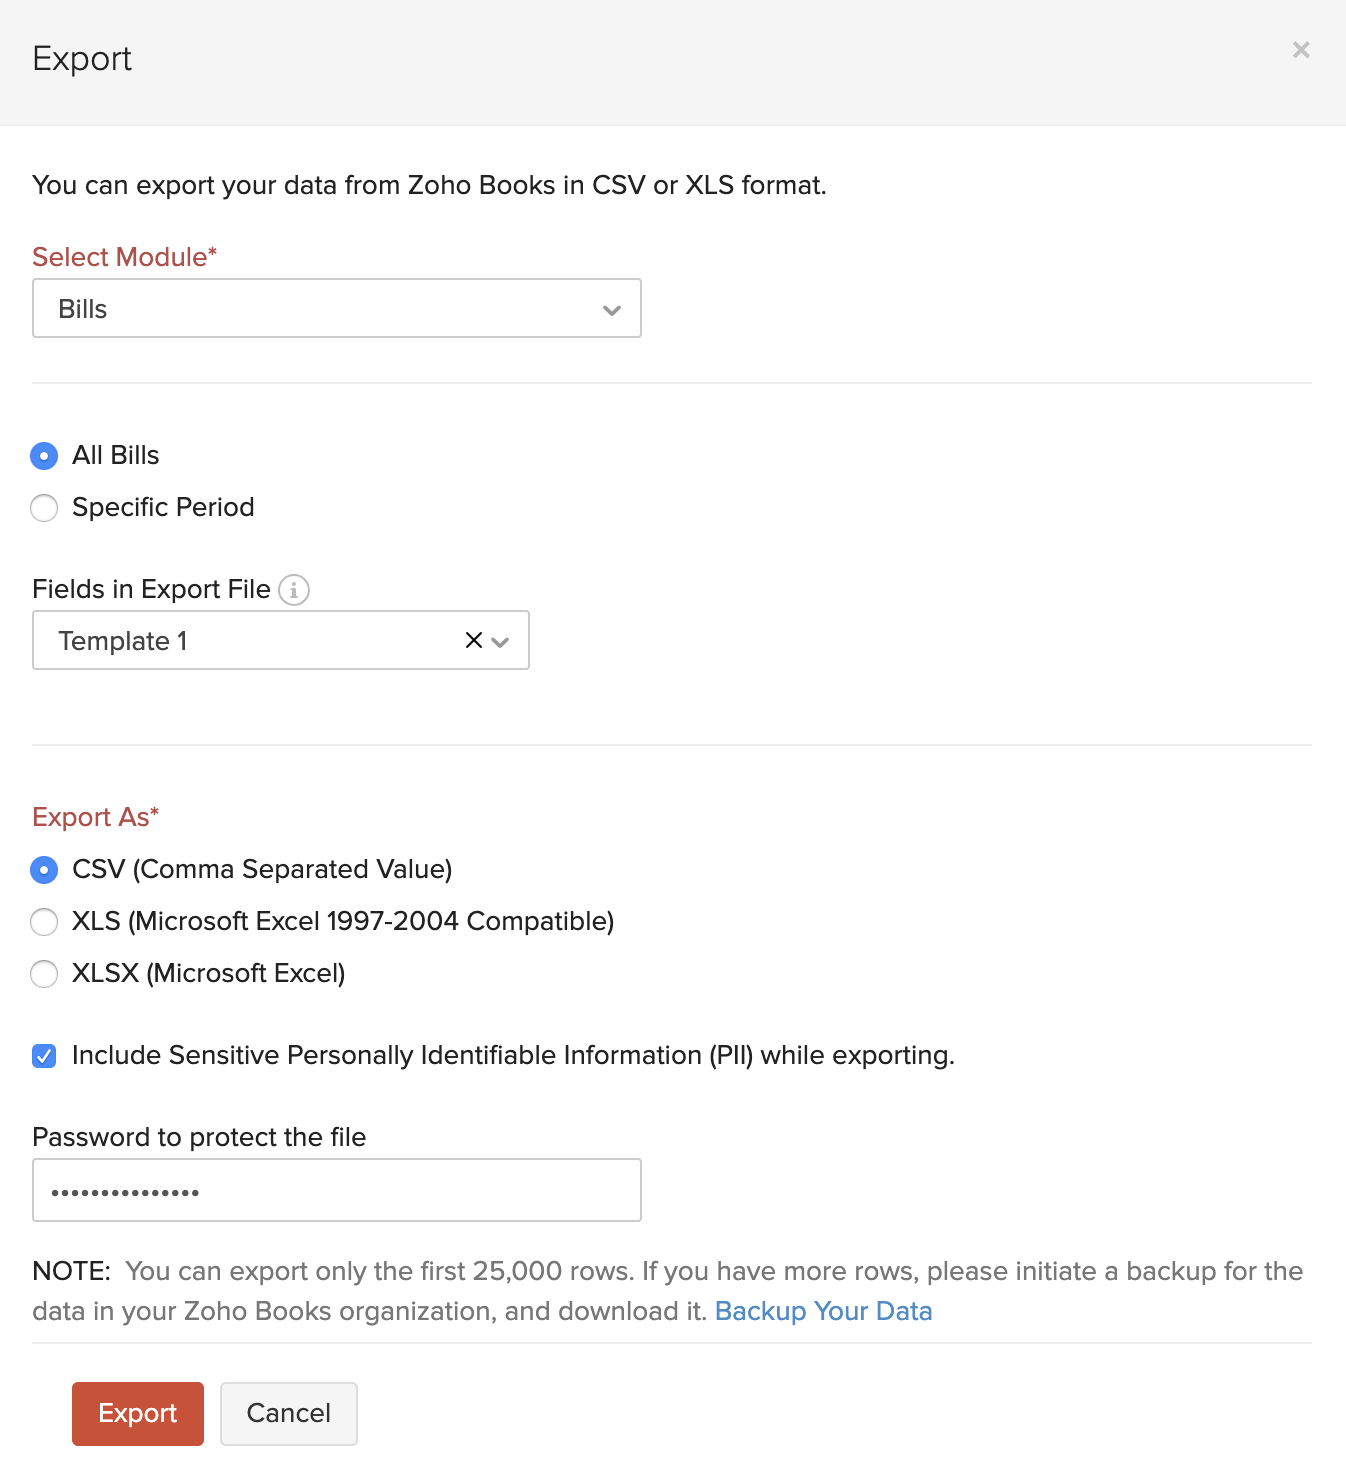
| Fields | Description |
|---|---|
| Select Module | By default, the Bills module will be selected. |
| Date Range | Export All Bills or select a Specific Period for which you want to export the bills. |
| Fields in Export File | If you want to export only certain fields, you can select a custom template. If you don’t have an export template, you can create a new one by clicking + Add New. |
| Export As | Select the format in which the file should be exported. |
| Personally Identifyable Information (PII) | If you have any PII that you are exporting, mark the box Include Sensitive Personally Identifiable Information (PII) while exporting. The PII fields include your vendor’s address, email address, phone number, bank account number and any sensitive custom field. |
| Password | Enter a password to secure your export file. |
- Click Export.
Next >
Bill Preferences
Related
 Yes
Yes