Reporting Tags
As a growing business, you would have a rapidly expanding customer base spread across several domains and locations. So when you generate reports, it becomes hard and confusing to find details pertaining to a particular domain or location. Zoho Billing lets you associate tags known as Reporting Tags and filter all your reports based on the tags.
You will be able to associate reporting tags to Contacts, Items, Quotes, Sales Orders, Invoices, Recurring Invoices, Credit Notes, Expenses, Recurring Expenses, Purchase Orders, Bills, Recurring Bills, Vendor Credits and Journal entries.
In this page:
Create Reporting Tags
You can create reporting tags with as many options as you want based on your business needs. To create reporting tags:
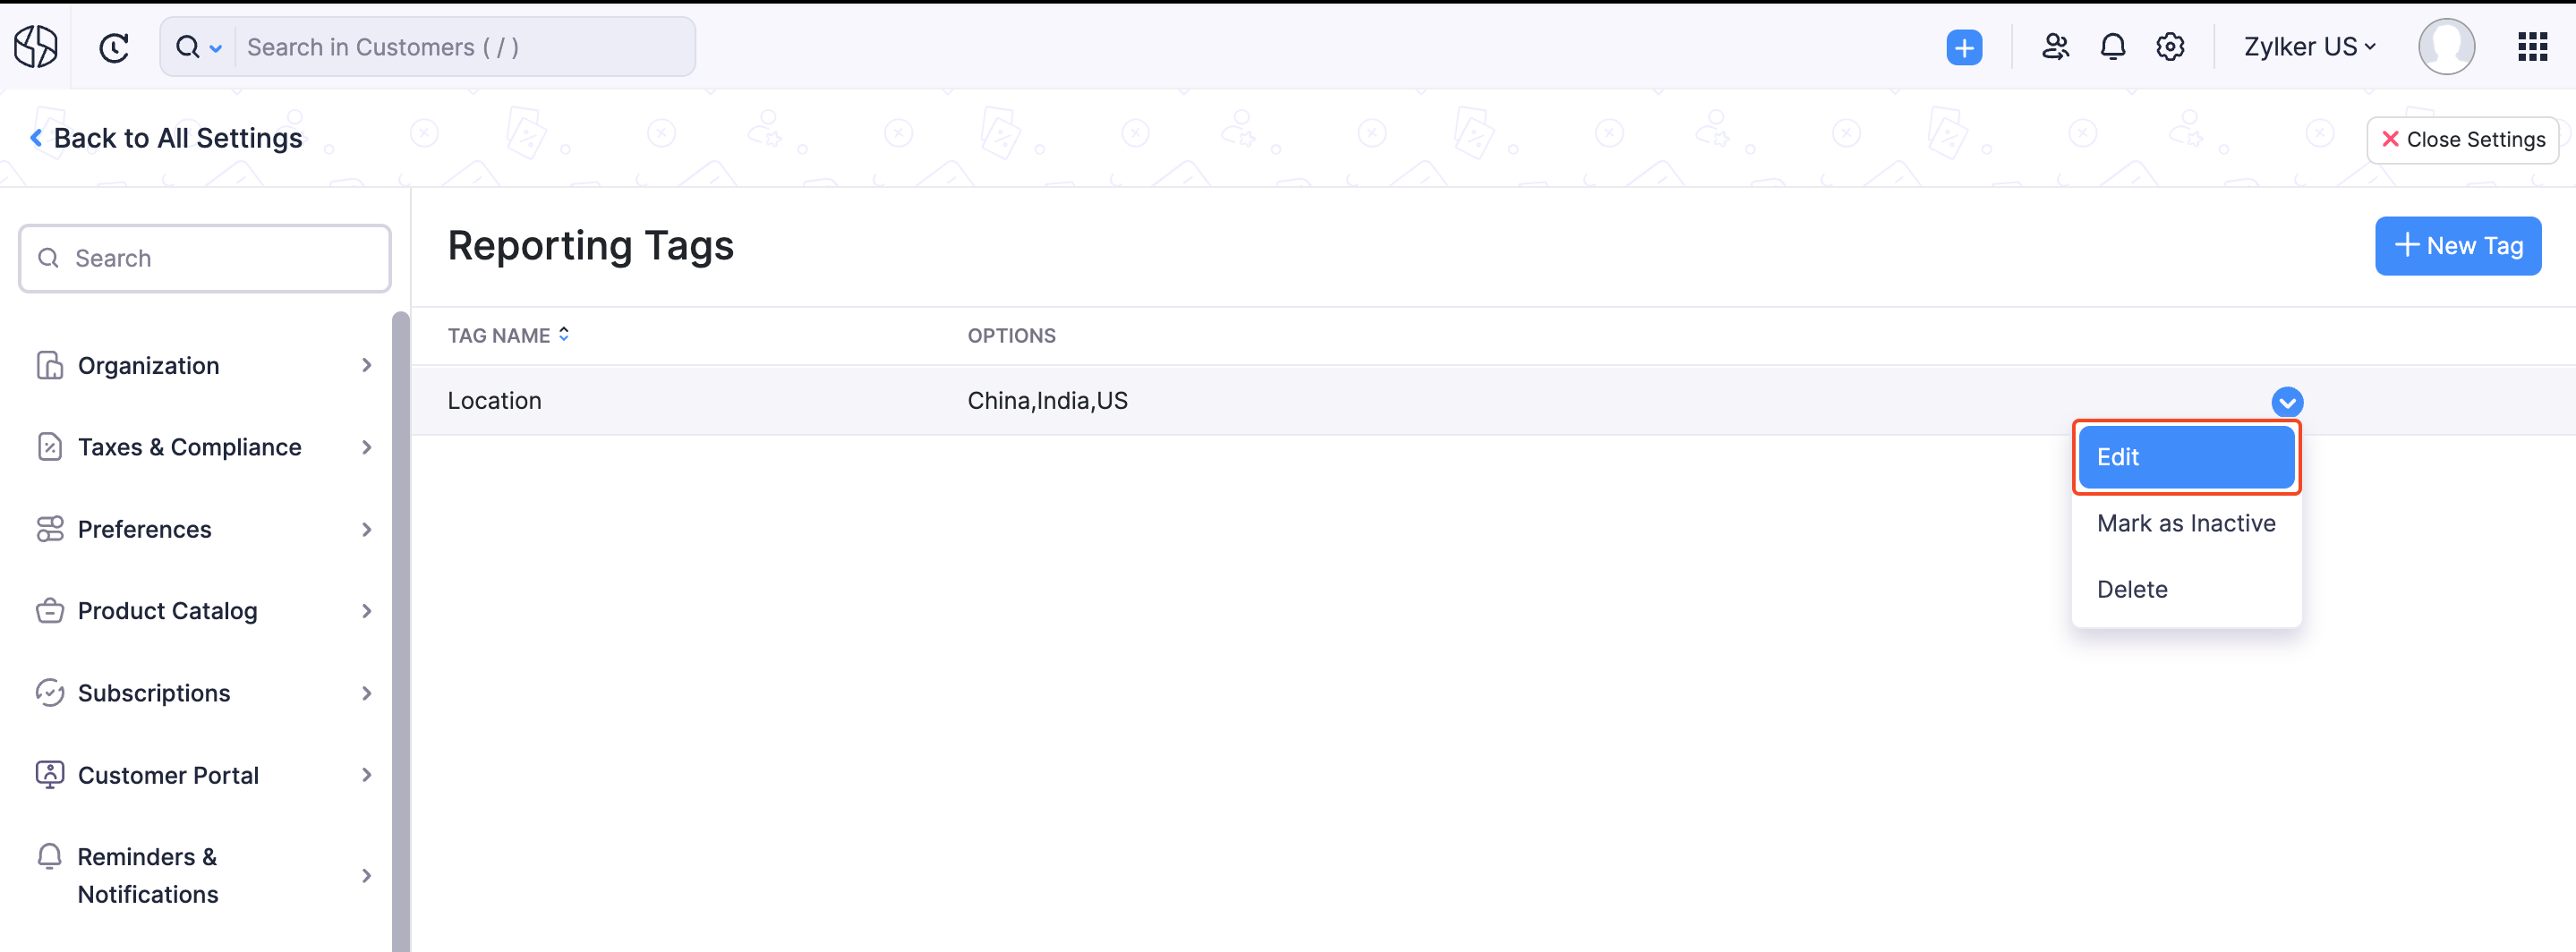
Go to Settings > Customization > Reporting Tags.
Click + New Tag in the top right corner.

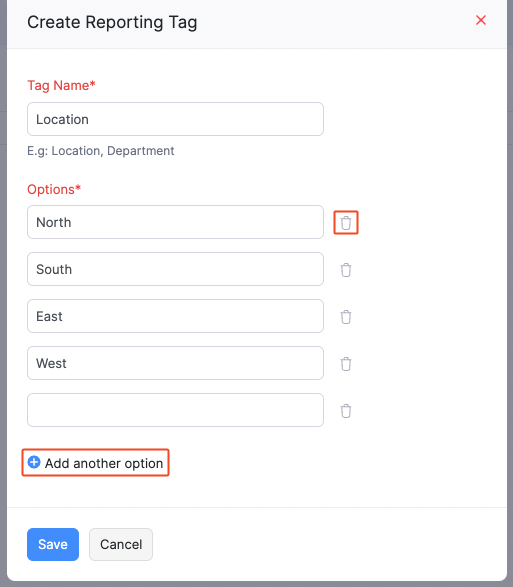
Enter a Tag Name and provide the Options.
Add more options by clicking + Add Another Option or delete an option by clicking the Trash Icon.
Click Save.

If you no longer wish to use a reporting tag, you can delete it or mark it as inactive. Tags that have been associated already, cannot be deleted. To do this:
Go to Settings > Customization > Reporting Tags.
Hover on a particular tag to Edit, Mark as Inactive or Delete it.

Mark only a few options as inactive in a reporting tag by unmarking the box near an option in the edit page.
Associate Reporting Tags
Once you have created reporting tags, you will be able to associate them with items, contacts and other transactions.
Associating Reporting Tags to Items
- Go to the Items page and create a New Item or edit an existing item.
- Enter all your details and click Associate Tags at the bottom of the page.
- Associate the required tags and click Save.
Associating Reporting Tags to Contacts
- Go to the Contacts page and create a New Contact or edit an existing contact.
- Enter the required details and click the Reporting Tags tab at the bottom.
- Associate the required tags and click Save.
Associating Reporting Tags to Transactions
- Create a new sales or purchase transaction (For example, a Quote).
- Enter the details and click More Options (the three horizontal dots near the item table).
- Click Add Additional Information and associate the reporting tags in the pop up that appears.
- Click Save.
Note: In case of expenses or recurring expenses, you can associate tags at the bottom of the expense creation page under Reporting Tags.
Generate Reports
Once you have created tags and associated them to transactions, you can run your business overview reports and filter them using the associated tags. To do this:
- Go to the Reports module and select a report.
- Click + More Filters.
- Click the Select a field dropdown and select your reporting tag.
- Select a comparator and enter the desired value.
- Click Run Report to generate a report based on the criteria you’ve set.


 Yes
Yes